Components
The CommonDialog class represents a component that provides a standard interface for common functionality required by Windows Forms applications. This figure shows the com-plete set of Windows Forms classes derived from the System.Windows.Forms.Common-Dialog class.
Windows Forms
Programming with C#
E
RIK
B
ROWN
M A N N I N G
For online information and ordering of this and other Manning books, go to www.manning.com. The publisher offers discounts on this book when ordered in quantity. For more information, please contact:
Special Sales Department Manning Publications Co.
209 Bruce Park Avenue Fax: (203) 661-9018 Greenwich, CT 06830 email: [email protected]
©2002 by Manning Publications Co. All rights reserved.
No part of this publication may be reproduced, stored in a retrieval system, or transmitted, in any form or by means electronic, mechanical, photocopying, or otherwise, without prior written permission of the publisher.
Many of the designations used by manufacturers and sellers to distinguish their products are claimed as trademarks. Where those designations appear in the book, and Manning Publications was aware of a trademark claim, the designations have been printed in initial caps or all caps.
Recognizing the importance of preserving what has been written, it is Manning’s policy to have the books we publish printed on acid-free paper, and we exert our best efforts to that end.
Manning Publications Co. Copyeditor: Lois Patterson 209 Bruce Park Avenue Typesetter: Syd Brown Greenwich, CT 06830 Cover designer: Leslie Haimes
ISBN 1930110-28-6
Printed in the United States of America
vii
brief contents
Part 1
Hello Windows Forms 1
1
Getting started with Windows Forms
3
2
Getting started with Visual Studio .NET
34
Part 2
Basic Windows Forms 67
3
Menus
69
4
Status bars
102
5
Reusable libraries
126
6
Common file dialogs
161
7
Drawing and scrolling
194
8
Dialog boxes
224
9
Basic controls
263
10
List controls
314
11
More controls
353
12
A .NET assortment
383
13
Toolbars and tips
410
Part 3
Advanced Windows Forms 437
14
List views
439
15
Tree views
485
16
Multiple document interfaces
525
17
Data binding
564
ix
contents
brief contents vii contents ix preface xix
about this book xxi acknowledgments xxviii about .NET xxx
about the cover illustration xxxiv
Part 1
Hello Windows Forms 1
1
Getting started with Windows Forms
3
1.1 Programming in C# 4
Namespaces and classes 6 ✦ Constructors and methods 8 ✦ C# types 9 ✦ The entry point 11 The Application class 11 ✦ Program execution 13
1.2 Adding controls 13
Shortcuts and fully qualified names 15
Fields and properties 16 ✦ The Controls property 18
1.3 Loading files 18
Events 20 ✦ The OpenFileDialog class 22 Bitmap images 24
1.4 Resizing forms 26
Desktop layout properties 28 ✦ The Anchor property 29 ✦ The Dock property 31
2
Getting started with Visual Studio .NET
34
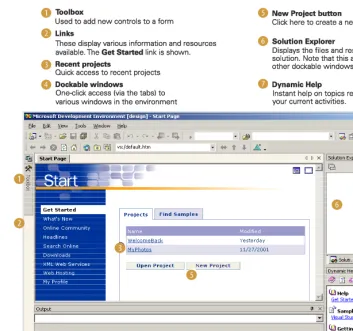
2.1 Programming with Visual Studio .NET 35Creating a project 36 ✦ Executing a program 39 Viewing the source code 39
2.2 Adding controls 43
The AssemblyInfo file 43 ✦ Renaming a form 46 The Toolbox window 48
2.3 Loading files 54
Event handlers in Visual Studio .NET 54 Exception handling 58
2.4 Resizing forms 61
Assign the Anchor property 63 Assign the MinimumSize property 64
2.5 Recap 65
Part 2
Basic Windows Forms 67
3
Menus
69
3.1 The nature of menus 70
The Menu class 71 ✦ The Menu class hierarchy 71 Derived classes 73
3.2 Menu bars 74
Adding the Main menu 74 ✦ Adding the File menu 77 Adding the dropdown menu 79 ✦ Adding a View menu 83
3.3 Click events 85
Adding handlers via the designer window 85 Adding handlers via the properties window 86
3.4 Popup events and shared handlers 88
Defining a shared handler 89 ✦ Handling Popup events 93
3.5 Context menus 97
Creating a context menu 98 ✦ Adding menu items 100
3.6 Recap 101
4
Status bars
102
4.1 The Control class 103 4.2 The StatusBar class 105
Adding a status bar 106 ✦ Assigning status bar text 109
4.3 Status bar panels 110
C O N T EN T S xi 4.4 Owner-drawn panels 118
The DrawItem event 118 ✦ Drawing a panel 121
4.5 Recap 125
5
Reusable libraries
126
5.1 C# classes and interfaces 127
Interfaces 128 ✦ Data collection classes 129
5.2 Class libraries 133
Creating the class library 134 ✦ Using the command-line tools 138 ✦ Creating the PhotoAlbum class 139 Creating the Photograph class 141
5.3 Interfaces revisited 145
Supporting the ICollection interface 146 Supporting the IList interface 146
Implementing album position operations 148
5.4 Robustness issues 151
Handling an invalid bitmap 151 ✦ Overriding methods in the Object class 154 ✦ Disposing of resources 157 Associating a file name with an album 159
5.5 Recap 160
6
Common file dialogs
161
6.1 Design issues 162
Changing the menu bar 162 ✦ Adding class variables 165
6.2 Multiple file selection 166
Adding images to an album 166 Removing images from an album 169
6.3 Paint events 169
Drawing the current photograph 170 Displaying the current position 171
6.4 Context menus revisited 173
Displaying the next photograph 174 Displaying the previous photograph 174
6.5 Files and paths 175
Creating a default album directory 175
Setting the title bar 179 ✦ Handling the New menu 180
6.6 Save file dialogs 181
Writing album data 182 ✦ Saving an album as a new file 186 Saving an existing album 188
6.7 Open file dialogs 189
Reading album data 190 ✦ Opening an album file 191
7
Drawing and scrolling
194
7.1 Form class hierarchy 195The ScrollableControl class 196 ✦ The Form class 196
7.2 Image drawing 198
Deleting the PictureBox control 198 ✦ Handling the Image menu 199 ✦ Implementing the Stretch to
Fit option 202 ✦ Implementing a Scale to Fit option 205 Repainting when the form is resized 210
7.3 Automated scrolling 212
Properties for scrolling 213
Implementing automated scrolling 213
7.4 Panels 215
Adding a panel 217 ✦ Updating the menu handlers 218 Drawing the status bar panel 219 ✦ Drawing the image 220
7.5 Recap 222
8
Dialog boxes
224
8.1 Message boxes 225
The MessageBox.Show method 227 ✦ Creating an OK dialog 227 ✦ Creating a YesNo dialog 229 Creating A YesNoCancel dialog 230
8.2 The Form.Close method 233
The relationship between Close and Dispose 233 Intercepting the Form.Close method 235
8.3 Modal dialog boxes 237
Adding captions to photos 238 ✦ Preserving caption values 239 Creating the CaptionDlg form 240 ✦ Adding properties to the CaptionDlg form 247 ✦ Displaying the dialog in the
MainForm class 249
8.4 Modeless dialogs 252
Creating the PixelDlg form 253 ✦ Adding class members to PixelDlg 255 ✦ Displaying the modeless PixelDlg form 256 Updating the PixelDlg form 259
Updating PixelDlg as the mouse moves 260
8.5 Recap 262
9
Basic controls
263
9.1 Form inheritance 264
Creating a base form 265 ✦ Creating a derived form 269
9.2 Labels and text boxes 271
C O N T EN T S xiii
Creating the PhotoEditDlg panel area 277
Creating the multiline text box 281 ✦ Adding PhotoEditDlg to our main form 285 ✦ Using TextBox controls 287
9.3 Button classes 290
Expanding the PhotoAlbum class 293 ✦ Using the new album settings 296 ✦ Creating the AlbumEditDlg panel area 298 Using radio buttons 300 ✦ Using check box buttons 304 Adding AlbumEditDlg to our main form 310
9.4 Recap 313
10
List controls
314
10.1 List boxes 315
Creating a list box 315 ✦ Handling selected items 322
10.2 Multiselection list boxes 325
Enabling multiple selection 325 ✦ Handling the Move Up and Move Down buttons 328 ✦ Handling the Remove button 331
10.3 Combo boxes 333
Creating a combo box 333 ✦ Handling the selected item 336
10.4 Combo box edits 339
Replacing the photographer control 340 Updating the combo box dynamically 341
10.5 Owner-drawn lists 343
Adding a context menu 344 ✦ Setting the item height 346 Drawing the list items 348
10.6 Recap 352
11
More controls
353
11.1 Tab controls 354
The TabControl class 355 ✦ Creating a tab control 356
11.2 Tab pages 359
Creating tab pages dynamically 360 Creating tab pages in Visual Studio 363
11.3 Dates and Times 366
Dates and times 367
Customizing a DateTimePicker control 369
11.4 Calendars 372
Adding a MonthCalendar control 372 Initializing a calendar 374
Handling mouse clicks in a calendar control 376
12
A .NET assortment
383
12.1 Keyboard events 384Handling the KeyPress event 384 Handling other keyboard events 386
12.2 Mouse events 387
The MouseEventArgs class 388 ✦ Handling mouse events 388
12.3 Image buttons 393
Implementing Next and Prev buttons 393 ✦ Drawing bitmaps for our buttons 399 ✦ Placing images on our buttons 402
12.4 Icons 405
Replacing the icon on a form 406 Replacing the application icon 408
12.5 Recap 409
13
Toolbars and tips
410
13.1 Toolbars 411
The ToolBar class 411 ✦ Adding a toolbar 412 The ToolBarButton class 413
13.2 Image lists 416
The ImageList class 416 ✦ Creating an image list 417
13.3 Toolbar buttons 420
Adding a push button 420 ✦ Adding a dropdown button 424 Adding a toggle button 426
13.4 Tool tips 430
The ToolTip class 431 ✦ Creating tool tips 431
13.5 Recap 434
Part 3
Advanced Windows Forms 437
14
List views
439
14.1 The nature of list views 440 14.2 The ListView class 443
Creating the MyAlbumExplorer project 443
Creating a list view 445 ✦ Populating a ListView 448
14.3 ListView columns 453
Creating the columns 454 ✦ Populating the columns 456 Sorting a column 458
14.4 Selection and editing 464
C O N T EN T S xv 14.5 Item activation 472
Handling item activation 473 ✦ Defining new columns 474 Populating the ListView 476 ✦ Sorting a column (again) 477 Updating the properties menu 480 ✦ Updating label
editing 481 ✦ Redisplaying the albums 483
14.6 Recap 483
15
Tree views
485
15.1 Tree view basics 486 15.2 The TreeView class 486
Creating a tree view 488 ✦ Using the Splitter class 489 Using the TreeNode class 492
15.3 Dynamic tree nodes 497
Assigning index constants 497 ✦ Creating the album nodes 498 Creating the photograph nodes 501
15.4 Node selection 505
Supporting node selection 506 ✦ Revisiting the list view 509
15.5 Fun with tree views 513
Displaying the photograph 514 ✦ Supporting label edits 516 Updating the properties menu 520
15.6 Recap 524
16
Multiple document interfaces
525
16.1 Interface styles 526
Single document interfaces 526 ✦ Explorer interfaces 526 Multiple document interfaces 527
Support in Windows Forms 529
16.2 MDI forms 530
Creating an MDI container form 531 ✦ Creating an MDI child form 532 ✦ Adding a new entry point 533
16.3 Merged menus 535
Assigning merge types 535 ✦ Assigning merge order 537 Opening a child form 541
16.4 MDI children 543
Replacing the toolbar 543 ✦ Displaying pixel data 548 Opening an album twice 551 ✦ Updating the title bar 553 Revisiting the activation events 556
16.5 MDI child window management 557
Arranging MDI forms 558 ✦ Creating an MDI child list 561
17
Data binding
564
17.1 Data grids 565Creating the MyAlbumData project 568 Displaying data in a data grid 569
17.2 Data grid customization 573
Customizing table styles 574 ✦ Customizing column styles 576
17.3 Editable objects 580
The IEditableObject interface 580 ✦ Supporting the IEditableObject interface 582 ✦ Using editable objects 584
17.4 Simple data binding 586
Altering the MyAlbumData application 587
Performing simple binding 590 ✦ Updating data bound controls 594 ✦ Displaying the image 599
Saving changes to bound controls 601
17.5 Recap 602
18
Odds and ends .NET
603
18.1 Printing 604
Using the print classes 605 ✦ Drawing a print page 607
18.2 Timers 611
Creating a slide show form 612
Implementing the slide show behavior 615
18.3 Drag and drop 618
Initiating drag and drop 620 ✦ Receiving drag and drop 622
18.4 ActiveX controls 625
Creating the About box 626 ✦ Wrapping the web browser control 629 ✦ Using the web browser control 631
18.5 Recap 635
A
C# primer
637
B
.NET namespaces
674
C
Visual index
680
D
For more information
690
xvii
preface
In early 2001 I began using Microsoft’s .NET Framework for a project I was working on with a small startup company. Unfortunately, the winds changed and I found myself with more free time than I would normally hope for. So when Manning Pub-lications asked me if I would contribute to a book on programming with the .NET Framework, I welcomed the idea.
As events unfolded, I found myself with some fairly strong opinions about how such a book should be organized, and offered up a proposal to write a solo book on programming Windows Forms applications. I have always enjoyed the book Program-ming Windows 95 with MFC by Jeff Prosise, so a book about developing Windows-based applications with the .NET Framework seemed like an obvious subject.
The core idea behind my proposal was to build a single application over the course of the book. The application would evolve to introduce each topic, so that by the end of the manuscript readers would have a robust application they had built from scratch. Manning Publications seemed to like the idea as well, and thus I suddenly found myself writing this book.
In approaching the task, I set out to achieve two objectives. The first was to provide ample coverage of most of the classes in the namespace. I have been frustrated by many books that do not provide robust examples for a topic. So I try to provide detailed examples that demonstrate how Windows Forms classes can be used and manipulated in real applications.
A second objective was to present advanced user interface topics such as tree views and drag and drop. While the book spends a good deal of time on fundamental classes, such as menus and buttons, more than a cursory glance is given to some of the more complex controls available for Windows-based programming.
xix
about this book
The .NET Framework contains such a large selection of topics that it is impossible to cover all of them in a single book of any depth. This section introduces the focus of this book, and provides an overview of the contents and conventions used in the text. The end of this section describes the online forum available for any questions or com-ments on the book, and explains how the source code used in the book can be down-loaded from the Internet.
Before we discuss the book specifically, we should introduce the concept of namespaces. A namespace defines a group, or scope, of related classes, structures, and other types. A namespace is a bit like a family: it defines a group of distinct members with a common name and some shared sense of purpose.
All objects in the .NET Framework, and indeed in C# itself, are organized into namespaces. The System namespace, for example, includes objects related to the
framework itself, and most namespaces defined by .NET are nested within the Sys-tem namespace. The System.Windows namespace defines types and namespaces
related to the Windows operating system, while the System.Web namespace defines
types and namespaces related to web pages and servers.
This organization into namespaces permits two objects with the same base name to be distinct, much like two people can both share the same first name. For example, the Button class in the System.Web.UI.WebControls namespace represents a
button on a web page, while the Button class in the System.Windows.Forms
namespace represents a button in an application window. Other namespaces in .NET include the System.IO namespace for file and directory related objects, the Sys-tem.Data namespace for database-related objects, the System.Drawing namespace
for graphical objects, and the System.Security namespace for security objects. An
overview of the more commonly used namespaces in .NET is provided in appendix B.
T
HE
W
INDOWS
F
ORMS
NAMESPACE
affectionately known as Windows Forms. Windows Forms applications are programs that are executed by the Windows operating system, and that employ the user inter-face features familiar to Windows desktop users everywhere.
The book attempts to provide a somewhat methodical approach to the Windows Forms namespace. Most of the types defined by this namespace are covered in the book. Appendix C provides a class diagram of the Windows Forms namespace, and includes a reference to the location in the book where each class or other type is discussed.
The book contains 18 chapters organized into three parts.
PART 1: HELLO WINDOWS FORMS
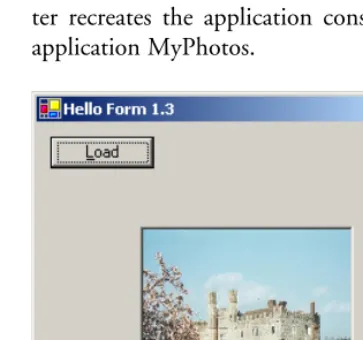
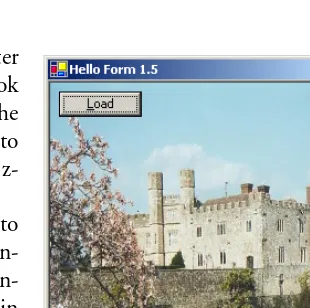
The first part of the book introduces fundamental concepts behind C# in general and Windows Forms specifically. Chapter 1 creates the application shown in figure 1 using a text editor. We discuss how a Windows Forms application is executed by the .NET Framework, and how a Windows Forms program is structured in C#.
In chapter 2 we begin using Visual Studio .NET, the graphical development envi-ronment from Microsoft for creating applications in the .NET Framework. This chap-ter recreates the application constructed manually in chapchap-ter 1. We will call this application MyPhotos.
PART 2: BASIC WINDOWS FORMS
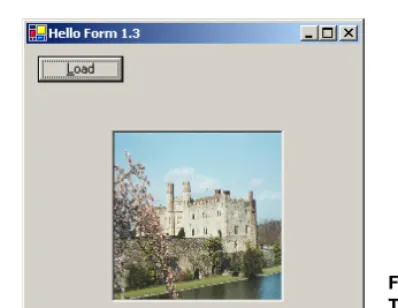
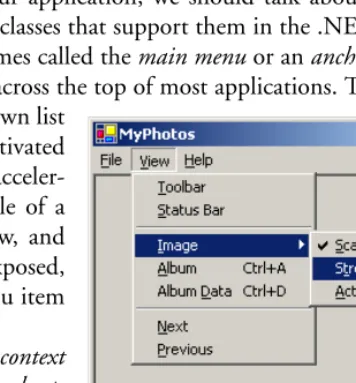
[image:22.612.102.284.287.457.2]In part 2 we begin a systematic approach to the classes in the Windows Forms namespace. This part continues the development of our MyPhotos application, shown in figure 2 as it appears in chapter 13. As you can see, part 2 covers the core user interface components required to build Windows Forms applications, including menus, status bars, dialog windows, text boxes, and combo boxes.
Figure 1
THE WINDOWS FORMSNAMESPACE xxi The MyPhotos application will display the contents of a photo album consisting of one or more image files, or photographs. The application stores each photo album in a file, and permits the user to view the images one at a time and edit the properties of both albums and photographs.
PART 3: ADVANCED WINDOWS FORMS
More advanced topics such as list views and drag and drop are covered in part 3 of the book. Part 3 builds a few different applications using the photo album concept, including an application similar to Windows Explorer for browsing photo albums, and a data-driven application that shows how to bind the contents of Windows Forms controls to values taken from a data source.
[image:23.612.117.444.112.354.2]Figure 3 shows the main window for our MyPhotos application as it appears in chapter 18. The application is converted into a multiple document interface that can display multiple albums. A number of additional features are added here as well, such as dragging photos between albums and displaying the book’s web site from within the application.
W
HO
SHOULD
READ
THIS
BOOK
?
Like any author, I would like everyone to read this book. The more the merrier! In the interest of full disclosure, however, I wrote Windows Forms Programming with C# with three kinds of people in mind:
• Windows programmers interested in developing desktop applications with .NET. • Developers familiar with .NET or C# interested in learning more about
Win-dows Forms classes and programming.
• C++ programmers with little or no experience creating Windows applications.
Once again, I should point out that this book examines one portion of the .NET
Framework, namely the classes contained in the System.Windows.Forms
[image:24.612.103.463.51.303.2]namespace. The book also provides a great deal of information about C# and Visual Studio .NET, and in particular it will guide you through the steps necessary to build each sample application using Visual Studio .NET. For additional information, appendix D provides a list of additional resources for C# and .NET, and the bibliog-raphy at the back of the book references a number of other books that cover various aspects of C# and the .NET Framework.
CONVENTIONS xxiii For a broad approach to the .NET Framework in general, check out Microsoft .NET for Programmers by Fergal Grimes, also available from Manning Publications.
C
ONVENTIONS
The following typographical conventions appear throughout the book:
• Technical terms are introduced in italics.
• Code examples and fragments appear in a fixed-width font.
• Namespaces and types, as well as members of these types, also appear in a
fixed-width font.
• Sections of code that are of special significance appear in a boldfixed-width font. Typically, these sections highlight changes made to code when compared with a previous example.
• Many sections of code have numbered annotations which appear in the right margin. These numbered annotations are then discussed more fully in a subse-quent numbered list following the code.
In addition, a number of graphical conventions are used to present the information in the text. Starting in chapter 2, all modifications made to example applications are illustrated with an Action-Result table showing step-by-step instructions for making the change in Visual Studio .NET. An example of this is shown here.
In addition to these tables, a number of classes and other types found in .NET are summarized using a .NET Table. These tables provide an overview of a .NET Frame-work class or other type discussed in a nearby section, and serve as a quick reference when referring back to these pages at a later time. Full details on these and any other members of the .NET Framework are available in the online documentation. For example, in Visual Studio .NET, bring up the Index window and enter the name of the class or member in which you are interested.
Of course, most of these .NET Tables describe members of the Windows Forms namespace. An example of this format is shown here as .NET Table 1 using the Pic-tureBox class.
DESCRIPTIONOFTHETASKDESCRIBEDBYTHISTABLE
Action Result
1 Description of the action to per-form.
Description of the result of this action. This is a textual description, a graphic, or the resulting code.
2 The second action to perform. How-to
a. Detailed steps required to per-form the described action. b. More steps if necessary.
The second result.
Note the following features of these tables:
• An initial paragraph defines the purpose of the class, the namespace that con-tains the class, and the base class. If the namespace containing the base class is not indicated, then it can be found in the same namespace containing the described class. If the base class is not indicated, then the class is derived from the System.Object class.
• A table shows the public members of the class, namely the properties, methods, and events specific to this class.1 The members inherited from base classes are not shown in these tables. In .NET Table 1, there are four members shown, namely three properties, no methods, and one event.
A final convention in the book is the use of special paragraphs to highlight topics for further exploration of Windows Forms and the .NET Framework. These are either
TRY IT! sections or More .NET sections.
TRY IT! These paragraphs provide suggestions or discussions of further changes that
can be made to the sample application using the material discussed in the prior sections. TRY IT! paragraphs provide an opportunity to further your understanding of the related topic. The code for these sections is not pro-vided in the book, but is available on the book’s web site.
The TRY IT! paragraphs appear throughout the text, and occasionally discuss class members that were not directly used in the sample code. The More .NET paragraphs,
.NET Table 1 PictureBox class
The PictureBox class represents a control that can display an image. Scroll bars are not supported when the image is larger that the client area, so care must be taken to ensure that the image appears properly within the control. This class is part of the System.Win-dows.Forms namespace, and inherits from the Control class. See .NET Table 4.1 on page 104 for more information on the Control class.
Public Properties
BorderStyle Gets or sets the style of border to display for the control.
Image Gets or sets the image to display in the picture box.
SizeMode Gets or sets the PictureBoxSizeMode enumera-tion value indicating how the image is displayed. The default is Normal.
Public Events SizeModeChanged Occurs when the value of the SizeMode property changes.
AUTHORONLINE xxv an example of which follows, also appear throughout the text, although they more often occur at the end of a chapter.
More .NET These paragraphs provide additional details about the .NET Framework or
sources of additional information accessible from the Internet. The URL addresses shown in these paragraphs were valid as of January 1, 2002.
S
OURCE
CODE
DOWNLOADS
All source code for the programs presented in Windows Forms Programing with C# is available to purchasers of the book from the Manning web site. Visit the site at www.manning.com/eebrown for instructions on downloading this source code.
A
UTHOR
ONLINE
Free access to a private Internet forum, Author Online, is included with the purchase of this book. Visit the web site for detailed rules about the forum, to subscribe to and access the forum, to retrieve the code for each chapter and section, and to view updates and corrections to the material in the book. Make comments, good or bad, about the book; ask technical questions, and receive help from the author and other Windows Forms programmers. The forum is available at the book’s web site at www.manning.com/eebrown.
Manning’s commitment to readers is to provide a venue where a meaningful dialog among individual readers and among readers and the author can take place. It is not a commitment to any specific amount of participation on the part of the author, whose contribution remains voluntary (and unpaid).
acknowledgments
It never ceases to amaze me how the tangled threads of our lives come together to produce a tangible result, in this case the book you are reading. While the front of this book bears my name, a number of people knowingly or unknowingly contrib-uted to its conception and development.
Special thanks go to my family: to my wife Bridgett for her patience and love; to Katie and Sydney for their regular office visits and unconditional acceptance; and to Bianca, my faithful companion, who curls up on the other chair in my office on a daily basis.
I am also grateful for my parents, David and Janet, and teachers and others who have supported me throughout my life. Special recognition goes to Steve Cox and David Cobb, who first interested me in computer programming so long ago.
Thanks also go to my many friends who provided support and encouragement in ways that only friends can do, most notably Jean Siegel, Janet Heffernan, Tony Mason, and Marc Zapf. I would also thank my soccer team, the Haymarket Outer Limits, for putting up with numerous impromptu practices while I was working on the manuscript, and yet still producing a fun and productive season.
I am also indebted to the many reviewers from all corners of the globe who dedi-cated their time and energy to reading early versions of various chapters. This book would not be the same without their assistance and efforts. This includes Marc Zapf for his technical review of the final manuscript; Javier Jarava for his exhaustive reviews of the code and text in each chapter; Josh Mitts for his thoughtful and encouraging comments; Andreas Häber for finding various important technical points (I apologize, Andreas, that I never did cover the PropertyGrid control); Craig Fullerton for his
meticulous review of the first half of the book; Mark Boulter for his detailed comments on the original chapters; Sam Raisanen for his thorough review of chapters 1, 3, and 16; and others who provided insightful comments and criticisms, including Dharmesh Chauhan, Chris Muench, Tomas Restrepo, and Vijay Upadya.
about .NET
The history of .NET is both long and brief. While the .NET Framework is based on programming languages and development environments that came years before, it is relatively new and its success in the marketplace is yet to be proven. This section pro-vides an abbreviated history of the C# programming language, pronounced see-sharp, and the .NET Windows Forms functionality.
The C programming language was originally developed in the early 1970s at Bell Telephone Laboratories in conjunction with the UNIX operating system. It evolved from a previous language called “B” which itself derived from a language called “BPCL.” The language became popular throughout the 1970s and was eventually standardized by the American National Standards Institute (ANSI) in the mid-1980s. One of the more definitive books on C, first published in 1978, was and still is The C Programming Language by Brian W. Kernighan and Dennis M. Ritchie.
The C++ language was designed by Bjarne Stroustrup, who originally published his well-known book The C++ Programming Language in 1986. This language was also standardized by ANSI and other organizations, and has grown in popularity to its rather ubiquitous use today.
The C language was used with the Windows operating system early on, beginning with Windows 1.0 in the mid 1980s. One of Microsoft’s first attempts at an interac-tive development environment (IDE) occurred around 1990 with Microsoft C 1.0. This environment grew to include C++ and eventually became the basis for Visual C++ in the mid 1990’s and later Visual Studio 6.0 supporting C++, Visual Basic, and a nonstandard variant of Java. The Windows operating system and Win32 API formed the foundation on which these products were built and extended.
Also worth mentioning are two competitive products for Microsoft Visual Studio, namely Borland C++Builder and Borland Delphi. Both products are highly successful visual development tools and have likely influenced the design and development of the .NET Framework. In fact, the Chief C# Language Architect at Microsoft, Anders Hejlsberg, was one of the original designers of Borland Delphi.
CASTINGTHE .NET xxix of the Internet, and the redesign of the DOS-based Windows into Windows NT and Windows XP.
C
ASTING
THE
.NET
Against this backdrop of technologies and products, the Internet has been redefining the way we as programmers think about user interfaces and application development. With the success of the Internet and companies such as Netscape and Amazon.com, a product or interface may now appear in a web browser rather than a more traditional Windows application. The Java programming language has had much success in UNIX and web server environments, and is the language of choice for many large-scale web applications at present.
Perhaps in response to these changes, or perhaps because it became clear that the line between a user’s desktop and the Internet was starting to blur, Microsoft set out to revolutionize the way we think about and develop applications. The result of their work is the .NET Framework and the C# programming language.2
The easiest way to understand C# might be to imagine someone writing down all the annoying aspects of C++ and then designing a language to do away with each item on this list. In C++, for example, dealing with pointers can be painful; a number of coding errors are not caught by the compiler (such as if (x = 5)); manipulating
strings can be difficult; and there is no good way to safely “downcast” an object to a derived type. The predecessors of C and C++, the B and BPCL languages, did not define a formal type system, which may well account for the free-wheeling nature of integers, pointers, and characters in these languages.
The C# language was redesigned from the ground up with the idea of retaining the flexibility of C and C++ while formalizing the type system and language syntax. Many common runtime errors in C++ are compiler errors in C#. Other distinct features include a built-in string type, lack of global variables, and integration of critical system and application errors into a common exception model. Appendix A of this book pro-vides an overview of the syntax, keywords, and features of the C# language.
While not strictly required from a design perspective, the C# language and .NET Framework will likely remain tightly intertwined for some time. The .NET Frame-work is a programming interface and execution environment for Windows operating systems, and large parts of the framework itself were written in C#.
The .NET Framework includes almost all of Microsoft’s development technologies and environments that have evolved over time, from COM to XML and ASP to Visual Studio. These technologies are recreated and reinvented under a single umbrella. While backward compatibility has not been totally lost, the .NET Framework redefines the classes and methods for these technologies and the products that use them. In particular,
2 The Visual Basic language was also redesigned, and numerous Microsoft products have been affected.
the framework includes new support for Windows application development, web site access and deployment, remote program communication, database interaction, security, local and remote installation, and other technologies as well.
My goal is not to enumerate all of the technologies to be found in .NET, nor try to convince you of its advantages or disadvantages. There are a number books and arti-cles that provide this information, and you would probably not be reading this intro-duction if you were not aware of at least some of them. My point is only to indicate that Microsoft has taken a fresh approach to its many technologies and products, and endeavored to integrate these various initiatives under a single offering called the .NET Framework.
W
INDOWS
F
ORMS
OVERVIEW
As we mentioned in the About this book section, all objects in the .NET Framework, and indeed in C# itself, are organized into namespaces. Appendix B provides an over-view of the more commonly-used namespaces defined by the .NET Framework.
This book focuses on the System.Windows.Forms namespace used to build
Windows-based applications. This section provides a summary of the classes defined by this namespace. A graphical index of the Windows Forms namespace in given in appendix C.
Before we discuss specific classes, there are three terms that are critical to under-standing the .NET Framework in general and the Windows Forms namespace specif-ically, namely components, containers, and controls. The book covers these terms in detail, so this section will provide only a brief introduction and a few examples.
A component is an object that permits sharing between applications. The Compo-nent class encapsulates this notion, and is the basis for most of the members of the
Windows Forms namespace. Also of note is the IComponent interface, which defines
the members supported by all components. We discuss interfaces in chapter 5, and the
Component class in chapter 3.
A container is an object that can hold zero or more components. A container is sim-ply a grouping mechanism, and ensures that sets of components are encapsulated and manipulated in similar ways. Containers are used throughout the Windows Forms namespace whenever a group of objects is required. The Container class
encapsu-lates the container concept, with the IContainer interface defining the members
required by all containers.
A control is a component with a visual aspect. In the Windows Forms namespace, a control is a component that presents a graphical interface on the Windows desktop. The Windows Forms Control class, discussed in chapter 4, is the basis for all
Win-dows Forms controls. It is worth noting that the System.Web.UI namespace defines
a Control class as well to represent graphical objects that appear on web pages.
WINDOWS FORMSOVERVIEW xxxi is represented by the StatusBarPanel class, which is a component. The actual
sta-tus bar you see in an interface is represented by the StatusBar class, which is a
con-trol. Status bars are the subject of chapter 4.
Controls may also be containers in that they may contain a set of controls or com-ponents. The StatusBar class is a container for zero or more StatusBarPanel
components. One of the more important container controls is the Form class, which
represents an application window for display on the Windows desktop. The Form
class is introduced in chapter 1 and discussed throughout the book, most notably in chapter 7, “Drawing and scrolling,” chapter 8, “Dialog boxes,” and chapter 16, “Mul-tiple document interfaces.”
Most visual elements of graphical interfaces such as buttons, text boxes, trees, and dialog boxes are all represented by control classes. The one exception is menus, which are the subject of chapter 3 and revisited again in chapter 16. Menu objects are all components, and are treated in a special manner by the Form class itself.
The controls in the Windows Forms namespace are discussed throughout the book. Many of the more common controls appear in chapter 9, “Basic controls,” chap-ter 10, “List controls,” chapchap-ter 11, “More controls,” and chapchap-ter 13, “Tool bars and tips.” Advanced controls such as list views, tree views, and data grids are covered in part 3 of the book.
In addition to the controls, containers, and components found in the Windows Forms namespace, there are a number of other objects provided to support the devel-opment of Windows-based applications. Some of these are presented in chapter 12, “A .NET assortment,” and chapter 18, “Odds and ends .NET.” Of specific impor-tance is the concept of data binding, covered in chapter 17.
about the cover illustration
The figure on the cover of Windows Forms Programming with C# is a “Pescador del Cabo de buena Esperanza,” a fisherman from the Cape of Good Hope in Africa. This fisherman is especially appropriate here, since the author, Erik Brown, worked with the U.S. Peace Corps in Botswana, which is not too far from the Cape of Good Hope. The illustration is taken from a Spanish compendium of regional dress cus-toms first published in Madrid in 1799. The book’s title page states:
Coleccion general de los Trages que usan actualmente todas las Nacio-nas del Mundo desubierto, dibujados y grabados con la mayor exacti-tud por R.M.V.A.R. Obra muy util y en special para los que tienen la del viajero universal
which we translate, as literally as possible, thus:
General collection of costumes currently used in the nations of the known world, designed and printed with great exactitude by R.M.V.A.R. This work is very useful especially for those who hold themselves to be universal travelers.
Although nothing is known of the designers, engravers, and workers who colored this illustration by hand, the “exactitude” of their execution is evident in this drawing. The “Pescador del Cabo de buena Esperanza” is of course just one of many figures in this colorful collection. Their diversity speaks vividly of the uniqueness and individu-ality of the world’s towns and regions just 200 years ago. This was a time when the dress codes of two towns, separated by a few dozen miles, identified people uniquely as belonging to one or the other. The collection brings to life a sense of isolation and distance of that period and of every other historic period except our own hyperkinetic present.
1
P A
R
T
Hello Windows Forms
I
t is common practice to write some sort of “Hello” program at the beginning of a book. This book is no different, and we begin our discussion on Windows Forms with the most basic of forms: an empty window. While this book is all about Win-dows Forms, Microsoft’s new interactive development environment Visual Studio .NET is an important part of creating .NET applications. To introduce both Win-dows Forms and Visual Studio .NET, we will create the same program in two subse-quent chapters.Chapter 1 is titled “Getting started with Windows Forms.” This chapter intro-duces Windows Forms programming and covers some fundamentals of the C# lan-guage and the .NET Framework. Here we use the C# command-line compiler in order to focus on a sample program and not get distracted by the graphical environment. While the remainder of the book will use Visual Studio .NET for the examples, enough detail about the command-line tools is provided in case you want to follow along using an alternate editor.
Chapter 2 covers “Getting started with Visual Studio .NET.” Here we rebuild the example from Chapter 1 within the Visual Studio .NET interactive development envi-ronment. This will give us a chance to cover additional subtleties of .NET and C#, and give you the reader a second go at understanding any code you missed in chapter 1.
3
C H A P T E R 1
Getting started with
Windows Forms
1.1 Programming in C# 4 1.2 Adding controls 13 1.3 Loading files 18 1.4 Resizing forms 26 1.5 Recap 33
With the introduction behind us, we can get down to business. We will start with a basic application of the “Hello World” variety, adding some functionality to intro-duce some key features and concepts. We will take a quick look at the following aspects of Windows Forms programming:
• The Form class: creating a blank form.
• Program execution: how the Microsoft .NET Framework executes a program.
• Controls: how each control is a distinct class, and how controls are
added to a form.
• C# classes: different kinds of class members, and how to use them
in our program.
• Files: opening an image file in C#.
• Events: using C# events to process user actions.
command-line programs does the real work of compiling and linking programs. In this chapter, we will use the same command-line tools employed by Visual Studio .NET internally. This will allow us to focus on C# and Windows Forms concepts, and not discuss Visual Studio .NET until the next chapter.
If you have prior experience with Windows programming, you will see many sim-ilarities in the names of the .NET controls. This chapter will show some of these names, and introduce some new terms and features as well. If you are new to Windows pro-gramming, you’ll find this chapter a good foundation for the remainder of the book.
This chapter is a bit of a wild ride through .NET, so don’t worry too much about the details here. The concepts and topics in this chapter should become clearer as we progress through the book.
This chapter assumes you have successfully installed the Microsoft .NET Framework SDK on your computer.
1.1
Programming in C#
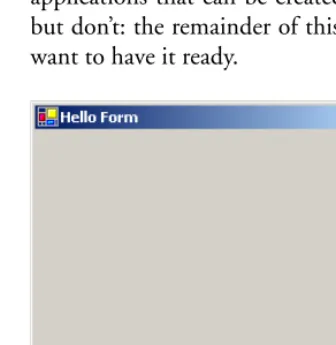
Let’s create a blank form in C# to see how a program compiles and runs in the .NET Framework. Such a form is shown in figure 1.1. This is the most basic of Windows applications that can be created in .NET. You may be tempted to skip this section, but don’t: the remainder of this chapter builds on this most basic of forms, so you’ll want to have it ready.
[image:40.612.103.271.322.494.2]Crank up your favorite editor and type in the code shown in listing 1.1. If you’re not sure which editor to use, type this code into Notepad here and throughout the chap-ter. Save this file as “MyForm.cs” in a convenient directory. Note that “cs” is the stan-dard extension used for C# files.
Figure 1.1
PROGRAMMINGIN C# 5
[assembly: System.Reflection.AssemblyVersion("1.1")] namespace MyNamespace
{
public class MyForm : System.Windows.Forms.Form {
public MyForm() {
this.Text = "Hello Form"; }
public static void Main() {
System.Windows.Forms.Application.Run(new MyForm()); }
} }
To compile this program, we will use the C# compiler, called csc, for C sharp
com-piler. You will need a command prompt with the PATH environment set to access the
.NET Framework programs and libraries. You can define these settings by hand or via a batch program, or use the shortcut Microsoft provides to do this for you. We will employ the shortcut, which is available via the Start menu.
To reach this shortcut, click the Start menu, then Programs, then Microsoft Visual Studio .NET, then Visual Studio .NET Tools, then Visual Studio .NET Com-mand Prompt. This item opens a comCom-mand window and executes a batch file that sets the appropriate environment variables. With the default installation directories, this menu item executes the following command:
cmd /k "C:\Program Files\Microsoft Visual Studio .NET\ Common7\Tools\vsvars32.bat"
Open a Visual Studio .NET command prompt as previously described and compile the program using the following command.
> csc MyForm.cs /reference:System.dll /reference:System.Windows.Forms.dll
The /reference switch specifies a library containing additional functionality for
the program. In .NET, libraries as well as programs are referred to as assemblies. For our application, we reference the System assembly (System.dll) and the Windows
Forms assembly (System.Windows.Forms.dll).1
Listing 1.1 Your first form
1 Strictly speaking, the csc compiler automatically references all major System DLLs. As a result, the
Once this command completes, you should see a MyForm.exe file in your direc-tory. Run the program using the myform command to see the result. You should see
a window similar to figure 1.1.
> myform2
While our program is not very useful yet, it only took us a few lines of code to create a fully functional Windows application. Most of the work is done internally by the .NET Framework and Windows. This includes drawing the outer portion of the win-dow such as the title bar and frame; handling the taskbar and standard winwin-dows interactions such as minimize, maximize, move, resize, and close; and redrawing the window when the application is behind, in front of, or obscured by other windows.
Stand up, stretch, stifle a yawn, and go tell your neighbor that you just wrote your first .NET Windows Forms application.
We will add bells and whistles to this application, of course. But before we do, our fully functional program warrants some discussion. Let’s break down the parts of our code to examine how the .NET Framework executes our program.
The first line of the program simply sets the version number for the program to 1.1, matching the section number of the book.
[assembly: System.Reflection.AssemblyVersion("1.1")]
You can verify this by right-clicking the myform.exe file, selecting the Properties item, and then clicking the Version tab. We’ll look at version numbers more closely in chapter 2, so we will not discuss this line any further at this point.
1.1.1 Namespaces and classes
The introduction discussed the use of namespaces in .NET to define a scope for a set of classes and other types. In our program we use the namespacekeyword to declare
a new namespace called MyNameSpace.
namespace MyNamespace {
. . . }
A namespace contains one or more types, such as the class MyFormin our program. A
class defines a new data abstraction, in that it defines a class name and a collection of members for representing and operating on the class. A class is just one of the types possible in a namespace. We will discuss additional types further along in the book, or you can visit appendix A for a complete listing of the possible types.
Classes in C# support single inheritance, in that each class inherits from at most one other class. As a quick description of inheritance, suppose you wanted to design
2 When you run this program, you will note that the console waits for the application to exit. This is
PROGRAMMINGIN C# 7 a program to track the traffic patterns in a city. You might want to differentiate between cars, trucks, delivery vehicles, buses, and other types of vehicles. It would be beneficial to define a core set of functions that all types of vehicles would employ, and then define additional functions for each type of vehicle as required. With inher-itance, a Vehicle class could define this base functionality, and subsequent classes,
called derived classes, would define additional functions for each vehicle type. For example, you might have the following:
namespace Traffic {
// The base Vehicle class class Vehicle
{ . . . }
// The Car class is derived from the Vehicle class class Car : Vehicle
{ . . . }
// The Bus class is derived from the Vehicle class class Bus : Vehicle
{ . . . } }
Back to our program, we define a class called MyFormthat inherits from the Form
class, which is found in the System.Windows.Formsnamespace. The period
nota-tion is used to separate namespaces and classes, so that the complete, or fully quali-fied, name for the class is System.Windows.Forms.Form. We will see how to
abbreviate this name later in the chapter.
namespace MyNamespace {
public class MyForm : System.Windows.Forms.Form {
. . . } }
The Formclass is the cornerstone of Windows-based applications in .NET. It
repre-sents any type of window in an application, from dialog boxes to MDI (Multiple Document Interface) client windows. The Form class provides the ability to display,
place controls within, and interact with an application window. We will discuss this class in detail in chapter 7, and dialog boxes and MDI applications in chapters 8 and 16, respectively. For now, simply understand that the Form class represents the
Classes in .NET contain one or more members that define the behavior and features of the class. We will discuss the members of our MyFormclass next. Class members may
be constants, fields, methods, properties, events, indexers, operators, constructors, and nested type declarations. Each of these members is discussed in subsequent chapters. For now, let’s take a quick look at the two members employed by our program.
1.1.2 Constructors and methods
Take another look at the declaration of our MyForm class. Note how two members of
this class are defined, namely the MyForm constructor and the Main method.
Both members are declared as public, as is the class MyForm. C# provides the
accessibility levels public, protected, and private that C++ programmers
should be familiar with. These are discussed in appendix A, as are the additional access levels provided by C#, namely internal and protectedinternal.
public class MyForm : System.Windows.Forms.Form {
public MyForm() {
this.Text = "Hello Form"; }
public static void Main() {
System.Windows.Forms.Application.Run(new MyForm()); }
}
The first member is called a constructor, and works much like a constructor in C++. This is an instance constructor since it initializes new instances of the MyForm class. An
instance constructor with no parameters, such as our constructor here, is called the default constructor. C# also supports static constructors to initialize the class itself. Appendix A contains more information on both kinds of constructors.
In the constructor for our MyForm class, a single statement sets the Text property
of the form to the string "Hello Form". We will discuss exactly what a property is shortly. It is enough for now to know that this line simply places the string Hello Form on the title bar of the application window. As in C++, the this keyword refers
to the current object.
The second member of our class is a method. A method is a member that per-forms an operation for the class. An instance method operates on a class instance, while a static method operates on the type itself. Methods in C# work much like their C++ counterparts.
An instance constructor for a class is invoked when an object of that class is first created. Typically, objects of any type are initialized using the new keyword, which we
discuss next. A method must be invoked explicitly within a program. The Main
PROGRAMMINGIN C# 9
1.1.3 C# types
The new keyword is used to initialize any type in C#. This includes classes and
struc-tures as well as simple types such as int and enumerations. In fact, it is a compiler
error to use an object before it has been initialized. Any instance constructor provided for a given type, in our code the Main constructor, is invoked during initialization. In
our case, we initialize the MyForm class with the following code.
public static void Main() {
System.Windows.Forms.Application.Run(new MyForm()); }
There are two classifications of types in C#, with different initialization behavior for each. Value types contain the actual data for the type. These include built-in types such as int, char, and bool as well as all structures created with the struct
key-word. Value types are typically small or short-lived, making it useful to have their value stored in place, either on the stack or within the object containing them, such as an integer declared as a member of a class.
Reference types contain a reference to the actual data for the type. This is a bit like a pointer in C++, except that the reference is implicit in C#. All classes in C# are ref-erence types, as are the built-in object and string types. The compiler
automati-cally converts value types into reference types as required, using a process called boxing. We will discuss boxing later in the book.
As an example, consider the following code:
int x = new int(); x = 54;
string s = new string(); s = "Fifty-Four";
As you might guess, this can be abbreviated as:
int x = 54;
string s = "Fifty-Four";
The storage allocated as a result of this code is illustrated in figure 1.2. The variable x
is a value type and contains the integer 54. The variable s is a reference type, so that
the string "Fifty-Four" exists somewhere else in memory. The variable s simply
contains a reference to this memory.
The area of memory reserved for reference data is called the heap. Memory allocated on the heap, such as the string in figure 1.2, is reclaimed using garbage collection. The garbage collector, as it is called, automatically identifies blocks of memory that are no longer accessible and reclaims it when the program has extra processing time or requires more memory. Rather than the constant memory management required by C++ programmers using the new and delete keywords, garbage collection manages
memory behind the scenes so you can concentrate on writing your program. Of course, from a performance perspective, you have to pay the piper sooner or later, but delaying such reclamation may allow an idle CPU cycle or two to be discovered and provide better overall performance.
No need to get knee-deep in this topic. For our purposes, garbage collection means no more pointers lying around leaking memory and resources. Of course, there are other ways to mismanage your memory and resources, and garbage collection cre-ates its own set of problems, but more on that as we go along.
We know from this discussion that classes are reference types, and an instance of a class cannot be used until it is assigned to an actual object using the new keyword or
an existing object. In the case where one reference type is assigned to an existing refer-ence type, both objects refer, or point, to the same block of data on the heap, and both variables must be destroyed before the object can be reclaimed by the garbage collector. Back in our application, the MyForm class is a reference type, so we create a MyForm object using the new keyword.
TRY IT! Go ahead, break your code. Change your Main function to the following: public static void Main()
{
MyForm badForm;
System.Windows.Forms.Application.Run(badForm); }
If you compile this change, you should receive an error as follows:
Error Use of unassigned local variable ‘badForm.’
We could have implemented our Main function with a variable to represent the form. public static void Main()
{
MyForm goodForm = new MyForm();
System.Windows.Forms.Application.Run(goodForm); }
However, this variable is not needed, so we wrote the Main function without it. public static void Main()
{
System.Windows.Forms.Application.Run(new MyForm()); }
PROGRAMMINGIN C# 11
1.1.4 The entry point
Every C# program starts execution in a Main function, just like it does in C, C++,
and Java (although in C# it must begin with a capital M). Thisfunction is the start-ing point, or entry point, for our application. After the Windows operating system creates a new process, initializes various internal data structures, and loads the execut-able program into memory, our program is invoked by calling this entry point, optionally providing the command-line arguments specified by the user.
The entry point in C# is similar to the main function found in C and C++, except
that in C# it must be a static member of a class. The Main function can be void or
return an int, and it can optionally receive the command-line parameters as an array
of strings. The four possible forms for this function are shown below.
public static void Main(); public static int Main();
public static void Main(string[] args); public static int Main(string[] args);
The expression string[] specifies an array of string objects. Arrays in C# are
zero-based, so the array args shown here has string values args[0], args[1],
and so forth. Unlike C++, the first element in the array here, namely args[0], is the
first parameter for the program, and not the name of the executable.
The C# compiler uses the first instance of Mainit locates as the entry point for
the program. In our case there is only one. If there are multiple Mainfunctions, the /main switch can be used to specify which instance should be used.
public static void Main() {
System.Windows.Forms.Application.Run(new MyForm()); }
Our Main function is void and accepts no arguments. It contains a single statement,
which we will discuss next.
1.1.5 The Application class
The Application class is used to manage applications, threads, and Windows
mes-sages. A summary of this class for future reference appears in .NET Table 1.1. This class is commonly used to display the initial form in an application and to wait for user actions to occur within this form, which is exactly how we use this class here.
public static void Main() {
System.Windows.Forms.Application.Run(new MyForm()); }
The Run method begins a message loop in the current thread to wait for operating
system messages. If a Form object is provided, as is done in our program, then this
.
.NET Table 1.1 Application class
The Application class is an object that encapsulates the static members necessary to manage and process forms, threads, and Windows messages on behalf of a program. This class is
sealed, meaning that the class cannot be inherited. The Application class is part of the Sys-tem.Windows.Forms namespace. You cannot create an instance of this class, as no accessible instance constructor is provided
Public Static Properties
CommonAppDataRegistry Gets the RegistryKey for application data shared among all users.
CurrentCulture Gets or sets the locale (for internationalization) for the current thread.
ProductName Gets the product name associated with the application.
ProductVersion Gets the product version associated with the application.
StartupPath Gets the path for the executable file that started the application.
UserAppDataRegistry Gets the RegistryKey for application data specific to the current user.
Public Static Methods
AddMessageFilter Installs an IMessageFilter interface to monitor routing of Windows messages on the current thread. Such a monitor can be used to intercept incoming messages to a form.
DoEvents Processes any Windows messages currently in the message queue.
Exit Stops all running message loops and closes all windows in the application. Note that this may not force the application to exit.
ExitThread Stops the message loop and closes all windows on the current thread only.
Run Starts a standard message loop on the current thread. If a Form is given, also makes that form visible.
Public Static Events
ApplicationExit Occurs when the application is about to shut down.
Idle Occurs when the application is about to enter the idle state.
ThreadException Occurs when an uncaught ThreadException
occurs.
ADDINGCONTROLS 13
1.1.6 Program execution
Before we leave this section, let’s review what we’ve learned about how our program executes within the operating system. Run the MyForm.exe program again to see this in action. When you execute this program, the Windows operating system creates and initializes a process that:
1 Uses the Main method as the entry point for execution, which:
a Instantiates an instance of the class MyFormusing the new keyword, which
b Invokes the instance constructor for MyForm, which
c Assigns the string “Hello Form” to the title bar.
2 Back in our Main method, the Application.Run method is called with the
newly created MyForm object as a parameter, and:
a Displays MyForm as the application window, and
b Waits for and processes any messages or user interactions that occur.
3 When the application window closes:
a The Application.Run method returns, and
b The Main method returns, and
c The program exits.
And that is how it is done in the world of .NET.
1.2
Adding controls
Let’s make our program a little more interesting by adding some controls. Through-out the course of the book, we will be building a photo viewing application, so let’s add a button for loading an image file, and a box where the image can be displayed. When we are done, our form will look like figure 1.3.
Revise your code as shown in listing 1.2. Changes from our previous code listing are shown in bold. Note that we have changed the version number of our program to 1.2
Figure 1.3
to distinguish it from our original code and to match the current section. This new version number is also displayed on the title bar. In chapter 2 we will see how to obtain the application’s version number programmatically. For now, changing it by hand will do just fine.
[assembly: System.Reflection.AssemblyVersion("1.2")] namespace MyNamespace
{
using System;
using System.Windows.Forms;
public class MyForm : Form {
private Button btnLoad;
private PictureBox pboxPhoto;
public MyForm() {
this.Text = "Hello Form 1.2"; // Create and configure the Button
btnLoad = new Button(); btnLoad.Text = "&Load"; btnLoad.Left = 10; btnLoad.Top = 10;
// Create and configure the PictureBox
pboxPhoto = new PictureBox(); pboxPhoto.BorderStyle =
System.Windows.Forms.BorderStyle.Fixed3D; pboxPhoto.Width = this.Width / 2; pboxPhoto.Height = this.Height / 2;
pboxPhoto.Left = (this.Width - pboxPhoto.Width) / 2; pboxPhoto.Top = (this.Height - pboxPhoto.Height) / 2; // Add our new controls to the Form
this.Controls.Add(btnLoad); this.Controls.Add(pboxPhoto);
}
public static void Main() {
Application.Run(new MyForm()); }
} }
Compile this program as before and run it to see our changes. We will walk through these changes one at a time.