“Makers”) of this book (“the Work”) do not guarantee or warrant the results to be obtained from the Work. There is no guarantee of any kind, expressed or implied, regarding the Work or its contents. The Work is sold AS IS and WITHOUT WARRANTY. You may have other legal rights, which vary from state to state. In no event will Makers be liable to you for damages, including any loss of profits, lost savings, or other incidental or consequential damages arising out from the Work or its contents. Because some states do not allow the exclusion or limitation of liability for consequential or incidental damages, the above limitation may not apply to you.
You should always use reasonable care, including backup and other appropriate precautions, when working with computers, networks, data, and files.
Syngress Media®, Syngress®, “Career Advancement Through Skill Enhancement®,” “Ask the Author UPDATE®,” and “Hack Proofing®,” are registered trademarks of Elsevier, Inc. “Syngress: The Definition of a Serious Security Library”™, “Mission Critical™,” and “The Only Way to Stop a Hacker is to Think Like One™” are trademarks of Elsevier, Inc. Brands and product names mentioned in this book are trademarks or service marks of their respective companies.
KEY SERIAL NUMBER
001 HJIRTCV764 002 PO9873D5FG 003 829KM8NJH2 004 BAL923457U 005 CVPLQ6WQ23 006 VBP965T5T5 007 HJJJ863WD3E 008 2987GVTWMK 009 629MP5SDJT 010 IMWQ295T6T PUBLISHED BY Syngress Publishing, Inc. Elsevier, Inc.
30 Corporate Drive Burlington, MA 01803
UNIX and Linux Forensic Analysis DVD Toolkit
Copyright © 2008 by Elsevier, Inc. All rights reserved. Printed in the United States of America. Except as permitted under the Copyright Act of 1976, no part of this publication may be reproduced or distributed in any form or by any means, or stored in a database or retrieval system, without the prior written permission of the publisher, with the exception that the program listings may be entered, stored, and executed in a computer system, but they may not be reproduced for publication.
Printed in the United States of America 1 2 3 4 5 6 7 8 9 0
ISBN 13: 978-1-59749-269-0
Page Layout and Art: SPi Publishing Services Copy Editor: Judy Eby
iii Chris Pogue is an Incident Response Manager and Forensic Analyst for a major Information Technology service provider. With over ten years of administrative and security experience he was worked cases all over the globe assisting organizations from fortune 500 companies to single owner small businesses build defense in depth into their infrastructure. Prior to becoming a forensic analyst, Chris spent the five years as part of the Ethical Hacking Team for the same service provider. Tasked with emulating the actions of a malicious attacker, he assisted customers in identifying and eliminating probable attack vectors. Brining that knowledge and experience to bear to the Incident Management team, Chris specializes in incidents involving intrusion, and unauthorized access.
Chris is also a former US Army Warrant Officer (Signal Corps) and has worked with the Army Reserve Information Operations Command (ARIOC) on Joint Task Force ( JTF) missions with the National Security Agency (NSA), Department of Homeland Security, Regional Computer Emergency Response Team-Continental United States (RCERT-CONUS), and the Joint Intelligence Center-Pacific ( JICPAC). Chris attended Forensics training at Carnegie Mellon University (CMU) in Pittsburgh, Pennsylvania, and was the ARIOC primary instructor for UNIX, Networking, and Incident Response for all CMU sponsored courses. Chris holds a Bachelor’s Degree in Applied Management, a Master’s degree in Information Security, is a Certified Information Systems Security Professional, (CISSP), a Certified Ethical Hacker (CEH), and a VISA PCI DSS Qualified Security Assessor (QSA).
Chris resides in Tulsa, Oklahoma with his wife Michelle, and his two children, Jenna age 4, and Colin age 2. While the world of computer forensics is fast paced, and challenging … nothing compares to the rush and excitement of being a husband and father.
First and foremost, I would like to thank my Lord and savior Jesus Christ, without whom nothing in my life would be possible. Since being saved, He has walked along side of me when I needed a friend, walked in front of me when I needed a perfect example of how to live my life, and carried me when I needed a Messiah. All that I am able to do is only through His grace and mercy.
Colin. Next to my salvation, Michelle is the greatest gift the Lord has ever bestowed upon me, and without her I would not be the man I am today. She is a wonderful wife, and mother. Thank you so much for supporting me, loving me, and being by best friend even though I am hands down, the biggest nerd you ever met.
My kids keep me young at heart. I cannot begin to count the number of times while writing this book; I played puppy with Jenna and asked Colin to kindly get off my desk. I love being a dad and hope and pray that I am half the father they deserve.
Finally, I would like to thank everyone who contributed in way or another to the completion of this work. Specifically I would like to thank Harlan Carvey, Tom Millar, Jon Evans, Sam Elder, Keith Fanselow, Clint Ruoho, Barry Grundy, Mariuzz Burdach, Todd Haverkos, Cory Altheide, Andrew Rosen, Rick Van Luvender, Darrell Vydra, Mark Eifert, my mother Donna Pogue, and my sister Juli Czajkowski. Without all of you helping me, guiding me, and encouraging me along the way, I would have never finished this freaking thing. Thank you all … and stuff.
Cory Altheide has been performing forensics & incident investigations for the past seven years for employers ranging from the National Nuclear Security Administration to Google. Cory has developed and presented hands-on forensics training for various government, law enforcement, and civilian entities geared towards improving inves-tigator’s skills in examining less common digital media, exotic operating systems, and live analysis and acquisition. He holds the GIAC GCIH and PCI QSA certifications and is on the technical program committee for the 8th Annual Digital Forensics Research Workshop (DFRWS).
I would like to the The Macallan.
Todd Haverkos has 16 years of experience in Information Technology (IT) and high technology, including 7 years with a Fortune 50 computer services company working in network security, ethical hacking roles and most recently Security Consulting and Penetration Testing roles, 6 years with an international semiconductor and communica-tions company as an integrated circuit designer for which he holds a US Patent, and 4 years with large regional electric utility in database administration, IT, and telecom. He has 6 years of dedicated experience in Information Security and has expertise with penetration testing, application security testing, vulnerability assessments and recom-mendations, security policy and procedure development, network architecture, firewall, switch and router configuration and management, and technical security documentation.
v a master’s degree in Computer Engineering from Northwestern University, and holds EC-Council Certified Ethical Hacker, and EC-Council Certified Security Analyst certifications.
Thanks first to Chris Pogue for the opportunity to contribute to the book (in an albeit-small, one chapter sort of way). It’s a pleasure to have the opportunity to spread *nix thoughts! James Lee, thank you for inspiration and encouragement to jump into the water.
Thanks also to the English faculty of St. Xavier High School in Cincinnati, OH, particularly Walter Koral, Jim Downie, Patricia Culley, and Mike Marchal. While I know at least one of you was quite unhappy with my choice of engineering as a career path lo, those many years ago, I would like to offer this consolation: The ability to communicate well–particularly in writing–is easily the most valuable skill I have brought to any technical job I’ve had, and a skill I use every day of this Internet-connected life. Many thanks!
Thanks also to Mom who so wisely and generously found a way to make sure I had that education and the one from her, and for all those other great things Mom’s do that earn them a much-deserved place in acknowledgements!
To those who like to keep a low profile, but who have been so generous in sharing their technical knowledge and friendship with me over the years, thank you!
vi
Appendix Contributor
Michael Cross (MCSE, MCP+I, CNA, Network+) is an internet specialist/ programmer with the Niagara Regional Police Service. In addition to designing and maintaining the Niagara Regional Police’s Web site (www.nrps. com) and intranet, he has also provided support and worked in the areas of programming, hardware, database administration, graphic design, and network administration. In 2007, he was awarded a Police Commendation for work he did in developing a system to track high-risk offenders and sexual offenders in the Niagara Region. As part of an information technology team that provides support to a user base of over 1,000 civilian and uniformed users, his theory is that when the users carry guns, you tend to be more motivated in solving their problems.
Michael was the first computer forensic analyst in the Niagara
Regional Police Service’s history, and for five years he performed computer forensic examinations on computers involved in criminal investigations. The computers he examined for evidence were involved in a wide range of crimes, inclusive to homicides, fraud, and possession of child pornography. In addition to this, he successfully tracked numerous individuals electroni-cally, as in cases involving threatening e-mail. He has consulted and assisted in numerous cases dealing with computer-related/Internet crimes and served as an expert witness on computers for criminal trials.
Michael has previously taught as an instructor for IT training courses on the Internet, Web development, programming, networking, and hardware repair. He is also seasoned in providing and assisting in presentations on Internet safety and other topics related to computers and the Internet. Despite this experience as a speaker, he still finds his wife won’t listen to him.
Chapter 1 Introduction . . . . 1
History. . . . . 2
Target.Audience. . . . . 3
What.is.Covered . . . . . 3
What.is.Not.Covered. . . . . 6
Chapter 2 Understanding Unix . . . . 9
Introduction . . . . . 10
Unix,.UNIX,.Linux,.and.*nix. . . . . 10
Linux.Distributions. . . . . 12
Get.a.Linux! . . . . . 12
Booting.Ubuntu.Linux.from.the.LiveCD. . . . . 15
The.Shell. . . . . 18
All.Hail.the.Shell. . . . . 20
Essential.Commands . . . . . 20
Highlights.of.The.Linux.Security.Model. . . . . 25
The.*nix.File.system.Structure. . . . . 29
Mount.points:.What.the.Heck.are.They?. . . . . 31
File.Systems. . . . . 34
Ext2/Ext3. . . . . 35
Summary. . . . . 37
Chapter 3 Live Response: Data Collection . . . . 39
Introduction . . . . . 40
Prepare.the.Target.Media. . . . . 41
Mount.the.Drive. . . . . 41
Format.the.Drive. . . . . 42
Format.the.Disk.with.the.ext.File.System. . . . . 42
Gather.Volatile.Information .. .. .. .. .. .. .. .. .. .. .. .. .. .. .. .. .. .. .. .. .. .. .. .. .. .. .. .. .. .. .. .. .. .. .. .. .. .. .. ..43
Prepare.a.Case.Logbook. . . . . 43
Acquiring.the.Image . . . . . 55
Preparation.and.Planning . . . . . 55
DD. . . . . 56
Bootable.*nix.ISOs. . . . . 60
Helix. . . . . 60
Knoppix. . . . . 61
Contents
BackTrack.2. . . . . 62
Insert. . . . . 63
EnCase.LinEn. . . . . 63
FTK.Imager . . . . . 65
ProDiscover. . . . . 68
Summary. . . . . 70
Chapter 4 Initial Triage and Live Response: Data Analysis . . . . 71
Introduction . . . . . 72
Initial.Triage .. .. .. .. .. .. .. .. .. .. .. .. .. .. .. .. .. .. .. .. .. .. .. .. .. .. .. .. .. .. .. .. .. .. .. .. .. .. .. .. .. .. .. .. .. .. .. .. .. .. ..72
Log.Analysis. . . . . 74
zgrep . . . . . 76
Tail. . . . . 76
More . . . . . 76
Less . . . . . 77
Keyword.Searches. . . . . 77
strings./proc/kcore.–t.d.>./tmp/kcore_outfile. . . . . 78
File.and.Directory.Names. . . . . 79
IP.Addresses.and.Domain.Names. . . . . 80
Tool.Keywords . . . . . 80
Tricks.of.the.Trade. . . . . 82
User.Activity. . . . . 86
Shell.History . . . . . 86
Logged.on.Users . . . . . 87
Network.Connections. . . . . 89
Running.Processes. . . . . 92
Open.File.Handlers. . . . . 95
Summary. . . . . 98
Chapter 5 The Hacking Top 10 . . . . 99
Introduction . . . . . 100
The.Hacking.Top.Ten. . . . . 104
Netcat. . . . . 105
Reconnaissance.Tools. . . . . 106
Nmap . . . . . 106
Nessus. . . . . 110
Try.it.Out. . . . . 111
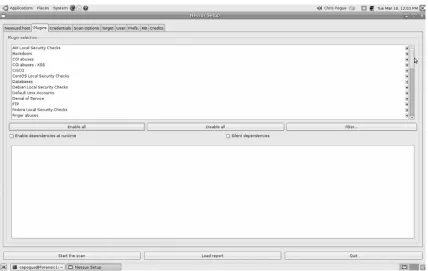
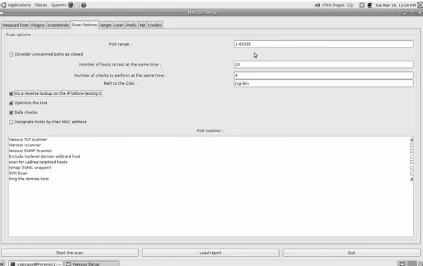
Configuring.Nessus. . . . . 111
Plug-ins. . . . . 113
Ports. . . . . 114
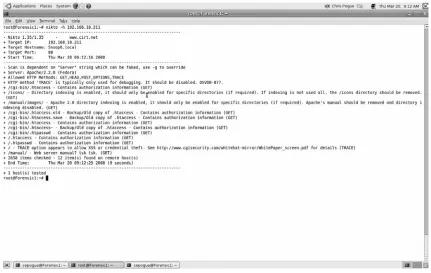
Nikto. . . . . 116
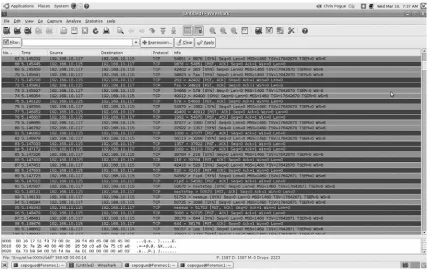
Wireshark . . . . . 118
Canvas/Core.Impact. . . . . 120
The.Metasploit.Framework. . . . . 121
Paros. . . . . 134
hping2.-.Active.Network.Smashing.Tool. . . . . 138
Ettercap. . . . . 144
Summary. . . . . 152
Chapter 6 The /Proc File System . . . . 153
Introduction . . . . . 154
cmdline. . . . . 155
cpuinfo. . . . . 155
diskstats. . . . . 156
driver/rtc .. .. .. .. .. .. .. .. .. .. .. .. .. .. .. .. .. .. .. .. .. .. .. .. .. .. .. .. .. .. .. .. .. .. .. .. .. .. .. .. .. .. .. .. .. .. .. 156
filesystems. . . . . 156
kallsyms.(ksyms). . . . . 157
kcore. . . . . 157
modules. . . . . 158
mounts. . . . . 158
partitions. . . . . 159
sys/. . . . . 159
uptime . . . . . 159
version . . . . . 159
Process.IDs. . . . . 159
cmdline. . . . . 160
cwd. . . . . 161
environ. . . . . 161
exe. . . . . 161
fd . . . . . 161
loginuid. . . . . 162
Putting.It.All.Together. . . . . 162
sysfs. . . . . 166
modules. . . . . 166
block. . . . . 166
Chapter 7 File Analysis . . . . 169
The.Linux.Boot.Process. . . . . 170
init.and.runlevels . . . . . 171
System.and.Security.Configuration.Files. . . . . 173
Log.Files. . . . . 176
Who. . . . . 177
Where.and.What . . . . . 177
Identifying.Other.Files.of.Interest. . . . . 178
SUID.and.SGID.Root.Files. . . . . 178
Recently.Modified/Accessed/Created.Files. . . . . 179
Modified.System.Files. . . . . 180
Out-of-Place.inodes. . . . . 180
Hidden.Files.and.Hiding.Places. . . . . 181
Chapter 8 Malware . . . . 183
Introduction . . . . . 184
Viruses . . . . . 185
Storms.on.the.Horizon . . . . . 188
Do.it.Yourself.with.Panda.and.Clam. . . . . 190
Download.ClamAV . . . . . 190
Install.ClamAV. . . . . 190
Updating.Virus.Database.with.Freshclam. . . . . 191
Scanning.the.Target.Directory. . . . . 192
Download.Panda.Antivirus. . . . . 193
Install.Panda.Antivirus. . . . . 193
Scanning.the.Target.Directory. . . . . 193
Web.References. . . . . 194
Appendix Implementing Cybercrime Detection Techniques on Windows and *nix . . . . 195
Introduction . . . . . 196
Security.Auditing.and.Log.Files . . . . . 197
Auditing.for.Windows.Platforms. . . . . 199
Auditing.for.UNIX.and.Linux.Platforms. . . . . 206
Firewall.Logs,.Reports,.Alarms,.and.Alerts. . . . . 208
Commercial.Intrusion.Detection.Systems. . . . . 211
Characterizing.Intrusion.Detection.Systems. . . . . 212
Commercial.IDS.Players. . . . . 217
IP.Spoofing.and.Other.Antidetection.Tactics. . . . . 218
Honeypots,.Honeynets,.and.Other.“Cyberstings”. . . . . 220
Summary. . . . . 223
Frequently.Asked.Questions. . . . . 226
Chapter 1
Introduction
Solutions in this chapter:
History
Target Audience
What is Covered
What is Not Covered
■
■
■
History
In 2007, I completed my Master’s Degree in Information Security from Capella University. As an Incident Response Analyst by trade, I figured that writing my thesis on UNIX forensic analysis would be a good topic, relevant both to my job duties and my course work. With Harlan Carvey being a colleague of mine, you would think I would just write something on Windows forensics and ask him for help. However, this was my thesis, and I wanted to do something that would challenge me, so I chose to write my paper on UNIX forensic analysis.
After about a day of research, I found that my original scope would have to be narrowed drastically. This was due both to the vastness of the sheer concept of UNIX forensics, and to the fact that there were no books on it (at least that I could find) anywhere. I did find some really good articles and white papers by Barry Grundy,1
Mariuz Burdach,2 and Holt Sorenson,3 but nothing in the form of a book. I also found
that there were some chapters in books like “Incident Response: Investigating Computer Crime” by Mandia and Prosise, “Hacking Exposed: Computer Forensics” by Davis, Philipp, and Cowen, and “Digital Evidence and Computer Crime: Forensic Science, Computers, and the Internet,” by Casey, but nothing wholly dedicated to UNIX.
At the time I wrote my thesis, I had no idea how many UNIX variants existed. I know that personally I have worked with, Solaris, AIX, HP-UX, BSD, Tru64, and several versions of Linux including Ubuntu, Fedora Core, Red Hat, Gentoo, SUSE, and Knoppix. Now, writing a book that would include all of these variants and all of the possible architecture and command structure differences is simply not feasible, so I picked one, and stuck with it. This book specifically covers the Linux 2.6.22-14 kernel, and all of our examples are either made using Ubuntu 7.10 Gutsy Gibbon, or Fedora Core 8. However, if you have been around UNIX in any form for any length of time, you can either use the exact command structure we use in this book, or make some slight variations.
At the completion of my thesis, I thought long and hard about the knowledge gap that existed in the world of UNIX forensics. Sure you can read white papers, or get on the CFID or HTCIA mailing lists, or the SMART forum, which are very informative, but don’t have all of the information you need in one place. Also, if you
1 http://www.linuxleo.com/
are a total n00b, you might feel foolish having to ask questions like, “How do I use dd?” and “How do I see my external hard drive in UNIX?”
So I decided that a book specifically geared toward Linux forensics was needed. I started by gathering information from colleagues such as Harlan, Cory Altheide, Todd Haverkos, Sam Elder, Barry Grundy, Mariuz Burdach, Andy Rosen, and Rick Van Luvender about what this book should look like. I got some great feedback from these trusted colleagues and friends and began to write my outline. Cory and Todd liked the idea so much that they decided to jump on board and contribute, for which I am extremely grateful. Without them, I would have never completed the manuscript on time, and my book would not have been as strong.
Target Audience
Due to the vast proliferation of Windows, about 80 percent of the incidents I encounter as a full time Incident Response Analyst are strictly Windows-based. In talking to Harlan, Cory, and several other colleagues in the law enforcement community, those numbers are pretty consistent across the board. The bottom line is that only about 20 percent of the cases that come across our desks involve some variant of UNIX. These numbers are estimates only, and I have no real empirical data to back them up. Depending on where you work and what you do, these numbers may vary, but in talking to forensic investigators in both the corporate and law enforcement communities, they are generally accurate.
Given the fact that you are reading this book, it’s probably safe to assume that you have come across one of the 20 percent of *nix cases. You probably also have little or no experience working with Linux as either a host operating system or as part of a forensic investigation. Don’t panic, this book is for you!
I realize that you may not meet either of these criteria, in that you have not had a *nix case as of yet and are reading the book to prepare yourself for the inevitable, or you are familiar with the different flavors of UNIX, have worked several cases, and are looking for some new knowledge to make you a better investigator. If this is the case, this book has some great information for you and you may want to go directly to Chapter 5, “Hacking Top 10” and Chapter 6 “/proc.”
What is Covered
that no two people will do the same thing the same way, yet get the same results. In our book, we have used what we feel is the quickest and easiest way to accomplish the task at hand. We understand that you may find a way that works better for you, and if that is the case, go with it, and please let us know so we can incorporate it in a later revision of this book.
In Chapter 2 of this book, you will learn about the most common file systems used with Linux, how the disk architecture is configured, and how the operating system interacts with the kernel (at a high level). This includes:
Linux distributions Booting a Linux system The shell
Disks and devices in Linux
File system organization and paths File system formats
Logs Daemons
In Chapter 3 of this book, you will learn how to acquire both the volatile and persistent data from a Linux system, using a Linux forensic system. This includes:
Connecting to the target machine
Locating the external hard drive to which you will transfer the image
Mounting the external hard drive to which you will transfer the image
Gathering volatile information
Creating a forensic image with the “dd” command
Verifying your information using Message Digest 5 (MD5) Maintaining your data in a forensically sound manner
In Chapter 4 of this book, you will learn how to analyze the data you have just acquired. This includes the analysis of:
Who is logged onto the system Which processes are running
Which ports are open, and where they are communicating to or receiving communication from
Open file handlers
Open Transmission Control Protocol (TCP) hooks Keyword searches
In Chapter 5 of this book, you will learn about the Top 10 most commonly used tools in Linux hacking, either as the launch point or the target. You will also learn what these tools look like when they are installed, how they are used, and what kind of artifacts they may leave behind. The Hacking Top 10 are:
nmap nessus netcat nikto Kismet wireshark metasploit paros hping2 ettercap
In Chapter 6 of this book, you will learn about the /proc filesystem and what important data you have to collect from it before powering a system down. This includes:
Disk and partition information Kernel symbols
A copy of physical memory All kernel modules
In Chapter 7 of this book, you will learn about the various file types that should be analyzed and how to analyze them. These files include:
System and security configuration files Init and Run Control scripts
Cron jobs
Hidden files and hiding places
Identifying other files of investigative interest
In Chapter 8 of this book, you will learn about malware as it exists in Linux machines, and what kinds of signatures they leave. This includes:
Viruses Worms
Trojan Horses Flooders
What is Not Covered
Obviously, with a limited number of pages in this book and a virtually inexhaustible supply of information, we had to narrow our focus to what we thought best encompassed the idea of a true introductory level book. Keeping that in mind, we understand that there may be some items that you wish were covered in greater detail, or perhaps you would have liked to see something addressed that was not. If that is the case, please let us know! We want our next book to not only include some more difficult forensic concepts as they pertain to Linux, but to include anything that you, the reader, have deemed important.
Loadable kernel modules were part of our original outline, but as we put fingers to keyboards, it became clear that this was not an easy topic to cover, and would likely result in an exceedingly granular, technical chapter that falls outside the scope of this book. That being the case, we decided to cut loadable kernel modules from this book, hopefully to include them in our next book.
In a similar vein, memory analysis was also left out of this book due to its complexity. I have read the articles by Mariuz Burdach4,5 and spoken with him about how to
■
■
■
■
■
■
■
■
■
best cover this concept. While it is something that we probably could have covered at a high level, Cory, Todd, and I felt that we could not write the chapter without prefacing it with a considerable amount of background information.
Although we do cover the Hacking Top 10 in Chapter 6, there are many additional techniques and tips we’d like to share on attack signatures that we couldn’t include in this first book. Our original concept was to perform several common attacks in our lab, footprint the attacks, then illustrate to the reader what was done, how, and what artifacts were left behind. For example, what does a buffer overflow look like in logs? How can you tell if one host was used as a zombie to scan others? How could you tell what a reverse bind shell looked like, or where it was going? These are the types of questions we wanted to answer, but again, were limited by time, and length. Our goal is to provide this type of material in a forthcoming work, so stay tuned!
Using this book as a guide, an examiner with limited experience on Linux systems should be able to connect to a Linux target, gather volatile and persistent data, and conduct a comprehensive forensic analysis of that data. While this book is by no means meant to be all encompassing, it does contain enough valuable information to propel the reader far beyond that which they would be able to achieve if they had not read the book.
It is our sincere desire that the reader finds this book useful, and that it helps to fan the flames of desire to learn even more about Linux forensics. Our goal during this project was to provide the forensic community with an introductory book that explains many of the details surrounding Linux forensics in a manner in which the most novice examiner can easily understand, yet also provide the more experienced examiner with novel techniques. If you consider yourself to be an expert, then this may not be the book for you. Provided we sell enough copies of this book, and the publishers let us write it, our next book will cover the advanced forensics techniques, which will provide the expert with the most value add.
Chapter 2
Understanding Unix
Solutions in this chapter:
Unix, UNIX, Linux, and *nix
Highlights of the Linux Security Model
The *nix File System Structure
File Systems
■ ■ ■ ■
Introduction
“So what the heck do I do with this thing?”
Perhaps someone’s dropped a *nix-based computer on your desk for analysis. Don’t feel bad. We’ve either been there ourselves, or seen colleagues faced with their first experience with an unfamiliar computer system. For the majority of professionals whose first—and sometimes only—computing experience comes from the world of Microsoft Windows, the prospect of using or investigating a Unix or Unix-like machine can be exceedingly daunting.
This chapter aims to help you hit the ground running and get over that fear of the world outside Windows. You’ll be introduced to Unix by booting Linux on your own PC, and be given a quick tour around some of the features of Linux that are common to most Unix-like systems. For comfort, we’ll draw on what you already know about the Windows operating system, and point out where Unix thinks and acts similarly, and also where *nix is very different from Windows.
Our focus and examples all use Linux—Ubuntu Linux specifically—but the concepts and nearly all of the commands and techniques introduced here are applicable to all Unix and Unix-like operating systems you are likely to encounter. By taking the time to get comfortable in this chapter, you’ll be able to both use free Linux forensic tools as appropriate for forensic analysis, and you will also have the knowledge to better analyze client systems that happen to be Linux or *nix variants.
Unix, UNIX, Linux, and
*
nix
You’ve probably noticed the alphabet soup of these related terms here in this chapter and elsewhere in this book. They’re all encountered when discussing the big family of operating systems known broadly as “Unix and Unix-like operating systems.”
It’s a very different mindset and world from the Microsoft-controlled definition of Windows. Instead of a single vendor setting the standards and calling the shots, in the *nix world, choices abound.
The trouble is that UNIX® is strictly a trademark and standard held in trust
these days by The Open Group.1 “Unix” on the other hand is a non-trademarked
word that is most often used in the loose sense we use it in this book—that is,
to refer to operating systems that follow a certain design philosophy. And “Linux” is an enormously popular, free UNIX-like operating system that is designed with the philosophy of Unix, but in actuality is not a truly UNIX-compliant implementation of that philosophy. The history of *nix is very rich, incestuous, and convoluted to the point we can’t begin to give it justice here. Knowing the heritage of “System V” *nixes versus those cut from the Berkeley Software Distribution (BSD) cloth is useful in understanding why commands don’t always seem to have the same switches and options (ps -ef vs ps -aux). If you’d like to see a family tree of all the *nix variants out there, spend a few minutes soaking in the diagrams at www.levenez.com/unix/ just trying to find Linux.
While these distinctions can make your head hurt, the good news is that the nomenclature isn’t that important to your daily work, though a familiarity with the history can certainly be helpful. To deal with all these particulars, we will follow the lead of other authors and avoid the clunkiness of trademarks, or of hyphenated concoctions of “Unix-like” and try to refer to the whole mess of Unix and friends as “*nix” when referring to Linux or compliant UNIX operating systems.
The further good news is that with some basic Linux skills, you’ll be opened up to the larger realm where a multitude of proprietary and free *nix implementations await you. Knowing Linux and its terminology will help you feel somewhat at home with these popular *nix operating systems below. Some you have probably heard of if not encountered first hand. In a hand-wavingly rough order-of-likely-encounter, *nix operating systems you may see in your work at some point include:
Linux, our new best friend, available in a colorful array of distributions. Apple OS X, little known to be hosting a fully compliant UNIX-based on FreeBSD behind all those pretty graphics. Try the Terminal application in the Utilities folder and embrace the Unix goodness.
Solaris, from Sun Microsystems. HP-UX, from Hewlett-Packard. AIX, IBM’s Unix variant.
Tru64, now owned by Hewlett-Packard, via Compaq via DEC, and lived its early life as Digital Unix.
FreeBSD, OpenBSD, free, open source *nixes of a Berkeley heritage.
■ ■
■ ■ ■ ■
And, for historical perspective, the legacies of these are still alive and well:
UNIX System V (“System 5”) aka SVR5, from AT&T, later to become SCO UnixWare.
Berkeley Software Distribution (BSD) UNIX, alive and well in many variants.
After spending some quality time at a *nix shell prompt, Unix will become akin to obscenity: you’ll know it when you see it! I’m happy to report that these *nix friends are all quite elegant in their design and are far from obscene. We’ll also do our best to keep you from uttering too many obscenities as you get introduced to *nix.
Linux Distributions
Like in discussions of *nix where many players are at the table, even Linux itself has a rich array of choices, for better or worse. Linux is available in a variety of different flavors that express the rich diversity of people who are using the operating system, and who are taking advantage of its open source nature to tweak and create a Linux that solves problems in their own way.
Some of the more common Linux distributions include: Ubuntu Linux (our choice for this book), Red Hat Enterprise Linux (RHEL), Fedora, SUSE Linux Enterprise (Novell), OpenSUSE, Gentoo, Debian, Mandriva, and 300 others. If you want to keep an eye on free open source distributions, you can drop your jaw at your first visit to http://distrowatch.com/.
All distributions implement the Linux kernel, and at the command prompt you’ll experience similar things in all of them. Where distributions differ from one another is in the realm of what software is included in a default installation, how software pack-ages are added to the system, what window manager graphical user interface (GUI) (if any) is used by default, and the release philosophy when it comes to stable updates.
For forensic work, it’s useful to be aware that there are different flavors, and that the location of program, log, and configuration files vary from one Linux distribution to another. The mantra of “there’s more than one way to do it” is alive and well in Linux.
Get a Linux!
Time to get the fingers to the keyboard! There’s no need to be paralyzed by all the choices—just get a copy of Ubuntu Linux. Ubuntu has rocketed to popularity, because it’s among the easiest installations to install, and because its installation CD is also what’s called a “Live CD”—you don’t even have to install it to try it out.
■
The entire operating system can boot up from the CD drive and you don’t have to worry about your Windows installation on your hard drive being touched at all.
[image:22.540.87.473.252.615.2]So, surf on over to http://ubuntu.com/ and follow your nose to the download section so we can get our hands on Linux. As of this writing, http://www.ubuntu. com/getubuntu/downloadmirrors gives a list of download sites around the world where the latest Ubuntu Linux distribution can be obtained for free. If you are bandwidth-challenged, Ubuntu will ship you free CD’s or DVD’s if you are willing to wait up to 10 weeks for them to arrive. Downloading the software is easy, though. Figure 2.1 shows the Ubuntu download page where you’ll select the default of Desktop Edition, and the most current stable release (currently 7.10 known as the Ubuntu Gutsy Gibbon Release).
The download will come in the form of an .iso file. ISO files are disk images. Don’t make the rookie mistake of trying to burn the .iso file itself to a data CD by right-clicking on it, sending it to a CD-ROM drive and expect it to magically become a bootable CD-ROM. It won’t work! ISO images are entire disk images and need to be burned with something that knows about disk images.
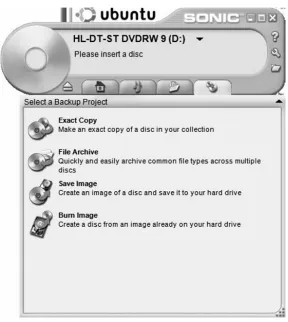
If you have a CD burning program supplied by your computer vendor, then things are very easy. For instance, IBM/Lenovo Thinkpads might come with Sonic RecordNow, which includes an easy to find “burn image” function. OEM versions of EZ Media Creator, and Nero Burning ROM have similar functionality. Burn Image is what Nero might call it. (See Figure 2.2.)
[image:23.540.118.406.246.568.2]If you don’t have OEM CD burning software, do not fear. Just grab a copy of ISO Recorder Power Toy at http://isorecorder.alexfeinman.com/isorecorder.htm.
Booting Ubuntu Linux from the LiveCD
Once you have the ISO image properly burned to a CD-ROM, pop it into your computer’s CD-ROM drive, and reboot.
If you end up right back in Windows, it’s likely that your Basic Input Output System (BIOS) of your computer has your hard drive at a higher priority than your CD-ROM in the boot order. A quick tweak of your BIOS settings will fix that. When you boot your computer, generally hitting F2 or DEL or some other key they hopefully mention on the first splash screen on bootup will get you into your BIOS configuration. Under the Boot option you can modify the order in which your computer searches for bootable media. Read the instructions on the screen on how to change the order (for Phoenix BIOS, use the right keyboard arrow to get to the Boot menu and arrow down to the CD-ROM device and press Shift and 1 and the same time). Here is an example of a boot order that will boot the Ubuntu LiveCD ahead of your hard drive installed Windows OS (see Figure 2.3).
With your CD-ROM set to boot ahead of your hard drive, and provided you burned the ISO as an image to the CD and not as a regular data file, you’ll see your first Ubuntu screen (see Figure 2.4).
You’ll take the default, and press Enter to start Ubuntu. Now, it’s not very Linux-like to be staring at a pretty graphic splash screen at boot time, so hit Alt-F1. You’ll see console boot messages flying by that tell you in delightful detail what’s going on in the boot process. Here’s a taste (see Figure 2.5).
Figure 2.4 Ubuntu Boot Options Screen
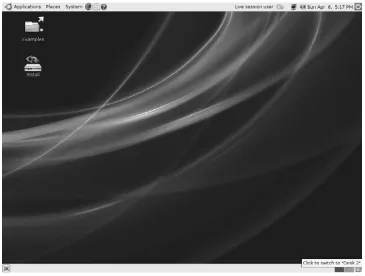
And when we’re all done, Ubuntu dumps you without prodding for a password into the pretty Gnome Window Manager (see Figure 2.6).
At this point, feel free to poke around and try some of the preinstalled applications. Now, in all the messages flying by at the console prompt, you may have noticed Ubuntu doing all sorts of wonderful things detecting your hardware, starting the X11 server so we can jump from the text world of the command prompt into the Gnome window manager.
[image:26.540.97.462.112.388.2]The concept of X11 and a window manager is also a departure from the Windows world. In Windows, the graphics subsystem is intimately tied to the operating system, and you can’t boot straight to the DOS prompt without a great deal of gyration. In *nix, the heritage of booting to a green screen text login: prompt is still alive and well, though Ubuntu Linux does a particularly good job of hiding it 99 percent of the time. In *nix, graphical displays and a windowed interface are bolt-on additions to the operating system’s core functionality. X11 provides the basis for doing bitmap graphics and providing an application programmer’s interface (API) for creating windows and interacting with the mouse. A windows manager, on the other hand, runs on top of
the X11 base, and is the source of the look and feel of your desktop, menus for start-ing programs, what the window close icon and window borders look like, what the right mouse button does when clicked over the workspace, and things of that nature.
Though it may seem alien to a Windows user, there are choices in Windows managers in *nix. Imagine in Windows XP if you didn’t ever want to see a Start button again, or you wanted a desktop that had multiple workspaces so you can keep all the windows associated with your mp3 media program in one desktop workspace while your work applications are in another. Or suppose you wanted to remap Alt-F4 to do something other than close a window. With the choice of different window managers in *nix (or the config file for the one you have), those sorts of a things are possible. Gnome is the default for Ubuntu, but if you want to see KDE in action, there’s a Linux distribution named Kubuntu that sets it as the default. Fluxbox is a very lightweight window manager useful for running on older hardware without a lot of memory. CDE and its dtwm manager you might find on older Solaris or HP-UX servers. They all have a slightly different look and feel.
If you have a wired Ethernet connection and a Dynamic Host Configuration Protocol (DHCP) server, Ubuntu will surely have grabbed an Internet Protocol (IP) address and has you sitting ready to hit the Internet if you fire up the Firefox Web browser, for instance. Hunt around, get comfy. After all, you’re not going to break anything because you’re booted into Linux using a read-only CD-ROM. Unless you go out of your way to double-click the Install icon and answer several prompts that warn you that you’re about to reformat your hard disk, or unless you intentionally browse to the hard drive icon in the file explorer, Ubuntu isn’t going to touch your hard disk, let alone change anything on it.
The Shell
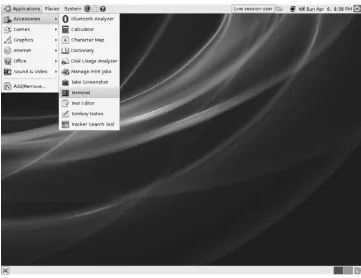
Figure 2.7 Finding the Terminal Program Under Applications>Accessories
All Hail the Shell
Like the Windows command prompt (except bigger, better, and more powerful), here’s where you get to reacquaint yourself with the keyboard by typing Unix commands.
Unlike Windows, there are actually options for your shell. There isn’t just one shell in *nix. In Windows, you have cmd.exe and … well, cmd.exe, unless you’ve gone far out of your way to implement a replacement Windows shell (or have installed Cygwin). In the *nix world, there are many supported shells often prein-stalled: Bourne shell (sh), Korn shell (ksh), C Shell (csh), Tom’s C Shell (tcsh), and Bourne Again Shell (bash). Bash is the usual default in Linux, but HP-UX machines often are configured to default to ksh. Solaris 10 defaults to Bourne shell. Depending on the whims of the system administrator of an environment, you may find yourself in csh or tcsh by default. If you ever want to know what shell you’re in, it’s just an echo $SHELL command away.
ubuntu@ubuntu:~$ echo $SHELL /bin/bash
ubuntu@ubuntu:~$
Essential Commands
Here is a list of commands you should get familiar with, and common options. This is by no stretch of the imagination even a tiny fraction of available *nix commands, but these will get your feet wet. Note that command options and syntax have a way of being different between the various flavors of *nix operating systems, so when in doubt, consult the man pages! Man pages? Read on….
Linux Command
Closest Windows Command Line
Equivalent (if any) What it does
ls -lart dir /od List files in current directory.
Options give you a long (detailed) listing with all files including hid-den files that begin with “.” in reverse time order with the newest file shown last.
Linux Command
Closest Windows Command Line
Equivalent (if any) What it does
touch filename - Creates an empty file if the file
doesn’t already exist. If it does exist, it updates access and modification timestamps on the file.
rm filename del Unlinks (“deletes”) a file.
shred filename - Overwrites a file to hide its contents, and optionally deletes it.
cd directoryname cd Change working directory. Note that in
*nix, the directory names use forward slashes, not backslashes, e.g., cd /tmp. hostname net config workstation Shows the hostname of the machine. ifconfig -a | less ipconfig /all Shows all network interfaces, and
pipes the output to a handy pager program named less.
cat filename type Display the contents of the file to the screen.
less filename - View text files with ability to scroll
forward and backward through the output with spacebar and b keys. q to quit.
more filename more View text files one screen at a time, advancing with the space bar. Available on all *nix systems. head filename tail
filename tail -f logfilename
- Head displays the first lines of a
file. Tail shows the last lines of a file. Add -f to follow the end of a
growing text file or a log.
history | less - Shows your previously executed
commands.
dmesg | less - Those console messages you saw on
bootup are all here. Extremely useful for debugging and for figuring out device names of external hard drives detected by hotplug.
Linux Command
Closest Windows Command Line
Equivalent (if any) What it does
script scriptfile name
- Creates a log of your command-line
activity in the filename specified. Very useful for logging your activity for evidence purposes! After your last command that you want to record, type “exit.”
strings scriptfile name / less
- Strip out all the control characters
showing only the printable string characters to review a command script, or any binary file for that matter.
date date Displays the current date, useful
inside of command sessions captured by script to provide rough time stamping.
export PS1=” ${USER}@$ {HOSTNAME} :\d:\t:\w\$ “
prompt Set your BASH command prompt to
include your username, hostname current date, time, and working directory via the special BASH envi-ronment variable PS1. man bash for details.
man command
name help commandname commandname /? Man(ual) pages. RTFM. Read The (fine) Manual. So important! Man is an interface to the on-line command reference manuals. Unlike the sel-dom useful and inconsistently avail-able Windows help, *nix writers very dutifully create detailed man pages for nearly every command line program available.
man -k keyword /less
- The -k switch allows you to search
the man pages for a keyword so you might find a relevant command for what you want to do. This was more important before the Web and search engines but still useful.
Linux Command
Closest Windows Command Line
Equivalent (if any) What it does
find The Search function
in explorer with the silly animated dog maybe?
Amazingly indispensable file find-ing/searching command. Almost anything you might want to do in *nix is probably possible to be done with a suitably long find command. As a forensic analyst, you will grow to love this command.
grep pattern file Displays lines of a file that match a given search string pattern. Another huge indispensable tool.
df . df - Lists disk space left in the current
directory (. represents the current directory). Without the . df, lists disk space usage for all mounted file systems. Units are in blocks, which may or may not be 1kB in size, depending on how the disk is formatted.
du -sk du -k - Show a summary of disk usage in
kilobytes for the current directory and all subdirectories.
mount - Lists mounted file systems. More
on this concept later. man mount for the impatient.
dd - Disk dumper. As you might expect,
this one’s quite important to the forensic community! This is a native *nix command that can dump raw disk devices including all slack space.
sudo runas Sudo is what you preface any
commands that require root
(Administrator) superuser privileges.
mkdir directory md Create a directory.
Linux Command
Closest Windows Command Line
Equivalent (if any) What it does
sudo mount -t type auto /dev/device /media/mountpoint
Windows automati-cally attempts this at boot time and when USB devices are plugged in.
To mount a file system, you need to be root, so sudo prefaces this command. This example shows mounting the disk device to a blank directory, automatically detecting the type of file system on it. sudo umount
/media/mount point
Right clicking on Eject or Safely Remove Hardware icons
Unmount a file system. For example, to remove a USB flash drive from the system, or an external hard disk.
chmod file chown file chgrp file
attrib Change file permissions, file owner ship, and group ownership of a file.
Other commands to look up that you should work into your *nix vocabulary include: top (shows programs running sorted by CPU utilization), ps -ef (shows all running processes), netstat -an (shows all network connections), last (shows last users logged in), who (who’s currently logged in), uname -a, cp, rmdir, touch, wc -l, passwd, su -, gunzip, gzip, tar, zcat, env, ps, cut, sort, uniq, alias, ssh, scp, rsync, fsck, and for a little levity among all that work, cowsay.
ubuntu@ubuntu:~$ cowsay “Cus it’s the bomb\!” ____________________
< Cus it’s da bomb\! > \ ^__^ \ (oo)\_______ (__)\ )\/\ ----w
Finally, two command-line features of modern *nix shells that Windows users might overlook are filename completion and command completion. Try it! Start typing a filename and hit that TAB key. Hit it again if nothing happens. When you see that long filename get completed, or a list of possible completions appear instantly, you’ll wonder how you ever lived without it. Incidentally, Windows cmd. exe has filename completion now, but you may have to tweak a registry entry to enable it. Also, prior command history is available often with hitting the up arrow, which can save a lot of retyping. Windows also has a similar feature.
Highlights of The Linux Security Model
Linux and all *nix are a lot pickier about security than Windows. Security permeates the design of the operating system in *nix rather than being a bit of an afterthought as sometimes it feels like in Windows. For instance, in the *nix world, there is no such thing as your default user being an Administrator. If you want to do something that will dramatically change your system, you need to do it as the administrative user, and anyone that does 100 percent of their work logged in as root is considered, well, a bit of a dangerous dolt. And happily, since the operating system was designed with this model in mind from the ground up, it’s not utterly painful to run this way. Any of you who have ever tried to make Windows actually usable running as a Limited User knows what I’m talking about.
User accounts in Linux fall into three categories: they are either the superuser (normally named root), system accounts (such as mail, uucp, bin, lp, nobody, apache), or normal user accounts ( james, todd, chris). In *nix, root is akin to Administrator in Windows.
Authentication in *nix can be done in a lot of different ways, but the simplest (and default) setup is local authentication. User accounts are stored in a plain text file called /etc/password and passwords are stored in their hashed form in /etc/shadow (or /etc/security/shadow in some *nix’s). All users can read /etc/password, but, so that no user can grab the hashes to go start cracking passwords, only root and the shadow group can read /etc/shadow. Have a look for yourself:
ubuntu@ubuntu:~$ ls -l /etc/shadow /etc/passwd
-rw-r--r-- 1 root root 1426 2008-03-23 14:27 /etc/passwd -rw-r--- 1 root shadow 877 2008-03-23 14:27 /etc/shadow
--- owner/user permission bits --- group permission bits
Above, we see the long-format file listing for the shadow and passwd files. This listing serves as our first introduction to *nix file permissions.
The permissions on the left show what the owner, group, and others can do with each file, who owns it, which user group is associated with it, its size in blocks, and its modification time are all shown in the long listing format. The permissions are listed in the order of owner, group, others. r is for read, w for write, x for execute. In this example, /etc/passwd has permissions of -rw-r--r--, which you can read as “readable (r) by its owner (root), its group (root), and others. It is only writeable by its owner (root). So anyone wanting to change /etc/passwd will need to have root privileges (either know the root password and do “su -” to switch user to root, or be in the admin group and/or be listed in /etc/sudoers appropriately and just prepend the command with sudo). File permissions bits can also be expressed numerically. The chmod and umask commands are where you’ll find this used most frequently. -rw-r--r-- can be expressed as 644. In binary, the execute bit is the least significant bit (2^0 = 1), the write bit is the next most significant bit (2^1 = 2), and the read bit is in the third position (2^2=4). For owner, read and write bits are set corresponding to 4+2=6. For group and world, the read bit alone becomes a 4.
In this example, we’ll create a blank file named foo, and exercise a few different ways to modify the file permissions with chmod. # is the comment character in *nix shell, and the shell ignores all things after a comment character. We’ll use this to annotate commands in examples.
ubuntu@ubuntu:~$ touch foo ubuntu@ubuntu:~$ ls -l foo
-rw-r--r-- 1 ubuntu ubuntu 0 2008-04-14 20:25 foo
ubuntu@ubuntu:~$ chmod go-r foo # remove group and other read permission ubuntu@ubuntu:~$ ls -l foo
-rw--- 1 ubuntu ubuntu 0 2008-04-14 20:25 foo ubuntu@ubuntu:~$ chmod 644 foo
ubuntu@ubuntu:~$ ls -l foo
-rw-r--r-- 1 ubuntu ubuntu 0 2008-04-14 20:25 foo
ubuntu@ubuntu:~$ chmod 777 foo # set read write and execute bits (dangerous) ubuntu@ubuntu:~$ ls -l foo
-rwxrwxrwx 1 ubuntu ubuntu 0 2008-04-14 20:25 foo
ubuntu@ubuntu:~$ chmod 000 foo # strip all the permissions ubuntu@ubuntu:~$ ls -l foo
--- 1 ubuntu ubuntu 0 2008-04-14 20:25 foo
cat: foo: Permission denied
ubuntu@ubuntu:~$ chmod u+r foo # Add back user/owner permission ubuntu@ubuntu:~$ ls -l foo
-r--- 1 ubuntu ubuntu 0 2008-04-14 20:25 foo
ubuntu@ubuntu:~$ cat foo # And now we can read again, but it’s a blank file ubuntu@ubuntu:~$
In addition to these read, write, and execute permissions we’ve explored in the example, *nix also has the notion of “set UID” and “set GID” permissions for files. There is no analogous file attribute in New Technology File System (NTFS) or File Allocation Table (FAT) in Windows. What these do for executable files is change the effective user ID or group ID to something when that program is executed. The security ramifications of this can be serious, so these are very important in forensic analysis, because these permissions allow an executable to be run as another user, regardless of who runs the program. For instance, many commands that require privileged access to hardware are set user ID root, indicated by an “s” in the “user/ owner” position of the permissions:
ubuntu@ubuntu:/$ ls -l /bin/ping
-rwsr-xr-x 1 root root 30856 2007-07-06 02:40 /bin/ping
When /bin/ping is run by any user, it runs as the superuser (root).
One thing you don’t want to find on a system is an Set User ID (SUID) root copy of /bin/bash, or any other shell. The ramifications are somewhat obvious. Any user who would execute such a shell may become root. Modern shells have some built-in protections against this classic attack, but all the same SUID root copies of shells should be a red flag to a forensic investigator.
This foursome of file permissions is very important. File permissions are defined in terms of:
Owner permissions (u, can the user/owner read, write, or execute this file?) Group permissions (g, can the group read, write, or execute?)
World permissions (o, can others on the system read, write, or execute?) SUID/SGID permissions (s, when this executes, will we change the effective user ID or group ID?)
Read and write permissions are fairly intuitive. Execute permissions, on the other hand, don’t really exist in the Windows world. In *nix, if a file is to be interpreted as a shell script or an executable program, the execute bit must be set for a role to
which the user belongs. For example, the humble “ls” command is an executable binary format file, executable by everyone:
ubuntu@ubuntu:/$ which ls /bin/ls
ubuntu@ubuntu:/$ file /bin/ls
/bin/ls: ELF 32-bit LSB executable, Intel 80386, version 1 (SYSV), for GNU/Linux 2.6.8, dynamically linked (uses shared libs), stripped
ubuntu@ubuntu:/$ ls -l /bin/ls
-rwxr-xr-x 1 root root 78004 2007-09-29 12:51 /bin/ls
For directories, the execute bit takes on a slightly different meaning. If you attempt to list a directory that does not have its execute bit set for a role you belong to, the directory listing will be denied:
etc/passwd
With that brief introduction to file permissions behind us, we can return to user authentication. Here’s what /etc/passwd looks like; a colon-delimited text file in the format of:
username:passwordfield:UID:GID:full name:home directory:default shell. ubuntu@ubuntu:~$ cat /etc/passwd | head -14
root:x:0:0:root:/root:/bin/bash daemon:x:1:1:daemon:/usr/sbin:/bin/sh bin:x:2:2:bin:/bin:/bin/sh
sys:x:3:3:sys:/dev:/bin/sh
sync:x:4:65534:sync:/bin:/bin/sync games:x:5:60:games:/usr/games:/bin/sh man:x:6:12:man:/var/cache/man:/bin/sh lp:x:7:7:lp:/var/spool/lpd:/bin/sh mail:x:8:8:mail:/var/mail:/bin/sh news:x:9:9:news:/var/spool/news:/bin/sh uucp:x:10:10:uucp:/var/spool/uucp:/bin/sh proxy:x:13:13:proxy:/bin:/bin/sh
www-data:x:33:33:www-data:/var/www:/bin/sh backup:x:34:34:backup:/var/backups:/bin/sh
The second field where we see an x is a password field. When shadow files are being used (as is the case in all modern *nix’s), the x represents a shadowed password entry and tells Linux to go look in the shadow file for the password hash.
methods including NIS, NIS+, AFS, Kerberos, and more. You can configure *nix boxes to authenticate against Active Directory, for example (not that I’d rush to recommend it). PAM controls this, and PAM configuration files determine what authentication sources get used. In Ubuntu, /etc/pam.conf is the file, but this varies among various *nix and even among Linux distributions.
User ID 0 has special meaning in *nix, and any user with a User ID of 0 is root. Think of this like a local administrators group. If you see users in /etc/password with a UID of 0 and they are not named root, your forensic eyebrow should raise. Group ID’s also have defined ranges. Group ID’s are defined by name in the /etc/groups file, whereby a user can be made a member of multiple groups rather than just the
primary group defined in /etc/passwd.
The
*
nix File system Structure
As you’ve surely noticed, the first thing that sticks with *nix neophytes (n00bs) is that: *nix doesn’t use drive letters
Unix pathnames use forward slashes (/) and not backslashes (\)
/ is the top level of the *nix directory structure. There isn’t really a Windows equivalent for this concept. While Windows does have a notion of a root directory, it’s local to the drive you’re on (e.g., c:\). There isn’t a directory in Windows you can go to to show you the top of the world, as it were.
Like so many *nix concepts, this is best learned by example. Let’s look at the root directory:
ubuntu@ubuntu:~$ ls /
bin cdrom etc initrd lib mnt proc root srv tmp var boot dev home initrd.img media opt rofs sbin sys usr vmlinuz
There’s no \Program Files, no \Windows or \Winnt and no boot.ini. But, here’s what we do have, and general statements about them that will help you feel more at home:
/bin (short for binary) is where you’ll find many of the commands you were introduced to in the last section. /sbin is similar, but for commands that only root should be running. /usr/bin and /usr/local/bin are other places to find binary files. “which “commandname” is a command you can run to find out where any command actually lives in the file hierarchy.
■ ■
/cdrom is a mount point for CD-ROM devices. What’s a mount point? We’ll get to it soon, I promise!
/etc is a directory where nearly all configuration files are found. Remember our password and shadow files?
/home is where users’ home directories are located. Think “c:\Documents and Settings\.”
/mnt and /media are places where mount points are located. /media is not something you’ll find much outside of Ubuntu Linux. /mnt is fairly ubiqui-tous across *nix. Don’t despair if these directories are empty presently if you are booted via a LiveCD.
/lib is home to shared libraries (.so files) needed during boot. Imagine if Windows took all the DLL’s that supported the .exe’s in %windir%\system32 but gave them their own directory to live in. /usr/lib and /usr/local/lib are similar, roughly corresponding to libraries for binaries in /usr/bin and /usr /local/bin respectively.
/tmp is for temporary files, not unlike %TEMP% in Windows.
/opt is where you may find optional software and add-on’s not included in a default installation. Yours is likely to be empty at this point.
/var is home to many log files (/var/log/*), mail spool files, and print spool files. It is your forensic friend (assuming you can trust the logs to not be tainted). The contents of /var tend to be, well, rather variable.
/boot holds things used for booting, including /boot/grub/grub.conf which is akin to boot.ini. You won’t see this file on a LiveCD, but it generally exists on an installed version of Ubuntu.
/proc is a wacky place and it gets its own chapter in this book. These aren’t really “files” in the sense that you and I might think of. /proc can be thought of as a live mirror of what’s in system memory, but presented like a file hierarchy. Compare what you see with “ls /proc” with the output of the process list command “ps –ef.” You’ll notice that for every process id number in the ps output, there’s an entry in /proc. This’ll be leveraged in a later chapter to grab a memory snapshot of a running system.
/dev is another wacky file system whereby actual devices on the system are represented hierarchically. /dev/sda1 for instance, represents the first partition
of the first hard disk. /dev/sda is a raw device for the entire disk. These are used when mounting file systems. More on that in a moment.
Mount points: What the Heck are They?
We’ve mentioned file system and mount points several times. A mount point is simply an empty directory we create somewhere in the file hierarchy where we will access an internal disk partition, flash drive, or external hard drive. In Windows parlance, “c:\” can be thought of as the mount point for the first partition of the first drive window recognized during boot. While the Windows ARC name for that drive is something cryptic and awful like multi(X)disk(Y)rdisk(Z)partition(W), Windows kindly mounts that piece of hardware to a friendly mount point of c:\ that looks nicer at the command prompt and in Windows explorer. Likewise, Windows likes to mount the secondary master to d:\ rather than us having to refer to the CD-ROM drive with a long nasty series of parentheses and digits. *nix eschews drive letters and instead allows you the flexibility to hang a drive off nearly any directory name you’d like. This allows for /var to have its very own file system or disk if you like, so your log files won’t totally wedge your system should they fill their disk. You can dedicate a partition to /home so Joe User doesn’t wedge the system downloading a bunch of movies from bittorrent. Instead, he’ll only fill up the disk that /home is mounted to. Users will still hate him, but at least the running daemons (think Windows “services”) will be able to write to their logfiles and e-mail will still get delivered.
Linux stores this disk device to file system to directory-name mapping information in what’s known as the “mount table.” The mount command lets you list it out, and also gives you manual control over which devices are mounted by Linux:
ubuntu@ubuntu:~$ mount proc on /proc type proc (rw) sysfs on /sys type sysfs (rw)
tmpfs on /lib/modules/2.6.22-14-generic/volatile type tmpfs (rw,mode=0755) tmpfs on /lib/modules/2.6.22-14-generic/volatile type tmpfs (rw,mode=0755) varrun on /var/run type tmpfs (rw,noexec,nosuid,nodev,mode=0755)
varlock on /var/lock type tmpfs (rw,noexec,nosuid,nodev,mode=1777) udev on /dev type tmpfs (rw,mode=0755)
devshm on /dev/shm type tmpfs (rw)
devpts on /dev/pts type devpts (rw,gid=5,mode=620) tmpfs on /tmp type tmpfs (rw,nosuid,nodev)
such as rw (mounted for read/write access). You can mount disks in mode “ro” for read only; something you may desire for doing forensic investigation, for instance (though it’s hard to beat the assurance that comes with a parallel ATA drive con-nected such that the write wires are physically disconcon-nected). Consult the mount man page for details, but we’ll whet your appetite with some examples.
One thing that’s nice about a LiveCD is that you can use it to peek onto your Windows disk if/when Windows is misbehaving or can’t be trusted in the event of a malware infection. The way to do this is to mount your internal hard drive. In *nix, with utilities like mount and finger installed by default, you’ll just have to get used to these things.
To mount your local hard drive read-only, we’ll first create a mount point (an empty directory), and then we’ll attempt to mount it:
ubuntu@ubuntu:~$ ls /dev/sd*
/dev/sda /dev/sda1
ubuntu@ubuntu:~$ mkdir /mnt/mywindrive
mkdir: cannot create directory ‘/mnt/mywindrive’: Permission denied ubuntu@ubuntu:~$ # Doh! Mortals don’t have write permission to /mnt ubuntu@ubuntu:~$ sudo mkdir /mnt/mywindrive
ubuntu@ubuntu:~$ ls /mnt mywindrive
ubuntu@ubuntu:~$ sudo mount -o ro -t auto /dev/sda1 /mnt/mywindrive ubuntu@ubuntu:~$ mount
proc on /proc type proc (rw) sysfs on /sys type sysfs (rw)
tmpfs on /lib/modules/2.6.22-14-generic/volatile type tmpfs (rw,mode=0755) tmpfs on /lib/modules/2.6.22-14-generic/volatile type tmpfs (rw,mode=0755) varrun on /var/run type tmpfs (rw,noexec,nosuid,nodev,mode=0755)
varlock on /var/lock type tmpfs (rw,noexec,nosuid,nodev,mode=1777) udev on /dev type tmpfs (rw,mode=0755)
devshm on /dev/shm type tmpfs (rw)
devpts on /dev/pts type devpts (rw,gid=5,mode=620) tmpfs on /tmp type tmpfs (rw,nosuid,nodev)
/dev/sda1 on /mnt/mywindrive type fuseblk (ro,nosuid,nodev,noatime,allow_other,blksize=4096)
/dev/sda2 though, then you may have an OEM PC that includes a “service parti-tion” for recovery. If you are using a different Linux and you don’t have any devices starting with sd listed here, /dev/hda1 might be where you’ll find your internal IDE hard drive’s first partition. Incidentally, in *nix’s other than Linux, the hard disk device naming is entirely different, so you’ll have to let your fingers do the Googling for information on those when you encounter them.
Next, we created the mount point, including the mistake I and the rest of the world seem to often make by forgetting that sudo is required before creating a directory in /mnt. In the mount command itself, we specified the read only option just to be safe, and allowed mount to attempt to automatically determine the file system type of my partition. The last line of the “mount” command output reveals that it mounted it read only (ro option happily displayed) with a type of fuseblk. It’s an NTFS partition that I mounted, and that type is correct for NTFS. Fuse is used by NTFS-3G effort to bring reliable NTFS write capability to Linux (ntfs-3g. org). Finally note that the external drive was mounted nosuid, which is wise as we don’t want to honor the SUID bits of any foreign file system on our machine. Just because a file is trusted as SUID root on someone else’s system, doesn’t mean I want that program running as the superuser on my system.
Now hang onto your hats—this is exciting:
ubuntu@ubuntu:~$ ls /mnt/mywindrive/
AUTOEXEC.BAT fromubuntu.txt pagefile.sys boot.ini IO.SYS Program Files CONFIG.SYS isos RECYCLER cygwin cygwin-pkgs MSDOS.SYS Documents and Settings msvcp71.dll swtools drivers msvcr71.dll System Volume Information drivex.log NTDETECT.COM DvrData
ntldr WINDOWS
So, you’ve mounted a Windows NTFS volume in Linux. Betcha a dollar you can’t mount a Linux native ext3 partition in Windows without a lot more effort (and third-party software).
Finally, to unmount, it’s simply the “umount” command with the mountpoint name added. A quick verification that it’s gone is always reassuring:
ubuntu@ubuntu:~$ sudo umount /mnt/mywindrive/ ubuntu@ubuntu:~$ mount
tmpfs on /lib/modules/2.6.22-14-generic/volatile type tmpfs (rw,mode=0755) tmpfs on /lib/modules/2.6.22-14-generic/volatile type tmpfs (rw,mode=0755) varrun on /var/run type tmpfs (rw,noexec,nosuid,nodev,mode=0755)
varlock on /var/lock type tmpfs (rw,noexec,nosuid,nodev,mode=1777) udev on /dev type tmpfs (rw,mode=0755)
devshm on /dev/shm type tmpfs (rw)
devpts on /dev/pts type devpts (rw,gid=5,mode=620) tmpfs on /tmp type tmpfs (rw,nosuid,nodev)
A common mistake is to try to umount a drive while still cd’d into that mount point. Linux doesn’t like this any more than Windows does when you try to eject a thumb drive that you’re still browsing in Windows Explorer. To remedy, simply cd out of the mount point, close any programs that might be accessing the drive in question, and retry the umount command.
File Systems
In Windows, life is rather simple in the file system realm. You had only two-disk file system formats to worry about (FAT and NTFS), with a few generations within each. On the FAT side of the house (which you only seem to find on removable drives these days), FAT32 rules the roost. We can fondly recall the old days of FAT16 and its cute 2-4GB maximum partition size. FAT32 gives us a lot more volume size to play with up to 2–8TB, but is hamstrung by 4GB maximum file sizes that cause video and database mavens to wrinkle their noses. In addition, none of the FAT variants supported a notion of file permissions, which made them quite a non-starter for the enterprise.
NTFS and its five revisions since the days of Windows NT 3.1 addressed the permissions concern, as it has very flexible support for file access control lists (ACL’s). NTFS also added journaling to the filesystem, which makes the NTFS file system more robust against corruption caused by power interruptions or the dreaded yanking of an external drive without properly ejecting it. As such, we don’t have to run scandisk or chkdsk nearly as often as we recall doing back in the bad old days of Windows 95/98. More interestingly to forensic investigators was NTFS’s inclusion of alternate data streams (ADS) where the bad guys can try to hide data from prying eyes.