Administrator's Guide
Bizfon, Inc.
50 Stiles Road
Salem, NH 03079
Tel 800.282.6163
Fax 877.603.4149
Notice
© 2000 Bizfon, Inc. All rights reserved.
This document is subject to change without notice.
Bizfon, BizTouch and the Bizfon logo are trademarks of Bizfon, Inc.
All other trademarks are held by their respective owners.
Printed in the United States of America.
PN: 050-00020:D
Preface
Congratulations on your purchase of a Bizfon! Your Bizfon 680 will transform how your business communicates, making you more available, informative, and responsive to your customers.
About this Administrator’s Guide
This guide provides information for installing, setting up, and using your Bizfon system. Keep this manual handy for future reference. The following table details where you can find infor-mation in the guide:
For information about . . . Refer to . . .
Installing one Bizfon 680 “Section 1 Installing Your
Bizfon 680” on page1
Installing more than one Bizfon 680 to create a cluster
“Appendix A Professional Installation Guide” on page57
Adding units to an existing installation
“Adding Units to an Existing Installation” on page73
Removing units from a Bizfon 680 cluster
“Removing Units from an Exist-ing Multibox Installation” on page 74
Initial Bizfon settings “Section 2 Initial Bizfon
Set-tings” on page9
Setting up your system “Section 3 Setting up Your
Sys-tem” on page17
Setting up and using extensions and details about voice mail
“Section 4 Setting Up and Using Extensions” on page39
Using your Bizfon with other office equipment such as fax machines
Telephone-Specific Documents
In addition to this Administrator’s Guide, your Bizfon may come with the following documents:
• Bizfon 680 Wallet Cards
• Reference Cards for BizTouch Feature Telephones
• Reference Cards for Non-Bizfon Telephones
NOTE: Refer to the telephone-specific documents for all
instructions on telephone-specific commands, like how to forward or transfer calls, or put calls on hold. This Administrator’s Guide describes Bizfon 680 sys-tem-specific features.
Changing the language that the Bizfon speaks
“Appendix B Multi-Language System Setup” on page81
Specifications of the Bizfon 680 “Appendix C Bizfon 680
Speci-fications” on page85
Regulatory and safety informa-tion
“Appendix D Regulatory and Safety Information” on page87
Section 1
Installing Your Bizfon 680
TIP! Bizfon recommends professional installation.
Call 877 603 4100 to order your professional installation.
This section is an overview of how to install a single Bizfon 680. For easy installation instructions, refer to the Bizfon 680 Quick Start Card. For your convenience, the Quick Start Card is reproduced in this section.
STEP 1: CONNECT YOUR BIZFON Note: This card will get you upand running quickly . Refer to the documentation for more detailed information. Bizfon recommends professional installation. Call (877)603-4100 to order your professional installation today . MODEM: SEP ARA TE LINE! NOT THROUGH BIZFON! F AX: OK THROUGH BIZFON 208 F ASTEN BRACKET T O W ALL, THEN... … SNAP BIZFON ONT O BRACKET PLUG POWER IN LAST! NOTE: If your telephone lines are not connected and functioning, you need a professional installation. Call (877)603-4100 to order your ProInstall today .
201 202 203 . . .
41 41 41
W
all
Mounting Your Bizfon 680
The Bizfon 680 includes a mounting bracket to attach the unit to a wall.
To mount your Bizfon 680 to a wall, follow these steps:
1. Find a location for the Bizfon 680(s) within four feet of an electrical outlet or power strip.
TIP! Bizfon recommends that you connect the unit(s)
to an uninterruptible power supply (UPS).
2. Attach the bracket to the wall.
A. Refer to the following figure for proper positioning of the bracket and mark four positioning holes on the wall where you will install the Bizfon 680.
B. Attach the bracket to the wall vertically, using the enclosed screws, or screws and drywall anchors, as appropriate for the type of wall on which you are mounting the Bizfon 680.
When using the anchors on drywall, pre-drill a 3/16” pilot hole. When using the anchors on concrete, pre-drill a 1/4” pilot hole.
3. Lock the Bizfon into place on the bracket by positioning it over the bracket and sliding it down onto the tabs of the bracket as shown in the following figures.
A. Align the four tabs on the mounting bracket with the four slots on the bottom of the Bizfon 680.
Connecting Your Phone Lines and Extensions
After you have positioned the Bizfon 680, you can easily con-nect your incoming lines and extensions.
Refer to the following figure as you connect your lines and extensions:
Line In for Music on Hold
Expansion Ports Ext 201
Ext 202 Ext 203 Ext 204 Ext 205 Ext 206 Ext 207 Ext 208
Network Port
Voice Vault Port F o r U p g r a d e s
E m e r g e n c y P h o n e E x t For Power Failure C O 1
C O 2 C O 3 C O 4 C O 5 C O 6
Line Out to PA
D r y C o n t a c t R e l a y F o r F u t u r e U s e Serial Port
F o r F a c t o r y U s e O n l y P o w e r
C o r d
1. Connect the lines from the wall jack to the ports on the Bizfon 680 labeled “INCOMING TELEPHONE LINES”. 2. Connect the lines from your telephone extensions to the
ports label “EXTENSIONS”.
Connect the telephone that is to be extension 201 to the port labeled “201” and continue with each phone until all are connected.
You can connect a fax machine to any extension on the Bizfon 680, but do not connect a modem.
3. After you have connected the phone lines and extensions, plug in the power cord and wait until you hear “The Bizfon is ready . . .”
Run the diagnostics as described in the next section.
Running Diagnostics
After connecting your phone lines and telephones, run diagnos-tics to ensure that the Bizfon 680 is working optimally.
NOTE: You cannot use the Bizfon 680 for calls during
diagnostics.
1. Press the blue button in the center of the Bizfon 680. You hear:
“Welcome to the Bizfon diagnostics. Note that during the diagnostics, the Bizfon may not be used for calls. To run diagnostics on incoming telephone lines and telephones, press the button again.”
2. Push the button again. You hear:
seconds. To end this test and continue with the voice quality test, press the button again.”
While the diagnostics run, verify that all incoming lines have blinking LEDs. This indicates that they are functioning cor-rectly.
3. Push the button again. You hear:
“Incoming telephone lines test complete. Now running the voice quality test. Please wait for the test to complete.”
The voice quality test determines the sound quality of your phone lines and automatically selects parameters to optimize the audio for your installation. The test normally takes about two minutes to complete. You hear a prompt letting you know that the test is in progress as the test is running.
When the test completes, you hear:
“Voice quality test complete. Now running the extensions test. Extensions will ring consecutively until the button is pushed again.”
This test verifies that all physical extensions are connected to the Bizfon correctly.
4. Push the button again. You hear:
“Extensions test complete.”
The system announces that it is ready and also announces the current time and date. To set the time to your local time refer to “Setting the System Clock” in the Owner’s Guide.
Section 2
Initial Bizfon Settings
This section gives you an introduction to the features of the Bizfon 680. It details the initial settings and how to change them.
Overview
Your Bizfon system is ready to use right out of the box. How-ever, you may choose to change some settings to meet your company’s specific needs.
You can work with some common settings yourself such as:
• Changing your automated Day or After Hours Greetings
• Turning the automated greeting off
• Setting the System Clock
Other changes we’ll make for you; just dial 299 to reach a Cus-tomer Care agent. We’ll consult with you to set up your Bizfon to meet your company’s unique needs.
Changes you can make Refer to . . .
Set up physical extensions “Setting Up Physical Extensions
In the Office” on pag e11
Set and change a system pass-word
“Setting Up and Changing the System Password” on pag e11
Set the system clock “Setting the System Clock” on
page 13
Change the automated greetings “Changing the System Day
Enable or disable after hours mode
“After Hours Mode” on page22
Turn the auto attendant off “Turning Off the Automated
Attendant” on page23
Change the list of after hours extensions
“Changing the List of After Hours Extensions” on page26
Set which extension rings when a caller presses 0
“Choosing which extension rings when callers press 0” on page26
Set up a group ring so that cer-tain extensions ring at the same time
“Setting up a Group Ring when callers press 0” on page28
Create informational messages “Informational Messages” on
page 29
Set up music on hold “Music-on-Hold” on page32
Create virtual extensions “Setting up Virtual Extensions
(250-264)” on page41
Changes that Bizfon Customer Care makes
Set the Bizfon 680 to answer a specific telephone line and ring a specific extension
Disable individual extensions from making outside calls
Have a fax machine automati-cally use an outside line when sending faxes
Program the Automated Atten-dant to perform different actions based on a caller’s key input
Setting Up Physical Extensions In the Office
The yellow jacks labeled Telephones on the Bizfon 680 are assigned to physical extension numbers starting at 201.
When you first set up an extension, you indicate whether it is going to be a private telephone, a public telephone (such as a telephone in a conference room), or a fax machine.
If it is a private telephone, you record your name in order to start receiving voice mail. You can also record a greeting and choose a password.
NOTE: If you do not set up a password, you cannot access the
Bizfon remotely.
When you first pick up the handset of a telephone connected to the Bizfon, the system prompts you with the following:
“Welcome to extension 201 <the number of the extension you’ve picked up>. To set up this extension now, press 1; otherwise, press *.”
• If you press to set up the extension, you are prompted
through a series of options to configure the extension. Sim-ply follow the prompts to configure an extension.
• You can press to defer setting up your extension.You then
hear a dial tone and can place calls.
Setting Up and Changing the System
Password
The system password prevents unauthorized people from changing your Bizfon 680 General Settings.
system password and are set up as part of configuring an exten-sion).
If you forget your system password, call Bizfon Customer Care at 299.
To change the system password:
1. Pick up any Bizfon telephone extension and access Settings.
NOTE: If you have not yet set up the extension, you must
press before you can access settings.
2. Dial extension 200 to access General Settings.
3. Press for security options.
4. Press to set the password.
5. Follow the prompts to set the system password.
System Greetings
The Bizfon 680 is shipped with automated attendant greetings for both Day and After Hours modes. The Bizfon automated attendant provides an immediate, automated greeting for callers to your business.
Your Bizfon comes with the following automated attendant greeting:
BizTouch 3: Press SETUP, select
SETTINGS, press ENTER. Phone must be hung up. If it is not, press FORWARD.
BizTouch 2 or BizTouch 1: Press SETTINGS.
Bizfon conference series phone or
“Thank you for calling. If you know your party's extension, you may dial it now. For a list of
extensions, press 1. To reach the operator, press 0, or wait and you will be transferred.”
See “Section 3 Setting up Your System” for instructions on how to change the Day and After Hours Greetings, and “Automated Attendant Greetings” on page19 to control how the automated attendant works.
Setting the System Clock
The Bizfon 680 is shipped with the clock preset to Eastern Stan-dard Time. You may want to change this to reflect your time zone or changes in Daylight Savings Time.
To set the clock, do the following:
1. Pick up any Bizfon telephone extension and access Settings.
NOTE: If you have not yet set up the extension, you must
press before you can access settings.
2. Dial extension 200, then enter the system password (if one has been configured) to access General Settings.
3. Press to set the clock.
4. Follow the prompts to enter the time and date. BizTouch 3: Press SETUP, select
SETTINGS, press ENTER. Phone must be hung up. If it is not, press FORWARD.
BizTouch 2 or BizTouch 1: Press SETTINGS.
Bizfon conference series phone or
Bizfon Extension Numbers
200: General Settings
Extension 200 provides access to General Settings. General Set-tings include things such as automated attendant greeSet-tings, the clock, and informational messages.
To access General Settings:
1. Pick up any Bizfon telephone extension and access Settings.
NOTE: If you have not yet set up the extension, you must
press before you can access settings.
2. Dial extension 200 to access General Settings.
3. Enter the system password (if one has been configured) and
press .
4. Follow the prompts to select the General Setting you want to change.
Physical Extensions
Universal Extension numbers are assigned to the yellow jacks on the Bizfon 680 labeled Telephones. These extensions are used to connect physical telephones. Jack 1 is for extension 201, jack 2 is extension 202, and so on, through jack 8, which is extension 208. If you have more than one Bizfon 680, physical
BizTouch 3: Press SETUP, select
SETTINGS, press ENTER. Phone must be hung up. If it is not, press FORWARD.
BizTouch 2 or BizTouch 1: Press SETTINGS.
Bizfon conference series phone or
extensions can go up to 232 (in a four-box cluster). For exam-ple, if you have two Bizfon 680s, Unit 1 hosts extensions 201 through 208 and Unit 2 hosts extensions 209 through 216.
Extension 201 rings by default when callers press or dial 201
in Day mode. For more information, see “0: Operator” on page 16.
Any extensions can be configured by the user for one or more fax machines as well. See “Fax Machines” on page53 for more information.
249: Public Address
Bizfon users can send messages to a public address system via their extension, by dialing 249.
On BizTouch 1 Feature phones, Public Address can be accessed by pressing the PA button.
Use of this feature requires connecting your Bizfon to a PA sys-tem. For more information on how to set up your Bizfon to a PA system, see “Audio Devices for Public Address” on page55.
250-264: Virtual Extensions
250 through 264 are extensions which do not correspond to any physical jacks on the Bizfon 680. Virtual extensions have their own voice mailboxes, and allow users not requiring a physical extension full access to the Bizfon system.
The use of Virtual Extensions requires the presence of an optional Voice Vault card. The Voice Vault card allows you to set up voice mail accounts for extensions 250-264. Without the card, these extensions are not accessible to the Bizfon 680. To order a Voice Vault card, dial 299.
For more on how to set up a Virtual Extension, see “Setting up Virtual Extensions (250-264)” on pag e41.
290: Meeting Room
Up to five callers can meet in a meeting room by dialing 290. Users can be internal or external, but some access restrictions apply to external callers.
On BizTouch feature phones, you can access the Meeting Room by pressing the CONF or CONFERENCE button when you have callers on hold.
0: Operator
Extension 0 is the Operator, or Receptionist extension. By
default, when the user presses in Day mode, Extension 201
rings. See “Operator Extension” on page26 for more informa-tion on how to change this default configurainforma-tion.
299: Bizfon Customer Care
To reach Bizfon Customer Care, dial 299.
Feel free to call to request information or assistance.
NOTE: Bizfon Customer Care is included when you purchase
Power Failure Telephone
Connecting and Using a
Power Failure Telephone
Your Bizfon includes a jack (labeled Power Fail Telephone in red) for connecting a telephone that can be used in the event of a power outage.
In the event of a power outage, The Power Fail Telephone jack connects to CO line number 1, so be sure that one of your tele-phone lines is connected to the jack marked “1-2.”
Note that the telephone used with the Power Fail Telephone jack should be a non-AC powered telephone in order to work during a power failure.
Emergency Use
Dialing Emergency Numbers
Dial to get an outside line, then dial 911 or the emergency
Section 3
Setting up Your System
Introduction
This section tells you about the ways that the Bizfon 680 can handle incoming telephone calls. Incoming call handling refers to how calls are handled as they come in to the Bizfon 680. This section provides information on:
• How to configure the incoming call greeting options for the
Automated Attendant Day and After Hours modes
• How to configure the Operator extension
• How to set up informational messages
Once an incoming call is directed to an extension, you can choose how to handle the call at that extension. See “Section 4 Setting Up and Using Extensions” on page39 for information on configuring how calls are handled once they reach an exten-sion.
The Automated Attendant Profiles
The Bizfon 680 comes with three pre-set profiles for how the automated attendant handles incoming calls. You can select one of these profiles for Day mode and select another for After Hours mode. The three pre-set profiles are:
• The default Day mode:
A. Incoming callers hear the Automated Attendant greeting.
B. If callers do not dial an extension, they are transferred to the operator.
The default After Hours mode is essentially the same, except:
A. The After Hours greeting is played.
B. If callers do not dial an extension, all extensions ring. C. Then the call goes into the Operator mailbox if the call
is not answered.
• Auto Attendant is turned off:
A. Incoming callers ring the Operator in Day mode or all phones in After Hours mode.
B. Then calls go to the Operator mailbox if the call is not answered.
• Auto Attendant plays after an extension is tried:
A. Incoming callers ring the Operator in Day mode, or all phones in After Hours mode.
B. If the call isn’t answered, the Day or After Hours Automated Attendant greeting is played.
C. If the call is still not answered, the call goes to the Operator mailbox.
To change your call profile:
1. Pick up any Bizfon telephone extension and access Settings.
BizTouch 3: Press SETUP, select SETTINGS, press ENTER.
BizTouch 2 or BizTouch 1: Press SETTINGS.
Bizfon conference series phone or
NOTE: If you have not yet set up the extension, you must
press before you can access settings.
2. Dial extension 0, then enter the Operator password (if one has been configured).
3. Press to choose how the auto attendant works, and follow
the prompts.
NOTE: To change the Day call profile, be sure you are in Day
mode. To change After Hours call profile, be sure you are in After Hours mode.
If you want to set up a customized incoming call handling pro-file, Bizfon can do it for you. Please call 299 to request special incoming call handling.
Automated Attendant Greetings
The Bizfon automated attendant provides an immediate, auto-mated greeting for callers to your business. By configuring your system greeting options in different ways, you can be respon-sive to callers by providing specific information through your system greetings.
You can change the greeting that people hear when they call your company. Your Bizfon comes with this default auto atten-dant greeting:
“Thank you for calling. If you know your party’s extension, you may dial it now. For directory information, press 1. To reach the operator, press 0, or wait and you will be transferred.”
You can use this generic greeting, record your own, or you can purchase a professionally recorded greeting by calling Bizfon Customer Care at 299.
• Write down what you plan to say.
• Include all of a caller’s options. (See sample greeting
below.)
• Describe each option before telling the caller what number
to press (for example, “For a list of extensions, press 1.”)
• Read the greeting aloud before you record it to be sure you
like the way it sounds.
Sample greeting:
“Thank you for calling Phassenphepher Consulting. If you know your party’s extension, you may dial it now. For directory information, press 1. For
directions, press 4. For hours, press 5. To reach the receptionist, press 0, or wait and you will be
transferred.”
For help on creating multi-language greetings, see “Other Lan-guage Considerations” on page45.
Changing the System Day Greeting
You can change the system greeting at any time. Before chang-ing it, we recommend that you write it down and practice speak-ing it before makspeak-ing the recordspeak-ing.
To change the default system day greeting, do the following:
1. Pick up any Bizfon telephone extension and access Settings.
BizTouch 3: Press SETUP, select SETTINGS, press ENTER.
NOTE: If you have not yet set up the extension, you must
press before you can access settings.
2. Dial extension 200, then enter the system password (if one has been configured) to access General Settings.
3. Press to change Automated Attendant greetings.
4. Press to change the System greeting.
5. The current greeting is played and you are prompted to accept the greeting or change it.
6. Press to record the new greeting.
7. Press any key when your are done recording the new greet-ing.
8. The new greeting is played. Press to use the greeting or
press to re-record the greeting.
Resetting the Greeting to Factory Default
If you’d like to revert back to the factory-set system day
greet-ing, follow the instructions above, and press to choose Delete
Greeting.
Bizfon conference series phone or
After Hours Mode
The Bizfon After Hours mode enables you to set up your sys-tem for operation after normal business hours.
When After Hours mode is enabled, the Bizfon plays the After Hours Greeting, then it rings all extensions. After a specified number of rings, calls are directed to the Operator mailbox at extension 0.
To select specific extensions to ring in After Hours mode, see “Changing the List of After Hours Extensions” on page29.
To enable or disable After Hours Mode:
1. Pick up any Bizfon telephone extension and access Settings.
NOTE: If you have not yet set up the extension, you must
press before you can access settings.
2. Enter an extension, or press for the current extension.
3. Enter the extension’s password.
4. Press to enable or disable After Hours Mode.
BizTouch 3: Press SETUP, select SETTINGS, press ENTER.
BizTouch 2 or BizTouch 1: Press SETTINGS.
Bizfon conference series phone or
Changing the After Hours Greeting
You can change the after hours greeting at any time. Before changing it, we recommend that you write it down and practice speaking it before making the recording.
To change the After Hours greeting, do the following:
1. Pick up any Bizfon telephone extension and access Settings.
NOTE: If you have not yet set up the extension, you must
press before you can access settings.
2. Dial extension 200 to access General Settings.
3. Press to change Automated Attendant greetings.
4. Press to change the After Hours greeting.
5. The current greeting is played and you are prompted to accept the greeting or change it.
6. Press to record the After Hours greeting.
7. Press any key when you are done recording the new greet-ing.
8. The new greeting is played back. Press to use the
greet-ing or press to re-record the greeting.
BizTouch 3: Press SETUP, select SETTINGS, press ENTER.
BizTouch 2 or BizTouch 1: Press SETTINGS.
Bizfon conference series phone or
Turning Off the Automated Attendant
You can turn off the Automated Attendant so that all incoming calls go directly to the extension(s) in the Operator ring group.
This is the second call profile described in “The Automated Attendant Profiles” on page19.
NOTE: If you use this mode, Bizfon recommends that you
record a personal greeting that includes your company name for the Operator mailbox. This will ensure that callers know whom they have called when they reach Operator mailbox.
To turn off the Automated Attendant:
1. Pick up any Bizfon telephone extension and access Settings.
NOTE: If you have not yet set up the extension, you must
press before you can access settings.
2. Enter the extension number, , and the password.
3. Press to select Attendant Setup.
4. Follow prompts to select “Turn off Auto Attendant.”
If your Bizfon is in Day mode, these steps will affect Day mode. If it is in After Hours mode, these steps will turn off the After Hours mode automated attendant.
BizTouch 3: Press SETUP, select SETTINGS, press ENTER.
BizTouch 2 or BizTouch 1: Press SETTINGS.
Bizfon conference series phone or
Extension Directories
The Bizfon 680 has two directories for extensions: the dial-by-name directory and the extensions list. When a caller hears the auto attendant, they can press 1 for directory information. They can then choose to listen to a list of extensions or dial by name. You can disable either of these directories.
Extensions Directory
The extensions directory plays an extension’s recorded name and then the extension number.
Dial-By-Name Directory
When you first set up an extension, you can enter up to the first six letters of your last name for the dial-by-name directory. You can also choose to exclude yourself from the directory.
To exclude yourself from the dial-by-name directory:
1. Pick up any Bizfon telephone extension and access Settings.
NOTE: If you have not yet set up the extension, you must
press before you can access settings.
2. Enter your extension number and the password if necessary.
3. Press to change extension information.
4. Press to change the dial-by-name settings.
5. Press to exclude yourself from the dial-by-name list.
6. Press when prompted to confirm.
Disabling the Extension Directories
1. Pick up any Bizfon telephone extension and access Settings.
NOTE: If you have not yet set up the extension, you must
press before you can access settings.
2. Enter the extension number, , and the password if
neces-sary to access Operator settings.
3. Press to set how the auto attendant works.
4. Press to change the auto attendant directory settings.
5. Press to disable the extensions list of press 2 to disable
the dial-by-name directory.
If you want to enable these features again, follow the previous steps.
BizTouch 3: Press SETUP, select SETTINGS, press ENTER.
BizTouch 2 or BizTouch 1: Press SETTINGS.
Bizfon conference series phone or
Call Routing Directly to a Specific Extension
You can have your Bizfon 680 configured to answer a particular incoming telephone line and immediately ring a specific exten-sion or group of extenexten-sions. This can be configured by Bizfon Customer Care at extension 299. When you configure the Bizfon 680 this way, Day and After Hours modes are ignored on that incoming telephone line.
Changing the List of After Hours Extensions
If you do not wish all extensions to ring in After Hours Mode, you can configure which extensions you wish to ring. To con-figure extensions for After Hours mode:
1. Put the Bizfon into After Hours mode as described in “After Hours Mode” on page24.
1. Pick up any Bizfon telephone extension and access Settings.
NOTE: If you have not yet set up the extension, you must
press before you can access settings.
2. Press to select the Personal Settings for the Operator, and
enter the Operator password followed by if one was set.
3. Press to change forwarding settings. You'll hear “Calls
will ring all extensions” or “Calls will ring extensions 201, 202, and 203.” To set a different extension or group of
extensions, press . To ring all phones, press ; otherwise,
start entering the specific extension(s).
BizTouch 3: Press SETUP, select SETTINGS, press ENTER.
BizTouch 2 or BizTouch 1: Press SETTINGS.
Bizfon conference series phone or
Operator Extension
The operator (or receptionist) is the person whose telephone rings when the Automated Attendant greeting finishes or when
callers press or when the automated attendant is turned off.
Choosing which extension rings when callers
press 0
By default, extension 201 rings when callers press in Day
mode. If you want a different extension to ring when callers
press , you can use call forwarding to forward extension 0 to
another extension number.
To configure the Operator extension to ring at an extension other than 201:
1. Pick up any Bizfon telephone extension and access Settings.
NOTE: If you have not yet set up the extension, you must
press before you can access settings.
2. Press to select the Personal Settings for the Operator, and
enter the Operator password followed by if one was set.
3. Press to select Call Forwarding.
4. Enter the extension to which calls should be forwarded. BizTouch 3: Press SETUP, select SETTINGS, press ENTER.
BizTouch 2 or BizTouch 1: Press SETTINGS.
Bizfon conference series phone or
See “Setting up a Group Ring when callers press 0” on page32 for instructions on forwarding to multiple extensions.
Changing personal options for the Operator
You change personal options for the Operator extension the same way you change personal options for any extension.
To change personal options for the receptionist:
1. Pick up any Bizfon telephone extension and access Settings.
NOTE: If you have not yet set up the extension, you must
press before you can access settings.
2. Enter the extension number, , and the password.
3. Follow the prompts.
BizTouch 3: Press SETUP, select SETTINGS, press ENTER.
BizTouch 2 or BizTouch 1: Press SETTINGS.
Bizfon conference series phone or
Group Ring
The Bizfon allows you to configure a group of extensions to ring, when a caller selects an extension. For example, you may wish extensions 201 through 208 to all ring at once as a group,
when a caller presses for the Operator.
Setting up a Group Ring when callers press 0
Use the instructions for “Choosing which extension rings when callers press 0” on page30. However, instead of forwarding extension 0 to a single extension when prompted, forward it to multiple extensions. Now when a caller stays on the line when the Automated Attendant Greeting finishes, or when a caller
presses , all selected lines will ring simultaneously. This is
useful both for temporary receptionist coverage, as well as in environments where multiple people function in the role of receptionist.
Setting up a Group Ring when Automated
Attendant is Turned Off
Setting up a Group Ring when callers dial an
extension
To set up a group of extensions to ring when callers dial an extension:
1. Pick up any Bizfon telephone extension and access Settings.
NOTE: If you have not yet set up the extension, you must
press before you can access settings.
2. Enter the extension number and the password.
3. Press to select Call Forwarding.
4. Press to set up a list of extensions to ring.
5. Follow the prompts.
Informational Messages
The standard Bizfon 680 supports two informational messages. By plugging in an optional Voice Vault card, the Bizfon can support four additional informational messages, for a total of six. Informational messages are typically used to provide spe-cific information to callers such as hours of operation or direc-tions to your office.
In your system greeting you should refer to the information available in the informational messages and instruct callers how
BizTouch 3: Press SETUP, select SETTINGS, press ENTER.
BizTouch 2 or BizTouch 1: Press SETTINGS.
Bizfon conference series phone or
to access the mailboxes. For example, your system greeting might sound something like this:
“Thank you for calling HomeSteader Realty. For directions to our office, press 4. For directory information, press 1.”
Creating Informational Messages
You can create two informational messages on a standard
Bizfon 680. Callers can hear them by pressing or as
instructed by the Auto Attendant greeting. Each message pro-vides 30 seconds of recording time.
An informational message can contain directions to your com-pany, hours of operation, details on special events, promotions, or any other information that callers may need to know.
To create an informational message:
1. Pick up any Bizfon telephone extension and access Settings.
NOTE: If you have not yet set up the extension, you must
press before you can access settings.
2. Dial extension 200 and enter the system password, if con-figured, to access General Settings.
3. Press to select Auto Attendant Greetings.
BizTouch 3: Press SETUP, select SETTINGS, press ENTER.
BizTouch 2 or BizTouch 1: Press SETTINGS.
Bizfon conference series phone or
4. Press to select Create an Informational Message. 5. Press the number associated with the informational
mes-sage, either or .
6. Record your informational message and press any key when finished.
7. The informational message will be played back to you.
Press to use the message or press to re-record the
informational message.
8. Whenever you create a new informational message, be sure to re-record your automated attendant greeting and refer to the new informational message.
To edit or delete an informational message, follow the instruc-tions above, and select the appropriate action in step 4.
NOTE: Since your system greeting is used to point the user to
the appropriate informational message, always be sure to edit your system greeting appropriately when you change or delete an informational message.
Additional Informational Messages
You can create up to four more informational messages, for a
total of six, corresponding to keys through . This requires
the presence of an optional Voice Vault card. Use the same
instructions to create them as you would for and above.
Changing the Phone Type
When you set up a Bizfon extension initially, the extension is programmed differently for BizTouch series feature phones than it is for non-BizTouch telephones. For example, to access settings on a BizTouch 2 phone, you press the SETTINGS
If, at some time in the future, the user of a physical extension (201-208) changes the phone type, you can re-program the Bizfon to understand that the phone type has changed.
To change the phone type:
1. Pick up any Bizfon telephone extension and access Settings.
NOTE: If you have not yet set up the extension, you must
press before you can access settings.
2. Enter the extension to be changed, or if it is the current
extension, followed by your password.
3. Enter for Additional Settings.
4. Enter to select the phone type.
BizTouch 3: Press SETUP, select SETTINGS, press ENTER.
NOTE: If the extension is already set up
as a BizTouch 3, you must change the phone type settings from an extension that is not set up as a BizTouch 3.
BizTouch 2 or BizTouch 1: Press SETTINGS.
Bizfon conference series phone or
Music-on-Hold
You can set up Music-on-Hold so that callers can listen to music or a pre-recorded looping message.
To set up Music-on-Hold, you need to connect an audio device, such as a CD player or a tape deck, to your Bizfon. See “Section 5 Using your Bizfon with Other Office Equipment” on page53 for information on connecting an audio device to the Bizfon 680.
Turning Bizfon Customer Care Access
Authorization On/Off
The Bizfon comes equipped with the ability to be remotely accessed by Bizfon Customer Service. This ability to access your site is what allows Bizfon to make the configuration changes you request on a 299 call.
Although Bizfon strongly encourages customers to leave the default authorization for Bizfon Customer Care access On, you can choose to turn authorization Off.
NOTE: When authorization is Off, Bizfon Customer Care
can’t perform configuration changes, backups, nor can it troubleshoot your system in the unlikely event of a problem.
To turn Bizfon Customer Care access to your site On/Off:
1. Pick up any Bizfon telephone extension and access Settings.
NOTE: If you have not yet set up the extension, you must
press before you can access settings.
2. Dial extension 200 and enter the system password, if con-figured, to access General Settings.
3. Press for Security Options.
4. Press for Bizfon Customer Care permissions.
5. Press to toggle authorization On/Off.
BizTouch 3: Press SETUP, select SETTINGS, press ENTER.
NOTE: If the extension is already set up
as a BizTouch 3, you must change the phone type settings from an extension that is not set up as a BizTouch 3.
BizTouch 2 or BizTouch 1: Press SETTINGS.
Bizfon conference series phone or
Section 4
Setting Up and
Using Extensions
This section provides information and instructions for setting up and using Bizfon Universal Extensions.
Additional information is provided in the BizTouch 2 and
BizTouch 3 Feature Phone Reference Cards (included with each
BizTouch 2 and BizTouch 3 Feature Phone) and Reference Card
for Non-Bizfon Telephones. Give each person with a Bizfon
uni-versal extension one of these cards according to the type of tele-phone that person is using. Wallet Cards with instructions for remote access are also included in your Bizfon 680 documenta-tion package.
About Universal Extensions
Your Bizfon 680 provides you with Universal Extensions. A Universal Extension is a three-digit number, starting at 201, that enables your clients and customers to reach you anywhere.
A universal extension can be:
• A Physical Extension connected to the Bizfon 680. These
are extensions 201 through 208 on a one unit installation. If you have more than one Bizfon 680, refer to the following table for a list of extension numbers.
Bizfon 680 Unit Extension Numbers
Unit 1 201 through 208
Unit 2 209 through 216
Unit 3 217 through 224
• A Virtual Extension, associated with any telephone located anywhere. These are extensions 250 through 264.
With a universal extension, there is no single telephone perma-nently associated with the extension number. For example, you can connect a salesperson working from a remote office to your company through a universal extension. You would assign a vir-tual extension number to this person, and configure the exten-sion to forward calls to the telephone number at the remote office. Therefore, when a caller dials 251, for example, the Bizfon 680 forwards the call to the salesperson’s telephone number.
With a universal extension, you can:
• Transfer calls to other extensions or outside numbers
• Receive calls remotely; forwarded from the Bizfon
• Set up and participate in Meeting Room calls
• Place long-distance calls through the Bizfon 680 from
inside or outside the office
• Receive and manage voice messages through your voice
mailbox
Setting Up Physical Extensions In the Office
The yellow jacks labeled Telephones on the Bizfon 680 are assigned to physical extension numbers starting at 201.
When you first set up an extension, you indicate whether it is going to be a private telephone, a public telephone (such as a telephone in a conference room), or a fax machine.
NOTE: If you do not set up a password, you cannot access the
Bizfon remotely.
When you first pick up the handset of a telephone connected to the Bizfon, the system prompts you with the following:
“Welcome to extension 201 <the number of the extension you’ve picked up>. To set up this extension now, press 1; otherwise, press *.”
• If you press to set up the extension, you are prompted
through a series of options to configure the extension. Sim-ply follow the prompts to configure an extension.
• You can press to defer setting up your extension.You then
hear a dial tone and can place calls.
Setting up Virtual Extensions (250-264)
A virtual extension is not physically connected to one of the extension jacks in the Bizfon 680. When you set up a virtual extension, 250 for example, you tell the Bizfon where it is that you want extension 250 to ring. It could ring at:
• Your cell phone
• Your home phone
• A remote sales office phone
• One of the physical extensions
An example of the last item would be where you share or rotate office resources, and for the next two weeks, you are in the office where physical extension 204 is. Your “permanent” extension may be 250, but for those two weeks, virtual exten-sion 250 will ring at physical extenexten-sion 204.
To set up a virtual extension:
1. Pick up any Bizfon telephone extension and access Settings.
NOTE: If you have not yet set up the extension, you must
press before you can access settings.
2. Dial extension 200 to access General Settings.
3. Enter the system password, if required, then press .
4. Press to manage extensions.
5. Press to set up a virtual extension.
6. Follow the prompts.
NOTE: If users of virtual extensions do not record their name
announcement, they are not listed in the company directories.
Disabling
as Hold on a Non-BizTouch
Phone
If you are using a non-BizTouch phone, is used to put a call
on hold. You may find that when you are connected to an Auto-mated Bank Teller, or an airline reservation system, or another
voice mail system, you need to use to perform a function
spe-cific to that call.
BizTouch 3: Press SETUP, select
SETTINGS, press ENTER. Phone must be hung up. If it is not, press FORWARD.
BizTouch 2 or BizTouch 1: Press SETTINGS.
Bizfon conference series phone or
In this case, you have the ability to disable the Hold function for
for the duration of a call.
To disable the Hold function, press . You can press when
you pick up the phone to call, so that Hold is disabled
through-out the call, or you can press once the call is on hold.
You can still put a call on hold after you disable the function
by pressing the Flash button found on many telephones, or by manually hook flashing (pressing as if to hang up, very briefly).
When the call is terminated, reverts to its normal function.
Voice Mail
Your Bizfon 680 comes complete with voice mail for each extension.
Voice Mail Features
• Voice mail notification via a message waiting light on the
BizTouch 2 and BizTouch 3 (for physical extensions).
• Bizfon announces how many messages you have when you
pick up an extension.
• Up to 100 minutes of voice mail storage on each Bizfon 680
unit (an optional Voice Vault card provides additional time).
• Pager notification of new voice mail messages.
• You can record your own personal greetings.
• Access voice mail from any physical extension.
• Forward voice mail to another extension.
• A caller can leave up to a three-minute voice mail. This can
be increased or decreased by Customer Care at extension 299.
For details about using voice mail, refer to the BizTouch 2 and
BizTouch 2 and BizTouch 3 Feature Phone) and Reference Card
for Non-Bizfon Telephones.
Expanding Your Bizfon 680 Voice Mail
Capacity
A standard Bizfon is capable of recording to 100 minutes of voice mail. Voice mail can be expanded by two increments: up to two more hours, and up to four more hours. This is done by installing an optional Voice Vault card. Contact Bizfon Cus-tomer Care at extension 299 for more information.
Operator Voice Mailbox
If a message is left for the operator, it is accessible to all users
via the voice mailbox for extension .
The extension which is configured to receive Operator voice mails hears a double message when the user calls to listen to voice mail. One message indicates the number of new messages left in their specific extension; the other indicates the number of new Operator messages.
To access the Operator voice mail from any physical extension:
1. Press BIZMAIL or .
2. Press .
3. Enter the password and press .
Ordering of Messages
The standard ordering for playback of voice mail messages is that the first message received is the first message played back.
Taking Incoming Calls Remotely
By default, when you receive an incoming call remotely, you hear:
“Bizfon call for <name at your extension>.”
You then have the option to:
1. Accept the call by pressing , or
2. Refuse the call by pressing . This will handle the call in
the same way as when you are in the office and not avail-able.
If you do not answer, the Bizfon recognizes this and directs the call to your Bizfon extension mailbox.
During the call, you can put the caller on hold, or transfer the call to another extension. At the end of the call, you can use remote disconnect to remain connected to the Bizfon to make another call or listen to voice mail.
The screening feature described above can be deactivated and reactivated as follows:
1. Pick up any Bizfon telephone extension and access Settings.
BizTouch 3: Press SETUP, select
SETTINGS, press ENTER. Phone must be hung up. If it is not, press FORWARD.
BizTouch 2 or BizTouch 1: Press SETTINGS.
Bizfon conference series phone or
NOTE: If you have not yet set up the extension, you must
press before you can access settings.
2. Dial your extension number, or for this extension.
3. Enter your password, if required, then press .
4. Press for the Call Forwarding menu.
5. Press to disable/enable announcement for forwarded
calls.
TIP! Deactivating the screening feature allows you to have
your remote telephone handle the entire call process. For example, with the screening feature active, a call bounces back to your Bizfon’s voice mail. If the
screening feature is not active, the call does not bounce back to the Bizfon. If your remote telephone has voice mail, such as a cellular phone company’s voice mail system, the remote call will go to your cell phone’s voice mail.
A disadvantage of this scenario is if your remote phone does not have voice mail or an answering machine. The telephone will continue to ring until the caller hangs up. Also, you will not be able to forward the call back to the Bizfon.
Remote Access when Automated Attendant is
Turned Off
To access the Bizfon remotely when the Automated Attendant has been turned off, do the following:
1. Dial in to the Bizfon 680.
2. If the call is answered by voice mail, press twice and
pro-ceed to step 5.
Or, if the operator is using a BizTouch feature telephone, have the operator press TRANSFER, BIZMAIL, and then hang up.
4. Wait until you reach your voice mail and the press twice.
5. Enter your extension number and password, then press .
You are now logged in and can access voice mail and make calls through the Bizfon 680.
Managing Extensions
Removing the Password for an Extension
If a user forgets their password, you can remove it so that the user does not need a password to access voice mail and personal settings. The user can then create a new password.
NOTE: You do not need to know the extension password to
remove it.
To remove the password for an extension:
1. Pick up any Bizfon telephone extension and access Settings.
NOTE: If you have not yet set up the extension, you must
press before you can access settings.
BizTouch 3: Press SETUP, select
SETTINGS, press ENTER. Phone must be hung up. If it is not, press FORWARD.
BizTouch 2 or BizTouch 1: Press SETTINGS.
Bizfon conference series phone or
2. Dial extension 200 to access General Settings.
3. Enter the system password, if required, then press .
4. Press to manage extensions.
5. Press to remove a password.
6. Enter the number of the extension. 7. Follow the prompts.
Resetting an Extension
To set an extension back to its default settings, you must reset the extensions.
Resetting an extension does the following:
• Clears the password
• Deletes the greeting and name recordings
• Deletes all voice mail for the account
• Returns the extension's default language to the primary
lan-guage
After a physical extension has been reset, the user of this exten-sion will hear the initial setup prompt when they lift the hand-set. Virtual extensions are deleted after they have been reset and need to be recreated via General Settings. Operator for-warding settings go back to the factory defaults.
To reset an extension:
1. Pick up any Bizfon telephone extension and access Settings.
BizTouch 3: Press SETUP, select
SETTINGS, press ENTER. Phone must be hung up. If it is not, press FORWARD.
NOTE: If you have not yet set up the extension, you must
press before you can access settings.
2. Dial extension 200 to access General Settings.
3. Enter the system password, if required, then press .
4. Press to hear the Manage Extensions menu.
5. Press to reset the extension.
6. Enter the number of the extension.
CAUTION Resetting an extension deletes all voice mail messages and recordings saved for that exten-sion.
Managing Bizfon Call Waiting
The Bizfon 680 has functionality equivalent to Call Waiting built into it. When you are on one call, and another call for you arrives, you will hear a double beep. Refer to the BizTouch 2
Reference Card, or the Reference Card for Non-Bizfon Tele-phones for specific instructions on managing multiple calls on
your telephone.
You can deactivate/reactivate Call Waiting for each extension, as follows:
Bizfon conference series phone or
1. Pick up any Bizfon telephone extension and access Settings.
NOTE: If you have not yet set up the extension, you must
press before you can access settings.
2. Dial your extension number, or for this extension.
3. Enter your password, if required, then press .
4. Press to turn on/off Bizfon Call Waiting.
Authorization to Make Outside Calls (Internal and
Remote Users)
When using an extension connected to the Bizfon 680 and when using the universal extension remotely, all extensions are autho-rized to make outside calls.
The Bizfon can be configured to limit outside line access for people using the Bizfon remotely. This prevents someone gain-ing access to the Bizfon from makgain-ing unauthorized outside calls. To limit outside line access from remote users:
BizTouch 3: Press SETUP, select
SETTINGS, press ENTER. Phone must be hung up. If it is not, press FORWARD.
BizTouch 2 or BizTouch 1: Press SETTINGS.
Bizfon conference series phone or
1. Pick up any Bizfon telephone extension and access Settings.
NOTE: If you have not yet set up the extension, you must
press before you can access settings.
2. Dial extension 200 to access General Settings.
3. Enter the system password, if required, then press .
4. Press to hear the Security Options menu.
5. Press to prevent remote users from accessing outside
lines.
If you would like to disable authorization to make outside calls for an individual extension, dial 299.
Configuring a Predial String
In order to support Centrex capabilities, you can set up the Bizfon to predial a specified string of keystrokes when you get an outside line.
The Bizfon allows you to set up the same predial string for all outgoing lines, or to set up individual strings for each outgoing line.
To set up predial strings:
BizTouch 3: Press SETUP, select
SETTINGS, press ENTER. Phone must be hung up. If it is not, press FORWARD.
BizTouch 2 or BizTouch 1: Press SETTINGS.
Bizfon conference series phone or
1. Pick up any Bizfon telephone extension and access Settings.
NOTE: If you have not yet set up the extension, you must
press before you can access settings.
2. Dial extension 200 to access General Settings.
3. Enter the system password, if required, then press .
4. Press to change Line Configuration Options.
5. Press to configure automatic predial when granting an
outside line, then follow the prompts to enter the string. BizTouch 3: Press SETUP, select
SETTINGS, press ENTER. Phone must be hung up. If it is not, press FORWARD.
BizTouch 2 or BizTouch 1: Press SETTINGS.
Bizfon conference series phone or
Section 5
Using your Bizfon with Other
Office Equipment
This section gives information on how to extend your Bizfon communications system to work with other equipment you may have in your office.
Fax Machines
You can connect one or more fax machines to the Bizfon 680 extension ports. In order for the Bizfon to correctly route incoming fax calls, you must configure the extensions you select to use a fax machine through Initial Setup of the exten-sion(s).
Extensions configured for fax machines do not have a voice mail box, name recording or personal greeting associated with them.
When the Bizfon detects an incoming fax, it searches for an available fax extension, and forwards the call there.
Fax Extension Setup
To set up a new extension which will be connected to a fax machine:
1. Make sure that the extension has been reset.
This will be the case if the extension has never been used before. If it has been used as a normal telephone extension, it must first be reset. Refer to “Resetting an Extension” on page 48 for instructions on how to do this.
If the fax machine has no handset, use a telephone for the configuration, then connect the fax machine when finished. 3. Follow the prompts through “Initial Settings.”
4. Press when you hear “If this extension will use a fax
machine, press 2.”
If all configured fax machines are busy and a new incoming fax is detected, the Bizfon plays a busy tone for ten seconds then hangs up. If more than one fax machine is set up, each is tried in sequential order.
Fax Extension Tips
Here are some tips to help you set up fax extensions for opti-mum performance:
• If callers are using the older, attended fax machines, then
you might want to add the following to your company greet-ing:
“...if you would like to send a fax and are using an attended fax machine, please press the ‘Start’ button now.”
The fax will then be correctly routed.
• If you must dial 9 to get an outside line, be sure to include a
pause after the 9 in order to give the Bizfon a chance to return a dial tone before the fax machine dials the number. If you want your fax machine to be able to get an outside line without you having to dial 9, contact a Bizfon Customer Care Agent.
• If you want to use your fax telephone line for incoming calls
as well, Bizfon recommends that you include this number in your hunt group with your telephone company. This will ensure that calls and faxes are managed correctly.
high-est-to-lowest, this will ensure the lowest possible chance that an incoming fax will encounter a busy signal.
Audio Devices for Music-on-Hold
In order to play music to callers who are on hold, you can con-nect an audio device, such as a CD player, tape deck or radio, to the Music-on-Hold (MOH) jack on the Bizfon 680 (see “Audio Devices for Public Address” on page55).
Your audio source most likely produces stereo output, and your Bizfon requires mono input. You need to purchase a stereo-to- mono converter that has a single RCA plug (Radio Shack part number: 42-2444).
Connect the cable to your audio source, and plug it into the Music-on-Hold (MOH) connector on the Bizfon 680. Set the levels on your audio source. If it is distorted, turn down the vol-ume on your audio source.
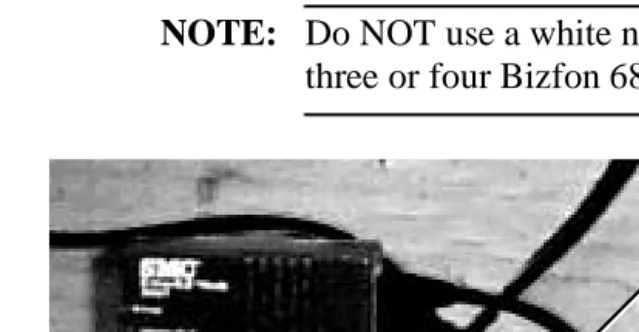
NOTE: You might need ASCAP authorization to play music
to callers on hold. For more information, contact ASCAP at (212) 621-6000 or go to their Web site at www.ascap.com.
Audio Devices for Public Address
In order to use the public address feature of the Bizfon 680, you must connect an external audio system to the PA output on the side of the Bizfon.
Connect the cable to your audio system and plug it into the PA connector on the Bizfon 680. Set the levels on your audio sys-tem. If it is distorted, turn down the volume of your audio source.
Modems
Bizfon currently does not recommend connecting modems to the 680. If you have a modem line, connecting the modem through a separate CO line, independent of the 680, for maxi-mum data throughput.
Appendix A
Professional Installation
Guide
WARNING! This section includes describes installation of
the product with the appropriate Bizfon ProIn-stall kit. It is suited for professional telephone systems personnel. You should be familiar with telephone systems and wiring before attempting this type of installation. Call (877) 603-4100 to order your professional installation and/or a ProInstall kit.
If you want to have more than six incoming lines or more than eight extensions, you must install more than one Bizfon 680. For example, if you want ten incoming lines and sixteen exten-sions, install two Bizfon 680s.
This following table details what is explained in the section:
For information about . . . Refer to . . .
Typical installation examples Figure 1 through Figure 3
Professional installation and wir-ing instructions
Pages 59 through 73
Adding units to an existing installation
“Adding Units to an Existing Installation” on page73
Removing units from a Bizfon 680 cluster
The following tools are required to complete the installation.
• 66/110 Punch-down tool
• Phillips Screwdriver
• Wire Cutters
• Telephone Test Set (Butt-set)
• Permanent Marker (Sharpie)
• Cable Tone Set
The following figures show examples of typical installation scenarios.
Figure 1. Example of a Single Switch Installation
Creating a multibox system (cluster) from four standalone units
“Creating a Multibox System from Four Standalone Units” on page 76
Running diagnostics to ensure optimal performance
“Running Diagnostics” on page 77
Figure 2. Example of a Two Switch Installation
Figure 3. Example of a Three Switch Installation
To install the Bizfon 680(s)
1. Find a location for the Bizfon 680(s) to be installed within four feet of an electrical outlet or power strip.
TIP! Bizfon recommends you connect the unit(s) to
an uninterruptible power supply (UPS).
2. Install the bracket (wall mount) for each Bizfon 680. See Figure 4.
A. Level off to one of the long edges and mark four
positioning holes on the wall where each switch is to be installed.
B. Fasten screws to wall and install bracket into permanent position.
Figure 4. Bracket Installation
If you are installing more than one Bizfon 680, position each bracket correctly and space apart twelve inches on center. Refer to Figure 5 for the proper location of each unit in a multibox installation.
Figure 5. Locating Multiple Bizfon 680s Note orientation
of bracket
1
Or
2
3
4
1
4
3. For a single Bizfon 680, install four (4) surface mount tele-phone jacks (quad biscuits) using double back tape or screws.
For multiple Bizfon 680s, install four quad biscuits for each switch.
The two top biscuits are for outgoing lines to the house ter-mination point(s).
The two bottom biscuits are for incoming CO lines. 4. Run two CAT 3 4 pair cables from the DMARC
(termina-tion point RJ 21X) to the two bottom biscuits
TIP! For easy identification, label the cables at each
end. For example: Cable #1 and Cable #2.
5. Run two CAT 3 4 pair cables from the two top biscuits to the house cables final termination point (66 Block, 110 Block, and so on).
For steps 6 and 7, refer to Figur e6.
6. Terminate cable number 1 by stripping back the outside coating and punch down using the appropriate tool (66,110...).
White/Blue Pair CO number 1
White/Orange PairCO number 2 White/Green Pair CO number 3 White/Brown Pair CO number 4 7. Terminate cable number 2
White/Blue Pair CO number 5
White/Orange PairCO number 6
Regardless of how many CO lines exist, wire for six incoming and wrap back extra for future expansion
Figure 6. CO Termination of Incoming Telephone Lines from the Demarcation Point
For steps 8 through 10, refer to Figur e7.
8. At the opposite end of the CO lines that have been termi-nated go to the two bottom biscuits.
9. Remove the covers and terminate, from the bottom up, the
six CO lines (1 – 6) to the BLUE Posts of each 110 terminal (four terminals per biscuit) starting with white/blue, white/ orange, white/green and white/brown
10. On cable number 2, terminate white/blue, white/orange as above and remove/cut the green and brown pairs (not neces-sary for this installation).
Cable #2
Cable #1 O P E N
O P E N
W H O R / O R W H
W H B L / B L W H
W H B R / B R W H
W H G R / G R W H
W H B L / B L W H W H O R / O R W H
Figure 7. Terminate to the Blue Post
For steps 11 through 14, refer to Figur e8.
11. At the house cables termination point (66 block/110 block, and so on) identify which house cables/locations are for which extensions.
Extension Number Ports Unit Number
201 through 208 1 through 8 1
209 through 216 1 through 8 2
217 through 224 1 through 8 3
225 through 232 1 through 8 4
Blue Posts
12. Strip back the outside coating of house cable number 1 (CAT 3 4 pair cable) and terminate using appropriate punch down tool 66/110
13. Strip back the outside coating of house cable number 2(CAT 3 4 Pair Cable) and terminate using appropriate punch down tool 66/110.
White/Blue to White/Blue of house cable number 1
White/Orange to White/Blue of house cable number 2
White/Green to White/Blue of house cable number 3
White/Brown to White/Blue of house cable number 4
White/Blue to White/Blue of house cable number 5
White/Orange to White/Blue of house cable number 6
White/Green to White/Blue of house cable number 7
Figure 8. House Extensions Connections Termination Point
14. At the top two biscuits, remove the covers and terminate from the bottom up.
TIP! Terminate from the bottom up so the patch cords
stay neat.
The eight house cables/locations/extensions punch down to the BLUE Posts of each 110 terminal.
One pair per extension, one extension per port, four ports per biscuit starting with the first cable.
Cable #2
Cable #1 WH OR / OR WH
WH BL / BL WH
WH BR / BR WH
WH GR / GR WH
WH BL / BL WH WH OR / OR WH WH BR / BR WH
WH GR / GR WH
201 202 203 204 205 206 207 208
First Cable:
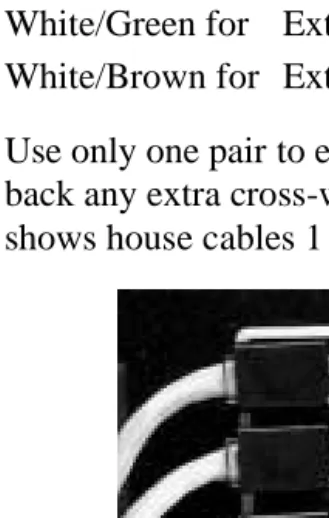
White/Blue for Ext. 201
White/Orange for Ext. 202 White/Green for Ext. 203 White/Brown for Ext. 204
Second Cable:
White/Blue for Ext. 205
White/Orange for Ext. 206 White/Green for Ext. 207 White/Brown for Ext. 208
Use only one pair to each house termination location. Wrap back any extra cross-wires for further expansion. Figure9 shows house cables 1 and 2 terminated to the blue posts.
15. Install covers on all biscuits and clearly label CO numbers and extension numbers with a permanent marker on biscuit cover above applicable ports.
16. Install the BIZFON 680 to the bracket that has been mounted to wall.
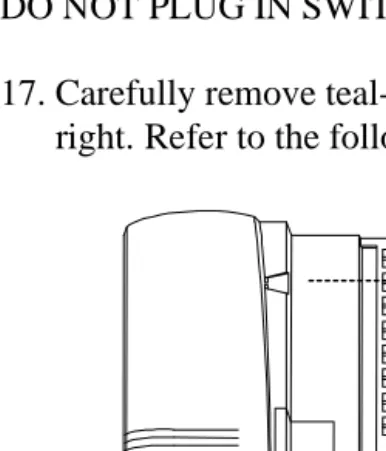
DO NOT PLUG IN SWITCH YET.
17. Carefully remove teal-colored cover by sliding it to the right. Refer to the following figure.
Figure 10. Removing the Cover
WARNING! DO NOT PULL COVER OFF BY PULLING
STRAIGHT UP! IT WILL BREAK!
18. Connect the blue cables from biscuits to the switch. The cable from CO number 1 goes to blue port number 1 on the switch.
20. Repeat step 19 for all switches if you are installing more than one switch.
Connect all blue cables regardless of the number of operating CO lines.
If you are installing more than one switch and have only six CO lines, connect all six CO lines to Unit 1.
21. Connect the yellow cables from biscuits to the switch. The cable for extension 201 goes to yellow port number 1 on the switch.
22. Continue for ports number 2 through number 8 in the same manner.
23. Repeat step 22 for all switc