SPRA601 - November 1999
Code Composer Studio’s
Command Window
Jeff Sherman Digital Signal Processing Solutions
ABSTRACT
With the introduction of Code Composer and Code Composer Studio, Texas Instruments (TI) has provided a Command Window plug-in to ease the transition for customers who are familiar with the TI debugger’s command line entries, legacy setup, and test scripts. Due to some inherent differences in the products some of the old TI Debugger commands were not duplicated in the Command Window.
This document describes:
•
Code Composer Studio’s Command features•
GEL – Code Composer Studio’s scripting language•
Using GEL•
TI Debugger to GEL Command mapping•
Code Composer Studio’s Command Window features•
Using the Command Window•
Differences between the Command Window and the TI Debugger scripts•
How to transition TI Debugger script filesThis document assumes the user has knowledge of the TI Debugger script commands and a general knowledge of Code Composer Studio.
Contents
1 Introduction . . . 3
2 Code Composer’s GEL Command Features. . . 3
2.1 GEL language . . . 3
2.2 GEL Functions . . . 3
2.3 Entering GEL commands. . . 4
2.4 Auto-Executing GEL Functions at Startup . . . 5
2.5 Built-in GEL Commands. . . 5
2.6 TI to GEL Command Mapping . . . 7
4 Command Window Features . . . 10
4.1 Starting the Command Window . . . 10
5 On-line Help . . . 10
5.1 Supported Commands . . . 10
5.2 New Commands . . . 12
5.3 Command Differences . . . 13
5.4 Unsupported Commands . . . 13
6 Moving TI Debugger Scripts to Code Composer Studio . . . 14
6.1 Translating to Code Composer Studio Command Window . . . 14
6.2 Logical Expression Issue . . . 15
6.3 Other Porting Issues . . . 15
7 Conclusion . . . 16
List of Figures Figure 1. GEL Toolbar . . . 4
Figure 2. GEL Command Line Dialog Box . . . 4
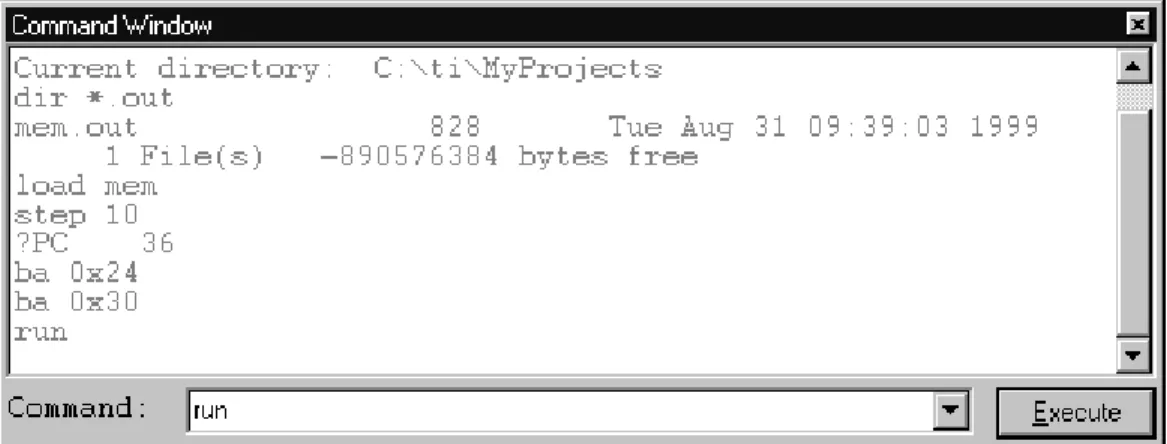
Figure 3. Command Window Plug-in Window . . . 9
List of Tables Table 1. GEL Commands . . . 5
Table 2. Target Manipulation Commands . . . 7
Table 3. Watch Commands . . . 7
Table 4. Memory Commands . . . 7
Table 5. Take File Commands . . . 8
Table 6. Miscellaneous Commands . . . 8
Table 7. Descriptions of the Partial Mappings . . . 9
Table 8. Supported Commands . . . 10
Table 9. New Commands . . . 12
Table 10. Command Differences . . . 13
Table 11. Unsupported Commands. . . 14
1
Introduction
Moving to Code Composer Studio from the TI Debugger requires changes to both command entry and script execution. While the Command Window eases this transition, it does not eliminate it.
Before transitioning your scripting files to Code Composer Studio you will need to decide on what scripting method you will use. Code Composer Studio has an integrated scripting language called GEL – General Extension Language. GEL is ’C’ like and offers many new features that were not available in the TI Debugger. For example, you can create menu items, input dialogs, and have them execute on breakpoints, etc. While GEL offers many new features, you will need to write your existing script files into the GEL scripting language. The number, size, and complexity of your files will determine the effort required.
The other scripting method is to use the Command Window plug-in and its implementation of the TI Debugger commands. The Command Window is very similar to the TI Debugger Command Window in terms of appearance and performance. The script files require minimal changes and your familiarity of the commands should make the transition easy.
There is also the option of mixing these two scripting mechanisms. GEL commands can be called from within the Command Window, but the Command Window commands are not recognized outside of the Command Window.
The following sections discuss GEL scripting followed by a discussion of the Command Window scripting. The GEL section maps TI Debugger commands to its corresponding GEL command. The Command Window section discusses the steps required to convert scripts from the TI Debugger to the Command Window and all the issues and discrepancies.
2
Code Composer’s GEL Command Features
2.1
GEL language
GEL is an interpretive language similar to C that lets you create functions to extend Code Composer Studio’s usefulness. You create your GEL functions using the GEL grammar and then load them into Code Composer Studio. With GEL, you can access target memory locations and add options to Code Composer Studio’s GEL menu. GEL is particularly useful for
automated testing and user workspace customization. You can call GEL functions from anywhere that you can enter an expression. You can also add GEL functions to the Watch window so they execute at every breakpoint.
2.2
GEL Functions
There are several built-in GEL functions that allow you to control the state of the target, access target memory locations, and display results in the output window.
All GEL built-in functions are preceded with the prefix GEL_ to ensure that they are not confused with user-defined GEL functions. If you wish to avoid preceding all calls to GEL built-in functions with GEL_ you can define functions with your own names and call the GEL built-in functions within your functions. For example, the following GEL function allows you to call the
Load(a) {
GEL_Load(a); }
2.3
Entering GEL commands
All built-in GEL functions and user-defined GEL functions consisting of GEL statements can be invoked directly from the GEL toolbar. This toolbar consists of an expression field and an Execute button (icon). To invoke any GEL statement or user-defined function, enter the appropriate function call in this field box and press Execute to evaluate the expression. The expression dialog box maintains a history of the most recently invoked GEL
statements/user-defined functions, any of which can be selected by using the scroll buttons.
Figure 1. GEL Toolbar
To access this toolbar, select View→GEL Toolbar from the menu. The scrollable list in the GEL toolbar contains a history of the most recently executed GEL functions. To execute a previously used command, select the command and press the Execute button.
The GEL Command Line dialog also provides a convenient way of entering expressions or executing GEL functions. You can execute any of the built-in GEL functions or you can execute your own GEL functions that have been loaded.
Figure 2. GEL Command Line Dialog Box
To access this dialog, select Edit→Edit Command Line from the menu. When the dialog box is displayed enter an expression or GEL function in the Command field and click OK to execute the command.
The following examples display commands that can be entered in the GEL toolbar or the GEL command line dialog:
Modify variables by entering expressions:
PC = c_int00
Load programs with built-in GEL functions:
GEL_Load(”c:\\myprog.out”)
MyFunc()
2.4
Auto-Executing GEL Functions at Startup
GEL functions allow you to configure the development environment according to your needs. You may want to set up your environment each time you start Code Composer Studio. Instead of loading your GEL file using File→Load Gel each time and then executing the GEL function, you can pass a GEL file name to Code Composer Studio on startup. This informs Code
Composer Studio to scan and load the specified GEL file. It may not be enough to just load the GEL file; you may also want to execute the function as well. You can do this by naming one of your GEL functions in the specified file StartUp(). When a GEL file is loaded into Code
Composer Studio, it searches for a function defined as StartUp(). If it finds this function in the file, it automatically executes it.
To automatically load and execute a GEL function you place the filename in the command line of the Properties dialog box of the Code Composer Studio icon. Detailed instructions on doing this are available in the Code Composer Studio help file.
The following example shows a typical GEL file that you may load at startup. In this example, each time you start Code Composer Studio the memory mapping feature is turned on and the function LoadMyFile() is added to the menu bar.
StartUp() {
/*Everything in this function will be executed on startup*/ /*turn on our memory map*/
GEL_MapOn(); GEL_MapAdd(0, 0, 0xF000, 1, 1); GEL_MapAdd(0, 1, 0xF000, 1, 1); } dialog LoadMyFile() {
/* load my coff file, and start at main */ GEL_Load(”myfile.out”);
GEL_Go(main); }
2.5
Built-in GEL Commands
The following table lists the available built-in GEL functions.
Table 1. GEL Commands
GEL Command Description
GEL_Animate Start animating
GEL_BreakPtAdd Add a new breakpoint GEL_BreakPtDel Delete an existing breakpoint GEL_BreakPtReset Delete all breakpoints
GEL_CloseWindow Close an existing output window GEL_Exit Close the active control window
Table 1. GEL Commands
GEL Command Description
GEL_Go Run target to specified point
GEL_Halt Halt the target
GEL_Load Load a COFF file
GEL_MapAdd Add a memory map
GEL_MapDelete Delete a memory map
GEL_MapOn Enable memory mapping
GEL_MapOff Disable memory mapping
GEL_MapReset Clear the memory map
GEL_MemoryFill Fill a block of memory
GEL_MemoryLoad Load a block of memory from a file GEL_MemorySave Save a block of memory to a file GEL_OpenWindow Open an output window
GEL_PatchAssembly Patch memory with specified assembly instructions GEL_ProjectBuild Build the current project
GEL_ProjectLoad Loads the specified project
GEL_ProjectRebuildAll Completely rebuild the current project
GEL_Reset Reset the target
GEL_Restart Reset PC to program entry point
GEL_Run Start executing the target
GEL_RunF Start executing and disconnect from the target GEL_SymbolLoad Load symbols only
GEL_System Execute the ‘system’ command GEL_TargetTextOut Output formatted target string GEL_TextOut Print text to output window
GEL_WatchAdd Add expressions to the watch window GEL_WatchDel Delete expressions from the watch window GEL_WatchReset Delete all expressions from the watch window GEL_XMDef Define extended memory ranges (C5000 targets only) GeL_XMOn Enable extended memory mapping (C5000 targets only)
2.6
TI to GEL Command Mapping
The following tables show a mapping of TI Debugger commands to the corresponding Code Composer Studio GEL command. The table only shows the commands that can be mapped. Some TI Debugger commands do not have corresponding GEL commands and vice-versa. The ‘Mapping’ column in the tables indicates if the GEL command fully supports the TI
Debugger command or partially supports it. A full explanation is shown in a table following the commands.
Table 2. Target Manipulation Commands
TI Command Description GEL Command Mapping
BA Add software breakpoint GEL_BreakPtAdd Full
BD Delete software breakpoint GEL_BreakPtDel Full
BR Reset software breakpoints GEL_BreakPtReset Full
GO Run to specified address GEL_Go Full
HALT Halt target system GEL_Halt Full
LOAD Load a target object file GEL_Load Full
RESET Reset target system GEL_Reset Full
RESTART Reset PC to program entry point GEL_Restart Full
RUN Run target program GEL_Run Partial
RUNF Free run the target GEL_RunF Full
SLOAD Load symbol table GEL_SymbolLoad Full
Table 3. Watch Commands
TI Command Description GEL Command Mapping
WA Add expression to watch window GEL_WatchAdd Partial
WD Delete expression from watch window GEL_WatchDel Partial
WR Clear/close watch window GEL_WatchReset Partial
Note: Partials since the GEL commands do not support multiple windows.
Table 4. Memory Commands
TI Command Description GEL Command Mapping
FILL Fill memory with a value GEL_MemoryFill Full
MA Add memory block to map GEL_MapAdd Partial
MAP Enable/disable memory mapping GEL_MapOn,
GEL_MapOff
Full
MR Reset memory map GEL_MapReset Full
MS Save memory block to a file GEL_MemorySave Full
PATCH Modify program code GEL_PatchAssembly Full
Table 5. Take File Commands
TI Command Description GEL Command Mapping
ECHO Echo a string to display area GEL_TextOut Full
IF / ELSE ENDIF
Conditionally execute debugger commands If / else Full
LOOP ENDLOOP
Loop through debugger commands While Full
Table 6. Miscellaneous Commands
TI Command Description GEL Command Mapping
QUIT Exit debugger GEL_Exit Full
The following table shows the differences between the TI Debugger commands and the Code Composer Studio commands listed above as being “Partial”.
Table 7. Descriptions of the Partial Mappings
TI Command GEL Command Difference
MA GEL_MapAdd If the GEL_MapAdd command defines a “range” that overlaps an existing range the attributes of the new range take precedence in the memory map. The TI Debugger would ignore the new range. RUN GEL_Run The GEL_Run command doesn’t support executing “count”
instructions. Run allows an optional “expression” parameter, whereas GEL_RUN only allows an optional “condition” parameter.
SYSTEM GEL_System Both allow you to send a command to the Operating System, however the optional parameters of each are quite different. The GEL_System command allows you to pass additional parameters with the OS command (actually a formatted string) via format specifiers. If you use the TI “system” command with no
parameters, the debugger opens an interactive system shell and displays an OS prompt. Also, if you supply an OS command to the TI “system” command, you can also supply an optional “flag” parameter to tell the debugger whether or not it should hesitate after displaying the result of the OS command.
WA WD WR GEL_WatchAdd GEL_WatchDel GEL_WatchReset
The GEL watch commands do not allow you to open named watch windows. The TI Debugger watch commands allow an optional “window name” parameter.
WR GEL_WatchReset the WR command deletes all items from a watch window and closes the window, whereas the GEL_WatchReset command only clears all expressions from the watch window.
3
Command Window
The following sections provide information about the use, features and valid commands that are available in the Code Composer Studio Command Window plug-in.
4
Command Window Features
4.1
Starting the Command Window
The Command Window plug-in is started by selecting Tools–>Command Window from the Code Composer Studio menu.
To Enter a Command:
You must first give the Command Window focus by clicking anywhere on the Command Window except the Execute button. This will place the cursor in the command field for entering the command. Previous commands can be recalled by using the up/down arrow keys.
When entering a command, right-click in the Command field to open the context menu. The editing functions Undo, Cut, Copy, Paste, Delete, and Select All are available.
Any output generated by the debugger appears in the output section of the Command Window directly above the Command field.
To Execute/Halt a Debugging Command:
Click the Execute button to execute a debugging command such as “run”. Notice that the label on the button changes to Halt when your program is running.
Click the Halt button to stop the execution of your program.
5
On-line Help
The on-line help file can be accessed in one of several ways:
•
Press F1 while the Command Window has focus.•
Enter HELP in the command field to display general help information.•
Enter HELP <cmd> in the command field to display help about a single command.•
Select Help–>Tools–>Command Window from the menu.5.1
Supported Commands
The commands listed in the following table are TI Debugger commands supported in the Code Composer Studio Command Window plug-in. Some of these commands have slight differences from the TI Debugger implementation, see Table 10 ‘Command Differences’ for details.
Table 8. Supported Commands
Command Command Description
?, EVAL, E Evaluate an expression
ALIAS, UNALIAS Define custom command string
BA, BD, BL, BR Breakpoint control (add, delete, list, reset)
Table 8. Supported Commands
Command Command Description
CLS Clear output section of Command Window
DIR List directory contents
DISP Display a C structure
DLOG Create a log file
EL, ECR, ECS, EE, ED, EB, ER C6x analysis event commands
ECHO Display a string to Command Window output section
FILE Display a text file
FILL Fill memory
GO Run to specified address
HALT Halt the target system
HELP Display command information
IF, ELSE, ENDIF TAKE file condition commands
LINE Display specified line in file
LOAD Load an executable program
LOOP, ENDLOOP TAKE file looping commands
MA, MD, MR, ML, MAP Memory map commands (add, delete, reset, list, enable)
MC, MI Connect simulated I/O port to a file
MS Save memory block to a file
NEXT, CNEXT Single step the program
PATCH Change an assembly instruction
PAUSE Stop TAKE file execution
PINC, PIND, PINL Connect an input file to an interrupt pin
PROMPT Change Command Window prompt
QUIT Exit debugger
REALTIME Update debugger in realtime
RELOAD Reload program
RESET Reset target system
RESTART, REST Reset PC to program entry point
RETURN, RET Return to function’s caller
Table 8. Supported Commands
Command Command Description
RUNB Run the program counting cycles
RUNF Disconnect from target system
SCONFIG Load workspace
SLOAD Load symbol table
SOUND Enable error beeping
SSAVE Save workspace
STEP, CSTEP Single step to program
STEPCYCLE Step one cycle at a time
STOPMODE Update the debugger after halting
SYSTEM Execute OS command
TAKE Execute a batch file
UPDATE Rate to refresh in realtime mode
USE Add directories to search
VERSION Display current debugger information
WA, WD, WR Watch commands (add, delete, reset)
5.2
New Commands
The commands listed in the following table have been added. Their use and description can be found in the on-line help file for the Command Window plug-in.
Table 9. New Commands
Command Command Description
ABORT Terminates the processing of the current TAKE file. ABORTALL Terminates the processing of all TAKE files.
FILES Displays a list of all the currently opened source files.
OUTPUTLINES Set the maximum number of lines to display in the command output window. STEPON Enables single-stepping of the script file.
STEPOFF Disables single-stepping of the script file. TIME Displays the current time and date.
IFPROC Compares the target processors’ device number to the parameter. FC / FCX Compare two files line by line and report any differences.
5.3
Command Differences
The commands listed in the following table behave in a different manner than their original TI Debugger counterpart. The differences have been minimized, but they should be considered during the porting of existing script files to the Code Composer Studio environment.
For commands that list a difference of ‘Logical Expression’, refer to the section called ‘Logical Expression Issue’ for details.
Table 10. Command Differences
Command Difference from TI Debugger Command
CNEXT Steps through assembly code depending upon Code Composer Studio’s mode. CSTEP Logical Expression. Will step through assembly code depending upon Code
Composer Studio’s mode.
DISP Acts like the WA command does not accept filenames.
LOOP Logical Expression.
MS The default extension is .out instead of .obj, dumps COFF format only for .obj files; hex for all other extensions.
NEXT Logical Expression.
RELOAD Will also reload the symbols.
RUN Logical Expression.
SCONFIG Loads a Code Composer Studio workspace defaulting to ’init.wks.’ Disabled within TAKE files.
SSAVE Saves a Code Composer Studio workspace defaulting to ’init.wks.’
STEP Logical Expression.
SYSTEM ’flag’ is not used, output of command goes to a Code Composer Studio window.
WA Ignores the window parameter.
WD Ignores the window parameter, the index parameter must be changed to be the expression specified in the ’wa’ command.
WR Ignores the window parameter.
5.4
Unsupported Commands
The commands listed in the following table are not supported in the Code Composer Studio Command Window plug-in. Some of these commands may be implemented in the future but many are no longer useful within the Code Composer Studio GUI environment.
Table 11. Unsupported Commands
Command Types TI Debugger Commands
Window Control BORDER, COLOR, MOVE, SCOLOR, SIZE, WIN, ZOOM Profile PF, PQ, PR, PROFILE, SA, SD, SL, SR, VAA, VAC, VR Window Display ADDR, CALLS, DASM, FUNC, MEM
Mode Changing ASM, C, MIX Miscellaneous SETF, WHATIS
6
Moving TI Debugger Scripts to Code Composer Studio
6.1
Translating to Code Composer Studio Command Window
Translating old TI Debugger command scripts to Code Composer Studio’s Command Window scripts requires some modifications. While the changes have been kept to a minimum, some are required in most cases. The following steps should be followed:
1. Make a copy of all the script files.
2. Convert all register names to uppercase. This may be the largest change required. Note that in Code Composer Studio all register names are uppercase. This is true for GEL commands, watch expressions, etc.
3. Remove all unsupported commands as listed in the table “Unsupported Commands.” This step is optional, when the Command Window detects one of these commands it will display a warning, but will not halt processing.
4. Look at all the commands listed in the table “Command Differences” for possible changes that may be required. In some cases you may need to change the method of doing something whereas in other cases no change will be required.
5. Test the modified script files. For regression tests it is very important that you validate that the changed script still performs as expected.
The following table illustrates the conversion process. The script on the left is from the old TI Debugger and its converted equivalent is on the right. All the elements that needed to be changed have been highlighted.
Table 12. Converting TAKE Files
Old TI Debugger Script New Command Window Script RESET MR MA 0,1000,RAM LOAD sample.out BA trans BA exit BL WA a1,x,,WINDOW1 LOOP (pc != exit) RUN ?pc ENDLOOP RESET MR MA 0,1000,RAM LOAD sample.out BA trans BA exit WA A1,x LOOP (PC != exit) RUN ?PC ENDLOOP
6.2
Logical Expression Issue
Several of the TI Debugger commands allow you to enter a parameter that will be used as a ’count’ or a ’condition’ when executing the command. For example, the STEP command allows an optional parameter of this type. Below are the possible interpretations of the parameter.
STEP Step the target once STEP 100 Step the target 100 times
STEP PC!=MAIN Step the target until we get to ’main’
To determine a logical TRUE expression, the expression result must evaluate to ‘1’ AND a logical operator must be used in the expression. The logical operators are “!”, “==”, “!=”, “<”, “>”, “>=”, “<=”, “&&”, and “||”.
STEP 1 Count value of one.
STEP 1==1 Logical expression that is always TRUE. STEP 1+1 Count value of two.
STEP 1+(1==0) Intention is a count value of one, but will be interpreted as a logical expression since the two rules are true.
This typically is not a problem, yet you should be aware of the potential.
6.3
Other Porting Issues
•
If the Command Window is saved as part of a Code Composer Studio workspace it will be reloaded when the workspace is loaded. The Command Window will then try to execute the init.cmd or siminit.cmd script file. The init.cmd file will execute prior to any GEL StartUp() functions that may also have been loaded.•
DLOG created files contain the same information as the old TI Debuggers, but the formatting may be slightly different. For example, spacing may be different or the directory-listing format may be different. This becomes an issue if you use a file compare utility to verify correctness of regression tests. Either have the file compare ignore spaces or re-verify the log file and use that as your new ’golden’ file.•
GEL commands may be executed from the command window by using the ’?’ command and enclosing the entire GEL command within double quotes: ?”GEL_Run(”PC!=main”)”•
The following command for a C6x target returns FALSE ’?B0==0x80000000’ even if B0 is 0x80000000. The problem is correctly processed as ’?(unsigned)B0==0x80000000’. This is due to a difference in expression analysis used between Code Composer Studio and the TI Debugger.•
The concept of Modes (C, ASM, MIX) doesn’t exist in Code Composer Studio. The TI Debugger commands that switched modes have been removed. In addition, the TI Debugger commands that acted differently depending upon the current mode of the TI Debugger will now act according to Code Composer Studio’s standard. For example, the STEP command would either step assembly code or C code based upon the mode of C or ASM, now its based upon Code Composer Studio’s mode set in the View/Mixed Source menu.•
The D_OPTIONS environment variable is not supported.•
The D_DIR environment variable is used. Therefore, during startup of the Command Window all the directories in the D_DIR environment variable will be searched if necessary to locate the ‘init.cmd’ file. Be aware that other TI Debuggers may have already defined it.7
Conclusion
Moving to Code Composer Studio from the TI Debugger requires some changes to both command entry and script execution. While the Command Window eases some of these required changes, it does not eliminate them.
For command line entry the user has three options; use the Command Window, use the GEL command line, use GUI input. Your choice will depend upon what you are most efficient in using.
For script files the user has three basic options; convert the script files to GEL scripts, convert the script files to Command Window scripts, or a combination of the two. Users with many legacy script files may prefer to use the Command Window approach to ease conversion and relearning.
Texas Instruments and its subsidiaries (TI) reserve the right to make changes to their products or to discontinue any product or service without notice, and advise customers to obtain the latest version of relevant information to verify, before placing orders, that information being relied on is current and complete. All products are sold subject to the terms and conditions of sale supplied at the time of order acknowledgement, including those pertaining to warranty, patent infringement, and limitation of liability.
TI warrants performance of its semiconductor products to the specifications applicable at the time of sale in accordance with TI’s standard warranty. Testing and other quality control techniques are utilized to the extent TI deems necessary to support this warranty. Specific testing of all parameters of each device is not necessarily performed, except those mandated by government requirements.
CERTAIN APPLICATIONS USING SEMICONDUCTOR PRODUCTS MAY INVOLVE POTENTIAL RISKS OF DEATH, PERSONAL INJURY, OR SEVERE PROPERTY OR ENVIRONMENTAL DAMAGE (“CRITICAL APPLICATIONS”). TI SEMICONDUCTOR PRODUCTS ARE NOT DESIGNED, AUTHORIZED, OR WARRANTED TO BE SUITABLE FOR USE IN LIFE-SUPPORT DEVICES OR SYSTEMS OR OTHER CRITICAL APPLICATIONS. INCLUSION OF TI PRODUCTS IN SUCH APPLICATIONS IS UNDERSTOOD TO BE FULLY AT THE CUSTOMER’S RISK.
In order to minimize risks associated with the customer’s applications, adequate design and operating safeguards must be provided by the customer to minimize inherent or procedural hazards.
TI assumes no liability for applications assistance or customer product design. TI does not warrant or represent that any license, either express or implied, is granted under any patent right, copyright, mask work right, or other intellectual property right of TI covering or relating to any combination, machine, or process in which such semiconductor products or services might be or are used. TI’s publication of information regarding any third party’s products or services does not constitute TI’s approval, warranty or endorsement thereof.