Administrator Guide
NEC America, Inc.
functions, or features, in this document at any time, without notice. NEC America, Inc. has prepared this document for use by its employees and customers. The information contained herein is the property of NEC America, Inc. and shall not be reproduced without prior written approval from NEC America, Inc.
TABLE OF CONTENTS
Page
Chapter 1 - INTRODUCTION . . . 1
How To Use This Guide . . . 1
-Guide Organization . . . 1
What is Student Services? . . . 2
-Overview . . . 2
-Application & Functions . . . 2
-Databases. . . 2
Chapter 2 - GETTING STARTED . . . 5
Keyboard Conventions . . . 5
Step Procedures . . . 5
Logging in to Student Services . . . 5
Main Menu Screen . . . 6
-Selecting Menu Items . . . 6
-Main Commands. . . 7
Screen Saver . . . 7
Screen Scrolling . . . 7
Exit Student Services . . . 8
-Procedure . . . 8
Chapter 3 - STATIONS DATABASE . . . 9
Using the Stations Database . . . 9
Adding a Station . . . 11
Deleting a Station . . . 13
Modifying a Station . . . 15
Finding a Station . . . 17
-Finding by Extension . . . 17
-Finding by Description . . . 19
Saving & Installing Database . . . 21
-Save Database . . . 21
-Install Database . . . 22
Print. . . 23
-Printing the Current Record . . . 23
-Printing Records On Screen . . . 24
-Printing All Records . . . 25
Exit . . . 26
Chapter 4 - GROUPS DATABASE. . . 27
Using the Groups Database . . . 27
Add . . . 29
-Adding a New Group . . . 29
-Adding a Station In Group . . . 31
Delete . . . 34
-Deleting a Group. . . 34
-Deleting a Station In Group . . . 36
Modify . . . 38
Page
-Modifying a Station In Group . . . . 40
Find . . . 42
-Find a Group by Name . . . 42
-Find a Station In Group by Extension . . . 44
-Find a Station in Group by Description . . . 47
Saving & Installing Database . . . 50
-Save Database . . . 50
-Install Database . . . 51
Print . . . 52
-Printing Group Current Record . . . 52
-Printing Group Records On Screen . . . 54
-Printing Group All Records . . . 55
-Printing Station In Group Current Record. . . 56
-Printing Station In Group Records On Screen . . . 58
-Printing Station In Group All Records . . . 60
Chapter 5 - SCHEDULED EVENTS. . . 63
-Event Types . . . 63
-Event Times . . . 63
-Special Event Times . . . 63
Using Scheduled Events. . . 64
Adding an Event . . . 66
Deleting an Event . . . 72
Modifying An Event . . . 73
Filter . . . 75
-Show All Events . . . 75
-Show Today’s Events . . . 76
-Show Events By Date . . . 77
-Show Events By Weekday . . . 79
Saving & Installing Database . . . 81
-Save Database . . . 81
-Install Database . . . 82
Print . . . 83
-Printing Event Current Record . . . 83
-Printing Event Records On Screen. . . 84
-Printing Event All Records . . . 85
Exit . . . 86
Chapter 6 - INSTALL DATABASES . . . 87
Install Databases . . . 87
-Procedure . . . 87
Page
Appendix A - EXAMPLE SCHEDULED EVENTS . . . A1
LIST OF FIGURES
Figure Title Page
2-1 Main Menu Screen . . . 6
3-1 Main Menu Screen - Select Stations Database. . . 9
3-2 Stations Database Screen. . . 10
3-3 Find Station by Extension Screen . . . 18
3-4 Find Station by Description Screen . . . 20
4-1 Main Menu Screen - Select Groups Database . . . 27
4-2 Groups Database Screen . . . 28
5-1 Main Menu Screen - Select Scheduled Events . . . 64
5-2 Scheduled Events Screen . . . 65
Chapter 1
INTRODUCTION
This guide provides the information needed to work effectively with the Student Services software application. This document is based on Release 1 of the Student Services software.
Refer also to the Student Services Installation Guide for additional information. The installation guide describes the screens, parameters, and step-by-step procedures to install and configure all components of the Student Services software.
How To Use This Guide
This guide describes the screens and functions for Administrator operation of Student Services. There are examples of displayed screens and step-by-step procedures. The steps to perform a given task (Adding a Station, for example) are given in sequence and marked as: Step 1...Step 2...etc.
Guide
Organization
Chapter 1 - Introduction
This chapter details how to use this guide, the actual guide organization, and an overview of Student Services.
Chapter 2- Getting Started
Getting Started describes the procedures for logging on, main menu screen format, and program Exit functions.
Chapter 3- Stations Database
Chapter 3 explains the Stations Database and all procedures for adding, deleting, or modifying stations.
Chapter 4- Groups Database
This chapter describes the Groups Database and all procedures for adding, deleting, or modifying groups and group stations.
Chapter 5- Scheduled Events
Chapter 5 describes the procedures for adding, deleting or modifying group and station scheduled events.
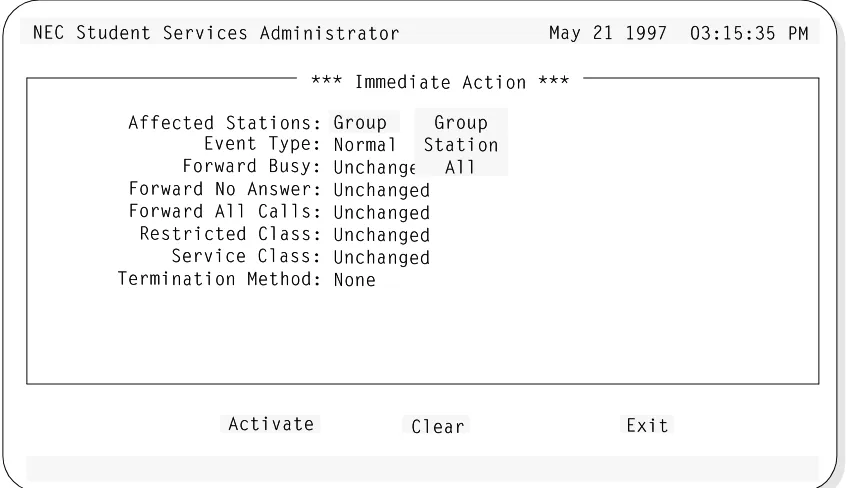
Chapter 6- Install Databases & Immediate Action
The chapter describes the procedures for Installing the databases to the PBX and procedures for performing an Immediate Action change.
Chapter 7- Special Functions
How To Use This Guide (Cont)
Appendix A - Example Scheduled Events
The Appendix provides further information on the types of events and how they function. Examples are shown for typical applications of Normal and Special events.
What is Student Services?
Overview
Student Services is an application software package for the NEC Open ApplicationInterface (OAI) environment. It operates on an NEC User Application Processor (UAP) system, in conjunction with an NEC PBX.
The Student Services application is designed to meet the needs of a student housing facility. It provides a telephone system Administrator’s interface for feature and operational scheduling of designated telephone stations and station groups.
The application updates station parameters directly to the premises NEC PBX. The PBX applies these parameters to the designated stations, providing telephone service restrictions or service changes based on a defined schedule.
Application &
Functions
Often in a student housing environment, telephone service must be limited and operational capabilities changed on a scheduled basis. Daily, weekly, and special term scheduling may be required depending on the facility. Additionally, the telephone privileges and scheduling may be different for select groups of users.
Student Services provides a database for station telephone functions. The database allows existing stations to be scheduled for special operation according to the defined parameters for the schedule. Stations can also be grouped in a group database where parameters can be defined and scheduled over the whole group.
Databases
The Student Services software application is comprised of multiple databases.What is Student Services? (Cont)
The software uses two copies of these databases; the Working database and the Installed database. The working database allows changes to be made to Student
Services Stations, Groups, or Scheduled Events without affecting the realtime operation of the PBX system. The installed database is the data base actually being used realtime by the PBX for Student Services data.
When changes are made to any of the three primary databases, they are first made to the working database copy. It is this working copy that is being changed from any of the menus and functions of the Student Services software. The Install Databases function of the Student Services application (or when exiting the program) will install the current working database as the new installed database.
This process ensures the PBX operates on complete data and only receives any changes all at once. This also allows major changes to the working database to be discarded if an error is made, before installing to the PBX.
Stations Groups ScheduledEvents
Stations Groups ScheduledEvents
Working Database
Installed Database
Chapter 2
GETTING STARTED
Review the sections in this chapter for software logon and startup, and general main menu screen information.
Keyboard Conventions
All letter and number keys are used to enter data in the various menu functions. The following keys are also used:
• Enter Accepts a selection or field entry.
• Esc Exits the current screen or action and moves to the previous screen or action.
• Arrow keys Moves to select the next menu item or data field.
• BkSp Erases the character to the left of the cursor.
• Tab Moves to select the next window or command field.
• Back Tab (Shift+Tab) Moves to select the previous window or command field.
Step Procedures
The Student Services functions and associated screen displays are described in this guide. In addition, Step-by-Step procedures show how to perform a specific function or action. This will be shown in a procedure section for the action, and uses the Step 1, Step 2, etc. terminology to illustrate the steps. (This can be seen below in the Log In procedure.)
Logging in to Student Services
Student Services is a software application that executes on a UAP (User
Application Processor). From the UAP terminal, follow the steps below to login and start Student Services:
Step 1: At the Login: prompt, type stactrl (lower case) and press Enter. - If the system is configured for a password, a password prompt will be
displayed. Type your password at the prompt and press Enter.
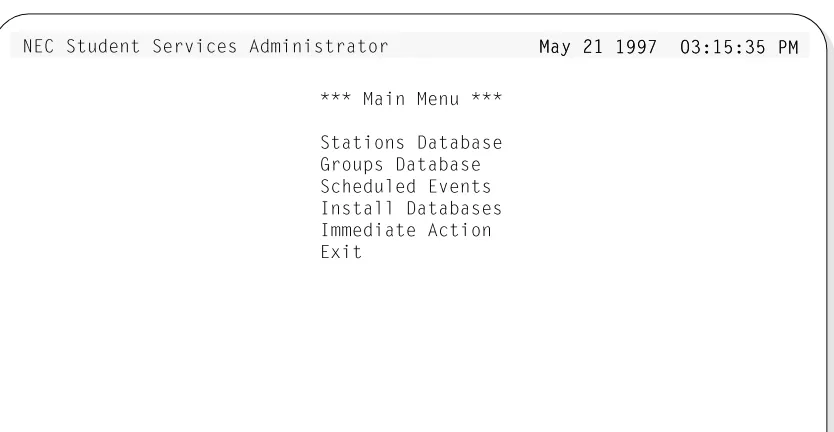
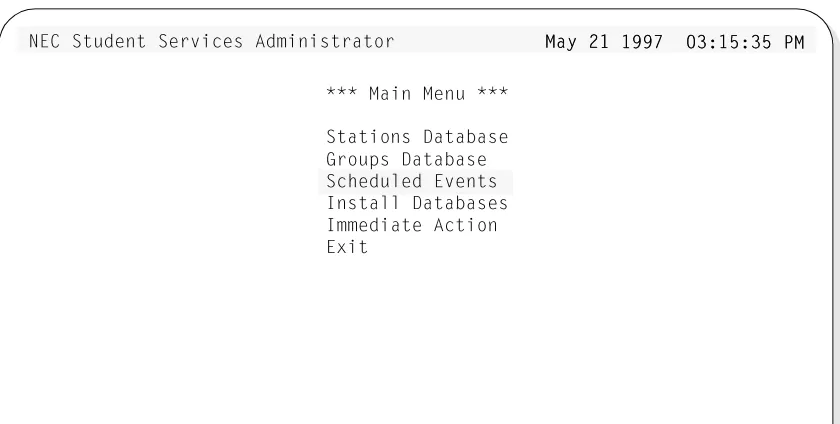
Main Menu Screen
Figure 2-1 Main Menu Screen
The Main Menu screen is divided into three areas:
• Title Bar At the top of the screen, shows the application title and current system date and time.
• Message Bar At the bottom of the screen, any system status or error messages will be displayed in this area.
• Command The center area of the screen, between the Title and Message bars, will show specific menu selections, function windows, and action messages. This area will change depending on what function or action is being performed.
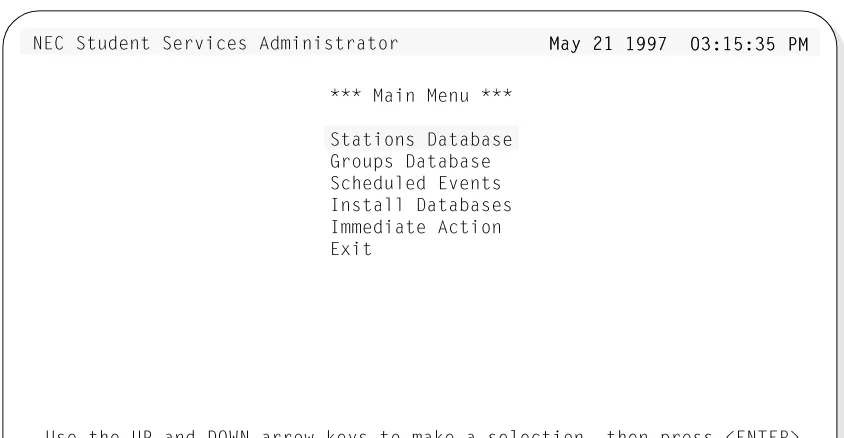
Selecting Menu
Items
Select menu items from the screen using the Up and Down arrow keys to highlight the desired function. Each menu selection can also be selected by a specific “Hot Key” character, displayed in Bold.
For example: Stations Database
>53 CdeTU^d CUbfYSUc 1T]Y^YcdbQd_b =Qi "=Qi "!! !))' #*!%*#%!))' #*!%*#% @@==
=QY^ =U^e
CdQdY_^c 4QdQRQcU 7b_e`c 4QdQRQcU CSXUTe\UT 5fU^dc 9^cdQ\\ 4QdQRQcUc 9]]UTYQdU 1SdY_^ 5hYd
Main Menu Screen (Cont)
Main Commands
Some Main Menu command selections and their functions are described in detailin other chapters of this guide:
• Stations Database - See Chapter 3
• Groups Database - See Chapter 4
• Scheduled Events - See Chapter 5, Appendix A
• Install Databases - See Chapter 6
• Immediate Action - See Chapter 6
• Exit - See this chapter
Refer to these chapters for specific information on these functions.
Screen Saver
The Student Services application uses a screen saver function to avoid screen image burn-in of the terminal display. If when in Student Services, no keys are pressed for a period of time, the screen will clear and display a message. Both the time period and the displayed message are configurable in the application
configuration files. Pressing any key will deactivate the screen saver and redisplay the screen that was previously in use.
Screen Scrolling
Many functions use scrolling windows to display database entries. Each window shows a highlight bar which indicates the current selected entry. Use the UP and DOWN arrow keys to move the highlight bar through the database entries to the desired record entry.
With many entries, all may not display in the window. The UP and DOWN arrow keys will move through the database entries one entry at a time, and scroll the window entries accordingly.
The HOME key can be used to position the highlight bar to the first entry in the database and Top will be displayed in the window lower right corner.
The END key can be used to position the highlight bar to the last entry in the database and End will be displayed in the window lower right corner.
Exit Student Services
Follow the steps to exit the Student Services application:
Procedure
Step 1: Go to the Student Services Main Menu.Step 2: Use the UP and DOWN arrow keys to select Exit from the menu and press Enter.
- If changes have been made in one of the databases, the following window will be displayed.
- Select the Install Now option to install the current working database to the PBX. When returned to the Main Menu after installing database, select Exit again and press Enter to exit the application.
G1B>9>7* DXU G_
G1B>9>7* DXU G_bb[Y^W 4QdQRQcU X[Y^W 4QdQRQcU XQQc RUU^ ]_TYVYUTc RUU^ ]_TYVYUT RRed ^_d Y^cdQ\\Ued ^_d Y^cdQ\\UTT I_e ]Qi
I_e ]Qi Y^cdQ\\ YdY^cdQ\\ Yd ^^_g _b UhYd Q^T_g _b UhYd Q^T \\__cU Q\\ ]_TYVY__cU Q\\ ]_TYVYSSQdY_^cQdY_^c G_b[Y^W 4QdQ
G_b[Y^W 4QdQRRQcU =_TYVYUTQcU =_TYVYUT
Chapter 3
STATIONS DATABASE
The Stations Database contains the station numbers and descriptions for all stations used in Student Services. These stations are existing stations in the telephone PBX system.
A Note on Selecting Commands
In the following procedures, a step may call for pressing the Tab key to select a command. It may be required to press the Tab key multiple times in order to select the specific command. When reading a step, understand to press the Tab key (as needed) to select the specified command.
Using the Stations Database
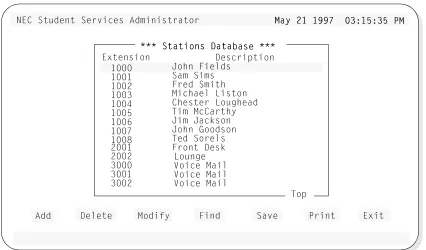
Step 1: From the Student Services Main Menu (Figure 3-1), select Stations Da-tabase and press Enter.
Figure 3-1 Main Menu Screen - Select Stations Database
Step 2: The Stations Database screen will be displayed (See Figure 3-2). The screen will display the top entries of the database.
Continue to the next page...
>53 CdeTU^d CUbfYSUc 1T]Y^YcdbQd_b =Qi "=Qi "!! !))' #*!%*#%!))' #*!%*#% @@==
=QY^ =U^e
7b_e`c 4QdQRQcU CSXUTe\UT 5fU^dc 9^cdQ\\ 4QdQRQcUc 9]]UTYQdU 1SdY_^ 5hYd
Using the Stations Database (Cont)
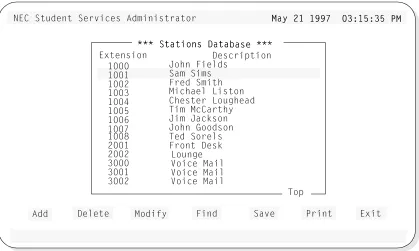
Figure 3-2 Stations Database Screen
The screen window shows the first entries of the Stations Database. Use the UP and DOWN arrow keys to move through the station entries. When at the first entries of the database, Top will be shown in the lower right corner of the window (as shown in Figure 3-2). Likewise, when the end is reached, End will be displayed.
Below the screen window, seven commands are available:
• Add Add a station to the database.
• Delete Delete a station from the database.
• Modify Change an existing station in the database.
• Find Locate a specific station in the database.
• Save Save the current changes to the working database.
• Print Print station information in the database.
• Exit Exit the Stations Database.
>53 CdeTU^d CUbfYSUc 1T]Y^YcdbQd_b =Qi "=Qi "!! !))' #*!%*#%!))' #*!%*#% @@==
CdQdY_^c 4QdQ CdQdY_^c 4QdQRRQcU QcU 5hdU^cY_^
! ! ! " ! # ! $ ! % ! & ! ' ! ( " ! " " # # ! # "
CQ] CY]c 6bUT C]YdX =YSXQU\ <Ycd_^ 3XUcdUb <_eWXUQT DY] =S3QbdXi :Y] :QS[c_^ :_X^ 7__Tc_^ DUT C_bU\c 6b_^d 4Uc[ <_e^WU F_YSU =QY\ 4UcSbY`dY_^ F_YSU =QY\ F_YSU =QY\
1TT 4U\UdU =_TYVi 6Y^T CQfU @bY^d 5hYd ! :_X^ 6YU\Tc
Adding a Station
The Add command will add a station to the Stations Database: Follow the steps to add a station:
Step 1: From the Stations Database screen (Figure 3-2), press Tab to select the Add command (at the bottom of the screen) and press Enter. The follow-ing window will be displayed:
Step 2: Type the extension number of the station to be added to the database and press Enter.
- If the station is already in the database, the existing station information will be displayed in the window (see below). The station description information can now be modified if desired.
Note: The window shows the number and description for the existing station in the database. The window shows the modified information (if any) and the original information (before this modify operation).
Continue to Step 3 on the next page...
D_ 1TT Q CdD_ 1TT Q CdQQdY_^ di`U Y^ QdY_^ di`U Y^ Q\\\ VYU\Tc D_ =_T\ VYU\Tc D_ =_TYYVi Q cdQdY_^Vi Q cdQdY_^ ]_TYVi dXU]_TYVi dXU TUcYbUTTUcYbUT VYU\TcVYU\Tc D_D_ cQfU SXQ^WUccQfU SXQ^WUc cU\USdcU\USd ?[ Q^T `?[ Q^T `bbUccUcc
1TT=_TYVi
1TT=_TYVi 11 CdQdY_^CdQdY_^
3\UQb 3\UQb ?[
?[
,5>D5B. @b,5>D5B. @bUUcc ,5C3. _b cU\cc ,5C3. _b cU\UUSd 5hYd Q^T `bUcSd 5hYd Q^T `bUccc ,5>D5B. gXU^ T,5>D5B. gXU^ T__^U^U
5hYd 5hYd =_T=_TYYVYUTVYUT ?bYW?bYWYY^Q\^Q\
4UcSbY 4UcSbY``dY_^*dY_^*
5hdU^cY_^* 5hdU^cY_^*
DD__ 1TT Q CdQdY_^1TT Q CdQdY_^ di`Udi`U Y^ Q\\ VYU\Y^ Q\\ VYU\TTc D_ =_TYVi Qc D_ =_TYVi Q ccdQdY_^dQdY_^ ]]_TYVi dXU TUcYb_TYVi dXU TUcYbUUT VYU\Tc D_ cQfT VYU\Tc D_ cQfUU SXQ^WUc cU\USSXQ^WUc cU\USdd ?[ Q^T `bUcc?[ Q^T `bUcc
1T
1TTT=_TYVi 1 CdQdY=_TYVi 1 CdQdY__^^
3\ 3\UUQbQb ?[
?[
,,55>D5B. @bUcc ,5C>D5B. @bUcc ,5C33. _b cU\USd 5hY. _b cU\USd 5hYdd Q^T `bUcc ,5>DQ^T `bUcc ,5>D55B. gXU^ T_^UB. gXU^ T_^U
5h 5hYYdd =_TYVYUT
=_TYVYUT ?bYWY^Q\?bYWY^Q\
4UcSbY`dY_^*
Adding a Station (Cont)
Step 3: Type a description for the new station to be added to the database and press Enter. (This description can contain up to 25 characters.)
- The window will now show the new station and description to be added to the database (shown below):
Step 4: Select Ok and press Enter. The following message will be displayed in the screen message bar:
Station 1010 added to the database
- To add more stations, select Clear, press Enter, and repeat this procedure from Step 2.
Step 5: When finished adding stations, press Esc (or select Exit) to return to the Stations Database menu screen.
Step 6: Whenever changes are made to one of the databases, it is recommended the changes be saved to disk before proceeding to another operation. See “Saving & Installing Database” on page 21.
DD__ 1TT Q CdQdY_^1TT Q CdQdY_^ di`Udi`U Y^ Q\\ VYU\Y^ Q\\ VYU\TTc D_ =_TYVi Qc D_ =_TYVi Q ccdQdY_^dQdY_^ ]]_TYVi dXU TUcYb_TYVi dXU TUcYbUUT VYU\Tc D_ cQfT VYU\Tc D_ cQfUU SXQ^WUc cU\USSXQ^WUc cU\USdd ?[ Q^T `bUcc?[ Q^T `bUcc
1T
1TTT=_TYVi 1 CdQdY=_TYVi 1 CdQdY__^^
3\3\UUQbQb ?[
?[
,,55>D5B. @bUcc ,5>D5B. @bUcc ,5CC3. _b cU\USd 5hY3. _b cU\USd 5hYdd Q^T `bUcc ,5>DQ^T `bUcc ,5>D55B. gXU^ T_^UB. gXU^ T_^U
5h 5hYYdd =_TYVYUT
=_TYVYUT ?bYWY^Q\?bYWY^Q\
4UcSbY`dY_^*
Deleting a Station
The Delete command will remove a station from the Stations Database. Follow the steps to delete a station:
Step 1: From the Stations Database screen (Figure 3-2), press Tab to select the Delete command (at the bottom of the screen) and press Enter. The fol-lowing window will be displayed:
Step 2: Type the number of the station to be deleted from the database, and press Enter. The example window (below) shows an entered station number (1010) to be deleted from the database. The window also displays the as-sociated station description.
Step 3: Select Ok and press Enter to delete the station. From the example above, the following message will be displayed in the screen message bar:
Station 1010 removed from the database
- To delete more stations, select Clear, press Enter, and repeat this procedure from Step 2.
Continue to Step 4 on the next page...
DDii`U dXU UhdU^cY_`U dXU UhdU^cY_^^ _V dXU cdQdY_^_V dXU cdQdY_^ dd_ TU\UdU dXU^ `_ TU\UdU dXU^ `bbUcc ,5>D5B.Ucc ,5>D5B. CCU\USd ?[ Q^T `bU\USd ?[ Q^T `bUUcc ,5>D5B. d_ TUcc ,5>D5B. d_ TU\\UdU dXU cdQdY_^UdU dXU cdQdY_^ @bUcc ,5C3.@bUcc ,5C3.
4U
4U\\UdU 1 CdQdY_^UdU 1 CdQdY_^
3\3\UUQbQb ?[
?[
__bb cU\USd 5hYd Q^cU\USd 5hYd Q^TT `bUcc ,5>D5B. g`bUcc ,5>D5B. gXXU^ T_^UU^ T_^U
5h 5hYYdd 4UcSbY`dY_^*
4UcSbY`dY_^* 55hhdU^cY_^*dU^cY_^*
DDii`U dXU UhdU^cY_`U dXU UhdU^cY_^^ _V dXU cdQdY_^_V dXU cdQdY_^ dd_ TU\UdU dXU^ `_ TU\UdU dXU^ `bbUcc ,5>D5B.Ucc ,5>D5B. CCU\USd ?[ Q^T `bU\USd ?[ Q^T `bUUcc ,5>D5B. d_ TUcc ,5>D5B. d_ TU\\UdU dXU cdQdY_^UdU dXU cdQdY_^ @bUcc ,5C3.@bUcc ,5C3.
4U
4U\\UdU 1 CdQdY_^UdU 1 CdQdY_^
3\3\UUQbQb ?[
?[
__bb cU\USd 5hYd Q^cU\USd 5hYd Q^TT `bUcc ,5>D5B. g`bUcc ,5>D5B. gXXU^ T_^UU^ T_^U
5h 5hYYdd 4UcSbY`dY_^*
Deleting a Station (Cont)
Step 4: When finished deleting stations, press Esc (or select Exit) to return to the Stations Database menu.
Step 5: Whenever changes are made to one of the databases, it is recommended the changes be saved to disk before proceeding to another operation. See “Saving & Installing Database” on page 21.
Modifying a Station
The Modify command will change the information for a station in the Stations Database. Follow the steps to Modify a station:
Step 1: From the Stations Database screen (Figure 3-2), press Tab to select the Modify command (at the bottom of the screen) and press Enter. The fol-lowing window will be displayed:
Step 2: Type the extension number of the station to be modified and press Enter. An example window for station 1008 is shown below:
Note: The window shows the number and description for the existing station in the database. The window shows the modified information (if any) and the original information (before this modify operation).
Step 3: Modify the extension description as desired, and press Enter.
Continue to Step 4 on the next page... D_ 1
D_ 1TTT Q CdQdY_^ diT Q CdQdY_^ di``U Y^ Q\\ VYU\TcU Y^ Q\\ VYU\Tc D_D_ =_TYVi Q cdQ=_TYVi Q cdQddY_^Y_^ ]_T
]_TYYVi dXU TUcYbUTVi dXU TUcYbUT VVYU\Tc D_ cQfU SYU\Tc D_ cQfU SXXQ^WUc cU\USd ?Q^WUc cU\USd ?[[ Q^T `bUccQ^T `bUcc 1TT
1TT==_TYVi 1 CdQdY_^_TYVi 1 CdQdY_^
3\UQb3\UQb ?[
?[ ,5>D
,5>D55B. @bUcc ,5C3.B. @bUcc ,5C3. _b_b cU\USd 5hYd QcU\USd 5hYd Q^^T `bUcc ,5>D5B.T `bUcc ,5>D5B. gXU^gXU^ T_^UT_^U
5hYd 5hYd =_TYVYUT
=_TYVYUT ?bYWY^Q\?bYWY^Q\
4UcSbY`dY_^* 4UcSbY`dY_^*
5hdU 5hdU^^cY_^*cY_^*
D_ 1
D_ 1TTT Q CdQdY_^ diT Q CdQdY_^ di``U Y^ Q\\ VYU\TcU Y^ Q\\ VYU\Tc D_D_ =_TYVi Q cdQ=_TYVi Q cdQddY_^Y_^ ]_T
]_TYYVi dXU TUcYbUTVi dXU TUcYbUT VVYU\Tc D_ cQfU SYU\Tc D_ cQfU SXXQ^WUc cU\USd ?Q^WUc cU\USd ?[[ Q^T `bUccQ^T `bUcc 1TT
1TT==_TYVi 1 CdQdY_^_TYVi 1 CdQdY_^
3\UQb3\UQb ?[
?[ ,5>D
,5>D55B. @bUcc ,5C3.B. @bUcc ,5C3. _b_b cU\USd 5hYd QcU\USd 5hYd Q^^T `bUcc ,5>D5B.T `bUcc ,5>D5B. gXU^gXU^ T_^UT_^U
5hYd 5hYd =_TYVYUT
=_TYVYUT ?bYWY^Q\?bYWY^Q\
4UcSbY`dY_^*
Modifying a Station (Cont)
Step 4: Select Ok and press Enter to modify the station. From the example, the following message will be displayed in the screen message bar:
Station 1008 has been modified
- To modify more stations, select Clear, press Enter, and repeat this procedure from Step 2.
Step 5: Whenever changes are made to one of the databases, it is recommended the changes be saved to disk before proceeding to another operation. See “Saving & Installing Database” on page 21.
Finding a Station
The Find command can be used to locate a station in the database by extension or by description. Follow the steps to find a station in the Stations Database:
Finding by
Extension
Follow the steps to Find a station by extension number.
Step 1: From the Stations Database screen (Figure 3-2), press Tab to select the Find command (at the bottom of the screen) and press Enter. The fol-lowing window will be displayed:
Step 2: Use the UP and DOWN arrow keys to select the Extension field and press Enter. The following window will be displayed:
Step 3: Type the extension number of the station to find, select the Ok option and press
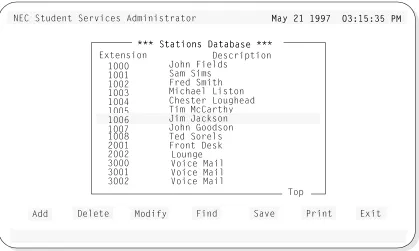
Enter. The Stations Database screen will be displayed, with the found extension. (This is shown in Figure 3-3, of an example search for exten-sion 1006.)
Continue to step 4 on the next page...
EcU dXU E@ Q^TEcU dXU E@ Q^T 44?G> 1bb_g [Uic?G> 1bb_g [Uic dd_ cU\USd dXU_ cU\USd dXU VYU\T di`U ecUVYU\T di`U ecUTT d_ VY^T Q cdQdd_ VY^T Q cdQdYY_^ Q^T `bUcc_^ Q^T `bUcc
66YY^T 1 CdQdY_^^T 1 CdQdY_^
,5>D
,5>D55B. _b `bUcc ,5B. _b `bUcc ,5CC3. d_ SQ^SU\3. d_ SQ^SU\ 4Uc 4UcSSbY`dY_^bY`dY_^ 5hd 5hdUU^cY_^^cY_^ 3Q^ 3Q^SSU\U\ Di`U dXU
Di`U dXU UhdU^cY_^ _UhdU^cY_^ _VV dXU cdQdY_^ d_dXU cdQdY_^ d_ VVY^T dXU^Y^T dXU^ cU\U
cU\USSd ?; Q^T `bUccd ?; Q^T `bUcc ,,5>D5B. @bUcc ,55>D5B. @bUcc ,5CC3. _b3. _b 6Y^T 1
6Y^T 1 CdQdY_^ 2i 5hCdQdY_^ 2i 5hddU^cY_^U^cY_^
cU\U
cU\USSd 3Q^SU\ Q^T `bd 3Q^SU\ Q^T `bUUcc ,5>D5B. d_ SQcc ,5>D5B. d_ SQ^^SU\SU\ 5hdU
5hdU^^cY_^*cY_^*
3\UQ3\UQbb ?[
Finding a Station (Cont)
Finding by
Extension (Cont)
The example Find a Station result screen of a find for extension 1006.
Figure 3-3 Find Station by Extension Screen
Step 4: At this point, any of the Stations Database commands of Add, Delete, Modify, Find, Save, and Print can be performed.
>53 CdeTU^d CUbfYSUc 1T]Y^YcdbQd_b =Qi "=Qi "!! !))' #*!%*#%!))' #*!%*#% @@==
CdQdY_^c 4QdQ CdQdY_^c 4QdQRRQcU QcU 5hdU^cY_^
! ! ! " ! # ! $ ! % ! ' ! ( " ! " " # # ! # "
CQ] CY]c 6bUT C]YdX =YSXQU\ <Ycd_^ 3XUcdUb <_eWXUQT DY] =S3QbdXi :_X^ 7__Tc_^ DUT C_bU\c 6b_^d 4Uc[
<_e^WU F_YSU =QY\
4UcSbY`dY_^
F_YSU =QY\ F_YSU =QY\
1TT 4U\UdU =_TYVi 6Y^T CQfU @bY^d 5hYd ! :_X^ 6YU\Tc
Finding a Station (Cont)
Finding by
Description
Follow the steps to Find a station by description.
Step 1: From the Stations Database screen (Figure 3-2), press Tab to select the Find command (at the bottom of the screen) and press Enter. The fol-lowing window will be displayed:
Step 2: Use the UP and DOWN arrow keys to select the Description field and press Enter. The following window will be displayed:
Step 3: Type the description of the station to find, select the Ok option and press Enter. The Stations Database screen will be displayed, with the found station description. (This is shown in Figure 3-4, of an example search for description Sam Sims.)
Note: The description must be exact as it is in the database. A “wildcard” char-acter (*) can be used and the Find will locate the first occurrence of the most complete match.
EXAMPLE: A find for Sam Sims...
Sam * or Sam S* or Sam Si*, etc. could be typed as a find parameter. EcU dXU E@ Q^TEcU dXU E@ Q^T 44?G> 1bb_g [Uic?G> 1bb_g [Uic dd_ cU\USd dXU_ cU\USd dXU
VYU\T di`U ecUVYU\T di`U ecUTT d_ VY^T Q cdQdd_ VY^T Q cdQdYY_^ Q^T `bUcc_^ Q^T `bUcc 66YY^T 1 CdQdY_^^T 1 CdQdY_^
,5>D
,5>D55B. _b `bUcc ,5B. _b `bUcc ,5CC3. d_ SQ^SU\3. d_ SQ^SU\ 4Uc 4UcSSbY`dY_^bY`dY_^ 5hd 5hdUU^cY_^^cY_^ 3Q^ 3Q^SSU\U\ Di`U dXU
Di`U dXU TUcSbY`dY_^TUcSbY`dY_^ _V_V dXU cdQdY_^ ddXU cdQdY_^ d__ VY^T dXU^VY^T dXU^ cU\U
cU\USSd ?; Q^T `bUccd ?; Q^T `bUcc ,,5>D5B. @bUcc ,55>D5B. @bUcc ,5CC3. _b3. _b 6Y^T 1
6Y^T 1 CdQdY_^ 2i 4UCdQdY_^ 2i 4UccSbY`dY_^SbY`dY_^
cU\U
cU\USSd 3Q^SU\ Q^T `bd 3Q^SU\ Q^T `bUUcc ,5>D5B. d_ SQcc ,5>D5B. d_ SQ^^SU\SU\ 4UcS
4UcSbbY`dY_^*Y`dY_^*
3\UQ3\UQbb ?[
Finding a Station (Cont)
Finding by
Description (Cont)
The example Find a Station result screen of a find for description Sam Sims.
Figure 3-4 Find Station by Description Screen
Step 4: At this point, any of the Stations Database commands of Add, Delete, Modify, Find, Save, and Print can be performed.
>53 CdeTU^d CUbfYSUc 1T]Y^YcdbQd_b =Qi "=Qi "!! !))' #*!%*#%!))' #*!%*#% @@==
CdQdY_^c 4QdQ CdQdY_^c 4QdQRRQcU QcU 5hdU^cY_^
! " ! # ! $ ! % ! ' ! ( " ! " " # # ! # "
6bUT C]YdX =YSXQU\ <Ycd_^ 3XUcdUb <_eWXUQT DY] =S3QbdXi :_X^ 7__Tc_^ DUT C_bU\c 6b_^d 4Uc[ <_e^WU F_YSU =QY\ 4UcSbY`dY_^ F_YSU =QY\ F_YSU =QY\
1TT 4U\UdU =_TYVi 6Y^T CQfU @bY^d 5hYd :_X^ 6YU\Tc
D_` ! & :Y] :QS[c_^
CQ] CY]c !
Saving & Installing Database
Changes made to the Stations Database using the Add, Delete or Modify
commands are first changed to UAP memory. It is recommended, when a series of changes are made that the changes are saved.
The Save command saves any current changes in UAP memory to the UAP hard disk. This prevents an error made in a later change operation from affecting any previous changes.
For example: When adding stations, add all the needed stations. Before proceeding to any other operation (such as deleting or modifying a station); save these add changes. Then, if an error is encountered in a later modify operation, a cancel or clear to start over will not affect the changes made in the previous Add operation.
The databases will not become recognized by the system, until the databases have been installed in the system. Unlike the save command following each database change, the Install Databases command only needs to be performed when all changes to any (and all) of the Student Services database are completed.
Save Database
Follow the steps below to save the database.Step 1: From the Stations database screen (Figure 3-2), press Tab to select the Save command, and press Enter. The following window will be dis-played:
Step 2: Select Yes and press Enter to save all changes. The following will be dis-played in the screen message bar:
The changes made to the Stations Database have been saved
Step 3: If finished with the Stations Database, press Esc or select Exit to return to the Student Services Main Menu.
Continue to Install Database on the next page... 4_ i_e gQ^d d_
4_ i_e gQ^d d_ ccQfU dXU SXQ^WUcQfU dXU SXQ^WUc ]QTU d_ dXU Cd
]QTU d_ dXU CdQQdY_^c 4QdQRQcU/dY_^c 4QdQRQcU/ CQfU CdQdY_^c
CQfU CdQdY_^c 4QdQRQcU4QdQRQcU
>>__ IUc
Install Database
The Install Database function installs the Student Services Working Database to the PBX. The working database then becomes the installed database that the PBX will operate from. Until the working database is installed, the PBX will not be able to implement any changes made to station parameters in Student Services.Note: This step only needs to be performed if no other changes to any of the databases will be made at this time. Otherwise complete any other changes and then per-form a Install Databases procedure.
Follow the step below to install the database.
Step 1: From the Student Services Main Menu, select the Install Databases function, and press Enter. The following message appears in the screen message bar:
The Working Database has been installed
- If no changes have been made to the working database, the following window will be displayed:
This completes the Save and Install Databases procedures... DXU G_b[Y^W
DXU G_b[Y^W 44QdQRQcU XQc ^_dQdQRQcU XQc ^_d RRUU^ ]_TYVYUT cYUU^ ]_TYVYUT cY^^SU dXUSU dXU \Qcd Y^cdQ\\QdY_^
\Qcd Y^cdQ\\QdY_^ II__e ]Qi Y^cdQ\\ Yde ]Qi Y^cdQ\\ Yd QWQY^QWQY^ _b SQ^SU\_b SQ^SU\ G_b[Y^W 4QdQ
G_b[Y^W 4QdQRRQcU E^SXQ^WUTQcU E^SXQ^WUT
3Q^SU\ 3Q^SU\ 9^cdQ\\ 1WQY
Station Database information can be printed to a hardcopy printer device. Three Print command options are available:
Current Record Prints the current record selected on the Stations Database screen window.
Records On Screen Prints all records shown in the window on the Stations database screen.
All Records Prints all the records in the Stations Database.
Follow the next procedures for these print options:
Printing the
Current Record
This prints the current record of the selected station.
Step 1: From the Stations database screen (Figure 3-2), use the UP and DOWN arrow keys to select the station record to be printed.
Step 2: Press Tab to select the Print command, and press Enter. The following window will be displayed:
Step 3: Use the UP and DOWN arrow keys to select the Current Record option and press Enter.
Step 4: Select Print and press Enter. The following message (for an example station 1008) will be displayed in the screen message bar and the record will be printed on the online printer device.
Printing Station 1008
Step 5: If finished with the Stations Database, press Esc or select Exit to return to the Student Services Main Menu.
CU\U
CU\USSd dXU bUS_bTc dd dXU bUS_bTc d__ `bY^d dXU^ cU\`bY^d dXU^ cU\UUSd @bY^d Q^T `bSd @bY^d Q^T `bUUcc ,5>D5B.cc ,5>D5B. @bUc
@bUccc ,5C3. _b cU\US,5C3. _b cU\USdd 3Q^SU\ Q^T `bUc3Q^SU\ Q^T `bUccc ,5>D5B. d_ SQ^,5>D5B. d_ SQ^SSU\U\ @bY^d CdQdY_
@bY^d CdQdY_^^c 4QdQRQcUc 4QdQRQcU
@bY^
@bY^dd 3Q^SU\3Q^SU\ BUS_
BUS_bbTc d_ @bY^d*Tc d_ @bY^d* 3ebb3ebbUU^d BUS_bT^d BUS_bT
Print (Cont)
Printing Records
On Screen
Prints the records of the stations displayed in the window of the Stations Database screen.
Step 1: From the Stations database screen (Figure 3-2), use the UP and DOWN arrow keys to select the station records in the window to be printed. All station records shown within this window will be printed
Step 2: Press Tab to select the Print command, and press Enter. The following window will be displayed:
Step 3: Use the UP and DOWN arrow keys to select the Records On Screen op-tion and press Enter.
Step 4: Select Print and press Enter. The following message will be displayed in the screen message bar and the records will be printed on the online printer device.
Printing the stations shown on screen
Step 5: If finished with the Stations Database, press Esc or select Exit to return to the Student Services Main Menu.
CU\U
CU\USSd dXU bUS_bTc dd dXU bUS_bTc d__ `bY^d dXU^ cU\`bY^d dXU^ cU\UUSd @bY^d Q^T `bSd @bY^d Q^T `bUUcc ,5>D5B.cc ,5>D5B. @bUc
@bUccc ,5C3. _b cU\US,5C3. _b cU\USdd 3Q^SU\ Q^T `bUc3Q^SU\ Q^T `bUccc ,5>D5B. d_ SQ^,5>D5B. d_ SQ^SSU\U\ @bY^d CdQdY_
@bY^d CdQdY_^^c 4QdQRQcUc 4QdQRQcU
@bY^
@bY^dd 3Q^SU\3Q^SU\ BUS_
BUS_bbTc d_ @bY^d*Tc d_ @bY^d* 3ebb3ebbUU^d BUS_bT^d BUS_bT
Print (Cont)
Printing All
Records
Prints the records for all stations in the Stations Database.
Step 1: From the Stations database screen (Figure 3-2), press Tab to select the Print command, and press Enter. The following window will be dis-played:
Step 2: Use the UP and DOWN arrow keys to select the All Records option and press Enter.
Step 3: Select Print and press Enter. The following message will be displayed in the screen message bar and the records will be printed on the online printer device.
Printing all stations
Step 4: If finished with the Stations Database, press Esc or select Exit to return to the Student Services Main Menu.
CU\U
CU\USSd dXU bUS_bTc dd dXU bUS_bTc d__ `bY^d dXU^ cU\`bY^d dXU^ cU\UUSd @bY^d Q^T `bSd @bY^d Q^T `bUUcc ,5>D5B.cc ,5>D5B. @bUc
@bUccc ,5C3. _b cU\US,5C3. _b cU\USdd 3Q^SU\ Q^T `bUc3Q^SU\ Q^T `bUccc ,5>D5B. d_ SQ^,5>D5B. d_ SQ^SSU\U\ @bY^d CdQdY_
@bY^d CdQdY_^^c 4QdQRQcUc 4QdQRQcU
@bY^
@bY^dd 3Q^SU\3Q^SU\ BUS_
BUS_bbTc d_ @bY^d*Tc d_ @bY^d* 3ebb3ebbUU^d BUS_bT^d BUS_bT
Exit
Follow the step to exit the Stations Database function.
Step : From the Stations database screen (Figure 3-2), press Tab to select the Exit command, and press Enter.
- If changes have been made and not saved to the database, The following window will be displayed:
- Select Yes and press Enter to save all changes. The following will be displayed in the screen message bar:
The changes made to the Stations Database have been saved
4_ i_e gQ^d d_
4_ i_e gQ^d d_ ccQfU dXU SXQ^WUcQfU dXU SXQ^WUc ]QTU d_ dXU Cd
]QTU d_ dXU CdQQdY_^c 4QdQRQcU/dY_^c 4QdQRQcU/ CQfU CdQdY_^c
CQfU CdQdY_^c 4QdQRQcU4QdQRQcU
>>__ IUc
Chapter 4
GROUPS DATABASE
The Groups Database contains named groups of stations used in Student Services functions. This allows common use stations to be grouped and events scheduled for the group.
A Note on Selecting Commands
In the following procedures, a step may call for pressing the Tab key to select a command. It may be required to press the Tab key multiple times in order to select the specific command. When reading a step, understand to press the Tab key (as needed) to select the specified command.
Using the Groups Database
Step 1: From the Student Services Main Menu (Figure 4-1), select Groups Da-tabase and press Enter.
Figure 4-1 Main Menu Screen - Select Groups Database
Step 2: The Groups Database screen will be displayed (See Figure 4-2). The screen will display the top entries of the database.
Continue to the next page...
Stations Database
NEC Student Services Administrator May 21 1997 03:15:35 PM
*** Main Menu ***
Groups Database Scheduled Events Install Databases Immediate Action Exit
Using the Groups Database (Cont)
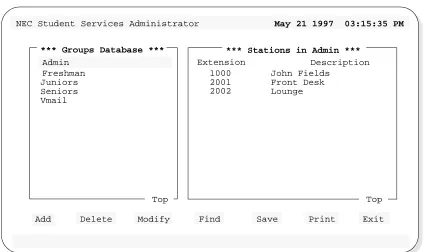
Figure 4-2 Groups Database Screen
The left screen window shows the first entries of the Groups Database. Use the UP and DOWN arrow keys to move through the group entries. When at the first entries of the database, Top will be shown in the lower right corner of the window (as shown in Figure 4-2). Likewise, when the end is reached, End will be displayed.
The right screen window shows the stations that have been assigned to the selected group. In the screen example (Figure 4-2), the Admin group is selected on the left. The stations shown on the right are the stations that have been assigned to the Admin group. Using the Up and Down arrow keys to move through the groups on the left, will display the associated stations for that group on the right.
Below the screen window, seven commands are available:
• Add Add a group to the database, or station to a group.
• Delete Delete a group from the database, or station from a group.
• Modify Change an existing group or station in the database.
• Find Locate a specific group or station in the database.
NEC Student Services Administrator May 21 1997 03:15:35 PM
*** Groups Database ***
Add Delete Modify Find Save Print Exit
Top
Extension Description
1000 John Fields
2001 2002
Front Desk Lounge
*** Stations in Admin ***
Seniors Freshman Admin
Juniors
Vmail
Add
The Add command will add a new group to the Groups Database and add a station to a group. Follow the steps for these two procedures:
Adding a New
Group
Follow the steps to add a new group to the Groups Database.
Step 1: From the Groups Database screen (Figure 4-2), press Tab to select the Add command (at the bottom of the screen) and press Enter. The follow-ing window will be displayed:
Step 2: Select Groups Database and press Enter. The following window will be displayed:
Step 3: Type the name of the group to be added to the database and press Enter.
Continue to Step 4 on the next page...
Do you want this command to apply to the groups database, or to the stations in the group?
Groups Database Or Stations In Group
Cancel Groups Database Stations In Group
Type the group name, then select Ok and press <ENTER> to save changes. Press <ESC> or select Exit and press <ENTER> when done.
Add/Modify A Group
Clear
Ok Exit
Modified Original
Add (Cont)
Adding a New
Group (Cont)
Step 4: Select the Ok command and press Enter. The following message will be displayed in the screen message bar (for an example new group of Class 8):
Group “Class 8” added to the database
- To add more groups, select Clear, press Enter, and repeat this procedure from Step 3.
Step 5: When finished adding groups, press Esc to return to the Groups Database screen.
Step 6: Whenever changes are made to one of the databases, it is recommended the changes be saved to disk before proceeding to another operation. See “Saving & Installing Database” on page 50.
Add (Cont)
Adding a Station In
Group
Follow the steps to add a station to a group.
Step 1: From the Groups Database screen (Figure 4-2), use the UP and DOWN arrow keys to select a group (in the left window) to add a station.
Step 2: Press Tab to select the Add command (at the bottom of the screen) and press Enter. The following window will be displayed:
Step 3: Select Stations In Group and press Enter. The following window will be displayed:
Continue to Step 4 on the next page...
Do you want this command to apply to the groups database, or to the stations in the group?
Groups Database Or Stations In Group
Cancel Groups Database Stations In Group
To Add a Station, type in all fields. To Modify a station, modify the desired fields. To save changes, select Ok and press
Add/Modify A Station
Clear Ok
<ENTER>. Press <ESC> or select Exit and press <ENTER> when done.
Exit
Modified Original
Description:
Add (Cont)
Adding a Station In
Group (Cont)
Step 4: Type the extension number of the station and press Enter. The following window will be displayed (for an example station 1000):
Note: The window shows the number and description for the existing station in the database. The window shows the modified information (if any) and the original information.
- A station not yet defined in the Stations Database can also be added at this step. The new station will be added to both the Stations Database and added to this group in one operation.
5.Type the extension number of the new station and press Enter (as above). A new station will not have a description (as shown above).
6.Type the description for the new station and press Enter. Now continue to Step 5.
Step 5: Select Ok and press Enter. The following message will be displayed in the screen message bar (for the example station 1000, added to group Ad-min):
Station 1000 added to group “Admin”
- To add more stations, select Clear, press Enter, and repeat this procedure from Step 4.
To Add a Station, type in all fields. To Modify a station, modify the desired fields. To save changes, select Ok and press
Add/Modify A Station
Clear Ok
<ENTER>. Press <ESC> or select Exit and press <ENTER> when done.
Exit
Modified Original
Description: Extension:
John Fields John Fields
Add (Cont)
Adding a Station In
Group (Cont)
Step 6: When finished adding stations in groups, press Esc (or select Exit) to re-turn to the Groups Database menu screen.
Step 7: Whenever changes are made to one of the databases, it is recommended the changes be saved to disk before proceeding to another operation. See “Saving & Installing Database” on page 50.
Delete
The Delete command will delete a group from the Groups Database and delete a station from a group. Follow the steps for these two procedures:
Deleting a Group
Follow the steps to delete a group from the Groups Database:Step 1: From the Groups Database screen (Figure 4-2), press Tab to select the Delete command (at the bottom of the screen) and press Enter. The fol-lowing window will be displayed:
Step 2: Select Groups Database and press Enter. The following window will be displayed:
Step 3: Type the name of the group to be deleted from the database, and press Enter. The example window (below) shows an entered group name (Ad-min) to be deleted from the database.
Do you want this command to apply to the groups database, or to the stations in the group?
Groups Database Or Stations In Group
Cancel Groups Database Stations In Group
Type the name of the group to delete then press <ENTER>.
<ESC> or select Exit and press <ENTER> when done. Delete A Group
Clear
Ok Exit
Group Name:
Select Ok and press <ENTER> to delete the group. Press
Delete A Group
Delete (Cont)
Deleting a Group
(Cont)
Step 4: Select Ok and press Enter to delete the group. From the example, the lowing message will be displayed in the screen message bar and the fol-lowing window will be displayed:
Group Admin removed from the database
Step 5: Select Yes or No and press Enter.
- CAUTION ---- If answering Yes, all stations that were assigned to the deleted group will also be removed from the Stations Database. Consider whether any of these stations are also assigned to other groups or whether they might be reassigned to another group later. If these stations were removed now and needed later, they will have to be added back to the Stations Database.
- To delete more groups, repeat this procedure from Step 3.
Step 6: When finished deleting groups, press Esc (or select Exit) to return to the Groups Database menu.
Step 7: Whenever changes are made to one of the databases, it is recommended the changes be saved to disk before proceeding to another operation. See “Saving & Installing Database” on page 50.
This completes the Deleting a Group procedure...
Do you want to delete all stations used by this group from the Stations Database?
Delete Group Stations
No Yes
Delete (Cont)
Deleting a Station
In Group
Follow the steps to delete a station from a group.
Step 1: From the Groups Database screen (Figure 4-2), use the UP and DOWN arrow keys to select a group (in the left window) to delete a station.
Step 2: Press Tab to select the Delete command (at the bottom of the screen) and press Enter. The following window will be displayed:
Step 3: Select Stations In Group and press Enter. The following window will be displayed:
Do you want this command to apply to the groups database, or to the stations in the group?
Groups Database Or Stations In Group
Cancel Groups Database Stations In Group
Type the extension of the station to delete then press <ENTER> Select Ok and press <ENTER> to delete the station. Press <ESC>
Delete A Station
Clear Ok
or select Exit and press <ENTER> when done.
Exit Description:
Delete (Cont)
Deleting a Station
In Group (Cont)
Step 4: Type the extension number of the station and press Enter. The following window will be displayed (for an example station 1000):
Step 5: Select Ok and press Enter. The following message will be displayed in the screen message bar (for the example station 1000):
Station 1000 removed from the database
- To delete more stations from this group, select Clear, press Enter, and repeat this procedure from Step 4.
- If a station extension is typed that is not part of this group, a message will be displayed in the screen message bar indicating the station could not be found. Ensure the station to be deleted is part of the selected group.
Step 6: When finished deleting stations, press Esc (or select Exit) to return to the Groups Database menu.
Step 7: Whenever changes are made to one of the databases, it is recommended the changes be saved to disk before proceeding to another operation. See “Saving & Installing Database” on page 50.
This completes the Deleting a Station in Group procedure...
Type the extension of the station to delete then press <ENTER> Select Ok and press <ENTER> to delete the station. Press <ESC>
Delete A Station
Clear Ok
or select Exit and press <ENTER> when done.
Exit Description:
Extension: 1000
Modify
The Modify command will change the name of a group and change the station description in a selected group.
Modifying a Group
Follow the steps to modify a group name in the Groups Database:Step 1: From the Groups Database screen (Figure 4-2), use the UP and DOWN arrow keys to select a group (in the left window) to modify.
Step 2: Press Tab to select the Modify command (at the bottom of the screen) and press Enter. The following window will be displayed:
Step 3: Select Groups Database and press Enter. The following window will be displayed (for an example group of Admin):
Step 4: Modify the name of the group and press Enter.
Do you want this command to apply to the groups database, or to the stations in the group?
Groups Database Or Stations In Group
Cancel Groups Database Stations In Group
Type the group name, then select Ok and press <ENTER> to save changes. Press <ESC> or select Exit and press <ENTER> when done.
Add/Modify A Group
Clear
Ok Exit
Modified Original
Modify (Cont)
Modifying a Group
(Cont)
Step 5: Select Ok and press Enter. The following message will be displayed in the screen message bar (for the example - changed group name Admin to Admin2):
Group “Admin2” has been modified
Step 6: Press Esc (or select Exit) to return to the Groups Database menu.
Step 7: Whenever changes are made to one of the databases, it is recommended the changes be saved to disk before proceeding to another operation. See “Saving & Installing Database” on page 50.
Modify (Cont)
Modifying a
Station In Group
This will change a station description in the same manner as the modify command from the Stations Database function. Follow the steps to modify a station in the selected group:
Step 1: From the Groups Database screen (Figure 4-2), use the UP and DOWN arrow keys to select a group (in the left window).
Step 2: Press Tab to move to the right stations window. Use the UP and DOWN arrow keys to select a station to modify (in the right window).
Step 3: Press Tab to select the Modify command (at the bottom of the screen) and press Enter. The following window will be displayed:
Step 4: Select Stations In Group and press Enter. The following window will be displayed (for an example station 1000):
Do you want this command to apply to the groups database, or to the stations in the group?
Groups Database Or Stations In Group
Cancel Groups Database Stations In Group
To Add a Station, type in all fields. To Modify a station, modify the desired fields. To save changes, select Ok and press
Add/Modify A Station
Clear Ok
<ENTER>. Press <ESC> or select Exit and press <ENTER> when done.
Exit
Modified Original
Description: Extension:
John Fields John Fields
Modify (Cont)
Modifying a
Station In Group
(Cont)
Step 5: Select station Description and type a new description, and press Enter. (Perhaps there is a new person at this station.).
Step 6: Select Ok and press Enter. The following message will be displayed in the screen message bar. The following screen shows the changes (for ex-ample - station 1000, description change from John Fields to Joe Luna):
Station 1000 has been modified
Note: The station description has also been changed in the Stations Database.
Step 7: Press Esc (or select Exit) to return to the Groups Database menu.
Step 8: Whenever changes are made to one of the databases, it is recommended the changes be saved to disk before proceeding to another operation. See “Saving & Installing Database” on page 50.
This completes the mODIFYING a Station in Group procedure... To Add a Station, type in all fields. To Modify a station, modify the desired fields. To save changes, select Ok and press
Add/Modify A Station
Clear Ok
<ENTER>. Press <ESC> or select Exit and press <ENTER> when done.
Exit
Modified Original
Description: Extension:
Joe Luna Joe Luna
Find
The Find command can be used to locate a group in the Groups Database and find a station in a group.
Find a Group by
Name
Follow the steps to find a group by name:
Step 1: From the Groups Database screen (Figure 4-2), press Tab to select the Find command (at the bottom of the screen) and press Enter. The fol-lowing window will be displayed:
Step 2: Select Groups Database and press Enter. The following window will be displayed:
Step 3: Type the name of a group to find and press Enter.
Do you want this command to apply to the groups database, or to the stations in the group?
Groups Database Or Stations In Group
Cancel Groups Database Stations In Group
Type the name of the group to find, then
select Cancel and press <ENTER> to cancel. Find A Group By Name
Clear
Ok Exit
Group Name:
Find (Cont)
Find a Group by
Name (Cont)
Step 4: Select the Ok command and press Enter. The Groups Database screen will be displayed, and the found group name highlighted in the left win-dow. The screen example below shows a find for group name Seniors:
Note: The Groups Database may have many groups defined. This would require scrolling the left window through all the group names. The Find com-mand will position the display directly to the located group name.
Step 5: At this point, any of the Groups Database commands of Add, Delete, Modify, Find, Save, and Print can be performed on the found group.
NEC Student Services Administrator May 21 1997 03:15:35 PM
*** Groups Database ***
Add Delete Modify Find Save Print Exit
Top
Extension Description
1000 John Fields
2001 2002
Front Desk Lounge
*** Stations in Admin ***
Seniors Freshman Admin
Juniors
Vmail
Find (Cont)
Find a Station In
Group by
Extension
This will find a station, by extension, in the selected group. Follow the steps to find a Station In Group:
Step 1: From the Groups Database screen (Figure 4-2), use the UP and DOWN arrow keys to select a group (in the left window).
Step 2: Press Tab to select the Find command (at the bottom of the screen) and press Enter. The following window will be displayed:
Step 3: Select Stations In Group and press Enter. The following window will be displayed:
Do you want this command to apply to the groups database, or to the stations in the group?
Groups Database Or Stations In Group
Cancel Groups Database Stations In Group
Use the UP and DOWN Arrow keys to select the field type used to find a station and press
Find A Station
<ENTER>, or press <ESC> to cancel Description Extension
Find (Cont)
Find a Station In
Group by
Extension (Cont)
Step 4: Use the UP and DOWN arrow keys to select the Extension field and press Enter. The following window will be displayed:
Step 5: Type the extension number of the station to find, select Ok and press Enter. The Groups Database screen will be displayed, with the found ex-tension. The screen example shows a Find for station extension 2001, of group Admin.
Step 5 continues on the next page...
Type the extension of the station to find, then select OK and press <ENTER>. Press <ESC> or
Find A Station By Extension
select Cancel and press <ENTER> to cancel. Extension:
Clear
Ok Cancel
NEC Student Services Administrator May 21 1997 03:15:35 PM
*** Groups Database ***
Add Delete Modify Find Save Print Exit
Top
Extension Description
1000 John Fields
2002 Lounge
*** Stations in Admin ***
Seniors Freshman Admin
Juniors
Vmail
Top
Find (Cont)
Find a Station In
Group by
Extension (Cont)
Step 5: CONTINUED
---- If the extension typed is not assigned to the selected group, the following message will be displayed in the screen message bar:
Unable to find station 2001
Find (Cont)
Find a Station in
Group by
Description
This will find a station, by description, in the selected group. Follow the steps to Find a Station In Group:
Step 1: From the Groups Database screen (Figure 4-2), use the UP and DOWN arrow keys to select a group (in the left window).
Step 2: Press Tab to select the Find command (at the bottom of the screen) and press Enter. The following window will be displayed:
Step 3: Select Stations In Group and press Enter. The following window will be displayed:
Continue to Step 4 on the next page...
Do you want this command to apply to the groups database, or to the stations in the group?
Groups Database Or Stations In Group
Cancel Groups Database Stations In Group
Use the UP and DOWN Arrow keys to select the field type used to find a station and press
Find A Station
<ENTER>, or press <ESC> to cancel Description Extension
Find (Cont)
Find a Station In
Group by
Description (Cont)
Step 4: Use the UP and DOWN arrow keys to select the Description field and press Enter. The following window will be displayed:
Step 5: Type the description of the station to find, select Ok and press Enter. The Groups Database screen will be displayed, with the found extension. The screen example shows a Find for station description Front Desk, of group Admin.
Type the description of the station to find, then select OK and press <ENTER>. Press <ESC> or
Find A Station By Description
select Cancel and press <ENTER> to cancel. Description:
Clear
Ok Cancel
NEC Student Services Administrator May 21 1997 03:15:35 PM
*** Groups Database ***
Add Delete Modify Find Save Print Exit
Top
Extension Description
1000 John Fields
2002 Lounge
*** Stations in Admin ***
Seniors Freshman Admin
Juniors
Vmail
Top
Find (Cont)
Find a Station In
Group by
Description (Cont)
Step 5: CONTINUED
---Note: The description must be exact as it is in the database. A “wildcard” char-acter (*) can be used and the Find will locate the first occurrence of the most complete match.
EXAMPLE: A find for Sam Sims...
Sam * or Sam S* or Sam Si*, etc. could be typed as a find parameter.
- If the description typed is not assigned to the selected group, the following message will be displayed in the screen message bar:
Unable to find description “Front Desk”
Saving & Installing Database
Changes made to the Groups Database using the Add, Delete or Modify commands are first changed to UAP memory. It is recommended, when a series of changes are made that the changes are saved. This command saves the changes to UAP disk. This prevents an error made in a later change operation from affecting any previous changes.
For example: When adding groups (or stations to groups), add all the needed groups. Before proceeding to any other operation (such as deleting or
modifying a group); save these add changes. Then, if an error is encountered in a later modify operation; a cancel, or clear to start over will not affect the changes made in the previous Add operation.
In all the operations (Add, Delete, and Modify), this Save operation was provided as an ending step in all the procedures. However, the Save operation can be done at any time.
The databases will not become recognized by the system, until the databases have been installed in the system. Unlike the save command following each database change, the Install Databases command only needs to be performed when all changes to any (and all) of the Student Services database are completed.
Save Database
Follow the steps below to Save the database.Step 1: From the Groups Database screen (Figure 4-2), press Tab to select the Save command, and press Enter. The following window will be dis-played:
Step 2: Select Yes and press Enter to save all changes. The following will be dis-played in the screen message bar:
The changes made to the Groups Database have been saved
Do you want to save the changes made to the Groups Database?
Save Groups Database
Install Database
The Install Database function installs the Student Services Working Database to the PBX. The working database then becomes the installed database that the PBX will operate from. Until the working database is installed, the PBX will not be able to implement any changes made to station parameters in Student Services.Note: This step only needs to be performed if no other changes to any of the databases will be made at this time. Otherwise complete any other changes and then per-form a Install Databases procedure.
Follow the step below to install the database.
Step : From the Student Services Main Menu, select the Install Databases function, and press Enter. The following message appears in the screen message bar:
The Working Database has been installed
- If no changes have been made to the working database, the following window will be displayed:
This completes the Save and Install Databases procedures... The Working Database has not been modified since the
last installation. You may install it again or cancel. Working Database Unchanged
Group Database information can be printed to a hardcopy printer device. Three Print options are available:
Current Record Prints the current record selected on the Groups Database screen (left window).
Records On Screen Prints all records shown in the left window on the Group database screen.
All Records Prints all the records in the Groups Database.
Information can also be printed for stations of a selected group. Follow the procedures for these print options:
Printing Group
Current Record
Prints the current record of the selected group.
Step 1: From the Groups Database screen (Figure 4-2), use the UP and DOWN arrow keys to select a group (in the left window).
Step 2: Press Tab to select the Print command, and press Enter. The following window will be displayed:
Step 3: Select Groups Database and press Enter. The following window will be displayed
Do you want this command to apply to the groups database, or to the stations in the group?
Groups Database Or Stations In Group
Cancel Groups Database Stations In Group
Print Groups Database
Records to Print: Current Record