Red Hat Enterprise Linux 6
Virtualization Guide
Virtualization Guide
Red Hat Enterprise Linux 6 Virtualization Guide
Guide to Virtualization on Red Hat Enterprise Linux 6
Edition 1
Author
Copyright © 2008,2009,2010 Red Hat, Inc.
The text of and illustrations in this document are licensed by Red Hat under a Creative Commons Attribution–Share Alike 3.0 Unported license ("CC-BY-SA"). An explanation of CC-BY-SA is available at http://creativecommons.org/licenses/by-sa/3.0/. In accordance with CC-BY-SA, if you distribute this document or an adaptation of it, you must provide the URL for the original version.
Red Hat, as the licensor of this document, waives the right to enforce, and agrees not to assert, Section 4d of CC-BY-SA to the fullest extent permitted by applicable law.
Red Hat, Red Hat Enterprise Linux, the Shadowman logo, JBoss, MetaMatrix, Fedora, the Infinity Logo, and RHCE are trademarks of Red Hat, Inc., registered in the United States and other countries. Linux® is the registered trademark of Linus Torvalds in the United States and other countries.
Java® is a registered trademark of Oracle and/or its affiliates.
XFS® is a trademark of Silicon Graphics International Corp. or its subsidiaries in the United States and/or other countries.
MySQL® is a registered trademark of MySQL AB in the United States, the European Union and other countries.
All other trademarks are the property of their respective owners. 1801 Varsity Drive Raleigh, NC 27606-2072 USA Phone: +1 919 754 3700 Phone: 888 733 4281 Fax: +1 919 754 3701
The Red Hat Enterprise Linux Virtualization Guide contains information on installation, configuring, administering, and troubleshooting virtualization technologies included with Red Hat Enterprise Linux.
Preface vii
1. Document Conventions ... vii
1.1. Typographic Conventions ... vii
1.2. Pull-quote Conventions ... ix
1.3. Notes and Warnings ... ix
2. We need your feedback ... x
1. Introduction 1
1.1. What is virtualization? ... 1
1.2. KVM and virtualization in Red Hat Enterprise Linux ... 1
1.3. libvirt and the libvirt tools ... 2
1.4. Virtualized hardware devices ... 2
1.4.1. Virtualized and emulated devices ... 3
1.4.2. Para-virtualized drivers ... 4
1.4.3. Physically shared devices ... 5
1.5. Storage ... 6
1.6. Virtualization security features ... 7
1.7. Migration ... 7
1.8. V2V ... 8
I. Requirements and limitations 9
2. System requirements 11
3. KVM compatibility 13
4. Virtualization limitations 15
4.1. General limitations for virtualization ... 15
4.2. KVM limitations ... 15
4.3. Application limitations ... 16
II. Installation 19
5. Installing the virtualization packages 21
5.1. Installing KVM with a new Red Hat Enterprise Linux installation ... 21
5.2. Installing KVM packages on an existing Red Hat Enterprise Linux system ... 25
6. Virtualized guest installation overview 27
6.1. Virtualized guest prerequisites and considerations ... 27
6.2. Creating guests with virt-install ... 27
6.3. Creating guests with virt-manager ... 28
6.4. Installing guests with PXE ... 37
7. Installing Red Hat Enterprise Linux 6 as a virtualized guest 43
7.1. Creating a Red Hat Enterprise Linux 6 guest with local installation media ... 43
7.2. Creating a Red Hat Enterprise Linux 6 guest with a network installation tree ... 53
7.3. Creating a Red Hat Enterprise Linux 6 guest with PXE ... 55
8. Installing Red Hat Enterprise Linux 6 as a para-virtualized guest on Red Hat Enterprise Linux 5 59
8.1. Using virt-install ... 59
8.2. Using virt-manager ... 60
9. Installing a fully-virtualized Windows guest 71
9.1. Using virt-install to create a guest ... 71
Virtualization Guide
III. Configuration 73
10. Network Configuration 75
10.1. Network Address Translation (NAT) with libvirt ... 75
10.2. Bridged networking with libvirt ... 76
11. KVM Para-virtualized Drivers 79
11.1. Using the para-virtualized drivers with Red Hat Enterprise Linux 3.9 guests ... 79
11.2. Installing the KVM Windows para-virtualized drivers ... 82
11.2.1. Installing the drivers on an installed Windows guest ... 82
11.2.2. Installing drivers during the Windows installation ... 92
11.3. Using KVM para-virtualized drivers for existing devices ... 99
11.4. Using KVM para-virtualized drivers for new devices ... 100
12. PCI passthrough 107
12.1. Adding a PCI device with virsh ... 108
12.2. Adding a PCI device with virt-manager ... 110
12.3. PCI passthrough with virt-install ... 114
13. SR-IOV 117
13.1. Introduction ... 117
13.2. Using SR-IOV ... 118
13.3. Troubleshooting SR-IOV ... 121
14. KVM guest timing management 123
IV. Administration 127
15. Server best practices 129
16. Security for virtualization 131
16.1. Storage security issues ... 131
16.2. SELinux and virtualization ... 131
16.3. SELinux ... 133
16.4. Virtualization firewall information ... 133
17. sVirt 135
17.1. Security and Virtualization ... 136
17.2. sVirt labeling ... 136
18. KVM live migration 139
18.1. Live migration requirements ... 139
18.2. Shared storage example: NFS for a simple migration ... 140
18.3. Live KVM migration with virsh ... 141
18.4. Migrating with virt-manager ... 142
19. Remote management of virtualized guests 155
19.1. Remote management with SSH ... 155
19.2. Remote management over TLS and SSL ... 156
23. Migrating to KVM from other hypervisors using virt-v2v 171
23.1. Preparing to convert a virtualized guest ... 171
23.2. Converting virtualized guests ... 175
23.2.1. virt-v2v ... 175
23.2.2. Converting a local Xen virtualized guest ... 177
23.2.3. Converting a remote Xen virtualized guest ... 177
23.2.4. Converting a VMware ESX virtualized guest ... 177
23.2.5. Converting a virtualized guest running Windows ... 178
23.3. Running converted virtualized guests ... 179
23.4. Configuration changes ... 179
23.4.1. Configuration changes for Linux virtualized guests ... 179
23.4.2. Configuration changes for Windows virtualized guests ... 180
24. Miscellaneous administration tasks 183
24.1. Automatically starting guests ... 183
24.2. Using qemu-img ... 183
24.3. Verifying virtualization extensions ... 184
24.4. Setting KVM processor affinities ... 185
24.5. Generating a new unique MAC address ... 189
24.6. Improving guest response time ... 190
24.7. Very Secure ftpd ... 191
24.8. Disable SMART disk monitoring for guests ... 192
24.9. Configuring a VNC Server ... 192
24.10. Gracefully shutting down guests ... 192
24.11. Virtual machine timer management with libvirt ... 193
V. Virtualization storage topics 197
25. Storage concepts 199
25.1. Storage pools ... 199
25.2. Volumes ... 200
26. Storage pools 203
26.1. Creating storage pools ... 203
26.1.1. Dedicated storage device-based storage pools ... 203
26.1.2. Partition-based storage pools ... 205
26.1.3. Directory-based storage pools ... 211
26.1.4. LVM-based storage pools ... 217
26.1.5. iSCSI-based storage pools ... 223
26.1.6. NFS-based storage pools ... 232
27. Volumes 237
27.1. Creating volumes ... 237
27.2. Cloning volumes ... 237
27.3. Adding storage devices to guests ... 238
27.3.1. Adding file based storage to a guest ... 238
27.3.2. Adding hard drives and other block devices to a guest ... 240
27.4. Deleting and removing volumes ... 241
28. Miscellaneous storage topics 243
28.1. Creating a virtualized floppy disk controller ... 243
28.2. Configuring persistent storage in Red Hat Enterprise Linux 6 ... 244
28.3. Accessing data from a guest disk image ... 247
29. N_Port ID Virtualization (NPIV) 251
Virtualization Guide
29.1.1. Identifying HBAs in a Host System ... 251
29.1.2. Verify NPIV is used on the HBA ... 252
VI. Virtualization reference guide 255
30. Managing guests with virsh 257
31. Managing guests with the Virtual Machine Manager (virt-manager) 267
31.1. Starting virt-manager ... 267
31.2. The Virtual Machine Manager main window ... 268
31.3. The virtual hardware details window ... 269
31.4. Virtual Machine graphical console ... 271
31.5. Adding a remote connection ... 273
31.6. Displaying guest details ... 274
31.7. Performance monitoring ... 281
31.8. Displaying CPU usage ... 283
31.9. Displaying Disk I/O ... 284
31.10. Displaying Network I/O ... 285
31.11. Managing a virtual network ... 286
31.12. Creating a virtual network ... 288
32. libvirt configuration reference 297
33. Creating custom libvirt scripts 299
33.1. Using XML configuration files with virsh ... 299
VII. Troubleshooting 301
34. Troubleshooting 303
34.1. Debugging and troubleshooting tools ... 303
34.2. kvm_stat ... 304
34.3. Log files ... 307
34.4. Troubleshooting with serial consoles ... 307
34.5. Virtualization log files ... 308
34.6. Loop device errors ... 308
34.7. Enabling Intel VT and AMD-V virtualization hardware extensions in BIOS ... 308
34.8. KVM networking performance ... 309
A. Additional resources 311
A.1. Online resources ... 311
A.2. Installed documentation ... 311
Glossary 313
B. Revision History 317
Preface
Welcome to the Red Hat Enterprise Linux 6 Virtualization Guide. This guide covers all aspects of using and managing virtualization products included with Red Hat Enterprise Linux 6.
This book is divided into 7 parts: • System Requirements • Installation • Configuration • Administration • Reference • Troubleshooting • Appendixes
Key terms and concepts used throughout this book are covered in the Glossary.
1. Document Conventions
This manual uses several conventions to highlight certain words and phrases and draw attention to specific pieces of information.
In PDF and paper editions, this manual uses typefaces drawn from the Liberation Fonts1 set. The
Liberation Fonts set is also used in HTML editions if the set is installed on your system. If not,
alternative but equivalent typefaces are displayed. Note: Red Hat Enterprise Linux 5 and later includes the Liberation Fonts set by default.
1.1. Typographic Conventions
Four typographic conventions are used to call attention to specific words and phrases. These conventions, and the circumstances they apply to, are as follows.
Mono-spaced Bold
Used to highlight system input, including shell commands, file names and paths. Also used to highlight keycaps and key combinations. For example:
To see the contents of the file my_next_bestselling_novel in your current working directory, enter the cat my_next_bestselling_novel command at the shell prompt and press Enter to execute the command.
The above includes a file name, a shell command and a keycap, all presented in mono-spaced bold and all distinguishable thanks to context.
Key combinations can be distinguished from keycaps by the hyphen connecting each part of a key combination. For example:
Press Enter to execute the command.
Preface
Press Ctrl+Alt+F2 to switch to the first virtual terminal. Press Ctrl+Alt+F1 to return to your X-Windows session.
The first paragraph highlights the particular keycap to press. The second highlights two key combinations (each a set of three keycaps with each set pressed simultaneously).
If source code is discussed, class names, methods, functions, variable names and returned values mentioned within a paragraph will be presented as above, in mono-spaced bold. For example:
File-related classes include filesystem for file systems, file for files, and dir for directories. Each class has its own associated set of permissions.
Proportional Bold
This denotes words or phrases encountered on a system, including application names; dialog box text; labeled buttons; check-box and radio button labels; menu titles and sub-menu titles. For example:
Choose System → Preferences → Mouse from the main menu bar to launch Mouse Preferences. In the Buttons tab, click the Left-handed mouse check box and click Close to switch the primary mouse button from the left to the right (making the mouse suitable for use in the left hand).
To insert a special character into a gedit file, choose Applications → Accessories
→ Character Map from the main menu bar. Next, choose Search → Find… from the Character Map menu bar, type the name of the character in the Search field and click Next. The character you sought will be highlighted in the Character Table. Double-click this highlighted character to place it in the Text to copy field and then Double-click the Copy button. Now switch back to your document and choose Edit → Paste from the gedit menu bar.
The above text includes application names; system-wide menu names and items; application-specific menu names; and buttons and text found within a GUI interface, all presented in proportional bold and all distinguishable by context.
Mono-spaced Bold Italic or Proportional Bold Italic
Whether mono-spaced bold or proportional bold, the addition of italics indicates replaceable or variable text. Italics denotes text you do not input literally or displayed text that changes depending on circumstance. For example:
To connect to a remote machine using ssh, type ssh [email protected] at a shell prompt. If the remote machine is example.com and your username on that machine is john, type ssh [email protected].
The mount -o remount file-system command remounts the named file system. For example, to remount the /home file system, the command is mount -o remount /home.
Pull-quote Conventions Publican is a DocBook publishing system.
1.2. Pull-quote Conventions
Terminal output and source code listings are set off visually from the surrounding text. Output sent to a terminal is set in mono-spaced roman and presented thus:
books Desktop documentation drafts mss photos stuff svn books_tests Desktop1 downloads images notes scripts svgs
Source-code listings are also set in mono-spaced roman but add syntax highlighting as follows:
package org.jboss.book.jca.ex1;
import javax.naming.InitialContext;
public class ExClient {
public static void main(String args[]) throws Exception
{
InitialContext iniCtx = new InitialContext(); Object ref = iniCtx.lookup("EchoBean"); EchoHome home = (EchoHome) ref;
Echo echo = home.create(); System.out.println("Created Echo");
System.out.println("Echo.echo('Hello') = " + echo.echo("Hello")); }
}
1.3. Notes and Warnings
Finally, we use three visual styles to draw attention to information that might otherwise be overlooked.
Note
Notes are tips, shortcuts or alternative approaches to the task at hand. Ignoring a note should have no negative consequences, but you might miss out on a trick that makes your life easier.
Important
Important boxes detail things that are easily missed: configuration changes that only apply to the current session, or services that need restarting before an update will apply. Ignoring a box labeled 'Important' will not cause data loss but may cause irritation and frustration.
Warning
Preface
2. We need your feedback
If you find a typographical error in this manual, or if you have thought of a way to make this manual better, we would love to hear from you. Submit a report in Bugzilla: http://bugzilla.redhat.com/ against the Red_Hat_Enterprise_Linux product.
When submitting a bug report, be sure to refer to the correct component: doc-Virtualization_Guide and version number: 6.
If you have a suggestion for improving the documentation, try to be as specific as possible when describing it. If you have found an error, include the section number and some of the surrounding text so we can find it easily.
Chapter 1.
Introduction
This chapter introduces various virtualization technologies, applications and features and explains how they work. The purpose of this chapter is to assist Red Hat Enterprise Linux users in understanding the basics of virtualization.
1.1. What is virtualization?
Virtualization is a broad computing term for running software, usually operating systems, concurrently and isolated from other programs on one system. Most existing implementations of virtualization use a hypervisor, a software layer that controls hardware and provides guest operating systems with access to underlying hardware. The hypervisor allows multiple operating systems to run on the same physical system by offering virtualized hardware to the guest operating system. There are various methods for virtualizing operating systems:
• Hardware-assisted virtualization is the technique used for full virtualization with KVM. • Para-virtualization is a technique used by Xen to run Linux guests.
• Software virtualization or emulation. Software virtualization uses binary translation and other emulation techniques to run unmodified operating systems. Software virtualization is significantly slower than hardware-assisted virtualization or para-virtualization. Software virtualization, using QEMU without KVM, is unsupported by Red Hat Enterprise Linux.
1.2. KVM and virtualization in Red Hat Enterprise Linux
What is KVM?
(KVM) is a Full virtualization solution for Linux on AMD64 and Intel 64 hardware. KVM is a Linux kernel module built for the standard Red Hat Enterprise Linux 6 kernel. KVM can run multiple, unmodified virtualized guest Windows and Linux operating systems.The KVM hypervisor in Red Hat Enterprise Linux is managed with the libvirt API and tools built for libvirt, virt-manager and virsh. Virtualized guests are run as Linux processes and threads which are controlled by these modules. Red Hat Enterprise Linux KVM hypervisors can be managed by the Red Hat Enterprise Virtualization Manager as an alternative to the virsh and virt-manager tools.
The kvm package also contains Linux kernel modules which manage devices, memory and management APIs for the Hypervisor module itself.
This book covers virtualization topics for Red Hat Enterprise Linux 6. The Kernel based Virtual Machine (KVM) hypervisor is provided with Red Hat Enterprise Linux. The KVM hypervisor supports Full virtualization.
Overcommitting
The KVM hypervisor supports overcommitting virtualized CPUs and memory. Overcommitting means allocating more virtualized CPUs or memory than the available resources on the system. CPU overcommitting allows virtualized guests to run on fewer servers and in higher densities. Memory overcommitting allows hosts to utilize memory and virtual memory to increase guest densities. For more information on overcommitting with KVM, refer to Chapter 20, Overcommitting with KVM.
Chapter 1. Introduction
KSM
Kernel SamePage Merging (KSM) is used by the KVM hypervisor to allow KVM guests to share identical memory pages. These shared pages are usually common libraries or other identical, high-use data. KSM allows for greater guest density of identical or similar guest operating systems by avoiding memory duplication.
For more information on KSM, refer to Chapter 21, KSM.
1.3. libvirt and the libvirt tools
Libvirt is a hypervisor-independent virtualization API that is able to interact with the virtualization capabilities of a range of operating systems.
libvirt provides a common, generic and stable layer to securely manage virtualized guests on a host. libvirt provides a common interface for managing local systems and networked hosts. libvirt provides all APIs required to provision, create, modify, monitor, control, migrate and stop virtualized guests if the hypervisor supports these operations. Although multiple hosts may be accessed with libvirt simultaneously, the APIs are limited to single node operations.
libvirt is designed as a building block for higher level management tools and applications. libvirt focuses on managing single hosts, with the exception of migration capabilities. libvirt provides APIs to enumerate, monitor and use the resources available on the managed node, including CPUs, memory, storage, networking and Non-Uniform Memory Access (NUMA) partitions. The management tools can be located on separate physical machines from the host using secure protocols.
Red Hat Enterprise Linux 6 supports libvirt and included libvirt-based tools as its default method for virtualization management.
libvirt is free software available under the GNU Lesser General Public License. The libvirt project aims to provide a long term stable C API. The libvirt Open Source project currently supports Xen, QEmu, KVM, LXC, OpenVZ, VirtualBox, OpenNebula, and VMware ESX. The Red Hat Enterprise Linux 6
libvirt package supports Xen on Red Hat Enterprise Linux 5 and KVM on Red Hat Enterprise Linux 5 and Red Hat Enterprise Linux 6.
virsh
The virsh command-line tool is built on the libvirt management API and operates as an alternative to the graphical virt-manager application. The virsh command can be used in read-only mode by unprivileged users or, with root access, full administration functionality. The virsh command is ideal for scripting virtualization administration.
The virsh command is included in the libvirt-client package.
virt-manager
virt-manager is a graphical desktop tool for managing virtualized guests. virt-manager can be used to perform virtualization administration, virtualized guest creation, migration and configuration
Virtualized and emulated devices • Emulated software devices.
• Para-virtualized devices. • Physically shared devices.
These hardware devices all appear as physically attached hardware devices to the virtualized guest but the device drivers work in different ways.
1.4.1. Virtualized and emulated devices
The KVM hypervisor implements many core devices for virtualized guests in software. These emulated hardware devices are crucial for virtualizing operating systems. This section is provided as an
introduction to the emulated devices and emulated device drivers.
Emulated devices are virtual devices which exist entirely in software. The emulated devices do not require a real hardware device to back them.
Emulated drivers may use either a physical device or a virtual software device. Emulated drivers are a translation layer between the guest and the Linux kernel (which manages the source device). The device level instructions are completely translated by the KVM hypervisor. Any device, of the same type, recognized by the Linux kernel may be used as the backing source device for the emulated drivers.
Virtualized CPUs (VCPUs)
A system has a number of virtual CPUs (VCPUs) relative to the number of physical processor cores. The number of virtual CPUs is finite and represents the total number of virtual CPUs that can be assigned to guest virtual machines.
Emulated graphics devices
Two emulated graphics devices are provided. These devices can be connected to with the SPICE protocol or with VNC.
• The ac97 device emulates a Cirrus CLGD 5446 PCI VGA card.
• The vga device emulates a dummy VGA card with Bochs VESA extensions (hardware level, including all non-standard modes).
Emulated system components
Various core system components are emulated to provide basic system functions. • A Cirrus i440FX host PCI bridge.
• PIIX3 PCI to ISA bridge. • A PS/2 mouse and keyboard. • An EvTouch USB Graphics Tablet.
• A PCI UHCI USB controller and a virtualized USB hub. • A PCI and ISA network adapters.
Chapter 1. Introduction
Emulated sound devices
Two emulated sound devices are available:
• The ac97 device emulates an Intel 82801AA AC97 Audio compatible sound card. • The es1370 device emulates an ENSONIQ AudioPCI ES1370 sound card.
Emulated network drivers
There are four emulated network drivers available for network devices:
• The e1000 driver emulates an Intel E1000 network adaptor (Intel 82540EM, 82573L, 82544GC). • The ne2k_pci driver emulates a Novell NE2000 network adaptor.
• The pcnet driver emulates an AMD Lance Am7990 network adaptor. • The rtl8139 driver emulates a Realtek 8139 network adaptor.
Emulated storage drivers
Storage devices and storage pools can use the emulated drivers to attach storage devices to virtualized guests. Alternatively, the para-virtualized drivers can be used.
Note that the storage drivers are not storage devices. The drivers are used to attach a backing storage device, file or storage pool volume to a virtualized guest. The backing storage device can be any supported type of storage device, file, or storage pool volume.
The emulated IDE driver
The KVM hypervisor provides two emulated PCI IDE interfaces. The emulated IDE driver can be used to attach any combination of up to four virtualized IDE hard disks or virtualized IDE CD-ROM drives to each virtualized guest. The emulated IDE driver is used for virtualized CD-ROM and DVD-ROM drives.
The emulated floppy disk drive driver
The emulated floppy disk drive driver is used for creating virtualized floppy drives.
1.4.2. Para-virtualized drivers
Para-virtualized drivers are device drivers that increase the I/O performance of virtualized guests. Para-virtualized drivers decrease I/O latency and increase I/O throughput to near bare-metal levels. It is recommended to use the para-virtualized drivers for virtualized guests running I/O intensive applications.
The virtualized drivers must be installed on the guest operating system. By default, the para-virtualized drivers are included in Red Hat Enterprise Linux 4.7 and newer, Red Hat Enterprise Linux 5.4 and newer and Red Hat Enterprise Linux 6.0 and newer. The para-virtualized drivers must be
Physically shared devices
Para-virtualized block driver
The para-virtualized block driver is a driver for all storage devices supported by the hypervisor attached to the virtualized guest (except for floppy disk drives, which must be emulated).
The para-virtualized clock
Guests using the Time Stamp Counter (TSC) as a clock source may suffer timing issues.
KVM works around hosts that do not have a constant Time Stamp Counter by providing guests with a para-virtualized clock.
For more information on the para-virtualized clock refer to Chapter 14, KVM guest timing management.
The para-virtualized serial driver
The para-virtualized serial driver (virtio-serial) is a bytestream-oriented, character stream driver. The para-virtualized serial driver provides a simple communication interface between the host's user space and the guest's user space where networking is not available or unusable.
The balloon driver
The balloon driver allows guests to express to the hypervisor how much memory they require. The balloon driver allows the host to efficiently allocate memory to the guest and allow free memory to be allocated to other guests and processes.
Guests using the balloon driver can mark sections of the guest's RAM as not in use (balloon inflation). The hypervisor can free the memory and use the memory for other host processes or other guests on that host.
When the guest requires the freed memory again, the hypervisor can reallocate RAM to the guest (balloon deflation).
1.4.3. Physically shared devices
Certain hardware platforms allow virtualized guests to directly access various hardware devices and components. This process in virtualization is known as passthrough. Passthrough is known as device assignment in some of the KVM documentation and the KVM code.
PCI passthrough
The KVM hypervisor supports attaching PCI devices on the host system to virtualized guests. PCI passthrough allows guests to have exclusive access to PCI devices for a range of tasks. PCI passthrough allows PCI devices to appear and behave as if they were physically attached to the guest operating system.
Almost all PCI and PCI Express devices that support passthrough, except for graphics cards, can be directly attached to virtualized guests with PCI passthrough.
SR-IOV
SR-IOV (Single Root I/O Virtualization) is a standard for a type of PCI passthrough which natively shares a single device to multiple guests.
SR-IOV enables a Single Root Function (for example, a single Ethernet port), to appear as multiple, separate, physical devices. A physical device with SR-IOV capabilities can be configured to appear
Chapter 1. Introduction
in the PCI configuration space as multiple functions, each device has its own configuration space complete with Base Address Registers (BARs).
SR-IOV uses two new PCI functions: • Virtualization-PF
• Virtualization VF
For more information on SR-IOV, refer to Chapter 13, SR-IOV.
NPIV
N_Port ID Virtualization (NPIV) is a function available with some Fibre Channel devices. NPIV shares a single physical N_Port as multiple N_Port IDs. NPIV provides similar functionality for Host Bus Adaptors (HBAs) that SR-IOV provides for network interfaces. With NPIV, virtualized guests can be provided with a virtual Fibre Channel initiator to Storage Area Networks (SANs).
NPIV can provide high density virtualized environments with enterprise-level storage solutions. For more information on NPIV, refer to Chapter 29, N_Port ID Virtualization (NPIV).
1.5. Storage
Storage for virtualized guests is abstracted from the physical storage used by the guest. Storage is attached to virtualized guests using the para-virtualized (Section 1.4.2, “Para-virtualized drivers”) or emulated block device drivers (Emulated storage drivers).
Storage pools
A storage pool is a file, directory, or storage device managed by libvirt for the purpose of providing storage to virtualized guests. Storage pools are divided into storage volumes that store virtualized guest images or are attached to virtualized guests as additional storage.
Storage pools can be divided up into volumes or allocated directly to a guest. Volumes of a storage pool can be allocated to virtualized guests. There are two categories of storage pool available:
Local storage pools
Local storage pools are directly attached to the host server. Local storage pools include local directories, directly attached disks, and LVM volume groups on local devices.
Local storage pools are useful for development, testing and small deployments that do not require migration or large numbers of virtualized guests. Local storage pools are not suitable for many production environments as local storage pools do not support live migration.
Networked (shared) storage pools
Virtualization security features Storage volumes are presented to virtualized guests as local storage devices regardless of the
underlying hardware.
For more information on storage and virtualization refer to Part V, “Virtualization storage topics”.
1.6. Virtualization security features
SELinux
SELinux was developed by the US National Security Agency and others to provide Mandatory Access Control (MAC) for Linux. All processes and files are given a type and access is limited by fine-grained controls. SELinux limits an attackers abilities and works to prevent many common security exploits such as buffer overflow attacks and privilege escalation.
SELinux strengthens the security model of Red Hat Enterprise Linux hosts and virtualized Red Hat Enterprise Linux guests. SELinux is configured and tested to work, by default, with all virtualization tools shipped with Red Hat Enterprise Linux 6.
For more information on SELinux and virtualization, refer to Section 16.2, “SELinux and virtualization”.
sVirt
sVirt is a technology included in Red Hat Enterprise Linux 6 that integrates SELinux and virtualization. sVirt applies Mandatory Access Control (MAC) to improve security when using virtualized guests. sVirt improves security and hardens the system against bugs in the hypervisor that might be used as an attack vector for the host or to another virtualized guest.
For more information on sVirt, refer to Chapter 17, sVirt.
1.7. Migration
Migration is the term for the process of moving a virtualized guest from one host to another. Migration can be conducted offline (where the guest is suspended and then moved) or live (where a guest is moved without suspending).
Migration is a key feature of virtualization as software is completely separated from hardware. Migration is useful for:
• Load balancing - guests can be moved to hosts with lower usage when a host becomes overloaded. • Hardware failover - when hardware devices on the host start to fail, guests can be safely relocated
so the host can be powered down and repaired.
• Energy saving - guests can be redistributed to other hosts and host systems powered off to save energy and cut costs in low usage periods.
• Geographic migration - guests can be moved to another location for lower latency or in serious circumstances.
Migration only moves the virtualized guest's memory. The guest's storage is located on networked storage which is shared between the source host and the destination.
Shared, networked storage must be used for storing guest images. Without shared storage migration is not possible. It is recommended to use libvirt managed storage pools for shared storage.
Chapter 1. Introduction
Offline migration
An offline migration suspends the guest then moves an image of the guest's memory to the destination host. The guest is resumed on the destination host and then memory the guest used on the source host is freed.
Live migration
Live migration is the process of migrating a running guest from one physical host to another physical host.
For more information on migration refer to Chapter 18, KVM live migration.
1.8. V2V
Virtualized to virtualized migration, known as V2V, is supported in Red Hat Enterprise Linux 6 for certain virtualized guests.
Red Hat Enterprise Linux 6 provides tools for converting virtualized guests from other types of hypervisor to KVM. The virt-v2v tool converts and imports virtual machines from Xen, other versions of KVM and VMware ESX.
For more information on using V2V, refer to Chapter 23, Migrating to KVM from other hypervisors using virt-v2v
Part I. Requirements and limitations
System requirements, support
restrictions and limitations
for virtualization with Red
Hat Enterprise Linux 6
These chapters outline the system requirements, support restrictions, and limitations of virtualization on Red Hat Enterprise Linux 6.
Chapter 2.
System requirements
This chapter lists system requirements for successfully running virtualized guest operating systems with Red Hat Enterprise Linux 6. Virtualization is available for Red Hat Enterprise Linux 6 on the Intel 64 and AMD64 architecture.
The KVM hypervisor is provided with Red Hat Enterprise Linux 6.
For information on installing the virtualization packages, read Chapter 5, Installing the virtualization packages.
Minimum system requirements
• 6GB free disk space • 2GB of RAM.
Recommended system requirements
• 6GB plus the required disk space recommended by the guest operating system per guest. For most operating systems more than 6GB of disk space is recommended.
• One processor core or hyper-thread for each virtualized CPU and one for the hypervisor. • 2GB of RAM plus additional RAM for virtualized guests.
KVM overcommit
KVM can overcommit physical resources for virtualized guests. Overcommitting resources means the total virtualized RAM and processor cores used by the guests can exceed the physical RAM and processor cores on the host. For information on safely overcommitting resources with KVM refer to Chapter 20, Overcommitting with KVM.
KVM requirements
The KVM hypervisor requires:
• an Intel processor with the Intel VT and the Intel 64 extensions, or • an AMD processor with the AMD-V and the AMD64 extensions.
Refer to Section 24.3, “Verifying virtualization extensions” to determine if your processor has the virtualization extensions.
Storage support
The working guest storage methods are: • files on local storage,
• physical disk partitions,
• locally connected physical LUNs, • LVM partitions,
• NFS shared file systems, • iSCSI,
Chapter 2. System requirements • GFS2 clustered file systems, and • Fibre Channel-based LUNs
• SRP devices (SCSI RDMA Protocol), the block export protocol used in Infiniband and 10GbE iWARP adapters.
File-based guest storage
File-based guest images should be stored in the /var/lib/libvirt/images/ folder. If you use a different directory you must add the directory to the SELinux policy. Refer to Section 16.2, “SELinux and virtualization” for details.
Chapter 3.
KVM compatibility
The KVM hypervisor requires a processor with the Intel-VT or AMD-V virtualization extensions.
Note that this list is not complete. Help us expand it by sending in a bug with anything you get working. To verify whether your processor supports the virtualization extensions and for information on
enabling the virtualization extensions if they are disabled, refer to Section 24.3, “Verifying virtualization extensions”.
Red Hat Enterprise Linux 6.0 Servers with the kvm package are limited to 256 processor cores or less.
Supported guests
Operating system Support level
Red Hat Enterprise Linux 3 x86 Optimized with para-virtualized drivers Red Hat Enterprise Linux 4 x86 Optimized with para-virtualized drivers Red Hat Enterprise Linux 4 AMD
64 and Intel 64
Optimized with para-virtualized drivers Red Hat Enterprise Linux 5 x86 Optimized with para-virtualized drivers Red Hat Enterprise Linux 5 AMD
64 and Intel 64
Optimized with para-virtualized drivers Red Hat Enterprise Linux 6 x86 Optimized with para-virtualized drivers Red Hat Enterprise Linux 6 AMD
64 and Intel 64
Optimized with para-virtualized drivers Fedora 12 x86 Optimized with para-virtualized drivers Fedora 12 AMD 64 and Intel 64 Optimized with para-virtualized drivers Fedora 13 x86 Optimized with para-virtualized drivers Fedora 13 AMD 64 and Intel 64 Optimized with para-virtualized drivers Windows Server 2003 R2 32-Bit Optimized with para-virtualized drivers Windows Server 2003 R2 64-Bit Optimized with para-virtualized drivers Windows Server 2003 Service
Pack 2 32-Bit
Optimized with para-virtualized drivers Windows Server 2003 Service
Pack 2 64-Bit
Optimized with para-virtualized drivers Windows XP 32-Bit Optimized with para-virtualized drivers Windows Vista 32-Bit Supported
Windows Vista 64-Bit Supported
Windows Server 2008 32-Bit Optimized with para-virtualized drivers Windows Server 2008 (and R2)
64-Bit
Optimized with para-virtualized drivers Windows 7 32-Bit Optimized with para-virtualized drivers Windows 7 64-Bit Optimized with para-virtualized drivers
Chapter 4.
Virtualization limitations
This chapter covers additional support and product limitations of the virtualization packages in Red Hat Enterprise Linux 6.
4.1. General limitations for virtualization
Other limitations
For the list of all other limitations and issues affecting virtualization read the Red Hat Enterprise Linux 6 Release Notes. The Red Hat Enterprise Linux 6 Release Notes cover the present new features, known issues and limitations as they are updated or discovered.
Test before deployment
You should test for the maximum anticipated load and virtualized network stress before deploying heavy I/O applications. Stress testing is important as there are performance drops caused by virtualization with increased I/O usage.
4.2. KVM limitations
The following limitations apply to the KVM hypervisor: Maximum VCPUs per guest
Virtualized guests support up to a maximum of 64 virtualized CPUs in Red Hat Enterprise Linux 6.0.
Constant TSC bit
Systems without a Constant Time Stamp Counter require additional configuration. Refer to Chapter 14, KVM guest timing management for details on determining whether you have a Constant Time Stamp Counter and configuration steps for fixing any related issues. Memory overcommit
KVM supports memory overcommit and can store the memory of guests in swap. A guest will run slower if it is swapped frequently. When KSM is used, make sure that the swap size is the size of the overcommit ratio.
CPU overcommit
It is not recommended to have more than 10 virtual CPUs per physical processor core. Any number of overcommitted virtual CPUs above the number of physical processor cores may cause problems with certain virtualized guests.
Overcommitting CPUs has some risk and can lead to instability. Refer to Chapter 20, Overcommitting with KVM for tips and recommendations on overcommitting CPUs. Virtualized SCSI devices
SCSI emulation is limited to 16 virtualized (emulated) SCSI devices.. Virtualized IDE devices
Chapter 4. Virtualization limitations Para-virtualized devices
Para-virtualized devices, which use the virtio drivers, are PCI devices. Presently, guests are limited to a maximum of 32 PCI devices. Some PCI devices are critical for the guest to run and these devices cannot be removed. The default, required devices are:
• the host bridge,
• the ISA bridge and usb bridge (The usb and isa bridges are the same device), • the graphics card (using either the Cirrus or qxl driver), and
• the memory balloon device.
Out of the 32 available PCI devices for a guest 4 are not removable. This means there are only 28 PCI slots available for additional devices per guest. Every para-virtualized network or block device uses one slot. Each guest can use up to 28 additional devices made up of any combination of para-virtualized network, para-virtualized disk devices, or other PCI devices using VT-d.
Migration limitations
Live migration is only possible with CPUs from the same vendor (that is, Intel to Intel or AMD to AMD only).
The No eXecution (NX) bit must be set to on or off for both CPUs for live migration. Storage limitations
The host should not use disk labels to identify file systems in the fstab file, the initrd file or used by the kernel command line. If less privileged users, especially virtualized guests, have write access to whole partitions or LVM volumes the host system could be compromised.
Guest should not be given write access to whole disks or block devices (for example, /dev/sdb). Virtualized guests with access to block devices may be able to access other block devices on the system or modify volume labels which can be used to compromise the host system. Use partitions (for example, /dev/sdb1) or LVM volumes to prevent this issue.
SR-IOV limitations
SR-IOV is only supported with the following devices: Intel® 82576NS Gigabit Ethernet Controller (igb driver) Intel® 82576EB Gigabit Ethernet Controller (igb driver) Neterion X3100 Series 10GbE PCIe (vxge driver)
Intel® 82599ES 10 Gigabit Ethernet Controller (ixgbe driver) Intel® 82599EB 10 Gigabit Ethernet Controller (ixgbe driver) PCI passthrough limitations
Application limitations Applications with high I/O throughput requirements should use the para-virtualized drivers for fully virtualized guests. Without the para-virtualized drivers certain applications may be unstable under heavy I/O loads.
The following applications should be avoided for their high I/O requirement reasons: • kdump server
• netdump server
You should carefully evaluate databasing applications before running them on a virtualized guest. Databases generally use network and storage I/O devices intensively. These applications may not be suitable for a fully virtualized environment. Consider the para-virtualized drivers or PCI passthrough for increased I/O performance. Refer to Chapter 11, KVM Para-virtualized Drivers for more information on the para-virtualized drivers for fully virtualized guests. Refer to Chapter 12, PCI passthrough for more information on the PCI passthrough.
Other applications and tools which heavily utilize I/O or require real-time performance should be evaluated carefully. Using full virtualization with the para-virtualized drivers (refer to Chapter 11, KVM Para-virtualized Drivers) or PCI passthrough (refer to Chapter 12, PCI passthrough) results in better performance with I/O intensive applications. Applications still suffer a small performance loss from running in virtualized environments. The performance benefits of virtualization through consolidating to newer and faster hardware should be evaluated against the potential application performance issues associated with using virtualization.
Part II. Installation
Virtualization installation topics
These chapters cover setting up the host and installing virtualized guests with Red Hat Enterprise Linux 6. It is recommended to read these chapters carefully to ensure successful installation of virtualized guest operating systems.
Chapter 5.
Installing the virtualization packages
Before you can use virtualization, the virtualization packages must be installed on your computer. Virtualization packages can be installed either during the installation sequence or after installation using the yum command and the Red Hat Network (RHN).
The KVM hypervisor uses the default Red Hat Enterprise Linux kernel with the kvm kernel module.
5.1. Installing KVM with a new Red Hat Enterprise Linux
installation
This section covers installing virtualization tools and KVM package as part of a fresh Red Hat Enterprise Linux installation.
Need help installing?
The Installation Guide (available from redhat.com1) covers installing Red Hat Enterprise Linux in
detail.
1. Start an interactive Red Hat Enterprise Linux installation from the Red Hat Enterprise Linux Installation CD-ROM, DVD or PXE.
2. You must enter a valid installation number when prompted to receive access to the virtualization and other Advanced Platform packages.
3. Complete the other steps up to the package selection step.
Chapter 5. Installing the virtualization packages
Select the Virtual Host server role to install a platform for virtualized guests. Alternatively, select the Customize Now radio button to specify individual packages.
4. Select the Virtualization package group. This selects the KVM hypervisor, virt-manager, libvirt and virt-viewer for installation.
Installing KVM with a new Red Hat Enterprise Linux installation
5. Customize the packages (if required)
Chapter 5. Installing the virtualization packages
Press the Close button then the Next button to continue the installation.
Note
You require a valid RHN virtualization entitlement to receive updates for the virtualization packages.
Installing KVM packages with Kickstart files
This section describes how to use a Kickstart file to install Red Hat Enterprise Linux with the KVM hypervisor packages. Kickstart files allow for large, automated installations without a user manually installing each individual system. The steps in this section will assist you in creating and using a Kickstart file to install Red Hat Enterprise Linux with the virtualization packages.
In the %packages section of your Kickstart file, append the following package group:
%packages @kvm
Installing KVM packages on an existing Red Hat Enterprise Linux system
5.2. Installing KVM packages on an existing Red Hat
Enterprise Linux system
The section describes the steps for installing the KVM hypervisor on a working Red Hat Enterprise Linux 6 or newer system.
Adding packages to your list of Red Hat Network entitlements
This section describes how to enable Red Hat Network (RHN) entitlements for the virtualization packages. You need these entitlements enabled to install and update the virtualization packages on Red Hat Enterprise Linux. You require a valid Red Hat Network account in order to install virtualization packages on Red Hat Enterprise Linux.
In addition, your machines must be registered with RHN. To register an unregistered installation of Red Hat Enterprise Linux, run the rhn_register command and follow the prompts.
If you do not have a valid Red Hat subscription, visit the Red Hat online store3.
Procedure 5.1. Adding the Virtualization entitlement with RHN
1. Log in to RHN4
using your RHN username and password. 2. Select the systems you want to install virtualization on.
3. In the System Properties section the present systems entitlements are listed next to the Entitlements header. Use the (Edit These Properties) link to change your entitlements. 4. Select the Virtualization checkbox.
Your system is now entitled to receive the virtualization packages. The next section covers installing these packages.
Installing the KVM hypervisor with yum
To use virtualization on Red Hat Enterprise Linux you require the kvm package. The kvm package contains the KVM kernel module providing the KVM hypervisor on the default Red Hat Enterprise Linux kernel.
To install the kvm package, run:
# yum install kvm
Now, install additional virtualization management packages.
Recommended virtualization packages:
python-virtinst
Provides the virt-install command for creating virtual machines.
libvirt
The libvirt package provides the server and host side libraries for interacting with hypervisors and host systems. The libvirt package provides the libvirtd daemon that handles the library calls, manages virtualizes guests and controls the hypervisor.
Chapter 5. Installing the virtualization packages
libvirt-python
The libvirt-python package contains a module that permits applications written in the Python programming language to use the interface supplied by the libvirt API.
virt-manager
virt-manager, also known as Virtual Machine Manager, provides a graphical tool for administering virtual machines. It uses libvirt-client library as the management API.
libvirt-client
The libvirt-client package provides the client-side APIs and libraries for accessing libvirt servers. The libvirt-client package includes the virsh command line tool to manage and control virtualized guests and hypervisors from the command line or a special virtualization shell.
Install the other recommended virtualization packages:
Chapter 6.
Virtualized guest installation overview
After you have installed the virtualization packages on the host system you can create guest operating systems. This chapter describes the general processes for installing guest operating systems on virtual machines. You can create guests using the New button in virt-manager or use the command line interface virt-install. Both methods are covered by this chapter.
Detailed installation instructions are available for specific versions of Red Hat Enterprise Linux, other Linux distributions, Solaris and Windows. Refer to the relevant procedure for you guest operating system:
• Red Hat Enterprise Linux 5.
• Para-virtualized Red Hat Enterprise Linux 6 on Red Hat Enterprise Linux 5: Chapter 8, Installing Red Hat Enterprise Linux 6 as a para-virtualized guest on Red Hat Enterprise Linux 5
• Red Hat Enterprise Linux 6: Chapter 7, Installing Red Hat Enterprise Linux 6 as a virtualized guest • Microsoft Windows operating systems: Chapter 9, Installing a fully-virtualized Windows guest
6.1. Virtualized guest prerequisites and considerations
Various factors should be considered before creating any virtualized guests. Factors include: • Performance
• Input/output requirements and types of input/output. • Storage.
• Networking and network infrastructure.
• Guest load and usage for processor and memory resources.
6.2. Creating guests with virt-install
You can use the virt-install command to create virtualized guests from the command line. virt-install is used either interactively or as part of a script to automate the creation of virtual machines. Using virt-install with Kickstart files allows for unattended installation of virtual machines.
The virt-install tool provides a number of options one can pass on the command line. To see a complete list of options run:
$ virt-install --help
The virt-install man page also documents each command option and important variables. qemu-img is a related command which may be used before virt-install to configure storage options.
An important option is the --vnc option which opens a graphical window for the guest's installation.
Example 6.1. Using virt-install to install a RHEL 5 guest
Chapter 6. Virtualized guest installation overview • Uses LVM partitioning
• Is a plain QEMU guest • Uses virtual networking • Boots from PXE
• Uses VNC server/viewer
# virt-install \
--network network:default \ --name rhel5support --ram=756\
--file=/var/lib/libvirt/images/rhel5support.img \ --file-size=6 --vnc --cdrom=/dev/sr0
Refer to man virt-install for more examples.
6.3. Creating guests with virt-manager
virt-manager, also known as Virtual Machine Manager, is a graphical tool for creating and managing virtualized guests.
Procedure 6.1. Creating a virtualized guest with virt-manager 1. Open virt-manager
Start virt-manager. Launch the Virtual Machine Manager application from the Applications menu and System Tools submenu. Alternatively, run the virt-manager command as root. 2. Optional: Open a remote hypervisor
Refer to Section 31.5, “Adding a remote connection”
Select the hypervisor and press the Connect button to connect to the remote hypervisor. 3. Create a new guest
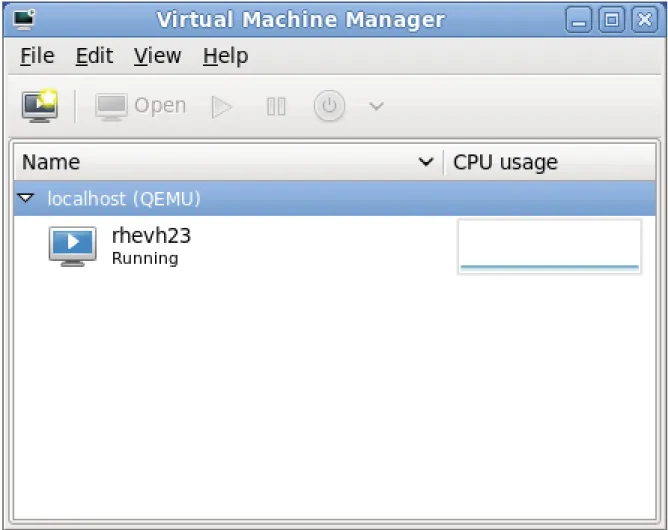
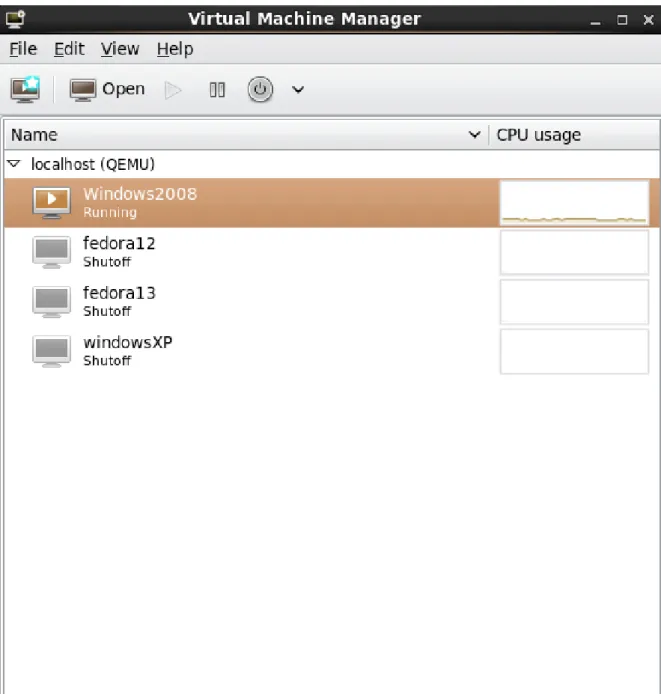
The virt-manager window allows you to create a new virtual machine. Click the New button (Figure 6.1, “Virtual Machine Manager window”) to open the New VM wizard.
Creating guests with virt-manager
Figure 6.1. Virtual Machine Manager window
4. New VM wizard
The New VM wizard breaks down the guest creation process into five steps: 1. Naming the guest and choosing the installation type
2. Locating and configuring the installation media 3. Configuring memory and CPU options
4. Configuring the guest's storage
5. Configuring networking, hypervisor type, architecture, and other hardware settings Ensure that virt-manager can access the installation media (whether locally or over the network).
5. Specify name and installation type
The guest creation process starts with the selection of a name and installation type. Virtual machine names can have underscores (_), periods (.), and hyphens (-).
Chapter 6. Virtualized guest installation overview
Figure 6.2. Step 1
Type in a virtual machine name and choose an installation type: Local install media (ISO image or CDROM)
Creating guests with virt-manager Network Boot (PXE)
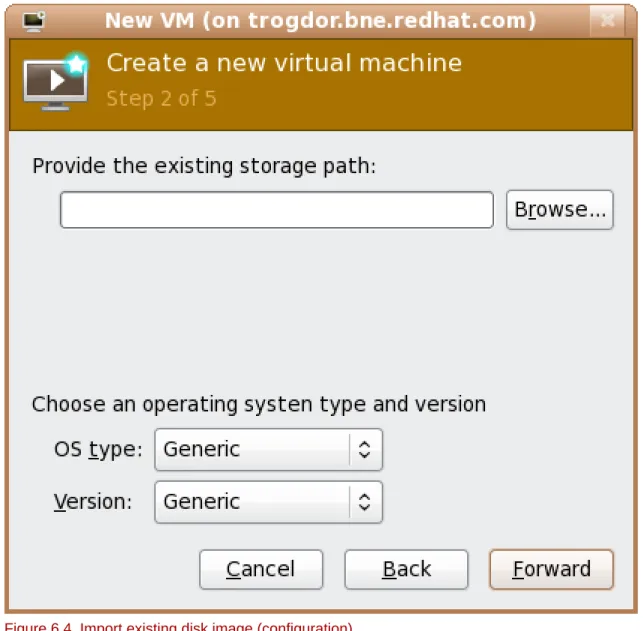
This method uses a Preboot eXecution Environment (PXE) server to install the guest. Setting up a PXE server is covered in the Deployment Guide. To install via network boot, the guest must have a routable IP address or shared network device. For information on the required networking configuration for PXE installation, refer to Chapter 10, Network Configuration. Import existing disk image
This method allows you to create a new guest and import a disk image (containing a pre-installed, bootable operating system) to it.
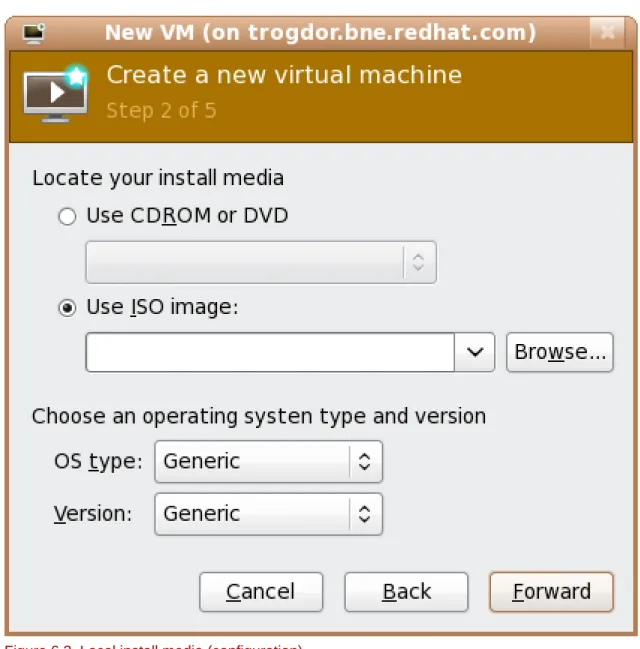
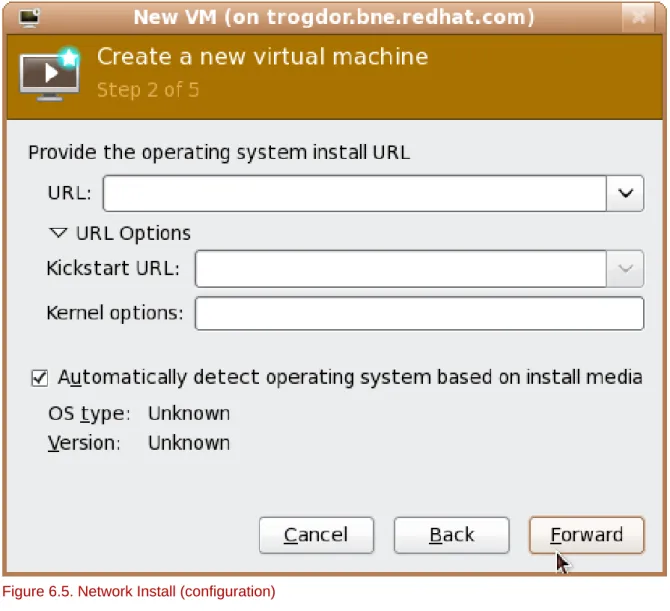
Click Forward to continue. 6. Configure installation
Next, configure the OS type and Version of the installation. Except for network booting, this step also requires further configuration (depending on your chosen installation method). When using local install media or importing an existing disk image, you need to specify the location of the installation media or disk image.
Chapter 6. Virtualized guest installation overview
Figure 6.4. Import existing disk image (configuration)
Important
It is recommend that you use the default directory for virtual machine images, /var/lib/ libvirt/images/. If you are using a different location, make sure it is added to your SELinux policy and relabeled before you continue with the installation. Refer to Section 16.2, “SELinux and virtualization” for details on how to do this.
When performing a network install, you need to specify the URL of the installation tree. You can also specify the URL of any kickstart files you want to use, along with any kernel options you want to pass during installation.
Creating guests with virt-manager
Figure 6.5. Network Install (configuration)
Click Forward to continue. 7. Configure CPU and memory
The next step involves configuring the number of CPUs and amount of memory to allocate to the virtual machine. The wizard shows the number of CPUs and amount of memory you can allocate; configure these settings and click Forward.
Chapter 6. Virtualized guest installation overview
Figure 6.6. Configuring CPU and Memory
8. Configure storage
Assign a physical storage device (Block device) or a file-based image (File). File-based images should be stored in /var/lib/libvirt/images/ to satisfy default SELinux permissions.
Creating guests with virt-manager
Figure 6.7. Configuring virtual storage
If you chose to import an existing disk image during the first step, virt-manager will skip this step.
Assign sufficient space for your virtualized guest and any applications the guest requires, then click Forward to continue.
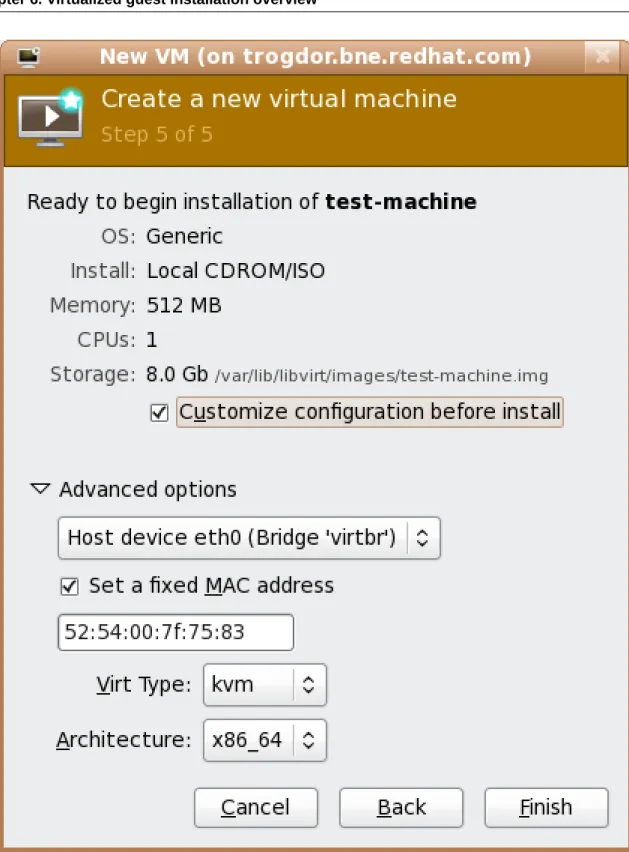
9. Final configuration
Verify the settings of the virtual machine and click Finish when you are satisfied; doing so will create the guest with default networking settings, virtualization type, and architecture.
Chapter 6. Virtualized guest installation overview
Figure 6.8. Verifying the configuration
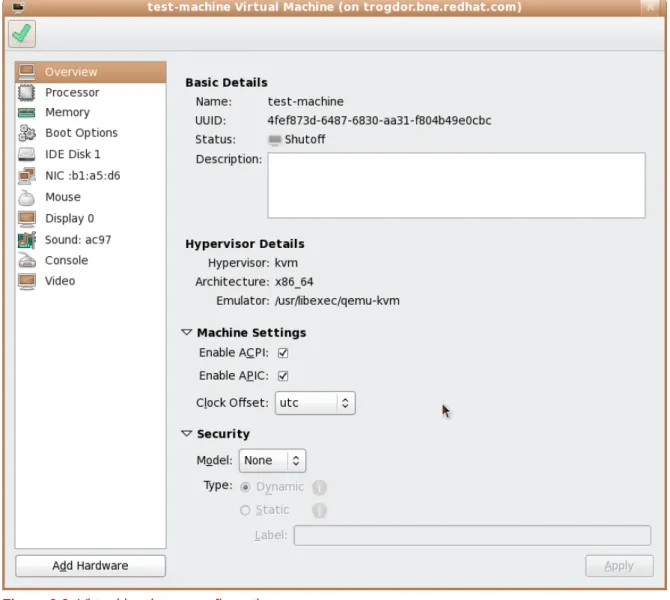
If you prefer to further configure the virtual machine's hardware first, check the Customize configuration before install box first before clicking Finish. Doing so will open another wizard
Installing guests with PXE
Figure 6.9. Virtual hardware configuration
After configuring the virtual machine's hardware, click Apply. virt-manager will then create the guest with your specified hardware settings.
This concludes the general process for creating guests with virt-manager. Chapter 6, Virtualized guest installation overview contains step-by-step instructions to installing a variety of common operating systems.
6.4. Installing guests with PXE
This section covers the steps required to install guests with PXE. PXE guest installation requires a shared network device, also known as a network bridge. The procedures below covers creating a bridge and the steps required to utilize the bridge for PXE installation.
1. Create a new bridge
a. Create a new network script file in the /etc/sysconfig/network-scripts/ directory. This example creates a file named ifcfg-installation which makes a bridge named installation.
# cd /etc/sysconfig/network-scripts/ # vim ifcfg-installation
Chapter 6. Virtualized guest installation overview
TYPE=Bridge BOOTPROTO=dhcp ONBOOT=yes
Warning
The line, TYPE=Bridge, is case-sensitive. It must have uppercase 'B' and lower case 'ridge'.
b. Start the new bridge by restarting the network service. The ifup installation command can start the individual bridge but it is safer to test the entire network restarts properly.
# service network restart
c. There are no interfaces added to the new bridge yet. Use the brctl show command to view details about network bridges on the system.
# brctl show
bridge name bridge id STP enabled interfaces installation 8000.000000000000 no
virbr0 8000.000000000000 yes
The virbr0 bridge is the default bridge used by libvirt for Network Address Translation (NAT) on the default Ethernet device.
2. Add an interface to the new bridge
Edit the configuration file for the interface. Add the BRIDGE parameter to the configuration file with the name of the bridge created in the previous steps.
# Intel Corporation Gigabit Network Connection DEVICE=eth1
BRIDGE=installation BOOTPROTO=dhcp
HWADDR=00:13:20:F7:6E:8E ONBOOT=yes
After editing the configuration file, restart networking or reboot.
# service network restart
Installing guests with PXE
# service iptables restart
Disable iptables on bridges
Alternatively, prevent bridged traffic from being processed by iptables rules. In /etc/ sysctl.conf append the following lines:
net.bridge.bridge-nf-call-ip6tables = 0 net.bridge.bridge-nf-call-iptables = 0 net.bridge.bridge-nf-call-arptables = 0
Reload the kernel parameters configured with sysctl.
# sysctl -p /etc/sysctl.conf
4. Restart libvirt before the installation Restart the libvirt daemon.
# service libvirtd reload
The bridge is configured, you can now begin an installation.
PXE installation with virt-install
For virt-install append the --network=bridge:installation installation parameter where installation is the name of your bridge. For PXE installations use the --pxe parameter.
Example 6.2. PXE installation with virt-install
# virt-install --hvm --connect qemu:///system \ --network=bridge:installation --pxe\ --name EL10 --ram=756 \
--vcpus=4
--os-type=linux --os-variant=rhel5 --file=/var/lib/libvirt/images/EL10.img \
PXE installation with virt-manager
The steps below are the steps that vary from the standard virt-manager installation procedures. 1. Select PXE
Chapter 6. Virtualized guest installation overview
2. Select the bridge
Installing guests with PXE
3. Start the installation
Chapter 6. Virtualized guest installation overview
Chapter 7.
Installing Red Hat Enterprise Linux 6 as
a virtualized guest
This Chapter covers how to install Red Hat Enterprise Linux 6 as a fully virtualized guest on Red Hat Enterprise Linux 6.
This procedure assumes that the KVM hypervisor and all other required packages are installed and the host is configured for virtualization. For more information on installing the virtualization pacakges, refer to Chapter 5, Installing the virtualization packages.
7.1. Creating a Red Hat Enterprise Linux 6 guest with local
installation media
This procedure covers creating a virtualized Red Hat Enterprise Linux 6 guest with a locally stored installation DVD or DVD image. DVD images are available from rhn.redhat.com1
for Red Hat Enterprise Linux 6.
Procedure 7.1. Creating a Red Hat Enterprise Linux 6 guest with virt-manager
1. Optional: Preparation
Prepare the storage environment for the virtualized guest. For more information on preparing storage, refer to Part V, “Virtualization storage topics”.
Note
Various storage types may be used for storing virtualized guests. However, for a guest to be able to use migration features the guest must be created on networked storage.
Red Hat Enterprise Linux 6 requires at least 1GB of storage space. However, Red Hat
recommends at least 5GB of storage space for a Red Hat Enterprise Linux 6 installation and for the procedures in this guide.
2. Open virt-manager and start the wizard
Open virt-manager by executing the virt-manager command as root or opening Applications -> System Tools -> Virtual Machine Manager.
Chapter 7. Installing Red Hat Enterprise Linux 6 as a virtualized guest
Figure 7.1. The main virt-manager window
Press the create new virtualized guest button (see figure Figure 7.2, “The create new virtualized guest button”) to start the new virtualized guest wizard.
Creating a Red Hat Enterprise Linux 6 guest with local installation media
Figure 7.3. The Create a new virtual machine window - Step 1
Press Forward to continue. 4. Select the installation media
Select the installation ISO image location or a DVD drive with the installation disc inside. This example uses an ISO file image of the Red Hat Enterprise Linux 6.0 installation DVD image.
Chapter 7. Installing Red Hat Enterprise Linux 6 as a virtualized guest
Figure 7.4. The Locate ISO media volume window
Image files and SELinux
For ISO image files and guest storage images, the recommended directory to use is the /var/lib/libvirt/images/ directory. Any other location may require additional configuration for SELinux, refer to Section 16.2, “SELinux and virtualization” for details.
Select the operating system type and version which match the installation media you have selected.
Creating a Red Hat Enterprise Linux 6 guest with local installation media
Figure 7.5. The Create a new virtual machine window - Step 2
Press Forward to continue. 5. Set RAM and virtual CPUs
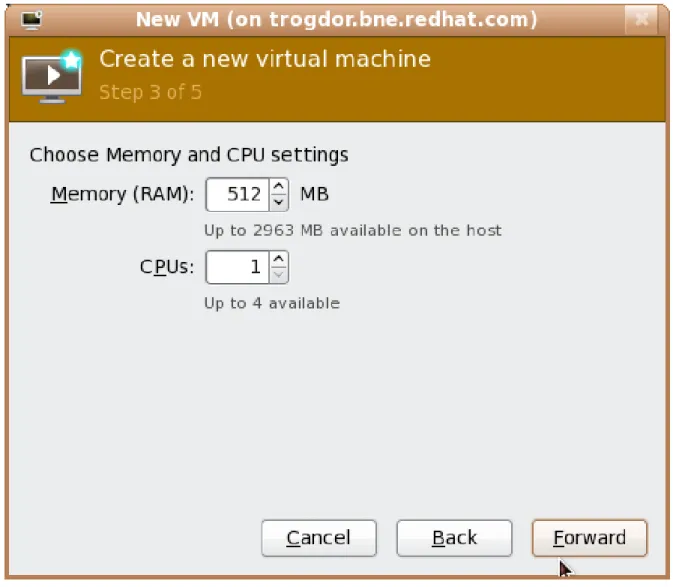
Choose appropriate values for the virtualized CPUs and RAM allocation. These values affect the host's and guest's performance. Memory and virtualized CPUs can be overcommitted, for more information on overcommitting refer to Chapter 20, Overcommitting with KVM.
Virtualized guests require sufficient physical memory (RAM) to run efficiently and effectively. Red Hat supports a minimum of 512MB of RAM for a virtualized guest. Red Hat recommends at least 1024MB of RAM for each logical core.
Assign sufficient virtual CPUs for the virtualized guest. If the guest runs a multithreaded application, assign the number of virtualized CPUs the guest will require to run efficiently. You cannot assign more virtual CPUs than there are physical processors (or hyper-threads) available on the host system. The number of virtual CPUs available is noted in the Up to X available field.
Chapter 7. Installing Red Hat Enterprise Linux 6 as a virtualized guest
Figure 7.6. The Create a new virtual machine window - Step 3
Press Forward to continue. 6. Storage
Enable and assign storage for the Red Hat Enterprise Linux 6 guest. Assign at least 5GB for a desktop installation or at least 1GB for a minimal installation.
Migration
Live and offline migrations require guests to be installed on shared network storage. For information on setting up shared storage for guests refer to Part V, “Virtualization storage topics”.
Creating a Red Hat Enterprise Linux 6 guest with local installation media
Figure 7.7. The Create a new virtual machine window - Step 4
b. With a storage pool
Chapter 7. Installing Red Hat Enterprise Linux 6 as a virtualized guest
Figure 7.8. The Locate or create storage volume window
i. Press the browse button to open the storage pool browser. ii. Select a storage pool from the Storage Pools list.
iii. Optional: Press the New Volume button to create a new storage volume. Enter the name of the new storage volume.