The smart way to learn
Microsoft PowerPoint 2013
—one step at a time!
Experience learning made easy—and quickly teach yourself how to create professional-looking presentations with Microsoft PowerPoint 2013. With Step by Step, you set the pace—building and practicing the skills you need, just when you need them!Cox Lambert
•
Work with PowerPoint on your PC or touch device•
Design, organize, and polish your slides•
Use tables, charts, and graphics to visualize content•
Engage your audience with animation, audio,and video
•
Customize themes and templates•
Prepare for your presentationYourStep by Stepdigital content includes:
•All the book’s practice files—ready to download at http://aka.ms/PowerPoint2013sbs/files
•Fully searchable ebook. See the instruction page at the back of the book.
Micr
oso
ft P
owerP
oint 201
3
Follow the easy numbered steps Use screenshots to check your work Get helpful tips and pointers Build your skills hands-on with
ready-made practice files
1
2
3
4
1
2
3
4
microsoft.com/mspress Microsoft Office/ Microsoft PowerPoint ISBN: 978-0-7356-6910-9 U.S.A. $29.99Canada $31.99
[Recommended]
spine = .96”
Build exactly the skills you need.
Learn at the pace you want.
Microsoft
PowerPoint 2013
®®
PUBLISHED BY Microsoft Press
A Division of Microsoft Corporation One Microsoft Way
Redmond, Washington 98052-6399
Copyright © 2013 by Joyce Cox and Joan Lambert
All rights reserved. No part of the contents of this book may be reproduced or transmitted in any form or by any means without the written permission of the publisher.
Library of Congress Control Number: 2012956092 ISBN: 978-0-7356-6910-9
Printed and bound in the United States of America. First Printing
Microsoft Press books are available through booksellers and distributors worldwide. If you need support related to this book, email Microsoft Press Book Support at [email protected]. Please tell us what you think of this book at http://www.microsoft.com/learning/booksurvey.
Microsoft and the trademarks listed at http://www.microsoft.com/about/legal/en/us/IntellectualProperty/ Trademarks/EN-US.aspx are trademarks of the Microsoft group of companies. All other marks are property of their respective owners.
Native plant photographs courtesy of Rugged Country Plants, which is no longer open to the public.
The example companies, organizations, products, domain names, email addresses, logos, people, places, and
events depicted herein are fictitious. No association with any real company, organization, product, domain name,
email address, logo, person, place, or event is intended or should be inferred.
This book expresses the author’s views and opinions. The information contained in this book is provided without any express, statutory, or implied warranties. Neither the authors, Microsoft Corporation, nor its resellers, or distributors will be held liable for any damages caused or alleged to be caused either directly or indirectly by this book.
Acquisitions Editor: Rosemary Caperton
Editorial Production: Online Training Solutions, Inc. Technical Reviewer: Rob Carr
Copyeditor: Jaime Odell Indexer: Joyce Cox
Contents
Introduction . . . . ix
Who this book is for. . . ix
How this book is organized . . . ix
Download the practice files . . . x
Your companion ebook. . . xiii
Get support and give feedback . . . xiii
Errata . . . xiii
We want to hear from you . . . xiv
Stay in touch . . . xiv
PART 1
Basic presentations
1
Explore Microsoft PowerPoint 2013
3
Identifying new features of PowerPoint 2013 . . . .6If you are upgrading from PowerPoint 2010. . . 6
If you are upgrading from PowerPoint 2007. . . 7
If you are upgrading from PowerPoint 2003. . . 9
Working in the PowerPoint 2013 user interface . . . .10
Identifying program window elements . . . 11
Sidebar: About buttons and arrows . . . 13
Working with the ribbon . . . 16
Sidebar: Adapting exercise steps. . . 20
Opening, navigating, and closing presentations. . . .28
Viewing presentations in different ways . . . .33
Searching for help with PowerPoint 2013 . . . .40
2
Create presentations
45
Starting and saving presentations. . . .46
Sidebar: Compatibility with earlier versions . . . 54
Sidebar: Saving files to SkyDrive. . . 55
Entering text in placeholders . . . .56
Editing text . . . .60
Sidebar: About the Clipboard . . . 64
Adding and deleting slides . . . .65
Sidebar: Exporting presentation outlines. . . 68
Importing slides from existing sources. . . .69
Key points . . . .73
3
Work with slides
75
Dividing presentations into sections. . . .76Rearranging slides and sections. . . .80
Applying themes . . . .84
Changing the slide background. . . .87
Sidebar: Non-theme colors . . . 94
Formatting text placeholders. . . .96
Key points . . . .101
4
Work with slide text
103
Changing the alignment, spacing, size, and look of text. . . 104Correcting and sizing text while entering it. . . .111
Checking spelling and choosing the best wording. . . .118
Sidebar: Researching information and translating text . . . 125
Finding and replacing text and fonts . . . 126
Adding text boxes . . . 129
Sidebar: Changing the default formatting for text boxes . . . 136
5
Add simple visual enhancements
139
Inserting pictures and clip art images. . . 140
Sidebar: Graphic formats . . . 146
Creating diagrams . . . .147
Sidebar: Converting existing bullet points into diagrams . . . 154
Plotting charts. . . 154
Drawing shapes . . . .162
Sidebar: Connecting shapes. . . 169
Adding transitions . . . .171
Key points . . . .175
6
Review and deliver presentations
177
Setting up presentations for delivery . . . .178Previewing and printing presentations. . . 184
Preparing speaker notes and handouts . . . 189
Sidebar: Enhanced handouts . . . 196
Sidebar: Easy note-taking. . . 197
Finalizing presentations. . . .197
Sidebar: Setting up Presenter view . . . 204
Delivering presentations . . . 204
Key points . . . 209
PART 2
Presentation enhancements
7
Present content in tables
213
Inserting tables . . . .213Formatting tables. . . .218
8
Fine-tune visual elements
229
Editing pictures. . . 229
Sidebar: Alt text . . . 238
Customizing diagrams. . . 238
Formatting charts. . . 244
Sidebar: Pie charts . . . 255
Arranging graphics. . . .255
Key points . . . .261
9
Add other enhancements
263
Adding WordArt text. . . 264Inserting symbols and equations. . . .267
Capturing screen clippings . . . .274
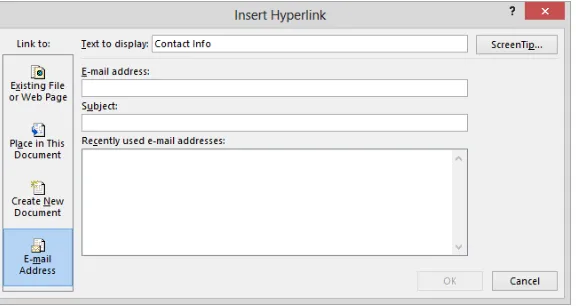
Creating hyperlinks . . . .276
Sidebar: Adding the same hyperlink to every slide . . . 280
Attaching actions to text or objects . . . .281
Key points . . . .285
10
Add animations, audio, and videos
287
Animating with ready-made effects . . . 288Customizing animation effects . . . .292
Adding audio content . . . 299
Inserting and playing videos . . . 303
PART 3
Additional techniques
11
Share and review presentations
315
Sharing presentations in other formats . . . .316
Sending presentations directly from PowerPoint . . . .326
Sidebar: Presenting presentations online. . . 329
Protecting presentations by using passwords. . . 330
Adding and reviewing comments . . . .332
Merging presentation versions . . . .336
Collaborating with other people . . . 340
Key points . . . .341
12
Create custom presentation elements
343
Viewing and changing slide masters. . . 344Creating themes, theme colors, and theme fonts. . . .353
Designing slide layouts . . . 362
Saving custom design templates . . . 369
Key points . . . .373
13
Prepare for delivery
375
Adapting presentations for different audiences . . . .376Rehearsing presentations . . . 380
Sidebar: Recording presentations . . . 384
Preparing presentations for travel. . . 386
14
Work in PowerPoint more efficiently
391
Changing default program options. . . .391
Sidebar: Using add-ins . . . 402
Customizing the ribbon. . . 403
Manipulating the Quick Access Toolbar . . . .410
Sidebar: Customizing the status bar . . . 414
Key points . . . .414
Glossary . . . . 415
Keyboard shortcuts . . . . 423
PowerPoint 2013 keyboard shortcuts . . . .423
Move between panes . . . 423
Work in an outline . . . 423
Work with shapes, objects, and WordArt . . . 424
Select text and objects . . . 424
Delete and copy text and objects . . . 425
Move around in text . . . 425
Move around in and work on tables. . . 426
Edit a linked or embedded object. . . 426
Format and align characters and paragraphs . . . 426
Manage a presentation. . . 428
Office 2013 keyboard shortcuts. . . .431
Display and use windows . . . 431
Use dialog boxes . . . 431
Use the Backstage view. . . 433
Navigate the ribbon . . . 433
Change the keyboard focus without using the mouse . . . 433
Undo and redo actions . . . 434
Change or resize the font . . . 434
Move around in text or cells . . . 435
Move around in and work in tables . . . 435
Access and use panes and galleries . . . 435
Access and use available actions . . . 436
Index . . . . 439
About the authors . . . . 461
How to download your ebook . . . . 463
Introduction
Part of the Microsoft Office 2013 suite of programs, Microsoft PowerPoint 2013 is a full-featured presentation program that helps you quickly and efficiently develop dynamic,
professional-looking presentations and then deliver them to an audience. Microsoft
PowerPoint 2013 Step by Step offers a comprehensive look at the features of PowerPoint
that most people will use most frequently.
Who this book is for
Microsoft PowerPoint 2013 Step by Step and other books in the Step by Step series are
de-signed for beginning-level to intermediate-level computer users. Examples shown in the book generally pertain to small and medium businesses but teach skills that can be used in organizations of any size. Whether you are already comfortable working in PowerPoint and want to learn about new features in PowerPoint 2013 or are new to PowerPoint, this book provides invaluable hands-on experience so that you can create, modify, and deliver profes-sional presentations with ease.
How this book is organized
This book is divided into three parts. Part 1 explores the everyday experience of working in PowerPoint 2013. Part 2 discusses ways of enhancing presentation content. Part 3 covers more advanced PowerPoint techniques, in addition to customizing program functionality to
fit the way you work. This three-part structure allows readers who are new to the program
to acquire basic skills and then build on them, whereas readers who are comfortable with PowerPoint 2013 basics can focus on material that is of the most interest to them.
This book has been designed to lead you step by step through all the tasks you’re most likely to want to perform with PowerPoint 2013. If you start at the beginning and work your
way through all the exercises, you will gain enough proficiency to be able to create and
work with most types of PowerPoint presentations. However, with the exception of the top-ics in Chapter 1, which build on each other, the toptop-ics are self-contained, so you can jump in anywhere to acquire exactly the skills you need.
Download the practice files
Before you can complete the exercises in this book, you need to download the book’s
prac-tice files to your computer. These pracprac-tice files can be downloaded from the following page:
http://aka.ms/PowerPoint2013sbs/files
IMPORTANT The PowerPoint 2013 program is not available from this website. You should purchase and install that program before using this book.
The following table lists the practice files for this book.
Chapter File
Chapter 1: Explore Microsoft PowerPoint 2013 BuyingTrips.pptx DesigningColor.pptx SalesMeetingA.pptx SalesMeetingB.pptx Chapter 2: Create presentations BuyingTravelB.pptx
ProjectProcess.pptx ServiceA.pptx ServiceB.pptx ServiceOutline.docx Chapter 3: Work with slides CommunityA.pptx
Chapter File
Chapter 4: Work with slide text CommunityServiceA.pptx CommunityServiceB.pptx CommunityServiceC.pptx TripsA.pptx
TripsB.pptx Chapter 5: Add simple visual enhancements Agastache.jpg
JournalingA.pptx JournalingB.pptx Penstemon.jpg WaterConsumption.xlsx WaterLandscapingA.pptx WaterLandscapingB.pptx WaterLandscapingC.pptx Chapter 6: Review and deliver presentations Harmony.pptx
MeetingA.pptx MeetingB.pptx ServiceProjectsA.pptx ServiceProjectsB.pptx YinYang.png
Chapter 7: Present content in tables MayMeeting.pptx NewEquipment.xlsx WaterSavingA.pptx WaterSavingB.pptx Chapter 8: Fine-tune visual elements JuneMeeting.pptx
NativePlant1.jpg through NativePlant8.jpg NativePlants.pptx
NaturalGardening.pptx SavingWater.pptx Chapter 9: Add other enhancements JulyMeeting.pptx
Chapter File
Chapter 10: Add animations, audio, and videos AGKCottage.pptx Amanda.wma Bird.jpg Butterfly.wmv HealthyEcosystemsA.pptx HealthyEcosystemsB.pptx NaturalGardenA.pptx NaturalGardenB.pptx Wildlife.wmv Chapter 11: Share and review presentations CottageShowA.pptx
CottageShowB.pptx HomeHarmony.pptx MeetingSH.pptx MeetingTA.pptx MeetingThemeA.pptx MeetingThemeB.pptx MeetingThemeC.pptx Projects.pptx WaterUse.pptx Chapter 12: Create custom presentation elements AnnualMeeting.pptx
NativePlant1.jpg through NativePlant3.jpg NaturalA.pptx
NaturalB.pptx NaturalC.pptx PhotoAlbum.pptx Chapter 13: Prepare for delivery CommunityProjects.pptx
GettingOrganized.pptx Jounal.pptx
Procedures.docx
If you would like to be able to refer to the completed versions of practice files at a later time, save the modified practice files at the end of each exercise. If you might want to repeat the exercises, either save the modified practice files with a different name or in a
different folder.
Your companion ebook
With the ebook edition of this book, you can do the following:
▪
Search the full text▪
Print▪
Copy and pasteTo download your ebook, please see the instruction page at the back of the book.
Get support and give feedback
The following sections provide information about getting help with this book and contact-ing us to provide feedback or report errors.
Errata
We’ve made every effort to ensure the accuracy of this book and its companion con-tent. Any errors that have been reported since this book was published are listed on
our Microsoft Press site at oreilly.com, which you can find at:
http://aka.ms/PowerPoint2013sbs/errata
If you find an error that is not already listed, you can report it to us through the same page.
If you need additional support, email Microsoft Press Book Support at
We want to hear from you
At Microsoft Press, your satisfaction is our top priority, and your feedback our most valuable asset. Please tell us what you think of this book at:
http://www.microsoft.com/learning/booksurvey
The survey is short, and we read every one of your comments and ideas. Thanks in advance for your input!
Stay in touch
Basic presentations
1
Explore Microsoft PowerPoint 2013
3
2
Create presentations
45
3
Work with slides
75
4
Work with slide text
103
5
Add simple visual enhancements
139
Chapter at a glance
Work
Work in the PowerPoint 2013 user interface, page 10
Navigate
Open, navigate, and close presentations, page 28
Search
Search for help with PowerPoint 2013, page 40
View
1
Explore Microsoft
PowerPoint 2013
IN THIS CHAPTER, YOU WILL LEARN HOW TO
▪
Identify new features of PowerPoint 2013.▪
Work in the PowerPoint 2013 user interface.▪
Open, navigate, and close presentations.▪
View presentations in different ways.▪
Search for help with PowerPoint 2013.Microsoft PowerPoint 2013 and a little creativity are all you need to develop professional presentations ready for delivery to any audience. You can use PowerPoint to:
▪
Introduce an idea, proposal, organization, product, or process with professionally designed, high-impact slides.▪
Add visual appeal by using themes, styles, and formatting options to achieve the right combination of colors, fonts, and effects.▪
Reinforce bullet points by adding pictures, shapes, and fancy display text.▪
Convey numeric data in easy-to-grasp ways by using attractive charts and tables.▪
Illustrate a concept by using the SmartArt Graphics tool to create sophisticateddiagrams that reflect processes, hierarchies, and other relationships.
▪
Maintain branding consistency by creating custom themes, designs, and layouts.▪
Collaborate with colleagues, giving and receiving feedback to ensure the best possible presentation.PRACTICE FILES To complete the exercises in this chapter, you need the practice files contained in the Chapter01 practice file folder. For more information, see “Download the practice files” in this book’s Introduction.
PowerPoint 2013 is part of Microsoft Office 2013, which encompasses a wide variety of pro
-grams, including Microsoft Access 2013, Excel 2013, InfoPath 2013, Lync 2013, OneNote 2013,
Outlook 2013, Publisher 2013, and Word 2013. Office is available in various editions that
include different combinations of programs; you can also purchase most of the programs individually.
The programs in the Office suite are designed to work together to provide highly efficient methods of getting things done. You can install one or more Office programs on your com -puter. Some programs have multiple versions designed for different platforms. Although the core purpose of a program remains the same regardless of the platform on which it runs, the available functionality and the way you interact with the program might be differ-ent. We provide a brief description of the various PowerPoint 2013 programs here so that you can identify any differences between what is displayed on your screen and what is de-scribed in this book.
▪
PowerPoint 2013 standard desktop installation The program we work with anddepict in images throughout this book is a desktop installation of PowerPoint 2013, meaning that we installed the program directly on our computers. The desktop
instal-lation has all the available PowerPoint functionality. It is available as part of the Office 2013 suite of programs, as a freestanding program, or as part of an Office 365 sub -scription that allows users to install the desktop programs from the Internet.
TIP Office 365 is a cloud-based solution that provides a variety of products and ser-vices through a subscription licensing program. Depending on the subscription plan purchased, users will have access either to the full PowerPoint 2013 desktop installa-tion and PowerPoint Web App or only to PowerPoint Web App.
▪
PowerPoint 2013 RT Tablet-style computers that run Windows RT (an installationof Windows 8 that runs only on devices that use a type of processor called an ARM
processor) come preloaded with Office Home and Student 2013 RT, which includes
Word, Excel, PowerPoint, and OneNote.
The Office Home and Student 2013 RT programs have the functionality of the full
programs and also include a Touch Mode feature to help you work with the program
1
a stylus. When Touch Mode is turned on, the user interface is slightly modified to
simplify on-screen interactions, and an on-screen keyboard is readily available for text input. (You can simplify your interactions even further by attaching a keyboard
and mouse to your Windows RT computer and interacting with Office in the usual
manner.)
▪
PowerPoint Web App When you want to work with a presentation that is stored ona Microsoft SkyDrive or Microsoft SharePoint site, you might be able to review and
edit the presentation in your web browser by using PowerPoint Web App. Office Web
Apps are installed in the online environment in which you’re working and are not part of the desktop installation on your computer. PowerPoint Web App is available as part
of Office 365 and SharePoint Online subscriptions, and is free on SkyDrive storage
sites.
SEE ALSO For more information about saving presentations to SkyDrive folders
and SharePoint sites, see “Starting and saving presentations” in Chapter 2, “Create presentations.”
PowerPoint Web App displays the contents of a presentation very much like the desktop application does. Although the Web App offers only a subset of the com-mands available in the full desktop application, it does provide the tools you need to create and edit most elements of a presentation. Commands that are not available in PowerPoint Web App control higher-level functionality such as that for managing slide layout, text box layout, and advanced font and paragraph formats; inserting tables, screen captures, charts, actions, specialized text or symbols, and media clips; changing the size or background of a slide; managing special features of animations and transitions; and working with slide masters, multiple windows, and window ele-ments. Slide show management and presentation reviewing tools, other than simple comments, are also not available in the Web App.
Both PowerPoint Web App and the desktop version of the program might be avail-able to you in the online environment. When viewing a presentation in the Web App, you can click the Edit Presentation menu and then choose the version you want to use by clicking Edit In PowerPoint or Edit In PowerPoint Web App. If you’re editing a
presentation in the Web App and find that you need more functionality than is avail -able, and you have the full PowerPoint program installed on your computer, you can click Open In PowerPoint to open the presentation and use the full program.
TIP At the time of this writing, Office Web Apps are compatible with recent versions
Identifying new features of PowerPoint 2013
PowerPoint 2013 builds on previous versions to provide powerful tools for all your presen-tation needs. If you’re upgrading to PowerPoint 2013 from a previous version, you’re prob-ably most interested in the differences between the old and new versions and how they will
affect you, and you probably want to find out about them in the quickest possible way. The
following sections list new features you will want to be aware of, depending on the version
of PowerPoint you are upgrading from. Start with the first section and work down to your
previous version to get the complete picture.
If you are upgrading from PowerPoint 2010
If you have been using PowerPoint 2010, you might be wondering how Microsoft could have improved on what seemed like a pretty comprehensive set of features and tools. The new features introduced between PowerPoint 2010 and PowerPoint 2013 include the following:
▪
Windows 8 functionality PowerPoint 2013, like all Office 2013 programs, is afull-featured Windows 8 application. When it is running on the Windows 8 operating sys-tem, it not only has the sleek new Windows 8 look but it also incorporates the latest touch technologies designed for tablet and mobile devices.
▪
Starting screen PowerPoint opens to a screen that provides easy access topresenta-tion templates, the presentapresenta-tions you recently worked on, and locapresenta-tions where exist-ing presentations might be stored.
▪
Cloud access When you connect Office or PowerPoint to a Microsoft account (for-merly known as a Windows Live account) or Office 365 account, you have the option of saving presentations “in the cloud” to a SharePoint document library or SkyDrive.
After saving a presentation in a shared location, you and your colleagues can simul-taneously work on one version of the presentation, using either the full version of PowerPoint or PowerPoint Web App.
▪
Previous location bookmark When you close a presentation, PowerPoint marks thelocation where you were working. The next time you open the presentation, a resume
reading flag enables you to quickly jump back to that location.
▪
Smart guides Dynamic on-screen alignment guides help you intuitively align1
▪
Outline view The old Outline tab has been replaced with a full-fledged Outline viewthat makes it easier than ever to enter and edit the text of a presentation.
▪
Improved charting Linked Excel data now appears in a window, and filters enableyou to select which of the data series in the linked data you want to appear in the chart.
▪
Improved comments The Comments button on the status bar and the Commentspane make it easier to enter and respond to comments.
▪
Enhanced Presenter View New tools make Presenter View setup easier and give youmore control during the presentation. For example, thumbnails of all the slides give you an overview and help you pinpoint your current location, and new zoom func-tionality enables you to focus your discussion.
▪
Web-based presentation delivery The Present Online feature makes it simpler thanever to deliver a presentation via the web. After you send a link to the presentation, audience members who don’t have PowerPoint can follow along in their web browser as you move from slide to slide.
If you are upgrading from PowerPoint 2007
In addition to the features discussed in the previous section, if you’re upgrading from PowerPoint 2007, you’ll want to take note of the following features that were introduced in PowerPoint 2010:
▪
The Backstage view All the tools you need to work with your files, as opposed totheir content, are accessible from one location. You display the Backstage view by
clicking the File tab, which replaces the Microsoft Office Button at the left end of the
ribbon.
▪
Customizable ribbon The logical next step in the evolution of the command center:create your own tabs and groups to suit the way you work.
▪
A window for each presentation You no longer display all presentations in thesame window, so you can arrange open presentations for easy comparison or work on different presentations at the same time.
▪
Reading view This way of previewing presentations makes it easy to quickly checkthe effect of one or two changes.
▪
Presentation videos Turning a presentation into a Windows Media Video is a simple▪
Paste preview No more trial and error when moving items to new locations. Previewthe appearance of an item in each of the available formats, and then choose the one you want.
▪
Animation Painter If you spend time developing a complex animation for oneob-ject, you can copy the animation settings to another object with a few mouse clicks.
▪
New themes and transitions Adding pizzazz to your presentations is just a matterof applying a professional-looking theme or a snazzy dynamic-content transition.
▪
Graphics editing Found the perfect picture, but its colors or style aren’t quite rightfor your presentation? After inserting a picture, you can edit it in new ways. In addi-tion to changing color, brightness, and contrast, you can remove the background and, most exciting of all, apply artistic effects that make it appear like a watercolor, pencil drawing, or pastel sketch.
▪
Improved cropping Not only can you drag crop handles to manually crop a picturebut you can also apply a built-in cropping ratio and then move a cropping window around the picture until you get precisely the part you want.
▪
Text effects WordArt has had a makeover. You can still use WordArt to createdistinctive headlines, but now you can use its effects on any selected text.
▪
Screen shots You don’t need to leave PowerPoint when you want to capture agraphic and insert it on a slide.
▪
Improved SmartArt Graphics tool Include pictures in addition to text in yourSmartArt diagrams.
▪
Video tools Found a perfect video, but it is too long to include in a presentation?You can insert the video and then use the video editing tools built into PowerPoint to trim and format it. You can also insert a link to a video on a website into a slide.
▪
Version merging You can merge two versions of the same presentation and acceptor reject changes.
▪
Team collaboration Team members can work simultaneously on a presentationstored on a SharePoint site or a SkyDrive.
▪
Broadcasting You can review a presentation with colleagues over the Internet by1
▪
Language support If you need to conduct business internationally across languagelines, you can easily tailor the language of your working environment. You can also use translation tools to collaborate with team members in other countries.
▪
Unsaved file recovery PowerPoint preserves your unsaved files for a period of time,allowing you to recover them if you need them.
If you are upgrading from PowerPoint 2003
In addition to the features discussed in the previous section, if you’re upgrading from PowerPoint 2003, you’ll also want to take note of the new features that were introduced
in PowerPoint 2007. The PowerPoint 2007 upgrade provided a more efficient working envi -ronment and included a long list of new and improved features, including the following:
▪
The ribbon No more hunting through menus, submenus, and dialog boxes. Thisinterface organizes all the commands most people use most often, making them quickly accessible from tabs at the top of the program window.
▪
Live Preview You can display the effect of a style, theme, or other option before youapply it.
▪
Custom layouts It’s easy to create your own layouts with placeholders for specificobjects, and then save them for use in other presentations.
▪
SmartArt Graphics tool Use this awesome diagramming tool to create sophisticateddiagrams with three-dimensional shapes, transparency, drop shadows, and other effects.
▪
Improved charting Enter data in a linked Excel worksheet and watch as your data isinstantly plotted in the chart type of your choosing.
▪
Presentation cleanup Have PowerPoint check for and remove comments, hiddentext, and personal information stored as properties before you declare a presentation
final.
▪
New file format The Microsoft Office Open XML Formats reduce file size and helpWorking in the PowerPoint 2013
user interface
As with all Office 2013 programs, the most common way to start PowerPoint is from the Start screen (Windows 8) or the Start menu (Windows 7) displayed when you click at the left
end of the Windows Taskbar. When you start PowerPoint without opening a specific presen -tation, a program starting screen appears. From this screen, you can create a new presenta-tion or open an existing one. Either way, the presentapresenta-tion is displayed in a program window that contains all the tools you need to add content and format slides to meet your needs.
1
Identifying program window elements
The program window contains the following elements:
▪
Title bar This bar across the top of the program window displays the name of theactive presentation and provides tools for managing the program and the program window.
The title bar for a new, unsaved presentation.
At the left end of the title bar is the program icon, which you click to display com-mands to restore, move, size, minimize, maximize, and close the program window. To the right of the PowerPoint icon is the Quick Access Toolbar. By default, the Quick Access Toolbar displays the Save, Undo, Redo/Repeat, and Start From Beginning but-tons, but you can customize it to display any command you want.
TIP You might find that you work more efficiently if you organize the commands
you use frequently on the Quick Access Toolbar and then display it below the ribbon,
directly above the workspace. For information, see “Manipulating the Quick Access Toolbar” in Chapter 14, “Work in PowerPoint more efficiently.”
On the far-right side of the title bar are five buttons: the Microsoft PowerPoint Help
button that opens the PowerPoint Help window, in which you can use standard
techniques to find information; the Ribbon Display Options button that controls
how much screen space the ribbon occupies; and the familiar Minimize, Maximize/ Restore Down, and Close buttons.
▪
Ribbon Below the title bar, all the commands for working with a PowerPointpresen-tation are gathered together in this central location so that you can work efficiently
with the program.
TIP If your ribbon appears as a row of tabs across the top of the workspace, click the Home tab to temporarily display that tab’s buttons. For information about how to
control the display of the ribbon, see “Viewing presentations in different ways,” later
The ribbon, with the Home tab active.
TIP Don’t be alarmed if your ribbon looks different from those shown in our screens. You might have installed programs that add their own tabs to the ribbon, or your
screen settings might be different. For more information, see “Working with the ribbon” later in this topic.
Across the top of the ribbon is a set of tabs. Clicking a tab displays an associated set of commands.
Commands related to managing PowerPoint and PowerPoint presentations (rather than slide content) are gathered together in the Backstage view, which you display by clicking the colored File tab located at the left end of the ribbon. Commands avail-able in the Backstage view are organized on pages, which you display by clicking the page tabs in the colored left pane. You redisplay the presentation and the ribbon by clicking the Back arrow located above the page tabs.
1
Commands related to working with slide content are represented as buttons on the remaining tabs of the ribbon. The Home tab, which is active by default, contains the commands most PowerPoint users will use most often. When an object is selected on a slide, one or more tool tabs might appear at the right end of the ribbon to make
commands related to that specific object easily accessible. Tool tabs disappear again
when their associated object is no longer selected.
TIP Some older commands no longer appear as buttons on the ribbon but are still available in the program. You can make these commands available by adding them to
the Quick Access Toolbar. For more information, see “Manipulating the Quick Access Toolbar” in Chapter 14, “Work in PowerPoint more efficiently.”
On each tab, buttons representing commands are organized into named groups. You can point to any button to display a ScreenTip with the command name, a descrip-tion of its funcdescrip-tion, and its keyboard shortcut (if it has one).
SEE ALSO For information about controlling the display and content of ScreenTips,
see “Changing default program options” in Chapter 14, “Work in PowerPoint more efficiently.” For more information about keyboard shortcuts, see “Keyboard shortcuts”
at the end of this book.
Related but less common commands are not represented as buttons in a group. Instead, they’re available in a dialog box or pane, which you display by clicking the dialog box launcher located in the lower-right corner of the group.
About buttons and arrows
Some buttons include an integrated or separate arrow. To determine whether a but-ton and its arrow are integrated, point to the butbut-ton to activate it. If both the butbut-ton
and its arrow are shaded, clicking the button will display options for refining the ac -tion of the button. If the button is shaded but the arrow isn’t, clicking the button will carry out its current default action. You can change the default action of the button by clicking the arrow and then clicking the action you want.
▪
Status bar cross the bottom of the program window, this bar displays informationabout the current presentation and provides access to certain program functions.
The status bar.
At the left end of the status bar is the number of the active slide and the total num-ber of slides in the presentation. To the right of the numnum-ber is a button representing the spell checker, which checks the spelling of the text you enter and displays a check
mark if there are no errors or an X if there are.
In the middle of the status bar are buttons for displaying and hiding notes or working with comments.
SEE ALSO For information about entering notes, see “Preparing speaker notes and handouts” in Chapter 6, “Review and deliver presentations.” For information about entering comments, see “Adding and reviewing comments” in Chapter 11, “Share and review presentations.”
To the right of the Comments button is a set of buttons called the View Shortcuts
toolbar, which provides convenient methods for switching the view of the presen tation.
SEE ALSO For information about the various ways you can view a presentation, see
“Viewing presentations in different ways” later in this chapter.
At the right end of the status bar are the Zoom Slider, the Zoom Level button, and the Fit Slide To Current Window button. These tools enable you to adjust the
magni-fication of the active slide.
The goal of all these user interface features is to make working on a presentation as intui-tive as possible. Commands for tasks you perform often are readily available, and even
1
When you point to a thumbnail in a gallery, the Live Preview feature displays what the current presentation, slide, or selection will look like if you click the thumbnail to apply its associated formatting.
Live Preview shows the effect on the selected bullet points of clicking the thumbnail you are pointing to in the Bullets gallery.
You can display the content of the active presentation in five primary views: Normal view,
Normal view consists of the following panes:
▪
Thumbnails This pane appears by default on the left side of the program windowand displays small thumbnails of all the slides in the active presentation.
▪
Slide This pane occupies most of the program window and shows the current slide asit will appear in the presentation.
▪
Notes This pane sits below the Slide pane and provides a place for entering notesabout the current slide. These notes might be related to the development of the slide, or they might be speaker notes that you will refer to when delivering the presenta-tion. You can open and close the Notes pane by clicking the Notes button on the status bar.
The three panes of Normal view.
Working with the ribbon
As with all Office 2013 programs, the PowerPoint ribbon is dynamic, meaning that as its
1
For example, when sufficient horizontal space is available, the buttons on the Home tab are
spread out, and the available commands in each group are visible.
The Home tab at 1024 pixels wide.
If you decrease the horizontal space available to the ribbon, small button labels disappear and entire groups of buttons might hide under one button that represents the entire group. Clicking the group button displays a list of the commands available in that group.
The Home tab at 712 pixels wide.
When the ribbon becomes too narrow to display all the groups, a scroll arrow appears at its right end. Clicking the scroll arrow displays the hidden groups.
The Home tab at 323 pixels wide.
The width of the ribbon depends on three factors:
▪
Program window width Maximizing the program window provides the most space▪
Screen resolution Screen resolution is the size of your screen display expressed aspixels wide × pixels high. Your screen resolution options are dependent on the display adapter installed in your computer, and on your monitor. Common screen resolutions range from 800 × 600 to 2560 × 1600. The greater the number of pixels wide (the
first number), the greater the number of buttons that can be shown on the ribbon.
To change your screen resolution:
1 Display the Screen Resolution control panel item in one of the following ways:
▪
Right-click the Windows desktop, and then click Screen Resolution.▪
Enter screen resolution in Windows 8 Search, and then click Adjust screen resolution in the Settings results.▪
Open the Display control panel item, and then click Adjust resolution.2 On the Screen Resolution page, click the Resolution arrow, click or drag to select the screen resolution you want, and then click Apply or OK.
1
▪
The magnification of your screen display If you change the screen magnificationsetting in Windows, text and user interface elements are larger and therefore more
legible, but fewer elements fit on the screen. You can set the magnification from 100
to 500 percent.
You can change the screen magnification from the Display page of the Appearance and Personalization control panel item. You can display the Display page directly from Control Panel or by using one of the following methods:
▪
Right-click the Windows desktop, click Personalize, and then in the lower-left corner of the Personalization window, click Display.▪
Enter display in Windows 8 Search, and then click Display in the Settings results.On the Display page, you can choose one of the standard magnification options or change the text size of specific elements.
To change the screen magnification to 125 or 150 percent, click that option on the
Display page. To select another magnification, click the Custom sizing options link and then, in the Custom sizing options dialog box, click the magnification you want in the drop-down list or drag the ruler to change the magnification even more.
After you click OK in the Custom sizing options dialog box, the custom magnifica -tion is shown on the Display page along with any warnings about possible problems
with selecting that magnification. Click Apply on the Display page to apply the
Adapting exercise steps
The screen shots shown in this book were captured at a screen resolution of 1024 x 768,
at 100-percent magnification. If your settings are different, the ribbon on your screen
might not look the same as the one shown in this book. As a result, exercise instructions that involve the ribbon might require a little adaptation. Our instructions use this format:
▪
On the Insert tab, in the Illustrations group, click the Chart button. If the command is in a list, our instructions use this format:▪
On the Home tab, in the Slides group, click the Section button and then, in the list, click Add Section.If differences between your display settings and ours cause a button to appear
differ-ently on your screen, first click the specified tab, and then locate the specified group.
If a group has been collapsed into a group list or under a group button, click the list or button to display the group’s commands. If you can’t immediately identify the button you want, point to likely candidates to display their names in ScreenTips.
If you prefer not to have to adapt the steps, temporarily set up your screen to match ours while you read and work through the exercises in this book.
In this book, we provide instructions based on traditional keyboard and mouse input methods. If you’re using PowerPoint on a touch-enabled device, you might be giving
1
In this exercise, you’ll start PowerPoint and explore the Backstage view and ribbon. Along the way, you’ll experiment with galleries and Live Preview.
SET UP
You need the SalesMeetingA presentation located in the Chapter01 practice file folder to complete this exercise. Start your computer, but don’t start PowerPoint. Then follow the steps .1
Start File Explorer, and navigate to your Chapter01 practice file folder. Thendouble-click the SalesMeetingA presentation to open it in PowerPoint.
TIP In Windows 8, File Explorer has replaced Windows Explorer. Throughout this book, we refer to this browsing utility by its Windows 8 name. If your computer is running Windows 7, use Windows Explorer instead.
TROUBLESHOOTING Don’t worry if an Information bar below the ribbon tells you that the presentation has been opened in Protected view. By default, PowerPoint opens any presentation that originates from a potentially unsafe location, such as a website or email message, in Protected view. Your computer can then display but not interact
with the presentation. If you trust the file and want to work with it, click the Enable
Editing button in the Information bar.
2
If the program window is not maximized, click the Maximize button. Notice that on the Home tab, only the buttons representing commands that can be performed on the currently selected presentation element (the entire slide) are active.On the Home tab, buttons related to creating slide content are organized in six groups: Clipboard, Slides, Font, Paragraph, Drawing, and Editing.
3
Point to each button on the Home tab to display the ScreenTips that name them, describe their functions, and give their keyboard shortcuts (if any).When you point to a button, a ScreenTip displays information
about the button’s function and keyboard shortcut.
Now let’s explore the other tabs.
4
Click the Insert tab, and then explore its buttons.On the Insert tab, buttons related to all the items you can insert into a presentation and its slides are organized in nine groups: Slides, Tables, Images, Illustrations, Links, Comments, Text, Symbols, and Media.
5
Click the Design tab, and then explore its buttons.1
6
In the Themes group, point to (but don’t click) each of the visible thumbnails to display a live preview of what the slide will look like if you click the thumbnail you’re pointing to.7
On the scroll bar to the right of the thumbnails in the Themes group, click the scroll down arrow to display the next row of theme thumbnails.8
At the bottom of the Themes scroll bar, click the More button to display a menu that includes the entire Themes gallery.The menu includes a gallery of thumbnails of all the themes you can apply to this presentation and two commands related to themes.
9
Point to various thumbnails in the Themes gallery, observing the live preview on the slide.10
Press the Esc key to close the gallery without applying a theme.On the Transitions tab, buttons related to the movement from slide to slide in your presentation are organized in three groups: Preview, Transition To This Slide, and Timing.
12
Click the Animations tab. Note that all the buttons except Preview, Animation Pane, and Reorder Animation are gray and unavailable until an object on the slide is selected.On the Animations tab, buttons related to the animation of objects on slides are organized in four groups: Preview, Animation, Advanced Animation, and Timing.
13
Click the Slide Show tab, and then explore its buttons.On the Slide Show tab, buttons related to displaying your presentation are organized in three groups: Start Slide Show, Set Up, and Monitors.
14
Click the Review tab, and then explore its buttons.1
15
Click the View tab, and then explore its buttons.On the View tab, buttons related to changing the view or the display of the presentation are organized in seven groups: Presentation Views, Master Views, Show, Zoom, Color/Grayscale, Window, and Macros.
16
In the lower-right corner of the Show group, click the dialog box launcher to open the Grid And Guides dialog box.In the Grid And Guides dialog box, you can set options to control tools that help you align objects on a slide.
17
At the bottom of the Grid and Guides dialog box, click Cancel.18
On the slide, click anywhere in the Sales Meeting title, and then click the Format tool tab that appears on the ribbon.Let’s investigate the Backstage view, where commands related to managing presen-tations (such as creating, saving, and printing) are available.
19
Click the File tab to display the Backstage view with the Info page active.20
In the left pane, click the New page tab.You can start a presentation based on a template from the New page of the Backstage view.
SEE ALSO For information about creating presentations, see “Starting and saving presentations” in Chapter 2, “Create presentations.”
21
In the left pane, click each of the next six page tabs to get an overview of the options available on these pages. Stop when the Export page is displayed.22
Skipping the Close page tab, click the Account page tab to display information about1
The Account page displays information and settings related to your version of Office 2013.
23
In the left pane, click Options to open the PowerPoint Options dialog box.This dialog box provides access to settings that control the way the program looks and behaves.
SEE ALSO For information about the PowerPoint Options dialog box, see “Changing default program options” in Chapter 14, “Work in PowerPoint more efficiently.”
24
At the bottom of the PowerPoint Options dialog box, click Cancel.Opening, navigating, and closing
presentations
In the previous exercise, you double-clicked an existing presentation in File Explorer to start PowerPoint and open the presentation. If you start PowerPoint from the Windows 8 Start screen or the Windows 7 Start menu, a screen appears that enables you to cre-ate a new presentation, open a presentation you worked on recently, or open any existing presentation.
The screen displayed when you start PowerPoint.
1
To open a presentation that is stored on your computer, click Computer in the Open pane.
When Computer is selected, clicking Browse in the right pane opens the Open dialog box.
The first time you use this command, the Open dialog box displays the contents of your
TIP In the Open dialog box, clicking a file name and then clicking the Open arrow displays a list of alternative ways to open the selected file. To look through a presentation without making any inadvertent changes, you can open the file as read-only, open an independent copy of the file, or open it in Protected view. You can also open the file in a web browser. In
the event of a computer crash or other similar incident, you can tell PowerPoint to open the
file and try to repair any damage.
When a presentation is open, you can use several techniques to move from slide to slide, including the following:
▪
Click the slide you want to move to in the Thumbnails pane.▪
Use the scroll bar on the right side of the Slide pane.▪
Click the Previous Slide or Next Slide button at the bottom of the Slide pane scroll bar.▪
Press navigation keys on the keyboard.TIP When you open a presentation you have worked on recently, PowerPoint displays a flag adjacent to the Slide pane’s scroll bar. Clicking the flag displays a link to the slide you were
working on when you closed the presentation, with the date and time of your last change. Simply click the link to jump to that slide.
Every time you open a presentation, a new instance of PowerPoint starts. If you have more than one presentation open, clicking the Close button at the right end of a presentation’s title bar closes that presentation and exits that instance of PowerPoint. If you have only one presentation open and you want to close the presentation but leave PowerPoint running, display the Backstage view and then click Close.
In this exercise, you’ll open an existing presentation and explore various ways of moving around in it. Then you’ll close the presentation.
SET UP
You need all the presentations located in the Chapter01 practice file folder to complete this exercise . With the SalesMeetingA presentation from the previous exercise still open on your screen, follow the steps.1
2
At the bottom of the right pane, click Browse to open he Open dialog box. Then if the contents of the Chapter01 practice file folder are not displayed, use theNavigation pane or the Address bar to display the contents of that folder.
In the Open dialog box, you display the contents of the folder you want by clicking locations in the Navigation pane on the left or the Address bar at the top.
3
Double-click BuyingTrips to open it in a new program window.4
Display the Open page again, click Computer in the Places pane, and then in theCurrent Folder area, click Chapter01 to display the contents of that folder in the
Open dialog box.
5
Double-click DesigningColor to open it in a new program window.6
Repeat steps 4 and 5 to open the SalesMeetingB presentation in a new program window.Now let’s practice moving around in this presentation.
8
At the bottom of the scroll bar on the right side of the Slide pane, click the Next Slide button to move to slide 4.9
Click the Previous Slide button to move back to slide 3.10
Drag the scroll box slowly down to the bottom of the scroll bar.As you drag the scroll box, a ScreenTip tells you the number and title of the slide that will be displayed if you release the scroll box at that point.
11
Press the Page Up key until slide 3 is displayed.12
Press Home to move to slide 1.Now let’s experiment with closing open presentations.
13
At the right end of the title bar, click the Close button to close the SalesMeetingBpresentation.
14
On the Windows Taskbar, point to the PowerPoint button to display thumbnails of the three open presentations.1
16
Repeat either step 13 or step 15 to close the DesigningColor presentation.17
With the BuyingTrips presentation active, display the Backstage view, and then clickClose to close the presentation without exiting the program.
TROUBLESHOOTING If you click the Close button at the right end of the title bar instead of displaying the Backstage view and then clicking Close, you’ll close the presentation and exit the PowerPoint program.
+
CLEAN UP
Leave PowerPoint running for the next exercise .Viewing presentations in different ways
PowerPoint has four primary views to help you create, organize, and preview presentations. There are other views, but these are the ones you’ll use most frequently for your develop-ment work:
▪
Normal As described earlier, this view includes the Thumbnails pane, which you use for navigation, and the Slide pane, where you work on the content of an individual slide. It also has a Notes pane where you can enter notes to help with presentation development and delivery.SEE ALSO For information about working with notes, see ”Preparing speaker notes and handouts” in Chapter 6, “Review and deliver presentations.”
▪
Outline In this view, the Thumbnails pane changes to the Outline pane, where a text outline of the presentation is displayed. You can enter text either directly on the slide or in the outline.SEE ALSO For information about working with outlines, see ”Entering text in place
-holders” in Chapter 2, “Create presentations.”
▪
Slide Sorter In this view, the slides of the presentation are displayed as thumbnails sothat you can easily reorganize them. You can also apply transitions from one slide to another, as well as specify how long each slide should remain on the screen.
SEE ALSO For information about changing the order of slides, see “Rearranging slides and sections” in Chapter 3, “Work with slides.” For information about applying transi
▪
Reading view In this view, which is ideal for previewing the presentation, each slidefills the screen. You can click buttons on the navigation bar to move through or jump to specific slides.
The four primary presentation-development views: Normal view, Outline view, Slide Sorter view, and Reading view.
While you are developing a presentation, you can switch among Normal, Outline, Slide Sorter, and Reading views in two ways:
▪
Click the buttons on the View Shortcuts toolbar at the right end of the status bar. (Clicking the Normal button while it is active toggles between Normal and Outlineviews.)
▪
Click the buttons in the Presentation Views group on the View tab.1
SEE ALSO For information about creating more elaborate notes, see ”Preparing speaker notes and handouts” in Chapter 6, “Review and deliver presentations.”
TIP Are you wondering what the Master Views group on the View tab is all about? You can control the default look of a presentation by working with the masters displayed in Slide Master view, Handout Master view, or Notes Master view. For information about masters,
see “Viewing and changing slide masters” in Chapter 12, “Create custom presentation elements.”
The View tab includes other buttons that do the following:
▪
Display rulers, gridlines, and guides to help you position and align slide elements.▪
Change the zoom percentage of the current slide.▪
Show how a colored slide will look if rendered in grayscale or black and white (usually for printing).▪
Arrange and manipulate windows.TIP Clicking the Macros button displays the macros embedded in a presentation. The sub-ject of macros is beyond the scope of this book. For information, refer to PowerPoint Help.
When you are working in Normal view, you can adjust the relative sizes of the panes to suit your needs by dragging the borders that separate them. When you point to a movable bor-der, the pointer changes to a bar with opposing arrows, and you can drag in either direc-tion. You can hide the Thumbnails or Notes pane by dragging the border to shrink the pane as far as it will go. (You cannot hide the Slide pane.) Click the Thumbnails or Notes button to display the pane again. If you adjust the width of the Thumbnails pane, the size of the slide thumbnails is adjusted accordingly—that is, there are more small thumbnails in a narrow pane and fewer large thumbnails in a wide pane.
TIP Any changes you make to a view, such as adjusting the sizes of panes, are saved with the presentation that is open at the time and do not affect other presentations.
Clicking anywhere other than the ribbon hides the groups again. When the groups are tem-porarily visible, you can click the Pin The Ribbon button to make their display permanent.
KEYBOARD SHORTCUT Press Ctrl+F1 to collapse or pin the ribbon. For a complete list of
keyboard shortcuts, see “Keyboard shortcuts” at the end of this book.
In any of these three views, you can also hide the title bar, ribbon, and status bar by clicking the Ribbon Display Options button at the right end of the title bar and then clicking Auto-hide Ribbon. To temporarily display the hidden program window elements, click the three dots in the upper-right corner of the screen; to hide them again, click away from the rib-bon. To permanently redisplay the title bar, ribbon, and status bar, click the Ribbon Display Options button, and then click Show Tabs or Show Tabs And Commands.
When you are ready to deliver a presentation to an audience, you display it in Slide Show
view. In this view, each slide fills the screen, and PowerPoint implements transitions, anima
-tions, and media effects the way you have specified. How you switch to Slide Show view
depends on which slide you want to start with.
▪
To start with slide 1, click the Start From Beginning button on either the Quick Access Toolbar or in the Start Slide Show group on the Slide Show tab.▪
To start with the current slide, click either the Slide Show button on the View Short-cuts toolbar or the From Current Slide button in the Start Slide Show group on theSlide Show tab.
SEE ALSO For information about delivering a presentation to an audience, see “Delivering presentations” in Chapter 6, “Review and deliver presentations.”
In this exercise, you’ll switch among different PowerPoint views and then return to Normal view, where you’ll adjust the size of the panes. You’ll display more than one presentation at the same time and experiment with adjusting the zoom percentage.
SET UP
You need the BuyingTrips and DesigningColor presentations located in the Chapter01 practice file folder to complete this exercise. Open both presentations, and then with BuyingTrips displayed on your screen, follow the steps.1
2
On the View tab, in the Presentation Views group, click the SlideSorter button to display all the slides as thumbnails in one large pane, with slide 1 surrounded by an orange border to indicate that it is selected.3
On the View Shortcuts toolbar, click the Normal button once to switch to the previous view (Outline) and again to switch to the view before that (Normal).4
On the View tab, in the Presentation Views group, click the Reading View button todisplay a full-screen view of the first slide in the presentation.
5
Without moving your mouse, click its button to advance to the next slide.TIP You can also click the Previous or Next button on the status bar to move from one slide to another. To stop previewing a presentation, press the Esc key, or click the Normal or Slide Sorter button on the View Shortcuts toolbar.
6
Continue clicking the mouse button to advance through the presentation one slide at a time until PowerPoint displays a black slide, which signals the end of the presentation.TIP If you don’t want a black slide to appear at the end of a presentation, display the Backstage view, and click Options. In the PowerPoint Options dialog box, click the Advanced page tab. Then in the Slide Show area, clear the End With Black Slide check box, and click OK.
7
Click again to return to Normal view.Next let’s adjust the size of the Normal view panes.
8
Point to the border between the Slide pane and the Notes pane, and when the pointer changes to a bar with opposing arrows, drag down until the Notes pane is completely closed.10
Point to the right border of the Thumbnails pane, and drag it all the way to the left to hide the pane.In Normal view, you can size the three panes to suit the task at hand.
11
On the View tab, in the Window group, click the Switch Windows button, and then click DesigningColor. Notice that customizing Normal view for the BuyingTripspresentation has not affected Normal view for this presentation. Now let’s view both open presentations at the same time.
1
In this view, it is easy to compare two presentations or copy content from one to the other.
13
Experiment with the other commands in the Window group, and then close theDesigningColor presentation.
14
At the right end of the BuyingTrips title bar, click the Maximize button. Then click the arrow button at the top of the Thumbnails bar to display the hidden Thumbnailspane, and click the Notes button on the status bar to close the Notes pane. Let’s get a closer look at the open presentation.
15
On the View tab, in the Zoom group, click the Zoom button to open the ZoomYou can select a zoom percentage or enter the percentage you want in the Percent box.
16
In the Zoom dialog box, click 100%, and then click OK. Notice that at the right end of the status bar, the zoom percentage has changed and the indicator has moved to the middle of the slider.17
At the left end of the slider on the status bar, click the Zoom Out button until the percentage is 50%.18
At the right end of the slider, click the Zoom In button once to increase the zoom percentage to 60%.Finally, let’s expand the displayed slide to fit the available space in the Slide pane.
19
At the right end of the status bar, click the Fit slide to current window button.+
CLEAN UP
Close the BuyingTrips presentation, but leave PowerPoint running for thenext exercise .
Searching for help with PowerPoint 2013
Whenever you have a question about PowerPoint that is not answered by this book, your next recourse is the PowerPoint Help system. This system is a combination of articles, videos,
and training available from the Office web site for reference when you are online, and basic information stored on your computer for reference when you are offline. You can find Help
resources in the following ways:
▪
To find out about an item on the screen, point to the item to display a ScreenTip. Forbut-1
the button does when you click it. Some ScreenTips also include enhanced informa-tion such as instrucinforma-tions and links to related Help topics.
▪
In the program window, click the Microsoft PowerPoint Help button (the question mark) near the right end of the title bar to display the PowerPoint Help window.▪
In a dialog box, click the Help button (also a question mark) at the right end of the dialog box title bar to open the PowerPoint Help window and display any available topics related to the functions of that dialog box.In this exercise, you’ll explore the PowerPoint Help window and search for information about using SkyDrive.