This is the Internet version of the user’s guide. © Print only for private use.
197
0
0
Full text
(2) This is the Internet version of the user’s guide. © Print only for private use. Letters Lower case letters are written below the arrow and purchase letters in line with the arrow.. a b c d e f g h i j k l m. 2. 2 1 2 1. 1. 1. 2. 2. 1. n o p q r s t 2 u v w x1 y z. .. Accented letters Write the character as described above, then write the accent above the arrow. Other such characters, for example, ö and ü, follow the same principle.. , ´ Note Start each stroke at the dotted end.. ? ! & 1. @. ". 2. Note Start each stroke at the dotted end.. 1 2. Numbers Numbers are written above the arrow.. 0 1 2 3 4 5 6 7. 8 9. =. +. ,. * / \ ( ). Note Start each stroke at the dotted end.. .. or. *.
(3) This is the Internet version of the user’s guide. © Print only for private use.. Contents OVERVIEW. P800 locks........................................................................ 40. Introduction ................................................................. 9. TELEPHONY. Getting to know your P800....................................... 10. Phone.......................................................................... 42. P800 package.................................................................... 10 P800 overview .................................................................. 11 SIM card ........................................................................... 12 Battery .............................................................................. 12 Care instructions ............................................................... 13 First time start-up.............................................................. 14 Turning your P800 on and off .......................................... 14 Importing phone book entries........................................... 14 Operational modes............................................................ 15 Flip closed mode ............................................................. 16 Flip open mode ................................................................. 18 Flip removed..................................................................... 20 Jog Dial ............................................................................ 23 Keypad functions.............................................................. 24 Indicators and status bar icons.......................................... 25 Memory Stick® Duo® ..................................................... 26 Connecting the accessories............................................... 29 Services............................................................................. 29 Applications - overview.................................................... 30 General functions.............................................................. 32 Entering text ..................................................................... 36. Call handling with the flip closed .................................... Call handling with the flip open ...................................... Handling two or more calls.............................................. Call list and call log ......................................................... Hints and smart functions ................................................ Preferences........................................................................ 42 45 47 49 50 52. MEDIA CommuniCam and Pictures..................................... 59 Camera settings................................................................ 59 Taking pictures ................................................................ 59 Managing pictures............................................................ 61. Video player .............................................................. 64 Video clips ....................................................................... 64 Streaming ......................................................................... 66. Audio player .............................................................. 68 Playing sound files........................................................... 68 Managing sound files....................................................... 69. 3.
(4) This is the Internet version of the user’s guide. © Print only for private use. Internet ....................................................................... 72 Using the browser view .................................................... 74 Using the bookmark view................................................. 77 Preferences........................................................................ 79. Games ......................................................................... 81 Chess................................................................................. 81 Solitaire............................................................................. 81. BUSINESS Messages..................................................................... 83 Folders in Messages.......................................................... 84 The accounts in Messages ................................................ 85 Handling text messages .................................................... 85 Handling multimedia messages ........................................ 86 Handling e-mails............................................................... 89. Sending and receiving calendar entries.......................... 102 Preferences ..................................................................... 102. Tasks ........................................................................ 104 Creating task entries....................................................... Managing task entries .................................................... Moving task entries........................................................ Sending and receiving task entries................................. Preferences ...................................................................... 104 105 105 106 106. Jotter ........................................................................ 107 Creating and editing notes ............................................. Drawing pictures ............................................................ Managing notes.............................................................. Sending and receiving notes ........................................... 107 108 108 108. TOOLS. Contacts...................................................................... 94. Voice memo ............................................................. 109. Using Contacts with the flip closed .................................. 94 Using contacts with the flip open ..................................... 96 Creating and managing contacts....................................... 97 Managing the SIM phone book ........................................ 98 Making an owner card ...................................................... 98 Sending and receiving contact details............................... 99 Preferences........................................................................ 99. Making sound recordings............................................... 109 Using sound recordings as ring signals.......................... 110 Sending Voice memo recordings ................................... 110. Calendar................................................................... 100 Creating calendar entries ................................................ 100 Managing calendar entries.............................................. 101. 4. Calculator ................................................................ 111 Time.......................................................................... 112 Setting time and date...................................................... Specifying workdays...................................................... Setting locations............................................................. Setting number formats.................................................. Setting alarms.................................................................. 112 113 114 114 115.
(5) This is the Internet version of the user’s guide. © Print only for private use. Viewer....................................................................... 116 Common viewer functions.............................................. 116 Viewing Word documents .............................................. 117 Viewing Excel spreadsheets ........................................... 117 Viewing PowerPoint presentations and PDFs ................ 118. Online services ......................................................... 119 ADVANCED FUNCTIONS PC Suite and multimedia for P800 ........................ 120 PC Suite for P800 ........................................................... 120 Multimedia for P800....................................................... 120. Installing applications ............................................. 122 Installing applications on your P800 .............................. 122 Removing applications from your P800......................... 124. Connecting to other devices.................................... 125 Connection via SyncStation............................................ 125 Connection via infrared port........................................... 126 Connection via Bluetooth wireless technology .............. 127. Synchronization and backup.................................. 130 Local synchronization..................................................... 130 Remote synchronization ................................................. 131 Backing up data .............................................................. 132 Restoring data ................................................................. 133. SETTINGS Personalizing your P800......................................... 134 Changing your application shortcuts ............................. Setting a background picture ......................................... Setting a Screen Saver ................................................... Adding images to your Contacts.................................... Ring signals.................................................................... Alarm tones and sound notification ................................ 134 134 134 135 135 136. Control panel........................................................... 137 The Device tab Certificate manager........................................................ Display ........................................................................... Flip closed shortcuts ...................................................... Flip removed .................................................................. Format Memory Stick Duo ............................................ Language selection ........................................................ Master reset.................................................................... Storage manager ............................................................ System sounds................................................................ Text input ....................................................................... User greeting.................................................................. WIM PIN settings ........................................................... 137 138 139 139 140 140 140 140 141 141 142 142. The Connections tab Bluetooth........................................................................ 143 Cable .............................................................................. 144 Infrared........................................................................... 145 5.
(6) This is the Internet version of the user’s guide. © Print only for private use. Internet accounts............................................................. 145 IP security manager ........................................................ 151 Messaging accounts ........................................................ 151 Secure tokens .................................................................. 157 WAP accounts ................................................................ 158. System failure ................................................................ 171. Guidelines for safe and efficient use...................... 172 Limited warranty............................................................ Environmental information............................................ Declaration of Conformity............................................. FCC Statement ................................................................ 176 178 179 179. The General tab International.................................................................... 159 Time & date .................................................................... 159. Terms and definitions............................................. 180. Getting started with Internet and Messages ......... 161. Technical data ......................................................... 188. Introduction..................................................................... 161 Automatically set up service provider and messaging ... 162 Manually set up service provider.................................... 162 Manually set up Messages .............................................. 163 Setting up WAP accounts ............................................... 164 Using your P800 as a modem ......................................... 164 GPRS - connection information...................................... 166. Index......................................................................... 191. REFERENCE Troubleshooting....................................................... 168 Start-up problems............................................................ 168 SIM card related problems.............................................. 168 Lock problems ................................................................ 169 Emergency calls only...................................................... 169 Fax calls .......................................................................... 169 Indicator light.................................................................. 170 Memory full .................................................................... 170 No network ..................................................................... 171 6.
(7) This is the Internet version of the user’s guide. © Print only for private use. Sony Ericsson P800. Beatnik is a trademark of Beatnik, Inc.. User's Guide. Java and all Java based trademarks and logos are trademarks or registered trademarks of Sun Microsystems, Inc. in the U.S. and other countries.. First edition (November 2002) This User’s Guide is published by Sony Ericsson Mobile Communications AB, without any warranty. Improvements and changes to this User’s Guide necessitated by typographical errors, inaccuracies of current information, or improvements to programs and/or equipment, may be made by Sony Ericsson Mobile Communications AB at any time and without notice. Such changes will, however, be incorporated into new editions of this User’s Guide.. Other product and company names mentioned herein may be the trademarks of their respective owners. Copyright SyncML initiative Ltd. (1999-2002). All rights reserved. Men In Black II and MIB II are trademarks of Colombia Pictures Industries, Inc.. Sony Ericsson Mobile Communications AB, 2002. All rights reserved.. Part of the game Men In Black II included in this product is (2002) Columbia Pictures Industries, Inc. All rights reserved.. Publication number: AE/LZT 108 6040 R1B. Portions of software © PacketVideo Corporation (USA) 1999, 2002. PacketVideo, pvPlayer and the PacketVideo logo are trademarks of PacketVideo Corporation. All rights reserved.. The Bluetooth trademarks are owned by Bluetooth SIG, Inc. This product contain QuickView Plus and Outside In which are © 1992-2002 Stellent Chicago Inc. All rights reserved. QuickView Plus and Outside In are trademarks or registered trademarks of Stellent Chicago Inc.. This product contains software copyright Beatnik, Inc. 19962002.. Symbian and all Symbian-based marks and logos are trademarks of Symbian Limited.. 1. Restrictions: Software is confidential copyrighted information of Sun and title to all copies is retained by Sun and/ or its licensors. Customer shall not modify, decompile, disassemble, decrypt, extract, or otherwise reverse engineer. Memory Stick Duo is a trademark of Sony, its parent and/or its affiliates.. End-user license agreement for Sun Java J2ME:. 7.
(8) This is the Internet version of the user’s guide. © Print only for private use. Software. Software may not be leased, assigned, or sublicensed, in whole or in part. 2. Export Regulations: Software, including technical data, is subject to U.S. export control laws, including the U.S. Export Administration Act and its associated regulations, and may be subject to export or import regulations in other countries. Customer agrees to comply strictly with all such regulations and acknowledges that it has the responsibility to obtain licenses to export, re-export, or import Software. Software may not be downloaded, or otherwise exported or re-exported (i) into, or to a national or resident of, Cuba, Iraq, Iran, North Korea, Libya, Sudan, Syria (as such listing may be revised from time to time) or any country to which the U.S. has embargoed goods; or (ii) to anyone on the U.S. Treasury Department's list of Specially Designated Nations or the U.S. Commerce Department's Table of Denial Orders. 3. Restricted Rights: Use, duplication or disclosure by the United States government is subject to the restrictions as set forth in the Rights in Technical Data and Computer Software Clauses in DFARS 252.227-7013(c) (1) (ii) and FAR 52.22719(c) (2) as applicable. Any rights not expressly granted herein are reserved.. 8. Note Some of the services in this User’s Guide are not supported by all networks. This also applies to the GSM International Emergency Number 112. Please contact your network operator or service provider if you are in doubt whether you can use a particular service or not. Important Your mobile phone has the capability to load, store and forward additional content, e.g. ring tone melodies. The use of such content may be restricted or prohibited by rights of third parties, including but not limited to restriction under applicable copyright laws. You, and not Sony Ericsson, are entirely responsible for additional content that you download to or forward from your mobile phone. Prior to your use of any additional content, please verify that your intended use is properly licensed or is otherwise authorised. Sony Ericsson does not guarantee the accuracy, integrity or quality of any additional content or any other third party content. Under no circumstances will Sony Ericsson be liable in any way for your improper use of additional content or other third party content..
(9) This is the Internet version of the user’s guide. © Print only for private use. OVERVIEW. Introduction About this user’s guide For ease of reference the “Getting to know your P800” chapter gives a quick overview of the main functions of the phone, shortcuts and general information. Your P800 combines advanced business and entertainment features in one intuitive device. Its integrated camera lets you to take and send pictures wherever you are and use them in a wide range of applications such as the Picture Phone book, where they can be used to identify callers. MMS (Multimedia Messaging Service) allows you to send and receive messages that include pictures, sound, text and voice notes. The P800 features advanced entertainment functionality that offers high quality MP3 music and widescreen format video clips and 3D games. New content is quickly and easily downloaded from Internet sites or can be transferred to the phone via Bluetooth™ Wireless Technology, an infrared port or a cable. Extra memory is available through Memory Stick Duo™, which also serves as a convenient way to exchange content and applications such as Java games.. Introduction. The P800 also contains an organizer which includes contacts, a calendar, notes and e-mail, all of which can be quickly and efficiently synchronized with a PC. The e-mail application supports attachments. Viewers let you read documents in various formats such as Microsoft® Word, Excel and PowerPoint. The complete P800 documentation consists of the following parts: • Quick Guide • User’s Guide • Help texts in the P800 • Complementary information on the Internet, refer to www.SonyEricsson.com • Interactive learning on the PC Suite for P800 CD.. 9.
(10) This is the Internet version of the user’s guide. © Print only for private use.. Getting to know your P800 P800 package A P800 with stylus B Battery. L F. C Travel charger D SyncStation. A P800. E. Stereo headset. F. Protective bag and strap. G 3 extra styli H Cover - flip replacement J. Memory Stick Duo. K Memory Stick Duo adaptor. D. L. F J. M. H. B K. G. Note If your package does not include all the listed items above, please contact your retailer. Note Before you can use your P800 you need to insert the SIM card, and insert and charge the battery. Always detach the charger before you insert or remove the SIM card.. E. 10. User documentation package. M 2 CDs, PC Suite for P800 and Multimedia for P800. C. Getting to know your P800.
(11) This is the Internet version of the user’s guide. © Print only for private use.. P800 overview A. H. C. A. I. B. H C. G. D B. F. D E. E. F G. A External antenna connector A Indicator light for Bluetooth wireless technology (blue). B Battery compartment. B Connector for stereo head phone. C CommuniCam. C Jog Dial. D Touchscreen. D Infrared port. E Flip (in open position). E On/Off button. F Stylus. F Flip with Keypad (in closed position). G Slot for Sony Memory Stick Duo (under the stylus). G Connector for accessories and charger. H Internet button for activation of the browser. H Indicator light for network and battery (green/red). I. Getting to know your P800. CommuniCam activation and shutter release. 11.
(12) This is the Internet version of the user’s guide. © Print only for private use.. SIM card. Insertion and removal. When you register as a subscriber with a network operator, you receive a SIM (Subscriber Identity Module) card. The SIM card contains a computer chip that keeps track of your phone number, the services included in your subscription, and your phone book information, among other things.. To insert the battery. A PIN (Personal Identity Number) code is supplied with the SIM card from your operator and must be entered when switching on your P800.. 1. Ensure that your P800 is turned off.. Insert the SIM card as shown in the picture. For more information. see “Managing the SIM phone book” on page 98.. Battery Before you use your P800 for the first time, charge the battery provided for at least 4 hours. Use the supplied charger. See “Charging the battery” on page 13.. 12. 1. Ensure that the flip is closed. 2. Place the battery in the battery compartment and close the lid. 1. To remove the battery. Note It is important that you always turn off your P800 before removing the battery. Failure to do so can result in loss of information.. 2. 2. Remove the battery lid by pulling down the release catch below the CommuniCam. 3. Use your fingernail at the lower left-hand edge of the battery to gently lift the lower edge of the battery outwards. 4. Take out the battery.. Getting to know your P800.
(13) This is the Internet version of the user’s guide. © Print only for private use. Charging the battery • When the battery needs to be charged, a beep is heard. The indicator light (on the top of your P800) blinks red and a battery low message appears on the screen. • The battery can be charged whenever you want. The P800 performance is not affected. However, using your P800 while charging increases the charging time. To charge the battery The P800 can be charged either when it is switched on or off. 1. Make sure the battery is inserted in your P800 and the lid is closed. 2. Connect the charger to the P800 at the base of the phone by the flash symbol. The charger plug flash symbol must face upwards. 3. Connect the charger to the electrical outlet. Charging is indicated by the battery meter on the screen pulsing continuously, and the indicator at the top of the P800 showing a steady red light (or green, if the P800 is switched on).. TipYou can also use other battery chargers that have been supplied with other Sony Ericsson mobile phones using the same connector plug, for example, T68i or T300. Note When the battery is completely discharged, or new, it may take up to 30 minutes before the battery charging icon appears on the screen. 4. Wait approximately 4 hours or until the battery meter on the screen is full and the indicator on the top of the P800 shows a steady green light. 5. Remove the charger by tilting the plug upwards.. Care instructions Your P800 is a highly sophisticated electronic device. To get the most out of it, please make sure that you follow this advice: • Keep the P800 in its protective bag when not using it. • Use a commercial glass screen cleaner sprayed on a cloth, when you clean the screen. • Use only stylus provided to tap on the screen.. See also “Battery Information” on page 175.. Getting to know your P800. 13.
(14) This is the Internet version of the user’s guide. © Print only for private use.. First time start-up. Turning your P800 on and off. Please read “Guidelines for safe and efficient use” on page 172 before you start using your P800.. By default the Power menu prompts you to choose normal operation or Flight mode each time you press the On/Off button. These settings can be turned off. See “To use the power menu” on page 51. In Flight mode the phone and Bluetooth functions are switched off, but you can still use the other functions. Set your P800 in Flight mode where use of mobile phones is not allowed.. When you start your P800 the first time 1. Press the On/Off button to turn on your P800, keeping the flip closed. The language selection dialog opens. 2. Select one of the languages from the list. Read more about selecting a language in “Language selection” on page 140. 3. When you have selected a language, the phone powers down. 4. Open the flip. Press the On/Off button again. The Setup Wizard starts automatically and guides you through the essential settings. These include time and date settings, and information on the Jog Dial, text entry, and status bar. Follow the instructions on the screen. 5. The Power menu opens. Select Phone on. 6. Enter your PIN when the dialog box appears and press Press to delete a digit.. .. Importing phone book entries You may want to import existing contact information from another mobile phone to your P800. You can do this in several ways: • Beam the phone book entries from the other phone by infrared or Bluetooth wireless technology and save the set to Contacts. See “Sending and receiving contact details” on page 99. • Synchronize the SIM and the internal memory on the other phone with one of the PC PIM applications supported by your P800. Then you can synchronize this information with Contacts. Note When you synchronize Contacts with your PC PIM application the SIM information is not synchronized. You might get two versions of the same contact. See “Synchronization and backup” on page 130.. 14. Getting to know your P800.
(15) This is the Internet version of the user’s guide. © Print only for private use. • Phone book entries stored on your SIM card are accessible through Contacts. Select SIM phone book in the folders menu to the right in the menu bar to see the list of entries in your SIM phone book. These entries can be imported to Contacts. See “Managing the SIM phone book” on page 98.. Operational modes The P800 works in different operational modes:. The Jog Dial provides further navigation and selection capability. Closing the flip generally ends an activity and saves the data. Multimedia. phone calls and data sessions will however continue.. Flip removed The flip can also be removed which makes the organizer applications easier to access. A virtual flip is then available, making it possible to work in both flip open and flip closed operational modes.. Flip closed With the keypad flip closed, the P800 can be used like a conventional mobile phone using the keypad to dial and the Jog Dial to navigate. For more information please see “Jog Dial” on page 23 and “Keypad functions” on page 24. You can open the flip at any time to continue working. Many more functions are available when the flip is open.. Flip open When the flip is opened, the large touch-screen is revealed. You use the stylus to tap the screen to navigate and enter data. There is also a handwriting recognition feature, so that you can use the stylus to write on the screen.. Getting to know your P800. 15.
(16) This is the Internet version of the user’s guide. © Print only for private use.. Flip closed mode C B A. D E Applications. 1 2 3 4 5 6. A Shortcut to the Messages application B Shortcut to the Contacts application C Shortcut to the Call list application D Shortcut to the Calendar application E Shows all applications available in flip closed mode. Standby view The standby view shows shortcuts to the most commonly used applications. Choose which shortcuts you want to use in standby. See “Personalizing your P800” on page 134. 16. CommuniCam Messages Contacts Calendar Tasks Jotter. 1 2 3 4 5 6 7 8 9. Applications CommuniCam Messages Contacts Calendar Tasks Jotter Voice Memo Online services Connections. Selecting and starting applications Rotate the Jog Dial to select an application. When the desired application is highlighted, press the Jog Dial or to start the application. TipWhen view is selected it is also possible to start an application by pressing its specific number. Closing applications The current application automatically closes and the data is saved when you return to the standby view or switch to another application. To return to standby, press and hold or press the Jog Dial backward. Getting to know your P800.
(17) This is the Internet version of the user’s guide. © Print only for private use. Options menu Press or press the Jog Dial forward to open the standby options menu to get access to keylock, battery status, missed calls and more.. Getting to know your P800. 17.
(18) This is the Internet version of the user’s guide. © Print only for private use.. Flip open mode A Shortcut to the Messages application B Shortcut to the Contacts application C. D. B. C Shortcut to the Phone application. E. D Shortcut to the Calendar application F. A. Applications View. CommuniCam Pictures Video Audio Internet Messages Contacts Phone Calendar Tasks Jotter Voice Memo Calculator. 18. All. E Shortcut to the Internet application CommuniCam Pictures Video Audio Internet Messages Contacts Phone Calendar Tasks Jotter Voice Memo Calculator Time Viewer Remote Sync Online services Control panel Demo GPRS data log Chess Solitaire. F Shows all applications available in flip open mode. You can change the shortcuts A-E. See “Changing your application shortcuts” on page 134.. Navigation When the flip is open, the application shortcut icons shown in the flip closed mode move to the top row in the flip open screen. You navigate by using the stylus and tapping selected items and by using the Jog Dial, see “Jog Dial” on page 23.. Getting to know your P800.
(19) This is the Internet version of the user’s guide. © Print only for private use. Screen areas. C Application area. Applications use this central area of the screen to display the essential information. Many of the built-in applications are based on two standard view layouts: a list view and a detail view. D Button bar. An application view displays a button bar that contains useful controls and shortcuts. Not all application views require a button bar.. E Status bar. Displays device status information such as: signal strength, battery and device information, settings for sounds and time, on-screen keyboard, temporary indicators such as missed calls and unread messages.. When the flip is open the screen is touch sensitive. The screen is divided into a number of areas, see the figure and table below. A B. Internet. Edit. C Sony Ericsson Sony Ericsson P800. D E. Item. Description. A Application picker Displays six icons for quick and easy access to the most common applications. These are customizable. B Menu bar. Usually contains two menus on the left, and a folder menu on the right. The two left-hand menus contain: • the application menu, whose name is always the same as the application. It contains the system services used by most applications, such as Find, Send as, and Delete. • the edit menus contain editing items such as Cut, Copy, Paste, Zoom, Preferences and Help. Getting to know your P800. Calibration The screen is pre-calibrated using factory settings. Calibration is calculated by the average stylus tap speed and the location of the stylus tap on selection. If you want to change the setting, recalibrate the screen. To recalibrate the screen 1. Select Applications > Control panel > Device > Display. 2. Tap Calibrate and the calibrate screen appears. 3. Tap once at the center of each of the three calibration points in numerical order. 4. Tap Yes or No to accept or reject the new settings.. 19.
(20) This is the Internet version of the user’s guide. © Print only for private use. To restore the factory settings. .. 1. Select Applications > Control panel > Device > Display. 2. Tap Calibrate and the calibrate screen appears. 3. Press the Jog Dial - the text “Factory settings restored” is shown.. 2 1. Flip removed You can use your P800 without the physical flip. Remove the flip keypad and activate the virtual flip, which gives you the same functionality as when using the keypad on the real flip. Enter numbers and characters using your stylus.. Removing and attaching the flip keypad To remove the keypad 1. To remove the key pad you first have to remove the cover plate beneath it. Use your fingernails or the back end of the stylus to gently prize the cover plate off its catches (See figure). Put your nail or the end of the stylus in the hollow right below one of the catches and prize the edge of the cover plate upwards. A distinct click will let you know that the catch has released. Continue with the second catch.. PRIZE. HERE. 2. Fold the keypad out and lift away the loose cover plate from under the keypad. 3. Use your nails or the back end of the stylus to gently pull the release catch in the same direction as the arrow. The key pad is now loose and may be lifted off.. Note Be careful with the touch-sensitive screen. Never use a sharp object like a screwdriver. 20. Getting to know your P800.
(21) This is the Internet version of the user’s guide. © Print only for private use. To attach the flip replacement. To attach the keypad. 1. The flip replacement has two hooks at the bottom edge. These hooks will fit into the two recesses at the, now opened, bottom of the P800. Align the flip replacement until it is almost in place, then gently push it upwards towards the screen. A distinct click will let you now that it is in correct place.. 1. To attach the key pad you have first have to remove the flip replacement (if mounted). Place the key pad so that its release catch is facing the arrow on the now opened bottom of the P800. The key pad will be in a more or less horizontal angle at this time... To remove the flip replacement 1. Put your nail or the end of the stylus in the hollow right below one of the catches and prise the edge of the cover plate upwards. A distinct click will let you know that the catch has released. Continue with the second catch.. Note At the end of the flip key pad there is a hinge, which is adjustable in three positions. Make sure the hinge is in its middle position when you attach it.. Getting to know your P800. 21.
(22) This is the Internet version of the user’s guide. © Print only for private use. 2. Push the release catch against the rounded edge below the. To de-activate the virtual flip • Cancel the selection. Click. Control Panel > Device > Flip removed.. 1. Clear the Enable virtual flip checkbox. 2. Tap Done.. Virtual flip When the flip is open, is shown on the status bar when the virtual flip is enabled. Select to “close” the virtual flip. arrow. A distinct click will let you know that the key pad is now attached correctly 3. Let the key pad stay fully opened. Place the cover plate in position (see “To attach the flip replacement” on page 21).. Activating the virtual flip. When the virtual flip is “closed”, the virtual flip keypad is shown. Select to open the virtual flip. You can then continue working in another application with the flip open.. You must activate the virtual flip, when you have removed the flip keypad, to be able to open and close the virtual flip. To activate the virtual flip • Select. Control Panel > Device > Flip removed.. 1. Tap the Enable virtual flip checkbox. 2. Tap Done.. 22. GHI PQRS. ABC. DEF. JKL. MNO. TUV. WXYZ. a/A. Getting to know your P800.
(23) This is the Internet version of the user’s guide. © Print only for private use.. Jog Dial Action. Function. Rotate the Jog Dial (up). Scrolls up items in a list: increases volume during a call, moves back a page when playing a multimedia message.. Rotate the Jog Dial (down). Scrolls down items in a list: decreases volume during a call, moves forward a page when playing a multimedia message.. Press the Jog Dial (inward). Flip closed: Generally the same action as .. Action. Function. Press the Jog Dial (forward). Flip closed: Brings up the Options menu. Flip open: Scrolls to the right across the Application picker icons at the top.. Up. Down Inward. Flip open: Selects a highlighted item, dials selected phone number. Press the Jog Dial (backward). Flip closed: Always the same action as . Goes back to the previous screen, dismisses dialogs, and sends a busy signal to the calling party when you receive a call. It will not end a call.. Backward. Forward. Flip open: Scrolls to the left across the Application picker icons at the top.. Getting to know your P800. 23.
(24) This is the Internet version of the user’s guide. © Print only for private use.. Keypad functions Key. Key. Function S TA R • Enter the character *. • Press and hold to enter a p (pause) character. • Press to switch between different input modes (Abc, 123 ... ). This is useful when writing SMS or similar texts.. Function OK Enter selected function, indicated on the display above the key. BACK • Return to previous menu. • Press and hold to return to Standby. CLEAR • Delete entered characters/digits from the screen one by one. • Press and hold to delete an entire row of entered characters/digits. • Delete an entry from Contacts, Calendar, Tasks, Voice memo, and Messaging. • Press and hold to disconnect the microphone (mute function) when a call is in progress. • Mute the ring signal during an incoming call. • Press and hold to put the P800 into silent mode, when in the standby view.. HASH • Enter the character #. • Press and hold to see a list with special characters. • Terminate the input of PIN and security codes. • Retrieve a phone number from the SIM card phone book Enter the number of the memory position and then press . -. NUMERIC KEYS • Enter the digits 0 to 9. • Enter associated characters or perform associated functions. See “Short cuts” on page 44.. OPTIONS • Open the menu with different options for different applications. • Press and hold to open Applications.. 24. Getting to know your P800.
(25) This is the Internet version of the user’s guide. © Print only for private use.. Indicators and status bar icons These icons appear in the flip closed standby screen or in the status bar when the flip is open. When the flip is open, you can often tap the icons to get more detailed information or start an application.. SMS notification MMS notification E-mail notification. Signal strength, GPRS status. SMS overflow. Battery strength. Area info. Bluetooth discoverable. 18:20 /. Time, activated alarms. Bluetooth on. Time, alarm set. Infrared on. Key lock. GPRS is active. Magic word. GPRS datatransfer in progress. Keyboard. Ongoing data call. Multimedia volume. Ongoing call. Speaker phone. Missed call. Muted microphone. Divert all calls notification. Silent mode. Calls screened. Home zone. Getting to know your P800. 25.
(26) This is the Internet version of the user’s guide. © Print only for private use.. • Store pictures taken with the CommuniCam • Store data from the P800, for example backup copies of important files • Store media for personalizing your P800, for example ring signals, alarm sounds and pictures of contacts • Store media for use when composing MMS messages • Store installation files for new applications • Transfer data between the P800 and a PC or Mac • Transfer data over SyncStation between a Memory Stick Duo in the P800 and a connected PC • Provide storage for third-party applications. 1. Remove the stylus by pushing it upwards. 2. Insert the Memory Stick Duo in the slot, with the connector side facing you (see picture). Make sure it is securely inserted. A click should be heard.. LOCK. The Memory Stick Duo provides a convenient way of increasing the storage space in your P800. Memory Stick Duo is approximately a third of the size and half the weight of a regular sized Memory Stick. You can save still images, video clips, music, and voice recordings as well as computer data and applications on a Memory Stick Duo and use it to store or transfer the contents for many different purposes. Such as:. To insert the Memory Stick Duo. LOCK. Memory Stick® Duo®. A. Note Insert the Memory Stick Duo correctly to avoid damages to your P800 or the Memory Stick Duo. To lock the Memory Stick Duo 1. Use the stylus to move the erasure prevent switch (A ) to the lock position. The switch shows red when the Memory Stick Duo is locked. To remove the Memory Stick Duo 1. Remove the stylus.. 26. Getting to know your P800.
(27) This is the Internet version of the user’s guide. © Print only for private use. 2. Press the edge of the Memory Stick Duo using your fingernail or the stylus to release it. You hear a click as it jumps out of the slot. Note Be careful when removing the Memory Stick Duo to avoid dropping it.. Renaming a Memory Stick Duo You can rename a Memory Stick Duo to give it a name that is meaningful to you. Select Control Panel > Device > Format disk and tap Rename to set a name to the disk. The name you set will be shown in the divider between internal and external storage in the folder menu. See “Folders” on page 32. Renaming will not erase any data.. Copying and moving data For information on how to copy and move data to and from the Memory Stick Duo, refer to “Folders” on page 32.. Sharing data with other devices Your P800 uses the shorter memory stick variant, Memory Stick Duo. Memory Stick Duo Adapter Use the Memory Stick Duo Adaptor when using your Memory Stick Duo in a device equipped with a regular sized Memory Stick, for example a personal computer. Insert your Memory Stick Duo according to the picture on the adapter. WarningDo not insert a Memory Stick Duo adapter without a Memory Stick Duo into a Memory Stick slot. This may damage the product. Always insert the adapter in the slot with the connector end (marked with a triangle) first. Compatibility The P800 defines its own folder structure on a Memory Stick. Each application has its own set of folders. A folder created in one application is not visible in another.. Formatting a Memory Stick Duo If you need to re-format a Memory Stick Duo, select Control When you format a disk, you delete all the information on it, including any applications that you may have installed.. Panel > Device > Format disk.. Getting to know your P800. 27.
(28) This is the Internet version of the user’s guide. © Print only for private use. Other devices must access the same folder structure to interact with the P800 files. If you are using a PC this is easily done by browsing to the required folder on the Memory Stick. Memory Stick enabled devices where you cannot browse and manage a folder structure may not be able to share data directly with your P800. For example, it may not be possible for your P800 to read images taken on a Memory Stick enabled digital camera without first using a PC to copy them to the images folder in the P800 folder structure. When your P800 is connected to your PC, you have access to the P800 folder structure and the Memory Stick Duo content in My P800. Personal computer support Both PCs and Apple Macs, may be enabled for Memory Stick use via built-in Memory Stick slots, Floppy Disk adaptors, PC card adaptors and even a Memory Stick enabled mouse. (Memory Stick Duo Adapter required.) For more information about Sony Memory Stick, visit the site www.memorystick.com.. 28. Getting to know your P800.
(29) This is the Internet version of the user’s guide. © Print only for private use.. Connecting the accessories A The travel charger is connected to the desk stand or to the P800. B The USB connector from the desk stand is connected to a PC.. C. C The headset is connected to the P800.. E. D Other accessories can be connected to the connector at the base of the P800. E A car holder can be connected to the antenna connector at the rear.. The wrist strap is hooked over the holder below the battery and carefully placed in the slot in the battery compartment lid.. B. D A. Services You need the following services to use the P800 functions: To use.... You need.... telephony. GSM subscription. text messaging (SMS). GSM subscription. multimedia messaging (MMS) MMS account, GSM data subscription. Getting to know your P800. e-mail. e-mail account, GSM data subscription. Internet. Internet account, WAP account (only for WAP 1.x services), GSM data subscription. data communication. GSM data subscription. 29.
(30) This is the Internet version of the user’s guide. © Print only for private use. Please consult your network operator and Internet service provider for more information about the services that are available to you.. Applications - overview You can start applications in different ways. Select icons in the standby view (flip closed) and in the application picker (flip open) to start the most important ones. Select to list all applications. Demo application The Demo application shows some of the most common functions in your P800. You can uninstall the demo application and also reinstall it from the Multimedia for P800 CD. See “Removing applications from your P800” on page 124 for how to uninstall the demo application and “Installing applications on your P800” on page 122 for how to reinstall it. To start the Demo 1. Turn on the light (tap Applications > Control panel > Device > Display > Light > On). 2. Select the Applications icon 3. Select the Demo icon The demo starts.. 30. .. .. To stop the Demo • Tap the screen or rotate the Jog Dial to stop the demo. The demo also stops when any other dialog is opened. Note When the flip is open, an incoming text or MMS message will not stop the demo. Phone This is the mobile phone application. When the flip is opened, select to start it. Call list The call list displays the most recent calls, either outgoing, incoming or missed. In flip closed, press the Jog Dial or to call the selected entry. To view the call list when the flip is open, open Phone and select the call list view by tapping the icon. CommuniCam In CommuniCam view, the screen becomes a viewfinder. Press the CommuniCam button or the Jog Dial to take a photo. Alternatively tap the red button at the bottom of the screen. Pictures (flip open only) Manages your pictures. You can take pictures with CommuniCam, or receive them via e-mail, Bluetooth wireless technology, infrared communication. Download via the Internet browser, or transfer them from your PC.. Getting to know your P800.
(31) This is the Internet version of the user’s guide. © Print only for private use. Video (flip open only) Plays video clips. You can download these from Internet or transfer them from your PC. You can stream video and audio from Internet.. Calendar The Calendar view displays entries for the current day. Use the Jog Dial to get more information about a selected entry or to change days.. Audio Plays music tracks and other audio files. You can download these from Internet or transfer them from your PC. The player supports the most common sound formats. You can save music tracks on the Memory Stick Duo.. Tasks Keeps track of your tasks. Set due date, alarm, priority, and so on, for all your tasks and let your P800 remind you in time. Jotter Displays a list of stored entries. In detailed view, the complete entry is displayed.. Internet (flip open only) The Internet browser can access both Web and WAP pages. It can also download images, video clips, audio files, and Java applications.. Voice Memo You can use your P800 as a sound recorder.. Messages You can read, create, send and delete text (SMS), multimedia (MMS) and e-mail messages in this view.. Calculator (flip open only) A standard 10-digit calculator. You can add, subtract, multiply, divide, calculate square root and percentage.. Contacts Displays a list of your contacts. Select a contact to view associated contact data.. Time (flip open only) Shows time and date. You can set your current location and another. You can also set different alarms.. Getting to know your P800. 31.
(32) This is the Internet version of the user’s guide. © Print only for private use. Viewer (flip open only) Use it to view various type of documents: For example Microsoft® Word, Excel, Power Point, Adobe® Acrobat® (PDF files).. Remote Sync (flip open only) Performs synchronization over the air. Using GPRS, the P800 can be continuously connected to the remote synchronization server. Remote Sync works equally well over CSD or HSCSD.. Online services Your service provider may offer different services, for example, weather forecasts, financial information or newsletters. Contact your service provider for more information.. GPRS data log (flip open only) A list of GPRS Internet accounts. Open an account to view your logged GPRS traffic, and by those means also your cost. The P800 creates a new data log when a connection to an account is created.. Control panel (flip open only) Contains all settings that are system-wide and affect more than one application. This is the main view to go use to initially set up your P800.. General functions. Note Settings for Flight mode and P800 locks are located under. Application launcher views. Phone > Edit > Preferences. In flip open, the P800 can present the applications in two ways:. Connections Set the way you communicate with your PC or other device. Select between infrared, Bluetooth wireless technology and cable. In the cable menu, you also select whether the P800 synchronizes with a PC or acts as a wireless modem.. • List view (small icons appear in one column). 32. • Icon view (large icons appear in two columns). Folders Folders are used to organize information, for example contacts, jotter entries, or task lists. You might want to organize your contacts in business and personal folders.. Getting to know your P800.
(33) This is the Internet version of the user’s guide. © Print only for private use. Folders are also used when managing files of different types on your P800 and Memory Stick Duo. You might want to move or copy sound files into a sound track folder to store on a Memory Stick Duo. As you may notice if you connect your P800 to a PC and view the contents of your P800 in My P800, it is easier to get an overview of a folder and file structure on a large screen than on a hand-held device. If you make it a habit to set up specific folders to suit your needs and use them to categorize all your information, working with it becomes easy. Each application has its own set of folders. A folder created in one application is not visible in another.. Using the Folder Menu In the applications that use folders you can see the folders menu to the right in the menu bar. When a Memory Stick Duo is available in the P800, the folders on it are shown in the folders menu under the divider. If you rename the disk (see“Renaming a Memory Stick Duo” on page 27) the divider will show the new name. In list view, there is a super-folder called All, which, when Contacts, the All selected, displays items from all folders (in folder does not display the entries in the SIM phone book). All is the default value in list views and when an application is first launched.. For each application there is a default Unfiled folder. Since there is no way of seeing on your P800, if a file in an Unfiled folder is located on your P800 or on a Memory Stick Duo, we recommend that you move files to your own folders as soon as possible.. Use the Edit Folders menu item to:. Every item created in an application is always assigned to a single folder, by default the same folder as displayed in the list view.. • To Add a new folder. Tap Add, enter a folder Name and choose a Location from the list. Tap Done.. In list view, the folder menu is used to organize your entries. In detail view, the folder menu allows you to change the folder of the current item.. Getting to know your P800. • Rename a folder, or move a folder to or from Memory Stick Duo. Select the folder you want to move or rename, tap Edit, type the name of the new folder, and choose a Location from the list. Tap Done.. • To Delete a folder. Select the folder you want to delete and tap Delete. A folder can only be deleted if it is empty. Not all folders can be deleted.. 33.
(34) This is the Internet version of the user’s guide. © Print only for private use. To copy all the files in a folder to another folder. Find. 1. Open the folder in list view, and select Copy to in the main application menu; for example Audio or Pictures.. The Find function searches through all the items stored in an application. The standard Find dialog contains a single text edit box with two buttons, Find and Cancel. Selecting Find starts the search, Cancel closes the Find dialog.. 2. Select the destination Folder from the list and select Copy. To move a file from one folder to another 1. Open the file in detail view. In the folder menu, select the destination folder. To copy a file to another folder. In some applications, for example Messaging, Find may be more complicated: • The size of each message is so large that you may want to restrict the search to the current message only.. 1. Open the file in detail view. In the folder menu, select the destination folder. Select Copy to in the main application menu; for example Audio or Pictures.. • Folders are potentially more significant, so you may want to restrict the search to the current folder only.. 2. Select the destination Folder from the list and tap Copy.. Sorting your files. TipTo delete multiple files in application you can use Storage Manager. See“Removing or copying general files” on page 141.. You can sort the files you have stored in your P800. By sorting your files, you choose in which order you want the files to be displayed on the screen. You can choose between sorting by type, size, date or name.. Zooming You can change the size of the screen fonts. Choose between Small, Medium or Large. From the menu bar, tap Edit > Zoom.. Note Sort is not included in all applications.. Sending and receiving items Automatic saving When you work in an application and leave it, your work is automatically saved.. 34. From many applications it is possible to exchange items like appointments, contacts and images.. Getting to know your P800.
(35) This is the Internet version of the user’s guide. © Print only for private use. To send an item using Send as. 2. Open the message.. 1. Enter the Send as menu in the specific application.. 3. Select the attachments tab.. 2. Depending on the application and item, you can choose between the following transfer methods:. 4. Select the required attachment. The attachment or a summary of the attachment will be displayed.. • Text message (using SMS), P800 will create a new SMS. Add the mobile number of the recipient and tap Send.. 5. Select Save to save the item. You may optionally display the received item within the related application.. • E-mail, P800 will create a new message with the item included as an attachment. Complete and tap Send.. Refer to “Messages” on page 83 for more information.. • Multimedia message (using MMS), P800 will create a new message with the item included as an attachment. Complete and tap Send.. To receive beamed items 1. Ensure that infrared or Bluetooth wireless technology is activated.. • Infrared, align the infrared port of the P800 with the infrared port of the other device. Select Send. Progress messages on screen will tell you when the information in transferred.. 2. For infrared, ensure that the infrared ports are aligned.. • Bluetooth wireless technology, the P800 will search the local area for paired devices. These will be presented in a list. Select a device to which the item is to be sent and select Send. Progress messages will tell you when the information is transferred.. 4. Select View to view and save the item to the related application. Select Done and any unsaved items will be automatically saved for you in the Beamed inbox in Messages.. TipThe other devices must have Bluetooth wireless technology enabled. You can select Refresh to perform a new search if, for example, a destination device was not enabled at first.. Methods for storing data. 3. The received item will be notified by a dialog box listing the item(s) received.. Your P800 can store data in three different ways:. To handle items received in e-mail and multimedia messages. • Internal memory. Up to 12 MB of capacity for storing pictures, messages, music, applications, and so on.. 1. Open Messages and select MMS or an e-mail inbox.. • Memory Stick Duo (expansion memory).. Getting to know your P800. 35.
(36) This is the Internet version of the user’s guide. © Print only for private use. • Several other expansion-memory alternatives on the market.. Settings. • Pictures on Sony Image Station on the Web:. For settings that are application-specific, tap Edit > Preferences in the application menu bar. For generic settings, go to Control Panel.. – For Europe: http://www.sonystyle-imaging.com – For Japan: http://www.imagestation.jp – For USA: http://www.imagestation.com • SIM card, for phone numbers and associated names. See “Managing the SIM phone book” on page 98.. Getting help From the menu bar tap Edit > Help or View > Help to get to the P800 help system. The help system uses two views: • The Topics view shows all available topics, for example both specific application topics and general topics.. Entering text Entering text with the flip closed With the flip closed, you use the keypad keys to enter text, for example, when writing a text message. When you press a key, a pre-edit box with the different characters on that key is shown in the title area: wxyz9. • The Detail view presents the title and text of a single topic.. If the same key is pressed again, the next character in the preedit box will be selected.. The Topics view allows you to select a topic, which opens the detail view/text view and displays the selected topic. You can also set the zoom level and exit the Help system.. The key deletes the character to the left of the cursor. If continuously pressed, the key deletes several characters and then whole words.. In many dialog boxes you can select the Help icon ? in the upper right corner.. Types of text input There are four text input types: • Abc – initial upper case letter, the rest lower case. Default for each new text edit field • 123 – numeric entry only. 36. Getting to know your P800.
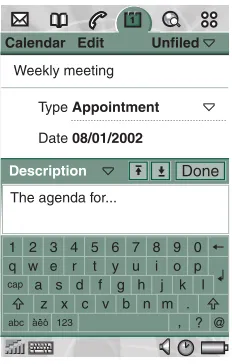
(37) This is the Internet version of the user’s guide. © Print only for private use. • ABC – upper case entry • abc – lower case entry When you are editing text you can:. Calendar Edit Weekly meeting. • Press and select Text options > Input type to select text input type. • Press mode.. Unfiled. Type Appointment. to switch between the input types in text edit. Date 08/01/2002 Description. Inserting symbols When you are editing text you can press and choose Text Options > Add symbol to select an item from the symbol selector table. Use the Jog Dial to select the row and press . Then scroll within the row to select a symbol and press .. Done. The agenda for.... 1 2 3 4 5 6 7 8 9 0 q w e r t y u i o p cap a s d f g h j k l z x c v b n m . abc aeo 123 , ? @. Entering text with the flip open There are two ways of entering text with the flip open: • Use the on-screen keyboard screen.. located at the bottom of the. • Write directly on the screen using the stylus. On-screen keyboard When you need to edit text, tap the keyboard icon in the status bar and then select characters. Tap Done when ready.. Getting to know your P800. At the bottom left of the keyboard you can choose between three keyboard layouts with different character sets. abc - standard characters àëó -. international characters. 123 -. numeric characters and currencies. 37.
(38) This is the Internet version of the user’s guide. © Print only for private use. The current input field is shown to the left in the top bar of the keyboard. Tap the arrows or rotate the Jog Dial to change input field. The keyboard top bar also contains a drop-down menu with Cut, Copy and Paste. When copying or cutting, the text must be selected first. Handwriting recognition Handwriting recognition translates stylus gestures into letters, digits or other characters, and displays these characters as text. Handwriting recognition is only active in places where text can be input.. Contacts. Edit. Unfiled. First name Jane Last name Jones Job title Graphic Desig Phone (w) Phone (h) Mobile (w). The text mode screen is split into an upper and a lower part, by an arrow in the middle of the right edge. Write lower case letters below the arrow and upper case letters in line with it. Write digits above the arrow.. Ring tone. Default Melody. Email (w) Fax (w) Web. Mark text by putting the stylus on the text, wait a moment, and drag the stylus over the text. Note Most letters can be written using different stroke styles. See the tables below. The style does not determine case. The position on the screen decides case.. 38. Getting to know your P800.
(39) This is the Internet version of the user’s guide. © Print only for private use. Letters Lower case letters are written below the arrow and upper case letters in line with the arrow.. a b c d e f g h i j k l m. 2. 1. 2 1 2 1. 1. 1. 2. 2. n o p q r s t 2 u v w x 1 y z. . , ´. Note Start each stroke at the dotted end.. ? ! & 1. @. ". 2. Note Start each stroke at the dotted end. Getting to know your P800. Accented letters Write the character as described above, then write the accent above the arrow. Other such characters, for example, ö and ü, follow the same principle.. 1 2. Numbers Numbers are written above the arrow.. 0 1 2 3 4 5 6 7. 8 9. =. +. ,. .. or. *. * / \ ( ). Note Start each stroke at the dotted end. 39.
(40) This is the Internet version of the user’s guide. © Print only for private use. Extended characters To write symbols and characters that are not shown in these tables, please consult the Extended characters section of the Handwriting recognition help topic in your phone.. P800 locks Use the SIM card lock and the device lock to protect your SIM card and your P800 from unauthorized use. Use the key lock to prevent the keys from being accidentally pressed. Note You can usually make an emergency call without unlocking the P800.. 2. Select a lock option. 3. Select Done. An error message informs you if a wrong PIN code has been entered. Usually after three wrong attempts (SIM card dependent) the SIM card will be blocked and you need to enter the PUK code to unblock it. The PUK code consists of eight digits. When you have entered the right PUK code you must enter a new PIN code. You have ten attempts to enter the PUK code. If all ten attempts fail, the SIM card will be disabled and you need to contact your network operator. You cannot change the PUK code.. SIM card lock The SIM card lock protects your SIM card, not the P800, against unauthorized use. It is unlocked by the PIN and PUK codes which you receive from your service provider. You can choose to have the SIM card locked every time you turn the P800 on, or to have the SIM card unlocked.. PIN2 Some functions on the SIM card can be protected by a secondary code feature. The PIN2 lock cannot be deactivated. The code can be changed by a user who knows the old code. Some SIM cards do not have a PIN2 lock.. Your PIN (Personal Identification Number) code consists of four to eight digits. If you activate the SIM card lock, the P800 will ask for the PIN code when you start it. To activate the SIM card lock 1. Select Phone > Edit > Preferences > Locks. 40. Getting to know your P800.
(41) This is the Internet version of the user’s guide. © Print only for private use. Device lock The device lock protects your P800 and the data in it against unauthorized use. If the device lock is set to When SIM changed, it means that normally the P800 is not locked. However, if the SIM is changed, the P800 asks you to enter the code to unlock the P800 before you can use it. Thus, if someone steals your P800 and puts another SIM card into it, they will not be able to use it. The device lock is not on when you buy your P800. You can change the device lock code to any four to eight digit personal code. To activate the device lock 1. Select. Phone > Edit > Preferences > Locks. 2. Select a lock option.. Change code To change a code 1. Select Phone> Edit> Preferences> Locks. 2. Select Change Codes. 3. Select the code you want to change. 4. First enter the old code, then the new one. (To ensure that you have typed the new code correctly you have to enter it twice.). Automatic key lock This option locks the keys on your P800. This is to protect the device if the keys are accidentally pressed. When this setting is active, the flip closed keypad will become automatically locked after a period of inactivity.. 3. Select Done. You can choose to have the P800 locked every time you turn it on, locked when the SIM card has been changed, or unlocked. It is also possible to use the device lock in combination with the Control panel > Device > screen saver. Just mark the checkbox Display > Screen saver device lock to have the device lock activated when the screen saver goes on.. To activate or change the key lock • Select Phone > Edit > Preferences > Locks. To unlock the keys • Select. >. .. When using the screen saving device lock, make sure you have set the device lock to activate at Power on. Otherwise your P800 is unprotected, after Power on, until the screen saver goes on. Getting to know your P800. 41.
(42) This is the Internet version of the user’s guide. © Print only for private use. TELEPHONY. Phone The P800 is a full-featured mobile phone having full integration with the other functions of the device, including third party applications. The phone includes useful features such as: • Personalized ringtones. • Picture Phone Book • Quick access back to the entry in Contacts, making it easy to try an alternative number or send an E-Mail if the contact is unavailable or busy. • Voice dialing – make a call by speaking the contact’s name. • Voice answer – an incoming call may be answered or sent busy signal, using the words recorded for ‘answer’ and ‘busy’. • Access to most other applications whilst talking on the phone. • Office handsfree (speakerphone) which is enabled when the flip is open, making it easy to access applications such as Calendar and Jotter whilst talking.. • Flight mode which enables the P800 to be used as a PDA in situations where radio transmitters may not be used. The GSM and Bluetooth transmitters (and receivers) are switched off. With the flip closed you can access most of the functions using the Jog Dial and the keypad. More advanced tasks such as handling conference calls or using other applications during a call are best handled with the flip open.. Call handling with the flip closed With the flip closed, you can use either the keypad or the Jog Dial to handle calls.. Outgoing calls To make a call • Enter the telephone number on the keypad and press the Jog Dial or press . – Press. 42. to delete a typed character. Press and hold to delete all characters. Phone.
(43) This is the Internet version of the user’s guide. © Print only for private use. – Press and hold prefix +.. +. to insert the international call. If a call is not successfully connected, the P800 can be set to automatically retry to connect the call. When a retry is successful, the P800 alerts you with a single ring signal.. Usually, but not always, no SIM card or PIN code is required for emergency calls and you will be able to make the call as long as the available network allows and you have coverage from a GSM network. Check with your local provider to find out if emergency calls are possible without SIM card, and which emergency call number that is supported. To make a call using Speed Dial Speed Dial is a fast way to call one of your special speed dial numbers. See“Set-up speed dial numbers” on page 50. 1. Select the key corresponding to the desired number. .. To make a call using the Call list on the standby screen.. 2. Press the Jog Dial or. .. 3. Scroll the list by rotating the Jog Dial and select an entry. Phone. To make a call using the Contact list 1. Select. on the standby screen.. 2. Press the Jog Dial or. .. 4. Scroll by rotating the Jog Dial and select the desired number.. • Enter the emergency number on the keypad and press the Jog Dial or press .. 1. Select. .. 3. Scroll the list by rotating the Jog Dial and select a contact.. To make an emergency call. 2. Press. 4. Press the Jog Dial or. 5. Press the Jog Dial or. .. Fore more information, see “Contacts” on page 94 To make a call using voice control 1. When the voice recognition is activated, the Magic word icon appears in the upper corner of the screen. There are three ways to use the voice recognition function. • Press and hold the Jog Dial • Say the “Magic word” • Press the call button on the head set 2. When you hear a short tone, say the voice command connected to the number you want to call. See“To record a voice command” on page 54. The P800 will connect you with the matching contact. You can use voice control when the P800 is handheld or used with a handsfree set (car or portable). It is not needed together with a Bluetooth wireless technology headset. 43.
(44) This is the Internet version of the user’s guide. © Print only for private use. For more information, see “Voice control” on page 53. To end a call • Press. You can press ring signal.. to reject a call and press. to silence the. An incoming call will bring up the following options:. , or press the Jog Dial.. • 1 Answer – Answer the call. Short cuts • Press and hold to dial your voice mail. With the flip open, select Phone > Call voice mail. See “Voice mail” on page 56 on how to set up voice mail. • Press and hold any of the keys from to to open your Contact list. Press again to reach the next letter. Additional key presses will add letters to you search. • Press any digit followed by the SIM phone book. • Press. • 3 Mute – Silence the ring signal. The calling party will not notice that you have silenced the call. The call will be logged as a missed call. If a large picture of the caller fills the screen, you can use the Jog Dial to get the menu with the options above.. to reach a phone number in. for the last dialled number.. Incoming calls When you receive a call, if the calling party is found in contacts, the name of the caller will be displayed. If there is an associated picture it will also be shown in a small or large version. See “Incoming call picture” on page 53. To handle an incoming call You can press to answer the call or answer by voice control, see “Voice control” on page 53.. 44. • 2 Send Busy – Reject the call. The calling party will hear a busy tone and the call will be logged as a rejected call.. Options during or after a call Use the Jog Dial to change the phone volume during a call. Press to get a list of call handling options. The list will vary depending on the situation. Options that concern two or more active calls are described in “Handling two or more calls” on page 47. • End call – End the active call. • Hold call/retrieve call – Put the active call on hold /retrieve the held call. This is useful if you want to make a new call during a call.. Phone.
(45) This is the Internet version of the user’s guide. © Print only for private use. • Add to contacts – Create a new Contacts entry if the phone number of the active call is known, and not already stored in Contacts.. Outgoing calls. • Show contact – Display the entry in Contacts, if any, that corresponds to the phone number of the active call.. 1. Select opened.. • Transfer sound – Transfer the call to a Bluetooth wireless technology headset.. 2. Tap. • Turn On/Off tones – You can send DTMF tones with the keypad, “Controlling tone based services” on page 51. • Microphone mute On/Off – Turn the microphone on or off. • Copy number – Copy a phone number for exchange with other text fields or applications. • Paste number – Paste a copied number into a field. To make a call in the application picker. The Speed Dial view is on the button bar.. 3. Enter the digits with the virtual keypad and tap right of the keypad. To remove a typed character - select. on the. .. If a call is not successfully connected, the P800 can be set to automatically retry to connect the call. When a retry is successful, the P800 alerts you with a single ring signal.. • Speakerphone On/Off – You can use the P800 as a speakerphone. See “Speakerphone” on page 50. • Applications – Open another application, and, for example, paste a copied phone number into a Jotter entry. Press and hold to mute the microphone. Press and hold again to reactivate the microphone.. Call handling with the flip open You use the stylus and the virtual keypad to handle calls with the flip open.. Phone. 45.
Figure
Related documents
SQL SERVER OR LYNC SERVER 2013 ROLE ROLE-TYPICAL SQL SERVER PERMISSIONS AND GROUP MEMBERSHIP ROLE-TYPICAL LYNC SERVER 2013 PERMISSIONS AND GROUP MEMBERSHIP PERMISSIONS
However, this would likely give rise to much litigation to determine whether this was consistent with the MSFCMA and not an overly broad reading of section 1856(a)(3)(A) of that
I feel that this event has the potential to be a monthly event as this programme really benefits the school children as their command of English is at a satisfactory level. ACTION
According to the American College of Sports Medicine and the American Dietetic Association, they recommend chocolate milk for athletes to help aid in muscle recovery due to a study
(2003) as a method to assess diversity of macro-organism communities and revealed both extinct and extant mammals, birds and plants. There is great potential for improving
The store of the future – the iConvenience Store – is a customized destination that leverages local consumer interests and attitudes, erecting a utilitarian community presence
Online services* PlayNow™* Media player Games PhotoDJ™ Record sound Camera Messaging Write new Inbox My friends* Email Call voicemail Drafts Outbox Sent messages Saved
After the Agreement terminated or expired, the Developer shall be solely responsible for proper handling Hami Apps Users complaint of those purchased Developer’s Products and shall
