Wicket Application Development
Release 1.1
H. Turgut Uyar
CONTENTS
1 Basics 3 1.1 Project Files . . . 3 1.2 Dynamic Content. . . 6 1.3 Adding Links. . . 8 1.4 Shorter Code . . . 9 1.5 Exercise . . . 10 2 Application Structure 11 2.1 Base Pages . . . 11 2.2 Panels. . . 12 2.3 Exercise . . . 14 3 Data Model 15 3.1 Movies . . . 15 3.2 Displaying Lists . . . 16 3.3 Movie Collections . . . 18 3.4 Exercise . . . 20 4 Forms 21 4.1 Text Boxes . . . 22 4.2 Check Boxes . . . 25 4.3 Exercise . . . 27 5 Data Persistence 29 5.1 Collection Interface . . . 29 5.2 JDBC . . . 30 6 Solutions to Exercises 35 iWicket Application Development, Release 1.1
Author H. Turgut Uyar
Copyright © H. Turgut Uyar, 2010-2013.
License This tutorial is released under the Creative Commons Attribution-NonCommercial-ShareAlike 3.0 Unported License.
You are free:
• to Share — to copy, distribute and transmit the work • to Remix — to adapt the work
Under the following conditions:
• Attribution — You must attribute the work in the manner specified by the author or licensor (but not in any way that suggests that they endorse you or your use of the work).
• Noncommercial — You may not use this work for commercial purposes.
• Share Alike — If you alter, transform, or build upon this work, you may distribute the resulting work only under the same or similar license to this one.
You can find more information on the page: http://creativecommons.org/licenses/by-nc-sa/3.0/.
Formats You can read this tutorial online at the following address: http://web.itu.edu.tr/uyar/wicket-application-development/ You can also download it in various formats:
• Zipped HTML
The code of the example application is kept in the following Mercurial repository: https://pikacode.com/uyar/wicket-application-development/
Releases v1.1 - September 2013 • Updated for Wicket 6.0.10. • Removed IDE discussions. v1.0 - August 2010
This tutorial aims to demonstrate how to build an application using the Apache Wicket web framework. You can find more information about the Wicket project on its web site:
http://wicket.apache.org/
Although the application code does not depend on any particular development environment, the narration makes use of Eclipse features and it can be easier to use Eclipse when repeating the steps explained in the tutorial.
Warning: Please keep in mind that this is not a “best practices” tutorial; it just tries to make it easier for a beginner to understand the Wicket framework. Although I have prepared this tutorial to the best of my understanding on the subject, it may still contain errors, omissions, and improper uses of Java or Wicket features.
CHAPTER
ONE
BASICS
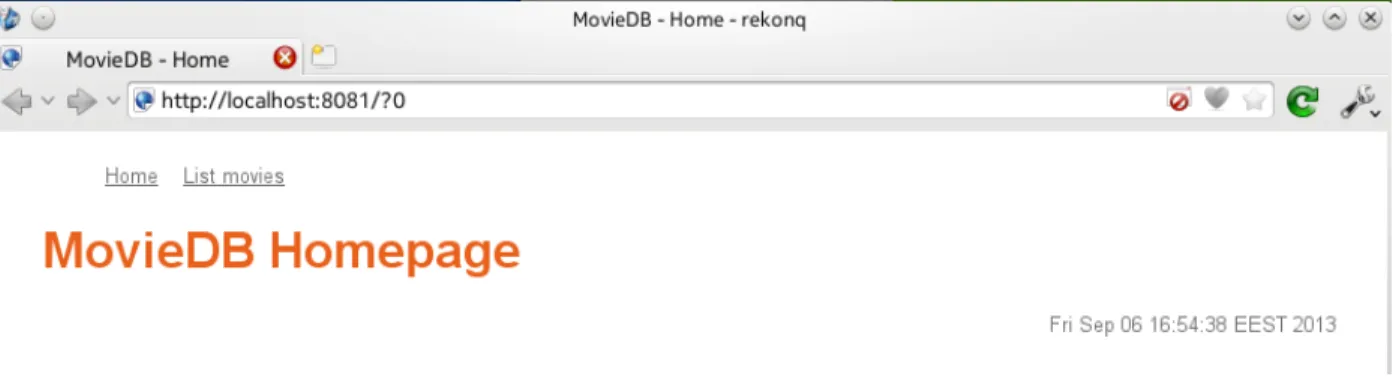
We will first start by creating a simple home page containing only a page title. Then we will add the current date and time to this page to show how dynamic elements are handled in Wicket. Next, we will create a second page also containing only a page title. This second page will be populated with the list of movies in later chapters. Finally, we will provide a link from the home page to the movie list page. In the end, the home page will look like as shown inScreenshot: Home page containing a title and a link to the movie list page..
Figure 1.1: Screenshot: Home page containing a title and a link to the movie list page.
1.1 Project Files
A project that uses the Wicket framework consists of source code (in Java), web page templates (in HTML), style sheets (in CSS) and configuration files (in XML). Other than the project files themselves, we also need a web server environment in which to execute our application. Setting up a correctly configured project can prove to be a difficult task, especially for a beginner. Therefore, we will use the following files prepared specifically for this tutorial.
1. https://dl.dropboxusercontent.com/u/61579540/quickstart.zip
This archive contains the files needed for a very basic Wicket application. Extract it anywhere on your computer. 2. https://dl.dropboxusercontent.com/u/61579540/wicket.zip
This archive contains the Wicket libraries on which our application code depends. Extract it under the folder where you extracted thequickstart.zipfile.
3. https://dl.dropboxusercontent.com/u/61579540/slf4j.zip
This archive contains the logging libraries needed by Wicket. Extract it to the same folder as thewicket.zip archive.
4. https://dl.dropboxusercontent.com/u/61579540/jetty.zip
This archive contains the web server which will provide us with the environment that can run our application. Extract it to the same folder as thewicket.ziparchive.
The resulting folder hierarchy should look like this:
wicket-quickstart |- src | |- resources | |- webapp | |- wicket |- lib | |- wicket-*.jar | |- slf4j-*.jar | |- jetty-*.jar
Note: If you are using Eclipse, you can import the project from thewicket-quickstartdirectory.
Most of the files that we are going to work on are in thesrcfolder. Since the Java classes in the quickstart archive are in the Java packagewicket.quickstartpackage, they are kept in thesrc/wicket/quickstartfolder. The HTML web page templates are also in that folder. Static files like style sheets and logos are placed into the src/webappfolder. Finally, configuration files reside in thesrc/webapp/WEB-INFfolder.
The starting point for a Wicket application is the application class. In our example, this is theWicketApplication class. Change the contents of the file src/wicket/quickstart/WicketApplication.javaas given in
Listing: Initial application class. Note that, this class extends theWebApplicationclass from the Wicket
frame-work (line 6) and defines agetHomePage()method (line 8) for specifying what the initial page of the application will be. In our example, the initial page will be an instance of theHomePageclass (line 9).
Listing Initial application class. 1 package wicket.quickstart; 2
3 import org.apache.wicket.markup.html.WebPage;
4 import org.apache.wicket.protocol.http.WebApplication; 5
6 public class WicketApplication extends WebApplication {
7 @Override
8 public Class<? extends WebPage> getHomePage() {
9 return HomePage.class;
10 }
11
12 @Override
13 public void init() {
14 super.init();
15 }
16 }
Any extra initialization for the application should be handled in theinit()method of the application class (lines 13-15). For now, we don’t have anything to do at this step.
In Wicket, we have to write two files for every page in the application: one is an HTML file that contains the template of the page, and the other is a Java source file containing the components that control the dynamic elements in the template. The name of the class (and therefore the base name of the Java source file) has to be the same as the base name of the HTML template file, as inSearchPage.javaandSearchPage.html. Since our application class refers to aHomePageclass as the initial page for the application, we need to implement that class. Change the contents of the filessrc/wicket/application/HomePage.htmlandsrc/wicket/application/HomePage.java
Wicket Application Development, Release 1.1
as given inListing: Initial home page templateandListing: Initial home page class. Page classes extend theWebPage class of the Wicket framework and establish the relations with the HTML template in their constructors. Since there is no dynamic element in the home page template at the moment, there is also nothing to do in the constructor of the HomePageclass (lines 6-7).
Listing Initial home page template. 1 <!DOCTYPE html>
2 <html xmlns:wicket="http://wicket.apache.org"> 3 <head>
4 <meta charset="utf-8" /> 5 <title>MovieDB - Home</title>
6 <link rel="stylesheet" href="style.css" /> 7 </head>
8 <body>
9 <h1>MovieDB Homepage</h1> 10 </body>
11 </html>
Listing Initial home page class. 1 package wicket.quickstart; 2
3 import org.apache.wicket.markup.html.WebPage; 4
5 public class HomePage extends WebPage { 6 public HomePage() {
7 }
8 }
Let us also apply a style sheet to our page. Change the contents of the filesrc/webapp/style.cssas given in
Listing: Initial style sheet. Listing Initial style sheet. 1 body {
2 background-color: white; 3 color: #6F6F6F;
4 font-family: ’Droid Sans’, ’Helvetica’, ’sans’; 5 font-size: 12pt;
6 margin: 2ex 2em; 7 } 8 9 h1, h2, h3, h4 { 10 color: #E9601A; 11 } 12 13 a { 14 color: #6F6F6F; 15 text-decoration: underline; 16 }
The last issue to discuss is how to run the application. The application can be deployed to various runtime environ-ments, but for the sake of simplicity, we are going to run thesrc/wicket/quickstart/Start.javafile as a regular Java application. This file is not directly a part of the project, so we will not go over its source code. When you run the application, you should see the following message in the console:
[main] INFO org.eclipse.jetty.server.AbstractConnector - Started [email protected]:8081
In your browser, visit the addresshttp://localhost:8081/and you should see the text “MovieDB Homepage”. You can stop the application by pressing theEnterkey in the console.
Note: You can see this initial version of the project at the address: https://pikacode.com/uyar/wicket-application-development/files/a91f1ccf55cd. You can get a copy of this version by clicking on the download link on that page.
1.2 Dynamic Content
Let us add the current date and time to the home page. We first change theHomePage.htmlfile as inListing: Home
page template showing the current date and time. Note that, the difference is the added a footer section (lines 11-15).
Listing Home page template showing the current date and time. 1 <!DOCTYPE html>
2 <html xmlns:wicket="http://wicket.apache.org"> 3 <head>
4 <meta charset="utf-8" /> 5 <title>MovieDB - Home</title>
6 <link rel="stylesheet" href="style.css" /> 7 </head>
8 <body>
9 <h1>MovieDB Homepage</h1> 10
11 <footer>
12 <div id="datetime" wicket:id="datetime"> 13 Wed Sep 4 15:32:40 EEST 2013
14 </div> 15 </footer> 16 </body> 17 </html>
The lines 12-14 contain the markup that will display the date and time. Thewicket:idattribute indicates that the contents of thisdivelement are dynamic. Therefore, the date and time on line 13 is just a placeholder to be replaced by the data provided by a Wicket component at runtime.
For every dynamic element in the template, there has to be a corresponding component in the Java class (seeListing:
Home page class providing the current date and time). The template element and the component are matched using
their Wicket id attributes. In our example, this means that theHomePageclass must contain a Wicket component with the Wicket iddatetime. We have to choose a suitable Wicket component that can supply the requested data. In this case, since the data is a simple string, we can use the WicketLabelcomponent. Line 11 shows how to instantiate a label: the first parameter is the Wicket id, and the second parameter is the string content of the label. When this component is added to the page (line 12), the connection between the template element and the label component will be established.
Listing Home page class providing the current date and time. 1 package wicket.quickstart;
2 3 import java.util.Date; 4 5 import org.apache.wicket.markup.html.WebPage; 6 import org.apache.wicket.markup.html.basic.Label; 7
8 public class HomePage extends WebPage { 9 public HomePage() {
10 Date now = new Date();
Wicket Application Development, Release 1.1
11 Label dateTimeLabel = new Label("datetime", now.toString());
12 this.add(dateTimeLabel);
13 }
14 }
Finally, we would like control how the date and time will be displayed, so we add the lines given inListing: Stylesheet
for date and timeto thestyle.cssfile.
Listing Style rules for date and time.
div#datetime {
font-size: 80%;
text-align: right; }
The application, as implemented so far, will run as follows:
• AWicketApplicationobject will be instantiated. This object will set theHomePageclass as the entry page of the application.
• AHomePageobject will be instantiated. This, in turn, will instantiate aLabel object with the Wicket id datetimeand set the current date and time as its contents. This label will be added to the page.
• TheHomePage.htmltemplate will be used to display the page. All elements without a Wicket id will be displayed as they are. The contents of thedivelement with the Wicket iddatetimewill be replaced by the content of the label component with the same id in theHomePageobject.
Adding a component to another component creates a hierarchy between the two. For example, when we added the label component to the page component, it made the label a subcomponent of the page. The HTML template also has a hierarchy due to the nesting of the HTML tags. Wicket matches the hierarchy of the HTML template to the hierarchy of the Java components. For example, consider the template below where aspanelement is nested inside adivelement:
<body>
<div wicket:id="x">
some text
<span wicket:id="y">some other text</span> </div>
</body>
The corresponding Java page component could contain code like given below. Note that thecomponentX(Wicket idx) is added tothis(the page component), whereascomponentY(Wicket idy) is added tocomponentX:
SomeComponent componentX = new SomeComponent("x"); this.add(componentX);
SomeOtherComponent componentY = new SomeOtherComponent("y");
componentX.add(componentY);
The parent component of any component can be retrieved using itsgetParent()method. Continuing with the example above, the following code will assigncomponentXtoparent:
SomeComponent parent = (SomeComponent) componentY.getParent();
Note: You can see the changes from the previous version at the address: https://pikacode.com/uyar/wicket-application-development/commit/05a5a934c6ae. You can get a copy of this version by clicking on the download link on that page.
1.3 Adding Links
Now we want to create a second page which will be responsible for listing the movies in the collection. At first, the page will only contain some static text, it will be populated in later chapters. Create an HTML file with the name MovieListPage.html, and a Java file with the nameMovieListPage.java. Arrange the HTML file as given
inListing: Initial movie list page template. Again, since there is no dynamic element in this template, the constructor
of theMovieListPageclass is empty (seeListing: Initial movie list page class). Listing Initial movie list page template.
1 <!DOCTYPE html>
2 <html xmlns:wicket="http://wicket.apache.org"> 3 <head>
4 <meta charset="utf-8" />
5 <title>MovieDB - Movie List</title>
6 <link rel="stylesheet" href="style.css" /> 7 </head>
8 <body>
9 <h2>Movie List</h2> 10 </body>
11 </html>
Listing Initial movie list page class. 1 package wicket.quickstart; 2
3 import org.apache.wicket.markup.html.WebPage; 4
5 public class MovieListPage extends WebPage { 6 public MovieListPage() {
7 }
8 }
Our next step will be to provide a link from the home page to the movie list page. In order to achieve this, we modify theHomePage.htmlas inListing: Home page template with link to movie list page. The code for adding the link is on line 12. This line states that the necessary information for theaelement will be supplied by a component with the Wicket id list_moviesin the HomePageclass. As before, thehref attribute of the aelement is just a placeholder and will be replaced by the value supplied by the Wicket component.
Listing Home page template with link to movie list page. 1 <!DOCTYPE html>
2 <html xmlns:wicket="http://wicket.apache.org"> 3 <head>
4 <meta charset="utf-8" /> 5 <title>MovieDB - Home</title>
6 <link rel="stylesheet" href="style.css" /> 7 </head>
8 <body>
9 <h1>MovieDB Homepage</h1> 10
11 <ul>
12 <li><a href="#" wicket:id="list_movies">List movies</a></li> 13 </ul>
14
15 <footer>
16 <div id="datetime" wicket:id="datetime"> 17 Wed Sep 4 15:32:40 EEST 2013
18 </div>
Wicket Application Development, Release 1.1
19 </footer> 20 </body> 21 </html>
The Wicket framework provides an abstractLinkclass which can be extended to create a new link class. For the new class, we have to implement a constructor and override theonClick()method that specifies what will happen when the link is clicked. Create a Java file namedMovieListPageLink.javaand arrange it as inListing: Movie list
page link class. Note that, since this is not a Wicket page, there is no template associated with it.
Constructor methods of Wicket component classes take an id value as their first parameter (their Wicket id). Since there is nothing special to do, the constructor will just invoke the constructor of its superclass with the same pa-rameter (line 7). The onClick()method creates a new instance of a movie list page (line 12) and calls the setResponsePage()method to direct the user to this newly created page (line 13).
Listing Movie list page link class. 1 package wicket.quickstart; 2
3 import org.apache.wicket.markup.html.link.Link; 4
5 public class MovieListPageLink extends Link { 6 public MovieListPageLink(String id) {
7 super(id);
8 }
9
10 @Override
11 public void onClick() {
12 MovieListPage targetPage = new MovieListPage();
13 this.setResponsePage(targetPage);
14 }
15 }
The final step is to add an instance of this link to the constructor of theHomePageclass (lines 2-3 inListing: Home
page class constructor with link component to movie list page):
Listing Home page class constructor with link component to movie list page. 1 public HomePage() {
2 MovieListPageLink movieListPageLink = new MovieListPageLink("list_movies"); 3 this.add(movieListPageLink);
4
5 Date now = new Date();
6 Label dateTimeLabel = new Label("datetime", now.toString()); 7 this.add(dateTimeLabel);
8 }
Note: You can see the changes from the previous version at the address: https://pikacode.com/uyar/wicket-application-development/commit/10a4f316e0b3. You can get a copy of this version by clicking on the download link on that page.
1.4 Shorter Code
There are a few things we can do to make the code shorter and more readable. First of all, we do not have to assign the result of every intermediate step to a variable. For example, when adding the date and time to the home page, we can skip the assignment of the label to a variable and send the label directly as parameter to theadd()method. That
means, we can change the lines 5-7 of theHomePageclass constructor inListing: Home page class constructor with
link component to movie list pageto:
Date now = new Date();
this.add(new Label("datetime", now.toString()));
Similarly, we can change theonClick()method of theMovieListPageLinkclass to: public void onClick() {
this.setResponsePage(new MovieListPage()); }
When the project gets larger, it becomes impractical to create Java files for every custom Wicket component we need. For example, we have to extend the Linkclass to create a link component for every link with a different target. Instead, we can use anonymous classes to reduce the number of files in our project and make it easier to manage. In
Listing: Home page class constructor using shorter code, we extend the WicketLinkclass where we instantiate a
link to the movie list page (lines 2-7) and therefore we do not need aMovieListPageLinkclass anymore. Listing Home page class constructor using shorter code.
1 public HomePage() {
2 Link movieListPageLink = new Link("list_movies") {
3 @Override
4 public void onClick() {
5 this.setResponsePage(new MovieListPage());
6 }
7 };
8 this.add(movieListPageLink); 9
10 Date now = new Date();
11 this.add(new Label("datetime", now.toString())); 12 }
Note: You can see the changes from the previous version at the address: https://pikacode.com/uyar/wicket-application-development/commit/569ed45fc7b3. You can get a copy of this version by clicking on the download link on that page.
1.5 Exercise
• Add a link from the movie list page to the home page. (Solution)
CHAPTER
TWO
APPLICATION STRUCTURE
The pages in a web application share some components such as global navigation panels. In this chapter, we will see how to implement such components without repeating code. We will create a base page that will contain the components that all pages in the application will acquire. SeeScreenshot: Home page containing navigation panel.for the screenshot of the resulting home page.
Figure 2.1: Screenshot: Home page containing navigation panel.
2.1 Base Pages
Adding shared components to multiple pages in an application is a tedious and error-prone approach. Therefore, we would like to be able to specify these at one point and let pages get them from that single source. For instance, we want all our pages to use the same footer that contains the date and time but we do not want to add a footer component to every page separately. Instead, we would like to add it to a base page and extend all pages from this base page. Add a new Java class namedBasePageto your package (careful: a Java class, not a Wicket page; there will be no template for this class). The code of the class is given inListing: Base page class with standard footer. Note that, the date and time label is already contained in this page (lines 15-17).
Listing Base page class with standard footer. 1 package wicket.quickstart;
2 3 import java.util.Date; 4 5 import org.apache.wicket.markup.html.WebPage; 6 import org.apache.wicket.markup.html.basic.Label; 7 import org.apache.wicket.model.IModel; 8 11
9 public class BasePage extends WebPage { 10 public BasePage() {
11 this(null);
12 }
13
14 public BasePage(IModel model) { 15 super(model);
16 Date now = new Date();
17 this.add(new Label("datetime", now.toString()));
18 }
19 }
Now theHomePageclass will extend thisBasePageinstead of the generic WebPage(seeListing: Home page
class extending the base page class) and it will not contain the label component for the footer anymore.
Listing Home page class extending the base page class. 1 public class HomePage extends BasePage {
2 public HomePage() {
3 Link movieListPageLink = new Link("list_movies") {
4 @Override
5 public void onClick() {
6 this.setResponsePage(new MovieListPage());
7 }
8 };
9 this.add(movieListPageLink);
10 }
11 }
Note: You can see the changes from the previous version at the address: https://pikacode.com/uyar/wicket-application-development/commit/46c3bd6d99f7. You can get a copy of this version by clicking on the download link on that page.
2.2 Panels
Another improvement concerns the navigation. We might need links to the home page or the movie list page from many pages in the application. So, having a global navigation mechanism where all such links will be available in all pages might be a good idea. Wicket provides panels which let us handle components as a group. Add aNavigationPanel class and its template HTML file to your package with the contents given inListing: Navigation panel templateand
Listing: Navigation panel class. In the HTML template, we are only interested in the lines 9-14, the part where we
describe the content of the panel. The correspondingNavigationPanelclass places the link components into this panel component.
Listing Navigation panel template. 1 <!DOCTYPE html>
2 <html xmlns:wicket="http://wicket.apache.org"> 3 <head>
4 <meta charset="utf-8" /> 5 <title>MovieDB</title>
6 <link rel="stylesheet" href="style.css" /> 7 </head>
8 <body>
9 <wicket:panel> 10 <ul>
Wicket Application Development, Release 1.1
11 <li><a href="#" wicket:id="home">Home</a></li>
12 <li><a href="#" wicket:id="list_movies">List movies</a></li> 13 </ul>
14 </wicket:panel> 15 </body>
16 </html>
Listing Navigation panel class. 1 package wicket.quickstart; 2
3 import org.apache.wicket.markup.html.link.Link; 4 import org.apache.wicket.markup.html.panel.Panel; 5
6 public class NavigationPanel extends Panel { 7 public NavigationPanel(String id) {
8 super(id);
9
10 Link homePageLink = new Link("home") {
11 @Override
12 public void onClick() {
13 this.setResponsePage(new HomePage());
14 }
15 };
16 this.add(homePageLink);
17
18 Link movieListPageLink = new Link("list_movies") {
19 @Override
20 public void onClick() {
21 this.setResponsePage(new MovieListPage());
22 }
23 };
24 this.add(movieListPageLink);
25 }
26 }
To make this panel available in all pages, we add it to the base page (seeListing: Base page class constructor with navigation panel, line 3).
Listing Base page class constructor with navigation panel. 1 public BasePage(IModel model) {
2 super(model);
3 this.add(new NavigationPanel("mainNavigation")); 4 Date now = new Date();
5 this.add(new Label("datetime", now.toString())); 6 }
Now the templates of our actual pages (the home page and the movie list page) will only add this panel instead of the links (seeListing: Home page template with navigation panel, lines 3-5). Besides, since all components on the page are now inherited from the base page, the constructor of theHomePageclass becomes completely empty (seeListing:
Home page class with navigation panel).
Listing Home page template with navigation panel. 1 <body> 2 <header> 3 <nav wicket:id="mainNavigation"> 4 navigation links 5 </nav> 2.2. Panels 13
6 </header> 7
8 <h1>MovieDB Homepage</h1> 9
10 <footer>
11 <div id="datetime" wicket:id="datetime"> 12 Wed Sep 4 15:32:40 EEST 2013
13 </div> 14 </footer> 15 </body>
Listing Home page class with navigation panel. 1 package wicket.quickstart;
2
3 public class HomePage extends BasePage { 4 public HomePage() {
5 }
6 }
To display the navigation links side by side instead of as a list, let us add the following lines to the style sheet:
nav li {
display: inline;
margin-right: 1em;
font-size: 80%; }
Note: You can see the changes from the previous version at the address: https://pikacode.com/uyar/wicket-application-development/commit/146972c319ad. You can get a copy of this version by clicking on the download link on that page.
2.3 Exercise
• Arrange the movie list page so that it will use the same navigation panel and footer. (Solution)
CHAPTER
THREE
DATA MODEL
In this chapter, we will create the Java classes in our data model, that is, the classes for movies and movie collections. First we will implement the movie class and fill the movie list page with some in-place generated test data. Then we will implement the movie collection class which will hold some application-wide test data. The resulting movie list page will look like inScreenshot: Movie list page populated with test data.Figure 3.1: Screenshot: Movie list page populated with test data
3.1 Movies
To represent movies in the application, we implement aMovieclass (seeListing: Movie class. At first, it only has a title and a year, along with their getters and setters. Apart from the default constructor without any parameters, there is one more constructor which takes the movie title as parameter:
Listing Movie class. 1 package wicket.quickstart; 2
3 public class Movie {
4 private String _title = null; 5 private Integer _year = null; 6
7 public Movie() {
8 }
9
10 public Movie(String title) {
11 this.setTitle(title);
12 }
13
14 public void setTitle(String title) {
15 this._title = title;
16 }
17
18 public String getTitle() {
19 return this._title;
20 }
21
22 public void setYear(Integer year) {
23 this._year = year;
24 }
25
26 public Integer getYear() {
27 return this._year;
28 }
29 }
3.2 Displaying Lists
To display a list of movies, we have to connect an element in the HTML template to a WicketListViewcomponent. These components are associated with Java lists and every element in the Java list is associated with aListItem component in the list view. If the Wicket id in the template matches a list view component, the underlying markup will be generated for each element in the list. We change the code for theMovieListPage.html template as given inListing: Movie list template using a list view. This code will generate atrelement for each movie in the list (lines 11-16). Again, note that, “The Matrix” and “1999” are just placeholders, they will be replaced when the page is actually rendered.
Listing Movie list template using a list view. 1 <body> 2 <header> 3 <nav wicket:id="mainNavigation"> 4 navigation links 5 </nav> 6 </header> 7 8 <h2>Movie List</h2> 9 10 <table> 11 <tr wicket:id="movie_list"> 12 <td>
13 <span wicket:id="title">The Matrix</span> 14 (<span wicket:id="year">1999</span>) 15 </td>
16 </tr> 17 </table> 18
19 <footer>
20 <div id="datetime" wicket:id="datetime"> 21 Wed Sep 4 15:32:40 EEST 2013
22 </div> 23 </footer> 24 </body>
Wicket Application Development, Release 1.1
ListViewis an abstract class that has to be extended in order to be used (seeListing: Movie list page class with
sample movie data). By passing the movies list as the second parameter to the constructor (line 20), we associate it
with this list view component and every item (movie) in the list will be associated with the corresponding list item component in this list view. Since we don’t have a data source to supply us with the movie information at the moment, we generate a sample list (lines 12-18).
Listing Movie list page class with sample movie data. 1 package wicket.quickstart;
2 3 import java.util.LinkedList; 4 import java.util.List; 5 6 import org.apache.wicket.markup.html.basic.Label; 7 import org.apache.wicket.markup.html.list.ListItem; 8 import org.apache.wicket.markup.html.list.ListView; 9
10 public class MovieListPage extends BasePage { 11 public MovieListPage() {
12 List<Movie> movies = new LinkedList<Movie>(); 13 Movie movie1 = new Movie("The Shining"); 14 movie1.setYear(1980);
15 movies.add(movie1);
16 Movie movie2 = new Movie("Barton Fink"); 17 movie2.setYear(1991);
18 movies.add(movie2); 19
20 ListView movieListView = new ListView("movie_list", movies) {
21 @Override
22 protected void populateItem(ListItem item) { 23 Movie movie = (Movie) item.getModelObject(); 24 item.add(new Label("title", movie.getTitle()));
25 item.add(new Label("year", movie.getYear().toString()));
26 }
27 };
28 this.add(movieListView);
29 }
30 }
When extending theListViewclass, we have to implement thepopulateItem()method which will be ex-ecuted for every item in the list view (lines 22-26). The current list item will be passed as the itemparameter, and we can get the Java object associated with this item using itsgetModelObject()method. That means, the item.getModelObject()call on line 23 will give us the reference of the associated movie object. Then we use WicketLabelcomponents to display the title and year of the movie on the web page (lines 24-25).
Wicket also supports a simpler way of creating custom list views. If your code conforms to a few basic conventions, Wicket can automatically map the model object (in our case, the movie) to the component (the list view item). The rule is that the model object has to define getters and setters for each of its attributes using standard method names:
• The name of the getter method for an attribute has to start withget, followed by the name of the attribute with its first letter capitalized. For instance, if the name of the attribute istitle, the name of the getter has to be getTitle(). This method should take no parameters and return the value of the attribute in a proper format. • The name of the setter method for an attribute has to start withset, followed by the name of the attribute with its first letter capitalized. Again, if the name of the attribute istitle, the name of the setter has to be setTitle(). This method should take the value to be assigned to the attribute as its only parameter and return nothing.
• Getters for boolean attributes have to be named starting withisinstead ofget. For instance, if the attribute is
a boolean namedsuccessful, the name of the getter has to beisSuccessful().
Since ourMovie class already conforms to these rules, we just have to extend the PropertyListView class instead of the ListView class to use this feature. Note that, in this code, we do not supply the contents for the title and year labels (lines 5-6). Wicket will call thegetTitle()method for the Wicket idtitleand the getYear()method for the idyear. Also, the conversion from integer to string for years is handled automatically (notoString()on line 6).
1 PropertyListView movieListView =
2 new PropertyListView("movie_list", movies) {
3 @Override
4 protected void populateItem(ListItem item) {
5 item.add(new Label("title"));
6 item.add(new Label("year"));
7 }
8 };
Note: You can see the changes from the previous version at the address: https://pikacode.com/uyar/wicket-application-development/commit/b411e0590d20. You can get a copy of this version by clicking on the download link on that page.
3.3 Movie Collections
Next, we will implement a class that will represent a movie collection. This class will contain a list of movie objects and some methods to interact with that list such as adding or deleting movies and getting a list of all movies (see
Listing: Movie collection class).
Listing Movie collection class. 1 package wicket.quickstart; 2
3 import java.util.LinkedList; 4 import java.util.List; 5
6 public class MovieCollection { 7 private List<Movie> _movies; 8
9 public MovieCollection() {
10 this._movies = new LinkedList<Movie>();
11 }
12
13 public List<Movie> getMovies() {
14 return this._movies;
15 }
16
17 public void addMovie(Movie movie) {
18 this._movies.add(movie);
19 }
20
21 public void deleteMovie(Movie movie) {
22 this._movies.remove(movie);
23 }
24 }
In our earlier example, the list of movies was generated by the page that lists the movies. This is obviously not the proper place to generate the collection because there should be one movie collection object which is
Wicket Application Development, Release 1.1
cessible to all components in the application. Therefore, the better place to generate that list would be in the WicketApplicationclass (seeListing: Application class containing the collection object). So, we add a col-lection object member to this class (line 7), instantiate it at initialization (line 18), and add agetCollection() method which will return this collection (lines 27-29). Again, we provide some sample data (lines 19-24) in order to test our application.
Listing Application class containing the collection object 1 package wicket.quickstart;
2
3 import org.apache.wicket.markup.html.WebPage;
4 import org.apache.wicket.protocol.http.WebApplication; 5
6 public class WicketApplication extends WebApplication { 7 private MovieCollection _collection;
8
9 @Override
10 public Class<? extends WebPage> getHomePage() { 11 return HomePage.class;
12 }
13
14 @Override
15 public void init() {
16 super.init();
17
18 this._collection = new MovieCollection();
19 Movie movie1 = new Movie("The Shining"); 20 movie1.setYear(1980);
21 this._collection.addMovie(movie1);
22 Movie movie2 = new Movie("Barton Fink"); 23 movie2.setYear(1991);
24 this._collection.addMovie(movie2);
25 }
26
27 public MovieCollection getCollection() { 28 return this._collection;
29 }
30 }
Now that theMovieListPageclass does not generate the list of movies, it has to retrieve them from the application. So the lines 12-18 inListing: Movie list page class with sample movie datawill be replaced by the lines 2-4 inListing:
Movie list page class constructor getting movie list from application. We can use thegetApplication()method
of Wicket web page classes to get a handle of the application object that contains this web page (note that this is a Wicket application object that we have to cast to ourWicketApplicationclass as on line 2).
Listing Movie list page class constructor getting movie list from application. 1 public MovieListPage() {
2 WicketApplication app = (WicketApplication) this.getApplication(); 3 MovieCollection collection = app.getCollection();
4 List<Movie> movies = collection.getMovies(); 5
6 PropertyListView movieListView =
7 new PropertyListView("movie_list", movies) {
8 private static final long serialVersionUID = 1L;
9
10 @Override
11 protected void populateItem(ListItem item) {
12 item.add(new Label("title"));
13 item.add(new Label("year"));
14 }
15 };
16 this.add(movieListView); 17 }
Note: You can see the changes from the previous version at the address: https://pikacode.com/uyar/wicket-application-development/commit/4a959f3f381a. You can get a copy of this version by clicking on the download link on that page.
3.4 Exercise
• (Warning: DIFFICULT) Add a page that will display a movie (seeScreenshot: Movie display page.). Then, organize the movie list page so that the entries are links to pages that will display the selected movie (see
Screenshot: Movie list page with links to movie display pages.). (Solution)
Figure 3.2: Screenshot: Movie display page.
Figure 3.3: Screenshot: Movie list page with links to movie display pages.
CHAPTER
FOUR
FORMS
In this chapter, we will implement the parts that will enable us to modify the collection. This includes the operations to add a new movie and to delete an existing movie. Both operations require the use of forms containing components such as text boxes and check boxes. The resulting pages are given inScreenshot: Movie edit pageandScreenshot:Movie list page with delete option.
Figure 4.1: Screenshot: Movie edit page
Figure 4.2: Screenshot: Movie list page with delete option
4.1 Text Boxes
First, we will add a new page to edit the data of a movie. Add an HTML template namedMovieEditPage.html and modify its contents as inListing: Page template for editing a movie. We are interested in theformelement of the page (lines 15-32).
Listing Page template for editing a movie. 1 <!DOCTYPE html>
2 <html xmlns:wicket="http://wicket.apache.org"> 3 <head>
4 <meta charset="utf-8" />
5 <title>MovieDB - Movie Edit Form</title> 6 <link rel="stylesheet" href="style.css" /> 7 </head> 8 <body> 9 <header> 10 <nav wicket:id="mainNavigation"> 11 navigation links 12 </nav> 13 </header> 14
15 <form action="#" wicket:id="movie_edit"> 16 <table>
17 <tr>
18 <th>Title:</th> 19 <td>
20 <input wicket:id="title" type="text" placeholder="The Matrix"
21 required autofocus /> 22 </td> 23 </tr> 24 <tr> 25 <th>Year:</th> 26 <td>
27 <input wicket:id="year" type="text" size="4" placeholder="1999" /> 28 </td>
29 </tr> 30 </table>
31 <input value="Save" name="save" type="submit" /> 32 </form>
33
34 <footer>
35 <div id="datetime" wicket:id="datetime"> 36 Wed Sep 4 15:32:40 EEST 2013
37 </div> 38 </footer> 39 </body> 40 </html>
From this template we can see that the corresponding Wicket page class has to contain a component with the Wicket idmovie_edit which has to be able to handle forms (line 15). And this component has to contain two other components with the Wicket idstitleandyear, both of which will be responsible for handling text boxes (lines 20 and 27).
Let us start by creating the form component. Add a new Java class with the nameMovieEditFormwhich extends the WicketFormcomponent (seeListing: Movie edit form class). This form component will take the movie object it will edit as a parameter to its constructor (line 8). The movie object will serve as the model for the component, i.e. it will provide the data for any of the components contained in the page. To achieve this, we create a Wicket
Wicket Application Development, Release 1.1
CompoundPropertyModelobject from the movie and set it as the model of this form (lines 11-12). The form component contains two text field subcomponents, one for each of the text boxes defined in the HTML template (lines 14-15).
Listing Movie edit form class. 1 package wicket.quickstart; 2
3 import org.apache.wicket.markup.html.form.Form; 4 import org.apache.wicket.markup.html.form.TextField; 5 import org.apache.wicket.model.CompoundPropertyModel; 6
7 public class MovieEditForm extends Form {
8 public MovieEditForm(String id, Movie movie) {
9 super(id);
10
11 CompoundPropertyModel model = new CompoundPropertyModel(movie);
12 this.setModel(model);
13
14 this.add(new TextField("title")); 15 this.add(new TextField("year"));
16 }
17
18 @Override
19 public void onSubmit() {
20 Movie movie = (Movie) this.getModelObject();
21 WicketApplication app = (WicketApplication) this.getApplication(); 22 MovieCollection collection = app.getCollection();
23 collection.addMovie(movie);
24 this.setResponsePage(new MovieDisplayPage(movie));
25 }
26 }
When implementing a form, another major task is to specify what will happen when the form is submitted. We do this by overriding theonSubmit()method of the WicketFormclass (lines 19-25). For this particular form, we need to add the movie object to the collection; therefore, we get the movie which is the model object of this form (line 20), add the movie to the collection (lines 21-23), and redirect the user to the page that will display this movie (line 24). Now we have to add this form component to theMovieEditPageclass to complete the connection between the template and all the Wicket components (seeListing: Movie edit page class). This page takes the movie to be edited as a parameter to its constructor (line 4) and passes it to the form component (line 5).
Listing Movie edit page class. 1 package wicket.quickstart; 2
3 public final class MovieEditPage extends BasePage { 4 public MovieEditPage(Movie movie) {
5 this.add(new MovieEditForm("movie_edit", movie));
6 }
7 }
Important: Pay extra attention to the hierarchy between the HTML elements and the Java components in this example.
To make this page accessible from other pages, we add a link to the global navigation panel (Listing: Navigation panel
template with link to movie adding page) and a link component to the corresponding Java class (Listing: Navigation
panel class constructor with link component to movie adding page). When this link is clicked, we instantiate a new
movie object and send it to the edit page as parameter (lines 18-19). Listing Navigation panel template with link to movie adding page. 1 <wicket:panel>
2 <ul>
3 <li><a href="#" wicket:id="home">Home</a></li>
4 <li><a href="#" wicket:id="list_movies">List movies</a></li> 5 <li><a href="#" wicket:id="add_movie">Add movie</a></li> 6 </ul>
7 </wicket:panel>
Listing Navigation panel class constructor with link component to movie adding page. 1 public class NavigationPanel extends Panel {
2 public NavigationPanel(String id) {
3 super(id);
4
5 Link homePageLink = new Link("home") {
6 @Override
7 public void onClick() {
8 this.setResponsePage(new HomePage());
9 }
10 };
11 this.add(homePageLink);
12
13 Link movieListPageLink = new Link("list_movies") {
14 @Override
15 public void onClick() {
16 this.setResponsePage(new MovieListPage());
17 }
18 };
19 this.add(movieListPageLink);
20
21 Link movieAddLink = new Link("add_movie") {
22 @Override
23 public void onClick() {
24 Movie movie = new Movie();
25 this.setResponsePage(new MovieEditPage(movie));
26 }
27 };
28 this.add(movieAddLink);
29 }
30 }
Note that, now that we can add movies to the collection, we don’t need the sample movie data anymore and we can delete the relevant lines from theinit()method of theWicketApplicationclass to get:
@Override
public void init() { super.init();
this._collection = new MovieCollection(); }
Note: You can see the changes from the previous version at the address: https://pikacode.com/uyar/wicket-application-development/commit/2977f56c0cb0. You can get a copy of this version by clicking on the download link on that page.
Wicket Application Development, Release 1.1
4.2 Check Boxes
Our next step is to delete movies from the collection. We will change the movie list page so that there will be a check box next to every movie and a delete button at the bottom of the page. When the delete button is pressed all the checked movies will be deleted. First, we change the template for the movie list page as inListing: Movie list template with check boxes for entries.
Listing Movie list template with check boxes for entries. 1 <h2>Movie List</h2>
2
3 <form action="#" wicket:id="movie_list_form"> 4 <div wicket:id="selected_movies">
5 <table>
6 <tr wicket:id="movie_list">
7 <td><input type="checkbox" wicket:id="selected" /></td> 8 <td>
9 <a href="#" wicket:id="movie_link">
10 <span wicket:id="title">The Matrix</span> 11 (<span wicket:id="year">1999</span>) 12 </a>
13 </td> 14 </tr> 15 </table> 16 </div>
17 <input type="submit" value="Delete" name="delete" /> 18 </form>
19 <table>
The changes from the earlier version are as follows:
• There is a check box in front of every movie link (line 7). These check boxes will be controlled by Wicket Checkcomponents in the Java code.
• We will group check boxes so that we can handle them easier using aCheckGroupcomponent in Wicket. We use thedivelement on line 4 to establish this connection.
• Since check boxes need to be part of a form, we put all the elements under a form element (line 3). • There is now a button for submitting this form (line 17).
The movie list view we have used so far is no longer sufficient for handling this template. We need a movie list form that will include the movie list view. The implementation is given inListing: Movie list form class. This component will keep the list of selected movies in the_selectedMoviesattribute (line 14), which is initialized as an empty linked list in the constructor (line 18). The constructor creates and adds a check box group component (lines 20-22) which it associates with this list. This way, all movies associated with the check boxes under this check group will be elements of the list.
Until now, the movie list view used to be directly under the movie list page but now it has to be placed under this check group according to the hierarchy in the HTML template. Therefore we move the code generating the movie list view from theMovieListPageclass to this class (lines 24-40) and add the list view under the check group (line 41). This code contains a new statement for adding a check box to the list item (line 37). Sending the model of the item as a parameter to the constructor of theCheckcomponent (via thegetModel()method) creates the connection between the check box and the check group it is in.
As before, we override theonSubmit()method to determine the action to take when the submit button is clicked. Since the_selectedMoviesattribute keeps the list of movies selected for deletion, we iterate over its elements and delete them from the collection (lines 48-49). Then we redirect the user to the movie list page (line 50).
Listing Movie list form class.
1 package wicket.quickstart; 2 3 import java.util.LinkedList; 4 import java.util.List; 5 6 import org.apache.wicket.markup.html.basic.Label; 7 import org.apache.wicket.markup.html.form.Check; 8 import org.apache.wicket.markup.html.form.CheckGroup; 9 import org.apache.wicket.markup.html.form.Form; 10 import org.apache.wicket.markup.html.list.ListItem; 11 import org.apache.wicket.markup.html.list.PropertyListView; 12
13 public class MovieListForm extends Form { 14 private List<Movie> _selectedMovies; 15
16 public MovieListForm(String id) {
17 super(id);
18 this._selectedMovies = new LinkedList<Movie>(); 19
20 CheckGroup movieCheckGroup =
21 new CheckGroup("selected_movies", this._selectedMovies);
22 this.add(movieCheckGroup);
23
24 WicketApplication app = (WicketApplication) this.getApplication(); 25 MovieCollection collection = app.getCollection();
26 List<Movie> movies = collection.getMovies(); 27
28 PropertyListView movieListView =
29 new PropertyListView("movie_list", movies) {
30 @Override
31 protected void populateItem(ListItem item) { 32 Movie movie = (Movie) item.getModelObject(); 33 MovieDisplayPageLink movieLink =
34 new MovieDisplayPageLink("movie_link", movie); 35 movieLink.add(new Label("title"));
36 movieLink.add(new Label("year"));
37 item.add(new Check("selected", item.getModel()));
38 item.add(movieLink);
39 }
40 };
41 movieCheckGroup.add(movieListView);
42 }
43
44 @Override
45 public void onSubmit() {
46 WicketApplication app = (WicketApplication) this.getApplication(); 47 MovieCollection collection = app.getCollection();
48 for (Movie movie : this._selectedMovies) 49 collection.deleteMovie(movie);
50 this.setResponsePage(new MovieListPage());
51 }
52 }
TheMovieListPageclass now only needs the form component, so its constructor will be as inListing: Movie list
page class containing movie list form component.
Listing Movie list page class containing movie list form component.
Wicket Application Development, Release 1.1
1 public MovieListPage() {
2 MovieListForm movieListForm = new MovieListForm("movie_list_form"); 3 this.add(movieListForm);
4 }
Note: You can see the changes from the previous version at the address: https://pikacode.com/uyar/wicket-application-development/commit/9d7f8d6bce66. You can get a copy of this version by clicking on the download link on that page.
4.3 Exercise
• Add a link to the movie display page which, when clicked, will take the user to the movie edit page. After saving, the movie should be updated in the collection (not added a second time). (Solution)
CHAPTER
FIVE
DATA PERSISTENCE
A major problem with the application as implemented so far is that the data the user enters do not persist. Every time, the application starts with an empty collection and added movies are lost when the application is shut down. In this chapter we will see how to store the data in a database. This chapter has nothing to do with Wicket; it just stores the data in an SQL database and assumes that the reader knows about SQL.5.1 Collection Interface
In order to make it easier to switch between different persistence mechanisms, we will first create a simple interface that all these mechanisms will implement. Add a Java interface with the nameIMovieCollection. The interface has to declare the methods as shown inListing: Movie collection interface.
Listing Movie collection interface. package wicket.quickstart;
import java.util.List;
public interface IMovieCollection { public List<Movie> getMovies(); public void addMovie(Movie movie); public void deleteMovie(Movie movie); public void updateMovie(Movie movie); }
TheMovieCollectionclass based on lists already implements this interface; we just have to acknowledge this by changing the class definition:
public MovieCollection implements IMovieCollection { ...
}
We also have to change the code pieces that refer to the MovieCollection class so that they will use the IMovieCollection interface. That means changing theWicketApplication class, so that the only place where the actual collection implementation is used will be where the collection is initialized (line 12):
1 public class WicketApplication extends WebApplication { 2 private IMovieCollection _collection;
3
4 @Override
5 public Class<? extends WebPage> getHomePage() {
6 return HomePage.class;
7 }
8
9 @Override
10 public void init() {
11 super.init();
12 this._collection = new MovieCollection();
13 }
14
15 public IMovieCollection getCollection() { 16 return this._collection;
17 }
18 }
Also the references to theMovieCollectionclass in theMovieEditFormandMovieListFormclasses have to be changed to theIMovieCollectioninterface.
Note: You can see the changes from the previous version at the address: https://pikacode.com/uyar/wicket-application-development/commit/355df788f8f0. You can get a copy of this version by clicking on the download link on that page.
5.2 JDBC
To keep things simple and to avoid database installation or configuration issues, we will an SQLite database. Download the JDBC driver JAR file for SQLite from the following page, put it in thelibdirectory, and add it to the project classpath:
http://www.xerial.org/trac/Xerial/wiki/SQLiteJDBC
Next, create a database with the namemovies.sqlitein your home directory and create a table in it using the following SQL statement:
CREATE TABLE MOVIE (
ID INTEGER PRIMARY KEY AUTOINCREMENT, TITLE VARCHAR(80) NOT NULL,
YEAR INTEGER
)
Tip: You can use the SQLite Manager add-on for Firefox to manage SQLite databases: https://addons.mozilla.org/en-US/firefox/addon/sqlite-manager/
As indicated by the SQL table creation statement above, movie objects now have identifiers. We modify ourMovie class as shown inListing: Movie class with id attributeto add this attribute (line 3) and its getter and setter methods (lines 9-15):
Listing Movie class with identifier attribute. public class Movie {
private Integer _id = null; private String _title; private Integer _year;
...
public void setId(Integer id) { this._id = id;
Wicket Application Development, Release 1.1
}
public Integer getId() { return this._id; }
... }
Now we have to implement aMovieCollectionJDBCclass which will implement our common collection inter-face but this time using a database to store the data (line 2).
1 public class MovieCollectionJDBC implements IMovieCollection { 2 private Connection _db;
3
4 public MovieCollectionJDBC(String dbFilePath) {
5 try {
6 Class.forName("org.sqlite.JDBC"); 7 } catch (ClassNotFoundException e) {
8 throw new UnsupportedOperationException(e.getMessage());
9 }
10
11 try {
12 String jdbcURL = "jdbc:sqlite:" + dbFilePath; 13 this._db = DriverManager.getConnection(jdbcURL); 14 } catch (SQLException ex) {
15 throw new UnsupportedOperationException(ex.getMessage());
16 }
17 }
18
19 public List<Movie> getMovies() {
20 ...
21 }
22
23 public void addMovie(Movie movie) {
24 ...
25 }
26
27 public void deleteMovie(Movie movie) {
28 ...
29 }
30
31 public void updateMovie(Movie movie) {
32 ...
33 }
34 }
The methods for getting the movie list, adding a movie, removing a movie, and updating a movie are given below. These are simple JDBC operations and are not within the scope of this tutorial.
Important: Note that, in order to simplify the code, the examples throw an UnsupportedOperationException whereever an exception is needed. A real-life application should handle errors properly. It should also close resources like statements and result sets in thefinallyclauses of the try - catchblocks.
Listing Getting movies from a JDBC-based collection.
1 public List<Movie> getMovies() {
2 List<Movie> movies = new LinkedList<Movie>();
3 try {
4 String query = "SELECT ID, TITLE, YEAR FROM MOVIE"; 5 Statement statement = this._db.createStatement(); 6 ResultSet results = statement.executeQuery(query); 7 while (results.next()) {
8 Integer id = results.getInt("ID");
9 String title = results.getString("TITLE"); 10 Integer year = results.getInt("YEAR"); 11 Movie movie = new Movie(title);
12 movie.setId(id); 13 movie.setYear(year); 14 movies.add(movie);
15 }
16 results.close(); 17 statement.close(); 18 } catch (SQLException e) {
19 throw new UnsupportedOperationException(e.getMessage());
20 }
21 return movies; 22 }
Listing Adding a movie to a JDBC-based collection. 1 public void addMovie(Movie movie) {
2 try {
3 String query = "INSERT INTO MOVIE (TITLE, YEAR) VALUES (?, ?)"; 4 PreparedStatement statement = this._db.prepareStatement(query); 5 statement.setString(1, movie.getTitle());
6 statement.setInt(2, movie.getYear()); 7 statement.executeUpdate();
8 } catch (SQLException e) {
9 throw new UnsupportedOperationException(e.getMessage());
10 }
11 }
Listing Deleting a movie from a JDBC-based collection. 1 public void deleteMovie(Movie movie) {
2 try {
3 String query = "DELETE FROM MOVIE WHERE (ID = ?)";
4 PreparedStatement statement = this._db.prepareStatement(query); 5 statement.setInt(1, movie.getId());
6 statement.executeUpdate(); 7 statement.close();
8 } catch (SQLException e) {
9 throw new UnsupportedOperationException(e.getMessage());
10 }
11 }
Listing Updating a movie in a JDBC-based collection. 1 public void updateMovie(Movie movie) {
2 try {
3 String query = "UPDATE MOVIE SET TITLE = ?, YEAR = ? WHERE (ID = ?)"; 4 PreparedStatement statement = this._db.prepareStatement(query); 5 statement.setString(1, movie.getTitle());
6 statement.setInt(2, movie.getYear());
Wicket Application Development, Release 1.1
7 statement.setInt(3, movie.getId()); 8 statement.executeUpdate();
9 statement.close(); 10 } catch (SQLException e) {
11 throw new UnsupportedOperationException(e.getMessage());
12 }
13 }
Finally, we just have to change the collection implementation chosen in the initialization method of the WicketApplicationclass. The database is assumed to be a file namedmovies.sqlitein the user’s home directory.
@Override
public void init() { super.init();
String homeDir = System.getProperty("user.home");
String dbFilePath = homeDir + File.separator + "movies.sqlite"; this._collection = new MovieCollectionJDBC(dbFilePath);
}
Note: You can see the changes from the previous version at the address: https://pikacode.com/uyar/wicket-application-development/commit/ffdf17e8983c. You can get a copy of this version by clicking on the download link on that page.
CHAPTER
SIX
SOLUTIONS TO EXERCISES
Chapter BasicsExercise Add a link from the movie list page to the home page. MovieListPage.html
1 <!DOCTYPE html>
2 <html xmlns:wicket="http://wicket.apache.org"> 3 <head>
4 <meta charset="utf-8" />
5 <title>MovieDB - Movie List</title>
6 <link rel="stylesheet" href="style.css" /> 7 </head>
8 <body>
9 <h2>Movie List</h2> 10
11 <ul>
12 <li><a href="#" wicket:id="home">Home</a></li> 13 </ul>
14 </body> 15 </html>
MovieListPage.java 1 package wicket.quickstart; 2
3 import org.apache.wicket.markup.html.WebPage; 4 import org.apache.wicket.markup.html.link.Link; 5
6 public class MovieListPage extends WebPage { 7 public MovieListPage() {
8 Link homePageLink = new Link("home") {
9 @Override
10 public void onClick() {
11 this.setResponsePage(new HomePage());
12 }
13 };
14 this.add(homePageLink);
15 }
16 }
Note: You can see the changes needed to solve this exercise at the address: https://pikacode.com/uyar/wicket-application-development/commit/eda07d059353. You can get a copy of this version by clicking on the download link on that page.
Chapter Application Structure
Exercise Arrange the movie list page so that it will use the same navigation panel and footer. MovieListPage.html
1 <!DOCTYPE html>
2 <html xmlns:wicket="http://wicket.apache.org"> 3 <head>
4 <meta charset="utf-8" />
5 <title>MovieDB - Movie List</title>
6 <link rel="stylesheet" href="style.css" /> 7 </head> 8 <body> 9 <header> 10 <nav wicket:id="mainNavigation"> 11 navigation links 12 </nav> 13 </header> 14 15 <h2>Movie List</h2> 16 17 <footer>
18 <div id="datetime" wicket:id="datetime"> 19 Wed Sep 4 15:32:40 EEST 2013
20 </div> 21 </footer> 22 </body> 23 </html>
MovieListPage.java 1 package wicket.quickstart; 2
3 public class MovieListPage extends BasePage { 4 public MovieListPage() {
5 }
6 }
Note: You can see the changes needed to solve this exercise at the address: https://pikacode.com/uyar/wicket-application-development/commit/bc187a53483d. You can get a copy of this version by clicking on the download link on that page.
Chapter Data Model
Exercise Add a page that will display a movie. Then, organize the movie list page so that the entries are links to pages that will display the selected movie.
MovieDisplayPage.html 1 <!DOCTYPE html>
2 <html xmlns:wicket="http://wicket.apache.org"> 3 <head>
4 <meta charset="utf-8" /> 5 <title>MovieDB - Movie</title>
6 <link rel="stylesheet" href="style.css" /> 7 </head>
8 <body>