Outlook
®
2007
FOR
DUMmIES
‰Published by
Wiley Publishing, Inc.
111 River Street Hoboken, NJ 07030-5774
www.wiley.com
Copyright © 2007 by Wiley Publishing, Inc., Indianapolis, Indiana Published by Wiley Publishing, Inc., Indianapolis, Indiana Published simultaneously in Canada
No part of this publication may be reproduced, stored in a retrieval system or transmitted in any form or by any means, electronic, mechanical, photocopying, recording, scanning or otherwise, except as permit-ted under Sections 107 or 108 of the 1976 Unipermit-ted States Copyright Act, without either the prior written permission of the Publisher, or authorization through payment of the appropriate per-copy fee to the Copyright Clearance Center, 222 Rosewood Drive, Danvers, MA 01923, (978) 750-8400, fax (978) 646-8600. Requests to the Publisher for permission should be addressed to the Legal Department, Wiley Publishing, Inc., 10475 Crosspoint Blvd., Indianapolis, IN 46256, (317) 572-3447, fax (317) 572-4355, or online at http:// www.wiley.com/go/permissions.
Trademarks:Wiley, the Wiley Publishing logo, For Dummies, the Dummies Man logo, A Reference for the Rest of Us!, The Dummies Way, Dummies Daily, The Fun and Easy Way, Dummies.com, and related trade dress are trademarks or registered trademarks of John Wiley & Sons, Inc. and/or its affiliates in the United States and other countries, and may not be used without written permission. Microsoft and Outlook are registered trademarks of Microsoft Corporation in the United States and/or other countries. All other trademarks are the property of their respective owners. Wiley Publishing, Inc., is not associated with any product or vendor mentioned in this book.
LIMIT OF LIABILITY/DISCLAIMER OF WARRANTY: THE PUBLISHER AND THE AUTHOR MAKE NO REP-RESENTATIONS OR WARRANTIES WITH RESPECT TO THE ACCURACY OR COMPLETENESS OF THE CON-TENTS OF THIS WORK AND SPECIFICALLY DISCLAIM ALL WARRANTIES, INCLUDING WITHOUT LIMITATION WARRANTIES OF FITNESS FOR A PARTICULAR PURPOSE. NO WARRANTY MAY BE CRE-ATED OR EXTENDED BY SALES OR PROMOTIONAL MATERIALS. THE ADVICE AND STRATEGIES CON-TAINED HEREIN MAY NOT BE SUITABLE FOR EVERY SITUATION. THIS WORK IS SOLD WITH THE UNDERSTANDING THAT THE PUBLISHER IS NOT ENGAGED IN RENDERING LEGAL, ACCOUNTING, OR OTHER PROFESSIONAL SERVICES. IF PROFESSIONAL ASSISTANCE IS REQUIRED, THE SERVICES OF A COMPETENT PROFESSIONAL PERSON SHOULD BE SOUGHT. NEITHER THE PUBLISHER NOR THE AUTHOR SHALL BE LIABLE FOR DAMAGES ARISING HEREFROM. THE FACT THAT AN ORGANIZATION OR WEBSITE IS REFERRED TO IN THIS WORK AS A CITATION AND/OR A POTENTIAL SOURCE OF FUR-THER INFORMATION DOES NOT MEAN THAT THE AUTHOR OR THE PUBLISHER ENDORSES THE INFOR-MATION THE ORGANIZATION OR WEBSITE MAY PROVIDE OR RECOMMENDATIONS IT MAY MAKE. FURTHER, READERS SHOULD BE AWARE THAT INTERNET WEBSITES LISTED IN THIS WORK MAY HAVE CHANGED OR DISAPPEARED BETWEEN WHEN THIS WORK WAS WRITTEN AND WHEN IT IS READ.
For general information on our other products and services, please contact our Customer Care Department within the U.S. at 800-762-2974, outside the U.S. at 317-572-3993, or fax 317-572-4002. For technical support, please visit www.wiley.com/techsupport.
Wiley also publishes its books in a variety of electronic formats. Some content that appears in print may not be available in electronic books.
Library of Congress Control Number: 2006934819 ISBN-13: 978-0-470-03830-7
ISBN-10: 0-470-03830-6
Manufactured in the United States of America 10 9 8 7 6 5 4 3 2 1
About the Author
Author’s Acknowledgments
Publisher’s Acknowledgments
We’re proud of this book; please send us your comments through our online registration form located at www.dummies.com/register/.
Some of the people who helped bring this book to market include the following:
Acquisitions, Editorial, and Media Development
Project Editor:Tonya Maddox Cupp
(Previous Edition: Linda Morris)
Acquisitions Editor:Greg Croy
Technical Editor:Lee Musick
Editorial Manager:Jodi Jensen
Media Development Specialists:Angela Denny, Kate Jenkins, Steven Kudirka, Kit Malone, Travis Silvers
Media Development Manager:
Laura VanWinkle
Editorial Assistant:Amanda Foxworth
Sr. Editorial Assistant:Cherie Case
Cartoons:Rich Tennant (www.the5thwave.com)
Composition Services
Project Coordinator: Erin Smith
Layout and Graphics:Carl Byers, Lavonne Cook, Denny Hager, Barbara Moore, Barry Offringa,
Lynsey Osborn, Rashell Smith, Alicia South
Proofreaders: Christine Pingleton, Techbooks
Indexer: Sherry Massey
Publishing and Editorial for Technology Dummies
Richard Swadley,Vice President and Executive Group Publisher
Andy Cummings,Vice President and Publisher
Mary Bednarek,Executive Acquisitions Director
Mary C. Corder,Editorial Director
Publishing for Consumer Dummies
Diane Graves Steele,Vice President and Publisher
Joyce Pepple,Acquisitions Director
Composition Services
Gerry Fahey,Vice President of Production Services
Contents at a Glance
Introduction ...1
Part I: Getting the Competitive Edge with Outlook ...9
Chapter 1: Fundamental Features: How Did You Ever Do without Outlook? ...11
Chapter 2: Inside Outlook: Mixing, Matching, and Managing Information...21
Chapter 3: On the Fast Track: Drag ’til You Drop ...37
Part II: Taming the E-Mail Beast ...45
Chapter 4: The Essential Secrets of E-Mail...47
Chapter 5: E-Mail Tools You Can’t Do Without ...67
Chapter 6: Conquering Your Mountain of Messages...83
Part III: Managing Contacts, Dates, Tasks, and More...109
Chapter 7: Your Little Black Book: Creating Contact Lists...111
Chapter 8: The Calendar: How to Unleash Its Power...139
Chapter 9: Task Mastery: Discovering All the Bells and Whistles ...161
Chapter 10: For the Record: Outlook Notes and Journal Entries ...187
Part IV: Beyond the Basics: Tips and Tricks
You Won’t Want to Miss ...217
Chapter 11: Feeding on Blogs, Podcasts, and News with Outlook RSS ...219
Chapter 12: What You Need to Know to Use Outlook at Home ...229
Chapter 13: Supercharging Your Sales with Business Contact Manager...237
Part V: Outlook at the Office ...251
Chapter 14: Big-Time Collaboration with Outlook ...253
Chapter 15: Keeping Secrets Safe with Outlook Security ...279
Chapter 16: See It Your Way: Organizing and Customizing Outlook ...287
Chapter 17: Work from Anywhere with Outlook Web Access...309
Part VI: The Part of Tens ...333
Chapter 18: Top Ten Accessories for Outlook ...335
Chapter 19: Ten (Or So) Things You Can’t Do with Outlook ...339
Chapter 20: Ten Things You Can Do After You’re Comfy...343
Chapter 21: Ten Shortcuts Worth Taking ...349
Table of Contents
Introduction...1
About This Book...2
Foolish Assumptions ...3
How This Book Is Organized...3
Part I: Getting the Competitive Edge with Outlook...3
Part II: Taming the E-Mail Beast...4
Part III: Managing Contacts, Dates, Tasks, and More ...4
Part IV: Beyond the Basics: Tips and Tricks You Won’t Want to Miss ...5
Part V: Outlook at the Office ...5
Part VI: The Part of Tens ...5
Conventions Used in This Book ...6
Dialog boxes...6
Tabs and Ribbons ...7
Links ...7
Keyboard shortcuts ...7
Icons Used in This Book...8
Where to Go from Here...9
Part I: Getting the Competitive Edge with Outlook ...9
Chapter 1: Fundamental Features: How Did You Ever
Do without Outlook? . . . .11
Easy Ways to Do Anything in Outlook ...11
Reading E-Mail ...12
Answering E-Mail...14
Creating New E-Mail Messages ...14
Sending a File ...15
Entering an Appointment ...16
Checking Your Calendar ...17
Adding a Contact...17
Entering a Task ...18
Taking Notes ...19
Chapter 2: Inside Outlook: Mixing, Matching,
and Managing Information . . . .21
Outlook and Other Programs ...22
There’s No Place Like Home: Outlook’s Main Screen ...23
Looking at modules ...23
Finding your way with the Navigation Pane ...25
The Information Viewer: Outlook’s hotspot ...26
The To-Do Bar ...28
Navigating the Folder List ...29
Clicking Once: Toolbars ...30
Viewing ToolTips ...30
Using the New tool ...32
Finding Things in a Flash with Instant Search...33
Getting Help in Outlook...35
Chapter 3: On the Fast Track: Drag ’til You Drop . . . .37
Drag...37
Creating E-Mail Messages...38
From a name in your Address Book...38
From an appointment ...40
Creating Appointments from E-mail ...41
Creating Contact Records from E-Mail ...42
Drag-and-Drop Dead: Deleting Stuff ...44
Performing Right-Button Magic...44
Part II: Taming the E-Mail Beast ...45
Chapter 4: The Essential Secrets of E-Mail . . . .47
Front Ends and Back Ends ...47
Creating Messages ...48
The quick-and-dirty way...48
The slow, complete way ...48
Setting priorities ...51
Setting sensitivity ...52
Setting other message options ...54
Adding an Internet link to an e-mail message ...54
Reading and Replying to E-Mail Messages ...55
Previewing message text ...56
Sending a reply ...57
Using a Web link from your e-mail...59
Don’t get caught by phishing ...60
That’s Not My Department: Forwarding E-Mail...60
Blind Copying for Privacy ...62
Deleting Messages...63
Saving Interrupted Messages...64
Chapter 5: E-Mail Tools You Can’t Do Without . . . .67
Nagging by Flagging ...68
One-click flagging ...68
Setting flags for different days ...69
Changing the default flag date ...70
Adding a flag with a customized reminder ...71
Changing the date on a flag...72
Saving Copies of Your Messages ...74
Automatically Adding Your Name to a Reply ...75
Setting Your Options...77
Sending Attachments...79
Creating Signatures for Your Messages ...81
Chapter 6: Conquering Your Mountain of Messages . . . .83
Organizing Folders ...84
Creating a new mail folder...84
Moving messages to another folder...86
Organizing Your E-Mail with Search Folders...86
Using a Search Folder ...87
Setting up a new Search Folder ...87
Deleting a Search Folder...88
Using (Electronic) Stationery ...88
Using the Reading Pane...91
Playing by the Rules ...93
Creating a rule the quick-and-dirty way ...93
Creating a rule the regular way ...93
Running a rule...97
Filtering Junk E-Mail...97
Fine-tuning the filter’s sensitivity ...97
Filtering your e-mail with sender and recipient lists ...99
Filtering domains...100
Archiving for Posterity ...101
Setting up AutoArchive...102
Activating the archive process manually ...103
Finding and viewing archived items ...104
Closing the Archive file...105
Arranging Your Messages...105
Part III: Managing Contacts, Dates, Tasks, and More ...109
Chapter 7: Your Little Black Book: Creating Contact Lists . . . .111
Storing Names, Numbers, and Other Stuff ...112
The quick-and-dirty way to enter contacts...112
Viewing Contacts...120
Sorting a view...123
Rearranging views ...124
Using grouped views ...126
Flagging Your Friends ...128
Adding a flag to a contact...129
Using Contact Information ...129
Finding contacts in the Contacts module ...129
Searching for details about contacts ...133
Finding a contact from any Outlook module ...134
Using the Activities page ...135
Sending a business card ...136
Distribution Lists...138
Creating a Distribution List ...138
Editing a Distribution List ...138
Using a Distribution List ...138
Adding pictures to contacts...138
Chapter 8: The Calendar: How to Unleash Its Power . . . .139
The Date Navigator: Really Getting Around...140
Meetings Galore: Scheduling Appointments...143
The quick-and-dirty way to enter an appointment ...143
The complete way to enter an appointment...143
Not this time: Changing dates...146
Not ever: Breaking dates ...151
We’ve got to keep seeing each other: Recurring dates...152
Getting a Good View of Your Calendar ...156
Printing Your Appointments ...160
Adding Holidays to Your Outlook Calendar...160
Chapter 9: Task Mastery: Discovering All
the Bells and Whistles . . . .161
The To-Do Bar...162
Adding a new item to the To-Do Bar ...163
Customizing or minimizing the To-Do Bar ...164
Customizing the To-Do Bar ...165
Closing the To-Do Bar ...165
Entering New Tasks in the Tasks Module...165
Adding an Internet link to a task ...168
Editing Your Tasks...168
The quick-and-dirty way to change a task ...169
The regular way to change a task...170
Copying a task...174
Managing Recurring Tasks ...175
Creating a regenerating task ...177
Skipping a recurring task once ...178
Marking Tasks Complete ...179
Marking several tasks complete ...180
Picking a color for completed or overdue tasks ...181
Viewing Your Tasks ...183
Tasks in the Calendar ...184
Chapter 10: For the Record: Outlook Notes and Journal Entries . . .187
Writing a Note ...188
Finding a Note...190
Reading a Note...191
Deleting a Note ...192
Changing a Note’s Size...193
Color-Coding Notes...194
Viewing Your Notes...196
Icons view...196
Notes List view ...197
Last Seven Days view ...198
By Category view...199
The Reading Pane...200
Printing Your Notes...200
Printing a list of your notes...201
Printing the contents of a note ...202
Changing Your Default Options for New Notes ...203
Changing size and color ...204
Turning the date and time display on or off ...205
Forwarding a Note...206
Keeping a Journal for Tidy Recordkeeping...208
Don’t Just Do Something — Stand There! ...208
Recording an Outlook item in the Journal manually ...210
Viewing Journal Entries for a Contact ...210
Finding a Journal Entry ...212
Printing Your Journal...213
Viewing the Journal ...215
The Entry List ...215
By Type ...216
By Contact ...216
By Category...216
Last Seven Days ...216
Phone Calls...216
Part IV: Beyond the Basics: Tips and Tricks
You Won’t Want to Miss...217
Chapter 11: Feeding on Blogs, Podcasts,
and News with Outlook RSS . . . .219
Feeding Your Need for RSS...219
Setting Up an RSS Feed via Internet Explorer...222
Setting Up an RSS Feed via Outlook...224
Reading Feeds...227
Chapter 12: What You Need to Know to Use Outlook at Home . . . . .229
Investigating an ISP ...229
Picking a Provider ...231
Setting Up Internet E-Mail Accounts...231
Dealing with Multiple Mail Accounts...234
Chapter 13: Supercharging Your Sales
with Business Contact Manager . . . .237
Understanding the Outlook Business Contact Manager ...237
Adding a Contact to Business Contact Manager...240
Adding an Account to Business Contact Manager...243
Adding a New Opportunity ...245
Viewing and Using Reports ...248
Part V: Outlook at the Office ...251
Chapter 14: Big-Time Collaboration with Outlook . . . .253
Collaborating with Outlook’s Help...253
Organizing a meeting ...254
Responding to a meeting request...256
Checking responses to your meeting request ...257
Taking a vote ...258
Tallying votes ...260
Collaborating with Outlook and Exchange ...261
Giving delegate permissions ...261
Opening someone else’s folder...264
Viewing Two Calendars Side by Side ...265
Setting access permissions ...266
Viewing two accounts ...268
Assigning tasks ...270
Sending a status report...271
Going Public with Public Folders ...273
Viewing a public folder ...274
Adding new items ...274
Replying to items in an existing public discussion folder ...275
Moving items to a public folder...276
For the public record ...276
Using SharePoint Team Services...277
Joining a SharePoint team ...277
Linking Outlook to SharePoint data ...278
Viewing SharePoint data from Outlook ...278
Updating SharePoint data from Outlook ...278
Chapter 15: Keeping Secrets Safe with Outlook Security . . . .279
Getting a Digital ID ...280
Sending Digitally Signed Messages ...281
Receiving Digitally Signed Messages ...283
Encrypting Messages...285
Other Security Programs for Outlook...286
Chapter 16: See It Your Way: Organizing and
Customizing Outlook . . . .287
Organizing Outlook ...287
Enjoying the Views...288
Table/List view...289
Icons view...290
Timeline view ...291
Card views ...292
Day/Week/Month view ...292
Playing with Columns in Table or List View ...293
Adding a column...294
Moving a column ...294
Formatting a column ...296
Widening or shrinking a column ...297
Removing a column...298
Sorting ...299
From Table view ...299
From the Sort dialog box ...299
Grouping...300
Grouping views with a few mouse clicks...300
Grouping views with drag-and-drop...300
Using the Group By dialog box ...302
Viewing grouped items ...304
Viewing headings only ...304
Saving Custom Views...305
Using Categories...305
Assigning a category ...305
Changing a category color ...306
Assigning a category shortcut key...307
Customizing Outlook Menus and Toolbars...308
Chapter 17: Work from Anywhere with Outlook Web Access . . . . .309
Getting Started with Outlook Web Access ...310
Logging on and off ...311
The Outlook screen...311
Exchanging E-Mail ...312
Reading messages ...312
Sending a message ...313
Flagging messages ...314
Setting individual message options ...315
Using Your Calendar ...316
Entering an appointment...316
Changing an appointment ...318
Viewing the Calendar ...318
Managing Contacts...319
Viewing your contacts ...319
Adding contacts...320
Collaborating with Outlook Web Access...322
Inviting attendees to a meeting ...322
Respond to a meeting request ...324
Using Public Folders ...326
Viewing public folders ...326
Adding items to a public folder ...327
Exploring Your Options ...327
Out of Office ...328
Ruling the school...328
Creating a signature ...330
Part VI: The Part of Tens ...333
Chapter 18: Top Ten Accessories for Outlook . . . .335
Smartphones...335
Migo ...336
Microsoft Office ...336
A Business-Card Scanner ...336
A Large, Removable Disk Drive ...337
Nelson E-mail Organizer ...337
Address Grabber ...337
Microsoft Exchange ...337
MindManager...338
Chapter 19: Ten (Or So) Things You Can’t Do with Outlook . . . .339
The Top Ten (or so) List...339
Change the Inbox color ...340
Insert a phone number into your calendar ...340
Drag and drop multiple items ...340
Perform two-sided printing ...340
Search and replace area codes ...340
Turn off AutoPreview globally ...341
Embed pictures in notes...341
Automatically record all contact stuff in the Journal ...341
Calculate expenses with Journal phone call entries...341
Create a Distribution List from a single e-mail ...342
Back up Outlook data ...342
Ten More Things Outlook Can’t Do for You ...342
Chapter 20: Ten Things You Can Do After You’re Comfy . . . .343
Customizing the Quick Access Toolbar ...344
Embellishing E-Mail with Word Art ...344
Wising Up Your Messages with Smart Art...345
Adding Charts for Impact...345
Opening Multiple Calendars ...346
Superimposing Calendars ...346
Viewing Unusual Numbers of Days ...346
Selecting Dates as a Group...346
Turning on Additional Toolbars ...347
Opening a Web Page from Outlook ...347
Introduction
O
ver 200 million people use Outlook every day. If you think they’re all sending e-mail to you, you may be right. Ninety percent of those people know less than ten percent of Outlook’s features according to the folks at Microsoft. That means that you’ll be getting even more messages once every-one reads this book (as I hope everyevery-one does). So you need to know more about Outlook in order to keep up with the fastest rats in the race. Even if that’s not your goal, Outlook gives you a fighting chance of finishing your work before you run out of workweek.Seriously, Microsoft Outlook has been the world’s most popular tool for orga-nizing your business, your life, and your communications for over ten years. I’ve had the pleasure of training literally thousands of people on the power that Outlook can bring to your work and the ways it can simplify your life. People are often amazed when they discover how much they can reduce their daily workload by learning to use Outlook effectively.
Microsoft Outlook was designed to make organizing your daily information easy — almost automatic. You already have sophisticated programs for word processing and number crunching, but Outlook pulls together everything you need to know about your daily tasks, appointments, e-mail messages, and other details. More important, Outlook enables you to use the same methods to deal with many different kinds of information, so you have to understand only one program to deal with the many kinds of details that fill your life, such as
Finding a customer’s phone number
Remembering that important meeting
Planning your tasks for the day and checking them off after you’re done
Recording all the work you do so you can find what you did and when you did it
About This Book
As you read this book and work with Outlook, you discover how useful Outlook is, as well as new ways to make it more useful for the things you do most. If you fit in any of the following categories, this book is for you:
Your company just adopted Outlook as its e-mail program and you need to learn how to use it in a hurry.
You’ve used Outlook for years just because “it was there,” but you know you’ve only used a tenth of its power. Now you’re overwhelmed with work and want to plow through that mountain of tasks faster by using Outlook better.
You’re planning to purchase (or have just purchased) Outlook and want to know what you can do with Outlook — as well as how to do it.
You want an easier, more efficient tool for managing tasks, schedules, e-mail, and other details in your working life.
Even if you don’t fall into one of these groups, this book gives you simple, clear explanations of how Outlook can work for you. It’s hard to imagine any computer user who wouldn’t benefit from the features that Outlook offers.
If all you want is a quick, guided tour of Outlook, you can skim this book; it covers everything you need to get you started. Getting a handle on most major Outlook features is fairly easy — that’s how the program is designed. (You can also keep the book handy as a reference for the tricks that you may not need every day.)
The first part of this book gives you enough information to make sense of the whole program. Because Outlook is intended to be simple and consistent throughout, when you’ve got the big picture, the details are fairly simple (usually).
Don’t be fooled by Outlook’s friendliness, though — you can find a great deal of power in it if you want to dig deeply enough. Outlook links up with your Microsoft Office applications, and it’s fully programmable by anyone who wants to tackle a little Visual Basic script writing (I don’t get into that in this book). You may not want to do the programming yourself, but finding people who can do that for you isn’t hard; just ask around.
Foolish Assumptions
recommend picking up (respectively) Andy Rathbone’s Windows Vista For Dummies (Wiley) or Wally Wang’s Microsoft Office 2007 For Dummies (Wiley).
If all you have is a copy of this book and a computer running Outlook, you can certainly do basic, useful things right away, as well as a few fun things. And after some time, you’ll be able to do manyfun and useful things.
How This Book Is Organized
To make it easier to find out how to do what you want to do, this book is divided into parts. Each part covers a different aspect of using Outlook. Because you can use similar methods to do many different jobs with Outlook, the first parts of the book focus on howto use Outlook. The later parts con-centrate on whatyou can use Outlook to do.
Part I: Getting the Competitive Edge
with Outlook
I learn best by doing, so the first chapter is a quick guide to the things that most people do with Outlook on a typical day. You find out how easy it is to use Outlook for routine tasks such as handling messages, notes, and appoint-ments. You can get quite a lot of mileage out of Outlook even if you do only the things our fictional detective does in the first chapter.
Because Outlook allows you to use similar methods to do many things, I go on to show you the things that stay pretty much the same throughout the program: how to create new items from old ones by using drag-and-drop; ways to view items that make your information easy to understand at a glance; and the features Outlook offers to make it easier to move, copy, and organize your files.
Part II: Taming the E-Mail Beast
E-mail is now the most popular function of computers. Tens of millions of people are hooked up to the Internet, an office network, or one of the popular online services, such as MSN or AOL.
mes-sage fit the software you’re using. Outlook keeps track of the details involved in getting your message to its destination.
Outlook also allows you to receive e-mail from a variety of sources and manage the messages in one place. You can slice and dice your list of incom-ing and outgoincom-ing e-mail messages to help you keep track of what you send, to whom you send it, and the day and time you send it.
Part III: Managing Contacts, Dates,
Tasks, and More
Outlook takes advantage of its special relationship with your computer and your office applications (Microsoft Outlook with Microsoft Office, Microsoft Internet Explorer, and Microsoft Windows — notice a pattern emerging here?) to tie your office tasks together more cleanly than other such programs — and make it easier for you to deal with all the stuff you have to do. The chap-ters in Part III show you how to get the job done with Outlook.
If you’ve got yellow sticky notes covering your monitor, refrigerator, desktop, or bathroom door, you’ll get a great deal of mileage out of Outlook’s Notes feature. Notes are little yellow (or blue, or green) squares that look just like those handy paper sticky notes that you stick everywhere as reminders and then lose. About the only thing that you can’t do is set your coffee cup on one and mess up what you wrote.
Part IV: Beyond the Basics: Tips and
Tricks You Won’t Want to Miss
Some parts of Outlook are less famous than others, but no less useful. Part IV guides you through the sections of Outlook that the real power users take advantage of to stay ahead of the pack.
Part V: Outlook at the Office
Beyond planning and scheduling, you probably spend a great deal of your working time with other people, and you need to coordinate your schedule with theirs (unless you make your living doing something strange and anti-social, like digging graves or writing computer books). Outlook allows you to share schedule and task information with other people and synchronize information with them. You can also assign tasks to other people if you don’t want to do them yourself (now there’s a timesaver). Be careful, though; other people can assign those tasks right back to you.
Part VI: The Part of Tens
Why ten? Why not! If you must have a reason, ten is the highest number you can count to without taking off your shoes. A program as broad as Outlook leaves a great deal of flotsam and jetsam that doesn’t quite fit into any cate-gory, so I sum up the best of that material in groups of ten.
Conventions Used in This Book
Outlook has many unique features, but it also has lots in common with other Windows programs — dialog boxes, pull-down menus, toolbars, and so on. To be productive with Outlook, you need to understand how these features work — and recognize the conventions I use for describing these features throughout this book.
Dialog boxes
Title bar:The title bar tells you the name of the dialog box.
Text boxes:Text boxes are blank spaces into which you type informa-tion. When you click a text box, you see a blinking I-beam pointer, which means that you can type text there.
Control buttons:In the upper-right corner of a dialog box, you find three control buttons:
• The Close buttonlooks like an X and makes the dialog box disappear.
• The Size buttontoggles between maximizing the dialog box (making it take up the entire screen) and resizing it (making it take up less than the entire screen).
• The Minimize buttonmakes the dialog box seem to go away but really just hides it in the taskbar at the bottom of your screen until you click the taskbar to make the dialog box come back.
Tabs: Tabs look like little file-folder tabs. If you click one, you see a new page of the dialog box. Tabs are just like the divider tabs in a ring binder; click one to change sections.
The easiest way to move around a dialog box is to click the part that you want to use. If you’re a real whiz on the keyboard, you may prefer to press the Tab key to move around the dialog box; this method is much faster if you’re a touch typist. Otherwise, you’re fine just mousing around.
Tabs and Ribbons
Some Outlook screens feature a colorful ribbon across the top, adorned with festive-looking buttons. Many of those buttons are labeled with the names of the things that happen if you click them with your mouse, such as Save, Follow Up, or Delete. Sometimes a row of tabs appears just above the ribbon, reading something like Task, Write, Insert. Clicking any of those words reveals an entirely different ribbon full of buttons for a different set of tasks.
Links
Links are special pictures or pieces of text that you can click to change what you see on-screen. If you’re used to surfing the Internet, you’re used to click-ing blue, underlined text to switch from one Web page to another. Outlook has some links that work just like links on the Internet. When you see under-lined text, the text is most likely a link — click that text if you want to see where it leads.
Keyboard shortcuts
Normally, you can choose any Windows command in at least these three ways (and sometimes more):
Choose a menu command or click a toolbar button.
Press a keyboard combination, such as Ctrl+B, which means holding down the Ctrl key and pressing the letter B (you use this command to make text bold).
Press the F10 key or the spacebar to pull down a menu, press an arrow key to choose a command, and press Enter (way too much trouble, but possible for those who love a challenge).
You often tell Outlook what to do by choosing from menus at the top of the screen. I normally simplify menu commands by saying something like “Choose Yeah ➪Sure,” which means “Choose the Yeah menu; then choose the Sure command.”
Icons Used in This Book
Sometimes the fastest way to go through a book is to look at the pictures — in this case, icons that draw your attention to specific types of information that’s useful to know. Here are the icons I use in this book:
The Remember icon points out helpful information. (Everything in this book is helpful, but this stuff is even morehelpful.)
The Tip icon points out a hint or trick for saving time and effort, or some-thing that makes Outlook easier to understand.
The Warning icon points to something that you may want to be careful about in order to prevent problems.
The Technical Stuff icon marks background information that you can skip, although it may make good conversation at a really dull party.
Where to Go from Here
Getting the
In this part . . .
Chapter 1
Fundamental Features: How Did
You Ever Do without Outlook?
In This Chapter
Reading and creating e-mail
Sending files by e-mail
Entering appointments and contacts
Checking your calendar
Entering tasks
Taking notes
O
utlook is easier to use than you might think; it also does a lot more than you might realize. Even if you use only about 10 percent of Outlook’s fea-tures, you’ll be amazed at how this little program can streamline your life and spiff up your communications. People get pretty excited about Outlook — even if they take advantage of only a tiny fraction of what the package can do. I’m kicking off this book with “Outlook’s Greatest Hits,” the things you’ll want to do with Outlook every single day. The list sounds simple enough: sending e-mail, making appointments, and so on. But there’s more here than meets the eye; Outlook does ordinary things extraordinarily well. I know you want to do the same, so read on.Easy Ways to Do Anything in Outlook
Well, okay, maybe you can’t use Outlook to decipher hieroglyphics — but if you learn a little about some basic techniques, you can do a lot in Outlook — click an icon to do something, view something, or complete something.
Open an item and read it: Double-click the item.
Create a new item:Click an icon in the Navigation Pane, click the New button in the toolbar at the top of the screen, and fill out the form that appears. When you’re done, click the button labeled Send — or, alterna-tively, Save and Close.
Delete an item:Click the item once to select it, and then click the Delete icon in the toolbar at the top of the screen. The Delete icon contains a black X.
Move an item:Use your mouse to drag the item to where you want it. Does that seem too simple? No problem. If you have an itch to complicate things, you couldtry to use Outlook while hopping on a pogo stick or flying the space shuttle. But why? These four tricks can take you a long way.
Outlook can also do some sophisticated tricks, such as automatically sorting your e-mail or creating automated form letters, but you’ll need to learn a few details to take advantage of those tricks. The other 300 pages of this book cover the finer points of Outlook. If you only wanted the basics, I could’ve sent you a postcard.
The pictures you see in this book and the instructions you read assume you’re using Outlook the way it comes out of the box from Microsoft — with all the standard options installed. If you don’t like the way the program looks (or what things are named) when you install Outlook, you can change nearly everything. If you change too much, however, some instructions and exam-ples I give you won’t make sense, because then the parts of the program that I talk about may have names you gave them, rather than the ones Microsoft originally assigned. The Microsoft people generally did a good job of making Outlook easy to use. I suggest leaving the general arrangement alone until you’re comfortable using Outlook.
Reading E-Mail
E-mail is Outlook’s most popular feature. I’ve run across people who didn’t know Outlook could do anything but exchange e-mail messages. It’s a good thing Outlook makes it so easy to read your e-mail.
Here’s how to see the entire message:
1. Click the Mail button in the Navigation Pane.
You don’t need this step if you can already see the messages, but it doesn’t hurt.
2. Double-click the title of the message.
Now you can see the entire message.
3. Press Esc.
The message form closes.
A quick way to skim the messages in your Inbox is to click a message, then press the up-arrow or down-arrow key on your keyboard. You can move through your message list as you read the text of your messages in the Reading Pane.
[image:32.531.72.462.89.369.2]Reading pane Mail button
Figure 1-1:
If you feel overwhelmed by the number of e-mail messages you get each day, you’re not alone. Billions and billions of e-mail messages fly around the Internet each day, and lots of people are feeling buried in messages. You dis-cover the secrets of sorting and managing your messages in Chapter 6.
Answering E-Mail
When you open an e-mail message in Outlook to read it, buttons labeled Reply and Reply to All appear at the top of the message screen. That’s a hint. When you want to reply to a message you’re reading, click the Reply button. A new message form opens, already addressed to the person who sent you the message. If you’re reading a message sent to several people besides you, you also have the option of sending a reply to everyone involved by clicking the Reply to All button.
When you reply to a message, the text of the message that was sent to you is automatically included. Some people like to include original text in their replies, some don’t. In Chapter 5, I show you how to change what Outlook automatically includes in replies.
Creating New E-Mail Messages
At its easiest, the process of creating a new e-mail message in Outlook is ridiculously simple. Even a child can do it. If you can’t get a child to create a new e-mail message for you, you can even do it yourself.
To create a new e-mail message, follow these steps:
1. Click the Mail button in the Navigation Pane.
Your message list appears.
2. Click the New button in the toolbar.
The New Message form appears.
3. Fill out the New Message form.
Put the address of your recipient in the To box, a subject in the Subject box, and type a message in the main message box.
4. Click Send.
Your message is on its way.
Priority message to impress some big shots, or send a Confidential message about a hush-hush topic. (Discover the mysteries of confidential e-mail in Chapter 4.)
Sending a File
Call me crazy, but I suspect you have more to do than exchange e-mail all day. You probably do lots of daily work in programs other than Outlook. You might create documents in Microsoft Word or build elaborate spreadsheets with Excel. When you want to send a file by e-mail, Outlook gets involved, although sometimes it works in the background.
To e-mail a document you created in Microsoft Word, for example, follow these steps:
1. Open the document in Microsoft Word.
The document appears on-screen.
2. Click the Office icon in the upper-left corner of the screen and choose Send To ➪Mail Recipient (as attachment).
[image:34.531.81.462.374.628.2]The New Message form appears with your document listed on the Attachment line (as pictured in Figure 1-2).
Figure 1-2:
3. Type the e-mail address of your recipient on the To line.
The address you enter appears on the To line.
4. Click Send.
Your file is now en route.
When you’re just sending one Word file, these steps are the easiest way to go. If you’re sending more than one file, I describe a more powerful way to attach files in Chapter 5.
Entering an Appointment
If you’ve ever used an old-fashioned paper planner, the Outlook calendar will look familiar to you. When you click the Calendar icon and then click the Day tab, you see a grid in the middle of the screen with lines representing each half hour of the day (as in Figure 1-3). To enter an appointment at a certain time, just click the line next to the time you want your appointment to begin, type a name for your appointment, and press Enter.
[image:35.531.76.461.377.631.2]If you want to enter more detailed information about your appointment — such as ending time, location, category, and so on; see Chapter 8 for the nitty-gritty about keeping your calendar.
Figure 1-3:
Checking Your Calendar
Time management involves more than just entering appointments. If you’re really busy, you want to manage your time by slicing and dicing your list of appointments to see when you’re free enough to add even more appoint-ments. You can choose from several different views of your calendar by click-ing the Day, Week, and Month buttons at the top of the Calendar screen. If you need a more elaborate collection of calendar views, choose one of the views listed in the Current View section of the Navigation Pane. To really master time management, see Chapter 8 to see the different ways you can view your Outlook calendar.
Adding a Contact
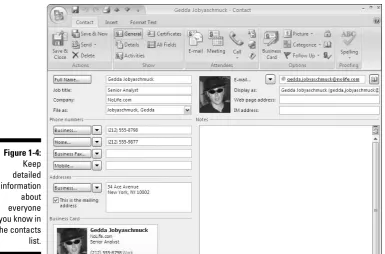
[image:36.531.76.462.375.629.2]When it’s not whatyou know but whoyou know, you need a good tool for keeping track of who’s who. Outlook is a great tool for managing your list of names and addresses, and it’s just as easy to use as your Little Black Book. To enter a new contact, click the Contacts button in the Navigation Pane; then click the New button on the toolbar to open the New Contact entry form. Fill in the blanks on the form (an example appears in Figure 1-4), and then click Save and Close. Presto — you have a Contacts list.
Figure 1-4:
Outlook does a lot more than your little black book — if you know the ropes. Chapter 7 reveals the secrets of searching, sorting, and grouping the names on your list — and of using e-mail to keep in touch with all the important people in your life.
Entering a Task
Entering a task in Outlook isn’t much of a task itself. You can click the Task button see a list of your tasks in a flash. If you see the words Type a New Task, you’ve got a clue.
To enter a new task, follow these steps:
1. Click the Tasks button in the Navigation Bar.
Your list of tasks appears.
2. Click the text that says Type a New Task.
The words disappear, and you see the insertion point (a blinking line).
3. Type the name of your task.
[image:37.531.84.460.381.634.2]Your task appears in the block under the Subject line on the Task List (which in turn appears in Figure 1-5).
Figure 1-5:
4. Press the Enter key.
Your new task moves down to the Task List with your other tasks.
Outlook can help you manage anything from a simple shopping list to a com-plex business project. In Chapter 9, I show you how to deal with recurring tasks, how to regenerate tasks, and also how to mark tasks as complete (and earn the right to brag about how much you’ve accomplished). I also show you how to take advantage of a gizmo called the Task Pad to do the job even quicker.
Taking Notes
I have hundreds of little scraps of information that I need to keep somewhere, but until Outlook came along, I didn’t have a place to put them. Now all the written flotsam and jetsam I’ve decided I need goes into my Outlook notes collection — where I can find it all again when I need it.
To create a new note, follow these steps:
1. Click the Notes button in the Navigation Pane (or press Ctrl+5).
Your list of notes appears.
2. Click the New button in the toolbar.
A blank note appears.
3. Type the text you want to save.
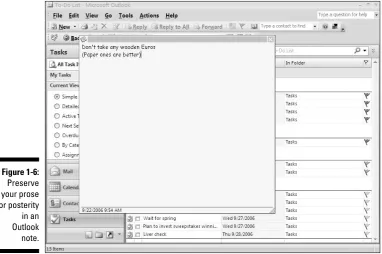
The text you type appears in the note (see Figure 1-6).
4. Press Esc.
The note you created appears in your list of notes.
An even quicker way to enter a note is to press Ctrl+Shift+N and type your note text. You can see how easy it is to amass a large collection of small notes. Chapter 10 tells you everything you need to know about notes, includ-ing how to find the notes you’ve saved, as well as how to sort, categorize, and organize your collection of notes and even how to delete the ones you don’t need anymore.
Figure 1-6:
Chapter 2
Inside Outlook: Mixing, Matching,
and Managing Information
In This Chapter
Examining the many faces of Outlook
Choosing menus
Using the tools of the trade
Getting the big picture from the Information Viewer
Fine-tuning with the Folder List
Y
ou have too much to do. I know that even if I’ve never even met you. It’s now the 21st century, and if you can read this book, there’s a good chance you have more things to do than time to do them. Welcome to the future — it’s already here and it’s already booked solid.When I wrote the first edition of this book in 1996, few people had either sent or received an e-mail message. Now many people are slaves to e-mail mes-sages, online appointments, and other electronically generated demands. That means we have more stuff to do than we ever imagined possible — even in the 1990s.
Outlook and Other Programs
Outlook is a part of Microsoft Office. It’s called an Office suite,which means it’s a collection of programs that includes everything you need to complete most office tasks. Ideally, the programs in a suite work together, enabling you to create documents that you couldn’t create as easily with any of the indi-vidual programs. For example, you can copy a chart from a spreadsheet and paste it into a sales letter that you’re creating in your word processor. You can also keep a list of mailing addresses in Outlook and use the list as a mail-ing list to address form letters (see Chapter 18).
Microsoft Office includes a group of programs that cost less to buy together than you would pay to buy them separately. The concept is a little like buying an encyclopedia; it’s cheaper to buy the entire set than it is to buy one book at a time. Besides, who wants just one volume of an encyclopedia (unless you’re interested only in aardvarks)?
Outlook turns up in connection with several other Microsoft products, as well. Microsoft Exchange Server is the backbone of the e-mail system in many corporations, and Outlook is often the program that employees of those cor-porations use to read their company e-mail. Another program, called
SharePoint, connects to Outlook to help streamline the work of a group the way Outlook speeds up the work of an individual. Outlook’s first cousin, Outlook Express (a.k.a. Windows Mail), is included free when you install Internet Explorer and as a part of all versions of Windows. Outlook is also linked strongly to Internet Explorer, although technically they’re separate programs. You don’t need to worry about all this, though. You can start Outlook and use it the same way no matter which other programs it’s bun-dled with.
About Personal Information Management
When it comes to the basic work of managing names, addresses, appoint-ments, and e-mail, the word processing and spreadsheet programs just don’t get it. If you’re planning a meeting, you need to know with whom you’re meeting, what the other person’s phone number is, and when you can find time to meet.
Whatever the terminology, Outlook is — above all — easy to understand and hard to mess up. If you’ve used any version of Windows, you can just look at the screen and click a few icons to see what Outlook does. You won’t break anything. If you get lost, going back to where you came from is easy. Even if you have no experience with Windows, Outlook is fairly straightforward to use.
There’s No Place Like Home:
Outlook’s Main Screen
Outlook’s appearance is very different from the other Microsoft Office appli-cations. Instead of confronting you with a blank screen and a few menus and toolbars, Outlook begins by offering you large icons with simple names and a screen with information that’s easy to use and understand. If you’ve spent much time surfing the Web, you’ll find the Outlook layout pretty similar to many pages on the Web. Just select what you want to see by clicking an icon on the left side of the screen, and the information you selected appears on the right side of the screen.
Feeling at home when you work is nice. (Sometimes, when I’m at work, I’d rather beat home, but that’s something else entirely.) Outlook makes a home for all your different types of information: names, addresses, schedules, to-do lists, and even a list to remind you of all the stuff you have to do today (or didn’t get done yesterday). You can customize the main screen as easily as you rearrange your home furnishings. Even so, to make it easier to find your way around at first, I recommend waiting until you feel entirely at home with Outlook before you start rearranging the screen.
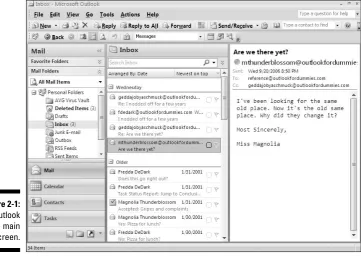
The Outlook main screen — which looks remarkably like Figure 2-1 — has all the usual parts of a Windows screen (see the Introduction if you’re not used to the Windows screen), with a few important additions. At the left side of the screen, you see the Navigation Pane. Next to the Navigation Pane is the Information Viewer, the part of the screen that takes up most of the space.
Looking at modules
Each module is represented by a button in the Navigation Pane on the left side of the screen. Clicking any button takes you to a different module of Outlook:
TheMail buttontakes you to the Inbox, which collects your incoming e-mail.
TheCalendar buttonshows you your schedule and all your appoint-ments.
TheContacts buttoncalls up a module that stores names and addresses for you.
TheTasks buttondisplays your To-Do list.
TheNotes buttontakes you to a module you can use to keep track of random tidbits of information that don’t quite fit anywhere else.
TheFolder List buttondisplays the entire collection of Outlook folders, allowing you to click to see contents.
To change Outlook modules, do either of the following things:
Click Go in the menu bar, and then choose the module you want from the menu that appears (as in Figure 2-2).
[image:43.531.97.459.90.348.2]For faster action, simply click the module’s button in the Navigation Pane.
Figure 2-1:
If you’re using Outlook on your company network, your network’s system administrator may have created a different set of buttons for you to work with. You may have a few more (or a few less) than you see in this book, but the buttons should work the same way.
Finding your way with
the Navigation Pane
Navigating your way through some computer programs can be a pain, but Outlook can ease your discomfort somewhat with the help of the Navigation Pane. This part of the Outlook screen was formerly called the Outlook Bar, but to prevent anybody from committing EWI (E-mailing While Intoxicated), Microsoft changed the name of this critter to the Navigation Pane. Now you’ll have to do your tippling in some other program.
The column on the left side of the Outlook screen is the one called the Navigation Pane. It contains several buttons with names such as Mail, Calendar, Contacts, Tasks, and Notes — the basic Outlook modules. I explain these modules later, but the names alone already tell you the story.
Figure 2-2:
The Navigation Pane is made up of two sections: an upper window section and a bottom section made up of buttons. Each button in the bottom section is connected to one of Outlook’s main modules — Mail, Calendar, Contacts, Tasks, and so on. Just click a button, any button, and you’ll see what it sets in motion. Clicking the button changes the stuff on the main screen to fit what that button describes. Click the Calendar button, for example, and a Calendar screen shows up. Click Contacts, and you get a screen for names and
addresses. The process is like changing the channels on the TV set. If you switch to a channel you don’t want, switch to another — no problem.
The top section of the Navigation Pane displays different kinds of information at different times. Sometimes the top half of the Navigation Pane shows the Folder List, sometimes it shows a list of available views, and sometimes it contains phrases in blue lettering. You can click a phrase, such as Open a Shared Calendar, to do something. If you want to make the Folder List appear in this top window section, choose Go ➪Folder List.
Just above the Mail icon in the Navigation Pane, there’s a gray border sepa-rating buttons on the bottom from the top part of the bar. If you drag that gray borderline downward with your mouse, the buttons in the Navigation Pane disappear one by one. That’s something you might want to do to get a better view of your Folder List. You can make those buttons reappear by simply dragging the gray border upward again.
The Information Viewer: Outlook’s hotspot
The Information Viewer is where most of the action happens in Outlook. If the Navigation Pane is like the channel selector on your TV set, the Information Viewer is like the TV screen. When you’re reading e-mail, you look in the Information Viewer to read your messages; if you’re adding or searching for contacts, you see contact names here. The Information Viewer is also where you can do all sorts of fancy sorting tricks that each module in Outlook lets you perform. (I talk about sorting Contacts, Tasks, and so forth in the chap-ters that apply to those modules.)
The Information Viewer organizes the items it shows you into units called
views.You can use the views that are included with Outlook when you install it, or you can create your own views and save them. (I go into more details about views in Chapter 16.)
You can navigate among the slices of information that Outlook shows you by clicking different parts of the Information Viewer. Some people use the word
browsingfor the process of moving around the Information Viewer — it’s a little like thumbing through the pages of your pocket datebook (that is, if you have a million-page datebook). To see an example of how to use the
Information Viewer, look at the Calendar module in Figure 2-3.
To browse the calendar data in the Information Viewer, follow these steps:
1. Click the Calendar button in the Navigation Pane (or press Ctrl+2).
The calendar appears.
2. Click the word Week at the top of the Calendar screen.
The weekly view of the calendar appears.
Figure 2-3:
Try these tricks to see how the Information Viewer behaves:
Click a date in the small calendar in the upper-left corner. The large cal-endar changes to a one-day view.
Click the W for Wednesday at the top of one of the small calendars in the To-Do Bar. The large calendar changes to a monthly view.
You can change the appearance of the Information Viewer an infinite number of ways to make the work you do in Outlook make sense to you. For example, you may need to see the appointments for a single day, or only the items you’ve assigned to a certain category. Views can help you get a quick look at exactly the slice of information you need.
When you choose the Day or Week view, a row at the bottom of the Calendar screen shows all the tasks scheduled for completion that day, as well as any e-mail messages you’ve flagged for that day. That’s to help you manage your time better. After all, if you have too many meetings on a certain day, you may not have time to finish a lot of tasks; the Outlook calendar makes that easy to see. You can drag a task from one day to another to balance your schedule a bit.
The To-Do Bar
Outlook 2007 features a revamped region called the To-Do Bar, the place to go to manage everything you need to do; see Figure 2-4. Outlook’s always had a Task List, which offers a tool for tracking all the projects and errands that you think to enter. But now that we all live and work in a 24-by-7 world of e-mail and instant digital communications, you probably have things to do that you don’t think to add to your Task List — particularly items that come to you via e-mail.
When fully displayed, the To-Do Bar takes up the rightmost column of the Outlook screen. Clicking the double arrows next to the words To-Do Bar col-lapses the bar against the side of the screen; clicking the black X makes the To-Do Bar disappear entirely. The To-Do Bar ties together your tasks, flagged e-mail messages, and calendar appointments so that you can see what you need to do at a glance.
Navigating the Folder List
If you want to navigate Outlook in a more detailed way than you can with the Navigation Pane, you can use the Folder List. If you think of the Navigation Pane buttons as being like a car’s radio buttons for picking favorite stations, then the Folder List is like the fine-tuning button that tunes in the stations between your favorite ones. The Folder List simply shows you the folders — your Windows folders or your Outlook folders — where your files and Outlook items are stored.
A tale of two folders
Folders can seem more confusing than they need to be because, once again, Microsoft gave two different things the same name. Just as two kinds of Explorer (Windows and Internet) exist, more than two kinds of Outlook exist, and way too many kinds of Windows exist. You may run across two different kinds of folders when you use Outlook — and each behaves differently.
[image:48.531.80.461.88.348.2]You may be used to folders in Windows 95, XP, or Vista, which are the things you use to organize files. You can copy, move, and delete files to and from folders on your disk drive. Outlook doesn’t deal with that kind of folder. If you need to manage the files you’ve created on your computer, click the Windows Start button, and then choose Documents.
Figure 2-4:
Outlook has its own special folders for storing items (calendar items, contact names, tasks, and so on) that you create in the various Outlook modules. Each module has its own folder, and the Folder List gives you immediate access to any of them.
If you’re looking at an Outlook module, such as the Inbox, for example, and you turn on the Folder List by choosing Go ➪Folder List, you see a list of folders that represent the other standard Outlook modules, such as the Task List, contacts, calendar, and so on.
Using the Folder List
The only time you absolutely must use the Folder List is when you want to create a new folder for a separate type of item (such as a special Contacts List or a folder for filing e-mail) or find that folder again to use the items you’ve stored there.
You may quite possibly never use the Folder List at all. The Navigation Pane includes the folder choices that most people use most of the time. You may never need to get a different one. Fortunately, the Folder List appears all by itself when you’re likely to need it.
If you don’t see the Folder List but want to, choose Go ➪Folder List (or press Ctrl+6). It’s a matter of taste, so take your pick.
Clicking Once: Toolbars
Toolsare those little boxes with pictures in them all lined up in a row just below the menu bar. Together, they’re called a toolbar, and they’re even more popular than menus when it comes to running Windows programs. Outlook has three toolbars to choose from: the Standard toolbar, the Advanced bar, and the Web toolbar. If you don’t do anything special, the Standard tool-bar is the one you see, and it will probably do everything you need. If you want to get fancy and open another toolbar (or customize any toolbar), see Chapter 20. Toolbars are great timesavers; one little click on a little picture, and voilà — your wish is granted and you’re off to lunch.
Viewing ToolTips
Another slick thing about tools is that when you rest the mouse pointer on any of them for a second or so, a little tag pops up to tell you the tool’s name (see Figure 2-5). Tags of this sort, called ToolTips,are very handy for deci-phering the hieroglyphics on those tool buttons.
To view a ToolTip, follow these steps:
1. Place the mouse pointer on the word File in the menu bar (but don’t click).
2. Slide the mouse pointer straight down until it rests on the New icon, directly below the word File.
After about half a second, you see a little tab that says New Office Document or New Something-or-Other.( The text changes, depending on what section of Outlook you’re in.)
Some tools have a little triangle to their right. This triangle means the tool has a pull-down menu. The first tool at the left end of any Outlook toolbar is the New tool. Click the triangle to pull down its menu and see all the glorious new stuff you can create — a new appointment, a new e-mail message, or even a new Office document.
Figure 2-5:
Using the New tool
You can use the New tool, which is available in any module of Outlook, to create an item in any other module. Perhaps you’re entering the name and address of a new customer who is also mentioned in an interesting article in today’s paper. You want to remember the article, but it doesn’t belong in the customer’s address record. Although you’re still in the Calendar module (see Figure 2-6), you can pull down the New button’s menu and create a quick note, which gets filed in the Notes section. Using the New tool to create a new note when you’re looking at the Calendar screen can get confusing. At first, you may think the note isn’t entered, but it is. Outlook just files it in the Notes module, where it belongs.
Figure 2-6:
Finding Things in a Flash
with Instant Search
Outlook makes it incredibly easy to accumulate dribs and drabs of data. That quickly becomes a problem because it’s tough finding things when there is so much to find. Outlook has always had a search feature, but it was painfully slow. By the time it found what you were looking for, you no longer needed what it found. Fortunately, the people at Google scared Microsoft by invent-ing a tool that could search Outlook data in a jiffy. After ten years of offerinvent-ing the same crummy search tool, the people at Microsoft cooked up a search tool for Outlook that was worth using. The new tool is called Instant Search and it’s pretty slick. I hope Google scares Microsoft this way more often.
Near the top of the Information Viewer Pane, in the center of the screen, you see the Instant Search box (see Figure 2-7). Click that box and type the first few letters of a word that you want to find. Almost immediately, the Information Viewer screen goes blank, then shows only the items containing the text you entered. For example, if you’re in the Contacts module and you type jon, you see only the records containing names like Jones, Jonas, Jonquil — any word containing the letters jon. While Outlook is displaying the items it found, the magnifying glass is replaced by an X. Clear the search results by clicking the X.
Figure 2-7:
In some cases, searching for a certain group of letters isn’t specific enough. For example, you may want Outlook to just show the people named Jones
andwho work for XYX Company. You can create a more detailed search by clicking the double arrow just to the right of the magnifying glass. That reveals a group of labeled boxes in which you can search for specific types of information (see Figure 2-8). The exact collection of boxes varies according to which Outlook module you’re searching. If you’re in the Contacts module, you have choices such as Name, Company, Business Phone, and so on. To find all the Joneses at XYZ Corporation, type Jones in the Name box and XYZ in the Company box; instantly you’ll be keeping up with the Joneses at XYZ.
If the items Outlook offers don’t meet your needs, you can make different choices by clicking the label for each type of information; then you can see a list of other kinds of information to search for (see Figure 2-9). For example, when you’re searching your Contacts List, you can pick City or State to find people in a certain location.
Figure 2-8:
The best way to learn about the Instant Search feature is to try it out. Just type some information into the box to see what you get, then click the X to create a new search.
Getting Help in Outlook
Even though Outlook is as user-friendly a program as you could hope to find, at times you may want to take advantage of the efficient Windows online Help system when you’re temporarily stumped (of course, you can turn to this book for help, but sometimes online help is faster).
The Windows Outlook Help system appears as a separate pop-up window (as shown in Figure 2-10) whenever you press F1. The Windows Help system finds answers to any question you type in the text box at the top of the screen. When you type a question in the text box and press Enter, a list of possible answers appears in the box following the text box. Click the answer that seems best related to your question, and a full explanation appears in a new window. The Help system includes lots of blue underlined text, just like you see in your Web browser, which you can click to make the Help system show you more information about the underlined topic.
Figure 2-9:
Figure 2-10:
Chapter 3
On the Fast Track: Drag
‘til You Drop
In This Chapter
Doing the drag and drop
Creating and sending e-mail messages
Creating Contact records
Deleting information
T
yping — ugh! Who needs it? It’s amazing to think that we still use a 19th century device — the typewriter keyboard — to control our computers in the 21st century. We appear to be stuck with the QWERTY keyboard (the standard we all know and, uh, love) for a while longer, but we can give our carpal tunnels a rest now and then: By using the mouse, trackball, or touch-pad, we can drag and drop rather than hunt and peck.Drag
When I say drag,I’m not referring to Monty Python’s men in women’s cloth-ing. I mean the process of zipping items from one place to another with quick, easy mouse moves rather than slow, laborious menu choices. Throughout the rest of this book, I tell you how to do nearly everything in Outlook by the menu method only because it’s the clearest way to explain how to do most things reliably. But if you want to work quickly in Outlook, drag and drop is the ticket to the simple and speedy completion of your tasks.
Before you can drag an item, you have to selectit, which simply means to click the item once. Then the rest of the process is straightforward:
Droppingmeans letting go of the mouse button. The mouse pointer detaches from the object you dragged and leaves it in its new location.
When you drag an item, you see an icon hanging from the tail of the mouse pointer as you move the pointer across the screen. The icon makes the pointer look like it’s carrying baggage, and to some degree, that’s true; drag-ging your mouse between Outlook modules “carries” information from one type of item to another.
When you drag and drop items between different Outlook modules, you can keep creating new types of items from the old information, depending on what you drag and where you drop it.
Everything you can do by using the drag-and-drop method can also be done through menu choices or keystroke shortcuts, but you lose the advantage of having the information from one item flow into the new item, so you have to retype information. I’m too lazy for that, so I just drag and drop.
Because I’m using this chapter to extol the benefits of drag and drop, I describe every action in terms of a drag-and-drop movement rather than through menu choices or keyboard shortcuts. Throughout the rest of the book, however, I describe how to do things in terms of menu choices. That’s because the menus stay the same, whereas the Navigation Pane changes its appearance from time to time. So when you read other parts of the book, don’t think I’m discouraging you from trying drag and drop; I’m just trying to offer you the clearest explanation I can. (Whew! I’m glad that’s off my chest.)
Creating E-Mail Messages
Anything you drag to the Inbox becomes an outgoing e-mail message:
If the item you drag to the Inbox contains an e-mail address (for exam-ple, a contact), Outlook automatically creates the message with that person’s e-mail address filled in.
If the item you drag to the Inbox contains a subject (for example, a task), Outlook automatically creates the message with that subject filled in.