C H A P T E R
7
Setting Up a yum Repository
As discussed in Chapter 6, “Configuring a yum Client,” yum is built on the Python programming language, which is a building block for the Red Hat/Fedora distributions. While current support is limited to the Red Hat/Fedora/Yellow Dog/Mandriva/Asp distributions, per the latest available Netcraft survey (http://news.netcraft.com/archives/2005/03/index.html), that’s over half the Linux market. If you want to learn patch management for Linux, you need to know how to use yum and configure, or “yummify,” associated repositories.
The simplest way to configure a yum repository is to mirror one that already exists. Most Fedora repositories already support yum. But you do not have to mirror the entire repository, because much of it is built from installa-tion CDs. In addiinstalla-tion, as packages change, or if you combine packages from different mirrors, you may prefer to create yum headers on your own system rather than download them from a remote mirror.
We’ve divided this chapter into several major sections. You can take most of the packages for a repository from the installation CDs. You’ll need to man-age headers for those repositories. You’ll need to configure sharing of that repository with other computers on your network. You’ll need to download other repositories associated with updates, developmental packages, and those created by third parties. Finally, you’ll need to keep these repositories up to date.
When configured, you’ll be able to update your computers from local repositories, minimizing the loads on your Internet connections, giving you more control over what is installed on your systems. You can focus on making sure that critical packages, including those related to security, are up to date. That is the essence of good patch management.
At the end of this chapter, we’ll show you how you can create a yum repository for Red Hat Enterprise Linux (RHEL) 4 clients with an authorized subscription to the Red Hat Network. If you have valid subscriptions, this is a viable alternative to the Red Hat Network Proxy Server described in Chapter 2, “Consolidating Patches on a Red Hat/Fedora Network.”
7.1
G
ETTING THEP
ACKAGESYou already have many of the packages that you’ll want in a yum repository: the same RPMs that are already included with the installation CDs/DVDs for your distribution. With those RPMs, you can use yum to populate the base repository and add the headers needed for easy access from the other comput-ers on your network.
In this part of the chapter, we’ll show you how to start your repository, install yum, create an appropriate yum directory tree, add headers to the appro-priate directory, and test the base repository on your local system. We’ll start with the Fedora Core 4 Updates repository. When you see how it’s done, you can use the same techniques to create other repositories on your system.
While you could use the rsync command described in earlier chapters to mirror an entire repository, each version of Fedora requires well over 10GB of space. You do not need to mirror the directory with the 6GB+ of ISO files. As described earlier in this book, there are ways to cut that down with appropri-ate --exclude switches to the rsync command. But if the loads on your Internet connection are not a problem, you might not need a local patch man-agement repository in the first place.
Note
SUSE supports two different patch management tools described in Chapter 3, “SUSE’s Update Systems and rsync Mirrors”: YaST Online Update and Zenworks Linux Management. As noted in Chapters 5 and 6, they now support apt, and plan to support yum in the future.
7.1.1 Strategy
Before you create your repository, decide what you want to store locally. Viable options vary. If you have only two or three workstations, a local repository might not be so important. However, it can become profitable to configure a local repository if you have a substantial number of workstations. What you configure locally depends on your patch management strategy. Consider the following:
☞ To keep a substantial number of computers up to date, it can help to con-figure a local repository for updates. Alternatively, if your Internet band-width is unlimited, and the people behind your remote mirror do not object to the load, you may prefer to use remote mirrors, as they may be more up to date.
☞ If you frequently change the base software on your systems, you should load the installation RPMs on your repository.
☞ If you need packages outside the standards available on the installation CDs, look for other directories of RPMs on your favorite mirror. For exam-ple, Fedora includes the Extras repository with many useful packages.
☞ If you need packages simply unavailable from mirrors associated with your distribution, there are also third-party repositories described throughout this book.
☞ If your users test updates before they’re moved to the stable update repository, consider mirroring such repositories. You may even have reason to mirror a development repository. However, be warned that these packages are generally not stable or suitable for a production environment.
7.1 Getting the Packages 221
Note
The Fedora development repositories, formerly known as “Rawhide,” are collec-tions of RPMs that may change on a day-to-day basis. They are, by definition, not stable. They are not suitable for production use. However, they may be of consid-erable interest to developers and others looking for the latest available solutions.
After you decide what you’re going to mirror, you can set up a yum direc-tory tree for your local reposidirec-tory. In the following sections, we’ll focus on cre-ating an Updates repository. If you have the installation CD available, you can use the same steps to create an Installation repository.
In my case, I’ve created a Fedora Core 4 repository on a system running RHEL 4, as it is a fairly stable distribution. You’ll want to leave room for future releases of Fedora Core. It might even make sense to add a new hard drive for that purpose so that the packages won’t overwhelm other files on your system. In any case, it’s an excellent idea to at least configure a separate partition for your repository.
7.1.2 Creating a yum Directory Tree
We’re assuming that you’re ready to create your own yum repository directory tree for your own network and that the tree does not have to be identical to the one on your favorite mirror. For example, assume that you’ve created the /var/ftp/pub/yum directory in a separate partition. Assume that for now, all you need to provide for are standard 32-bit systems. If you wanted to create a yum directory tree for Fedora Core 4, you might end up with the following directories:
/var/ftp/pub/yum/4/i386/os /var/ftp/pub/yum/4/i386/updates /var/ftp/pub/yum/4/i386/extras /var/ftp/pub/yum/4/i386/dag
The /var/ftp/pub directory is the default directory associated with the vsFTP server. It happens to be the default FTP server for Fedora and Red Hat distributions. With the right settings, you can link to this directory from an Apache Web server. You can also share this directory on the local network using NFS. In fact, NFS is generally preferred on a network of Linux comput-ers because shared NFS directories can be treated as if they were on the local computer.
Note
To promote security, the vsFTP server does not allow symbolic links (also known as symlinks). Therefore, you can’t use the vsFTP server for packages downloaded to directories, such as /var/spool/up2date.
As the noted directories are several levels below /var/ftp/pub, you might feel like you’ll have to run the mkdir command a thousand times. There is one minor trick that can speed the process. The following command creates all needed subdirectories in one shot:
mkdir -p /var/ftp/pub/yum/4/i386/os
Note that the structure of these directories does not correspond to those you see in current Fedora Core mirrors. The directory structure of different Fedora Core mirrors varies. Unless you’re creating a mirror for public use, there is no need to create a directory structure similar to any existing Fedora Core mirror.
7.1.3 Start with a Distribution
For the purpose of this chapter, I’ve downloaded the Fedora Core 4 installation DVD, to create repositories for Fedora Core 4 systems. As noted earlier, it’ll be on a RHEL 4 computer so that I can add repositories for future releases of Fedora Core. As RHEL 4 was developed in large part from Fedora Core 3, I’ll be using Fedora-based yum packages. Naturally, the following instructions will also work for a repository configured on Fedora Core 3.
Note
For Fedora Core 3, this section works in the same way. Just substitute appropri-ate file names. I could not test these settings on Fedora Core 5, as Red Hat was just starting its test (beta) releases for this distribution as this book was going to print.
For example, if you’ve download the Fedora Core DVD, you can mount the ISO file almost as if it were a DVD/CD with the following command:
Of course, you can “burn” the DVD .iso file (or associated CD .iso files) to appropriate media. It may be handy to have a DVD available. But, in my opinion, because you can mount the ISO directly, you don’t need a physical DVD.
7.1 Getting the Packages 223
Note
If you can’t work with DVD-sized files, you can still create a local repository. For example, if you’ve downloaded the four Fedora Core 4 binary CDs, all you need to do is mount the CDs one at a time, and copy their contents (including the .discinfo file from the first CD) to the directory of your choice. For example, you could run the following commands:
mount -o loop FC4-i386-disc1.iso /media/cdrecorder cp -ar /media/cdrecorder/* \
/var/ftp/pub/yum/4/i386/os/
If it’s the first CD, don’t forget to copy the .discinfo file to the noted directory. Change CDs:
mount -o loop FC4-i386-disc2.iso /media/cdrecorder cp -ar /media/cdrecorder/* \
/var/ftp/pub/yum/4/i386/os/
Repeat the process until you’ve reached the fourth CD.
A quick look at other mirrors confirms that the contents of the Fedora Core DVD are part of the os/repository directory. You can make it part of your own local repository, by copying the contents of the DVD to the corresponding directory described earlier:
cp -ar /media/cdrecorder/* /var/ftp/pub/yum/4/i386/os/
7.1.4 Installing yum
For Fedora Core 3 and above, you’ll need at least the yum and createrepo RPMs, along with the packages associated with the way you plan to share your repository on your network (FTP, Apache, or NFS server). Earlier ver-sions of Fedora Core did not include a createrepo RPM; if you want to create a repository from Fedora Core 1 or 2, use the yum-arch command, which is part of the yum RPM and is functionally similar to createrepo.
When the appropriate CD or DVD is mounted, you can then install the Fedora Core 3 yum and createrepo RPMs with the following commands:
rpm -Uvh /media/cdrecorder/Fedora/RPMS/yum* rpm -Uvh /media/cdrecorder/Fedora/RPMS/createrepo*
If you’re working with RHEL 4, you can install the yum and createrepo RPMs from Fedora Core 3. If you don’t have the associated installation media, you can download the RPMs directly from your favorite mirror from among those listed at http://fedora.redhat.com/download/mirrors.html.
7.1.5 Synchronizing Updates
More important than the installation RPMs are the updates. While you can use tools, such as system-config-packages, to install and remove Fedora pack-ages from the installation files, you need access to the updates to manage patches on your system. Based on the directories described earlier, we’re plan-ning to store RPMs from the Fedora Core 4 Updates repository on the follow-ing directory:
/var/ftp/pub/yum/4/i386/updates
Based on the rsync commands described in Chapter 2, you should find an Updates repository in the rsync mirror of your choice. Fedora rsync mirrors are listed at http://fedora.redhat.com/download/mirrors.html. One rsync mir-ror that I use is rsync://mirmir-rors.kernel.org/fedora/core.
Note
Because RHEL 4 is built on Fedora Core 3, it generally works when you use Fedora Core 3 RPMs on RHEL 4. However, Fedora Core 4 RPMs sometimes require more advanced dependent packages. If you install those dependencies, that might cause problems for other RHEL 4 applications.
If you’re working with a RHEL 4 rebuild distribution, such as CentOS-4, the appropriate yum packages may already be installed on your system. The actual directory with these packages may vary; for example, the CentOS-4 version of the createrepo RPM is part of the CentOS-4 addons/ repository directory.
Note
If you are also using this server for installations, copy the .iso files associated with the DVD or CDs to the /var/ftp/pub directory. The Red Hat installation pro-gram, Anaconda, can automatically mount and read appropriate .iso files. When shared, you can use this directory as a network installation source, which can help you automate the installation of additional PCs.
You can list the directories and files on a remote rsync server. Just make sure to include the last forward slash in your command. For example, the fol-lowing command lists the directories available in the Kernel.org Fedora Core repository:
rsync rsync://mirrors.kernel.org/fedora/core/
You’ll see updates/ in the directory tree. As you continue this process, you’ll find the actual updates/RPMs in the updates/4/i386/subdirectory.
Search through the subdirectory. You’ll find debug/ and repodata/ subdi-rectories. While you may be able to use the data in the repodata/subdirectory in your own yum repository, you don’t need to download the hundreds of megabytes of files in the debug/subdirectory. To avoid downloading files from that directory, you’ll need to apply the --exclude switch. For example, the fol-lowing rsync command synchronizes the packages from the remote updates/ repository, without debug/packages:
7.1 Getting the Packages 225
Note
Through Fedora Core 3, the noted repository included a headers/subdirectory, as created with the yum-arch command.
rsync -av --exclude debug \
rsync://mirrors.kernel.org/fedora/core/updates/4/i386/* \ /var/ftp/pub/yum/4/i386/updates/
As noted in Chapter 3, this synchronizes the noted remote and local directories in (-a) archive mode, with (-v) verbose output. Contents from the debug directory are (--exclude) excluded.
Note
Note the backslashes (\) at the end of the first two parts of the command line. It’s an escape character, which cancels out the carriage return; in other words, all three lines are run as a single command.
7.2
M
ANAGINGH
EADERSOne key skill in maintaining a repository is header management. Headers, stripped from RPM packages, allow yum to determine dependent packages. Unless the packages you download are identical to those on your selected mir-ror, you won’t be able to use the headers created on the mirror. You will have to learn to create your own headers. There are two major header creation com-mands, which we’ll review in this section and then use on a Fedora Core 4 repository.
7.2.1 Header Creation Commands
As noted earlier, there are two different commands associated with creating headers for a yumrepository. Before Fedora Core 3, the key command was yum-arch. It may still be the primary command for the distribution for which you’re managing patches. The alternative, starting with Fedora Core 3, is createrepo. yum-arch
The yum-arch command comes with the yum RPM and is the first method to strip headers from associated RPM packages and organize them in a headers subdirectory. When the headers are available, various yum commands described in Chapter 6 can use them to identify packages and package groups, along with any dependencies for the purposes of installation, upgrades, and removals.
There are several different options associated with the yum-arch com-mand. While none are absolutely necessary, they can help you in various spe-cial cases. They do not always work. For more information on the options associated with the yum-arch command, see Table 7-1.
Table 7-1 The yum-arch command options
Option Description
-d Checks for dependencies and conflicts from listed RPM packages -n Creates the database without headers; may be appropriate if you’ve
already download headers
-s Creates headers from source packages
-c Checks package integrity against available checksums -l Follows any noted symlinks
createrepo
The createrepo command now creates metadata from the headers in XML for-mat. If you’re familiar with the Red Hat comps.xml file (available from the first installation CD’s RedHat/base or Fedora/base subdirectory), you understand how these distributions use XML to organize packages and their associated package groups for installation. As Fedora (and perhaps other Linux distribu-tions) evolves, they might move toward XML as a Linux standard to organize packages and their associated package groups.
There are several different options associated with the createrepo com-mand. While none are absolutely necessary, they can help you in various spe-cial cases. For more information on createrepo options, see Table 7-2.
Table 7-2 The createrepo command options
7.2 Managing Headers 227
Option Description
-g Supports commands associated with Red Hat/Fedora groups from the comps.xml file
-p Supports output in XML format
-s Selects the type of checksum to use, such as md5 -c Checks package integrity against available checksums -u Creates headers from a list of files at a specified URL -x Excludes specified files; wildcards are allowed
If you want to see how the createrepo command works, you can analyze its code in the /usr/bin/createrepo script. As with yum, this command is writ-ten in Python.
7.2.2 Adding the Headers
As suggested earlier, there are two commands you can use to create the head-ers needed for a yum repository:yum-arch and createrepo. If you use yum-arch in Fedora Core 3 or above, you’ll see the following message:
THIS PROGRAM IS DEPRECATED!
You should be generating xml metadata instead. Please see http://linux.duke.edu/metadata
If you’re running RHEL 4 or the associated rebuild distributions, you should use the createrepo command, because these distributions are based on Fedora Core 3. However, several other distributions still use yum-arch. If you don’t see the “deprecated” message, use the yum-arch command, which is a part of the yum RPM.
yum-arch
The yum-arch command is fairly straightforward. All you have to do is navigate to the directory with the RPMs and you can create the headers in the local directory with the following command (don’t forget the dot, which specifies the files in the current directory):
yum-arch .
As you can see in Figure 7-1, headers are generated and “digested.” You’ll find the headers in the local headers/ subdirectory.
Figure 7-1 The yum-arch command digests RPMs and exhales headers
If you’re successful, the numbers associated with Total and Used in the output should match. In other words, Figure 7-1 tells me that there are 639 RPMs in this repository, and all were used to create headers.
If there are problems, there may be older RPMs in the repository. Updates to an update repository where older RPMs conflict with others could be the cause. Therefore, if you use the rsync command to synchronize your repository, you should take care to delete older RPMs. Alternatively, you can wipe the repository directories before downloading updates.
This repository is now ready. You’ll still need to share the directory with an FTP, Apache, or an NFS server.
createrepo
While the yum-arch command was developed for RPMs, Red Hat’s move to organize packages in XML files is fairly recent. The createrepo command con-solidates headers in compressed XML files. It creates the headers that the yum command needs to specify dependencies.
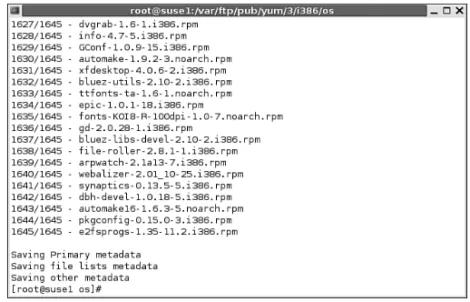
As you can see in Figure 7-2, the createrepo -v <PATH> command creates metadata. You’ll find the headers in compressed XML files in the local repodata/ subdirectory.
7.3 Configuring a Local yum Server 229
Figure 7-2 The createrepo command
This repository is now ready. You’ll still need to share the directory with an FTP, Apache, or an NFS server.
7.3
C
ONFIGURING AL
OCAL YUMS
ERVERThe skills you need to configure a local yum server are not related to yum. They require knowledge of the FTP, Apache, or NFS services. While this section is not designed to provide a complete guide to any of these services, it provides a description of how you can configure a yumrepository server based on the set-tings described earlier for Fedora Core 4 updates.
Because I personally prefer the efficiency of the FTP and NFS services for sharing files, I’ve covered the configuration steps required only for those services. For completeness, I’ve described how you can configure an Apache server to share files on a RHEL 4 yum repository near the end of this chapter. If you’re configuring a yum server, what you do will vary based on the follow-ing factors:
☞ Distribution and version
☞ Preferred version of a server (configuration steps vary for different FTP and HTTP servers and, to some extent, the way different distributions implement NFS servers)
☞ Availability of yum for the distribution (i.e., if it isn’t available, be pre-pared to compile yum from a source RPM)
As with other network services,yum servers may be sensitive to any fire-walls that you may configure. If you have a firewall between the yum server computer and associated clients, you’ll need to make sure traffic can travel through appropriate TCP/IP ports; for example, Apache services require access through TCP/IP port 80. Sure, there are ways to “tunnel” data through other services, such as SSH, but that should not be necessary for updates limited to your internal network. In any case, that level of detail is beyond the scope of this book.
7.3.1 Configuring an FTP yum Server
On current Red Hat/Fedora distributions, the default FTP server is vsFTP. According to its home page at http://vsftpd.beasts.org/, it’s the default FTP server used to share a number of Linux distributions, including Red Hat and Debian. It’s even used to share kernels through ftp.kernel.org.
The default version of vsFTP is configured in the vsftpd RPM. The default installation works well in most cases. The vsFTP configuration file is stored in /etc/vsftpd/vsftpd.conf for Red Hat/Fedora distributions (/etc/vsftpd.conf for SUSE and Debian distributions). In this case, we’re working from the RHEL 4 version of vsFTP.
By default, vsFTP files are stored in the /var/ftp directory. By conven-tion, files that you copy for downloads are stored in the pub/ subdirectory. Therefore, the repository that you create should be in the /var/ftp/pub direc-tory. For the example described earlier, update RPMs are stored in the follow-ing directory:
/var/ftp/pub/yum/4/i386/updates
If you’ve used the commands described earlier for Fedora Core 4, you’ll find the update header database in the repodata/ subdirectory.
There is a substantial number of options for vsFTP, most of which you can configure in the vsftpd.conf configuration file. The following is a review of active options in the RHEL 4 version of this file. If you want to check the cur-rent defaults for these and other options, read the vsftpd.conf man page asso-ciated with your vsFTP RPM.
anonymous_enable=yes
You absolutely want to enable anonymous access for a FTP-based yum server. Anonymous access is normally enabled by default on a vsFTP server.
It’s normally best to disable access by regular users to a FTP-based yum server. As it is disabled by default, all you need to do is comment out this option.
write_enable=yes
Naturally, because you do not want anyone (unless authorized) to over-write (or even add) to a yum-repository, you should disable write access.
local_umask=022
If you do authorize write access (I believe you should not do so on an FTP-based yumserver), this option sets the umask for any files created by users who are logged into your FTP server.
dirmessage_enable=yes
If active, this option looks for and reads any .message file that exists in the local directory. This can be useful if you want to send messages to other administrators.
xferlog_enable=yes
If active, this option logs downloads (and uploads) on the vsFTP server in the /var/log/xferlog file. For example, when I downloaded an updated version of yum, the vsFTP server placed the following entry in that file:
Mon Sep 2 17:18:25 2005 1 192.168.0.20 390363
/pub/yum/4/i386/updates/yum-2.4.0-0.fc4.noarch.rpm b _ o a anonymous@ ftp 0 * c
As you can see, this lists the date and time of the transfer, the client IP address, as well as the size and location of the file. This is a standard format shared with the WU-FTP server and can be mined as a database for more information on client computers that connect to your server.
connect_from_port_20=yes
Some FTP clients require this option, which uses TCP/IP port 20 for data transfers.
xferlog_std_format=yes
If you’ve activated the xferlog_enable option noted earlier, this option supports a standard format shared with the WU-FTP server.
pam_service_name=vsftpd
The pam_service_name option defers to Pluggable Authentication Modules to help secure the vsFTP service. This particular option sets rules in /etc/pam.d/vsftpd. One of the key options in this file prohibits users listed in /etc/vsftpd.ftpusers from logging into this vsFTP server.
userlist_enable=YES
As configured, this is redundant with the previous command. When enabled, it makes the vsFTP server read the /etc/vsftpd.user_list file and deny access to all who attempt to connect as one of the users listed in this file. By default, this file contains the same list of users as shown in /etc/vsftpd.users.
listen=YES
By default, Red Hat / Fedora configures the vsFTP server as a stand-alone service, with a vsftpd activation script in the /etc/rc.d/init.d directory. In contrast, SUSE does not configure vsFTP as a stand-alone service and con-figures listen=NOby default.
tcp_wrappers=YES
As configured, Red Hat / Fedora configures the vsFTP server for one more level of security, through TCP Wrappers support, which allows you to configure more security related commands in the /etc/hosts.allow and /etc/hosts.denyfiles.When you’re satisfied with the configuration, you should activate the vsFTP server with the following command (which is not required if you’ve set listen=NO):
/etc/init.d/vsftpd start
Finally, you can make sure that vsFTP is active the next time you reboot Linux with the following command:
chkconfig vsftpd on
This command activates the vsFTP server whenever you’re in run levels 2, 3, 4, or 5. (If you configure vsFTP in xinetd, it activates it in the /etc/xinetd.d
directory.) For the purpose of this chapter, assume the name of this server is yum.example.com.
7.3.2 Configuring a yum Client for an FTP-Based yum Repository
After you’ve configured this FTP yum server, configuring the associated yum client is a straightforward process. As you’ve seen in Chapter 6, yum configu-ration files that point to yum servers are normally configured in the /etc/yum.repos.d directory. For Fedora Core 4, we will examine the client file that points to the yum Update server:fedora-updates.repo.
For the yum FTP server as configured, all you need to include in the fedora-updates.repo file is the following:
[updates-released]
name=Fedora Core $releasever - $basearch - Released Updates baseurl=ftp://yum.example.com/pub/yum/4/i386/updates enabled=1
gpgcheck=1
As described earlier, for a vsFTP server, this means that update RPMs as well as the associated repodata/ subdirectory are stored on the yum.example.com computer in the /var/ftp/pub/yum/4/i386/updates directory. 7.3.3 Configuring an NFS yum Server
On current Red Hat/Fedora distributions, an NFS server is installed by default, courtesy of the nfs-utils RPM. The default installation works well in most cases. You can specify shared NFS directories in the /etc/exports config-uration file. In this case, we’re working from the RHEL 4 version of NFS.
You can share directories as configured on an NFS server. For the exam-ple described earlier, update RPMs are stored in the following directory:
/var/ftp/pub/yum/4/i386/updates
Therefore, you can share this directory at any level, as long as the mount point on the NFS client is consistent. For example, I’ve added the following line to my /etc/exports configuration file:
/var/ftp/pub 192.168.1.0/24(ro,sync)
This particular configuration command shares the /var/ftp/pub direc-tory. It limits access to clients in the noted IP address range. Clients are allowed read-only (ro) access. Changes are committed to disk before any new requests are made (sync).
For more information, see the exports man page Linux Administration Handbookby Evi Nemeth, Garth Snyder, and Trent Hein (Upper Saddle River, NJ: Prentice Hall, 2002). After you’re satisfied with the configuration in /etc/exports, deactivate the NFS server with the following command:
/etc/init.d/nfs stop
Note
The notation shown in /etc/exports is associated with Classless Inter-Domain Routing (CIDR). The 192.168.1.0/24 address corresponds to a range of client IP addresses from 192.168.1.1 and 192.168.1.254 (the range excludes network and broadcast addresses).
Note
Remember, this chapter is focused on Fedora/Red Hat. The NFS server script goes by different names on other Linux distributions.
By default, this should stop any NFS services, quotas, the NFS daemon, as well as the mountd daemon. Next, export the changes to /etc/exports with the following command:
exportfs -a
Now restart the NFS services with the following command: /etc/init.d/nfs start
Confirm the exports in from the local list with the following command: showmount -e
If you’re on another system, you can find the shared NFS directories. For example, you can list those on a server named yum.example.com with the fol-lowing command:
showmount -e yum.example.com
Finally, you can make sure that NFS is active the next time you reboot Linux with the following command:
This command activates the NFS server whenever you’re in run levels 2, 3, 4, or 5.
7.3.4 Configuring an NFS yum Client
You’ll need to mount the NFS share on an appropriate local directory, and then configure the associated file in /etc/yum.repos.d to point to that share. Because we’re configuring a share for Fedora updates, we’ll modify the fedora-updates.repo file.
First, on the NFS client, you should confirm your ability to connect to a
shared NFS directory. The following command connects to the
yum.example.com NFS server to find what shares are available on that server:
showmount -e yum.example.com
You’ll see the shared directories that you configured earlier, including /var/ftp/pub. I’ve mounted it on the local /var/yum directory with the following command:
mount yum.example.com:/var/ftp/pub /var/yum
If the /var/yum directory does not yet exist, you’ll get an error message. Now you can configure your fedora-updates.repo file in your /etc/yum.repos.d directory. For the yum NFS server as configured, all you need in fedora-updates.repo is the following:
[updates-released]
name=Fedora Core $releasever - $basearch - Released Updates baseurl=file:///var/yum/yum/4/i386/updates
enabled=1 gpgcheck=1
As described earlier, for a vsFTP server, this means that update RPMs as well as the associated repodata/ subdirectory are stored in the yum/4/i386/updates subdirectory, mounted on the /var/yum directory.
Note the syntax associated with the baseurl command. The file: com-mand works in place of ftp: or http:. The triple forward slash (///) is the stan-dard syntax required for mounted directories.
If you’ve configured a Fedora Updates repository on a Fedora Core server, this command may be slightly different. Based on the directory speci-fied earlier, you would substitute the following baseurl command:
baseurl=file:///var/ftp/pub/yum/4/i386/updates
Naturally, you may want to configure this shared directory as part of the boot process for each NFS client. It’s possible to configure it in the default /etc/fstab configuration file, as well as through the Automounter daemon. I recommend the latter, which avoids hangups when there are network prob-lems. The Automounter daemon is easy to configure; it requires the autofs RPM. After that RPM is installed, here’s how you can configure a NFS client for Fedora updates as configured in this chapter:
1.Install the autofs RPM; if you’ve configured yum, the simplest way is with the following command. Even if you’re not sure if autofs is installed, this command makes sure that you have the latest version of the Automounter:
yum install autofs
2.Configure the Automounter master file to read from /etc/auto.misc. Open the /etc/auto.master configuration file. You’ll see sample com-mands; activate the following to read from the noted file. The timeout prevents your system from hanging if there’s a problem with your net-work or the NFS server.
/misc /etc/auto.misc --timeout=60
Automounter shares configured in /etc/auto.misc are configured as sub-directories of /misc.
3.Configure the Automounter /etc/auto.misc file to read from the shared NFS directory. Based on the shared directory and NFS server name described earlier, add the following line to that file:
yum -ro,soft,intr yum.example.com:/var/ftp/pub 4.Start the Automounter service with the following command:
/etc/init.d/autofs start
Note
Yes, it is possible to use the /etc/auto.net script to find and connect to shared NFS directories. But it might not be compatible with SE Linux. For more infor-mation, see bug 174156 on bugzilla.redhat.com.
5.Test the result. If your network is connected and the NFS server is run-ning, you should be able to see the shared NFS directory with the follow-ing command:
ls /misc/yum
Occasionally, you may need to run this command more than once to establish the connection.
6.Configure the /etc/yum.repos.d/fedora-updates.repo file to point to this directory as shared. Based on the previously shared NFS directory, the baseurl command would be
7.Test the result with the yum update command. You should see messages similar to a regular yum update from other local or remote servers.
7.4
A
DDINGO
THERR
EPOSITORIESYou might want to maintain other repositories on a local server. Based on the chapter so far, you should have the tools you need to create the server and con-figure your clients to read from that server.
As suggested earlier, there are several different repositories available for Fedora, such as Extras, Development, and Testing repositories. In many cases, you might want to add repositories from allied distributions. For example, Fedora Core 3 repositories may be suitable for RHEL 4 and related rebuild distributions. There are also third-party repositories available; many of the same third-party apt repositories described in Chapter 5, “Configuring apt for RPM Distributions,” also include “yummified” RPM repositories of possible interest.
7.4.1 Using Distribution Installation Files
If you’ve followed the steps described earlier, you’ve copied the files from the Fedora Core 4 installation CDs to a directory in your yum repository. You should have a copy of the installation DVD (or CDs) in the following directory:
/var/ftp/pub/yum/4/i386/os/
You can now yummify this repository with one of the following com-mands. Naturally, if you’re using Fedora Core 3 or later, you should install the createrepo RPM and then yummify the repository with the second command:
yum-arch /var/ftp/pub/yum/4/i386/os/* createrepo /var/ftp/pub/yum/4/i386/os/*
If you’re running Fedora Core 4 on your clients, you can now point the fedora.repoconfiguration file in the /etc/yum.repos.d directory to the installa-tion repository. If you’ve configured the FTP server described earlier, you should use the following baseurl command in that file:
baseurl=ftp://yum.example.com/pub/yum/4/i386/os/
7.4.2 Keeping Extras with yum
One useful Fedora repository is known as Extras. It includes a number of packages not integral to the smooth running of the distribution. However, the Fedora Core 4 Extras repository includes a number of packages of interest,
including Tripwire, the WindowMaker GUI, the BitTorrent download man-ager, and even the apt tools described in Chapter 5.
Depending on how frequently you or your users need Extras packages, you might want a local copy of that repository. It might not be easy to find this repository in the rsync mirrors. For example, the mirror listed for the University of Southern California (USC) is rsync://mirrors.usc.edu/fedora/. Sometimes, you’ll find seemingly duplicate copies of the same repository in dif-ferent directories. For example, the following two commands return the same list of packages from the Fedora Core 3 Extras repository:
rsync rsync://mirrors.usc.edu/fedora/fedora/fedora/3/i386/RPMS.extras/ rsync rsync://mirrors.usc.edu/fedora-core/extras/3/i386/
In this case, the packages from the first repository are newer than those I found in the second. Naturally, I want the newest version of all packages, so I synchronize with that repository.
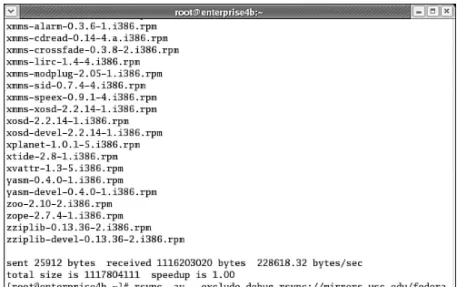
You can copy this repository to your own system. Based on the directories and rsynccommands described earlier, the following command would synchro-nize your system with the rsync repository from USC:
rsync -av --exclude debug \
rsync://mirrors.usc.edu/fedora/fedora/fedora/3/i386/RPMS.extras/* \ /var/ftp/pub/yum/3/i386/extras/
You can review the output in Figure 7-3. As you can see, the information includes the amount of data transmitted across the network. In this case, I downloaded over a gigabyte of data. You do not want to repeat this process often.
7.4.3 Adding Development Repositories
Do not mirror a Development repository unless it is absolutely necessary. Development RPMs are, by definition, not stable. They are not suitable for production systems. Because the RPMs in this repository are updated fre-quently, sometimes daily, updates take up a lot of bandwidth.
You or your users might want access to development repositories for dif-ferent reasons. For example, your users might be interested in helping with Linux development. You might need to test the latest version of a package that is adding new features that you may need. You might want to test Fedora Linux on an architecture other than standard PC 32- or 64-bit CPUs.
Development repositories are available through most of the same mir-rors associated with Fedora Linux. Unless your users need access to such packages frequently, it’s best to leave such repositories on remote mirrors.
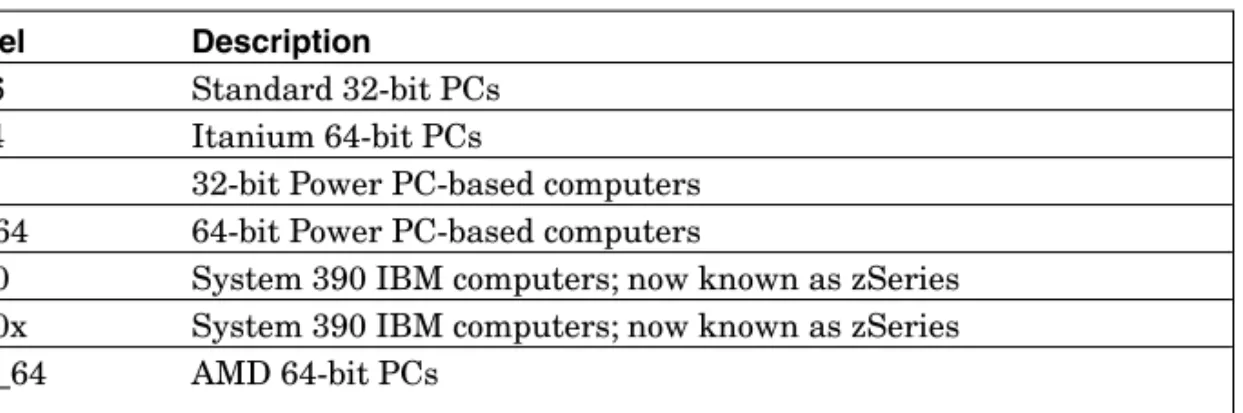
Using the techniques described earlier, find the development/ repository associated with your favorite mirror. For example, as shown in Figure 7-4, the following command returns a substantial list of architectures available through this repository:
rsync rsync://mirrors.kernel.org/fedora/core/development/
7.4 Adding Other Repositories 239
The available architectures are defined in Table 7-3.
Table 7-3 Fedora architectures
Note
Use the Development repository at your own risk. As defined by the README file associated with the repository, “DO NOT USE THESE RELEASES FOR ANY WORK WHERE YOU CARE ABOUT YOUR APPLICATION RUNNING, THE ACCURACY OF YOUR DATA, THE INTEGRITY OF YOUR NETWORK, OR ANY OTHER PURPOSE FOR WHICH A RESPONSIBLE HUMAN WOULD USE A COMPUTER.”
Label Description
i386 Standard 32-bit PCs ia64 Itanium 64-bit PCs
ppc 32-bit Power PC-based computers ppc64 64-bit Power PC-based computers
s390 System 390 IBM computers; now known as zSeries s390x System 390 IBM computers; now known as zSeries x86_64 AMD 64-bit PCs
7.4.4 Other Distribution Repositories
In some cases, you might want access to repositories available for other distri-butions. For example, if you’re running RHEL 4, you might want access to Fedora Core 3 repositories for additional packages. As RHEL 4 is based on Fedora Core 3, many packages from this version of Fedora work fine without modifications.
While you can mirror the repositories from other distributions, you should not do so unless you use packages from those repositories frequently. Otherwise, you’ll be using a lot of space with packages that might not work with your system. In fact, any Fedora Core 3 packages that you install on RHEL 4 are not supported by Red Hat.
If you’ve installed the yum and createrepo RPMs from Fedora Core 3 on RHEL 4, you can include the files of your choice in the /etc/yum.repos.d direc-tory. However, you should not install the RPM that installs Fedora Core 3 repository files in this directory because it may change the version associated with your system and affect the way your RHEL 4 system communicates with the Red Hat Network.
If you do not have access to Fedora Core 3, you can get more information about the files in the /etc/yum.repos.d directory at http://fedoranews.org/ tchung/yum-mirrorlist/. For details on how these files work (as well as those for Fedora Core 4), see Chapter 6.
7.4.5 Third-Party Repositories
In some cases, you might want access to repositories available from third par-ties. We’ve covered several of the third-party repositories in Chapter 6. As you’ve read, they’re available for several different distributions, especially those related to Red Hat Enterprise Linux or Fedora.
Evaluation copies of RHEL are available as of this writing from www.redhat.com/software/rhel/eval/. The subscription is valid for 30 days, and it includes access and administration privileges on the Red Hat Network. You can read about some of the associated features in Chapter 2. After the sub-scription expires, you might be able to update your RHEL system using the repositories available from one of the RHEL rebuild distributions. Naturally, any packages that you download and install from a third-party are not sup-ported by Red Hat and are done so at your own risk.
Unfortunately, many third-party repositories discussed in this book do not have rsync servers available. You’ll have to use more conventional meth-ods, such as FTP, to download the files associated with these repositories. Many of these mirrors are administered by small groups or even individuals. They might not be able to support enterprise-level package downloads. Therefore, if you use a third-party repository frequently, consider creating your own mirror of that repository.
7.5
M
AINTAINING THER
EPOSITORYPatch management means that you have to maintain updates for all the com-puters on your network. For the repositories that you’ve created, that means you need to keep them up to date. Generally, that means configuring updates as a cron job, not only for clients, but between your local repository and the mirror of your choice. You’ve seen samples of the cron jobs you can use for clients in Chapter 6. In this section, we’ll see how you can maintain a local repository.
As repositories are kept up to date, sometimes headers can be corrupted. In that case, you can delete the headers, whether from the headers/ directory or from the compressed files in the repodata/ directory.
7.5.1 Updating Packages
Generally, you’ll want to update repositories on a daily (or nightly) basis. After a repository is created, the required downloads go down significantly. In most cases, you’ll be able to create your own script in the /etc/cron.daily directory, which is automatically run on a daily basis, as determined by the schedule as defined in /etc/crontab.
As you saw earlier, the following command can synchronize files on the noted local directory with a remote server at mirrors.kernel.org:
rsync -av --exclude debug \
rsync://mirrors.kernel.org/fedora/core/updates/3/i386/* \ /var/ftp/pub/yum/3/i386/updates/
I’ve created the repo file in my /etc/cron.daily directory and added the following commands:
#!/bin/sh
rsync -av --exclude debug \
rsync://mirrors.kernel.org/fedora/core/updates/3/i386/* \ /var/ftp/pub/yum/3/i386/updates/
7.5.2 Cleaning Header Information
If there are problems with updates, check the applicable log file. It’s available in the yum.log file in the /var/log directory. In many cases, it can help to regenerate headers. In other words, you would take the following steps:
1.Delete the headers/or repodata/subdirectory in your repository. 2.Navigate to the directory with the repository.
3.Regenerate the headers with the command that applies to your distribu-tion:yum-arch or createrepo.
7.6
C
REATING ANE
NTERPRISER
EPOSITORYIn Chapter 2, you learned about patch management on RHEL computers. The Red Hat Network Proxy Server is an effective way to cache RPMs for multiple RHEL systems. However, some administrators prefer standard tools, such as apt and yum.
In this section, we’ll show you how you can configure a yum-based reposi-tory from packages downloaded using the Red Hat Update Agent. If you want to use update other RHEL clients from this repository, you may be required by contract to have valid subscription for each of these clients, even if the pack-ages are covered by an open source license.
Note
Do not use this book to update RHEL systems unless they have a current, valid subscription.
A working RHEL repository requires a combination of the existing installation packages, as well as the updates available over the Red Hat Network. When combined, you’ll have a set of packages that includes all the dependencies you might need.
The repository creation process on an RHEL system requires four basic steps:
1.Download the packages required to update your system; make sure they aren’t deleted after they’re installed. Add the packages associated with the RHEL installation CDs.
2.Apply the yum-arch or createrepo commands to “yummify” the repository. 3.Share the repository directory with an appropriate service, such as
Apache, FTP, or NFS.
4.Configure your clients to update from the new repository.
Depending on the channels you want to mirror, this process may require 2GB or more of downloads. If you have only one or two RHEL systems, you may find this process not to be worth the trouble. However, if you have several dozen RHEL systems, this might save you time and bandwidth.
If you have a substantial number of RHEL systems, you should consider the Red Hat Network Proxy Server described in Chapter 2. However, if you prefer standard tools, such as yum, and have the authorized Red Hat subscrip-tions for the RHEL clients on your network, you the approach taken in the fol-lowing sections is a viable alternative.
7.6 Creating an Enterprise Repository 243
Note
If you’re working with a RHEL rebuild distribution, it’s best if you use the patch management tool (yumor apt) configured for that distribution. Then you can keep it up to date by synchronizing your repository with that available from the mirror of your choice.
7.6.1 Creating a RHEL Update Repository
In Chapter 2, you learned to use the Red Hat Update Agent to update RHEL systems. With the right configuration, you can save the updated RPMs as an RHEL update repository. There are several basic steps in this process:
1.First, log into the Red Hat Network and assign desired channels to the RHEL Update Repository system.
2.Next, configure the Update Agent to keep downloaded packages.
3.Configure the system where you’ll store packages as needed.
4.Download desired RPMs into your repository.
Assign Desired Channels from the Red Hat Network
First, log into the Red Hat Network. Make sure your system is subscribed to the channels from which you want to create your repository.
As shown in Figure 7-5, you can configure your system with available channels, assuming that you have allowed subscriptions to that channel. To find your currently allowed subscriptions, click Channels on the top bar, then click Channel Entitlements on the left pane. Assign the channels of your choice, and then click Change Subscriptions. If you see the following error message, you may need additional subscriptions:
The assignment would exceed your allowed subscriptions in one or more channels
Figure 7-5 Assigning RHEL Channel Subscriptions
To confirm your channel assignments, log into the computer that you intend to use as the repository. The following command should return the channels that you’ve assigned:
up2date --showchannel
Based on Figure 7-5, the channels that you should see are as follows: rhel-i386-as-4
rhel-i386-as-4-extras rhel-i386-as-4-hwcert rhel-i386-as-4-sdk rhn-tools-rhel-4-as-i386
Configure the Update Agent to Keep Downloaded RPMs
Log into the computer that you intend to use as a repository. Updated RPMs are stored by default in the /var/spool/up2date directory. Make sure that updated RPMs are not deleted. To do so, run the up2date-config command. You’ll see the screen shown in Figure 7-6.
7.6 Creating an Enterprise Repository 245
Figure 7-6 Configuring the Update Agent to keep RPMs
Enter option 17 (the option number may vary). This is associated with the “keepAfterInstall” variable. If set to yes, packages which are downloaded remain available in /var/spool/up2date after they’re installed. The next time you download packages from the Red Hat Network, packages will be stored in that directory, and they won’t be deleted.
Note
You may also want to disable automatic updates to the up2date RPM, which is usually the option before keepAfterInstall. Any updates to up2date substitutes the default settings in /etc/sysconfig/rhn/up2date. If the up2date RPM is upgraded, you can restore your custom settings from the up2date.rpmnew file in the same directory. Just be aware, if you disable updates of up2date, updates will be disabled the next time there’s a new version of up2date available.
Configure the Repository with Appropriate Partitions
As you’ve seen throughout this book, repositories require gigabytes of space. It often makes sense to configure repositories in separate partitions. For the pur-pose of this repository, I’ve configured /var/spool/up2date on a new partition or logical volume.
Note
If you’re in the GUI, you might need to run the up2date-config --noxcommand to access the options shown in Figure 7-6.
For details on how you can configure a new partition, refer to any good basic book on Linux administration, including Linux Administration Handbookby Evi Nemeth, Garth Snyder, and Trent Hein (Upper Saddle River, NJ: Prentice Hall, 2002) or Mastering Red Hat Enterprise Linux 3by Michael Jang (Alameda, CA: Sybex, 2004) . If you want more information on these com-mands or settings, refer to that book. If you have free space on an available partition, you can assign it to /var/spool/up2date. One method would use the following steps, which assume that you’ve added a new hard drive. The steps may vary widely depending on the hard drive and whether there are existing partitions on that drive.
1.Open the hard disk of your choice for editing. For example, assume you’ve added a new hard drive. If this drive is the first SCSI or SATA hard drive on your system, run the fdisk /dev/sda command.
2.Assign a new partition with the n command. You’ll need to press p to assign a new primary partition. Assign partition number 1, start with the first cylinder, and assign the room you need. You can do so with a +10GB entry when prompted for the last cylinder. Press w to write the new partition table to the hard drive.
3.Format the drive. To format it with the default ext3 file system, run the following command:
mkfs -t ext3 /dev/sda1
4.Mount the /var/spool/up2date directory on that drive. mount /dev/sda1 /var/spool/up2date
5.Make sure the drive is mounted the next time you reboot your computer. Add the following line to your /etc/fstab configuration file:
/dev/sda1 /var/spool/up2date ext3 defaults 1 2
Download Desired RPMs from the Repository
Now you can download the desired RPMs from the Red Hat Network. You can download just the updates, but because of dependencies, those might not be enough. Therefore, download all available RPMs from the Red Hat Network channels to which you subscribe. This is a multi-step process. With the follow-ing command (which specifies a RHEL 4 Workstation channel), you can down-load the RPMs from your desired channel not currently installed on your system. Shortly, you’ll add RPMs from your installation CDs.
There is no separate updates repository on the Red Hat Network. New packages are incorporated into existing channels. Therefore, this command downloads all packages you do not have installed, including any updated RPMs.
Naturally, because there are around 2GB of data on RHEL installation RPMs, the download may be extensive. Depending on the speed of your con-nection, you may need to wait several hours for downloads. One example is shown in Figure 7-7.
7.6 Creating an Enterprise Repository 247
Figure 7-7 Downloading updates
Add RPMs from the Installation CDs
Now you should add the RPMs from the RHEL installation CDs. If you have the physical CDs, the mount command is elementary. If you have the ISO files (as I do), the mount command requires a small trick. For example, when I’ve stored the ISOs on my /mnt/testpartition, I can mount the first RHEL ISO with the following command:
mount -o loop /mnt/test/RHEL4-i386-AS-disc1.iso /media/cdrecorder
You can then copy the RPMs to the /var/spool/up2date directory with the following command:
cp -ar /media/cdrecorder/RedHat/RPMS/* /var/spool/up2date/
Naturally, when the process is complete with the first CD, you’ll want to unmount and repeat the process with the other RHEL CDs until you’ve copied all available RPMs to the /var/spool/up2date directory.
7.6.2 Yummifying the RHEL Update Repository
After you’ve configured the files you need in the RHEL repository, you can set it up as a yum repository. As described earlier in this chapter, this requires the yum-arch or createrepo commands, depending on your distribution. The createrepo package was adapted for Fedora Core 3. Because RHEL 4 was built from Fedora Core 3, we’ll use this package to “yummify” this repository.
If you haven’t already done so, install the yum and createrepo RPMs. As discussed earlier in this chapter, they are not currently available from RHEL 4 channels. However, compatible versions are available from Fedora Core 3 repositories. Download guidelines are described earlier in this chapter.
Now you can yummify your repository with one of the following com-mands, whichever is appropriate to your distribution:
yum-arch /var/spool/up2date createrepo /var/spool/up2date
If successful, you’ll find headers/ or repodata/ subdirectories in the /var/spool/up2date directory. I’ve used the second command on my RHEL 4 system, with downloaded updates and installation RPMs that I’ve just described.
7.6.3 Sharing the RHEL Repository
Now you can share the RHEL 4 repository that you’ve just created. You can configure the Apache or NFS servers described earlier. Unfortunately, as described earlier, the vsFTP service does not follow symlinks, for the security reasons described earlier. In this case, we’ll configure the server that we did not configure before, the Apache Web Server. We won’t go into detail on how to configure Apache on your system; we’ll just create a basic configuration that you can use for a RHEL repository.
If you want more information on how you can configure Apache on RHEL, there are many excellent books available, including Apache Administrator’s Handbookby Rich Bowen (Indianapolis, IN: Sams Publishing, 2002).
In this case, I’ve just installed the httpd RPM package on RHEL 4. To make sure it works, start the daemon with the following command:
If you see a message related to “Could not determine the server’s fully qualified domain name,” do not be concerned. There is no URL specified in the default version of the Apache configuration file, httpd.conf, in the /etc/httpd/conf directory.
Test the result. If you’re on the computer with the repository, open a browser and navigate to 127.0.0.1. If the service is working, you’ll see the Red Hat Enterprise Linux Test Page. Test the result on a remote computer. I’ve configured the repository computer with an URL of yum.example.com, and therefore can navigate to that URL to see the same test Web page.
By default, Apache files on this distribution are stored in the /var/www/html directory. You already have a repository in the /var/spool/up2date directory. To allow apache to work with the repository, you need to link directories. One method is with the following command:
ln -s /var/spool/up2date /var/www/html/up2date
If everything goes right, you should be able to navigate to the up2date/ direc-tory on the Apache server. In my case, I’ve navigated to http://yum.example.com/ up2date/. However, that doesn’t work at first. I’ve started with the default RHEL 4 Apache configuration file. For more information, see the error_log in the /var/log/httpd directory. The key error message from this file is
Directory index forbidden by rule: /var/www/html/
To address this issue, I’ve modified the messages associated with the Apache root directory. The default configuration file includes the following stanza about 25 percent of the way into the file:
<Directory />
Options FollowSymLinks AllowOverride None </Directory>
The Options directive you need is Indexes, which leads me to substitute the following command line:
Options Indexes FollowSymLinks
Now, you can try the desired URL again. You should see a result similar to Figure 7-8, with a list of files linked from the /var/spool/up2date repository.
Figure 7-8 A RHEL 4 yum Repository
Naturally, you can also share /var/spool/up2date with an NFS server by using the techniques described earlier in this chapter.
7.6.4 Configuring Updates to the RHEL Repository
After you’ve added the packages you need to /var/spool/up2date, it is up to you to maintain that RHEL repository. While the Red Hat Network does not include a rsync server, the effect from updates is essentially the same. You can repeat the same commands described earlier, and only new packages are down-loaded. However, obsolete packages are not removed from the local mirror.
However, if you’ve copied all of the installation files to the /var/spool/up2date directory, this is not necessary. You just need the updated RPMs, which are available with the following command:
up2date -u
If you want to keep using /var/spool/up2date, make sure that you never restore the defaults associated with the Red Hat Update Agent. Otherwise, the updated RPMs would be deleted after the next update. (You may also want to disable upgrades to the up2date RPM, as described in an earlier note.)
7.6.5 Configuring Clients to Use the RHEL Repository
Naturally, if you’ve created a repository on a RHEL computer, you may want to use it for that computer. You’ve already downloaded and installed the yum RPM package. You can now create a configuration file in the /etc/yum.repos.d directory similar to those you’ve created in Chapter 6. In this case, the reposi-tory is local; therefore, you can specify the file:/// (that’s three forward slashes) label described earlier to point to the /var/spool/up2date directory.
For example, I’ve entered the following in the local.repo file in the /etc/yum.repos.d directory:
[local]
name=Mike’s local RHEL 4 repo baseurl=file:///var/spool/up2date gpgcheck=1
enabled=1
Now I can use the yum commands described in Chapter 6 to update the system with the repository. Naturally, you can configure other RHEL 4 clients to use the same repository. Based on the Apache server configured earlier, I’ve modified the aforementioned local.repo file accordingly:
[local]
name=Mike’s local RHEL 4 repo
baseurl=http://yum.example.com/up2date gpgcheck=1
enabled=1
7.7
S
UMMARYWhile there are many Linux users who prefer other tools for doing their patch management, yum is designed for RPM-based distributions. Its popularity has grown as Fedora Linux has adapted yum as its primary patch management tool. Because the Red Hat Network is not available unless you’re a subscriber, many RHEL rebuild distributions have also adapted yum for updates and more.
The repository creation process can be time-consuming. If you use pack-ages from installation CDs, you can save some time. With the rsync command, you can download the remaining packages that you need. The advantage of rsync is that you can keep your repositories up to date with the same com-mands that you’ve used to download the packages you need.
When created, you’ll need to share your repositories. There are three major sharing services: NFS, Apache, and FTP. When shared, you can config-ure your clients to point to the repositories on your local network, minimizing the loads on your Internet connection, allowing you to focus on those packages critical to security and functionality on your network.
While you can use the Red Hat Network Proxy Server described in Chapter 2 to manage patches and updates on RHEL computers, you can also configure a yum repository based on an amalgamation of RHEL installation packages and updates.
We’ve covered a broad array of patch management tools that you can use on almost any Linux distribution. There are other excellent tools exclusive to specific distributions, such as uprmi for Mandriva and emerge for Gentoo. Our lack of coverage of these tools is not intended to denigrate these excellent tools but simply reflects the scope of this book.