1
Using Microsoft Outlook 2010
with Zimbra
2
Copyright © 2010 KSU Dept. of Information Technology Services
This document may be downloaded, printed or copied for educational use without further permission of the Information Technology Services Department (ITS), provided the content is not modified and this statement is not removed. Any use not stated above requires the written consent of the ITS Department. The distribution of a copy of this document via the Internet or other electronic medium without the written permission of the KSU - ITS Department is expressly prohibited.
Published by Kennesaw State University – ITS 2010
The publisher makes no warranties as to the accuracy of the material contained in this document and therefore is not responsible for any damages or liabilities incurred from its use.
Microsoft product screenshot(s) reprinted with permission from Microsoft Corporation.
3
Information Technology Services
Using Microsoft Outlook 2010 with Zimbra
Table of Contents
Introduction ... 4
Mail ... 5
Creating a Message ... 6
Addressing ... 6
Formatting text ... 8
Changing the background ... 9
To apply a solid color background: ... 9
To apply any other type of background: ... 9
To insert a picture as background: ... 10
Proofing... 11
Attachments ... 12
Signatures ... 13
To create and store one or more signatures in Outlook: ... 13
Importance Level ... 14
Delay Delivery ... 14
Saving a message as a file ... 15
Calendar ... 16
Creating an Appointment ... 17
Creating a Recurring Appointment ... 17
Scheduling a Meeting ... 18
Notification of New E-mail ... 21
Displaying Shared Items ... 22
Archiving with Outlook ... 23
Specify AutoArchive Settings ... 23
4
Introduction
Using Microsoft Outlook 2010 as a “desktop client” for Zimbra gives the end-user added functionality not available in Zimbra, due to the fact that the latter is a web-based application. This document covers the basic use of the Mail, Calendar and Sharing features of Outlook, as well as the following features of Outlook that are available to Zimbra users on campus:
Pop-up notification of new email
Delaying delivery of an email message
Saving one or more messages as a text or html file
Archiving
5
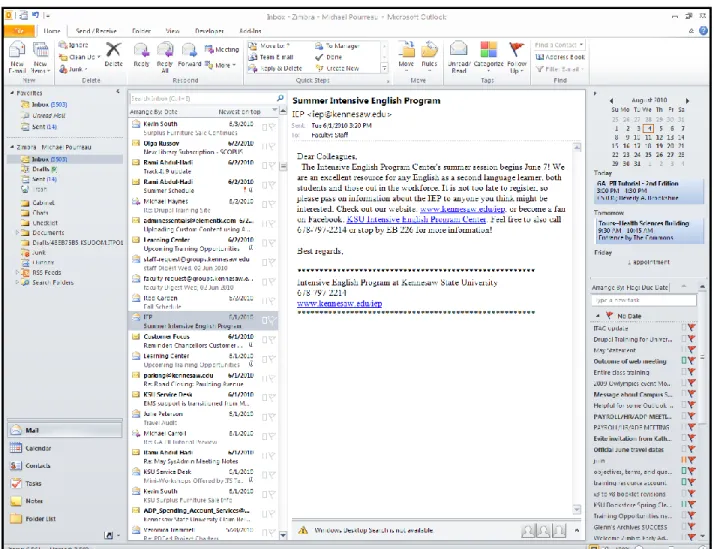
Important note about address books in Outlook:
Addressing email messages in Outlook works a little differently than it does in Zimbra. First of all, in order to have access to the Global Address List, you will need to click the To… or Cc… button, rather than simply entering the name into the To or Cc field. (Typing a name into the To or Cc field only
reveals names in the “Contacts” address book). Clicking the button opens the “Select Names: Contacts” window, in which you have access to the Global Address List. Further, you will need to set the Global Address List to be the first address list shown in the “Select Names - Contacts” window, as shown in steps 1 – 6 below:
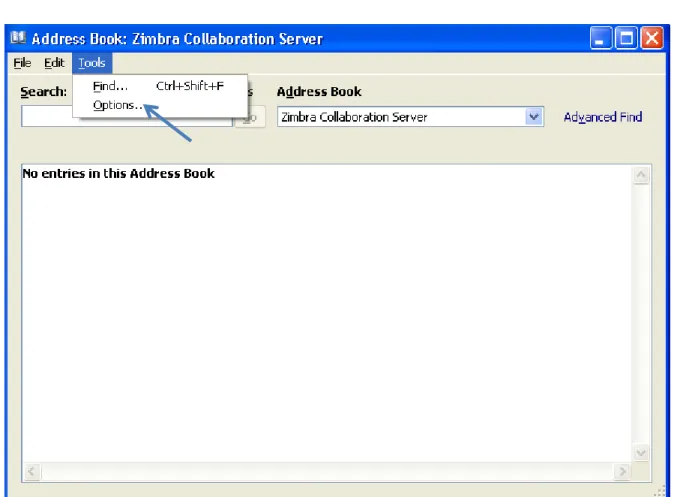
Figure 2 - Address Book
1. From the Home tab, go to the right end side of the ribbon and click on Address Book. The “Address Book: Contacts” window appears.
2. On the menu bar, click on Tools→Options.
6 3. In the “Addressing” window, verify that the “Start with Global Address List” is checked, and
then click on “Choose Automatically” to access the drop-down list of addresses.
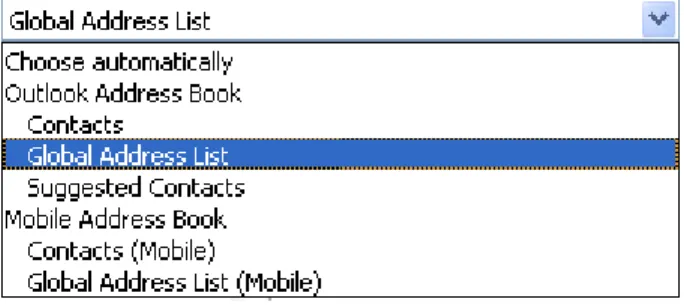
Figure 4 - Addressing
4. Select Global Address List.
Figure 5 - Global Address List 5. Click OK.
6. Close the “Address Book: Global Address List” window.
Creating a Message
Addressing
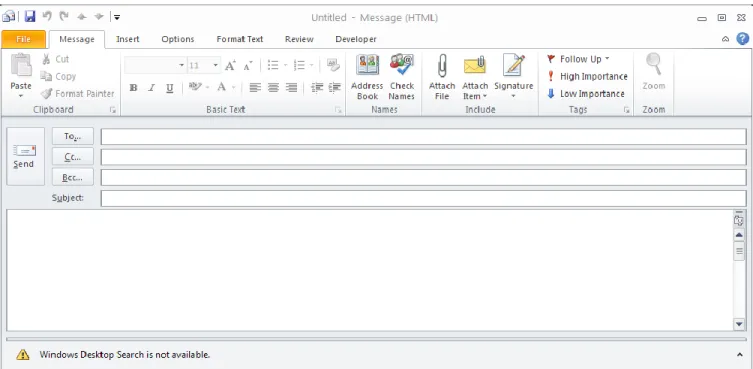
1. From the Home tab, click on New E-mail on the left end side of the ribbon. The “Message” window opens.
7 Figure 6 - Message Window
2. To select names from the Global Address List, click the To… button.
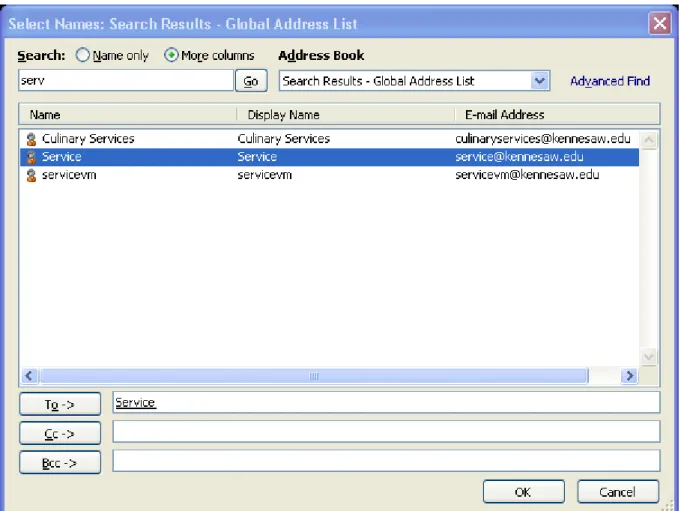
3. To be able to search by first name, last name, or username, click the More columns radio button. (see Figure 7)
8 4. Type in the name that you are searching for and click on the Go button.
5. Select the name from the results list by clicking on it:
a. Double-clicking the name will add it to the To -> field.
b. Single-clicking the name will allow you to place it on the Cc-> or Bcc-> field by clicking
on the appropriate button.
6. Repeat the search if you need more names. 7. Click OK.
Figure 8 - Select Names
Formatting text
1. From the Message tab, you have access to Basic Text formatting options on the ribbon.
9 2. From the Format Text tab, you have access to Word-like features, including font, paragraph and
styles properties. You can also choose to format your message in html, plain text, or rich text.
Changing the background
You can apply different types of backgrounds to your message: solid color, gradient fill, textured, or patterned. You may also use a picture as the background.
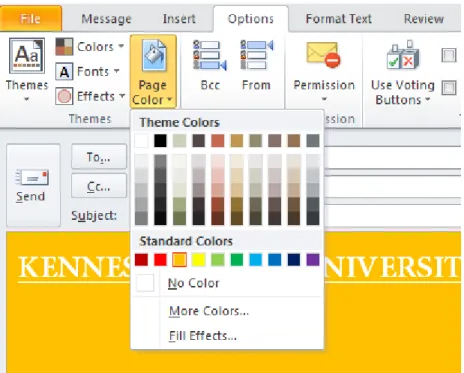
To apply a solid color background:
From the Options tab, click on Page Color.
Select one of the readily available Theme and Standard Colors or click on More Colors…
The selected solid background color will be applied automatically.
Figure 10 - Solid Background Color
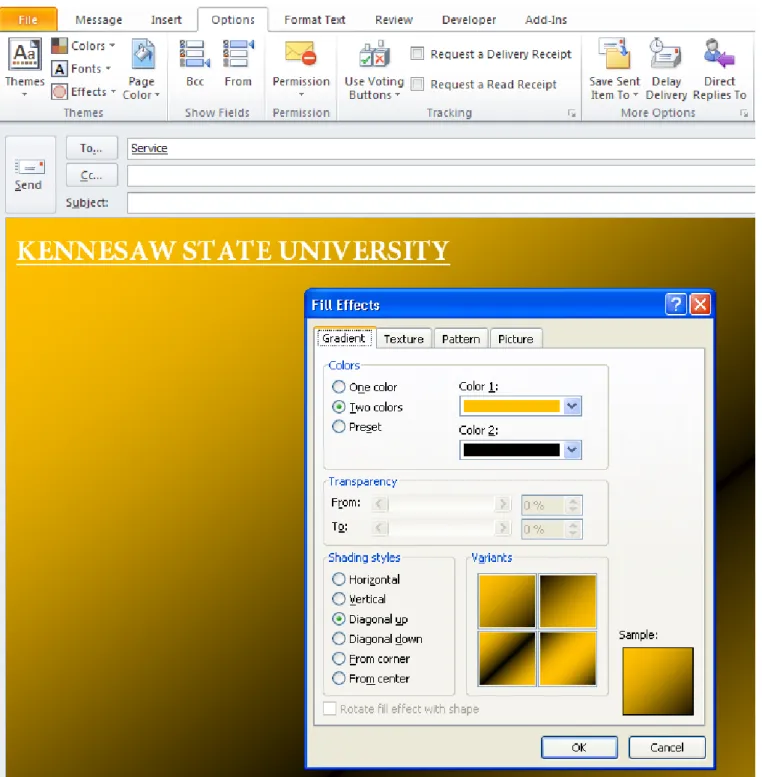
To apply any other type of background:
1. From the Options tab, click on Page Color.
2. Click on Fill Effects…
3. Click on the desired tab: Gradient, Texture, Pattern or Picture.
10 In the example below, a gradient fill based on two colors and a diagonal up shading style is applied to the background.
Figure 12 - Gradient Fill Background
To insert a picture as background:
1. From the Options tab, click on Page Color.
11
3. Click on the Picture tab.
4. Click on the Select Picture… button.
5. Browse your local drive for the picture, select it, and click on the Insert button. A preview appears on the “Fill Effects” screen.
Figure 13 - Picture as Background
6. Click on the OK button.
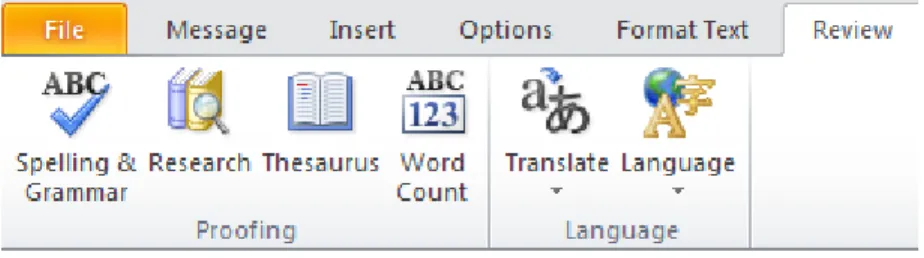
Proofing
Outlook 2010 is set to automatically spell check your message before it is sent out.
From the Review tab, you can manually do a spelling and grammar check. You can also use the thesaurus, research and word count tools.
12 Figure 14 – Review Tab
If your message is in a language other than US English, you may change the proofing language:
1. From the Review tab, click on Language.
2. Click on Set Proofing Language…
3. Select the desired language from the list. 4. Click on the OK button.
Attachments
In Outlook you can attach one or more files, as well as other messages or appointments. To attach a file:
1. From the Insert tab, click on Attach File (paper clip) in the Include group of the ribbon.
2. Browse your local drive, select the file to be attached, and click on the Insert button. To attach another message or appointment:
1. From the Insert tab, click on Outlook Item (envelope & paper clip) in the Include group of the ribbon.
2. Locate and select the item that you want to attach in the “Insert Item” window, and click on the OK
button.
Figure 15 - Other Proofing Language
13
Signatures
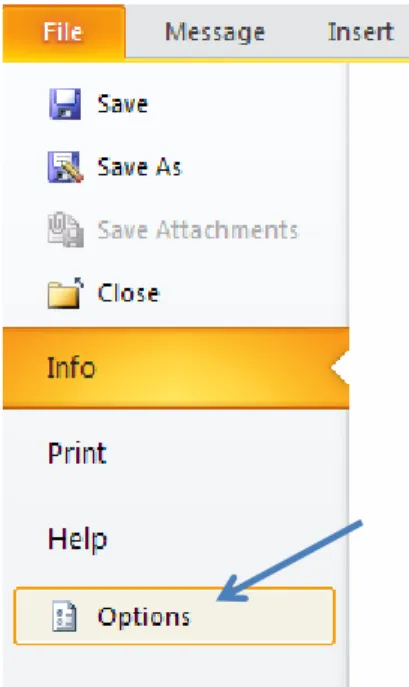
To create and store one or more signatures in Outlook: 1. Click on the File tab.
2. Click on Options.
3. On the “Outlook Options” screen, click on the Signatures button.
Figure 18 - Signatures Options
4. In the “Signatures and Stationery” window, from the E-mail Signature tab, click on the New
button.
5. Type a name for this signature.
6. Click in the Edit signature area and type your signature as you want it to appear.
7. Click the Save button.
8. Repeat the process for additional signatures. Figure 17 - Outlook Options
14 Figure 19 - New Signature
9. Select the signature you want to use as the default from the drop-down lists in the “Choose default signature” area.
10.Click on the OK button to confirm your new signature.
11.Click on the OK button again to exit the “Outlook Options” screen.
Importance Level
To mark a message as “high priority”:
1. Go to the Message tab.
2. Click on High Importance in the Tags group.
Delay Delivery
Outlook allows you to delay delivery of a message until a particular date and time.
Note that Outlook must, however, be up and running in order for the message to be sent out. 1. In the “Message” window, click the Options tab.
2. In the More Options group, click on Delay Delivery. The Properties window opens. Figure 20 - Importance Levels
15 Figure 21 - Delay Delivery
Figure 22 - Delay Delivery Properties
3. In the Delivery Options section, check the “Do not deliver before” checkbox. 4. Enter the date and time after which you want the message delivered.
5. Click on the Close button.
Saving a message as a file
Both sent and received messages can be saved as files
1. Locate and select the message with a single click.
16
3. Click on Save As. The “Save As” window opens.
4. Browse to the location where you want to save the message.
5. By default, the file name is the title of the message. You can change the name.
6. Click on the Save as type: drop-down arrow to change the file format to either text or html.
Figure 24 - Save As Options
Calendar
To view the Calendar, click on the Calendar button in the Navigation Bar. Figure 23 - Save As
17
Creating an Appointment
1. From the Home tab, click on New Appointment.
Figure 26 - New Appointment
Figure 27 - Creating a New Appointment
2. Enter the appointment information in the “Appointment” window.
3. Select how you would like to display the appointment in the Calendar from the Show As
drop-down list in the Options group.
4. Set the reminder notification time from the Reminder drop-down list in the Options group.
5. Click on the Save & Close button in the Actions group.
Creating a Recurring Appointment
18 2. Click on Recurrence in the Options group.
3. In the Appointment Recurrence dialog box, set the pattern and range of recurrence for the appointment.
Figure 29 - Recurrence Settings
4. Click OK. The “Appointment” window now indicates that the appointment is recurring.
Figure 30 - Recurrence in place 5. Click Save & Close.
Scheduling a Meeting
The “Invite Attendees” feature allows you to send an appointment invitation via email to people that you want to attend a meeting.
1. Create an appointment. (See Creating an Appointment.)
2. Click the Invite Attendees button in the Attendees group. Figure 28 - Recurrence
19 Figure 31 - Invite Attendees
3. Click the button.
Figure 32 - Select Attendees The “Select Attendees and Resources” dialog box appears.
20
4. In the Search field, enter the first name of the person, or, the name of the resource that you are looking for.
To search by last name or username, click the More columns radio button, and then enter the last name or username and click the Go button.
5. Double-click the name, or, select the name and then click the Required button. Disregard the Optional and Resources buttons.
6. When you have selected all the attendees, click the OK button. You will be returned to the Appointment (Meeting) window.
7. Click on Scheduling in the Show group to check the schedules of the prospective attendees and see if they are available at the time of the meeting.
Figure 33 - Scheduling
In the Scheduling area, you will see the name of each attendee and the blocks of time when he/she is busy and free during the date period of the meeting. If necessary, you can change the date and/or time of the meeting on this screen.
8. Click the Send button to send the appointment invitation email. To return to your inbox, click on Mail in the Navigation Bar.
21
Notification of New E-mail
Depending on your configuration, Outlook 2010 may display an envelope icon in the Windows taskbar whenever new e-mail, meeting requests, or other items arrive. This is an easy way to determine when you need to deal with new items in your Inbox without having to keep the Outlook window visible on-screen.
You can customize the Desktop Alert Settings from the “Outlook Options” screen.
1. Click on the File tab.
2. Click on Options.
The “Outlook Options” screen appears.
3. In the Message Arrival section, check or uncheck the different options such as “Show an envelope icon in the taskbar” as desired, underneath “When new messages arrive:”.
4. You may click on the Desktop Alert Settings… button to customize the alert display.
22
5. Set how long notification alerts are to be displayed on-screen.
6. Click on the OK button.
Displaying Shared Items
Sharing of items between users must be done in Zimbra before those shared items can be displayed and used in Outlook. For instructions on sharing items, and accepting shared items in Zimbra, refer to pages 25 – 26 in the Faculty and Staff Email Collaboration Suite (Zimbra) booklet.
It is easy to import into Outlook 2010 an item that has been shared in Zimbra.
For example, to view shared calendars:
1. Click on the Add-Ins tab at the far right of the tabs menu.
2. Click on Other User's Mailbox.
3. Type the first name of the user and double click the name from the list.
4. After the import occurs ensure you are viewing the calendar.
5. In the calendar folder list to the right, put a check mark next to the calendar you wish to view. Figure 36 - Add-Ins Tab
23
6. Repeat for each individual you want to add to your calendar view. You can remove the check mark without removing the calendar from your account. It will only remove the view.
Archiving with Outlook
Using Outlook, you can archive items either automatically or manually. AutoArchive is turned off by default, but you can turn it on if you choose.
Specify AutoArchive Settings
1. Click on the folder you would like to archive. (i.e.: Inbox)
2. Go to the Folder tab.
3. Click on AutoArchive Settings.
Figure 37 - AutoArchive Settings The “Folder Properties” screen appears.
4. Select "Archive this folder using these settings:”
5. Specify at which point in time items in the folder are to be automatically archived.
6. Select “Move old items to:”
7. In the path field, enter C:\Users\yourNetID\My Documents\Outlook Files\archive.pst
24
8. Click on Apply.
9. Click on OK.
Manually Archive Items
1. Go to the File tab -> Info.
2. Click on the Cleanup Tools button.
3. Click on Archive…
Figure 39 - Cleanup Tools
The “Archive” screen appears.
4. You may either select “Archive all folders according to their Auto-Archive settings”, or, click a folder in the list, and then select “Archive this folder and all subfolders”.
25
5. Set the appropriate date in the “Archive items older than” field.
Figure 40 - Archive
6. If you want to change the location of your archive file, click the Browse button, and then navigate to the location you want.
7. Click OK.
In your Folder List, you will now see an entry called “Archive Folders”.
Figure 41 - Archive Folder
Clicking the plus sign to the left of “Archive Folders” will expand the Archive Folders list, and reveal any folders that you have archived. The existing folder structure of your mailbox will be maintained. You work with items in your archives the same way that you work with items in your mailbox. You can move individual items into and out of archived folders by dragging and dropping.