by Barry Burd
Beginning
Programming
with Java
™FOR
DUMmIES
‰About the Author
Dr. Barry Burdhas an M.S. in Computer Science from Rutgers University, and a Ph.D. in Mathematics from the University of Illinois. As a teaching assistant in Champaign-Urbana, Illinois, he was elected five times to the university-wide List of Teachers Ranked as Excellent by their Students.
Since 1980, Dr. Burd has been a professor in the Department of Mathematics and Computer Science at Drew University in Madison, New Jersey. When he’s not lecturing at Drew University, Dr. Burd leads training courses for profes-sional programmers in business and industry. He has lectured at conferences in the United States, Europe, Australia, and Asia. He is the author of several articles and books, including Java 2 For Dummiesand Eclipse For Dummies, both published by Wiley Publishing, Inc.
Dedication
For Harriet, Sam and Jennie, Sam and Ruth, Abram and Katie, Benjamin and Jennie
Author’s Acknowledgments
Author’s To-Do List, February 13, 2005:
Item:Send chocolate to Christine Berman — the book’s project editor and copy editor. As anyone who reads Chapter 4 learns, chocolate is one of the most precious commodities on earth. So when I give chocolate, I give it thoughtfully and intentionally.
The only thing that rivals chocolate’s goodness is the benefit of a good night’s sleep. But with a 19-month-old child in the house, Christine probably isn’t getting enough sleep. Even so, she has the time and patience to work on my manuscript. Yes, Christine deserves special thanks.
Item:Have a plaque erected in honor of Steven Hayes, your acquisitions editor at Wiley. While you dragged your heels, Steve kept on insisting that you write this book. (Sure, you wanted a long vacation instead of a big book project, but who cares? He was right; you were wrong.)
Item:Send a thank-you note to tech editor Jim Kelly who helped polish your original work and, miraculously, didn’t make a lot of extra work for you.
Item:Recommend your agent Laura Lewin to other computer book authors. If it weren’t for Laura, you’d still be roaming the book exhibits and looking needy at the technology conferences.
Item:Visit Frank Thornton, Bonnie Averbach, and Herbert Putz at Temple University. Thank them for steering you to a career as a professor. In any other career, you’d have no time left to write. (And by the way, while you’re in Philly, don’t forget to stop for a cheesesteak.)
Item:Send e-mail to Gaisi Takeuti at the University of Illinois, and to William Wisdom and Hughes LeBlanc at Temple University. Thank them for teaching you about Symbolic Logic. It’s made your life as a computer scientist and mathematician much richer.
Item:Spend more time with your family. (Remind them that you’re the guy who wandered around the house before this book project got started.) Renew your pledge to clean up after yourself. Don’t be so highstrung, and finish each sentence that you start. Remember that you can never fully return the love they’ve given you, but you should always keep trying.
Publisher’s Acknowledgments
We’re proud of this book; please send us your comments through our online registration form located at www.dummies.com/register/.
Some of the people who helped bring this book to market include the following:
Acquisitions, Editorial, and Media Development
Project Editor:Christine Berman
Acquisitions Editor: Steve Hayes
Copy Editor:Christine Berman
Technical Editor:Jim Kelly
Editorial Manager:Carol Sheehan
Media Development Manager:Laura VanWinkle
Media Development Supervisor: Richard Graves
Editorial Assistant:Amanda Foxworth
Cartoons:Rich Tennant (www.the5thwave.com)
Composition Services
Project Coordinator:Maridee Ennis
Layout and Graphics:Andrea Dahl, Joyce Haughey, Lynsey Osborn, Melanee Prendergast, Heather Ryan
Proofreaders: Leeann Harney, Jessica Kramer, Carl William Pierce, Dwight Ramsey, TECHBOOKS Production Services
Indexer: TECHBOOKS Production Services
Publishing and Editorial for Technology Dummies
Richard Swadley,Vice President and Executive Group Publisher
Andy Cummings,Vice President and Publisher
Mary Bednarek,Executive Acquisitions Director
Mary C. Corder,Editorial Director
Publishing for Consumer Dummies
Diane Graves Steele,Vice President and Publisher
Joyce Pepple,Acquisitions Director
Composition Services
Gerry Fahey,Vice President of Production Services
Contents at a Glance
Introduction ...1
Part I: Revving Up...7
Chapter 1: Getting Started...9
Chapter 2: Setting Up Your Computer ...23
Chapter 3: Running Programs...33
Part II: Writing Your Own Java Programs ...45
Chapter 4: Exploring the Parts of a Program ...47
Chapter 5: Composing a Program ...65
Chapter 6: Using the Building Blocks: Variables, Values, and Types ...89
Chapter 7: Numbers and Types ...103
Chapter 8: Numbers? Who Needs Numbers?...121
Part III: Controlling the Flow...139
Chapter 9: Forks in the Road ...141
Chapter 10: Which Way Did He Go? ...157
Chapter 11: How to Flick a Virtual Switch...181
Chapter 12: Around and Around It Goes ...195
Chapter 13: Piles of Files: Dealing with Information Overload ...215
Chapter 14: Creating Loops within Loops...233
Chapter 15: The Old Runaround...245
Part IV: Using Program Units ...269
Chapter 16: Using Loops and Arrays ...271
Chapter 17: Programming with Objects and Classes...289
Chapter 18: Using Methods and Variables from a Java Class ...303
Chapter 19: Creating New Java Methods...325
Chapter 20: Oooey GUI Was a Worm ...347
Part V: The Part of Tens ...359
Chapter 21: Ten Sets of Web Links ...361
Chapter 22: Ten Useful Classes in the Java API ...367
Index ...371
Table of Contents
Introduction...1
How to Use This Book ...1
Conventions Used in This Book ...2
What You Don’t Have to Read ...2
Foolish Assumptions ...3
How This Book Is Organized...4
Part I: Revving Up ...4
Part II: Writing Your Own Java Programs ...4
Part III: Controlling the Flow ...5
Part IV: Using Program Units ...5
Part V: The Part of Tens...5
Icons Used in This Book...5
Where to Go from Here...6
Part I: Revving Up ...7
Chapter 1: Getting Started . . . .9
What’s It All About? ...9
Telling a computer what to do...10
Pick your poison...11
From Your Mind to the Computer’s Processor...12
Translating your code...12
Running code ...13
Code you can use ...17
Your Java Programming Toolset ...19
What’s already on your hard drive?...20
JCreator ...21
Chapter 2: Setting Up Your Computer . . . .23
Downloading and Installing the Software You Need ...24
Downloading and installing a Java compiler ...24
Downloading and installing the Java API documentation...26
Downloading and installing the JCreator integrated development environment ...28
Running JCreator for the First Time ...29
Is That All There Is to It? ...31
Chapter 3: Running Programs . . . .33
Running a Canned Java Program...33
Part II: Writing Your Own Java Programs ...45
Chapter 4: Exploring the Parts of a Program . . . .47
Checking Out Java Code for the First Time ...47
Behold! A program!...48
What the program’s lines say ...49
The Elements in a Java Program ...49
Keywords...50
Identifiers that you or I can define ...52
Identifiers with agreed upon meanings ...52
Literals ...53
Punctuation ...54
Comments ...56
Understanding a Simple Java Program...57
What is a method?...57
The main method in a program ...60
How you finally tell the computer to do something ...61
The Java class ...63
Chapter 5: Composing a Program . . . .65
A Program to Echo Keyboard Input...66
Typing and running a program ...68
How the EchoLine program works...70
Getting numbers, words, and other things ...72
Type two lines of code, and don’t look back ...74
Expecting the Unexpected ...74
Diagnosing a problem ...76
What problem? I don’t see a problem...86
Chapter 6: Using the Building Blocks:
Variables, Values, and Types . . . .89
Using Variables ...89
Using a variable ...90
Understanding assignment statements ...92
To wrap or not to wrap? ...93
What Do All Those Zeros and Ones Mean?...94
Types and declarations ...95
What’s the point?...96
Reading Decimal Numbers from the Keyboard...96
Though these be methods, yet there is madness in ’t...97
Methods and assignments ...99
Variations on a Theme...99
Moving variables from place to place...100
Chapter 7: Numbers and Types . . . .103
Using Whole Numbers ...103
Reading whole numbers from the keyboard...105
What you read is what you get ...106
Creating New Values by Applying Operators ...108
Finding a remainder ...108
The increment and decrement operators ...111
Assignment operators ...117
Size Matters ...118
Chapter 8: Numbers? Who Needs Numbers? . . . .121
Characters...122
I digress . . . ...123
One character only, please...125
Variables and recycling...125
When not to reuse a variable ...127
Reading characters ...129
The boolean Type ...131
Expressions and conditions ...132
Comparing numbers; comparing characters...133
The Remaining Primitive Types ...138
Part III: Controlling the Flow ...139
Chapter 9: Forks in the Road . . . .141
Making Decisions (Java if Statements)...143
Looking carefully at if statements ...143
A complete program ...147
Indenting if statements in your code ...150
Variations on the Theme ...150
. . . Or else what? ...151
Packing more stuff into an if statement...153
Some handy import declarations ...155
Chapter 10: Which Way Did He Go? . . . .157
Forming Bigger and Better Conditions...157
Combining conditions: An example ...159
When to initialize? ...161
More and more conditions ...162
Using boolean variables ...165
Mixing different logical operators together ...166
Using parentheses ...168
xi
Table of Contents
Part V: The Part of Tens ...359
Chapter 21: Ten Sets of Web Links . . . .361
The Horse’s Mouth...361
Finding News, Reviews, and Sample Code ...362
Improving Your Code with Tutorials ...362
Finding Help on Newsgroups...362
Reading Documentation with Additional Commentary ...363
Checking the FAQs for Useful Info...363
Opinions and Advocacy ...363
Looking for Java Jobs ...364
Finding Out More about Other Programming Languages ...364
Everyone’s Favorite Sites ...365
Chapter 22: Ten Useful Classes in the Java API . . . .367
Applet ...367
ArrayList...368
File...368
Integer...368
Math ...369
NumberFormat ...369
Scanner...369
String...369
StringTokenizer ...370
System ...370
Index...371
xv
Table of Contents
Introduction
W
hat’s your story?Are you a working stiff, interested in knowing more about the way your company’s computers work?
Are you a student who needs some extra reading in order to survive a beginning computer course?
Are you a typical computer user — you’ve done lots of word processing, and you want to do something more interesting with your computer? Are you a job seeker with an interest in entering the fast-paced, glam-orous, high-profile world of computer programming (or at least, the decent-paying world of computer programming)?
Well, if you want to write computer programs, this book is for you. This book avoids the snobby “of-course-you-already-know” assumptions, and describes computer programming from scratch.
The book uses Java — an exciting, relatively new computer programming lan-guage. But Java’s subtleties and eccentricities aren’t the book’s main focus. Instead, this book emphasizes a process — the process of creating instructions for a computer to follow. Many highfalutin’ books describe the mechanics of this process — the rules, the conventions, and the formalisms. But those other books aren’t written for real people. Those books don’t take you from where you are to where you want to be.
In this book, I assume very little about your experience with computers. As you read each section, you get to see inside my head. You see the problems that I face, the things that I think, and the solutions that I find. Some problems are the kind that I remember facing when I was a novice; other problems are the kind that I face as an expert. I help you understand, I help you visualize, and I help you create solutions on your own. I even get to tell a few funny stories.
How to Use This Book
But I have to be honest. If you don’t understand the bigger picture, writing a program is difficult. That’s true with any computer programming language — not just Java. If you’re typing code without knowing what it’s about, and the code doesn’t do exactly what you want it to do, then you’re just plain stuck.
So in this book, I divide programming into manageable chunks. Each chunk is (more or less) a chapter. You can jump in anywhere you want — Chapter 5, Chapter 10, or wherever. You can even start by poking around in the middle of a chapter. I’ve tried to make the examples interesting without making one chapter depend on another. When I use an important idea from another chap-ter, I include a note to help you find your way around.
In general, my advice is as follows:
If you already know something, don’t bother reading about it.
If you’re curious, don’t be afraid to skip ahead. You can always sneak a peek at an earlier chapter if you really need to do so.
Conventions Used in This Book
Almost every technical book starts with a little typeface legend, and Beginning Programming with Java For Dummies, 2nd Edition is no exception. What follows is a brief explanation of the typefaces used in this book:
New terms are set in italics.
When I want you to type something short or perform a step, I use bold. You’ll also see this computeresefont. I use the computerese font for
Java code, filenames, Web page addresses (URLs), on-screen messages, and other such things. Also, if something you need to type is really long, it appears in computerese font on its own line (or lines).
You need to change certain things when you type them on your own computer keyboard. For example, I may ask you to type
class Anyname
which means you should type classand then some name that you make up on you own. Words that you need to replace with your own words are set in italicized computerese.
What You Don’t Have to Read
If you already know what computer programming is all about, then skip the first half of Chapter 1. Believe me, I won’t mind.
If your computer has a Java compiler, and you’re required to use a devel-opment environment other than JCreator, then you can skip Chapter 2. This applies if you plan to use Eclipse, JBuilder, NetBeans, BlueJ, or a number of other development environments.
Just make sure that your system uses Java 5.0 or later. This book’s exam-ples don’t work on earlier versions of Java, including versions numbered 1.4.2 and below. So if you’re not sure about your computer’s Java version, or if you have leeway in choosing a development environment, your safest move is to read Chapter 3.
And by the way, if Eclipse is your thing, check my Eclipse For Dummies book, published by Wiley.
If you’ve already done a little computer programming, be prepared to skim Chapters 6 through 8. Dive fully into Chapter 9, and see if it feels comfortable. (If so, then read on. If not, re-skim Chapters 6, 7, and 8.) If you feel comfortable writing programs in a language other than Java,
then this book isn’t for you. Keep this book as a memento, and buy my Java 2 For Dummiesbook, also published by Wiley Publishing, Inc.
If you want to skip the sidebars and the Technical Stuff icons, then please do. In fact, if you want to skip anything at all, feel free.
Foolish Assumptions
In this book, I make a few assumptions about you, the reader. If one of these assumptions is incorrect, then you’re probably okay. If all these assumptions are incorrect . . . well, buy the book anyway.
I assume that you have access to a computer. Here’s good news. You can run the code in this book on almost any computer. The only computers you can’t use to run this code are ancient things that are more than eight years old (give or take a few years).
Occasionally, I’m lazy and lapse into Microsoft Windows terminology, but that’s only because so many people run Windows. You can run the latest version of Java on Windows computers, UNIX/Linux computers, and (by some time in 2005) the Macintosh.
I assume that you can navigate through your computer’s common menus and dialog boxes.You don’t have to be a Windows, Unix, or Macintosh power user, but you should be able to start a program, find a file, put a file into a certain directory . . . that sort of thing. Most of the time, when you practice the stuff in this book, you’re typing code on your keyboard, not pointing and clicking your mouse.
3
Introduction
On those rare occasions when you need to drag and drop, cut and paste, or plug and play, I guide you carefully through the steps. But your computer may be configured in any of several billion ways, and my instructions may not quite fit your special situation. So when you reach one of these platform-specific tasks, try following the steps in this book. If the steps don’t quite fit, send me an e-mail message, or consult a book with instructions tailored to your system.
I assume that you can think logically. That’s all there is to computer programming — thinking logically. If you can think logically, you’ve got it made. If you don’t believe that you can think logically, read on. You may be pleasantly surprised.
I assume that you know little or nothing about computer programming. This isn’t one of those “all things to all people” books. I don’t please the novice while I tease the expert. I aim this book specifically toward the novice — the person who has never programmed a computer, or has never felt comfortable programming a computer. If you’re one of these people, you’re reading the right book.
How This Book Is Organized
This book is divided into subsections, which are grouped into sections, which come together to make chapters, which are lumped finally into five parts. (When you write a book, you get to know your book’s structure pretty well. After months of writing, you find yourself dreaming in sections and chapters when you go to bed at night.) The parts of the book are listed here.
Part I: Revving Up
The chapters in Part I prepare you for the overall programming experience. In these chapters, you find out what programming is all about and get your computer ready for writing and testing programs.
Part II: Writing Your Own Java Programs
Part III: Controlling the Flow
Part III has some of my favorite chapters. In these chapters, you make the computer navigate from one part of your program to another. Think of your program as a big mansion, with the computer moving from room to room. Sometimes the computer chooses between two or more hallways, and some-times the computer revisits rooms. As a programmer, your job is to plan the computer’s rounds through the mansion. It’s great fun.
Part IV: Using Program Units
Have you ever solved a big problem by breaking it into smaller, more manage-able pieces? That’s exactly what you do in Part IV of this book. You discover the best ways to break programming problems into pieces and to create solu-tions for the newly found pieces. You also find out how to use other people’s solutions. It feels like stealing, but it’s not.
This part also contains a chapter about programming with windows, buttons, and other graphical items. If your mouse feels ignored by the examples in this book, read Chapter 20.
Part V: The Part of Tens
The Part of Tens is a little beginning programmer’s candy store. In the Part of Tens, you can find lists — lists of tips, resources, and all kinds of interesting goodies.
I added an Appendix on this book’s web site to help you feel comfortable with Java’s documentation. I can’t write programs without my Java programming documentation. In fact, no Java programmer can write programs without those all-important docs. These docs are in Web page format, so they’re easy to find and easy to navigate. But if you’re not used to all the terminology, the documentation can be overwhelming.
Icons Used in This Book
If you could watch me write this book, you’d see me sitting at my computer, talking to myself. I say each sentence several times in my head. When I have an extra thought, a side comment, something that doesn’t belong in the regu-lar stream, I twist my head a little bit. That way, whoever’s listening to me (usually nobody) knows that I’m off on a momentary tangent.
5
Introduction
Of course, in print, you can’t see me twisting my head. I need some other way of setting a side thought in a corner by itself. I do it with icons. When you see a Tip icon or a Remember icon, you know that I’m taking a quick detour.
Here’s a list of icons that I use in this book:
A tip is an extra piece of information — something helpful that the other books may forget to tell you.
Everyone makes mistakes. Heaven knows that I’ve made a few in my time. Anyway, when I think of a mistake that people are especially prone to make, I write about the mistake in a Warning icon.
Sometimes I want to hire a skywriting airplane crew. “Barry,” says the white smoky cloud, “if you want to compare two numbers, use the double equal sign. Please don’t forget to do this.” Because I can’t afford skywriting, I have to settle for something more modest. I create a Remember icon.
Occasionally, I run across a technical tidbit. The tidbit may help you understand what the people behind the scenes (the people who developed Java) were thinking. You don’t have to read it, but you may find it useful. You may also find the tidbit helpful if you plan to read other (more geeky) books about Java.
This icon calls attention to useful material that you can find online. (You don’t have to wait long to see one of these icons. I use one at the end of this introduction!)
Where to Go from Here
If you’ve gotten this far, then you’re ready to start reading about computer programming. Think of me (the author) as your guide, your host, your per-sonal assistant. I do everything I can to keep things interesting and, most importantly, help you understand.
Part I
Revving Up
In this part . . .
Y
ou have to eat before you can cook. You have to wear before you can sew. You have to ride before you can drive. And you have to run computer programs before you can write computer programs.Chapter 1
Getting Started
In This Chapter
What computer programming is all about
Understanding the software that enables you write programs
Revving up to use an integrated development environment
C
omputer programming? What’s that? Is it technical? Does it hurt? Is it politically correct? Does Bill Gates control it? Why would anyone want to do it? And what about me? Can I learn to do it?What’s It All About?
You’ve probably used a computer to do word processing. Type a letter, print it out, and then send the printout to someone you love. If you have easy access to a computer, then you’ve probably surfed the Web. Visit a page, click a link, and see another page. It’s easy, right?
Well, it’s easy only because someone told the computer exactly what to do. If you take a computer right from the factory and give no instructions to this computer, the computer can’t do word processing, the computer can’t surf the Web, it can’t do anything. All a computer can do is follow the instructions that people give to it.
Now imagine that you’re using Microsoft Word to write the great American novel, and you come to the end of a line. (You’re not at the end of a sentence, just the end of a line.) As you type the next word, the computer’s cursor jumps automatically to the next line of type. What’s going on here?
Well, someone wrote a computer program— a set of instructions telling the computer what to do. Another name for a program (or part of a program) is code.Listing 1-1 shows you what some of Microsoft Word’s code may look like.
Listing 1-1:
A Few Lines in a Computer Program
if (columnNumber > 60) { wrapToNextLine(); }
else {
continueSameLine(); }
If you translate Listing 1-1 into plain English, you get something like this:
If the column number is greater than 60, then go to the next line.
Otherwise (if the column number isn’t greater than 60), then stay on the same line.
Somebody has to write code of the kind shown in Listing 1-1. This code, along with millions of other lines of code, makes up the program called Microsoft Word.
And what about Web surfing? You click a link that’s supposed to take you directly to Yahoo.com. Behind the scenes, someone has written code of the following kind:
Go to <a href=http://www.yahoo.com>Yahoo</a>.
One way or another, someone has to write a program. That someone is called a programmer.
Telling a computer what to do
Everything you do with a computer involves gobs and gobs of code. Take a CD-ROM with a computer game on it. It’s really a CD-ROM full of code. At some point, someone had to write the game program:
if (person.touches(goldenRing)) { person.getPoints(10);
}
They know how to break big problems into smaller step-by-step procedures.
They can express these steps in a very precise language.
A language for writing steps is called a programming language,and Java is just one of several thousand useful programming languages. The stuff in Listing 1-1 is written in the Java programming language.
Pick your poison
This book isn’t about the differences among programming languages, but you should see code in some other languages so you understand the bigger picture. For example, there’s another language, Visual Basic, whose code looks a bit different from code written in Java. An excerpt from a Visual Basic program may look like this:
If columnNumber > 60 Then Call wrapToNextLine Else
Call continueSameLine End If
The Visual Basic code looks more like ordinary English than the Java code in Listing 1-1. But, if you think that Visual Basic is like English, then just look at some code written in COBOL:
IF COLUMN-NUMBER IS GREATER THAN 60 THEN PERFORM WRAP-TO-NEXT-LINE
ELSE
PERFORM CONTINUE-SAME-LINE END-IF.
At the other end of the spectrum, you find languages like ISETL. Here’s a short ISETL program, along with the program’s output:
{x | x in {0..100} | (exists y in {0..10} | y**2=x)}; {81, 64, 100, 16, 25, 36, 49, 4, 9, 0, 1};
Computer languages can be very different from one another but, in some ways, they’re all the same. When you get used to writing IF COLUMN-NUMBER IS GREATER THAN 60, then you can also become comfortable writing if (columnNumber > 60). It’s just a mental substitution of one set of symbols for another.
11
Chapter 1: Getting Started
From Your Mind to the
Computer’s Processor
When you create a new computer program, you go through a multistep process. The process involves three important tools:
Compiler:A compiler translates your code into computer-friendly (human-unfriendly) instructions.
Virtual machine:A virtual machine steps through the computer-friendly instructions.
Application programming interface:An application programming inter-face contains useful prewritten code.
The next three sections describe each of the three tools.
Translating your code
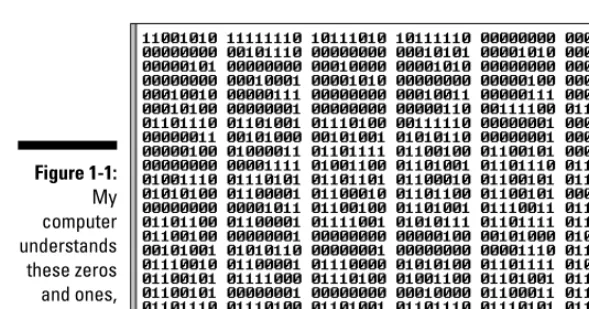
You may have heard that computers deal with zeros and ones. That’s cer-tainly true, but what does it mean? Well, for starters, computer circuits don’t deal directly with letters of the alphabet. When you see the word Starton your computer screen, the computer stores the word internally as 01010011 01110100 01100001 01110010 01110100. That feeling you get of seeing a friendly looking five-letter word is your interpretation of the computer screen’s pixels, and nothing more. Computers break everything down into very low-level, unfriendly sequences of zeros and ones, and then put things back together so that humans can deal with the results.
So what happens when you write a computer program? Well, the program has to get translated into zeros and ones. The official name for the transla-tion process is compilation.Without compilation, the computer can’t run your program.
I compiled the code in Listing 1-1. Then I did some harmless hacking to help me see the resulting zeros and ones. What I saw was the mishmash in Figure 1-1.
The compiled mumbo jumbo in Figure 1-1 goes by many different names:
Most Java programmers call it bytecode.
I often call it a .class file.That’s because, in Java, the bytecode gets stored in files named SomethingOrOther.class.
To visualize the relationship between source code and object code, see Figure 1-2. You can write source code, and then get the computer to create object code from your source code. To create object code, the computer uses a special software tool called a compiler.
Your computer’s hard drive may have a file named javacor javac.exe. This file contains that special software tool — the compiler. (Hey, how about that? The word javacstands for “Java compiler!”) As a Java programmer, you often tell your computer to build some new object code. Your computer fulfills this wish by going behind the scenes and running the instructions in the javacfile.
Running code
Several years ago, I spent a week in Copenhagen. I hung out with a friend who spoke both Danish and English fluently. As we chatted in the public park, I vaguely noticed some kids orbiting around us. I don’t speak a word of Danish, so I assumed that the kids were talking about ordinary kid stuff.
Figure 1-2:
The computer compiles source code to create object code.
Figure 1-1:
My computer understands these zeros and ones, but I don’t.
13
Chapter 1: Getting Started
Then my friend told me that the kids weren’t speaking Danish. “What lan-guage are they speaking?” I asked.
“They’re talking gibberish,” she said. “It’s just nonsense syllables. They don’t understand English, so they’re imitating you.”
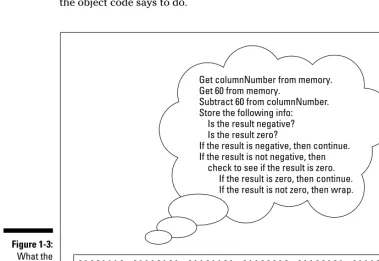
Now to return to present day matters. I look at the stuff in Figure 1-1, and I’m tempted to make fun of the way my computer talks. But then I’d be just like the kids in Copenhagen. What’s meaningless to me can make perfect sense to my computer. When the zeros and ones in Figure 1-1 percolate through my computer’s circuits, the computer “thinks” the thoughts in Figure 1-3.
Everyone knows that computers don’t think, but a computer can carry out the instructions depicted in Figure 1-3. With many programming languages (languages like C++ and COBOL, for example), a computer does exactly what I’m describing. A computer gobbles up some object code, and does whatever the object code says to do.
Figure 1-3:
15
Chapter 1: Getting Started
What is bytecode, anyway?
Look at Listing 1-1, and at the listing’s translationinto bytecode in Figure 1-1. You may be tempted to think that a bytecode file is just a cryptogram — substituting zeros and ones for the letters in words like ifand else. But it doesn’t work that way at all. In fact, the most important part of a bytecode file is the encoding of a program’s logic.
The zeros and ones in Figure 1-1 describe the flow of data from one part of your computer to another. I’ve illustrated this flow in the following figure. But remember, this figure is just an illustration. Your computer doesn’t look at this particular figure, or at anything like it. Instead, your computer reads a bunch of zeros and ones to decide what to do next.
That’s how it works in many programming languages, but that’s not how it works in Java. With Java, the computer executes a different set of instruc-tions. The computer executes instructions like the ones in Figure 1-4.
The instructions in Figure 1-4 tell the computer how to follow other instructions. Instead of starting with Get columnNumber from memory, the computer’s first instruction is, “Do what it says to do in the bytecode file.” (Of course, in the bytecode file, the first instruction happens to be Get columnNumber from memory.)
There’s a special piece of software that carries out the instructions in Figure 1-4. That special piece of software is called the Java virtual machine(JVM). The JVM walks your computer through the execution of some bytecode instruc-tions. When you run a Java program, your computer is really running the Java virtual machine. That JVM examines your bytecode, zero by zero, one by one, and carries out the instructions described in the bytecode.
Many good metaphors can describe the Java virtual machine. Think of the JVM as a proxy, an errand boy, a go-between. One way or another, you have the situation shown in Figure 1-5. On the (a) side is the story you get with most programming languages — the computer runs some object code. On the (b) side is the story with Java — the computer runs the JVM, and the JVM follows the bytecode’s instructions.
Carry out the first instruction in Figure 1-3. Carry out the second instruction in Figure 1-3. Carry out the third instruction in Figure 1-3. Keep going until you encounter an "If."
When you encounter an "If," then decide which of the two alternative paths you should follow. Carry out the instructions in the path that you choose.
Figure 1-4:
Your computer’s hard drive may have a file named javaor java.exe. This file contains the instructions illustrated previously in Figure 1-4 — the instruc-tions in the Java virtual machine. As a Java programmer, you often tell your computer to run a Java program. Your computer fulfills this wish by going behind the scenes and running the instructions in the javafile.
Code you can use
During the early 1980s, my cousin-in-law Chris worked for a computer soft-ware firm. The firm wrote code for word processing machines. (At the time, if you wanted to compose documents without a typewriter, you bought a “computer” that did nothing but word processing.) Chris complained about being asked to write the same old code over and over again. “First, I write a search-and-replace program. Then I write a spell checker. Then I write another search-and-replace program. Then, a different kind of spell checker. And then, a better search-and-replace.”
How did Chris manage to stay interested in his work? And how did Chris’s employer manage to stay in business? Every few months, Chris had to rein-vent the wheel. Toss out the old search-and-replace program, and write a new program from scratch. That’s inefficient. What’s worse, it’s boring.
For years, computer professionals were seeking the Holy Grail — a way to write software so that it’s easy to reuse. Don’t write and rewrite your search-and-replace code. Just break the task into tiny pieces. One piece searches for a single character, another piece looks for blank spaces, a third piece substitutes one letter for another. When you have all the pieces, just assemble these pieces
Your computer
(a)
Your computer Java bytecode
(b)
object code
Jav
aVirtual Machin
e
Figure 1-5:
Two ways to run a computer program.
17
Chapter 1: Getting Started
fea-Your Java Programming Toolset
To write Java programs, you need the tools described previously in this chapter:
You need a Java compiler.(See the section entitled, “Translating your code.”)
You need a Java virtual machine.(See the section entitled, “Running code.”)
You need the Java API.(See the section entitled, “Code you can use.”) You need the Java API documentation. (Again, see the “Code you can
use” section.)
You also need some less exotic tools:
You need an editor to compose your Java programs.
Listing 1-1 contains part of a computer program. When you come right down to it, a computer program is a big bunch of text. So to write a com-puter program, you need an editor— a tool for creating text documents. An editor is a lot like Microsoft Word, or like any other word processing program. The big difference is that an editor adds no formatting to your text — no bold, no italic, no distinctions among fonts. Computer programs have no formatting whatsoever. They have nothing except plain old let-ters, numbers, and other familiar keyboard characters.
You need a way to issue commands.
You need a way to say things like “compile this program” and “run the Java virtual machine.”
Every computer provides ways of issuing commands. (You can double-click icons or type verbose commands in a Run dialog box.) But when you use your computer’s facilities, you jump from one window to another. You open one window to read Java documentation, another window to edit a Java program, and a third window to start up the Java compiler. The process can be very tedious.
In the best of all possible worlds, you do all your program editing, documenta-tion reading, and command issuing through one nice interface. This interface is called an integrated development environment(IDE).
A typical IDE divides your screen’s work area into several panes — one pane for editing programs, another pane for listing the names of programs, a third pane for issuing commands, and other panes to help you compose and test programs. You can arrange the panes for quick access. Better yet, if you change the information in one pane, the IDE automatically updates the information in all the other panes.
19
Chapter 1: Getting Started
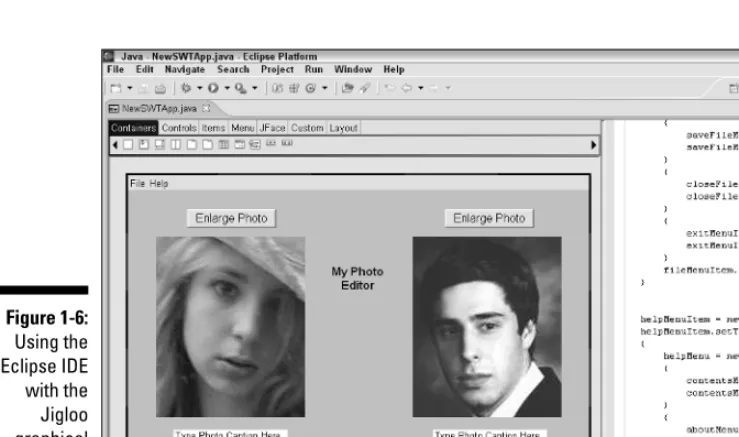
Some fancy environments give you point-and-click, drag-and-drop, plug-and-play, hop-skip-and-jump access to your Java programs. If you want your program to display a text box, then you click a text box icon and drag it to the workspace on your screen.
Figure 1-6 illustrates the use of a drag-and-drop IDE. In Figure 1-6, I create a program that displays two images, two text fields, and two buttons. To help me create the program, I use the Eclipse IDE with the Jigloo graphical plug-in. (For a taste of Eclipse, visit www.eclipse.org. For more info on the neato Jigloo graphical user interface builder, check out www.cloudgarden.com.)
An IDE helps you move seamlessly from one part of the programming endeavor to another. With an IDE, you don’t have to worry about the mechanics of edit-ing, compiledit-ing, and running a Java virtual machine. Instead, you can worry about the logic of writing programs. (Wouldn’t you know it? One way or another, you always have something to worry about!)
What’s already on your hard drive?
You may already have some of the tools you need for creating Java programs. Here are some examples:
Figure 1-6:
Most versions of Windows come with a Java virtual machine.Look for a file named java.exein your \windows\system32directory.
Most computers running Mac OS X come with a Java compiler, a Java virtual machine, and a Java API.
Some IDEs come with their own Java tools.For example, when you buy the Borland JBuilder IDE you get a compiler, a Java virtual machine, and a copy of the Java API. When you download the free Eclipse IDE you get a Java compiler, but no Java virtual machine and no Java API.
You may already have some Java tools, but your tools may be obsolete. This book’s examples use a relatively new version of Java — a version released in September 2004. Even computers and software sold in 2005 may not be up to date with the latest Java features. So if you use the tools that come with your computer, or if you use a commercial product’s software tools, some of this book’s examples may not run.
The safest bet is to download tools afresh from the Sun Microsystems Web site. To get detailed instructions on doing the download, see Chapter 2.
Many of this book’s examples don’t run on “older” versions of Java, and by “older” I mean versions created before the fall of 2004. If you have trouble running the programs in this book, check to make sure that your version of Java is numbered 5.0, 5.1, or something like that. Older versions (with version numbers like 1.4 or 1.4.2) just don’t cut the muster.
JCreator
The programs in this book work with any IDE that can run Java 5.0. You can even run the programs without an IDE. But to illustrate the examples in this book, I use JCreator LE (Lite Edition). I chose JCreator LE over other IDEs for several reasons:
JCreator LE is free.
Among all the Java IDEs, JCreator represents a nice compromise between power and simplicity.
Unlike some other Java IDEs, JCreator works with almost any version of Java, from the ancient version 1.0.2 to the new-and-revolutionary ver-sion 5.0.
JCreator LE is free. (It’s worth mentioning twice.)
21
Chapter 1: Getting Started
This book’s Web site has a special edition of JCreator LE — a version that’s customized especially for Beginning Programming with Java For Dummies,2nd Edition readers! For details on downloading and installing the special edition of JCreator, see Chapter 2.
Chapter 2
Setting Up Your Computer
In This Chapter
Downloading and installing a Java compiler
Downloading and installing an integrated development environment
Configuring the integrated development environment
Y
ou’ve arrived home, fresh from your local computer store. You have a brightly colored box (a box with software in it). You tear open the box, take out a CD-ROM, and put the CD-ROM into your computer. In a few minutes (or maybe a few hours), you’re off and running. The software is installed and you’re typing your heart out. This scenario is typical for software that you buy at your neighborhood computer store.But what about the software you need to begin writing your own computer programs? This book tells you how to write Java programs, but before you can write Java programs, you need several pieces of software. You need a Java compiler and a Java virtual machine (JVM, for short). You also need the Java API documentation and an integrated development environment (IDE).
You can get this software in a brightly colored box, but it’s easier (and cheaper) to download the software from the Web. In fact, all the software you need is free. It comes as a few downloads — some from Sun Microsystems, and another from this book’s Web site. Who needs another brightly colored box anyway?
Downloading and Installing
the Software You Need
If you’ve paid for this book, and you already have a working computer, you’ve already spent all the money you need to spend. All the software you need for learning Java is free for the downloading.
Downloading and installing
a Java compiler
When I want the weather to be sunny, I bring an umbrella to work. Bringing an umbrella tells the weather gods to do the opposite of whatever Barry anticipates. The same kind of thing happens with the Java Web site. If I want someone to redesign the Web site, I just write an article describing exactly how to navigate the site. Sometime between the time of my writing and the date of the article’s publication, the people at Sun Microsystems reorganize the entire Web site. It’s as dependable as the tides.
Anyway, the Java Web site is in a constant state of flux. That’s why I don’t put detailed instructions for navigating the Java Web site in this book. Instead, I offer some timeless tips.
If this section’s “timeless tips” aren’t specific enough for you, visit this book’s Web site at http://www.dummies.com/go/bpjavafd. At the Web site, you can find up-to-date instructions on getting the software you need.
What number comes after 1.4.2_06?
The numbering of Java’s versions is reallycon-fusing. First comes Java 1.0, then Java 1.1, then Java 2 Standard Edition 1.2 (J2SE 1.2). Yes, the “Java 2” numbering overlaps partially with the “1.x” numbering.
Next come versions 1.3 and 1.4. After version 1.4.1 comes version 1.4.2 (with intermediate stops at versions like 1.4.1_02). After 1.4.2_06, the next ver-sion is verver-sion 5.0. (That’s no misprint. Verver-sion 5.0 comes immediately after the 1.4 versions, although
some people use the term “Java 1.5” when they mean “Java 5.0.”)
• With the online installation, you don’t download a big setup file. Instead, you download a teeny little setup file. Then you download (and discard) pieces of the big 50MB file as you need them. Using online installation saves you 50MB of hard drive space. But, if you want to install the same version of the JDK a second time, you have to redo the whole surf/click/download process.
Why would anyone want to install the same version of the JDK a second time? Typically, I have two reasons. Either I want to install the software on a second computer, or I mess something up and have to uninstall (and then reinstall) the software.
4. Download whichever file you chose in Step 3.
5. Execute the file that you’ve downloaded.
With offline or online installation you download an executable file onto your computer’s hard drive. Execute this file to begin the JDK installation.
6. During the JDK installation, read the dialog boxes and wizards. Watch for the name of the directory in which the JDK is being installed.
On my computer, that directory’s name is c:\Program Files\Java\ jdk1.5.0_01, but on your computer, the name may be slightly different. This directory is called your Java homedirectory. (Depending on whom you ask, this may also be called the JDK homedirectory.) Write down the directory’s name, because you’ll need that name for stuff that comes later in this chapter.
If you don’t catch the Java home directory’s name during the JDK instal-lation, then search your computer’s hard drive for something named jdksomething-or-other. Write down the directory’s name and keep the name in your back pocket.
That’s how you put the Java compiler on your computer. But wait! Don’t walk away from your Web browser yet. At the same java.sun.com Web site, you can find the precious Java API documentation.
Downloading and installing the
Java API documentation
I introduced Java’s API documentation in Chapter 1. Without access to the API documentation, you’re a little lost puppy. With access to the documenta-tion, you’re a powerful Java programmer.
1. As in the previous section, visit java.sun.com/j2seand look for a Download J2SE link.
2. Find a link to the API documentation for the version of Java that you just downloaded.
The way the Sun Microsystems Web site is currently set up, it’s not too hard to find the API documentation. In fact, the download links for the JDK and the Java API documentation are on the same page. This may not be true by the time you read Beginning Programming with Java For Dummies, but it’s certainly true while I’m writing this book.
The download page has a big table with the words Download Java 2 on it. Scroll down in the table, and you find a J2SE Documentation heading with an option to download the docs.
A language like Java comes with many sets of docs. The documentation that you want is called the “API documentation,” or the “J2SE documen-tation.” If you see links to the “Java Language Specification” or the “Java Virtual Machine Specification,” just ignore these links for now.
3. Download the API documentation.
When the download is finished, you have a big ZIP file on your computer’s hard drive. If you use Windows XP or some other ZIP-friendly operating system, you can just double-click the ZIP file’s icon. Your operating system opens the file as if it’s an ordinary directory.
If you have Windows 98, Windows 2000, or some other system that doesn’t recognize ZIP files, you need an additional archive handling program. You can find a bunch of these programs by searching on the Web. 4. Extract the API documentation to your Java home directory.
The downloaded ZIP file is like a directory on your hard drive. The file contains another directory named docs. Just copy that docsdirectory (and all of its contents) to your Java home directory. By the time you’re done, you have a Java home directory (with a name like jdk1.5.0_01) and a docsdirectory immediately inside the Java home directory. (See Figure 2-1.)
I give this docsdirectory a special name. I call it your JavaDoc directory.
Figure 2-1:
The docs subdirectory of your Java home directory.
27
Chapter 2: Setting Up Your Computer
5. From My Computer navigate to whatever directory contains extracted contents of JCreator’s installation file.
The directory contains a file named Setup.exe(or just plain Setup). 6. Double-click the Setup file’s icon.
In response, the computer fires up JCreator’s installation wizard. 7. Follow the instructions in JCreator’s installation wizard.
In the end, the installation wizard may offer to launch JCreator for you. (Alternatively, you can scan your Start menu for a new JCreator folder.) One way or another, you start running JCreator.
Running JCreator for the First Time
The first time you run JCreator, the program asks for some configuration information. Just follow these steps:
1. If you haven’t already done so, launch JCreator.
The JCreator Setup Wizard appears on your screen. The wizard’s first page is for File Associations.
2. Accept the File Associations defaults and click Next.
The wizard’s next page (the JDK Home Directory page) appears. 3. Look at the text field on the JDK Home Directory page. Make sure
that this field displays the name of your Java home directory. (See Figure 2-2.)
Figure 2-2:
Confirming the location of your Java home directory.
29
Chapter 2: Setting Up Your Computer
If the wrong directory name appears in the text field, just click the Browse button and navigate to your computer’s Java home directory. For information on your computer’s Java home directory, see Step 6 of this chapter’s “Downloading and installing a Java compiler” section. 4. When you’re happy with the name in the home directory text field,
click Next.
The wizard’s last page (the JDK JavaDoc Directory page) appears. 5. Look at the text field on the JDK JavaDoc Directory page. Make sure that this field displays the name of your JavaDoc directory. (See Figure 2-3.)
Normally, your JavaDoc directory’s name is the name of your Java home directory, followed by \docs. For information on your computer’s JavaDoc directory, see Step 4 of this chapter’s “Downloading and installing the Java API documentation” section.
If the wrong directory name appears in the text field, just click the Browse button and navigate to your computer’s JavaDoc directory. If you do anything wrong in Steps 2 through 5, don’t fret. You can correct your mistake later. See this book’s Web site for details.
6. Click Finish.
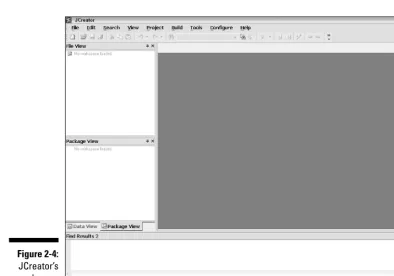
At this point, the JCreator work area opens. (See Figure 2-4.) Figure 2-3:
In JCreator’s help files, the stuff in Figure 2-4 is called the workspace,not the work area.But elsewhere in these help files, JCreator reuses the word work-spaceto mean something entirely different. To avoid any confusion, I use two different terms. I use work areafor the stuff in Figure 2-4, and I use workspace for that other, entirely different thing. (I explain that entirely different thing in Chapter 3.)
Is That All There Is to It?
If you’re reading this paragraph, you’ve probably followed some of the instructions in this chapter — instructions for installing a Java compiler, the Java API documentation, and the JCreator IDE on your computer. So the burn-ing question is, have you done the installation correctly? The answer to that question lies in Chapter 3, because in that chapter, you use these tools to run a brand new computer program.
Figure 2-4:
JCreator’s work area.
31
Chapter 2: Setting Up Your Computer
Chapter 3
Running Programs
In This Chapter
Compiling and running a program
Working with a workspace
Editing your own Java code
I
f you’re a programming newbie, for you, running a program probably means clicking a mouse. You want to run Internet Explorer. So you double-click the Internet Explorer icon, or maybe you choose Internet Explorer from the Start menu. That’s all there is to it.When you create your own programs, the situation is a bit different. With a new program, the programmer (or someone from the programmer’s company) creates the icons. Before that, a perfectly good program may not have an icon at all. So what do you do with a brand new Java program? How do you get the program to run? This chapter tells you what you need to know.
Running a Canned Java Program
The best way to get to know Java is to do Java. When you’re doing Java, you’re writing, testing, and running your own Java programs. This section prepares you by describing how you run and test a program. Instead of writing your own program, you run a program that I’ve already written for you. The program calculates your monthly payments on a home mortgage loan.
The mortgage-calculating program doesn’t open its own window. Instead, the program runs in JCreator’s General Output pane. (See Figure 3-1.) A program that operates completely in this General Output pane is called a text-based program.
Running the mortgage program is easy. Here’s how you do it:
1. Make sure that you’ve followed the instructions in Chapter 2 — instructions for installing the JDK and configuring JCreator.
Thank goodness! You don’t have to follow those instructions more than once.
2. Launch JCreator.
The big JCreator work area stares at you from your computer screen. (See Figure 3-2.)
If this is your first time running JCreator, you don’t see JCreator’s work area. Instead you see the JCreator Setup Wizard. To get past the Setup Wizard, see the instructions in Chapter 2.
3. In JCreator’s menu bar, choose File➪Open Workspace from the main menu.
Don’t choose File➪Open.Instead, choose File➪Open Workspace.
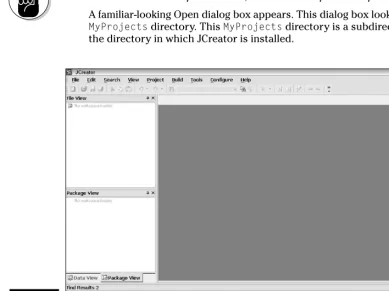
A familiar-looking Open dialog box appears. This dialog box looks in your MyProjectsdirectory. This MyProjectsdirectory is a subdirectory of the directory in which JCreator is installed.
Figure 3-2:
An empty work area.
35
Chapter 3: Running Programs
In this book’s special edition of JCreator the MyProjectsdirectory has subdirectories named Chapter03_Example01, Chapter04_Listing01 and so on. The MyProjectsdirectory also has files with names like Chapter03and Chapter04. If you set your computer so that it doesn’t hide file extensions, then the names of the files are Chapter03.jcw, Chapter04.jcw, and so on. (See the sidebar entitled “Those pesky file-name extensions.”)
4. Select the file named Chapter03(or Chapter03.jcw), and then click Open.
Clicking Open may coax out a message box asking if you want to “Save the workspace modifications?” If so, click Yes. Clicking Open may coax out another box asking if you want to “. . . close all document Windows?” If so, click Yes.
JCreator divides things into workspaces.Each workspace is further subdivided into projects.To organize this book’s examples, I made a workspace for each chapter, and then made a project for each complete Java program. When you open Chapter03.jcw, you get my Chapter03 workspace — a workspace that contains two projects. The project’s names are Chapter03_Example01and Chapter03_Listing01. That’s why, in JCreator’s File View pane, you see a Chapter03tree with branches labeled Chapter03_Example01and Chapter03_Listing01. (See Figure 3-3.) In MyWorkspace.jcw, the extension .jcwstands for “JCreator workspace.”
5. In the File View’s tree, right-click the Chapter03_Example01branch. In the resulting context menu, choose Sets as Active Project. (See Figure 3-3.)
Choosing Sets as Active Project makes Chapter03_Example01the active project.
Figure 3-3:
In JCreator, only one project at a time can be the active project. To run a particular program, the program’s code has to be in whatever project is currently active. In JCreator’s File View, you can tell which project is active by looking for the project whose name is boldface. (Refer to Figure 3-3.) On some systems, the active project’s name is a hazy, light-gray boldface.
If a particular program isn’t in the active project, you can’t run that pro-gram, but you can do some other things with that program. For example, you can see the program in one of JCreator’s panes, make changes to the program, save the program, and so on. For this reason, it’s really easy to get confused and forget which project is active. So always keep the active project in the forefront of your mind. If your code doesn’t do what you think it should do, check to make sure that the project you want to run is the active project.
6. Choose Build➪Compile Project from the main menu.
Choosing Compile Project does exactly what it says. It compilesthe pro-ject’s code. (To find out what compilemeans, see Chapter 1.)
After some pleasant chirping sounds from your hard drive, JCreator’s Build Output pane displays a Process completedmessage. (The Build Output pane appears in the lower portion of JCreator’s work area. See Figure 3-4.)
7. Choose Build➪Execute Project from the main menu.
When you choose Execute Project, the computer runs the project’s code. (In this example, the computer runs a Java program that I wrote.) As part of the run, the message How much are you borrowing?appears in JCreator’s General Output pane. (The General Output pane and the Build Output pane share the lower portion of JCreator’s work area. Refer to Figure 3-1.)
8. Click anywhere inside JCreator’s General Output pane, and then type a number, like 100000.00, and press Enter.
Figure 3-4:
The compiling process is completed.
37
Chapter 3: Running Programs
When you type a number in Step 8, don’t include your country’s currency symbol. (U.S. residents, don’t type a dollar sign.) Things like $100000.00 cause the program to crash. You see a NumberFormatException mes-sage in the General Output pane.
After you press Enter, the Java program displays another message (What’s the interest rate?) in JCreator’s General Output pane. 9. In response to the interest rate question, type a number, like 5.25, and
press Enter.
After you press Enter, the Java program displays another message (How many years . . . ?) in JCreator’s General Output pane. 10. Type a number, like 30, and press Enter.
In response to the numbers that you’ve typed, the Java program dis-plays a monthly payment amount. Again, refer to Figure 3-1.
Disclaimer: Your local mortgage company charges more than the amount that my Java program calculates. (A lot more.)
When you type a number in Step 10, don’t include a decimal point. Things like 30.0 cause the program to crash. You see a NumberFormatException message in the General Output pane.
Occasionally you decide in the middle of a program’s run that you’ve made a mistake of some kind. You want to stop the program’s run dead in its tracks. To do this, choose Tools➪Stop Tool from the main menu.
If you follow this section’s instructions, and you don’t get the results that I describe, there are three things you can try. I list them in order from best to worst:
Check all the steps to make sure you did everything correctly.
Send email to me at [email protected]. If you describe what happened, I can probably figure out what went wrong and tell you how to correct the problem.
Panic.
Typing and Running Your Own Code
4. In the File View pane, right-click MyWorkspace. Then choose Add new Project from the context menu that appears, as shown in Figure 3-5.
JCreator’s Project Wizard opens. (See Figure 3-6.)
5. On the wizard’s Project Template page, select the Empty Project icon, and then click Next.
After clicking Next, you see the wizard’s Project Paths page, as shown in Figure 3-7.
6. In the Name field, type MyFirstProject.
You can add blank spaces, making the name My First Project, but I don’t recommend it. In fact, having a blank space in any name (a workspace name, a project name, a filename, or whatever) is generally a bad idea. 7. Make sure that the Add to Current Workspace radio button is
selected, and then click Finish.
If you click Next instead of Finish, you see some other options that you don’t need right now. So to avoid any confusion, just click Finish. Figure 3-6:
The Project Wizard’s Project Template page.
Figure 3-5:
Clicking Finish brings you back to JCreator’s work area, with MyFirst Projectset in bold. The bold typeface means that MyFirstProjectis the active project. The next step is to create a new Java source code file. 8. In the File View pane, right-click MyFirstProject. Then choose Add➪
New Class from the context menu that appears, as shown in Figure 3-8.
JCreator’s Class Wizard opens. (See Figure 3-9.)
Like every other windowed environment, JCreator provides many ways to accomplish the same task. Instead of right-clicking MyFirstProject and choosing Add➪New Class, you can start at the menu bar and choose File➪New➪Class. But right-clicking a project has a small benefit. If you right-click the name of a project, the newly created class is without a doubt in that project. If you use the menu bar instead, the newly created class goes in whichever project happens to be the active project. So if your workspace contains many projects, you can accidentally put the new class into the wrong project.
Figure 3-8:
Getting JCreator to add a new class.
Figure 3-7:
The Project Wizard’s Project Paths page.
41
Chapter 3: Running Programs
9. In the Class Wizard’s Name field, type the name of your new class.
In this example, use the name MyFirstJavaClass, with no blank spaces between any of the words in the name. (Refer to Figure 3-9.)
The name in the Class Wizard must not have blank spaces. And the only allowable punctuation symbol is the underscore character (_). You can name your class MyFirstJavaClassorMy_First_Java_Class, but you can’t name it My First Java Class, and you can’t name it JavaClass,MyFirst. 10. Put a checkmark in the Generate Main Method check box.
I created most of this book’s examples without putting a checkmark in the Generate Main Method check box. But for this example, just this once, putting a checkmark in the Generate Main Method check box is very helpful.
11. Skip everything in the Class Wizard except the Name field and the Generate Main Method check box. (In other words, click Finish.)
Clicking Finish brings you back to JCreator’s work area. Now the Editor pane has a tab named MyFirstJavaClass.java.For your convenience, the MyFirstJavaClass.java tab already has some code in it. (See Figure 3-10.)
Figure 3-10:
JCreator writes some code in the Editor pane.
Figure 3-9:
12. Replace an existing line of code in your new Java program.
Type a line of code in JCreator’s Editor pane. Replace the line // TODO: Add your code here
with the line
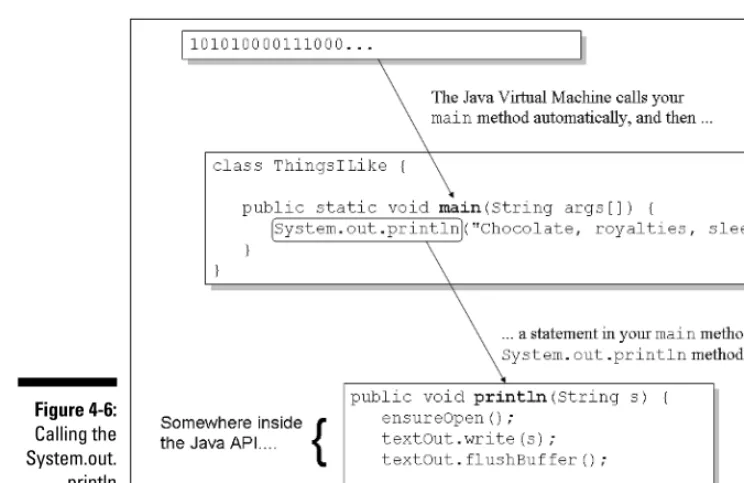
System.out.println(“Chocolate, royalties, sleep”);
Copy the new line of code exactly as you see it in Listing 3-1. • Spell each word exactly the way I spell it in Listing 3-1. • Capitalize each word exactly the way I do in Listing 3-1. • Include all the punctuation symbols — the dots, the quotation
marks, the semicolon, everything.
Listing 3-1:
A Program to Display the Things I Like
class MyFirstJavaClass {
/**
* Method main *
*
* @param args *
*/
public static void main(String[] args) {
System.out.println(“Chocolate, royalties, sleep”); }
}
Java is case-sensitive, which means that system.out.printLnisn’t the same as System.out.println. If you type system.out.printLn, you’re program won’t work. Be sure to capitalize your code eXactLy as it is in Listing 3-1.
13. From the menu bar, choose Build➪Compile Project.
If you typed everything correctly, you see the comforting Process com-pletedmessage, with no error messages, at the bottom of JCreator’s work area. The text appears in JCreator’s Build Output pane in the lower portion of JCreator’s work area. (Refer to Figure 3-4.)
When you choose Build➪Compile Project, JCreator compiles whichever project is currently active. Only one project at a time is active. So if your workspace contains several projects, make sure that the project you want to compile is currently the active project.
43
Chapter 3: Running Programs
14. Check for error messages at the bottom of JCreator’s work area.
If, in Step 12, you don’t type the code exactly as it’s shown in Listing 3-1, then in this step you get error messages in JCreator’s Task List pane. (Like so many other things, the Task List pane appears in the lower portion of JCreator’s work area. See Figure 3-11.)
Each error message refers to a specific place in your Java code. To jump the cursor to that place in the Editor pane, double-click the message in the Task List pane. Compare everything you see, character by character, with my code in Listing 3-1. Don’t miss a single detail, including spelling, punctuation, and uppercase versus lowercase.
15. Make any changes or corrections to the code in the Editor pane. Then repeat Steps 13 and 14.
When at last you see the Process completedmessage with no error messages, you’re ready to run the program.
16. From the menu bar choose Build➪Execute Project.
That does the trick. Your new Java program runs in JCreator’s General Output pane. If you’re running the code in Listing 3-1, you see the Chocolate, royalties, sleepmessage in Figure 3-12. It’s like being in heaven!
Figure 3-12:
Running the program in Listing 3-1.
Figure 3-11:
Part II
Writing Your Own
Java Programs
In this part . . .
Chapter 4
Exploring the Parts of a Program
In This Chapter
Identifying the words in a Java program
Using punctuation and indentation
Understanding Java statements and methods
I
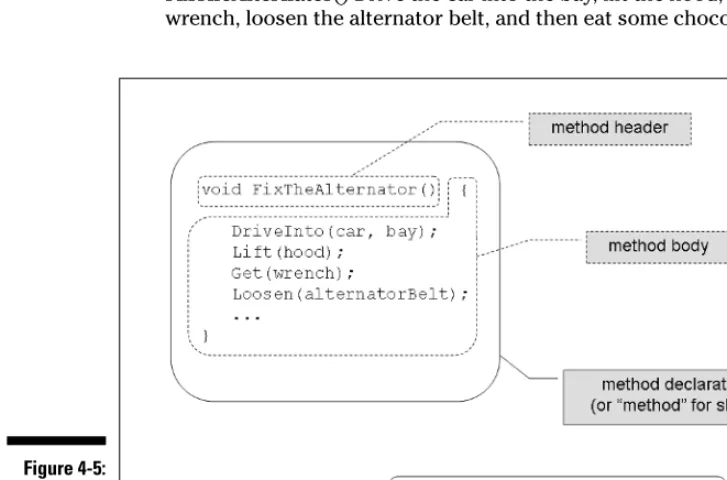
work in the science building at a liberal arts college. When I walk past the biology lab, I always say a word of thanks under my breath. I’m thankful for not having to dissect small animals. In my line of work, I dissect computer programs instead. Computer programs smell much better than preserved dead animals. Besides, when I dissect a program, I’m not reminded of my own mortality.In this chapter, I invite you to dissect a program with me. I have a small pro-gram, named ThingsILike. I cut apart the program, and carefully investigate the program’s innards. Get your scalpel ready. Here we go!
Checking Out Java Code
for the First Time
I have a confession to make. The first time I look at somebody else’s computer program, I feel a bit queasy. The realization that I don’t understand some-thing (or many some-things) in the code makes me nervous. I’ve written hundreds (maybe thousands) of programs, but I still feel insecure when I start reading someone else’s code.
The truth is, learning about a computer program is a bootstrapping experience. First I gawk in awe of the program. The