Operation
Installation
Programming
Installation
The software and hardware described in this document may be used or copied only in accordance
with the terms of the license pertaining to said software or hardware.
Reproduction, publication or duplication of this manual, or any part thereof, in any manner,
me-chanically, electronically, or photographically is prohibited without permission of the Matsushita
Communication Industrial Co., Ltd. (MCI).
TABLE OF CONTENTS
Important Information
O-4
Overview
O-4
In This Manual
O-5
Icons and Abbreviations ... O-5
Introduction
O-6
Important Information Before Use ... O-6 Parts and Features ... O-8 Adjusting Display Contrast and Volume Level ... O-10
LCD Display Contrast (Telephones with Alphanumeric LCD Only) ... O-10 Ringing Volume ... O-10 Speaker Volume ... O-10 BGM Volume ... O-10
Making an Exchange Line Call
O-11
Making a Call ... O-11
Using the LINE Key ... O-11 Line Group Dial ... O-12 Prime Line Preference ... O-12 Direct Exchange Line Access ... O-12 Dial Exchange Line Access ... O-13 On-Hook Dial ... O-13
Last Number Redial ... O-14 Save Dial ... O-14 Speed Dial ... O-15
ONE-TOUCH Key (Personal Speed Dial) ... O-15 System Speed Dial ... O-16
LCR ... O-16
OPERATION
Making an Intercom Call
O-17
Tone Call ... O-17 Voice Call ... O-17 Paging ... O-18 Message Wait ... O-19 Call Wait (Camp-On) ... O-21Answering a Call
O-22
Auto Answer ... O-22 Handsfree Answer Back, Intercom ... O-22 Handsfree Answer, Speakerphone ... O-22 Call Pick-up ... O-23
Group Call Pick-up ... O-23 Direct Call Pick-up ... O-23
Hold and Transfer
O-24
Exclusive Hold ... O-24
Exchange Line Hold ... O-24 Intercom Hold ... O-24
System Hold ... O-25 Supervised Transfer ... O-25 Unsupervised Transfer ... O-25 Trunk-to-Trunk ... O-26 External Conference ... O-26 Intercom Three Party Conference ... O-27 Intercom Transfer ... O-27
Other Useful Features
O-28
FF Key ... O-28 Privacy Release ... O-29 Sending a Timed Break Signal ... O-29 Alarm ... O-29 No-Answer ... O-30
DND (Do-Not-Disturb) ... O-30 Absence Message ... O-30 Call Forward ... O-31 Follow Me ... O-33 Manager/Secretary Working ... O-34
Call Barring ... O-35
Assignment
O-37
Extension Assignment ... O-37FF Key ... O-37 One-Touch Key (Personal Speed Dial) ... O-39
Administrator’s Phone Assignment ... O-41
Extension Name ... O-41 System Speed Dial ... O-42 Absence Message ... O-44 Call Wait, Message Wait ... O-44 ID Code for Station Lock Out ... O-45 Changing Date and Time ... O-46
Alphanumeric Character Assignment ... O-47
Operator Features
O-48
Operator’s Phone ... O-48 Day / Night Mode Switching ... O-48
Temporary Mode Change (Lunch Mode) ... O-49
Recall Timer for Operator ... O-49 DSS Console ... O-49
Optional Features
O-50
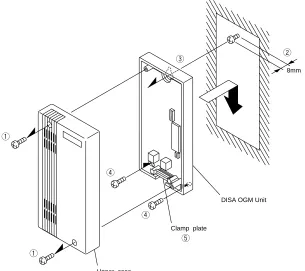
External Paging ... O-50 Power Failure ... O-50 Sensor ... O-50 Doorphone ... O-51 Door Opener ... O-51 Background Music (BGM) ... O-52 Headset Connection ... O-52 DISA OGM Unit (VAU) ... O-53 Call Logging ... O-54
Please observe the following guidelines for installation and use.
1. Install the main unit properly.
(For details about installation, refer to Installation Manual.)
2. Do not use the telephone near sources of electric ‘noise’ such as fluorescent lamps, air conditioners, washing machines, TV sets or radios.
3. Telephone should not be exposed to direct sunlight, extreme temperature, moisture, strong vibrations, or greasy or dusty environments.
Operating temperature : 0°C to 40°C Operating humidity : 30% to 80%
4. Never attempt to insert wires, pins, or similar objects in the vents or openings of the telephone set. 5. Never clean the telephone with benzene, paint thinner of other solvent materials to clean. Instead,
wipe with a soft cloth.
6. Do not move the unit without consulting your dealer/installer.
7. Installation of the telephone system close to welding equipment or a broadcasting material may cause interference.
WARNING
Do not remove the cover of the Central Control Unit or key telephone. It may cause electrical shock and expose equipment operating at high temperature.
For installation and wiring, contact your dealer. IMPORTANT
1) This is a class A product. In domestic environment this product may cause radio interference in which case the user may be required to take adeguate measures.
2) This apparatus must be installed in accordance with BS6701 and general approval
NS/G/23/L/100005. This is a condition of the approval and any installation which does not comply with the above will invalidate the approval status of that particular installation.
3) This equipment requires a maintenance contract issued by a maintainer holding BSI approval. This is a statutory requirement.
Overview
Thank you for purchasing the Panasonic SBS Key Telephone System. The SBS is designed, using state-of-the-art technology, to provide you with a telephone system perfectly tailored to the needs of today’s business communications.
The SBS allows connection of both key telephones and Single Line Telephones. The system ranges from an initial configuration of 2 lines and 8 extensions up to a maximum of 4 lines and 16 extensions to meet the special needs of small businesses, with optional expansion cards.
Panasonic offers you a valuable feature in a system for this size: hybrid ports in the initial configuration. This allows you to connect Single Line Telephones. With this feature, your answering machines, modems, fax machines, etc., can easily be integrated into the system.
This manual consists of the following chapters:
Introduction:
Describes important information for the system. Before using the system, please read this chapter.
Making an Exchange Line Call:
Describes useful features for when you make an Exchange Line call.
Making an Intercom Call:
Describes useful features for when you make an intercom call.
Answering a Call:
Describes useful features for when you answer a call.
Hold and Transfer:
Describes useful features for when you want to transfer a call to an extension.
Other Useful Features:
Describes additional useful features.
In This Manual
Icons and Abbreviations
Listed below are icons used in this manual:
FF Indicates the feature which can be programmed to an FF key.
PGM Indicates the feature requires system programming. Refer to “Programming Instructions” for more details.
Listed below are abbreviations used in this manual: ABM ... Absence Message
BGM ... Background Music CCU ... Central Control Unit CDR ... Calling Detail Record
(Same as Call Logging) CF ... Call Forward
CW ... Call Wait
DISA ... Direct Inward System Access DND ... Do-Not-Disturb
DPSLT ... Dial Pulse Type SLT DSS ... Direct Station Selector DT ... Dial Tone
DTMF ... Dual Tone Multi-Frequency EXT ... Extension
FF key ... Flexible Function key IDT ... Intercom Dial Tone INT ... Intercom
LCD ... Liquid Crystal Display LCR ... Least Cost Routing LED ... Light Emitting Diode LRB ... Loud Ringing Bell
MCO ... Pooled Trunk (Line) Access MFSLT ... DTMF (Tone) Type SLT MOH ... Music On Hold
OGM ... Out Going Message ODT ... Exchange Line Dial Tone PFU ... Power FailureTransfer Unit PSD ... Personal Speed Dial SLT ... Single Line Telephone
SMDR ... Station Message Detail Recorder SSD ... System Speed Dial
TRS ... Toll Restriction (Call Barring) TTY ... Teletypewriter
VAU ... DISA OGM Unit Assignment:
Describes operations for assigning various features.
Operator Features:
Describes useful features for use with the attendant’s phone.
Administrator’s Phone:
Describes various settings for the entire system. These settings can be made only with the administrator’s phone.
Single Line Telephone (SLT):
Describes features for use with the SLT.
Optional Features:
Important Information Before Use
Please read this information before proceeding to a further part of this manual.
1. Port and its usage
Ports which is available with SBS is shown below.
2. Description of port types
Interconnection circuits should be such that the equipment continues to comply with the requirements of 4.2 of EN41003 for TNV circuits and 2.3 of EN60950 for SELV circuits after making connections between circuits.
3. Port types and call paths between ports
Call paths can be established between following ports.
PA1 PA1
PA1 ITS
PA1 1AS
4. Port to port loss and associated cable loss for each port Port to port losses and associated cable losses are as follows.
Port Type
PA1
1AS
ITS
Port usage
2-wire PSTN exchange line without DDI 2-wire PBX extension
Loop calling unguarded clearing MF tone or loop disconnect signalling Timed break recall
2-wire analogue speechband apparatus MF tone or loop disconnect signalling Timed break recall
Panasonic SBS key telephone
Type of circuit
TNV
SELV
Port description Analogue PSTN Port
Port for power failure
Port for Single Line Telephone Port location
Exchange Line Port of the Central Control Unit (VB-9150UK)
Exchange Line Port of expansion cards (VB-9260UK,VB-9261UK) Power Failure Port of the Central Control Unit
Extension port 7, 8 of the Central Control Unit (VB-9150UK)
Extension port 1 to 8 of expansion cards (VB-9261UK,VB-9262UK)
Call path PA1 < > 1AS
Port to port loss 1dB
Associated cable loss 0dB to 1dB
1AS PA1
1AS 1AS
1AS ITS
ITS ITS
ITS 1AS
ITS PA1
> > >
> > >
Call path PA1 > ITS PA1 > 1AS
5. Cabling Requirement
Cabling between the Central Control Unit (CCU) and each Panasonic key telephone must be four wire, and between the CCU and each 2/3 wire apparatus shall be two wire, 0.5mm diameter copper conductor cable and terminated with LJU, slave socket for Panasonic key telephone and master socket for 2/3 wire apparatus.
Cable length from the CCU to each extensions should comply with following requirements.
Also cabling from TJF which is not a part of Panasonic system, normally supplied by PTO to the CCU shall comply with following requirement.
6. Over voltage protection
Surge absorber is fitted to exchange line ports (PA1) and extension ports (1AS) of the system.
If extension cable extends between buildings, surge arresters should be fitted at the point of entry and exit at both ends of the cable.
7. PBX register recall
SBS can be connected to the extention ports of approved PBXs (piggy backing).
SBS extension ports also connect to the exchange line ports of approved call routing system to work as host PBX system.
Timed break recall is available to work with another call routing apparatus.
8. Ring eqivalent number (REN) REN for exchange line port (PA1) is 3.
9. Line feeding
Line feeding from 1AS ports to telephones is derived internally from SBS the Central Control Unit (CCU). The SBS is not a through-fed system.
Maximum 30mA current is supplied to extension apparatus.
10. Recommended extension apparatus
When using separately approved extension apparatus, any UK approved 2 wire apparatus can be used. But in order to maximize the benefit Panasonic recommend the apparatus with MF signalling and timed break recall.
11. Call path delay
Call path delay for each speech direction is as follows.
12. In the event of power failure
A battery installed inside of the Central Control Unit (CCU) will back up full operation of SBS for approxi-mately 15 to 30 minutes (depends on call traffic condition).
When the battery is exhausted up, an exchange line is switched over to power fail telephone socket, which is installed adjacent to the CCU.
Max. cable resistance 40 ohms (loop) 100 ohms (loop)
Cable length Max. 240m Max. 600m Cabling
CCU to ITS CCU to 1AS
Max. delay 1000uS 1000uS
Max. delay 1000uS 1000uS Call path
Parts and Features
VB-9411ADSUK Key Telephone with a Speaker and Display
q
Handset For speaking and listening.w
Built-In Speaker For ringing, or listening to tone and voice calls.e
Dial keys For dialing telephone numbers and programming.r
FL/R key For sending the Timed Break signal while talking on an exchange line.t
REDIAL key For redialing the last exchange line number dialed.y
MEMORY key For assigning speed dial numbers and making exchange line calls with SSD codes.q
w
MIC
9 10 11 12
5 6
7 8
DND/CF INT
1
2
3
4
5
6
7
8
9
0
FL/R
LINE ¥VOLUME£ MIC
CONF
1 2 3 4
REDIAL
MEMORY
ON/OFF
HOLD GHI
PQRS JKL
TUV ABC DEF
MNO
WXYZ
i o
e !7 !0
u y t !6 !8 !9
!1 !2
r !4 !3 !5 (95)
6 (96)
7 (97)
8 (98)
9 (99)
10
1 (90)
2 (91)
3 (92)
4 (93)
5 (94)
MEMORY REDIAL FL@/@R
u
ON/OFF key and LED For making on-hook calls and assigning speed dial numbers. The LED lights up when the ON/OFF key is pressed or when a FF key is used to get an exchange line and activate the monitor function.i
LINE key For making exchange line calls.o
VOLUME key For adjusting the LCD contrast, ringing volume, speaker volume and BGM volume.!0
HOLD key For placing calls on hold or releasing intercom calls on hold. Also used for storing SSD and PSD assignments.!1
MIC key For turning the built-in microphone on and off.!2
CONF key For making conference calls, or confirming entries of speed dial numbers and FF key functions. It’s also used temporarily for releasing privacy of your exchange line conversation.!3
FF keys For accessing a vacant exchange line, and a variety of other features.!4
FF key indicator Indicates the FF key is in use. It lights or blinks in green or red depending on the features.!5
ONE-TOUCH keys For making exchange line calls or intercom calls to specific numbers. 1 to 10 indicate the number of ONE-TOUCH keys. (90) to (99) indicate PSD codes.!6
DND/CF INT LED Lights up in green when Do-Not-Disturb or call forward has been set. Also lights up in red when you make an intercom call, flashes quickly when you have an intercom call on hold, and flashes slowly when you receive an intercom tone call.!7
MIC LED Indicates the MIC key has been pressed to turn on the built-in microphone, and on-hook answer is available. It blinks in handsfree speakerphone mode.!8
Display(LCD) Displays date and time when the telephone is not in use. During a call, it displays the dialed number, PSD or SSD name, or extension name, as well as the duration of the call. When you receive an intercom call, the extension number or name of the caller is displayed.Also displays guidance for feature assignments, absence messages, alarms, the extension number of the telephone you are connected to, and other information.
Note: Segment type display models (VB-9211DSUK, VB-9411DSUK) have limited guidances compared to alphanumeric display model (VB-9411ADSUK)
!9
Large LED Blinks on reception of an incoming call.Also, this LED blinks when Message Wait feature is assigned from other extension.
LINE
VOLUME
HOLD
MIC
Note
Display contrasting is available for alphanumeric display type telephone (VB-9411ADSUK) only.
1
2
1
1
2
3
4
1
2
Adjusting Display Contrast and Volume Level
LCD Display Contrast (Telephones with Alphanumeric LCD Only) ...
You can adjust the LCD display contrast. The display will grow dimmer when the right side of the VOLUME key is pressed, and brighter when the left side is pressed. Do not pick up the handset or press the ON/OFF key before the following operation.
VOLUME
Ringing Volume ...
You can set the ringing volume to any of five different levels. It becomes louder when the right side of the VOLUME key is pressed, and softer when the left side is pressed.
• When Ringing
VOLUME
• When not Ringing
ON/OFF MEMORY 9 VOLUME
Speaker Volume ...
You can set the speaker volume (including the voice call receiving volume) to any of five different levels. It becomes louder when the right side of the VOLUME key is pressed, and softer when the left side is pressed. Adjust the volume while you hear a tone or voice through the speaker.
ON/OFF VOLUME
BGM Volume ...
You can set the BGM volume to any of five different levels. It becomes louder when the right side of the VOLUME key is pressed, and softer when the left side is pressed. Adjust the volume while listening to the BGM.
VOLUME
Making an Exchange Line Call
( )
Accountcode
( )
Telephone No.
( )
Accountcode
( )
Busy ToneMaking a Call
Using the LINE Key ...
You can make an exchange line call by pressing the LINE key and dialing a telephone number. You need not dial a group number.
LINE
1 3
4 52 6 0 7 8 9
Telephone Number
Pulse to DTMF Signal Conversion
You can send DTMF signals by pressing or # after dialing a telephone number. This feature is useful for calling bank computers.
By programming, the system automatically sends DTMF signals after dialing a telephone number.
Long Speech Alarm
The alarm beeps after you have been speaking for 2 min. and 30 sec. Afterwards, it beeps every 3 min. This feature requires programming and only available for key telephones.
Account Code
This system can record a separate account code for each client. Each account code can be up to 10 digits long. If you want to enter an account code and make a call, do the following:
8 7 14536
2 0
789 LINE
1 3 456 2 0 7 89
If you want to enter an account code during the conversation, do the following:
MEMORY
1 3 456 2 0 789
Trunk Queuing
When all exchange lines are busy, use this feature to tell you when a line becomes free.
LINE 6
When your telephone rings, pick up the handset within 16 sec. You are immediately connected to a vacant line.
FF
1
2
3
4
1
2
3
Line Group Dial...
This feature is useful when your telephone has more than two exchange lines and you want to select a specific group. Use this feature when you are calling from an SLT and you need a vacant line.
1 3
4 52 6 0 7 8 9
1 3
4 52 6 0 7 8 9
Group Code Telephone (9, 811, 812, 813) Number
Group Code
The system can handle up to four exchange lines. All exchange lines belong to group code 9. You can also divide these exchange lines into group code 811 to 813 by programming. Dialing 9 or one of these group codes opens a vacant line.
Prime Line Preference ...
You can automatically access a specific line group without pressing the LINE key. You can make a call by picking up the handset or pressing the ON/OFF key and dialing a telephone number. This feature requires pre-programming.
1 3
4 52 6 0 7 8 9
Telephone Number
Direct Exchange Line Access ...
You can select an exchange line by pressing an FF key if you have assigned it an exchange line number.
1 3
4 5 6 2 0 7 8 9
Exchange line Telephone (FF Key) Number
Using an FF Key
You can assign SSD codes to FF keys. Once you have assigned them, you can reach the number just by pressing the FF key instead of dialing the telephone number. Be sure to assign group code 9 before SSD codes.
ON/OFF MEMORY 9 MEMORY
1 3 4 56 2 0
78 9 HOLD
PGM
1
2
3
4
(
)
( )
ExchangeLine FF key SSD code 00-89
FF
1
2
3
4
1
2
3
4
5
FF
Dial Exchange Line Access ...
You can select a specific exchange line. This feature is useful when sending a fax or using the SLT.
1 3
4 52 6 0 7 8 9
1 3
4 52 6 0 7 8 9
Exchange Line Telephone Number Number (881 to 884)
Exchange Line Number
Available exchange line numbers are 881 to 884. Initially 881 to 884 are assigned to FF key 1 to 4.
On-Hook Dial ...
You can make a call without picking up the handset. Use the handset when you hear the voice from the speaker. Using a speakerphone (VB-9211DSUK, VB-9411DSUK, 9411ADSUK) allows you to talk through the built-in microphone when you hear the voice.
ON/OFF 14 52 36
0 7 8 9
1 3
4 52 6 0 7 8 9
Group Code (9, 811, 812, Telephone 813) or Exchange Line Number Number (881 to 884)
Line key, One-Touch Key, FF Key
1
2
3
4
1
2
3
4
1
2
3
4
5
1
2
3
1
2
3
4
5
Last Number Redial
You can redial the last outside telephone number dialed just by pressing the REDIAL key after seizing a line.
• To Redial
LINE REDIAL
• To confirm the last telephone number dialed (Telephones with LCD Only)
ON/OFF REDIAL ON/OFF
or [CONF] Key To finish
Auto Repeat Dial
If you redial with the REDIAL while you hear a busy tone, the telephone automatically redials after a certain period of time.
This feature is available when making an on-hook dial call on a key telephone. After Auto Repeat Dial is set, ON/OFF key’s led will blink red.
Save Dial
During an exchange line call, you can save the telephone number of the outgoing call for later use. Unlike the Redial feature, the number saved in this way will not be erased when you call another number. How-ever, it will be erased if you save a different number.
• To save the telephone number on Line
MEMORY 9
• To call the telephone number saved
LINE MEMORY
• To confirm the telephone number saved (Telephones with LCD Only)
ON/OFF MEMORY ON/OFF
Speed Dial
ONE-TOUCH Key (Personal Speed Dial) ...
You can assign up to 10 frequently dialed telephone numbers to ONE-TOUCH keys for use at your tele-phone only. ONE-TOUCH keys (1-10) correspond to PSD codes (90-99) respectively, and the numbers assigned to ONE-TOUCH keys are also assigned to corresponding PSD codes (90-99) on your telephone automatically. Once you have assigned them, you need press only one key, or short code in case of SLT, to call the desired telephone number. For more about TOUCH key assignment, refer to the ONE-TOUCH key part of the Assignment section in this book.
• To call with a ONE-TOUCH Key from key telephone (An Extension
Number, Feature Code, or Number with Outside Access Code is
As-signed)
ONE-TOUCH Key
To assign See page O-39.
• To confirm the Telephone Number Assigned to a ONE-TOUCH Key
(Telephones with LCD Only)
ON/OFF ON/OFF
or [CONF] Key ONE-TOUCH Key To finish
FF
1
2
3
System Speed Dial ...
You can assign up to 90 or 200 (if preprogrammed) frequently dialed telephone numbers to SSD codes, 00-89 (or 000-199), with the administrator’s phone. For more about SSD assignment, refer to the System Speed Dial part of the Assignment section in this book.
• To call with an SSD Code
LINE MEMORY 14 52 36
0 7 8 9
SSD Code 00-89 (or 000-199)
To assign See page O-42.
SLT
See User Guide (SLT).
• To confirm the telephone number assigned to an SSD Code
(Telephones with LCD Only)
ON/OFF MEMORY
1 3
4 5 6 2 0
7 8 9 ON/OFF
or [CONF] Key SSD Code 00- To finish 89 (or 000-199)
LCR
When the LCR function has been programmed, the LCR function is automatically activated when you make a call. When you dial the other party’s phone number, the cheapest route is automatically selected. This feature requires system programming and a special contract with the telephone company. Please consult with your local dealer.
1
2
3
4
5
1
2
3
4
5
Making an Intercom Call
1
2
3
FF
Tone Call
You can choose between tone call (ringing sounds) and voice call (speaking). The system default is tone call. You can switch tone call to voice call by dialing 1 during an intercom call. You can also program your telephone to make an intercom voice call when only an extension number is dialed, or to make an intercom tone call when 1 is dialed following an extension number.
1 3
4 52 6 0 7 8 9
Extension Number (10-25)
Operator Call
If you want to call the operator, dial 0.
Speed Dial
An extension number can be assigned to a ONE-TOUCH key or an FF key.
On-Hook Dial
You can make a call without picking up the handset. Press the ON/OFF key instead of picking up the handset.
Voice Call
You can choose between tone call (ringing sounds) and voice call (speaking). When making a voice call, a splash tone, followed by your voice, is heard from the telephone receiving your call. You can switch voice call to tone call by dialing 1 during an intercom call. You can also program your telephone to make an intercom voice call when only an extension number is dialed, or to make an intercom tone call when 1 is dialed following an extension number.
1 3
4 52 6 0
7 8 9 1
Extension During Intercom Number (10-25) Call
To Set to Tone Call
To set back to tone call, repeat the procedure.
1
2
3
4
Paging
This feature projects your voice through the speakers of other key telephones, enabling you to contact someone who is temporarily away from his/her telephone.
• To Page
1 3
4 52 6 0 7 8 9
Paging Group Code (60 - 63)
• To answer a Page/LRB (Meet Me Answer)
6 9
External Paging
If an external paging system is connected the system, you can also page through it. See External Paging in the Optional Features section.
Paging Group Code
The system has 3 paging groups (1-3). Select the group(s) you want to page.
LRB (Loud Ringing Bell)
Program setting allows you to transmit the incoming ring tone on an exchange or internal line to external paging.
FF PGM
All groups & External Paging 60
Group 1 61
Group 2 62
Group 3 & External Paging 63
1
2
3
1
2
3
4
5
FF
Procedure 4 may skipped
Message No. Message 1 VISITOR HERE 2 NEED HELP 3 IMPORTANT 4 URGENT 5 EMERGENCY
These messages are already stored in the system and used commonly for Call Wait. You can modify them with the administrator’s phone.
1
2
3
4
Message Wait
When no one answers at an extension, or the extension is busy, you can leave a message and your exten-sion name at the extenexten-sion you tried to reach.
• To send a Message Wait (With Add-on Message)
ON/OFF 14 5 36
2 0
7 8 9 2
1 3
4 5 6 2 0
7 8 9 ON/OFF
Extension Busy or No Message code Number (10-25) Answer (1-5)
Add-on Message (Procedure 4)
Message Wait with SLT
Sending a message wait from a SBS telephone to a SLT can not be performed. In the reversed direction, it is available.
DND, Absence Message, Call Forward
You can leave a message to the extension which is set in DND or absence message. However, if the extension you reached is set in call forward, your message will be forwarded to the other extension specified.
Busy Tone or Ringback Tone after Leaving a Message
If a busy tone or ringback tone continues after dialing a message code, you could not leave a message.
Number of Message Settings
Though only one message can be received for each key telephone, messages can be sent to two or more key telephones from one key telephone.
• To confirm an Add-on message you have received
(Telephones with Alphanumeric LCD Only)
ON/OFF 7 9 ON/OFF
• To call back to an extension that Left the message
7 9 1
Automatic Cancellation of Message Wait
Message wait is automatically canceled when you return a call.
• To cancel a message without calling back
ON/OFF 7 9 2 ON/OFF
To cancel the Message You Left
If you want to cancel the message you left, call the extension again from the telephone you used to leave it.
1
2
3
Extension Number (10-25)
(
)
( )
Busy Tone1
2
3
4
Message No. Message 1 VISITOR HERE 2 NEED HELP 3 IMPORTANT 4 URGENT 5 EMERGENCY
Call Wait (Camp-On)
When an extension is busy, you can camp-on the extension by dialing 3. Additionally, you can notify the extension of your call by sending various messages.
• To send a Call Wait
ON/OFF 14 52 36
0
7 8 9 3
1 3
4 52 6 0 7 8 9
Extension Busy Tone Turns Message Code Number (10-25) Ringback Tone (and Wait)
Message Code
Intercom Call Back
If you cannot reach an extension you want to contact, dial 6 and press the ON/OFF key when you hear the busy tone. When the extension becomes free, it will automatically call you and you can reach the extension just by picking up the handset.
ON/OFF 145236
0
78 9 6 ON/OFF
To Cancel
Call wait is automatically canceled when you press the ON/OFF key or replace the handset.
Call Wait with SLT
Sending a call wait from a key telephone to an SLT can not be performed. However, in the reversed direction, it is available.
• To answer a Call Wait during a call
HOLD
During Call
The First Call
If you answer a call wait, the first call is placed on hold and you are automatically connected to the other line. The first call you have can be either an exchange line call or intercom call.
These messages are already stored in the system and used commonly with Add-on Massage for Massage Wait. You can modify them with the administrator’s phone.
Auto Answer
You can answer any calls (intercom or exchange line calls) just by picking up the handset.
Exchange Line Incoming Ringing Alarm
If no one answers a ringing telephone, the ringing tone will change to the alaming tone if programmed.
To answer with the ON/OFF Key
If programmed, you can answer a call with the ON/OFF key instead of picking up the handset.
Ringing Tone
The ringing tone for incoming calls can be changed for each line port with programming.
Non-Ringing Auto Answer
When an incoming call is on the line to which your telephone does not have a direct access, your telephone does not ring and the LED on an FF key blinks slowly in red. If non-ringing auto answer is programmed, you can answer any calls to your paging group, just by picking up the handset.
Handsfree Answer Back, Intercom (Key Telephones only)
You can answer an intercom voice call without picking up the handset. You can talk through the built-in microphone when its LED lights. You can also use the handset if you pick up.
MIC
MIC LED blinks.
Handsfree Answer, Speakerphone
If your telephone is a speakerphone (VB-9211DSUK, VB-9411DSUK, 9411ADSUK), you can answer any calls (intercom or exchange line calls) by pressing the ON/OFF key. You can talk through the built-in micro-phone when its LED blinks. You can also use the handset if you pick up.
Red blinking FF Key
1
2
1
Ringing2
1
Intercom2
Voice Call
Note
FF
Call Pick-up
Group Call Pick-up ...
You can answer calls to other extensions in your paging group using your telephone. However, you cannot answer alarm (time reminder) calls, or perform call back for other extensions.
7 0
Direct Call Pick-up...
You can answer calls to other extensions not only in your paging group but also in other paging groups using your telephone. However, you cannot answer an alarm (time reminder) call, or perform call back for other extensions.
7 14 52 36
0 7 8 9
Extension Number (10-25)
1
2
3
1
2
3
4
1
2
1
2
FF
Exclusive Hold
You can put a call on exclusive hold to do something else. A call on exclusive hold can only be released by the extension from which it was put on hold. Exclusive hold is available both for exchange line calls and intercom calls.
Exchange Line Hold ...
Exchange Line Press same which you are Exchange Line using again
Hold Recall
If a call on hold is not answered within a certain period of time, a hold recall tone sounds on the telephone which placed the call on hold.
Intercom Hold ...
HOLD HOLD
Hold Recall
Hold recall is not available for intercom hold.
Brokers Hold
When you are talking to an extension with another intercom call on hold, you can switch the line just by pressing the HOLD key.
To Hold To Release
To Hold To Release
1
2
1
2
3
4
System Hold
You can put an exchange line call on system hold to transfer it or make a conference with it. A call on system hold can be released by any extension.
HOLD
Press Exchange Line which is placed on hold
To release a call on hold
• Pick up the handset and press the held FF key. (The FF key flashes in red.)
• Pick up the handset and dial “88n” if FF keys are not equipped. (n: exchange line number)
Supervised Transfer
You can notify a third party extension of an exchange line call on hold before transferring it. This feature is useful when the third party is in another room and visual confirmation is not possible.
HOLD 14 52 36 0 7 8 9
Extension Number (10-25)
Unsupervised Transfer
You can force transfer an exchange line call to an extension without notification. This feature is useful when you know that the extension exists or it is busy.
HOLD 14 52 36 0 7 8 9
Extension Number (10-25)
Transfer Recall
If a transferred call is not answered within a certain period of time, a transfer recall tone sounds on the telephone which transferred the call.
Trunk-to-Trunk
You can transfer an exchange line call to another exchange line.
HOLD 14 52 36 0
7 8 9 MEMORY REDIAL 5
Vacant Exchange Telephone Line (FF key) Number
Disconnection
Trunk-to-trunk talk is disconnected when;
1. A disconnection signal is received from exchange line.
It is disconnected when a Polarity Reverse signal or break signal is received from an exchange line. 2. A specified period of time has been passed.
The system has a timer monitoring a trunk-to-trunk talk. You can set this timer to 1 to 40 minutes. Trunk-to-trunk talk is automatically disconnected after a period of time specified to the timer. 3. A Busy Tone from PSTN is detected.
Set the number of Busy Tone detections by the programmed setting. Trunk-to-trunk talk is disconnected when the number of Busy Tones set here is detected.
4. The extension which transferred the call joins the conversation again.
External Conference
You can make a conference call among two exchange lines and one extension, or one exchange line and two extensions. This feature is particularly useful when making arrangements among three parties or when arranging schedules.
• To Make a Conference Call with an External 3rd Party
HOLD 14 52 36 0 7 8 9
CONF
Exchange Line Vacant Exchange Telephone Call or Intercom Line (FF key) Number Call
• To Make a Conference Call with an Internal 3rd Party
HOLD 14 52 36 0 7 8 9
CONF
Exchange Line Extension Call Number (10-25)
8
1
2
3
4
5
1
2
3
4
5
6
7
PGM
To Hold
1
To Hold2
3
4
Note
The voice level of outside callers may become lower because of a line attenuation when using trunk to trunk features.
Note
When having a conference, the voice level becomes lower (approximately 6dB). This is normal operation as the system balances the confer-ence party’s speech to avoid feedback occurring.
Note
Intercom Three Party Conference
You can make a conference call among three extensions. This feature is useful when you need a third person’s opinion.
HOLD
1 3
4 5 6 2 0 7 8 9
CONF
Intercom Call Extension Number (10-25)
Intercom Transfer
You can transfer an intercom call to another extension by entering Intercom Three Party Conference tempo-rarily.
HOLD
1 3
4 52 6 0 7 8 9
CONF
Intercom Call Extension Number (10-25)
1
2
3
4
5
1
To Hold2
3
4
To Hold
Note
FF Key
You can assign frequently used features to FF keys. Once you have assigned them, you can perform a feature just by pressing one FF key instead of dialing its number. You can assign exchange lines, PSD/SSD codes, or extension numbers to FF keys. For FF key assignment, refer to the FF key part of the “Assign-ment” section in this book (See page O-37).
• To Use an FF Key
Direct Exchange Line Access
If you assign exchange lines, 881-884 (intially assigned), to FF keys, you can access an exchange line just by pressing an FF key. You don’t have to press the ON/OFF key or pick up the handset.
Exchange Line Status Indication
The LED on an FF key indicates condition of the exchange line if assigned. When you use the line, it flashes in green. When another extension uses the line, it stays lit in red.
Serial Call
If extension numbers, 10-25, are assigned to FF keys, you can terminate the current intercom call and make another intercom call by pressing an FF key. This feature is available either when you are talking or when the busy tone is audible.
Exchange Line Auto Hold
If extension numbers, 10-25, are assigned to FF keys, you can place the current exchange line call on hold and make an intercom call by pressing an FF key.
If the paging feature is assigned to an FF key, you can place the current exchange line call on hold and page by pressing the FF key.
INT One-Touch Call (DSS/BLF)
If extension numbers, 10-25, are assigned to FF keys, you can call an extension by pressing an FF key. The LED on an FF key indicates the following conditions of the extension assigned.
1
Ringing Flashes in Red Speaking Stays Lit in Red DND/Call Forward/Absence Message Stays Lit in Green
1
PGM
1
2
3
1
2
3
4
5
6
1
2
3
4
Privacy Release
When you are talking on an exchange line, you can let another extension join in to make a conference call. The extension must press the Exchange Line key (FF key) within 15 sec. after you give it permission to join in.
CONF
Exchange line From other Another Extension Caller Presses Extension Press can join in
busy(red) FF key
Sending a Timed Break Signal
You can send a Timed Break Signal while talking on an exchange line.
FL@/@R
Flash
You can use the FL/R key for the flash function according to the program setting. If you press the FL/R key while talking on an exchange line or an internal line, you can release current call and reseize same line as a new call, without returning the handset.
Alarm
You can set an alarm to ring at your key telephone at a specific time. Once it has rung, the alarm is auto-matically canceled. If you are using the telephone at the time the alarm is set to ring, there will be no alarm. In the following example, enter 07152 to set the alarm at 7:15 PM (19:15). This feature is available for key telephone only.
• To set the Alarm
ON/OFF 7 8 0 7 1 5 2 ON/OFF
Hour Minute 1 for AM, 2 for PM
• To confirm the Alarm Setting (Telephones with LCD Only)
ON/OFF 7 8 ON/OFF
1
2
3
1
2
3
Message Code Message Message Code Message 0 IN MEETING (changeable) 5 (assignable) 1 AT LUNCH (changeable) 6 (assignable) 2 OUT OF OFFICE (changeable) 7 (assignable) 3 HOLIDAY (changeable) 8 (assignable) 4 ANOTHER OFFICE (changeable) 9 (assignable)
• To cancel the Alarm
ON/OFF 7 8 ON/OFF
To Stop the Alarm Ringing
Pick up the handset or press the ON / OFF key.
No-Answer
DND (Do-Not-Disturb) ...
You can make your telephone unavailable for incoming calls. Anyone calling your extension will receive a busy signal.
ON/OFF 7 3 ON/OFF
To Cancel
Repeat the procedure.
Absence Message ...
You can leave a message at your extension saying why you are out and the time you will return.
• To set the Absence Message
ON/OFF 7 1 14 52 36
0 7 8 9
1 3
4 52 6 0
7 8 9 ON/OFF
Message Code Returning Time (0000 - 2359)
Message Code
You can assign five messages to the message codes, 5-9. The message codes, 0-4, are initially assigned for the system. For message code assignment, refer to the Absence Message part of the “Assignment” section in this book.
1
2
3
4
5
FF
Procedure 4 may skipped
1
2
3
• To cancel the Absence Message
ON/OFF 7 1 ON/OFF
Call Forward...
You can forward an incoming call to another extension or an exchange line.
• To forward a Call to an Extension
ON/OFF 14 5 36
2 0 7 8 9
1 3
4 5 6 2 0
7 8 9 ON/OFF
Call Forward Extension Number Code (10-25)
Call Forward Code
• To confirm the Call Forward from an extension assigned (Telephones
with LCD Only)
ON/OFF 7 2 ON/OFF
or [CONF] key To finish
1
2
3
4
Call Forward Code Function 721 All Calls
722 Busy or No Answer 723 On-Busy
725 No-Answer
1
2
3
4
• To forward a Call to an exchange line
ON/OFF 7 2 4 ON/OFF
Outside Forwarding
If you set a telephone to forward calls to outside, incoming calls to the telephone are automatically transferred to the number assigned to PSD code 99. Line Access Code(9, or 811-813) must be included in front of dialing number on PSD 99. Therefore, you need not dial an extension number when setting. If PSD code 99 is not assigned, you will hear a busy tone, and can not set the call forward.
When a telephone is set to forward calls to exchange line, you can not use it to make and receive a call. The following operations can be carried out even during setting of Call Forward from the exchange line.
72 : Cancels Call Forward
88x : Acquires an extra exchange line (x: Exchange line No.) 74nnnn : Sets/cancels Station Lock Out (nnnn: ID code)
When this feature is assigned, outgoing intercom call will not be available. Operator cannot assign this feature.
• To cancel the Call Forward
ON/OFF 7 2 ON/OFF
1
2
3
1
2
3
Note
1
2
3
4
5
1
2
3
4
1
2
3
4
Follow Me ...
Allows you to automatically transfer incoming calls on each of the extension phones to your own extension phone.
• To set Follow Me
ON/OFF 7 7 14 52 36
0 7 8 9
1 3
4 52 6 0
7 8 9 ON/OFF
Source extension Target extension No. (10-25) No. (Own
extension) (10-25)
• To cancel Follow Me
ON/OFF 7 7 14 5 36
2 0
7 8 9 ON/OFF
Source extension No. (10-25)
• To cancel Follow Me from Operator’s Phone and Admistrator’s Phone
ON/OFF 7 7
1 3
4 52 6 0 7 8 9
1 3
4 52 6 0
7 8 9 ON/OFF
Source extension Target extension No. (10-25) No. (10-25)
• To confirm Follow Me assignment from an extension assigned
ON/OFF 7 7 ON/OFF
or [CONF] key To finish
• To confirm Follow Me assignment from Operator’s Phone or
Admistrator’s Phone
ON/OFF 7 7 14 52 36
0
7 8 9 ON/OFF
or [CONF] key Extension No. To finish (10-25)
Manager/Secretary working ...
Manager Secretary working groups are set by the system programming. Each group consists of one secre-tary and up to three manager extensions.
Maximum eight groups can be set in the system. When a group is set up by the system programming, call coverage is activated by a manager’s extension.
When the secretary passes a call to the manager whose extension is busy, call waiting will be generated at the manager’s extension and the secretary can notify her manager.
■
Preparation (At secretary’s extension)
• To set Follow Me to secretary
ON/OFF 7 7 14 52 36
0 7 8 9
1 3
4 52 6 0
7 8 9 ON/OFF
Manager’s Own Extension Extension No. No. (10-25) (10-25)
• To set BLF key of Manager’s extension to secretary’s extension
ON/OFF MEMORY 14 52 36
0
7 8 9 HOLD ON/OFF
FF key Manager’s Extension No. (10-25)
BLF(Busy Lamp Field)
By assigning an extension number to each FF key, this feature indicates whether each extension is in use or not, on each LED of FF key.
Although BLF is registered a use is not allowed to pick up an incoming call by pressing its key. This feature is useful for an operator.
PGM
1
2
3
4
5
X X –
– X X
Extension No.
Extension No. from
to [ Display ]
For example, 13-14- means this extension is forwarded from exten-sion 13 and 14.
1
2
3
4
5
■
Operation (At secretary’s extension)
HOLD ON/OFF
Answer to BLF key forwarded incoming
call from manager
When DND/ABM is Set
When the manager’s extension is set to DND/ABM, incoming calls and Call Back calls cannot be made to ring.
Call Barring
Class of Service ...
You can control access from your telephone by assigning one of the five access levels to each exchange line. This feature can only be programmed with the administrator’s phone.
1
2
3
4
Class 0: Exchange line calls are prohibited. (except emergency calls.)
Class 1: Long distance calls are prohibited. Class 2: Specific long distance calls are permitted. Class 3: International dialing is prohibited
Class 4: No restrictions.
PGM
Day Mode and Night Mode
A different access level can be programmed for day and night at each extension.
Station Lock Out...
You can make your telephone unavailable for exchange line calls except emergency calls. However, a locked out telephone is still available for intercom calls.
• To Lock Out an extension
ON/OFF 7 4 ON/OFF
FF PGM
• To Unlock an extension
ON/OFF 7 4 14 52 36
0
7 8 9 ON/OFF
ID Code (0000-9999)
ID Code
ID codes, 0000-9999 must be programmed from the administrator’s phone. See the ID Code for Station Lock Out part in the Assignment section in this book.
Making a Call
Exchange line calls are prohibited until Station Lock Out is canceled.
• To change the ID Code of Station Lock Out
ON/OFF 7 4 14 52 36
0 7 8 9
1 3
4 52 6 0
7 8 9 ON/OFF
Old ID code New ID code (0000-9999) (0000-9999)
Verified ID Code ...
Verified ID code entry overrides any toll restrictions placed on an extension. By entering a verified ID code, you will get an access class to make a call using any extension. The extension regains its service class when you hung up.
• To Call
8 7 14 52 36
0 7 8 9
Verified ID code Vacant Exchange (0-9999998) Line (FF key)
Verified ID Code
A verified ID code is a 7 (max.) digit code programmed with the administrator’s phone. You can assign a class of service to a verified ID code. When you enter a verified ID code, you receive a class of service assigned to the verified ID code. If a wrong verified ID code is entered, you receive a class of service assigned to the extension.
1
2
3
4
1
2
3
4
5
PGM
Extension Assignment
FF Key ...
You can assign exchange lines, extension numbers, PSD/SSD codes, etc., to FF keys. The number of digits assigned must be no more than four.
• To assign a feature to an FF Key
ON/OFF MEMORY 14 52 36
0
7 8 9 HOLD ON/OFF
FF Key to Assign Feature to Assign
See page O-38 To store
To Repeat
If you want to assign another FF key, repeat the procedure 2 to 5 (do not press ON/OFF key).
To Assign by Programming
You can also program to assign a feature to an FF key using the administrator’s phone.
If four exchange lines are accommodated, FF1 to FF4 is fixed as the exchange line key 1 to the exchange line key 4.
• To confirm a feature assigned (Telephones with LCD Only)
ON/OFF ON/OFF
or [CONF] key FF Key To finish
• To cancel a feature assigned
ON/OFF MEMORY HOLD ON/OFF
FF Key to cancel
FF Key Features and LED
LED lights to indicates that any of the following FF key features are in use. It does not light for any other FF key features.
Exchange Line Headset Connection Trunk Queuing INT One-touch Call Doorphone Paging
Door Opener
Assignment
1
2
3
4
5
6
1
2
3
4
FEATURE OPERATION REMARKS PAGE Absence Message Setting [71] [n] (XXXX) n=Message Code (0-9) O - 30
XXXX=Returning Time (0000-2359)
Absence Message Cancellation [71] O - 31
Answer to Paging [69] O - 18
Batch Output of Programming Data [#97] (XXXXn) XXXX=ID code (0000-9999) P - 11 n = Output code (0 - 4)
BGM (On/Off) [#53] O - 52
Call Forward Setting (All calls) [721] (nn) nn=Extension No. (10-25) O - 31 Call Forward Setting (No Answer) [725] (nn) nn=Extension No. (10-25) O - 31 Call Forward Setting (No Answer/Busy) [722] (nn) nn=Extension No. (10-25) O - 31 Call Forward Setting (On Busy) [723] (nn) nn=Extension No. (10-25) O - 31 Call Forward Setting (Exchange Line) [724] O - 32 Call Forward Cancellation [72] O - 32 Call Forward Confirmation [ 72] O - 31 Call Logging (SMDR) [#93] Available only with the administrator's phone I - 21
Call Wait [3] O - 21
Change ID Code of Station Lock Out [74] (XXXXYYYY) XXXX=Old ID Code for Station Lock Out (0000-9999) O - 36 YYYY=New ID Code for Station Lock Out (0000-9999) Direct Call Pick-up [7 ] [nn] nn=Extension No. O - 23 DND Setting/Cancellation [73] O - 30
Door Opener A [54] O - 51
Door Opener B [55] O - 51
Door Opener A/B [53] Available when talking through a doorphone O - 51
Doorphone A Call [51] O - 51
Doorphone B Call [52] O - 51
Exchange Line [88n] n=Exchange Line Number (1-4) O - 13 Follow Me Setting [77] (nnmm) O - 33 Follow Me Cancellation [77] (nn) nn = Transfer source extension No. (10 - 25) O - 33 Follow Me Cancellation from operator [77 ] (nnmm) mm = Transfer target extension No. (10 - 25) O - 33 or administrator
Follow Me Confirmation [ 77] O - 33
Follow Me Confirmation from operator [ 77] (nn) nn = Extension No. (10 - 25) O - 34
Group Call Pick-up [70] O - 23
Headset Mode(Setting/Cancellation) [#51] O - 52
INT Call Back with CW [6] O - 21
Intercom call [10] - [25] 10 - 25 = Extension No. O - 17 Line Group Dial [9] or [nnn] nnn=Group No. (811-813) O - 12 Lunch Mode (Setting/Cancellation) [#54] Available only with the operator’s phone or O - 49
administrator's phone.
Message Wait [2] O - 19
Message Wait Cancellation [792] O - 20 Message Wait Confirmation [ 79] O - 19 Message Wait with Call Back [791] O - 20 Automatic Mode Switching Cancellation [#55] Available only with the operator’s phone or O - 48 (Holiday Night Mode Setting) administrator's phone.
Day/Night Mode Switching (Day/Night) [#52] Available only with the operator’s phone or O - 48 administrator's phone.
Operator Call [0] O - 17
Paging (All Groups) [60] O - 18
Paging (Group 1) [61] O - 18
Paging (Group 2) [62] O - 18
Paging (Group 3 & External Paging) [63] O - 18 Programming Mode [MEMORY ##] (ONE-TOUCH) Available only with the administrator's phone. P - 3 PSD Call [MEMORY] [nn] nn=PSD No. (90-99) O - 39 Save Dial Assignment [MEMORY 9 ] O - 14
Save Dial Call [MEMORY ] O - 14
Save Dial Confirmation [ MEMORY ] O - 14 SSD Call [MEMORY nn] or [MEMORY nnn] nn or nnn=SSD No. (00-89) or (000-199) O - 16 Station Lock Out Setting/Cancellation [74] (XXXX) XXXX=ID Code for Station Lock Out (0000-9999) O - 35 Tone/Voice Call Switching [1] O - 17
Trunk Queuing [6] O - 11
DISA Message recording (1st message) [ 981] O - 53 DISA Message recording (2nd message) [ 982] O - 53 DISA Confirmation of Recording (1st message) [ 971] O - 53 DISA Confirmation of Recording (2nd message)[ 972] O - 53 DISA Registration of reception extension [ 99] (nmm) n = Registration code (0 - 9) O - 53 No./DISA speed-dial mm = Extention Number (10-25)
Features Available for FF Key Assignment
Any of the following (four digits max.) can be assigned to FF keys:
1
2
3
4
5
6
7
KEY FEATURE
[0]-[9] Dial numbers
[ ], [#] Converts the following entries to DTMF signals. [REDIAL] Pause insertion
[MEMORY] [00]-[89] Assigns an SSD code.
[ONE-TOUCH-1] Characters entered between this key will not be displayed on LCD.
1
2
3
4
FF
1
2
3
4
5
ONE-TOUCH Key (Personal Speed Dial) ...
You can assign up to 10 frequently dialed telephone numbers to ONE-TOUCH keys. The number of digits assigned to a ONE-TOUCH key must be no more than 24. Numbers assigned to ONE-TOUCH keys are automatically assigned to corresponding PSD codes.
• To assign a number to a ONE-TOUCH Key for key telephone
ON/OFF MEMORY
1 3
4 5 6 2 0 7 8 9
1 3
4 5 6 2 0
7 8 9 HOLD ON/OFF
ONE-TOUCH Key Exchange line Number to Assign To store Access Number
(9, 811-813)
To Repeat
If you want to assign another ONE-TOUCH key, repeat the procedure 2 to 6 (do not press ON/OFF key).
SLT
See User Guide (SLT).
Keys Available for One-Touch Dial Assignment
PSD Codes and ONE-TOUCH Keys
PSD codes (90-99) correspond to ONE-TOUCH keys (1-10). The left most ONE-TOUCH key in the lower row represents No.1, and the right most ONE-TOUCH key in the upper row represents No.10.
• To confirm a number assigned to a ONE-TOUCH Key (Telephones with
LCD Only)
ON/OFF ON/OFF
or [CONF] key ONE-TOUCH key To finish
• To cancel a number assigned to a ONE-TOUCH Key
ON/OFF MEMORY HOLD ON/OFF
ONE-TOUCH key
1
2
3
4
5
6
7
8
9
(M) (a) (r) (y)
1
2
3
4
5
6
1
2
3
4
5
6
• To assign a PSD Name (Corresponding ONE-TOUCH Key)
ON/OFF MEMORY 1 9 0 to 9 9 14 5 36
2 0
7 8 9 FL@/@R
PSD Code Number (See Page O-8, PSD Name Define and O-9) (1st Letter) Forward
1 3
4 5 6 2 0
7 8 9 HOLD ON/OFF
PSD Name To store (Next Letter)
Example of PSD Name Entry
If you want to assign “Mary” as a PSD name, for example, do the following. You need press the FL/R key after each character to proceed. See page O-47.
6 FL@/@R 2 2 2 2 FL@/@R 7 7 7 7 7 7 7 FL@/R@ 9 9 9 9 9 9 9 HOLD
To Repeat
If you want to assign another PSD Name, repeat the procedure 4 to 8 (do not press ON/OFF key)
• To confirm a PSD Name (Telephones with Alphanumeric LCD Only)
ON/OFF MEMORY 9 0 to 9 9 ON/OFF
or [CONF] key PSD Code Number (See Page O-8, To finish O-9)
• To cancel a PSD Name
ON/OFF MEMORY 1 9 0 to 9 9 CONF HOLD
PSD Code Number (See Page O-8, O-9)
ON/OFF
PSD Name after Cancellation
A PSD name is replaced with its default name when canceled.
* By assigning a new name, the original name will be erased automatically.
1
2
3
4
5
6
7
Administrator’s Phone Assignment
Extension Name ...
Once a name is assigned to each extension, the name of the extension you reach is displayed on the LCD on your telephone. Extension names can only be programmed with the administrator’s phone. This feature is available for alphanumeric key telephones.
• To assign a name to an extension
ON/OFF MEMORY 2 14 52 36
0 7 8 9
1 3
4 52 6 0
7 8 9 FL@/@R
1 3
4 52 6 0 7 8 9
Extension Number Extension Name Define and Extension Name (10-25) (1st Letter) Forward (Next Letter)
HOLD ON/OFF
To store
Example of Extension Name Entry
If you want to assign “Mary” as an Extension name, for example, do the following. You need press the FL/R key after each character to proceed. See page O-47.
6 FL@/@R 2 2 2 2 FL@/@R 7 7 7 7 7 7 7 FL@/@R 9 9 9 9 9 9 9 HOLD
To Repeat
If you want to assign another Extension Name, repeat the procedure 4 to 8 (do not press ON/OFF key).
• To cancel an extension name
ON/OFF MEMORY 2 14 5 36
2 0 7 8 9
CONF
HOLD ON/OFF
Extension Number (10-25)
Extension Name after Cancellation
An extension name is replaced with its default name when cancelled.
8
9
(M) (a) (r) (y)