Job Scheduler Users Guide
Adaptive Server® Enterprise
15.7
DOCUMENT ID: DC20001-01-1570-01 LAST REVISED: August 2011
Copyright © 2011 by Sybase, Inc. All rights reserved.
This publication pertains to Sybase software and to any subsequent release until otherwise indicated in new editions or technical notes. Information in this document is subject to change without notice. The software described herein is furnished under a license agreement, and it may be used or copied only in accordance with the terms of that agreement.
To order additional documents, U.S. and Canadian customers should call Customer Fulfillment at (800) 685-8225, fax (617) 229-9845. Customers in other countries with a U.S. license agreement may contact Customer Fulfillment via the above fax number. All other international customers should contact their Sybase subsidiary or local distributor. Upgrades are provided only at regularly scheduled software release dates. No part of this publication may be reproduced, transmitted, or translated in any form or by any means, electronic, mechanical, manual, optical, or otherwise, without the prior written permission of Sybase, Inc.
Sybase trademarks can be viewed at the Sybase trademarks page at http://www.sybase.com/detail?id=1011207. Sybase and the marks listed are trademarks of Sybase, Inc. ® indicates registration in the United States of America.
SAP and other SAP products and services mentioned herein as well as their respective logos are trademarks or registered trademarks of SAP AG in Germany and in several other countries all over the world.
Java and all Java-based marks are trademarks or registered trademarks of Sun Microsystems, Inc. in the U.S. and other countries. Unicode and the Unicode Logo are registered trademarks of Unicode, Inc.
IBM and Tivoli are registered trademarks of International Business Machines Corporation in the United States, other countries, or both. All other company and product names mentioned may be trademarks of the respective companies with which they are associated. Use, duplication, or disclosure by the government is subject to the restrictions set forth in subparagraph (c)(1)(ii) of DFARS 52.227-7013 for the DOD and as set forth in FAR 52.227-19(a)-(d) for civilian agencies.
Contents
CHAPTER 1 Overview ... 1
Introduction ... 1
Terminology and concepts ... 2
Job Scheduler components and functionality... 3
Job Scheduler architecture ... 3
Security ... 6
js_user_role ... 6
js_admin_role ... 6
js_sa_role... 6
Shared objects... 7
CHAPTER 2 Configuring and Running Job Scheduler ... 9
Installing Job Scheduler manually ... 9
Setting up Job Scheduler users... 11
Setting up access to target servers... 12
CHAPTER 3 Using Templates to Create Jobs ... 15
Introduction ... 15
Installing stored procedures on a target server... 16
Installing the templates into Job Scheduler... 16
Using Job Scheduler templates ... 18
Backup... 18
Statistics management ... 18
Reorganization... 19
Reconfiguration ... 20
Template updates... 21
CHAPTER 4 Using Job Scheduler at the Command Line ... 23
Creating a job ... 23
Job state codes ... 25
Creating a schedule ... 26
Contents
Modifying a scheduled job ... 28
Invoking stored procedures on a target server ... 29
Managing jobs ... 29
Managing job history and logs ... 30
CHAPTER 5 Command Reference ... 31
Command line stored procedures ... 31
Command syntax ... 32 sp_sjobcreate... 33 sp_sjobcmd ... 37 sp_sjobmodify... 38 sp_sjobdrop... 41 sp_sjobhelp ... 43 sp_sjobcontrol... 44 sp_sjobhistory ... 46
CHAPTER 6 Managing Job Scheduler in the Sybase Central ASE Plug-in... 51
Adding a scheduled job ... 51
Adding a job ... 52
Adding a schedule... 53
Scheduling an existing job... 53
Viewing job history ... 53
Purging job history ... 54
Administering Job Scheduler... 54
Showing all users ... 55
Managing a scheduled job ... 55
Editing properties... 56
Deleting a Job Scheduler object ... 57
CHAPTER 7 Troubleshooting... 59
Logging error messages ... 59
A job fails to run at the time you scheduled it ... 60
A scheduled job created from a template fails... 60
A job with multiple calls to sp_sjobcmd fails ... 60
A stored procedure fails... 60
C H A P T E R 1
Overview
This chapter provides an overview of the components and architecture of Job Scheduler.
Introduction
Job Scheduler eases the management of ASE by providing the ability to define and schedule database administration and maintenance tasks. With Job Scheduler, jobs that normally require interaction from a database administrator can be scheduled to run unattended at the appropriate times, freeing the database administrator to attend to other issues.
Job Scheduler allows you to create and schedule jobs, and to share jobs and schedules. One database administrator can create a job, and other database administrators can then schedule and run that job on another server. You can create jobs as follows:
• From scratch using the command line or GUI • From a SQL batch file
• From a template
Topic Page
Introduction 1
Terminology and concepts 2 Job Scheduler components and functionality 3 Job Scheduler architecture 3
Terminology and concepts
Job Scheduler captures the results and output of jobs and records that information in log tables. This data can be viewed at a later date. In addition, Job Scheduler keeps a history of scheduled jobs; however, to keep a limit on the size of the history table, Job Scheduler monitors it and removes outdated, unnecessary history records.
Note To use Job Scheduler effectively, you should understand database management and administration. Job Scheduler executes operations that are usually performed by a database administrator.
Terminology and concepts
This section explains some of the basic concepts and terminology associated with using Job Scheduler.
Terminology • A job is a series of one or more actions performed on a database in a single operation, such as backing up, updating statistics, and dumping a database. • A schedule defines a timescale for how and when jobs are executed and
re-executed.
• A scheduled job is a job that has been bound to a schedule. Only scheduled jobs are executed.
• The Job Scheduler Task (JS Task) is the functional component responsible for managing the schedules and providing timely notification to the Job Scheduler Agent to execute a particular job.
• The Job Scheduler Agent (JS Agent) is the functional component responsible for executing a job when notified by the JS Task. • A repeating schedule is a schedule that is active more than once. All
repeating schedules must have both start and end times.
• A target server is the Adaptive Server® on which a job is scheduled to run. • A template is a set of Transact-SQL (T-SQL) statements with parameters
CHAPTER 1 Overview
Concepts JS Task wakes up on demand, either by a job scheduled to be run or by a wake-up event that has occurred, such as the creation of a new job. At regular intervals (configurable by the database administrator), JS Task scans the
sybmgmtdb database tables and collects applicable schedule information to
maintain its dedicated server tables js_callouts and js_history. The JS Task performs the functions that allows Job Scheduler to perform its internal tasks. It is also what makes Job Scheduler run time programmable within ASE.
Job Scheduler components and functionality
Job Scheduler consists of the following components: • An internal ASE task called the JS Task • An external process called the JS Agent • The sybmgmtdb database and stored procedures
• The graphical user interface (GUI) using the ASE plug-in in Sybase® Central
• Predefined templates from which the database administrator can create and schedule useful, time-saving jobs
Basic tasks The following list of tasks makes up the basic functionality of Job Scheduler and can be performed at the command line or in the Sybase Central graphical management tool:
• Create a job, schedule, or scheduled job • Modify a job, schedule, or scheduled job • Delete a job, schedule, or scheduled job • Review job history
Job Scheduler architecture
The JS Task determines when scheduled jobs should run and creates a historical record of jobs that are run. It starts the JS Agent process and feeds it the necessary information to retrieve job information and run the job on the
Job Scheduler architecture
When the JS Agent retrieves the job information from Job Scheduler’s own database, called sybmgmtdb, it logs into the target ASE and issues the job commands. When the job completes, JS Agent logs any result or output to the log tables in the sybmgmtdb database.
All of the information about jobs, schedules, scheduled jobs, and data needed by the JS Task for internal processing is stored in the sybmgmtdb database, where data is usually accessed through stored procedures. The stored procedures make the data available to the GUI, the JS Agent, and the command-line interface. Only the JS Task accesses data directly from the
sybmgmtdb database.
Using the data it receives, the GUI helps you create and schedule jobs, view job status and job history, and control jobs. It also provides an administration feature that turns the ASE internal task on and off and, therefore, allows Job Scheduler to process and execute scheduled jobs.
Templates are an important tool in defining parameterized tasks for self-management of the database, such as database backups, reorganization rebuilds, modification of configuration parameters, and statistics updates and monitoring. They are implemented as batch T-SQL commands for which you provide parameter values. Database administrators can use templates to generate jobs schedule them to run at specific times.
Figure 1-1 shows the various components that form the Job Scheduler architecture.
CHAPTER 1 Overview
Figure 1-1: Job Scheduler architecture
Process flow As shown, the client GUI and the command line interface interact with the Job Scheduler database tables using stored procedures. Then, the stored procedures perform the actions requested by the user and maintain the definitions of the job commands, schedules, and other job information in the database tables. The JS Task reads the job and schedule information from these tables and determines when a scheduled job needs to be executed. At the appropriate times, the JS Task informs the JS Agent of the job that needs to be run. Then the JS Agent retrieves the job information and executes it on the target ASE database, which can be either local (on the same server as Job Scheduler), or remote (anywhere outside the JS Agent, including on the same server Job Scheduler is installed on). The JS Agent collects the output and any result sets and stores this output in the appropriate tables in the Job Scheduler sybmgmtdb
Security
Security
Job Scheduler uses predefined roles to manage security: js_user_role and
js_admin_role.
js_user_role
A user with js_user_role has permission to create, modify, delete, and run jobs, schedules, and scheduled jobs using the Job Scheuler GUI or the
command-line procedures. The owner of a job, schedule, or scheduled job, can limit which other users can see and use the object, but has no control over objects owned by another user.
js_admin_role
A user with js_admin_role has all the permissions of the js_user_role. It also allows a user to see and manipulate the jobs, schedules, and scheduled jobs of other users. Additionally, the js_admin_role allows a user to modify the following:
• the owner of a job, schedule, or scheduled job • the amount of device space Job Scheduler consumes • the frequency Job Scheduler checks for jobs • the maximum log size a job can write
For more information on roles in ASE, see Chapter 1 of the ASE System
Administration Guide, Volume 1.
js_sa_role
If you configure Job Scheduler to use the sa account, you must add this command whenever the sa password is changed:
sp_addexternlogin loopback, sa, sa, new_password go
CHAPTER 1 Overview
Shared objects
By default, running a job is restricted to the owner of the entry in the scheduled jobs table. However, you can set the shared_run property for a scheduled job to make it available for other Job Scheduler users to run. Also, you can set it to make jobs and schedules to other users. This allows them to create their own scheduled jobs using these shared jobs and schedules. Sharing jobs, schedules, and scheduled jobs does not give other Job Scheduler users permission to modify or delete them; the sharing is read only.
C H A P T E R 2
Configuring and Running Job
Scheduler
This chapter provides the necessary information to install, configure, and run Job Scheduler. It includes the following topics:
Installing Job Scheduler manually
When you select the Job Scheduler option during the Adaptive Server installation, it is installed and configured. If you do not select Job Scheduler during the Adaptive Server installation, it will not be installed. If you want to install Job Scheduler manually, after you have installed Adaptive Server, complete the following steps.
❖ Installing Job Scheduler
1 Create a device called sybmgmtdev with a size of at least 75 MB. 2 Run the installjsdb script:
isql –Usa –Psa_password –Sservername –i $SYBASE/$SYBASE_ASE/scripts/installjsdb
Note You must have the directory with the location of the isql
executable ($SYBASE/$SYBASE_OCS/bin) in your path.
Topic Page
Installing Job Scheduler manually 9 Setting up Job Scheduler users 11 Setting up access to target servers 12
Installing Job Scheduler manually
The installjsdb script looks for the sybmgmtdb database. If it exists, the script creates Job Scheduler tables and stored procedures. If it does not exist, the script looks for the sybmgmtdev device on which to create the
sybmgmtdb database, the tables, and stored procedures.
Note If the installjsdb script finds neither a sybmgmtdev device nor a
sybmgmtdb database, it creates a sybmgmtdb database on the master
device. Sybase strongly recommends that you remove the sybmgmtdb
database from the master device to prevent cluttering it and to make recovery easier in the case of a disk failure.
3 Create a directory services entry for the JS Agent using dscp, dsedit, or a text editor as appropriate for your specific directory services setup and operating system. Sybase suggests the name of “server
name_JSAGENT”:
servername_JSAGENT
master tcp ether server_machine port_number
query tcp ether server_machine port_number
where:
• server_machine is the name of the machine on which the Job
Scheduler Adaptive Server is installed.
• port_number is the port on which the JS Task communicates with the
JS Agent.
Note You must specify a port currently not in use.
See the System Administration Guide, Volume 1 for more information on directory services.
4 Use sp_addserver to create an entry in the sysservers table:
sp_addserver SYB_JSAGENT, null, <servername_JSAGENT>
See the ASE Reference Manual, Volume 2: Commands for more information on sp_addserver.
5 Enable Job Scheduler:
CHAPTER 2 Configuring and Running Job Scheduler
6 Set the number of user connections appropriately. Sybase recommends that you increase the number of user connections by at least 3 times the amount you increase job scheduler tasks. For example, if you increase the value for job scheduler tasks from the default (4) to 8, then you should increase the value for number of user connections by 12 because (8 - 4) x 3 = 12.
Note Changing the number of user connections may require that you increase the value for max memory.
7 To start Job Scheduler, you can either restart the server or use the following commands:
use sybmgmtdb go
sp_sjobcontrol @name=NULL, @option="start_js" go
For more information, see “sp_sjobcontrol” on page 44.
Setting up Job Scheduler users
Set up users so they can create, manage, or execute jobs and schedules in the
sybmgmtdb database.
Note Before you set up users in Job Scheduler, each user must have an ASE login.
❖ Setting up users for Job Scheduler
1 Add users to the sybmgmtdb database:
use sybmgmtdb go
sp_adduser local_login_name go
where local_login_name is the user's login name on the Job Scheduler server.
Setting up access to target servers
sp_role 'grant', js_admin_role, local_login_name go
sp_modifylogin local_login_name, 'add default role', js_admin_role
go
For Job Scheduler users:
sp_role 'grant', js_user_role, local_login_name go
sp_modifylogin local_login_name, 'add default role', js_user_role
go
Setting up access to target servers
Because the Job Scheduler agent runs outside of Adaptive Server, target servers consider it a remote user. Consequently, you must define each target server (even when the target server is the server where the Job Scheduler is installed) and login to the local server, which is where Job Scheduler is installed.
❖ Setting up access to target servers
1 Create a directory services entry for each target server using dscp, dsedit
or a text editor as appropriate to your directory services setup:
target_servername
master tcp ether targetserver_machine port_number
query tcp ether targetserver_machine port_number
where:
• target_servername is the name of the server on which you want to schedule and run a job.
• targetserver_machine is the name of the machine on which you want to schedule and run a job.
• port_number is the port on which JS Agent connects to the target
server.
See the System Administration Guide, Volume 1, for more information on directory services.
CHAPTER 2 Configuring and Running Job Scheduler
2 On the Adaptive Server running Job Scheduler, create an entry in the
sysservers table for each target server on which you want to run a job. A target server can be remote or it can be the Job Scheduler server itself. In both cases, you must add an remote entry for the target server in the
sysservers table.
• Remote target server: Use sp_addserver to add a remote target server. The server class you add must be ASEnterprise:
sp_addserver target_servername, ASEnterprise,
directoryservices_name
go
where:
• target_servername is an alias for the local server. When you install Job Scheduler with Adaptive Server, “loopback” is used as the alias for the server running Job Scheduler.
• directoryservices_name is the name used for the local server in
the directory services file.
Note A remote target server can be the same server as your Job Scheduler installation.
• Local (the server running Job Scheduler) target server: The
sysservers table already contains a local reference to the server where Job Scheduler is installed; however, to allow this server to be a target server, you must create a remote entry for the server in the sysservers
table:
sp_addserver target_servername, ASEnterprise,
directoryservices_name
go
where:
• target_servername is the server on which you want to schedule and
run a job, in this case, the local (Job Scheduler) server.
• directoryservices_name is the name used for this target server in the
directory services file.
3 Add logins for Job Scheduler users using sp_addexternlogin:
sp_addexternlogin target_servername, localname,
remotename, remotepwd
Setting up access to target servers
where:
• target_servername is the server on which you want to schedule and run a job.
• localname is the user's login name on the Job Scheduler server.
• remotename is user's login name on the target server.
• remotepwd is user's password on the target server.
Note You must add external logins for all users for all target servers, even if the target server is the server where Job Scheduler is installed.
You can now create jobs, schedules, and scheduled jobs using stored procedures from the command line or using the Sybase Central ASE plug-in. See Chapter 5, “Command Reference,” for more information on Job Scheduler stored procedures. See Chapter 6, “Managing Job Scheduler in the Sybase Central ASE Plug-in,” for more information on using Job Scheduler with Sybase Central.
C H A P T E R 3
Using Templates to Create Jobs
This chapter describes the installation and use of templates with Job Scheduler.
Introduction
Templates provide one more way to ease the management of your Adaptive Server databases. A template helps database administrators to create T-SQL scripts that perform specific database tuning and
maintenance tasks; the T-SQL that it creates becomes the T-SQL text for the job itself. These jobs can subsequently be customized to a particular server and scheduled to run on any network server at any specified time. As a result, templates can save database administrators the work of creating their own T-SQL or cron scripts, freeing them to concentrate on other duties.
When you use the Sybase Central ASE plug-in, a wizard leads you through each step to create the T-SQL that invokes the procedures for managing your databases.
Note When you create a job from a template that uses stored procedures, the stored procedures must exist on the server on which the job runs. See “Installing stored procedures on a target server” on page 16 for more information.
Topic Page
Introduction 15
Installing stored procedures on a target server 16 Installing the templates into Job Scheduler 16 Using Job Scheduler templates 18
Installing stored procedures on a target server
Installing stored procedures on a target server
Before you can run jobs on target servers, you must install the stored procedures used by the templates on the target servers where you want your jobs to run.
❖ Installing stored procedures on a target server
1 In your Sybase installation, go to the directory that contains the installation utility, which is $SYBASE/$SYBASE_ASE/jobscheduler/Templates/sprocs. 2 Run installTemplateProcs with the following parameters:
• On UNIX:
installTemplateProcs target_servername username
password
• On Windows:
installTemplateProcs.bat target_servername
username password
where:
• target_servername is the name of the target server.
• username is the login name on the target server for the user
installing the templates.
• password is the password on the target server for the user
installing the templates.
The stored procedures are now installed in the sybsystemprocs database on the target server. See Chapter 5, “Command Reference” for more information on stored procedures.
Installing the templates into Job Scheduler
Before you can use the templates, you must install the templates into the Job Scheduler you select to manage your jobs.
❖ Installing the Job Scheduler templates
1 In your Sybase installation, go to the directory containing the installation utility, which is $SYBASE/$SYBASE_ASE/jobscheduler/Templates/xml.
CHAPTER 3 Using Templates to Create Jobs
2 Run installTemplateXML with the following parameters: • On UNIX:
installTemplateXML servername machinename
serverport username password language
• On Windows:
installTemplateXML.bat servername machinename
serverport username password language
where:
• servername is the name of the server where Job Scheduler is
installed.
• machinename is the name of the machine hosting the Job
Scheduler server.
• serverport is the port number for connecting to the Job Scheduler
server.
• username is the user's login name on the Job Scheduler server.
• password is the user's password on the Job Scheduler server.
• language is the code to indicate which language version of the
templates is installed.
Job Scheduler supports the following languages. Use the following language codes to specify language:
• English — en • French — fr • Japanese — ja • Korean — ko
• Simplified Chinese — zh
If you do not specify a language code, Job Scheduler defaults to English templates.
The Job Scheduler templates are now installed on the Job Scheduler server.
Using Job Scheduler templates
Using Job Scheduler templates
The following templates are available to help you create jobs.
Backup
By allowing you to easily create database backup jobs, the backup templates help you preserve your data.
• Sybase backup database to disk template This template uses the
dump database command to allow you to back up one or more databases to disk. When creating a job from this template, you specify the database name and dump directory. You can also specify if you want to compress or stripe the database, and if you want to include the server name and date in the dump file name.
• Sybase backup transaction log to disk template This template uses the dump transaction command to allow you to back up the transaction log for one or more databases. When creating a job from this template, you specify the database name and dump directory. You can also specify if you want to compress or stripe the database, and if you want to include the server name and date in the dump file name. Additionally, you can specify a time threshold so if that amount of time has passed since the last dump, the log will be dumped. Similarly, you can specify a row threshold to force a dump of the log if it contains at least that number of rows. If you do not provide values to any of these parameters, the log dump occurs.
See Chapter 12, “Backing Up and Restoring User Databases,” in the System
Administration Guide, Volume 2.
Statistics management
The statistics management templates help you keep statistics current, so you can generate efficient query plans.
• Sybase server update statistics template This template uses the
update statistics command to allow users to update statistics on all tables in all server databases. The template allows you to supply values for the various options of the update statistics command, while the table, column, and index values are retrieved from the system tables.
CHAPTER 3 Using Templates to Create Jobs
Additionally, you can provide threshold values for data change, page count, and row count. If you supply any of these optional values, they will be used as a gauge in determining whether the update statistics command should be run. If current values for any one of these thresholds meet or exceed the threshold for a given table, update statistics will be executed on that table. After update statistics is run, the sp_recompile procedure is run for the table.
• Sybase update statistics template This template uses the update statistics command to allow you to update statistics at the table, partition, column, and index levels. Additionally, you can provide threshold values for data change, page count, and row count. Data change is a metric that allows you to track the amount of changes to a table, column, or partition. You can use it as an indicator that the update statistics command might help improve performance.
If you provide threshold values, they determine if the update statistics
command should be run. After update statistics is run, the sp_recompile
procedure is run for the table you specified in the template wizard.
• Sybase delete statistics template This template uses the delete statistics command to allow you to delete statistics for all columns in the specified table, for a specific column in the table, or for a partition and local indices on a partition. You must supply the database and table name. You can also specify a column list of which statistics you want to delete. If the column list is omitted, statistics for columns in the entire table are deleted.
Reorganization
The reorganization templates help you keep your database organized, avoiding lost table space and noncontiguous table data.
• Sybase rebuild indexes template This template runs the reorg rebuild
command on an index or indexes for a table. You must specify the database, table, and indexes required by the reorg rebuild command. You can also specify an index partition name and a database backup after the
reorg rebuild command executes.
• Sybase rebuild tables template This template runs the reorg rebuild
command on the entire table. You must specify the database and tables required by the reorg rebuild command. You can also specify to back up the database after the reorg rebuild command executes.
Using Job Scheduler templates
• Sybase reclaim index space template This template reclaims unused space left on a page as a result of deletions and updates that shorten rows. It invokes the reorg reclaim space command to reorganize an index’s data pages. If you specify more than one index, space is reclaimed for each index. You can also specify the name of the index partition that contains the specified index.
• Sybase reclaim table space template This template reclaims unused space left on a page as a result of deletions and updates that shorten rows. It invokes the reorg reclaim space command to reorganize a table’s data pages. If you specify more than one table, space is reclaimed for each table. You can provide a partition name to limit the reorg reclaim space
command to that partition of the table on the specified partition. You can also specify a partition name to limit reorganization to a partitioned portion of a table.
Reconfiguration
The reconfiguration templates help you keep user connections, metadata cache, and locks configured properly to meet your current demands.
• Sybase reconfigure locks template This template allows you to set up automatic reconfiguration for the number of locks allowed by the server at any one time, based on server data and user input. You can specify the number of locks you want to add.
• Sybase reconfigure metadata cache template The metadata cache is a reserved area of memory that is used for databases, indexes, and objects. Using this template, you can create jobs to determine the proper number of each metadata object type for your server. While creating the job, you supply values that are used at runtime to determine the proper number of objects needed for your current server conditions. The job will determine the current number of active objects and adjust the allowable number of objects of the specified type.
Alternatively, you can specify the exact number for one or all metadata object types, bypassing the self-tuning feature of this template.
• Sybase reconfigure user connections template This template calls
sp_configure to set the number of user connections. You can provide the new number of user connections, or the template can calculate it using information you supplied in the wizard.
CHAPTER 3 Using Templates to Create Jobs
Template updates
You can download updates to the Job Scheduler templates and new templates at Sybase CodeXchange on the Internet.
❖ Getting updates and new templates
1 Log in to MySybase at http://www.sybase.com
2 Log in to CodeXchange. 3 Click the Projects tab.
4 Click the ASE project in the projects box.
5 Scroll to the bottom to the subprojects. Select Job Scheduler.
Note Each release of Adaptive Server includes all the available Job Scheduler templates.
C H A P T E R 4
Using Job Scheduler at the
Command Line
This chapter provides examples for creating and scheduling jobs from the command line. You can also perform these procedures from the ASE plug-in in the Sybase Central management tool. See Chapter 6,
“Managing Job Scheduler in the Sybase Central ASE Plug-in,” for more information.
Creating a job
Following are the steps to create a job that prints Hello World.
❖ Creating a Hello World job and a list of its history
1 Perform the server and user setup described in Chapter 2, “Configuring and Running Job Scheduler.” Be sure you have permission to log in to your target server using the user name and password that was supplied to the sp_addexternlogin stored procedure.
2 In the following code example, use the sp_sjobcreate procedure to create a job:
Topic Page
Creating a job 23
Creating a schedule 26
Creating a scheduled job 27 Deleting a scheduled job 28 Modifying a scheduled job 28 Invoking stored procedures on a target server 29
Managing jobs 29
Creating a job
use sybmgmtdb go
declare @jobcmd varchar(255), @jobid int
select @jobcmd='jcmd=print “Hello World.”,server=
YOUR_SERVER'
+ ',starttime=' + convert(varchar(32),getdate()) exec @jobid=sp_sjobcreate 'sjname=hello', @jobcmd go
where
YOUR_SERVER is the name of your target server
3 Use sp_sjobhelp to look at the scheduled job that you created:
> exec sp_sjobhelp 'sjname=hello' > go
4 The following summary of the scheduled job is returned:
sjob_id: 127 name: 'hello' owner : jsadmin1
created : Jul 14 2005 4:42AM state : enabled
job name : 114 - 'job_114' schedule name : 115 - 'sched_115' server : pgibson_js
-- job ---: description :
owner : jsadmin1
created : Jul 14 2005 4:42AM -- schedule ---:
description :
owner : jsadmin1
created : Jul 14 2005 4:42AM starttime : 04:42
startdate : 14 Jul 2005
5 Use sp_sjobhistory to look at the short list history of executing a scheduled job:
sp_sjobhistory 'sjname=hello', @option='list_short' go
6 The following short list is returned:
sjob_id sjob_jobname sjob_schedname sjob_server sjob_state --- -- ---- - ---127 job_114 sched_115 pgibson_js C2
CHAPTER 4 Using Job Scheduler at the Command Line
sjob_start sjob_user_run sjob_user_req sjob_size - ---- ---- ---Jul 14 2005 4:42AM jsadmin1 jsadmin1 51
7 Use sp_sjobhistory to look at the output from executing a scheduled job:
sp_sjobhistory 'sjname=hello', 'list_output' go
8 The following output is returned:
jsout_run_id jsout_seqno jsout_size jsout_text --- --- --- ---
144 0 51 Changed database context to 'master'. hello world
Job state codes
The following table defines the job state codes that are returned in the history table.
Table 4-1: Job state codes descriptions
State name State code Description
waiting W An initial state for a job that has been created or is waiting to schedule.
queued Q Job Scheduler can run the job, but it may be waiting for a free thread to run it.
busy B Job Scheduler did not start the job because this job was already running.
runable R1 Job Scheduler has started the job. running R2 The job is running.
completing C1 The job has completed, and Job Scheduler is cleaning up logs, history, and so on.
completed C2 The job has completed. Post-processing SQL is complete.
terminating T1 Job Scheduler is terminating the job, killing the thread.
terminated T2 Job Scheduler has terminated the job. Post- processing SQL is complete.
timing-out X1 The job has timed out, and Job Scheduler is terminating the job.
Creating a schedule
Creating a schedule
The following code example shows how to create a schedule in Job Scheduler on the command line. You can perform the same task using the ASE plug-in in the Sybase Central management tool.
When you create a repeating schedule, it must have a start time and an end time.
Note When you create a name for a schedule, the name must begin with a letter. If you create a name beginning with a digit, an error occurs.
The following example creates a schedule that operates every five minutes, between 08:00 and 18:00, and is valid every day of the week:
sp_sjobcreate @name='sname=every5m_8to6',@option= 'repeats=5minutes, startime=08:00am, endtime=18:00'
The following example creates a schedule that operates every hour on Saturdays and Sundays between 08:00 and 18:00:
sp_sjobcreate @name='sname=hourly_8to6_weekends', @option='repeats=1hour,starttime=08:00am,endtime= 18:00,days=Saturday:Sunday
The following example creates a schedule that operates at 04:00am on the first and last day of every month, where 32 is the last day of the month:
sp_sjobcreate @name='sname=run_4am_1st_and_last', @option='starttime=04:00,endtime=04:00,dates=1:32'
missed M The scheduled run of the job was missed when Job Scheduler was inactive.
CHAPTER 4 Using Job Scheduler at the Command Line
The following example creates a schedule that operates at 09:00, beginning the first of January and ending the first of February:
sp_sjobcreate @name='sname=run_daily_9am_Jan', @option='starttime=09:00,endtime=09:00,repeats=
1day,startdate=1 January 2005,enddate=1 February 2005'
Note The schedule start time is inclusive—a job will begin at the start time. The schedule end time is exclusive—a job will run up to but not include the end time. For example, if a schedule has a start time of 13:00 and an end time of 16:00 and repeats every hour, it run at 13:00, 14:00, and 15:00, but not at 16:00.
Creating a scheduled job
The following code example shows how to create a scheduled job in Job Scheduler on the command line. You can perform the same task using the ASE plug-in in the Sybase Central management tool.
Note When you create a name for a scheduled job, the name must begin with a letter. If you create a name beginning with a digit, an error occurs.
❖ Creating a scheduled job that gathers statistics on a trial basis for one month
1 Create the schedule:
sp_sjobcreate @name='sname=Aug_stats_trial', @option='starttime=23:00,endtime=23:00,repeats= 1day,startdate=1 August
2005,enddate=31 August 2005'
2 Create the job:
sp_sjobcreate @name='jname=new_stats_proc', @option='jcmd=''exec statsdb..
new_stats_proc'',jdesc=New statistics proc.,jproperties=shared'
3 Create a scheduled job on a server called “devtest1”:
sp_sjobcreate @name='sjname=new_stats_devtest1', @option='sname=Aug_stats_trial,jname=
Deleting a scheduled job
new_stats_proc,server=devtest1'
Note The server name assigned to the scheduled job is the network name (the pname property in sp_addserver) in the interfaces file, not the logical name defined in the sysservers table.
Deleting a scheduled job
Here is an example that deletes a scheduled job.
❖ Deleting a scheduled job
• Use sp_sjobdrop to delete a scheduled job called “new_stats_devtest1”:
sp_sjobdrop 'sjname=new_stats_devtest1' go
Modifying a scheduled job
Using sp_sjobmodify you can configure a scheduled job to run at repeating intervals, on days of the week, or on specific dates in a month. The following examples modify the “hello world” job.
The following code sets the job to run every day at 09:00:
sp_sjobmodify 'sjname=hello', 'starttime= 09:00,repeats=1day'
go
The following code sets the job timout property to 120 minutes::
sp_sjobmodify @name='jname=hello', @option='default_timeout=120' go
The following code sets the job to run at 09:00 on Mondays and Fridays:
sp_sjobmodify 'sjname=hello', 'starttime= 09:00,endtime=09:00,days=Monday:Friday' go
CHAPTER 4 Using Job Scheduler at the Command Line
sp_sjobmodify 'sjname=hello', 'server=prodASE go
Invoking stored procedures on a target server
Scheduled jobs often will invoke stored procedures on the target server to perform the required function. The following example shows a scheduled job invoking sp_who:
use sybmgmtdb go
declare @jobcmd varchar(255), @jobid int
select @jobcmd='jcmd=exec sp_who,server=YOUR_SERVER'
+ ',starttime=' + convert(varchar(32),getdate()) exec @jobid=sp_sjobcreate 'sjname=hello', @jobcmd go
where YOUR_SERVER is the name of your target server.
Note When Job Scheduler executes a job it prefixes the job text with SQL that creates the job runid and the scheduled job ID. Therefore, the call to sp_who
needs to use exec to invoke the stored procedure.
Managing jobs
Using sp_sjobcontrol, you can perform the following ad hoc actions on Job Scheduler:
• Terminate a running job
• Run a scheduled job immediately • Enable and disable a scheduled job
Managing job history and logs
Managing job history and logs
You can adjust the configuration, such as, the rules and thresholds, that controls the automatic management of the history and job output logs.
To adjust these configuration parameters using the ASE plug-in in Sybase Central, see “Administering Job Scheduler” on page 54.
C H A P T E R 5
Command Reference
This chapter describes the properties and parameters of the command line stored procedures.
Command line stored procedures
Adding, modifying anddeleting There are two methods for creating a scheduled job: by specifying both the job and schedule information in one operation, or by defining the job and
the schedule separately and then combining them into a scheduled job.
Reporting and listing Stored procedures are provided for the command line interface to obtain information about the jobs and schedules configured in the Job Scheduler database. The information can be provided in a formatted report or as a simple list.
Running jobs You can run jobs by scheduling them or using ad hoc commands.
Jobs history and output It is possible to manage job history and job output separately. Deleting job history also deletes any corresponding job output, but deleting job output records does not delete job history. This flexibility allows for different rules to govern how much job history and job output is retained.
Topic Page
Command line stored procedures 31
Command syntax 32 sp_sjobcreate 33 sp_sjobcmd 37 sp_sjobmodify 38 sp_sjobdrop 41 sp_sjobhelp 43 sp_sjobcontrol 44 sp_sjobhistory 46
Command syntax
Job Scheduler users without the js_admin_role are restricted to viewing and manipulating the job history and job output from jobs which have their user name recorded in the history entry. However, a user with js_admin_role can use the all option to override this limitation and extend the scope to the history and output to all Job Scheduler users.
Table 5-1: Job Scheduler stored procedure descriptions
Command syntax
Job Scheduler provides a concise set of stored procedures for working with scheduled jobs. Their names are prefixed with sp_sjob, where sjob is an abbreviation for scheduled job.
The stored procedures for creating jobs, schedules, and scheduled jobs will use the server user name to record the owner. The suser_name system function will be used to obtain this.The stored procedures also support working with the underlying job and schedule objects, and provide an interface to control scheduled jobs that are currently running and manage the history and job output that they produce.
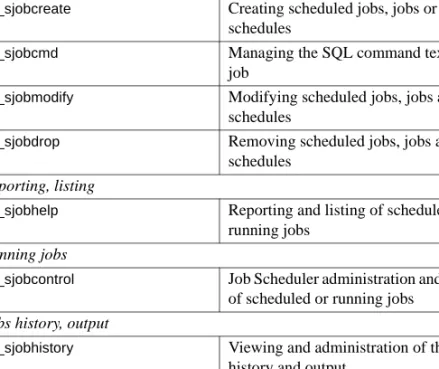
Procedure name Procedure purpose
Create, modify, delete
sp_sjobcreate Creating scheduled jobs, jobs or schedules
sp_sjobcmd Managing the SQL command text of a job
sp_sjobmodify Modifying scheduled jobs, jobs and schedules
sp_sjobdrop Removing scheduled jobs, jobs and schedules
Reporting, listing
sp_sjobhelp Reporting and listing of scheduled and running jobs
Running jobs
sp_sjobcontrol Job Scheduler administration and control of scheduled or running jobs
Jobs history, output
sp_sjobhistory Viewing and administration of the job history and output
CHAPTER 5 Command Reference
The stored procedures accept a name or ID argument, which specifies the object they should operate on. Stored procedures that operate on several different objects, such as a job, a schedule, or a scheduled job, accept a prefix to the name or ID argument, which specifies the sort of object the name or ID refers to: for schedules – @sname; for jobs – @jname.
The following is an example of @sname:
@name= ‘sname=daily_schedule’
The following is an example of using @jname:
@name= ‘jname=run_update_stats’
The name or ID default is to reference a scheduled job.
General usage • Command names, command keywords, the word “null”, data items, and statistic types are not case sensitive. File names, view names, and other user-supplied names are case sensitive.
• If a parameter value contains embedded spaces (such as those in data items, statistic types, and date-time specifications), you must surround the value with quotes. Matched pairs of single-quote or double-quotes are valid delimiters.
• If the parameter value contains an embedded quote that is the same as the character used to delimit the entire value, supply a pair of the quotes within the parameter value. Job Scheduler compresses the pair of quotes to a single character.
• The word “null” within quotes is not considered a keyword. • You can enter Job Scheduler commands on multiple lines.
sp_sjobcreate
Description This procedure serves several purposes:
• When only job information is supplied, it creates a new job.
• When only schedule information is supplied, it creates a new schedule. • When job and schedule information is supplied, it either combines an
existing job and schedule to create a new scheduled job, or creates a new job and a new schedule, and combines them into a new scheduled job.
sp_sjobcreate
By default, the @name argument is the name of a scheduled job. To specify the name of a job or a schedule, the @name argument is prefixed with jname or
sname.
Syntax sp_sjobcreate @name=’jsname’, @options=’server, jname, jdesc, jcmd, sname, sdesc, repeats, properties, starttime, enddate, endtime, days, dates’ Parameters name (jname, sname, sjname)
The name of the new job, schedule, or scheduled job.
Note When you create a name for a job, a schedule, or a scheduled job, the name must begin with a letter. If you create a name beginning with a digit, an error occurs.
option
A list separated by commas of the field names and values you use to create a job, a schedule, or a scheduled job. Values are:
• server – the name of the server where the job runs. The default is the local server.
• jname – the name of the job, which must be unique. • jdesc – comments describing the job.
• jcmd – the SQL text, used for simple jobs when it is easy to provide the text directly.
• sname – the name of the schedule, which must be unique. • default_timeout – the maximum amount of time permitted for the
execution of a job. This value is used by scheduled jobs if the scheduled job’s timeout property is not set.
• sdesc – comments describing the schedule.
• timeout – the maximum amount of time a scheduled job can execute. This value supercedes the job's default_timeout value
• repeats – the interval at which the schedule repeats. 0 or NULL means it does not repeat. The value is a number followed by:
• day or d
• days or dd
• hour or h
CHAPTER 5 Command Reference
• minute or m
• minutes or mm
• properties – the properties of the job, the schedule, or scheduled job:
jproperties, sproperties, or sjproperties, respectively. These properties are:
• jproperties (job properties) • multi_task • run_as_owner • no_job_header • no_sql_batching • no_conn_redirection • shared
• sjproperties (scheduled job properties) • shared_run
• only_at_starttime
• disable_on_faillure
• delete_on_completion
• no_output_log
• shared (schedule property only
• startdate – the date on which a schedule becomes active. • starttime – the time of day when a scheduled job begins. • enddate – the date on which a schedule becomes inactive. • endtime – the time at which a schedule becomes inactive for the
remainder of the day.
• days – a list of days separated by colons. Full names or abbreviations in the locale of the server may be used.
• dates – a list of dates in a month, from 1 to 31, separated by colons. The number 32 represents the last day of any month.
Note An error occurs if you try to specify values for both days and dates.
sp_sjobcreate
Return value • The job ID for a new job.
• The schedule ID for a new schedule.
• The scheduled job ID for a new scheduled job. • An error code.
Examples Example 1 The following example creates a new job called “find_old_logins” that consists of running a stored procedure:
sp_sjobcreate @name=’jname=find_old_logins’
@option=’jcmd=exec sp_find_old_logins,jproperties=shared’
Example 2 The following example creates a new schedule that becomes valid at 1:00 am and repeats every day:
sp_sjobcreate @name=’sname=daily 01:00am’,
@option=’repeats=1day,starttime=01:00am, endtime=02:00am’
Example 3 The following example creates a new scheduled job to run on server “dev1” using the existing job “find_old_logins” and schedule called “daily 01:00am”:
sp_sjobcreate @name=’dev1_old_logins’,
@option=’server=dev1,jname=find_old_logins, sname=daily 01:00am’
Example 4 The following example creates a new schedule called
“evening_sales_report,” using new job called “load_sales_data,” and a new schedule that runs every Monday, Wednesday and Friday at 23:00. The schedule is given a default name based upon the ID value in the schedule table.
sp_sjobcreate @name=’evening_sales_report’ @option=’server=reports, jname=load_sales_data, jcmd=exec sp_new_sales_data,
starttime=23:00,endtime=23:00,days=Monday:Wednesday:Friday’
Usage • A schedule using both a days value and a dates value is not allowed. However, separate schedules using days and dates can be bound to the same job.
• A schedule using a repeats value of more than one day is not valid with
days or dates values.
• A schedule using a repeats value equal to one day is not valid with days or
dates values. By default all days are valid when repeats equals one day. • A schedule using a repeats value of less than one day and a days value of
CHAPTER 5 Command Reference
• If the startdate is equal to the enddate and the endtime is specified, the
endtime value must be equal to or later than the starttime value.
• For schedules with a repeats value of one day or more, the endtime value has no meaning and is ignored.
• If endtime is not specified, the default is midnight. • If starttime is not specified, the default is 00:00am.
sp_sjobcmd
Description Allows the SQL text of a job to be manipulated. When @option=’list’, the SQL text is listed.
By default, the @name argument is the name or ID of a scheduled job. To specify the name or ID of a job, the @name argument is prefixed with jname.
Syntax sp_sjobcmd @name=’…’, @option=’…’, @text=’...’
Parameters name
The name or ID of a scheduled job or job. If it is prefixed with jname, the name or ID of a job.
option
An option to select add, list, or drop to the SQL text for a job. • drop – deletes all SQL text for the specified job.
• list – displays the job command text stored in the database.
• add – appends to any existing SQL text for the specified job, allowing large SQL batches to be stored in several chunks. When JS Agent runs the job, the SQL text for the job is concatenated.
text
The SQL text to store.
Return value Returns 0 or an error code.
Examples Example 1 The following example lists the SQL text for the job that is referenced by the scheduled job called “svr1_check_stats”:
sp_sjobcmd ’sjname=svr1_check_stats’, ’list’
Example 2 The following example deletes the existing SQL text for the “load_sales_data” job and then stores new SQL text for the job:
sp_sjobmodify
sp_sjobcmd ’jname=load_sales_data’, ’drop’ sp_sjobcmd ’jname=load_sales_data’, ’add’, @text=’truncate table sales_report_data’ go
’
Usage Job Scheduler does not implicitly add a new line at the end of the job text. So, when you create a job with sp_sjobcmd, you must explicitly add a new line after you execute a call:
sp_sjobcmd ’jname=load_sales_data’, ’drop’ sp_sjobcmd ’jname=load_sales_data’, ’add’, @text=’truncate table sales_report_data’ go
’
sp_sjobmodify
Description Allows you to modify any of the fields in a scheduled job, a job, or a schedule.
Syntax sp_sjobmodify @name=’...’, @option=’...’
Parameters name
The name or ID of the scheduled job, job, or schedule that is to be modified.
option
A comma-separated list of the field names to modify and the new values: • sjname – a new name for the scheduled job that must be unique. A new
ID may not be supplied.
• enable – 1 enables the scheduled job, 0 disables it. • sjproperties – the properties of the scheduled job.
• sjowner – the owner of the scheduled job. Caller must have
js_admin_role to change the owner.
• server – the server where the scheduled job should run.
• timeout – a timeout value specified for the scheduled job and server, in minutes.
CHAPTER 5 Command Reference
• locale – the locale to be used by the client connection when the scheduled job runs.
• jname – a new name for the job; this must be unique. A new ID may not be supplied.
• jdesc – comments describing the job.
• jcmd – SQL text used for simple jobs when it is convenient to supply the text directly. Replaces all existing SQL text.
• jproperties – the properties of the job, the schedule, or scheduled job:
jproperties, sproperties, or sjproperties, respectively. These properties are:
• jproperties (job properties) • multi_task • run_as_owner • no_job_header • no_sql_batching • no_conn_redirection • shared
• sjproperties (scheduled job properties) • shared_run
• only_at_starttime
• disable_on_faillure
• delete_on_completion
• no_output_log
• shared (schedule property only
• jowner – the owner of the job. Caller must have js_admin_role to change the owner.
sp_sjobmodify
• default_timeout – a timeout value for the job, in minutes.
• sname – a new name for the schedule; this must be unique. A new ID may not be supplied.
• sdesc – comments about the schedule.
• sowner – must have js_admin_role to change the owner. • sproperties – schedule properties.
• reset – “true” resets the timing information in the schedule. It clears the following: repeat, units, startdate, starttime, enddate, endtime, days, and
dates.
• repeats – the interval at which the schedule repeats. NULL or 0 means it does not repeat. The value is a number followed by:
• day or d • days or dd • hour or h • hours or hh • minute or m • minutes or mm
• startdate – the schedule becomes active on this date. The time part is ignored.
• enddate – the schedule becomes inactive. The time part is ignored. • starttime – the time of day when an active schedule begins to operate.
The date part is ignored. If starttime is not specified, it defaults to midnight (00:00).
• endtime – the time of day when an active schedule ceases to operate. The date part is ignored. If endtime is not specified, it defaults to midnight (00:00).
• days – a colon-separated list of days. Full or abbreviated names in the locale of the server may be used.
• dates – a colon-separated list of dates in a month.
CHAPTER 5 Command Reference
Examples Example 1 The following example modifies the scheduled job
“svr1_clean_stats,” updating the schedule to repeat every two hours between 10:00 and 16:00. The days or dates on which the scheduled job operates are unchanged.
sp_sjobmodify @name=’svr1_clean_stats’,
@option=’repeats=2hours,starttime=10:00,endtime=16:00’
Example 2 The following example modifies the job “backup_db5,” updating the default timeout to 120 minutes:
sp_sjobmodify @name=’jname=backup_db5’, @option=’default_timeout=120’
Example 3 The following example modifies the job named
“orders_picked_report,” removing the shared property and changing the owner to mary. The caller requires js_admin_role to change the job owner.
sp_sjobmodify @name=’jname=orders_picked_report’, @option=’jproperties=shared:false,owner=mary’
Usage By default, the @name argument is the name or ID of a scheduled job. To specify the name or ID of a job or a schedule, the @name argument is prefixed with jname or sname.
Following is an example of using @jname:
@name= ‘jname=run_update_stats’
Following is an example of using @sname:
@name= ‘sname=daily_schedule’
sp_sjobdrop
Description Deletes a job, a schedule, or a scheduled job.
By default, the name argument is the name or ID of a scheduled job. To specify the name or ID for a job or a schedule the name argument is prefixed with
jname or sname.
Syntax sp_sjobdrop @name=’...’, @option=’...’
Parameters name
sp_sjobdrop
option
A list of options for the command:
• all – used with a job or schedule to specify that all scheduled jobs owned by the caller that are using the specified job or schedule should also be deleted. When used with a scheduled job, it specifies that the job and schedule associated with the scheduled job should also be deleted, provided that no other scheduled jobs reference them.
• all_users – allows a user with the js_admin_role to use sp_sjobdrop on scheduled jobs, jobs, and schedules that are owned by someone else. • show – displays the jobs, schedules, and scheduled jobs that will be
deleted by this call to sp_sjobdrop, before any deleting occurs. • force – allows you to remove jobs from the database, even if they are
currently running.
(See the Usage section for more details on these parameters.)
Return value Returns 0 on success or an error code.
Examples Example 1 The following example deletes the scheduled job called “svr1_clean_stats”:
sp_sjobdrop ’svr1_clean_stats’
Example 2 The following example deletes the schedule called “daily 01:00am”:
sp_sjobdrop ’sname=daily 01:00am’
Example 3 The following example deletes the job called “load_sales_data”:
sp_sjobdrop ’jname=load_sales_data’
Example 4 The following example deletes the job called “load_sales_data” and any scheduled jobs the caller owns that were using it.
sp_sjobdrop @name=’jname=load_sales_data’, @option=’all’
Usage • An error occurs if you attempt to delete a scheduled job that is currently running, unless you use the force option.
• By default, the sp_sjobdrop procedure only operates on the scheduled job, job, or schedule specified by the @name argument.
For the general administration of jobs and schedules, the all and all_users
CHAPTER 5 Command Reference
• When a scheduled job is specified and the all or all_users option is not used, only the specified scheduled job is deleted.
• When the all option is used for a scheduled job, the scheduled job will be deleted. If there are no more references to the job that will also be deleted, and if there are no more references to the schedule, then the schedule will also be deleted.
• When a job or a schedule is specified and the all or all_users option is not used, an error occurs if the job or schedule is referenced by one or more scheduled jobs.
• When the all_users option is used for a specified job or a schedule and the scheduled jobs that reference the job or schedule are owned by the caller, then the job or schedule and the referencing scheduled jobs are deleted. • When the all_users option is used for a specified job or a schedule and the
caller has the js_admin_role, then the job or schedule and all referencing scheduled jobs are deleted.
The show option is provided so you can see which scheduled jobs, jobs, and schedules would be deleted by a call to sp_dropjob—without actually deleting them.
sp_sjobhelp
Description Generates a list or report about all the scheduled jobs, jobs, or running jobs that are visible to the caller, or about a restricted set based on the name and the option values.
Syntax sp_sjobhelp @name=’...’, @option=’...’
Parameters name
The name or ID of the scheduled job, a job, or a runid. The @name argument restricts the scope to a single scheduled job, all scheduled jobs using a particular job, or a single run of a scheduled job. By default, @name is the name ID of a scheduled job. To specify the name, the ID of a job, or the
sp_sjobcontrol
option
Specifies a comma-separated list of options, the option_name=option_value pairs that define the action to perform, and filters to restrict the information returned.
• report – format as a report. • list – format as a list.
• running – produce a report of running jobs. • scheduled – produce a report of scheduled jobs. • unscheduled – produce a report of unscheduled jobs. • all_users – include information about all users. • owner – restrict to information owned by this user. • jobs – provide information about jobs.
• schedules – provide information about schedules.
• user – restrict information for scheduled jobs to run on behalf of this user. Applies only to running jobs.
Return value Returns 0 on success or an error code.
Examples Example 1 The following example produces a list of all the scheduled jobs that are running:
sp_sjobhelp @option=‘list,all_users,running’
Example 2 The following example produces a report showing all the jobs scheduled by the caller:
sp_sjobhelp @option=’report,scheduled’
Example 3 The following example produces a list of all the jobs and schedules that are not used in any scheduled jobs:
sp_sjobhelp @option=‘list,all_users,unscheduled’ Usage The report will be in several sections, showing the scheduled jobs, jobs that do
not have schedules, and the schedules.
sp_sjobcontrol
CHAPTER 5 Command Reference
Syntax sp_sjobcontrol @name=’...’, @option=’...’
Parameters name
The name or ID of the scheduled job, a job, or a runid to be controlled.
option
Specifies a comma-separated list of options and option_name=option_value
pairs that define the action to perform.
• terminate – instances of the job with the given name, ID, or runid are terminated.
• enable – instances of the scheduled job with the given name or ID are enabled.
• disable – instances of the scheduled job with the given name or ID are disabled. Any currently running jobs are unaffected.
• run_now – schedules the job with the given name or ID to run now. However, there must be a nonconflicting scheduled job created for the corresponding job or sp_sjobcontrol returns an error.
• all_users – allows users with the role js_admin_role to administer scheduled jobs owned by other users.
• start_js – starts Job Scheduler.
• stop_js – stops Job Scheduler and terminates any running jobs. • stop_js_wait – waits for running jobs to complete, and then stops Job
Scheduler.
• stop_js_timeout=minutes – waits a specified number of minutes, and then stops Job Scheduler, terminating any running jobs.
Return value Returns 0 for success or an error code.
Examples Example 1 The following example requests the JS Task and JS Agent to terminate the running job with runid 1532:
sp_sjobcontrol @name=’runid=1532’, @option=’terminate’
Example 2 The following example marks the scheduled job called “svr1_load_sales_data” so that it can be run now. The existing schedule is unchanged.
sp_sjobcontrol @name=’svr1_load_sales_data’, @option=’run_now’
Example 3 The following example disables all of the caller’s scheduled jobs that use the job called “check_user_logins”.
sp_sjobhistory
sp_sjobcontrol @name=’jname=check_user_logins’, @option=’disable’
Usage By default, @name is the name, the ID, or a scheduled job. To specify the name or ID of a job or as a runid, the @name argument is prefixed with jname or
runid.
sp_sjobhistory
Description Lists or deletes job history and job output logs. You can use this procedure to look at the results of scheduled jobs that have completed. You can also use it during administration of the job history and job output logs.
Syntax sp_sjobhistory @name=’...’, @option=’...’
Parameters name
The name or ID of the scheduled job, a job, or a runid.
The @name argument can be used to restrict the scope to the history of a single scheduled job, all scheduled jobs using a particular job, or a single run of a scheduled job. By default, @name is the name or ID or a scheduled job. To specify the name or ID of a job or as a runid, the @name argument is prefixed with jname or runid.
option
Specifies a comma-separated list of options, and option_name=option_value
pairs that define the action to perform on a filtered set of the job history and job output.
• list – lists the job history fields for the jobs matching the filter conditions.
• list_short – lists a subset of the job history fields for the jobs matching the filter conditions.
• drop – deletes the job history entries and job output entries for the jobs matching the filter conditions.
• list_output – lists the job output for the jobs matching the filter conditions.