ID Works Basic, Standard, and
Enterprise Online Reference
Library
This file contains information about Datacard® ID Works® identification software version 6.5 or higher. Some information included here may not apply to your environment.
Please choose a title below to view the document, or click on the titles to the left of this page.
Operator’s Guide for ID Works Version 6 Administrator’s Guide for ID Works Version 6
Datacard® Smart Driver™ and ImageCard® Printer and Magnetic Stripe Plug-ins
Datacard® 150i and 275/280P/295 Card
Personalization Systems: Guide for Use with ID Works Software
Legal Notices
Conventions Used in this Library Comments? Suggestions?
ID Works Version 6 Online Reference Library
© 1999–2007 DataCard Corporation. All rights reserved. U.S. Patent No. 6,632,250.
This publication and the accompanying software are proprietary to DataCard Corporation and are protected under U.S. patent and copyright laws as well as various international laws and treaties. This publication may not be copied, translated, sold, or otherwise transferred to a third party, in whole or in part, without the express written permission of DataCard Corporation.
Information in this publication is subject to change without notice. DataCard Corporation assumes no responsibility for any errors that may appear in this publication.
Names and logos in sample projects are fictitious. Any similarity to actual names, trademarks, or trade names is coincidental.
Datacard, ID Works, ImageCard, and UltraGrafix are trademarks and registered trademarks of DataCard Corporation in the U.S. and other countries. Advanced Imaging Technology, Express, Magna, Platinum, Select, and Tru are trademarks of DataCard Corporation.
Adobe and Acrobat are registered trademarks and Type Manager is a trademark of Adobe Systems Incorporated. Microsoft, Vista, and Windows are trademarks or registered trademarks of
Microsoft Corporation. Pentium is a registered trademark of Intel Corporation.
All other product names are trademarks of their respective owners.
Portions of this product were created using LEADTOOLS © 1991-2005 LEAD Technologies, Inc. ALL RIGHTS RESERVED. Portions
of this product are licensed under US patent 5,327,254 and foreign counterparts.
Portions of the bar code technology of this product are copyrighted by StrandWare, Inc.
Enterprise Edition:Binary PDF417 barcode technology provided in this product is
copyrighted by TAL Technologies, Inc.
Conventions Used in this Library
Names of menus, dialog box options, and buttons appear in bold type.
File names also appear in bold type, and the variable part of the file name is in bold italics (for example, project name.iwx indicates that you supply the project name while iwx remains constant). Names of keyboard keys appear in large and small capital letters (for example, ENTER).
Information you enter appears in regular italic type (for example, you may be instructed to type Admin to log in to an ID Works application).
Parts of dialog box names that change depending on a name you supplied appear in brackets [ ].
Enterprise Edition:Information that applies only to certain ID Works editions is
identified by a phrase similar to this one in the left margin. Blue text indicates a jump (link) to the referenced topic for online
Notes remind or inform you of something you should know before proceeding.
ID Works Version 6 Online Reference Library
Please send comments, suggestions, or corrections to: ID Works Information Development
Mail Stop 210 Datacard Group 11111 Bren Road West
Minnetonka, MN 55343-9015 USA
Or send an e-mail message to: [email protected]
Operator’s Guide for
ID Works Version 6
ii ID Works Version 6 Online Reference Library About the Operator’s Guide _________________________________________________ iv
Chapter 1: System Overview _________________________________________ 1
Introducing the ID Works “Project” ___________________________________________ 1 Getting Started______________________________________________________________ 2 Log In to an ID Works Application_________________________________________ 3 Changing Your User Password ____________________________________________ 4 Using the Welcome Dialog Box ___________________________________________ 5 Using ID Works Applications ______________________________________________ 5 Opening a Project __________________________________________________________ 7
Chapter 2: Using the ID Works Production Application _________________ 9
Using an ID Works Project____________________________________________________ 9 Entering Information in Text Fields ________________________________________ 10 Entering Information in Date Fields_______________________________________ 12 Selecting Information in List Fields________________________________________ 13 Using Photo Fields ______________________________________________________ 14 Photo from File______________________________________________________ 15 TWAIN______________________________________________________________ 16 TWAIN (Fast) ________________________________________________________ 17 Video for Windows __________________________________________________ 17 Video for Windows (Fast) ____________________________________________ 18 Optional Cameras _________________________________________________ 18 Selecting a Different Photo Source __________________________________ 19 Cropping and Adjusting Photos______________________________________ 19 Exporting Images ___________________________________________________ 22 Importing Images ___________________________________________________ 22 Adjusting Photo Backdrop Removal Parameters ______________________ 23 Using Signature Fields ___________________________________________________ 27 Signature from File __________________________________________________ 28 Optional Capture Devices __________________________________________ 28 Using Check Box Fields__________________________________________________ 29 Using Binary Fields ______________________________________________________ 30 Data from File ______________________________________________________ 31 Optional Capture Devices __________________________________________ 32 Verifying Identity ____________________________________________________ 32
Contents
Mandatory Fields________________________________________________________ 32 Read-only Fields_________________________________________________________ 32 Previewing Cards _______________________________________________________ 33 Printing Cards ___________________________________________________________ 34 Using a Project that is Connected to a Database _____________________________ 36 Changing Information in a Database_____________________________________ 37 Entering a New Database Record________________________________________ 40 Deleting a Database Record ____________________________________________ 41 Using a Project that is Connected to a Directory Service ______________________ 42 Changing Information in a Directory Service ______________________________ 43 Creating a New Directory Service Entry ___________________________________ 45
Chapter 3: Using the ID Works Reporting Application __________________ 47
Reporting Procedure Overview ______________________________________________ 47 Selecting a Report ______________________________________________________ 48 Selecting Records _______________________________________________________ 48 Printing Reports _________________________________________________________ 48
Chapter 4: Searching the Data Source _______________________________ 51
Performing a Quick Search __________________________________________________ 52 Refining the Quick Search _______________________________________________ 53 Viewing Search Results __________________________________________________ 54 Navigating Search Results _______________________________________________ 57 Clearing a Record Set ___________________________________________________ 58 Running a Stored Advanced Search _________________________________________ 58 Creating an Advanced Search ______________________________________________ 59
iv ID Works Version 6 Online Reference Library
About the Operator’s Guide
This document, part of the Online Reference Library, guides users of the Production and Reporting applications through the tasks they perform.
Other sources of information about ID Works applications are: • The CD insert tells how to install ID Works software.
• The online help system tells you how to perform ID Works tasks. You can access the online help system from the Help menu in each ID Works application or by pressing the F1 key.
• The Administrator’s Guide, also part of the Online Reference Library, explains why you might want to use the various features available in the ID Works applications. It also suggests the order in which tasks should be performed.
Chapter 1: System
Overview
Datacard® ID Works® identification software includes four applications:
ID Works Designer lets a System Administrator create projects that meet your organization’s specific needs for card designs, report designs, data entry, and database access.
ID Works Production lets you use the projects you create in the Designer application to gather information, access your database, and print identification cards.
ID Works Reporting lets you generate and print image-rich reports from your database.
ID Works Administrator contains tools to manage user accounts, monitor security, and configure your ID Works software.
Introducing the ID Works “Project”
An ID Works project is similar to a folder or directory on a computer: it is the container that holds information about an identification implementation.
2 ID Works Version 6 Online Reference Library
Basic Edition: Basic Edition projects can contain only one card design.
By using field connections, information entered in a Production Form can be saved in a database, printed on a card, used in a report, or all of the above. The Production Form can also be used to query an existing database so that you can add or change information in the database or print cards and reports using information in the database.
Getting Started
The rest of this chapter explains the steps you take to begin using your ID Works identification software.
System Overview
Log In
to an ID Works Application
To begin using ID Works software, on the taskbar, click Start, and then click Programs, Datacard, ID Works, and then ID Works Production or ID Works Reporting.
In the User Login dialog box, type the User Name and User Password given to you by your System Administrator, and then click the Log in button.
When you are logged in to an ID Works application, you do not need to supply your user name and password again to start another ID Works application.
Your System Administrator may have configured your computer to require logging in again if you have not used the Production application after a certain period of time. If that happens, you will see a dialog box similar to the following.
4 ID Works Version 6 Online Reference Library
Changing Your User Password
Each time you log in to an ID Works application you have the
opportunity to change your user password. To change your password, click the Change Password button any time before completing the login.
Enterprise Edition:Your System Administrator may have configured additional
password requirements.
Passwords can be 1 to 32 characters long and can include any character you can type from the keyboard.
System Overview
Using the Welcome Dialog Box
After you have changed your password or entered it and clicked Log in, the Welcome dialog box appears.
From this dialog box you can open an existing project. If the project you want to open is not listed, click More projects to display the Open Project dialog box, which lists all ID Works projects available to you. You can also choose not to have the Welcome dialog box display by clearing the check mark next to Show this window at startup. If you hide the Welcome dialog box and later want to show it again, from the menu bar, select View and then Show Welcome on startup.
Using ID Works Applications
ID Works applications let you perform most actions several ways: by selecting menu commands with the mouse, or with the keyboard, or by clicking a toolbar button, or by clicking the right mouse button and selecting from the pop-up menu. Key commands or shortcuts for actions common to many applications—such as print and save—
6 ID Works Version 6 Online Reference Library Most ID Works applications have several toolbars, and you can display or hide toolbars to match the way you prefer to work. When you rest the mouse pointer on a toolbar button, the name and function of the button appears.
A status bar at the bottom of the window provides additional
information about the application. As with toolbars, you can choose to view or hide the status bar.
Menu bar Toolbars
System Overview
Opening a Project
To open a project, from the menu bar select File and then Open Project (either with the mouse or with the keyboard).
The Open Project dialog box opens. Select a project from the list of projects that are available to you and then click the Open button.
Chapter 2: Using the
ID Works Production
Application
This chapter uses the sample projects that came with your ID Works software to explain your tasks. The projects you will use will be created to meet your specific needs, but they will probably follow the same general principles.
This chapter gives you background information about using the ID Works Production application. While you are using the software you can get step-by-step instructions on the task you are doing by pressing the F1 key or by selecting Help Topics from the Help menu.
Using an ID Works Project
How your project opens depends on what privileges you have. If you are allowed to enter new records, the pointer will be in the field that the designer of the project designated as the starting field. (This is usually the field in the upper left corner of the window.) If your project is connected to a database, the New button on the toolbar will be “pushed in” and there will be a check mark next to the New command on the Record menu.
You can start entering information immediately. Most fields will have a prompt that indicates the kind of information you are to enter in the field. You can move between fields by tabbing or by clicking with the
10 ID Works Version 6 Online Reference Library The following sections discuss how to enter information into each type of field you may find in your project.
Entering Information in Text Fields
If you need to start over with the record and your project is connected to a database, from the menu bar select Record and then Refresh.All fields will return to the way they were when you selected the record from the database.
Using the ID Works Production Application
Most fields will be text fields. There will be a maximum number of characters you can enter in a text field. If a text field stops accepting characters, it may be that you have reached the maximum field length. If you enter more characters than the text field entry box can display, the text might scroll. You can see all the text using the HOME, END, left
arrow, and right arrow keys. You can also ask the project designer to make the text field wide enough to display all the text.
Some text fields may appear with characters already entered for you. For example, an identification number might appear with hyphens separating groups of digits. These fields have a “mask” applied to them to make your job easier. As you type data into these fields, the pointer will skip over the characters that are already there. Some other ways masked text fields might behave are:
• Converting characters. For example, lowercase characters you type might automatically be changed into uppercase characters.
• Requiring that you enter something in a field. If you try to print a card or save a record without entering a value in such a text field, you will see the message, “Mandatory character not present.” When you click OK to clear the message, the pointer will appear in the field you need to complete.
• Requiring a certain kind of character. If you type a letter into a phone number field that is masked to accept only numeric characters, the letter will not be accepted and the computer bell will sound.
Other text fields may be completely filled in for you. Sometimes such text is supplied as a convenience to you but you can change it. Other times the field is read-only and you cannot change the contents. Normally, read-only fields are indicated by gray text or some other visual cue.
12 ID Works Version 6 Online Reference Library
Entering Information in Date Fields
Date fields have separator characters (often slashes or hyphens) in them. You must enter numbers for the day, month, and year in the order that was specified when your project was created. If the prompt for the date field does not tell you whether to enter the month first or second and you enter it in the wrong position, an error message will appear when you try to print a card or save the record. You can easily change the order.
Some date fields also require that you enter a time. The time part of the date field will appear to the right of the date. You must enter numbers
Using the ID Works Production Application
for the hour, minute, and second part of the time. If your project uses the 12-hour time format, you will also need to enter AM or PM.
Selecting Information in List Fields
List fields have an arrow at the right side of the field. Instead of typing information in them, you make a selection from the items in the list. To see all the choices, click and hold on the arrow. See the online help
If you make a mistake while entering a date, move the pointer to the right of the incorrect character, press the BACKSPACE
key, and then type the correct number.
14 ID Works Version 6 Online Reference Library
Using Photo Fields
What happens when you enter a photo field depends on how your project was set up, whether your system has a camera, and, if so, what kind of camera it is. The most common behavior is for a photo capture to begin as soon as you enter the photo field. If no dialog box opens, you must start the capture operation. From the menu bar, select Capture and then Capture.
The dialog box for the default photo source opens. If an “Unable to capture photo . . .” message appears, you must select a source for the photo. From the menu bar, select Capture and then Select Capture Source. See the online help topic “Select a photo source” for step-by-step instructions.
Using the ID Works Production Application
The following paragraphs show the dialog boxes that open for the photo sources that are available on all ID Works computers.
Photo from File
If the photo source selected is Photo from File, the Open dialog box opens. You use standard Windows navigation techniques to find the drive, folder, and file that contains the photograph that should be used. Your supervisor or ID Works System Administrator will supply you with the file location and file naming scheme to use. When you select a file, a “thumbnail” of the file displays so you can verify that you have the correct file.
When you have found the file you want, click Open. The Photo Crop and Adjust dialog box opens, where you can center the subject or crop out (eliminate) unnecessary background. See Cropping and Adjusting
If you need to select a source, check with your System Administrator. They may have forgotten to assign a source.
16 ID Works Version 6 Online Reference Library
TWAIN
If the photo source selected is TWAIN, the TWAIN Interface dialog box opens. (The TWAIN standard specifies how an application, such as ID Works Production, can activate a scanner, digital camera, or other image-capturing device.)
When you click the Select Source button, the Select Source dialog box opens. It lists all the TWAIN devices installed on your computer.
Select the device you want to use and click the Select button. The Select Source dialog box closes. In the TWAIN Interface dialog box, click the Acquire Photo button. The software application that is associated with the device you selected opens.
Because there are many different TWAIN devices made by many different manufacturers, this document cannot supply explicit
instructions for using your TWAIN device. See the documentation that came with your device, or ask your supervisor or ID Works System Administrator for step-by-step instructions.
Using the ID Works Production Application
TWAIN (Fast)
If the photo source selected is TWAIN (Fast), the last TWAIN device used is automatically selected. See the documentation that came with your device or ask your System Administrator for step-by-step instructions.
Video for Windows
If the photo source selected is Video for Windows, the Video for Windows Interface dialog box opens.
When you click the Select Source button, the Select Source dialog box opens. It lists all the Video for Windows devices installed on your computer.
Select the device you want to use and click the OK button. The Select Source dialog box closes.
18 ID Works Version 6 Online Reference Library In the Video for Windows Interface dialog box, click the Acquire Photo button. The Video for Windows Camera dialog box opens.
When your subject is ready, click Take Photo. The camera captures the image and the label on the button changes to Retry. If the photo is unacceptable (for example, if the subject’s eyes are closed), click Retry. If the photo is acceptable, click OK. The Photo Crop and Adjust dialog box opens. See Cropping and Adjusting Photos on page 19.
Video for Windows (Fast)
If the photo source selected is Video for Windows (Fast), the Video for Windows Camera dialog box opens immediately. You do not have to select a source.
Optional Cameras
In addition to the photo sources already described, your ID Works system may include an optional capture device, such as a Datacard® Tru™ Photo solution. These optional devices have special software that makes them especially easy to use with your ID Works system. Optional cameras are explained in their own online documents, which you access through the Windows Start menu.
Using the ID Works Production Application
Selecting a Different Photo Source
If you have the necessary privilege, you can use a photo source other than the one specified when your project was created. See the online help topic “Select a photo source” for step-by-step instructions.
Cropping and Adjusting Photos
If your ID Works project allows you to crop photos, the Photo Crop and Adjust dialog box will open as soon as you have selected your photo. Your photo will appear in the image area with four squares, called sizing handles, around the outside.
20 ID Works Version 6 Online Reference Library To zoom in on the subject (eliminate unnecessary background), click and drag any sizing handle, then release the mouse button. The crop box proportions, set by the project designer, remain constant.
After you have zoomed in, your subject may no longer be centered in the crop box. To adjust the position of the crop box, move the mouse until the pointer is inside the crop box. The pointer changes to a four-way arrow. Click and drag the crop box to the position you want, then release the mouse button.
When the photo is as you want it, click the OK button. The Photo Crop and Adjust dialog box closes, and the photo appears in the photo field. Most of the time, cropping and adjusting is all you need to do to a photo. But the Photo Crop and Adjust dialog box also offers the following advanced capabilities.
Rotating Photos
Some previously taken photos may have an orientation different from the one you need. You can compensate for this by rotating the photo as necessary. Each time you click the Rotate button, the photo rotates one-quarter turn clockwise.
Selecting an Exposure
If the subject of the photo has a very light or very dark complexion, you can improve the quality of the photo to some degree by clicking the Photo Selection button.
Any cropping or adjusting you did is lost when you rotate a photo. If you need to rotate the photo, do that first, then crop and adjust.
Using the ID Works Production Application
An array of nine different brightnesses appears, with the original exposure in the center. Select a photo by clicking it with the mouse or by using the arrow keys to move the selection box.To adjust the contrast of the photo, select the More button. You can also select from nine choices for saturation. At any time you can start over or select OK or press ENTER to accept the currently-selected photo. Your selection
appears in the image area of the Photo Crop and Adjust dialog box. Remember, the final quality of the image is also affected by the printer you are using to print your ID cards. Changing
22 ID Works Version 6 Online Reference Library
Starting Over
You can undo all your changes (cropping, exposure selection, rotation) by clicking the Restore Original button.
Cropping and Adjusting Existing Photos
If you have the necessary privilege, you can crop or adjust photos that have been captured previously. First, locate the database record that contains the photo you need to change. See chapter 4, Searching the Data Source, or go to the online help topic “Find a record with Quick Search” or “Find a record with Advanced Search”. Select the photo field and, if necessary, cancel the dialog box that automatically opens. From the menu bar, select Capture and then Crop and Adjust Photo. The Photo Crop and Adjust dialog box opens.
Exporting Images
You can save an image you see in the Production window for use in other applications using the Capture menu command, Export.
Enterprise Edition:You can export the images from all of the selected records at one
time using the Capture menu command, Export Images. This
command starts the Export wizard where you can select the location to save the files, the Production Form field (text, list, or composite) used to name each exported file, the file type, and an overwrite choice if you happen to use duplicate file names. See the online help topic “About the Batch Image Export Wizard” for step-by-step instructions.
Importing Images
You can import an image into the Production application using the Capture menu command, Import.
Enterprise Edition:You can import images to all of the selected records at one time
using the Capture menu command, Import Images. This command starts the Import wizard where you first select all of the photo and
Using the ID Works Production Application
signature fields into which you want to import an image. You will then select the following information for each of the fields you selected; the source directory, the Production Form field (text, list, or
composite) used to match each import file to each record, import file type, and an overwrite choice for records where the image already exists. See the online help topic “About the Batch Image Import Wizard” for step-by-step instructions.
Adjusting Photo Backdrop Removal Parameters
Your ID Works project may be set to remove the backdrop color from photos of cardholders. This is often done so the card background shows all around the person. The backdrop color is removed from the photo as a card is printed. Photos are stored with the backdrop color in place, and the success of the backdrop color removal depends on how uniform the backdrop color is on the photo.
If your project uses backdrop color removal, you can use the Card Preview to verify that all the backdrop color has been removed. (See Previewing Cards on page 33.) If some of the backdrop color remains and if you have the necessary privilege, you can use the Capture menu command, Adjust Backdrop Removal Parameters, to improve the image on the card.
24 ID Works Version 6 Online Reference Library
In the Removal Method area, select Remove color from entire photo if backdrop color is surrounded by another color (for example, if you can see through the subject’s hair style, as in this photo). Be aware,
however, that if any part of the subject’s face or clothing is the same color as the backdrop, that feature will also be removed. For example, if the subject is wearing a shirt that has checks the same color as the backdrop color, the checks in the shirt will be removed. If this occurs, use the Advanced Controls and select the Remove color from around the person option.
In the Removal Sensitivity area, select if some of the backdrop is visible in the Card Preview. Select if some of the subject has been removed.
Using the ID Works Production Application
After you have made changes to the settings, the results appear in the large Backdrop Removed area. The original image is shown in the smaller area next to the Help button.
If you are satisfied with the adjusted image, click OK. The Adjust Photo Backdrop Removal Parameters - Basic dialog box closes and the results of your adjustment are shown in the Card Preview. The
adjusted settings are used until you move off the current record. If you click Cancel, the dialog box closes and your adjustments are
discarded. For additional capabilities, click Advanced Controls.
Advanced Controls
26 ID Works Version 6 Online Reference Library In the Removal Sensitivity area, you increase or decrease the spectrum of colors that are considered to be backdrop. Three attributes
determine what we think of as a color.
• Hue is described with the words we normally think of as describing a color (red, yellow, etc.).
• Saturation might be described with words like vivid or pale. It talks about the dominance of the hue.
• Value deals with lightness or darkness—how much black is in the color.
You increase or decrease the range for the attribute by clicking the up or down arrow. When you increase the range, more of the backdrop color is removed.
You can control the ranges individually or you can select Move all ranges together to control them as a group. You can also return to the factory default settings or to the settings you last saved by clicking the appropriate button.
When adjustments are complete, you can choose to use the current settings for the current image only, for all images in the current
database search results, or for all photos from now on. If you select Use for all photos, these settings become the ones you would return to if you clicked the Saved Settings button at some future time.
Using the ID Works Production Application
Using Signature Fields
Basic Edition: Signature fields are not available in ID Works Basic Edition. The next
relevant section for Basic Edition users is Mandatory Fields on page 32.
What happens when you enter a signature field depends on how your project was set up, whether your system has a signature pad, and, if so, what kind of signature pad it is. The most common behavior is for a signature capture dialog box to open as soon as you enter the
28 ID Works Version 6 Online Reference Library The dialog box for the default signature source opens. If an “Unable to capture signature . . .” message appears, you must select a source for the signature. From the menu bar, select Capture and then Select Capture Source.
Signature from File
If the signature source selected is Signature from File, the Open File dialog box opens. You use standard Windows navigation techniques to find the drive, folder, and file that should be used. Your supervisor or ID Works System Administrator will supply you with the file location and file naming scheme to use.
Optional Capture Devices
In addition to Signature from File, your ID Works system may include an optional signature capture device, such as the Datacard Tru
Signature Solution. These optional devices have special software that makes them especially easy to use with your ID Works system. Optional devices are explained in their own documents, which you access through the Windows Start menu.
If you need to select a source, check with your System Administrator. They may have forgotten to assign a source.
Using the ID Works Production Application
Using Check Box Fields
Basic Edition: Check Box fields are not available in ID Works Basic Edition. The next
relevant section for Basic Edition users is Mandatory Fields on page 32.
ID Works Standard Edition and Enterprise Edition allow a check box field to be added to a Production Form. If your Production Form contains a check box field that is not read-only, you can select the field using one of the following methods:
• Click directly over the check box.
• With the check box field active (for example, you have tabbed to the field), press the keyboard space bar.
30 ID Works Version 6 Online Reference Library
Using Binary Fields
Enterprise Edition:Binary fields are available only in ID Works Enterprise Edition
software. The next relevant section for Basic Edition and Standard Edition users is Mandatory Fields on page 32.
Binary fields give you a way to collect and use data that cannot be displayed as characters or that should not be interpreted by the ID Works Enterprise Edition software. The two main uses for binary fields are to load a smart card application on a smart card chip and to collect or verify (or both) biometric data such as fingerprints.
What happens when you enter a binary field depends on how your project was set up, how the field is used in your project, whether data
Binary field—data has been collected Binary field—data needs to be collected
Using the ID Works Production Application
has been collected for the field or not, and whether your system has a biometric capture device. The most common behavior is for a capture dialog box to open as soon as you enter the binary field. If no dialog box opens, you must start the capture operation. From the menu bar, select Capture and then Capture.
If an “Unable to capture” message appears, you must select a source for the binary field. From the menu bar, select Capture and then Select Capture Source.
Data from File
If the source selected is Data from File, the Open File dialog box opens. You use standard Windows navigation techniques to find the drive, folder, and file that should be used. Your supervisor or
ID Works System Administrator will supply you with the file location If you need to select a source, check with your System
32 ID Works Version 6 Online Reference Library
Optional Capture Devices
In addition to Data from File, your ID Works system may include an optional biometric capture device, such as the Datacard® Tru™ Fingerprint solution. These optional devices have special software that makes them especially easy to use with your ID Works system.
Optional devices are explained in their own documents, which you access through the Windows Start menu.
Verifying Identity
If your project is connected to a biometric device and the binary field has data, you will probably be asked to verify a cardholder against the stored biometric data. See the documentation that came with your biometric device for verification procedures. If you need to recapture biometric data, with the binary field selected, from the menu bar select Capture and then Capture.
Mandatory Fields
There may be some fields on your Production Form that require you to supply information. If you try to print a card or save the record without completing a mandatory field, a message box appears. When you click OK to clear the message, the pointer appears in the
mandatory field so you can complete it.
Read-only Fields
There may be some fields on your Production Form that contain information you cannot change, such as a person’s birth date or the number of times a card has been printed for that person. Those fields are there for your information only. The pointer will not move to them when you tab through the form and you cannot click in them to place the pointer there.
Using the ID Works Production Application
Previewing Cards
To see a preview of the card that will be printed, from the menu bar select View and then Card preview – front or Card preview – back. A Card Preview opens. (You can see previews of both sides of the card by selecting both card preview menu commands.)
You can move the Card Preview to a different location by clicking on its title bar and dragging it to the new location. You can change the size of the Card Preview by moving the mouse to an edge of the Card Preview until the pointer turns into a two-way arrow, then clicking and dragging the edge of the Card Preview until it is the size you want.
If your card design includes a bar code and if you enter too much data, the bar code in the Preview will change to diagonal lines. If you enter the wrong kind of data in the Production Form field associated with the bar code (for example, a letter if the bar code type only accepts numbers), the bar code in the Preview will change to a crosshatch pattern. Cards with too much or unsupported bar code data will not print.
Too much bar code data
34 ID Works Version 6 Online Reference Library or shape. If the field is a graphic or photo, as in the following
illustration, it will appear as a black-and-white image.
Printing Cards
You can print each card as you gather the information or you can collect information on a group of cardholders (saving it in the project database) and then print the cards in a batch.
You may be able to print cards, print multiple copies of a card, reprint cards, or some combination. Your ID Works System Administrator determines your card printing privileges.
If your ID Works project is not connected to a database, you must print each card as you gather the information.
If your project is connected to a database, you can print each card as you gather the information or you can collect information on a group of cardholders (saving it in a database) and then print the cards in a batch. Working with projects that are connected to a database is explained in the next section of this chapter.
You can print cards from either the Production Form view or the Table view. (See the online help topics “Select Production Form View” and “Select Table View”.) In table view, you can select a subset of records returned from a search and print cards for only the selected records. See chapter 4, Searching the Data Source, starting on page 51, for more information.
Using the ID Works Production Application
Card printing works the same whether you print cards singly or in batches:
1. Gather the cardholder information or select the record(s) to print. 2. To print a single card, from the menu bar select File and then Print
Card or click the Print button on the toolbar.
To print cards for all the records you selected, from the menu bar select File and then Print All or click the Print all button on the toolbar.
The Print Card(s) dialog box opens.
3. If necessary, select your card printer from the list.
4. If you want to print more than one copy of the card(s), enter the number of copies you want.
5. If your printer has a magnetic stripe or smart card encoder, you can choose to print the card, encode the card, or both by selecting the appropriate check boxes.
6. Click OK. If you chose to print cards for multiple records, the Batch Print Status dialog box opens.
36 ID Works Version 6 Online Reference Library Clicking the Cancel button stops processing cards.
However, cards that have already been processed will still be sent to the printer and cards that have been sent cannot be retrieved.
If you print cards in batches and if your ID Works project was set up to allow it, you can track the progress of your print request after it has been sent to the printer:
1. From the Windows Start button, select Settings and then Printers or Printers and Faxes. The appropriate dialog box opens.
2. Double-click on your card printer. A window with the name of your printer opens. For each card in the print queue, the Document Name column shows the contents of the field that was designated for print tracking (for example, the Name field).
3. To update the list, from the menu bar of the printer window, select View and then Refresh.
Using a Project that is Connected to a
Database
Many ID Works projects are connected to a database. That is, the information you gather is saved for future use not only by you but also by other departments in your organization. In other cases, much of the information was entered into the database by someone else, and you retrieve it, add to it (perhaps the photograph), and save changes to the database record.
Enterprise Edition:ID Works Enterprise Edition allows projects to use a directory
service instead of a database. Using a project that is connected to a directory service is explained on page 42.
You can use a Windows printer capability to cancel a print job that is in the printer’s queue. See Windows help for printers for more information.
Using the ID Works Production Application
If your ID Works project is connected to a database, your menu bar will have a Record menu and your toolbar will include additional buttons and a list box.
Databases store information in tables. Each row of the table is called a record, and that is why the new menu on the menu bar is named Record—it deals with database records. Each column of the table is known as a field. A column contains a category of information, such as a name, a telephone number, or a photograph of the person described in the record. The information you enter in fields in the ID Works Production Form can be stored in and retrieved from columns in a database table. Searching the database to retrieve information is explained in Searching the Data Source on page 51.
Changing Information in a Database
If you have permission to make changes to information in the database, a Save button will appear on your toolbar and the Record menu will have a Save command.
Record menu appears when the project is connected to a database
Additional buttons and list box appear when the project is connected to a database
38 ID Works Version 6 Online Reference Library
To change information in a database:
1. Locate the record you need to change. See Searching the Data Source on page 51, or go to the online help topic “Find a record with Quick Search” or “Find a record with Advanced Search”. 2. Click in or tab to the field that needs to be changed and correct the
information.
3. When all changes have been made, from the menu bar, select Record and then Save (or click the button on the toolbar that looks like a diskette). The changed information is saved in the database. To make the same change to multiple database records:
1. Create a search request that finds all the records you want to change (and only the records you want to change). See chapter 4, Searching the Data Source, or go to the online help topic “Find a record with Quick Search” or “Find a record with Advanced Search”.
2. Change one or more fields in the first record.
If you need to reverse all the changes you made to the record, from the menu bar, select Record and then Refresh. The information returns to the way the record is stored in the database.
Using the ID Works Production Application
3. From the menu bar, select Record and Update All. A confirmation message appears.
4. Click Yes to change all records in the current group of records.
If you change a photo, signature, or binary field, a message will appear saying that the field will be changed on the current entry but not any other entries in the group. You will have the opportunity to cancel the update operation or proceed.
You are not allowed to change a photo, signature, or binary field for multiple records using the Update All command.
40 ID Works Version 6 Online Reference Library
Entering a New Database Record
If you have permission to create records in the database, a New button will appear on your toolbar and the Record menu will have a New command.
To add a new record to a database:
1. From the menu bar, select Record and then New (or click the button on the toolbar that has a yellow starburst). All fields are cleared or set to their default value.
2. Enter data into the fields. See the online help topics “Enter data into a text field” and related topics, as well as “Take a photo” for step-by-step instructions.
3. When all information has been entered, from the menu bar, select Record and then Save (or click the button on the toolbar that looks like a diskette). The new record is saved in the database.
Save time and effort when entering many new records. From the Record menu, select Auto New Record on Save. A new record will be started as soon as you save the current new record.
An ID Works project can be set up so that a record is automatically saved to the database each time a card is printed. Ask your ID Works System Administrator if your project has been set up this way. If so, you do not have to remember to save each record.
Using the ID Works Production Application
Deleting a Database Record
If you have permission to delete database records, a Delete button will appear on your toolbar and the Record menu will have a Delete command.
To delete a record from a database:
1. Locate the record you need to delete (see Searching the Data Source on page 51, or go to the online help topic “Find a record”). 2. From the menu bar, select Record and then Delete (or click the
button on the toolbar that has an X). A confirmation message appears.
3. Click Yes to delete the record. The record is deleted from the database.
To delete multiple records, repeat the procedure above or use your database program directly. Another way to delete multiple records is to create a search request that finds all the records you want to delete (and only the records you want to delete). See Searching the Data Source on page 51, or go to the online help topic “Find a record” for
42 ID Works Version 6 Online Reference Library
Using a Project that is Connected to a
Directory Service
Enterprise Edition:Some ID Works Enterprise Edition projects are connected to a
directory service for data storage. If your ID Works project is connected to a directory service, your menu bar will have a Record menu and the QuickSearch button will be available on your Database Toolbar (if you have it selected in the View menu).
Directory services store information in objects. There can be many entries in an object. Each entry is composed of attributes that have one or more values. For example, an employee entry could have a “last name” attribute. The information you enter in fields in the ID Works Production window can be stored as attribute values. Searching the directory service to retrieve information is explained in Searching the Data Source on page 51.
Record menu appears when the project is connected to a directory service
Search button is available when the project is connected to a directory service
Using the ID Works Production Application
Changing Information in a Directory Service
If you have permission to make changes to information in the
directory service, a Save button will appear on your Database Toolbar and the Record menu will have a Save command.
1. Locate the entry you need to change. See chapter 4, Searching the Data Source, or go to the online help topic “Find a record with Quick Search”.
2. Click in or tab to the field that needs to be changed and correct the information.
3. When all changes have been made, from the menu bar, select Record and then Save. The changed information is saved in the directory service.
If you need to reverse all the changes you made to the entry, from the menu bar, select Record and then Refresh. The information returns to the way the entry is stored in the directory service.
44 ID Works Version 6 Online Reference Library To make the same change to multiple directory service entries:
1. Create a search request that finds all the records you want to change (and only the records you want to change). See chapter 4, Searching the Data Source, or go to the online help topic “Find a record with Quick Search” for more information.
2. Change one or more fields in the first entry.
3. From the menu bar, select Record and Update All. A confirmation message appears.
4. Click Yes to change all entries in the current group.
If you change a photo, signature, or binary field, a message will appear saying that the field will be changed on the current entry but not any other entries in the group. You will have the opportunity to cancel the update operation or proceed.
Using the ID Works Production Application
Creating a New Directory Service Entry
If you have permission to create entries in the directory service, a New button will appear on your Database Toolbar and the Record menu will have a New command.
To add an entry to a directory service:
1. From the menu bar, select Record and then New. All fields are cleared or set to their default value.
2. Enter data into the fields. See the online help topics “Enter data into a text field” and related topics, as well as “Take a photo”, for step-by-step instructions.
Save time and effort when creating many new entries. From the Record menu, select Auto New Record on Save. A new entry will be started as soon as you save the current new entry.
46 ID Works Version 6 Online Reference Library
3. When all information has been entered, from the menu bar, select Record and then Save. The new entry is saved in the directory service.
An ID Works project can be set up so that an entry is
automatically saved to the directory service each time a card is printed. Ask your ID Works System Administrator if your project has been set up this way. If so, you do not have to remember to save each entry.
Chapter 3: Using the
ID Works Reporting
Application
This chapter uses the sample projects that came with your ID Works software to explain tasks you will perform in the ID Works Reporting application. The projects you use will be created to meet your specific needs, but they will probably follow the same general principles. This chapter gives you background information about using the ID Works Reporting application. While you are using the software you can get step-by-step instructions on the task you are doing by pressing the F1 key or by selecting Help Topics from the Help menu.
Reporting Procedure Overview
There are four steps for using the ID Works Reporting application: 1. Open a project. (See Opening a Project on page 7.)
2. Select a report.
3. Select information to fill the report.
To use ID Works Reporting, your project must be connected to a database. If the project you select is not connected to a database, ID Works Reporting presents a message and closes the project.
48 ID Works Version 6 Online Reference Library
Selecting a Report
Reports for ID Works projects are created in the Designer application. You select a report to view or print from the menu bar or from the toolbar. See the online help topic “Select a report” for step-by-step instructions.
Selecting Records
The Reporting application lets you retrieve information stored in a database table and view or print it on a report. Searching the database to retrieve information is explained in chapter 4, Searching the Data Source, starting on page 51.
Enterprise Edition:ID Works Enterprise Edition allows projects to use a directory
service instead of a database. Except for searching, the kind of data source used in your ID Works project does not affect how you use the Reporting application. Searching is explained in chapter 4, Searching the Data Source, starting on page 51.
Printing Reports
You can print paper copies of your reports from the Production Form view or from the Table view. See the online help topic “Print a report” for step-by-step instructions. Report printing uses standard Windows Print dialogs.
You can also see a preview of your printed report. While in the print preview window you can page through the pages of a multi-page
Using the ID Works Reporting Application
report, view two pages side by side, enlarge the report content (Zoom In) or reduce it (Zoom Out), print the report, or close the print
preview. Printing the report or closing the print preview returns you to the view you were using previously.
You can change the Page Setup for a report. Page Setup includes settings for paper size, orientation, and margins (top, bottom, left, and right). See the online help topic “Change the page setup for a report” for step-by-step instructions.
50 ID Works Version 6 Online Reference Library
If you change Page Setup properties, the Reporting application will ask if you want the new properties applied to all reports in the project. Any changes you make to Page Setup properties are used until you make other changes or until you close the project. When the project is opened again, the default page setup (specified by the person who designed the project) is used.
When you print a report, the ID Works Reporting application puts as many records on a page as possible. If you change the paper size or margins significantly, fewer (or more) records may fit on a page.
Chapter 4: Searching
the Data Source
Most ID Works projects are connected to a database.
Enterprise Edition:ID Works Enterprise Edition projects can, instead, use a directory
service for data storage. Because searching a directory service is similar to searching a database, this chapter will use “database” to apply to both types of data source. Differences for directory services are marked with the words at the left of this paragraph.
You get information out of a database by searching it. There are two methods for searching the database: Quick Search, for simple or one-time searches, and Advanced Search, for more complicated searches or those you will perform repeatedly. This chapter explains how to run a stored advanced search. Creating and saving (storing) advanced searches is described in chapter 5 of the Administrator’s Guide.
52 ID Works Version 6 Online Reference Library
Performing a Quick Search
To perform a simple or one-time search of the database, click the button on the toolbar that has a magnifying glass on it (the Quick Search button), or from the menu bar, select Record and then Quick Search. The Quick Search dialog box opens.
The Quick Search dialog box contains a field for each searchable field in your Production Form.
The kind and amount of information you enter in the Quick Search dialog box determines how many records the database system finds
If the Quick Search button and menu command do not appear on your ID Works window, you do not have permission to search the database or you are restricted to running stored searches. Contact your ID Works System Administrator to gain permission to search the database.
You will never see a photo, signature, check box, or binary field in a Quick Search dialog box. Use the advanced search dialog to search these field types. In addition, the project designer may have excluded some Production Form fields from the Quick Search dialog box.
Searching the Data Source
for you. If you click the Search button without entering anything in any of the fields, the database system shows you all the records in the database. For example, if a database for a project has 15 records, clicking the Search button without making any entries in the dialog box results in 15 records.
Refining the Quick Search
You can reduce the number of records displayed by entering more specific information in one or more search fields and by using wildcard characters. For example, in the project Sample Loyalty, the following Quick Search dialog box returns 2 records—all the records of people in the database whose last names start with R.
This search uses the % (percent) wildcard character. It stands for any number of characters after the R. You can also use the _ (underscore) wildcard character to substitute for a single character. For example, entering Jo_n would find John and Joan but not Johann.
Enterprise Edition:Only one wildcard character works when searching ID Works
Enterprise Edition projects connected to a directory service. The asterisk (*) represents zero or more characters at that position in the string of characters you typed.
54 ID Works Version 6 Online Reference Library
Viewing Search Results
You can view the results of your database searches in two ways. Production Form view presents the information one record at a time in a graphical presentation. While in Production Form view you navigate the search results as described in Navigating Search Results on
page 57.
• Wildcard characters do not work in date fields or in fields attached to number fields in the database. You must enter exact values in these types of fields.
• If your database is case sensitive, your searches will be, too. You must use capital letters as appropriate.
• If you enter data into more than one search field, the database system looks for records that match all fields.
Searching the Data Source
Table view presents a screenload of records at a time in the form of a table or chart. Table view may be useful if your search results in more than one or two records. (See the online help topic “Select Table View”.)
Table view displays a thumbnail view of any photo that has its “Display in Table View” field option selected. Place the mouse cursor over the photo to see a larger image.
Only the columns selected in the project designer will display in Table view.
56 ID Works Version 6 Online Reference Library
While in Table view you navigate the search results using the same techniques you use navigating Windows Explorer. You can also select records in Table view the way you select files in Windows Explorer. If you select a single record and then switch to Production Form view (see the online help topic “Select Production Form view”), the record you selected appears in the Production Form view. If you select more than one record and then switch to Production Form view, the last record you selected appears in the Production Form view.
In the Production application, if you select only some records while in the Table view and then from the File menu choose Print Selected Cards, only the records you selected are printed.
In the Reporting application, if you select only some records while in the Table view and then choose the Selection option in the Print dialog box, only the records you selected are printed on your report.
To change the width of a column, place the pointer between
columns and drag the column boundary.
Use scroll bars to see additional information.
Searching the Database
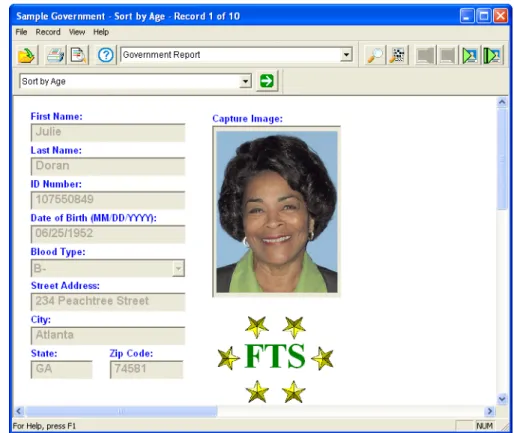
Navigating Search Results
When a database search finds multiple records, the title bar of the ID Works application window changes to describe which record is currently visible and the total number of records that met the specifications of the search. Also, the Next and Last buttons on the toolbar become available for use (as well as the Next and Last
commands on the Record menu). If you click the Next button, the title bar changes to “Record 2 of ...” and the First and Previous buttons on the toolbar (as well as the First and Previous commands on the Record menu) also become available for use. You can also use the PAGE DOWN
58 IDCentre Version 6 Online Reference Library
Clearing a Record Set
Standard Edition and Enterprise Edition:When you are done with your current record set in the Production application, you can remove the data from the screen by selecting the Clear command on the Record menu.
Running a Stored Advanced Search
Enterprise Edition:Stored and advanced searches are not available in ID Works projects connected to directory services.
Stored searches are useful if you perform the same search repeatedly. Instead of typing the search information in the Quick Search dialog box every time, you simply select the name of the stored search from a list. Because stored searches are created using the Advanced Search feature, you can search for additional kinds of records, such as records that still need a photo. See Using Advanced Search on page 113 of the
Administrator’s Guide.
To run a stored search:
1. Select Record and then Run Stored Search. A menu listing the available stored searches appears to the right of the Record menu. 2. Select the stored search to run. The search results appear in the
project window, and the name of the stored search appears in the title bar of the window.
To repeat a stored search, simply click the Run Stored Search button on the toolbar.
Searching the Data Source
Creating an Advanced Search
You can create an advanced search and, depending on your privileges, you may be able to save it as a stored search. See online help or chapter 5 of the Administrator’s Guide for complete information.
Index
Symbols
% wildcard character 53
_ wildcard character 53
A Administrator application definition 1 Advanced Search running 58 B
bar code field
errors 33
binary field 30
biometrics 30 C capture device biometric 32 camera 18 signature 28 card previewing 33 cards printing 34
check box field 29
D
data from file (binary field) 31
database 36
and Reporting application 47
changing information in 37
deleting a record 41
searching
advanced search 58
quick search 52
for all records 52
viewing records 57
date field
entering information in Production
application 12
Designer application definition 1
directory service 42, 48
adding a record 45
changing information in 43
wildcard characters 53
K
keyboard shortcuts 5
L
list field, selecting from 13
log in 3
M
mandatory field on Production Form 32
mask, text field 11
O
opening a project 7
P
page setup for reports 49
password
changing 4
photo
adjusting 19
capturing with TWAIN device 16
capturing with Video for Windows
device 17
cropping 19
62 ID Works Version 6 Online Reference Library
rotating 20
selecting 20
source, selecting in Production
application 19
photo field
using in Production application 14
photo from file 15
pop-up menu 5
previewing cards 33
previewing reports 48
print preview 48
printing
reports 48
printing cards 34
tracking print requests 36
Production application
definition 1
entering information 11
taking photos 14, 27
using 9
using a database 36
Production Form view 54
Production window
moving around in 9
project
definition 1
opening 7
using in Production application 9
Q
Quick Search 52
R
read-only field on Production Form 32
records, selecting 48
report
page setup 49
selecting 48
Reporting application
definition 1
reports
printing 48
right-click menu 5
S
searching database
quick search 52
stored search 58
wildcard character 53
signature
capturing 27
from file 28
signature field
using in Production application 27
stored search
running 58
T
Table view 55
text field
entering information in Production
application 11
mask 11
toolbars 6
topcoat 33
TWAIN
device, using in Production
application 16
interface standard 16
V
Video for Windows
device, using in Production
application 17
standard interface 17
W
Welcome dialog box 5
wildcard characters 53
directory service 53
wildcard characters in database