by David A. Crowder
®
Earth
FOR
DUMmIES
‰Google®Earth For Dummies® Published by
Wiley Publishing, Inc. 111 River Street Hoboken, NJ 07030-5774 www.wiley.com
Copyright © 2007 by Wiley Publishing, Inc., Indianapolis, Indiana Published by Wiley Publishing, Inc., Indianapolis, Indiana Published simultaneously in Canada
No part of this publication may be reproduced, stored in a retrieval system or transmitted in any form or by any means, electronic, mechanical, photocopying, recording, scanning or otherwise, except as permit-ted under Sections 107 or 108 of the 1976 Unipermit-ted States Copyright Act, without either the prior written permission of the Publisher, or authorization through payment of the appropriate per-copy fee to the Copyright Clearance Center, 222 Rosewood Drive, Danvers, MA 01923, (978) 750-8400, fax (978) 646-8600. Requests to the Publisher for permission should be addressed to the Legal Department, Wiley Publishing, Inc., 10475 Crosspoint Blvd., Indianapolis, IN 46256, (317) 572-3447, fax (317) 572-4355, or online at http://www.wiley.com/go/permissions.
Trademarks:Wiley, the Wiley Publishing logo, For Dummies, the Dummies Man logo, A Reference for the Rest of Us!, The Dummies Way, Dummies Daily, The Fun and Easy Way, Dummies.com, and related trade dress are trademarks or registered trademarks of John Wiley & Sons, Inc. and/or its affiliates in the United States and other countries, and may not be used without written permission. Google is a registered trade-mark of Google, Inc. All other tradetrade-marks are the property of their respective owners. Wiley Publishing, Inc., is not associated with any product or vendor mentioned in this book.
LIMIT OF LIABILITY/DISCLAIMER OF WARRANTY: THE PUBLISHER AND THE AUTHOR MAKE NO REP-RESENTATIONS OR WARRANTIES WITH RESPECT TO THE ACCURACY OR COMPLETENESS OF THE CONTENTS OF THIS WORK AND SPECIFICALLY DISCLAIM ALL WARRANTIES, INCLUDING WITHOUT LIMITATION WARRANTIES OF FITNESS FOR A PARTICULAR PURPOSE. NO WARRANTY MAY BE CRE-ATED OR EXTENDED BY SALES OR PROMOTIONAL MATERIALS. THE ADVICE AND STRATEGIES CON-TAINED HEREIN MAY NOT BE SUITABLE FOR EVERY SITUATION. THIS WORK IS SOLD WITH THE UNDERSTANDING THAT THE PUBLISHER IS NOT ENGAGED IN RENDERING LEGAL, ACCOUNTING, OR OTHER PROFESSIONAL SERVICES. IF PROFESSIONAL ASSISTANCE IS REQUIRED, THE SERVICES OF A COMPETENT PROFESSIONAL PERSON SHOULD BE SOUGHT. NEITHER THE PUBLISHER NOR THE AUTHOR SHALL BE LIABLE FOR DAMAGES ARISING HEREFROM. THE FACT THAT AN ORGANIZATION OR WEBSITE IS REFERRED TO IN THIS WORK AS A CITATION AND/OR A POTENTIAL SOURCE OF FUR-THER INFORMATION DOES NOT MEAN THAT THE AUTHOR OR THE PUBLISHER ENDORSES THE INFOR-MATION THE ORGANIZATION OR WEBSITE MAY PROVIDE OR RECOMMENDATIONS IT MAY MAKE. FURTHER, READERS SHOULD BE AWARE THAT INTERNET WEBSITES LISTED IN THIS WORK MAY HAVE CHANGED OR DISAPPEARED BETWEEN WHEN THIS WORK WAS WRITTEN AND WHEN IT IS READ. For general information on our other products and services, please contact our Customer Care Department within the U.S. at 800-762-2974, outside the U.S. at 317-572-3993, or fax 317-572-4002. For technical support, please visit www.wiley.com/techsupport.
Wiley also publishes its books in a variety of electronic formats. Some content that appears in print may not be available in electronic books.
Library of Congress Control Number: 2006936825 ISBN: 978-0-470-09528-7
Manufactured in the United States of America 10 9 8 7 6 5 4 3 2 1
About the Author
David A. Crowderhas authored or coauthored more than 25 books, includ-ing the bestsellers Building a Web Site For Dummies and Cliffs Notes Getting on the Internet.His two most recent books were both listed as essential for all library collections by the magazine Library Journal.
Professor Crowder is equally at home with high technology or with working his way through the backcountry on horseback or in a dugout canoe. When he is not writing, he spends his time with his wife Angela, wandering through villages in the Andes or frolicking in the Caribbean surf.
Dedication
This one’s for Angie, la luz de mi vida.
Author’s Acknowledgments
No book makes it into a bookstore solely by the efforts of its author. So many other people are involved in the process — from the first contact with the Acquisitions Editor to the time when a bookstore employee cuts open the box and stocks the shelves with your freshly printed title — that it would probably take a whole other book just to list their names.
I would like to particularly thank my literary agent, Bob Diforio, without whose tireless devotion this book might never have seen the light of day. My editors at Wiley are among the best I have ever worked with. From the first day, their input has made this book better than I could have done it without their help. My acquisitions editor Steve Hayes, project editor Chris Morris, copy editor Teresa Artman, and technical editor Paul Wolfe all deserve hearty thanks for their invaluable assistance in getting this book from the basic idea through print and onto the shelves.
Publisher’s Acknowledgments
We’re proud of this book; please send us your comments through our online registration form located at www.dummies.com/register/.
Some of the people who helped bring this book to market include the following:
Acquisitions, Editorial, and Media Development
Senior Project Editor:Christopher Morris Senior Acquisitions Editor:Steven H. Hayes Senior Copy Editor:Teresa Artman
Technical Editor:Paul Wolfe Editorial Manager:Kevin Kirschner Media Development Manager:
Laura VanWinkle
Editorial Assistant:Amanda Foxworth Sr. Editorial Assistant:Cherie Case Cartoons:Rich Tennant
(www.the5thwave.com)
Composition Services
Project Coordinator:Erin Smith Layout and Graphics:Carl Byers,
Stephanie D. Jumper, Barbara Moore, Barry Offringa, Laura Pence
Proofreaders: Lisa Stiers Indexer: Techbooks
Anniversary Logo Design:Richard Pacifico
Publishing and Editorial for Technology Dummies
Richard Swadley,Vice President and Executive Group Publisher Andy Cummings,Vice President and Publisher
Mary Bednarek,Executive Acquisitions Director Mary C. Corder,Editorial Director
Publishing for Consumer Dummies
Diane Graves Steele,Vice President and Publisher Joyce Pepple,Acquisitions Director
Composition Services
Contents at a Glance
Introduction ...1
Part I: Getting to Know Google Earth ...7
Chapter 1: The Earth According to Google ...9
Chapter 2: Finding Businesses, Places, and Things ...23
Chapter 3: Adjusting Your View on the World ...39
Part II: Personalizing Google Earth ...49
Chapter 4: Fine-Tuning the Program ...51
Chapter 5: Adding Layers and Points of Interest (POIs) ...65
Chapter 6: Pinning Down Placemarks...85
Part III: Becoming a Cybertourist ...103
Chapter 7: Going on Tour ...105
Chapter 8: Mingling with the Community ...117
Chapter 9: Importing Data and Images ...131
Chapter 10: KML: It’s Sorta Like HTML...145
Part IV: Advanced Features ...177
Chapter 11: Designing with Google SketchUp...179
Chapter 12: Designing with Google SketchUp, Part 2 ...195
Chapter 13: Creating Polygons and Other Complex Structures ...221
Chapter 14: Digging Deeper with Google SketchUp ...237
Part V: The Part of Tens ...257
Chapter 15: Ten Great Places to Get Coordinates ...259
Chapter 16: Ten Reliable Sources for Data Files...275
Chapter 17: Ten Cool Tools ...289
Part VI: Appendixes ...299
Appendix A: Glossary ...301
Appendix B: Default Content of the All Layers Pane...309
Appendix C: Latitudes and Longitudes of Major Landmarks ...319
Table of Contents
Introduction...1
About This Book...1
How to Use This Book ...2
Foolish Assumptions ...2
Conventions Used in This Book ...2
How This Book Is Organized...3
Part I: Getting to Know Google Earth...4
Part II: Personalizing Google Earth ...4
Part III: Becoming a Cybertourist ...4
Part IV: Advanced Features ...4
Part V: The Part of Tens...4
Part VI: Appendixes...5
Icons Used in This Book...5
Where to Go from Here...5
Part I: Getting to Know Google Earth ...7
Chapter 1: The Earth According to Google . . . .9
The View from Google Earth...9
Exploring the Earth Online ...11
Google Earth Gives You Options ...13
Starting with what’s free...14
Looking at Plus and Pro versions ...15
So What Can I Really Do with Google Earth? ...16
Plenty of personal uses ...16
And businesses might want to . . ...17
Joining the Google Earth Community...18
Getting Geekier with GPS, KML, and Overlays ...19
Downloading the Program ...20
A Note for Mac and Linux Users...22
Chapter 2: Finding Businesses, Places, and Things . . . .23
Flying Down to Rio (Or Anywhere Else)...24
Right on the dot: Understanding latitude and longitude ...25
Deciphering geocoding ...28
Searching for a Tailor in Tulsa: The Find Businesses Tab...30
Getting Directions ...31
Going Global: The Overview Map ...32
Surfing with the Integrated Web Browser ...35
Chapter 3: Adjusting Your View on the World . . . .39
Rock the World: Dragging and Zooming the Map ...39
Gaining a New Perspective: The Direction and Tilt Controls ...41
Three-dimensional viewing ...43
The compass and status bar...44
The Bigger They Are: Figuring Sizes with the Scale and Ruler...45
Using the Scale Legend ...45
Using the Ruler ...45
Part II: Personalizing Google Earth ...49
Chapter 4: Fine-Tuning the Program . . . .51
Relieve the Pane: Manipulating Screen Areas ...51
Setting the Options ...56
The 3D View tab...56
The Cache tab ...60
The Touring tab ...61
The Navigation tab ...62
The General tab ...63
Chapter 5: Adding Layers and Points of Interest (POIs) . . . .65
Peeling the Onion: A Guide to Layers...65
Built-in points of interest...66
Displaying Layers ...68
From School Districts to Earthquakes: Types of Layers ...70
The Google Earth Community layer...70
Featured Content...74
Location layers ...76
Boundary layers ...76
Geographic/geological layers ...78
Transportation layers ...80
Picking a good place to live ...81
Chapter 6: Pinning Down Placemarks . . . .85
Exploring the Built-in Sightseeing Placemarks...86
X Marks the Spot: Creating and Naming Placemarks ...88
Editing Placemarks ...90
Customizing styles and colors...91
Changing the placemark icon ...93
Adjusting the view...96
Setting the altitude ...97
Organizing Placemarks ...99
Saving files...100
Sorting — by hand!...102
Google Earth For Dummies
x
Part III: Becoming a Cybertourist ...103
Chapter 7: Going on Tour . . . .105
Real Roads: Getting Route Info...105
Animating placemarks and routes ...108
Touring a path...109
Working the Touring Tab...110
Fly-To/Tour settings ...110
Driving Directions Tour options...112
Making Custom Tours...113
Planning your tours...113
Constructing the tour ...114
Chapter 8: Mingling with the Community . . . .117
Using the Keyhole Forums ...117
Joining the Google Earth Community ...119
Signing on to the forums ...121
Browsing the forums...122
Searching the forums ...125
Getting Help ...127
Exploring Outside ...129
Chapter 9: Importing Data and Images . . . .131
Adding Custom Data to Google Earth...131
Using image overlays ...132
Transparency ...135
Positioning, rotating, and scaling ...136
Precision location...138
Importing from GPS Devices...140
Chapter 10: KML: It’s Sorta Like HTML . . . .145
Creating and Saving KML Files ...145
Mastering the Syntax ...147
Tags and elements...147
Attributes ...148
Containers ...148
The root element ...149
Comments ...149
The Most Useful KML Tags ...150
Placemarks ...150
The Snippet element ...158
Altitude and altitudeMode ...161
The address element...162
xi
Working with Styles ...163
The Style element ...164
The styleUrl element...164
LabelStyle ...165
IconStyle ...169
Radio buttons and check boxes (listStyle) ...170
Part IV: Advanced Features...177
Chapter 11: Designing with Google SketchUp . . . .179
The Google SketchUp Interface ...181
Touring the toolbars ...181
Chapter 12: Designing with Google SketchUp, Part 2 . . . .195
Creating a 3-D Model...196
Creating a yard and a house ...196
Adding the deck, porch, and patio...199
Adding a swimming pool ...204
Allowing entry and light: Adding doors and windows ...206
Driveway...211
Stepping stones ...212
Moving Your Creation to Google Earth ...215
The Google SketchUp Community ...217
Chapter 13: Creating Polygons and Other Complex Structures . . . .221
Joining Shapes ...222
Designing with the Offset Tool ...225
Creating Polygons ...228
Making a simple polygon...230
Making an arrowhead ...231
Chapter 14: Digging Deeper with Google SketchUp . . . .237
Slicing and Extruding a Stairway...238
Understanding Lines and Faces ...241
The Follow Me Tool...245
Lathing a Polygon...248
Setting Leader Text ...251
Understanding the Tape Measure and Dimension Tools ...253
Google Earth For Dummies
xii
Part V: The Part of Tens ...257
Chapter 15: Ten Great Places to Get Coordinates . . . .259
Aliensview Sightseeing ...259
Lat-Long.com ...262
fallingrain.com...265
NASA WorldWind...266
World Gazetteer...267
How Far Is It? ...269
Heavens Above ...270
U.S. Gazetteer ...271
USGS Geographic Names Information System...272
Maps of World...273
Chapter 16: Ten Reliable Sources for Data Files . . . .275
WebGIS...275
USGS Geographic Data Download ...277
DIVA-GIS ...278
Clary-Meuser Research Network...279
GIS Data Depot...281
Free GIS Data by Region ...282
FreeGIS.org ...283
Global Elevation Data ...284
NGDC...285
National Atlas Raw Data Download ...286
Chapter 17: Ten Cool Tools . . . .289
IrfanView ...289
Arc2Earth ...290
Juice Analytics Census Files ...291
Juice Analytics Geocoding Tool ...292
MyFsGoogleEarth - Link Google Earth with Flight Simulator (FS2004, FS9)...293
KML2X3D - Google Earth to Web 3D Converter...294
EarthPlot and EarthPaint ...295
Google Earth Hacks Image Overlays...296
GPS Utility ...297
GE-Path and GE-Graph...297
xiii
Part VI: Appendixes...299
Appendix A: Glossary . . . .301
Appendix B: Default Content of the All Layers Pane . . . .309
Appendix C: Latitudes and Longitudes of Major Landmarks . . . .319
Current Events...319
Historical Conflicts ...321
Monuments, Statues, and Historical Addresses...322
Items of Geographic Importance...324
Religious Sites...325
Major Cities...326
Engineering and Architectural Achievements...328
Index...331
Google Earth For Dummies
xiv
Introduction
W
ant to stroll down the Champs Elysees in Paris? Feel like taking a per-sonal look at the Great Wall of China? Or perhaps you’d like to explore the island of Tahiti on your lunch break? Thanks to Google Earth, you can. With Google Earth, you can forget the Frequent Flyer miles. All you have to do is plop down in front of your monitor to see the world up close the easy way. No lousy airline food, no baggage claim, no customs line — just plain fun! And I’m not just talking about some plain old maps here. Google has gone to the trouble to bring you the latest in high-tech GIS (Geographical Information Systems) — and has done it right. Although the program can easily compete with most of the high-end GIS software around today, Google Earth isn’t just for the cognoscenti:It’s for the masses.About This Book
Yes, there is such a thing as love at first sight. I fell in love with Google Earth about 30 seconds after I installed it. I found but one thing lacking. As several other Google Earth users once lamented, there was no such thing as Google Earth For Dummies.
Well, now there is. This is the book that I wish I had had on my desk during my early explorations with this fabulous program. It’s designed from the ground up to provide you with all that you need to know to get the most from Google Earth from the very start.
In this book, you’ll see not just how to spin a digital globe on your screen but also how to dig into all the wonderful features that Google Earth has to offer. That means that you can find — in a single resource — everything from how to search for pizza parlors to understanding how latitude and longitude work.
How to Use This Book
Put it on top of your desk. Keep it there. That’ll save you a bunch of walking to the bookshelf. Trust me — after you start playing (or working) with Google Earth, you’ll want to do more. And more. And more.
If you use this book the way a typical reader does, you’ll want to hit the Table of Contents and the index to find whatever it is you want to know about. But this isn’t just a reference book. It’s designed to show you how to get the most enjoyment and practical use out of the program, and it’s chock-full of exam-ples that (trust me) will enhance your Google Earth experience, so feel free to just flip from place to place and see what you find.
Foolish Assumptions
I assume that you have at least some vague idea that the world is composed of a lot of oceans and a bunch of land masses. Other than this simple begin-ning, you need no special geographic knowledge — Google Earth will take care of the rest for you.
Beyond that, this book assumes that you know at least the basics of how to operate your computer. For example, if I tell you that you need to make a menu selection, I assume that you know that a menu is that list of words at the top of the screen, like File, Edit, and so forth, and that you know how to move your mouse pointer over those words and click them to reveal further options. If not, you might first want to check out a copy of Windows XP Just the Steps For Dummiesor Windows Vista Just the Steps For Dummies(Wiley), both by Nancy Muir. If you don’t have Google Earth loaded yet, not to worry: See how in Chapter 1.
Conventions Used in This Book
A lot of folks have labored for many years to make the For Dummiesseries as user-friendly as possible, and we’re all as thankful as can be that they’ve done that. (I’ve authored several For Dummiesbooks, but I don’t just write them — I rely on them, too, just like you do.)
When you find a listing that says to choose something like File➪Save from the menu, that means to first click the word File on the menu and then choose
2
Google Earth For Dummies
Save from the resultant drop-down menu. (If you’re running Windows Vista, File has been replaced by the Office Button, at the top left of the window.) Code listings, which you’ll find in the chapter on KML (the native language of Google Earth’s files), look like this:
<Placemark> <name> ... </name>
<description> ...
</description> </Placemark>
The ellipsis (...) shows that further information needs to be supplied. When I need to show how to do that, I use an italic placeholder, like in this example:
<name>
Name goes here. </name>
When you see those words in italics (and they should always be obvious in any event), simply replace the placeholder with your own text, perhaps something like this:
<name>
Grandpa’s farm </name>
Whenever you see the URL for one of the top sites you can use to enhance your Google Earth experience, it appears in a special typeface within the paragraph, like this: www.dummies.com. Or it might appear on a separate line, like this:
www.dummies.com
How This Book Is Organized
This book is divided into six parts, each of which has various chapters in it. Each of the chapters is further subdivided into logical segments that cover various activities that you will probably want to pursue to increase your knowledge of Google Earth. Here’s an overview.
3
Part I: Getting to Know Google Earth
Part I introduces you to how the Google Earth program works and how you can use its search and location features to find just about anything in the world. It then goes on to explore the program’s basic visual features as well as its most exciting tools, like Tilt and Zoom.
Part II: Personalizing Google Earth
This part covers how to modify Google Earth’s options and modify the pro-gram’s screen display to suit you. This part also digs into how to use the built-in layers,which show where everything from school districts to hospi-tals is located. Then it goes on to deal with placemarks,which are the Google Earth geographical equivalent to Web browser bookmarks.
Part III: Becoming a Cybertourist
Part III shows how to jump into the world of satellite tourism, looking at routes from one place to another from a bird’s-eye viewpoint. It then goes on to show you how to participate in the Google Earth Community, which is the huge group of fellow users who are there to share and help.
Part IV: Advanced Features
Well, you knew it couldn’t all be simple. Google Earth does have some more complex features, and this part explains how they work and how you can tap into them for your own uses.
These four chapters delve into how you can import external data — ranging from image overlays to the output from your GPS device — into Google Earth. You can also read here how to use the companion program Google SketchUp to add custom 3-D models to your world. Finally, see how to get under the hood and understand the basics of KML— the markup language that is at the heart of Google Earth.
Part V: The Part of Tens
Part V tosses in 30 extra little items that will make your Google Earth experi-ence into all that it can be. From sources for external map images to Web sites that can give you all the location info you could ever want to a few other programs you’ll want to install, this is the icing on the cake.
4
Google Earth For Dummies
Part VI: Appendixes
Part VI includes a glossary of the technical terms that you might need to look up, along with details on just what is included in the Layers pane and a guide to a bunch of interesting places you’ll want to visit.
Icons Used in This Book
You’ll find several special graphics (icons) in the margins of various chapters. Each of these is there for a reason, so you need to keep watch for them. Hey, just between you and me, here’s the best way to handle this situation.
Watch your step, or things could get very ugly.
Just in case anybody reading this wants the egghead’s view, here it is.
These note something special to keep in mind.
Where to Go from Here
I advise you to dive in and explore! That’s the operative word for Google Earth, of course, but it’s also the best way to take this book. Dig into every-thing, flip through the chapters, stop at some random location, and then just do whatever you find there. You’ll be glad you did, as every part of the book introduces you to some new and wonderful feature of Google Earth.
5
Part I
In this part . . .
C
hapter 1 gives you a general overview of the program and its uses, and Chapter 2 shows you how to quickly and easily get a look at any location on Earth. Chapter 3 then explores Google Earth’s basic visual features and its most exciting tools, like Tilt and Zoom.Chapter 1
The Earth According to Google
In This Chapter
Getting to know Google Earth
Comparing versions
Understanding Google Earth’s capabilities
Joining Google Earth communities
G
oogle Earth is not just another map program or some kind of digitized globe inside your computer, but rather, a social phenomenon. Although it can stand on its own with other Geographic Information System (GIS) soft-ware, its focus is on giving the public a unique experience.With everything from National Geographicarticles to live Webcams to local commentaries built into it, the program doesn’t just display maps and photos but launches the era of satellite tourism. Calling it a 3-D interface to the planet,the folks at Google are backing it to the hilt with both their incredible wealth and their enviable marketing savvy, and it seems destined to grow into one of the largest of all the online communities.
With Google Earth, you have wings. You can fly high above the planet or zoom right down to the ground. In seconds, you can zip from the deserts of the American West to the tropic isle Tahiti. No tickets to buy, no bags to pack, no long lines or customs or anything else. Just go!
The View from Google Earth
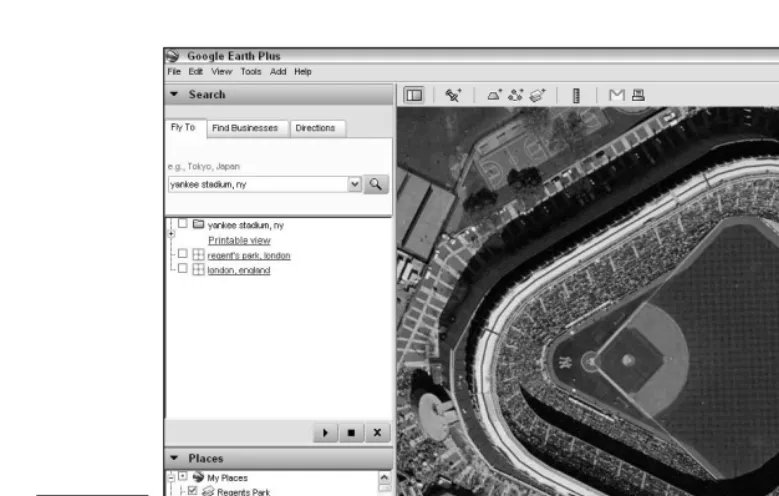
Because Google relies upon many outside providers for its satellite and aerial imagery, the quality of images in different locations varies somewhat. Figure 1-1 shows the program’s clean interface design as well as the kind of detail it can achieve. This close shot of New York’s Yankee Stadium is typical of the world’s major metropolitan areas.
The same level of detail is not, of course, generally available in rural areas, which have not been as extensively photographed from space. This is not a limitation of Google Earth but rather of the current state of available data, and this constraint applies to all GIS programs. The simple rule is that the more expensive the real estate, the more likely it is to have been the subject of detailed — and costly — satellite analysis.
Although it relies upon imagery from satellite photos taken anytime in the past three years, Google Earth isn’t merely a static collection of warmed-over satellite images from dusty sources. Rather, it’s continuously kept current through a vigorous program of updates. Such attention to detail and timeli-ness is one of the reasons why people ranging from casual users to real estate professionals have come to rely upon the Google Earth service.
Google Earth also makes it a point to respond quickly to breaking news. As an example, when a deadly earthquake struck Pakistan, Google Earth had updated, higher-quality satellite imagery of the quake area available online in
Figure 1-1:
The Google Earth interface.
less than a week, freely available to everybody from news junkies to interna-tional rescue workers. The first time such on-the-fly updating was used was during the Hurricane Katrina response. Google Earth, working with the National Oceanographic and Atmospheric Administration (NOAA), had very detailed imagery of the entire affected region online within five days after the event.
Exploring the Earth Online
The images in Google Earth are composed of zillions of separate pho-tographs. Most were taken from orbit by satellites or the Space Shuttle, but there are also much more detailed close shots taken from airplanes.
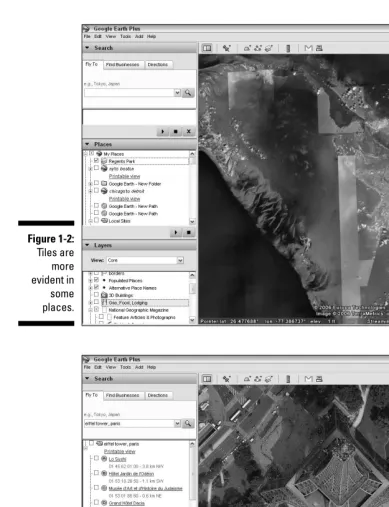
Each of these images is a tile,and these tiles are laid together side by side to form a mosaic of the entire planet. In most cases, the tiles are seamless, but in some places, the structure is a bit more obvious because the tiles come from different sources and have varying appearances. Figure 1-2 shows an example of one of these areas with varying tiles.
It’s nice to just buzz around the planet, seeing whatever there is to see. Sometimes, though, you need to get really specific, and the Search portion of Google Earth provides you with a tremendous helping hand.
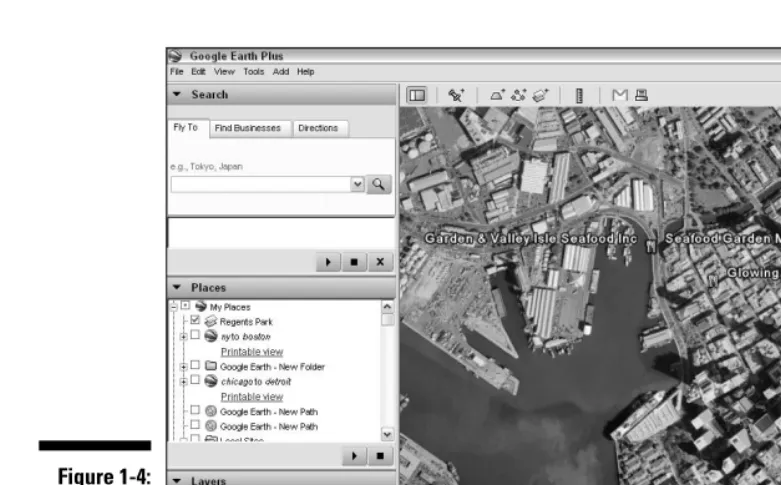
You can enter an address and go right to it, or you can specify a particular set of longitude/latitude coordinates. You can find monuments, famous locations, cities, and just about anything else you can think of by just typing in the appropriate name. Want a look at the Eiffel Tower of Paris, France? Just tell Google Earth, as I did in Figure 1-3, and it’ll take you right there. Even the names of major buildings are in the Google Earth location database.
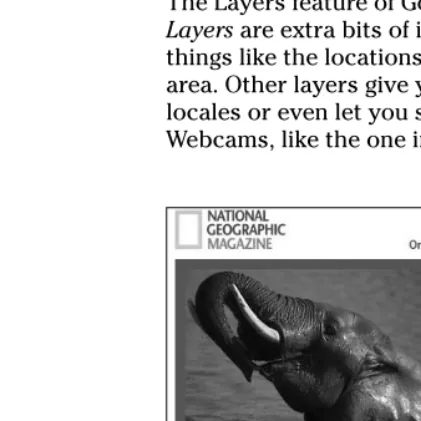
Life isn’t all about geography and satellite tourism, though. Sometimes you’ve just got to do simple, practical things — and once again, Google Earth comes through for you. You can do everything from hunting down the nearest Computer City to mapping out the locations of the seafood restaurants in your town. In Figure 1-4, you can see the results of my hunting for seafood restaurants in Honolulu.
You can even give Google Earth two locations and have it plan the best way for you to drive between them.
11
Figure 1-3:
Search for locations and famous structures.
Figure 1-2:
Tiles are more evident in some places.
Google Earth Gives You Options
For the most part, sophisticated GIS software has always been out of reach of the public. It’s generally very costly, and it isn’t easy to use. In fact, you gen-erally needed a Masters Degree in GIS to begin to comprehend how to work with it. Until Google Earth, that is.
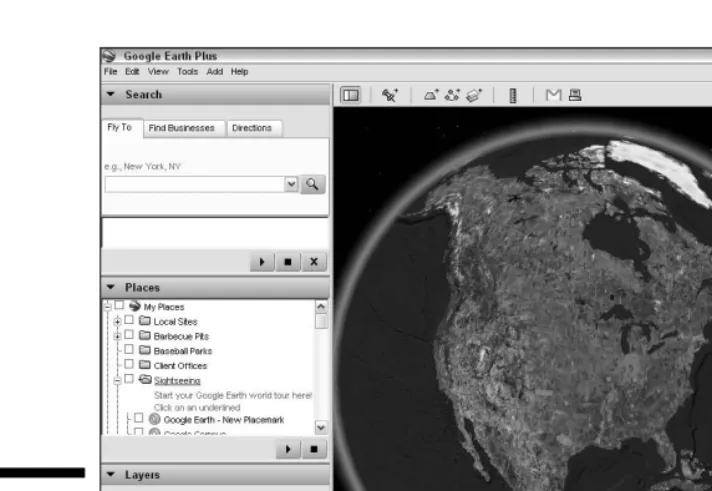
However, Google Earth isn’t a toy, either. It has three levels, each a bit more powerful than the last. The free version is simply called Google Earth; the mid-level one is Google Earth Plus; and the high-end, professional level is, of course, Google Earth Pro.
The cost of Google Earth Plus is a measly $20 a year, and Google Earth Pro goes for $495 a year.
If you’re going to use the program for commercial purposes, the license agreement requires you to pop for the Pro version.
Figure 1-4:
Google Earth has day-to-day uses as well.
13
Starting with what’s free
You get an astonishingly powerful piece of software for free with Google Earth. It’s not some pathetic little wimp of a program that doesn’t do much of anything; it’s actually everything that the average person could need — and then some.
Not only do you get the program itself for zero bucks, but you get the datafor free, too. This is perhaps the most incredible deal you will ever see because the cost of the satellite and aerial imagery alone would bankrupt the average citizen.
And you can spend all the time you want checking out every square inch of the Earth without ever buying one photo. You never have to learn what SRTM means or deal with the technicalities of geocoding or anything like that. Just fire up Google Earth, and you’re ready to rock and roll.
The slick and intuitive interface lets you easily view whatever you want in var-ious combinations of angles and altitudes. Zoom in and out and spin things around all you want; it’s amazing what you can discover when you do that. The Layers feature of Google Earth is one of its most impressive features.
Layersare extra bits of information above and beyond the mere pictures — things like the locations of public parks or the incidence of earthquakes in an area. Other layers give you crime and population information for various locales or even let you step out of Google Earth and see through live Webcams, like the one in Figure 1-5.
Figure 1-5:
National Geographic Live WildCams add a nice touch.
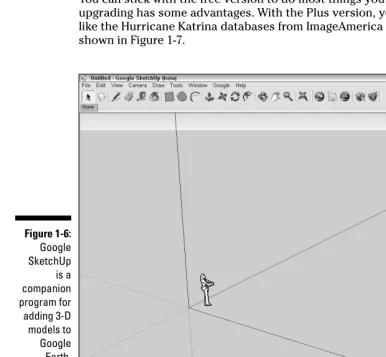
As if all this weren’t enough, another freebie — the companion program, Google SketchUp (see Figure 1-6) — lets you make your own 3-D models and add them to Google Earth. Go ahead and design your dream house; then drop it right onto your vacant lot in the real world. You can read more about SketchUp in Chapters 11 and 12.
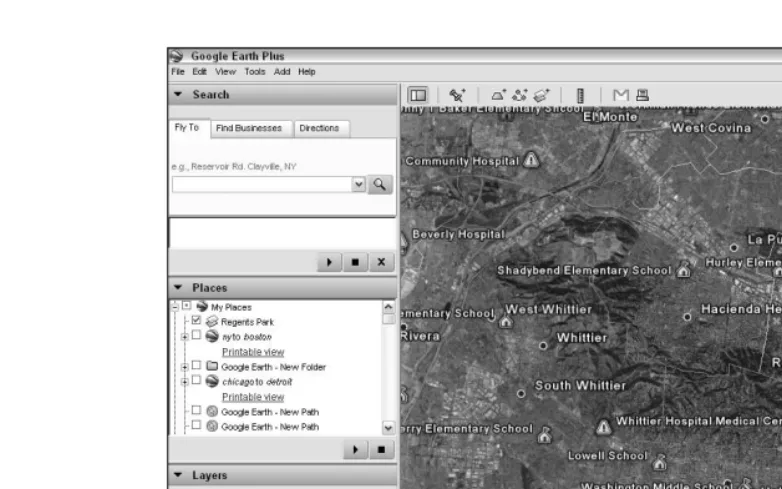
Looking at Plus and Pro versions
You can stick with the free version to do most things you’d like. However, upgrading has some advantages. With the Plus version, you get a few extras, like the Hurricane Katrina databases from ImageAmerica and NOAA, as shown in Figure 1-7.
Figure 1-7:
The Plus version includes Hurricane Katrina databases.
Figure 1-6:
Google SketchUp
is a companion program for adding 3-D models to Google Earth.
15
You also get the ability to import several extra kinds of data (see Chapter 9) including image files and the output from your GPS (Global Positioning System) device. However, in my opinion, the best reason to go for Google Earth Plus is its greater speed and higher printing resolution. It’s important to note here that this isn’t a higher screenresolution — all versions of Google Earth share the same main database — but it can make a difference if you need to make hard copies.
The Pro version, as you might expect, is even faster and adds the ability to perform more sophisticated measurements such as area calculations. A few add-on modules at this level enable you to do things, such as print extremely high-resolution images or add traffic count information. You also get person-alized tech support with Google Earth Pro.
So What Can I Really
Do with Google Earth?
Google Earth is a tool and, just as with any other tool, you can use it for lots of things. Whether you’re just playing around for the sheer fun of it or you desperately need it to perform your professional tasks, it’ll take the challenge.
Of course, right off the bat, it’s one of the best pieces of educational software out there, and it will doubtless quickly become a trusted part of every teacher’s toolset, but it has so much more to offer as well.
Plenty of personal uses
I don’t think I’ve seen too many homes that didn’t have an atlas and a globe, and it’s getting hard to imagine one that doesn’t have Google Earth. The pro-gram has everything the old style approach does and adds so much more to boot.
The next time you’re thinking of moving, fire up Google Earth and check out the boundaries of school districts, the location of fire stations, and all the other things that might help you choose your new neighborhood (see Figure 1-8). While you’re at it, have Google Earth figure out the best route to your job from there.
Tired of watching the news and having only a vague idea of where something is happening? Now you can see for yourself. You can fly from China to Antarctica to Africa and back in seconds.
And businesses might want to . . .
Businesses of almost every kind can benefit from Google Earth, whether they’re already using GIS technology or not. These are just a few of the uses to which it’s already being put:
Law firms can use it to investigate any location involved in a criminal or civil action.
Civil planners can research traffic patterns.
Real estate agents have a powerful sales and marketing tool in Google Earth, enabling them to pitch the virtues of any location.
TV stations now have their own instant source of satellite images to supplement their newscasters’ reports.
Don’t forget, either, that the learning curve for Google Earth is a lot less steep than other GIS software. This means less time lost when training employees.
Figure 1-8:
Plan a move.
17
Joining the Google Earth Community
Professional GIS users, such as real estate developers, environmental engi-neers, law firms, and the like, aren’t the only folks who find this program a wonderful tool, nor is it just a great new way to teach geography and history. Google Earth draws its users from a broad segment of the general population as well.
Many of the users of the program participate in an official community that keeps in close touch with one another, sharing both technical tips and inter-esting finds. The quest for unusual items is one of the high points of using Google Earth (see Figure 1-9). Hundreds of thousands of people are in the Google Earth Community’s membership, which is growing fast, with thou-sands more signing up every week.
Of course, you don’t have to register and participate in the official forums. There’s also an ever-growing number of other user-supported sites that offer help and information as well as companionship.
Figure 1-9:
The Google Earth Community is growing fast.
Getting Geekier with GPS,
KML, and Overlays
If you want to get into some of the more advanced things about Google Earth, no problem. It can interface with a GPS device,which is a global posi-tioning system that uses signals from satellites in orbit to determine your latitude, longitude, and (depending on how sophisticated it is) altitude (see Figure 1-10).
As long as I’m going alphabetical, allow me to throw in KML. It’s the language that Google Earth uses, and it’s a lot like HTML. If you have any kind of expe-rience creating even simple Web pages, you can go under the hood of Google Earth and really make it sing by controlling every little detail of its display. And maybe you want to dress things up a bit with some outside data. Go ahead and pop in an overlay,which is an image that you add on top of the basic data in Google Earth. Figure 1-11 shows an 1827 map of Regent’s Park in London on top of the satellite shot of the modern city.
Figure 1-10:
A GPS device.
19
Downloading the Program
Before you can experience any of these wonderful things, you have to get your hands on Google Earth, of course. Fortunately, Google makes this an easy and painless task:
1. Open your Web browser and go to http://earth.google.com (see Figure 1-12).
2. Click the Get Google Earth link on the upper-right side.
3. On the resulting Web page, as shown in Figure 1-13, select the check box if you want to subscribe to the Google Earth newsletter.
4. Select the appropriate radio button for the version of Google Earth for your operating system (Windows, Mac, or Linux).
5. Click the Download Google Earth button.
This takes you to the Web page shown in Figure 1-14, and the download should start automatically. If you are using Windows, the download might fail to start. Either click the yellow information bar at the top of the Web page and select Download File from the options, or just click the Click Here to Start It link.
Figure 1-11:
Historical maps can be overlaid on the modern world.
Figure 1-13:
Making choices.
Figure 1-12:
The Google Earth home page.
21
6. When the File Download dialog box appears, click the Save button.
This brings up your computer’s Save As dialog box.
7. Navigate to where you want to save the file and then click Save to complete the process.
8. To install Google Earth, double-click the downloaded file.
A Note for Mac and Linux Users
Google Earth’s three versions are as close as a very skilled group of program-mers can make them. In fact, the Windows commands are the same as the ones for Linux. For example, Alt+F opens the File menu in both systems. There is, however, no equivalent Mac key combination. For key combinations that use the Ctrl key in Windows or Linux, just use the corresponding Mac command (Ô) key instead.
A comprehensive and up-to-date list of the platform differences can be found at
http://earth.google.com/userguide/v4/ug_keyboard.html Figure 1-14:
The download Thank You page.
Chapter 2
Finding Businesses,
Places, and Things
In This Chapter
Locating things in Google Earth
Getting directions
Using the Overview Map
Surfing with the Integrated Web Browser
T
he world’s a very big place, of course, and you don’t always know where everything is. When you’ve got the whole planet tucked inside your com-puter, though, Google Earth is there to lend a hand, helping you find what-ever you’re looking for.Make that three hands, actually. You can use the Fly To tab to zip from place to place in many ways — by address, latitude and longitude, city names, or ZIP codes, to name a few. The Find Businesses tab (as shown in Figure 2-1) allows you to quickly track down various kinds of establishments like stores or restaurants. Finally, the Directions tab helps you map a route from one place to another.
The best way to quickly familiarize yourself with the various ways Google Earth has of finding things is to play with them. Click the three tabs in the Search pane — Fly To, Find Businesses, and Directions — and note the exam-ples shown. Now, do it again. And again. Each time, you see a different possi-bility (until the built-in samples start to repeat, of course — there are limits to this sort of thing).
Figure 2-1:
Check out the example searches first.
Flying Down to Rio (Or Anywhere Else)
The Fly To tab has the greatest variety of possible ways to enter your search terms. Say you want to get a look at Tokyo; just type in the name of the city. Of course, sometimes you’ll find more than one place with the same name. For example, if you type Washington,you’ll end up looking at the northwest-ern United States state and not the capital city, so be as specific as you can. You might, for instance, add a ZIP code. Of course, if you have an exact address, so much the better. Examples are shown in Table 2-1.
Table 2-1
Fly To Search Entry Examples
Example Type
37 25' 19.1"N, 122 05' 06"W Latitude/Longitude - Degrees, minutes, seconds 37.407229, –122.107162 Latitude/Longitude - Decimal
1600 Pennsylvania Avenue, 20006 Address with ZIP code Reservoir Rd. Clayville, NY Street with city and state 94043 ZIP code
San Francisco City name Tokyo, Japan City with country New York, NY City with state
Hotels near JFK Type of business near location
Now that you know what you can enter, here’s how to do it:
1. Enter the search term in the text box (see Figure 2-2).
2. Press Enter or click the Begin Search button.
Google Earth flies you to the location.
3. If the search term isn’t recognizable by Google Earth, you get a pop-up error message (see Figure 2-3). Click OK and try another one. Figure 2-2:
Searching for a location.
4. To redo an earlier search, click the down arrow at the right of the text box to access a drop-down list, as shown in Figure 2-4. If necessary, scroll down to find the one you want, and then click it.
Right on the dot: Understanding
latitude and longitude
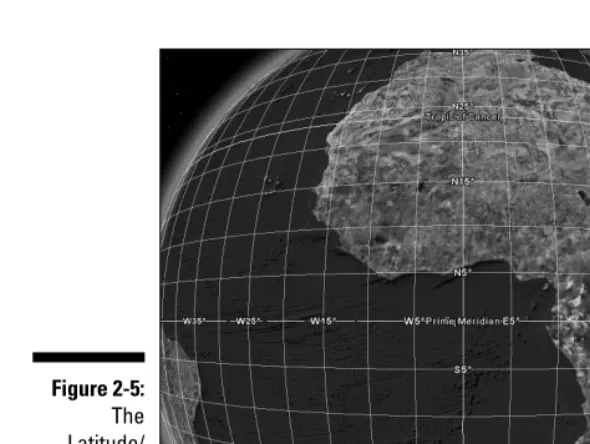
Latitude and longitude enable you to pinpoint the location of any place on Earth. As shown in Figure 2-5, lines of latitudeshow how far north or south you are from the equator, and lines of longitudeshow how far east or west you are from the prime meridian(an arbitrary north-south line drawn through Greenwich, England). Thus, latitudes to the north are larger and larger posi-tive numbers, whereas the ones to the south are progressively larger negaposi-tive numbers. When you see a positive latitude, you automatically know that it is north of the equator (and, conversely) that a negative latitude is south of it. The higher the number, the farther away from the equator the location is. The same system also holds true with longitudes except that the negative numbers are to the west (left) of the prime meridian and the positive numbers are to the east (right) of it. No land is found where the two meet: The equator and the prime meridian cross in the Atlantic Ocean off the coast of Africa.
Figure 2-4:
Repeating a previous search.
Figure 2-3:
Sometimes you can’t find what you’re looking for.
25
The two commonly used ways to specify latitude and longitude are
Sexagesimal degrees:This older system, still in use today, is also one that you will often find in historical records. It uses three measures: degrees, minutes, and seconds.
Decimal degrees:This modern system makes the minutes and seconds into a decimal fraction of a degree.
Okay, take a deep breath and bear with me. Look at a spot in Tahiti, located at latitude 17°31'25.00"S. This is 17 degrees, 31 minutes, and 25 seconds south of the equator. The same spot is expressed more neatly in decimal degrees as –17.523611°. The sexagesimal version uses S at the end to specify south of the equator, and the decimal version uses a minus sign at the beginning. To turn the Latitude/Longitude Grid on and off, use either the menu option View➪Grid or the keyboard shortcut Ctrl+L.
When you zoom in on a location (see Chapter 3), the lines of latitude and longitude become more precise, as shown in Figure 2-6.
Figure 2-5:
The Latitude/ Longitude Grid shows exact coordinates.
To set how latitude and longitude are displayed, follow these steps:
1. Choose Tools➪Options from the menu. 2. Click the 3D View tab.
3. The Show Lat/Long panel has three radio buttons, as shown in Figure 2-7. Select the first one to use the Degrees, Minutes, Seconds method. Select the second one to select decimal Degrees instead, or the third to choose Universal Transverse Mercator.
The Universal Transverse Mercator (UTM) coordinate system is not actually a method of specifying latitude and longitude but one which specifies a predetermined zone of the Earth’s surface.
4. Click OK to finish.
This changes both the display in the status bar at the bottom of the screen and the figures on the grid.
Regardless of which way you have the display set, you can still enter either type of latitude/longitude figures in the Search pane. However, you cannot mix and match. If the latitude is in decimal format, the longitude has to be the same.
Figure 2-6:
Zooming in to the intersection of the equator and the prime meridian. Closer views like this generate greater precision.
27
Deciphering geocoding
Geocodingis a fancy word for matching latitude and longitude with a spot on a computerized map. (See the earlier section, “Right on the dot: Understanding latitude and longitude.”) When you enter a location (either by address/inter-section or exact latitude and longitude), Google Earth has to look up those coordinates to find out what image to show on your computer screen. Latitude and longitude have been fairly well determined for most places in the civilized parts of the world. Even within cities, however, there’s an extra wrinkle involved with using street addresses. You see, people don’t build houses, office buildings, hospitals, and so forth according to a worldwide grid. Instead, they’re largely built wherever nature left enough flat space to put them or where TNT and bulldozers can make a large enough flat area. Nonetheless, most larger towns and cities are built according to some sort of plan today, even if they started out as a freeform cluster of farms way back when and just sort of grew into a municipality. How closely the “on-paper” version of city planning matches the reality you find when you walk or drive around the land varies widely from place to place, however.
On top of this, a standard lot size doesn’t exist. Two homes side by side can take up very different amounts of space on the map. If one is on a ten-acre lot and the other is on a half-acre lot, they just aren’t the same. Computer maps, however, know nothing of this kind of detail. Instead of knowing for sure where an address is, they make an educated guess.
Figure 2-7:
Set the latitude/ longitude display method.
The method used is interpolation,which is a fancy word meaning that you estimate an unknown value that falls between two known values. Say, for example, that you know something is more than a yard long but less than two yards long. You know that its length has to be around four or five feet. It’s the same with addresses in Google Earth. Say you have an ideally designed city, well laid out with a standardized address system. Each street is numbered sequentially from 1 to 100, north to south, and each avenue is numbered in the same manner from west to east. Thus, a building with an address of 100 Fifth Avenue would be on the corner of 1st Street and 5th Avenue, and one with an address of 200 Fifth Avenue would be at the intersection of 2nd Street and 5th Avenue. It logically follows that 150 Fifth Avenue would be right smack in the middle of that block.
However, it might not be there in reality. For example, take three structures along the shore of Lake Erie in Cleveland, Ohio. The Rock and Roll Hall of Fame’s address is 751 Erieside Avenue. To its west, at 601 Erieside Avenue, is the Great Lakes Science Center. One more block west, and you’re at Cleveland Browns Stadium, located around the corner at 1085 W. 3rd Street.
As you can see in Figure 2-8, the official locations in Google Earth are a mixed bag. As you might expect with address interpolation, only two of the three street addresses (marked by gray squares) fall on the exact spot. Of the built-in placemarks, only the Rock and Roll Hall of Fame is perfectly accurate.
Gray squares
Figure 2-8:
The Rock and Roll Hall of Fame in Cleveland, Ohio.
29
Thus, although Google Earth shows the stadium’s and the Great Lakes Science Center’s addresses correctly, the Science Center’s location is shown where the stadium actually lies, and the stadium’s placemark (as opposed to its address) is found to the south of the actual structure.
This sort of thing isn’t the fault of Google Earth — the same thing happens in any similar program because of the current state of geographic data.
This means that you sometimes have to do a bit of looking around after you get to where you’re supposed to be. If necessary, zoom out and scroll around a bit. If you know the area, look for identifiable landmarks, major intersec-tions, and the like in order to get your bearings. If you don’t, you might need to compare a map with the satellite image in order to figure out exactly what’s where.
Searching for a Tailor in Tulsa:
The Find Businesses Tab
Strictly speaking, the Find Businesses tab isn’t really about just businesses. You can use it to find anything from museums and colleges to libraries and hospitals. This tab uses a very straightforward approach. Here’s how to get the most out of it:
1. Enter the type of business in the What text box (see Figure 2-9).
2. Enter the location in the Where text box.
If you don’t enter a location here, Google Earth defaults to Current View. It assumes, in this case, that you’re already looking at the area you want to search in.
3. Press Enter or click the Begin Search button.
Like with the Fly To search, Google Earth displays the location. This time, though, it includes icons marking the location of each business of the specified type. The Search pane also generates a linked list, as you can see in Figure 2-10.
Figure 2-9:
Choose the kind of business to search for.
4. Click the icons in the viewing area or the links in the Search pane to generate a pop-up window with more information, such as the address and telephone number (see Figure 2-10).
Getting Directions
When you need to figure out how to get from point A to point B, it’s time to do that thing that wives always complain that their husbands never do — ask for directions.
Guys, nobody but you will know you did it.
To find out how to get from here to there, click the Directions tab and then do the following:
1. Enter the starting point in the From text box (see Figure 2-11).
This can be anything from a street address to a city name.
2. Enter the end point in the To text box.
3. Press Enter or click the Begin Search button. Figure 2-11:
Finding directions.
Figure 2-10:
Get more info.
31
Google Earth displays the area between the two points along with a series of icons marking each turn you need to take along the way. The waypoints are also shown as links in the Search pane.
A waypointis a marking of a specific location on a map. Typically, these are specified by citing the latitude and longitude — and, in most cases, altitude as well.
4. Click the icons or the links to get more information in a pop-up bal-loon (see Figure 2-12).
Whenever you see a pop-up info balloon in Google Earth, it has two links for Directions. If you click the To Here link, that location is automatically entered into the To text box in the Search pane; if you click the From Here link instead, that info goes right into the From text box.
Going Global: The Overview Map
Unless you’re a geography teacher or an explorer, you’ll probably get con-fused as to exactly where you are from time to time in Google Earth. To solve this little problem, the program includes an Overview Map feature that keeps you up to date on how your current location relates to the rest of the world (see Figure 2-13).
Figure 2-12:
Get more info from pop-up balloons.
You turn it on and off by choosing View➪Overview Map from the menu or using the Ctrl+M keyboard combination.
In addition to showing you where you are, the Overview Map also gives you another quick way to move about. Just double-click within it, and you’re flying to the point you chose.
You can change both the screen size of the Overview Map and the amount of detail it shows. Here’s how:
1. Choose Tools➪Options from the menu. 2. Click the 3D View tab.
3. To change the amount of space the Overview Map takes up onscreen, move the Map Size slider (see Figure 2-14).
Moving it to the right enlarges it; moving it to the left shrinks it.
4. To change the level of detail, move the Zoom Relation slider.
Taking it all the way to the left means that the Overview Map shows the same view as the viewing area does (1:1). Taking it all the way to the right (1:Infinity) means that the whole world is shown in the Overview Map regardless of how much you zoom into the viewing area. Figure 2-15 illustrates the two extremes.
5. To finish up, click OK.
Overview Map
Figure 2-13:
The Overview Map.
33
You can also manually enter a zoom factor in the text box to the left of the slider.
Figure 2-15:
Going from 1:1 zoom to 1:Infinity
zoom.
Figure 2-14:
Modifying the Overview Map.
When you have the Zoom Relation slider toward the left, the land in the view-ing area is shown as a red box. If you set the zoom to more than 52, the box symbol changes to a cross that marks the center of the viewing area.
Surfing with the Integrated Web Browser
The built-in Web browser comes in mighty handy when you need to check something out. For example, you might want to go to some of the places listed in Chapter 15 to copy some latitude and longitude figures so that you can paste them into the Search pane without having to switch back and forth between Google Earth and your external browser.
The home page in the integrated browser is (you guessed it) the Google search page, so you can be off and running right away. To display it, choose Tools➪Web from the menu. If you want to turn it off later, use the same menu option. By default, it shows up at the bottom, as shown in Figure 2-16, but it can also be moved to the side if you prefer (see Figure 2-17) by clicking its title bar and dragging it.
Figure 2-16:
The internal Web browser.
35
If you’re going to dock the Web browser on the side, you might want to turn off the sidebar so that the Viewing pane isn’t too crowded. To do so, click the Hide Sidebar button on the Google Earth toolbar, press Ctrl+Alt+B, or choose Tools➪Sidebar from the menu.
The browser is easy to use; its toolbar contains the few controls you need to operate it. Table 2-2 tells how to use them, starting from left to right.
Table 2-2
Web Browser Controls
Control Description
Go Back Display a previously viewed Web page. Go Forward Return from a previous page to the
current page.
URL Enter the Web address here. Search the Web Click this to go to the URL.
Dock Web window on the bottom Keep the Web browser in its default location.
Dock Web window on the side Move the browser to the right side.
Figure 2-17:
Changing the browser’s location.
Control Description
Launch this page in an external browser Close the internal browser and open the same page in your default Web browser. Close the Web window Turn off the internal browser.
When you’re exploring various points of interest (POIs; see Chapter 5), you’ll often encounter links to Web sites. You can choose to have these Web pages show up in either the integrated browser or your default external Web browser by setting the appropriate option:
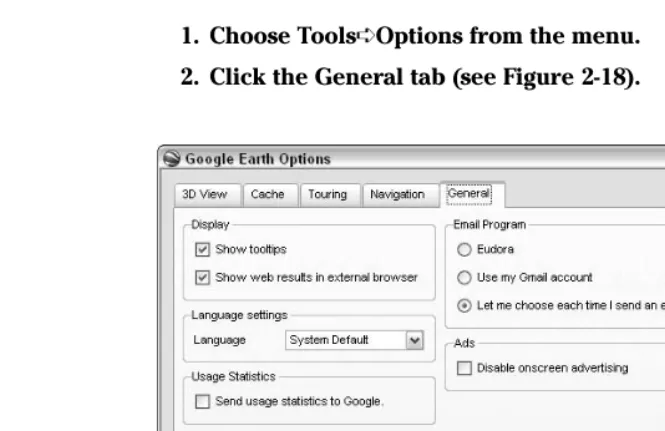
1. Choose Tools➪Options from the menu. 2. Click the General tab (see Figure 2-18).
3. Choose your display:
• Enable the second option under Display — the Show Web Results in External Browser check box.
or
• Clear the Show Web Results in External Browser check box to select the integrated browser instead.
4. Click OK to exit. Figure 2-18:
Setting the Web browser option.
37
When you next click a Web link in Google Earth, you see the resulting Web page in the browser of your choice. You don’t have to open the browser. If you click a link and the browser isn’t already open, it opens automatically at the desired Web page.
What if your browser is already open, though? That depends on which you chose. If it’s an external browser, like Internet Explorer, a new browser window opens. The integrated browser, however, has only one window, right there in Google Earth, so whatever page is displayed automatically replaces the old one.
Chapter 3
Adjusting Your View on the World
In This Chapter
Zooming the mapUsing direction and tilt controls
Sizing with the Ruler
G
oogle Earth is a lot of fun to use, and a good part of the reason for that is the careful design that went into its interface. It’s slick, intuitive, and easy to use. Even when you’re using it for serious work, it still feels like you’re playing a game.In this chapter, I take you on a tour of the various ways to modify, measure, and emphasize what you’re looking at. I’ll show you how to “spin the globe” that’s inside Google Earth and the different ways you can choose to zoom in and out or tilt and spin the landscape.
Rock the World: Dragging
and Zooming the Map
No matter what your tastes may be, Google Earth has some way of moving things around that’ll make you happy. Of the several methods for doing the same things, you can pick and choose the ones you like best. The two major approaches to navigation are using your mouse as a kind of virtual hand or using it to click the navigation controls. The controls are covered in the upcom-ing section, “Gainupcom-ing a New Perspective: The Direction and Tilt Controls.” Time to get started with a simple first exploration:
1. Place your mouse pointer on the globe in the viewing area.
2. Press and hold the left mouse button.
3. Move the mouse in any direction.
The globe follows, allowing you to turn it at will.
4. Move the mouse sharply and quickly release the button.
The globe continues to move in that direction. To stop it, just click it.
5. Double-click the globe.
The image begins to zoom in, as if you were descending.
6. Click the globe to stop it.
7. Double-click the right mouse button.
The image zooms out.
8. Click either mouse button to stop it.
9. Turn your mouse’s wheel forward and backward.
Forward moves the world away from you (as you gain altitude); backward moves it toward you.
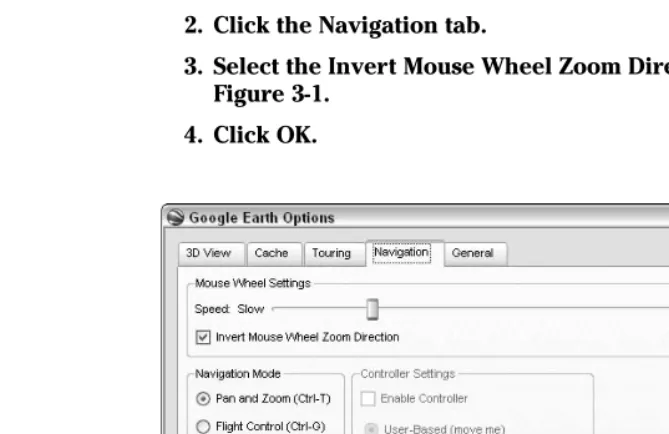
If you don’t like how the mouse wheel zooms, you can switch its direction. Here’s how:
1. Choose Tools➪Options from the menu. 2. Click the Navigation tab.
3. Select the Invert Mouse Wheel Zoom Direction check box, as shown in Figure 3-1.
4. Click OK.
Figure 3-1:
Change the direction of your mouse wheel.
Play with the methods of spinning and zooming for a bit until you’re comfort-able with them and then try out the full range of possibilities shown in Table 3-1.
Table 3-1
Mouse Navigation
Mouse Action Result
Press and hold left mouse button; Screen image follows mouse movement. move mouse. A sharp movement followed by the release of
the mouse button sets the Earth moving until you click it again.*
Press and hold right mouse button; Screen image zooms in and out. Moving the move mouse. mouse away from you moves the Earth away from you and vice versa. A sharp movement followed by the release of the mouse button results in a continuous zoom, which can be stopped by clicking in the viewing area.* Click. Stops any movement.
Left double-click. Zooms in. Right double-click. Zooms out.
Use mouse wheel. Zooms in and out. By default, rolling the wheel away moves the Earth away; rolling it toward you does the opposite, but you can reverse this action.
Press wheel or middle button; Movement toward you tilts the scene, away move mouse. restores it to normal view. Movement left or
right rotates the image.
* The speed of this sharp movement sets the speed of the continuous scrolling or zooming that results. The faster the mouse movement is, the faster the resulting screen movement will be.
Gaining a New Perspective:
The Direction and Tilt Controls
At first glance, the navigation controls can be a bit daunting, but they are quick to learn and easy to use (see Figure 3-2). There are two sliders and a ring. Inside the ring are a few other directional controls.
41
The horizontal slider is the tilt control. Moving it to the right tilts the scene, and going to the left returns to an overhead view. If you don’t feel like using the slider, just double-click the boxes on the ends of the slider. The right one tilts the image all the way, and the left one straightens it up again. A single click on the boxes tilts or untilts just a little bit.
The vertical slider is the zoom control. Moving it up zooms in; moving it down zooms out. Like with the other slider, it has control boxes on its ends as well. A single click on the top one zooms in a small amount and then stops; the bottom one does the same while zooming out. Double-clicking them causes the zoom to continue until you click the viewing area to stop it. The ring is the rotation control. To use it, click it and hold the mouse button down. Now, move the mouse. Both the ring and the image will rotate. After you start rotating things, you don’t have to keep the mouse pointer on the rotation ring. You can move it anywhere, and the effect will be the same until you release the button.
At the top of the rotation ring is the capital letter N. Of course, this stands for North, but in the process of rotation, North can end up pointing to just about anywhere onscreen. To restore it to its traditional position at the top of the screen, just double-click the N.
The four arrowheads within the rotation ring are directional movement con-trols. A single click of any of them moves the scene in the opposite direction (or moves your viewpoint in the indicated direction — it’s all relative). Double-clicking results in continuous movement; to stop it, just click. There are, of course, plenty of times when you want to do more than just go left and right, up and down. For those times, the starburst-shaped control in the center works like a joystick. Click it, hold down the mouse button, and then drag it around. You can move in any direction. As with the arrowheads, it is your viewpoint that moves in the direction you pull the control.
Figure 3-2:
The navigation controls.
The navigation controls only appear when you move your mouse pointer over their screen area (the upper-right corner). To change this behavior, choose View➪Show Navigation from the menu. The three options are Automatically (the default), Always, and Never.
Three-dimensional viewing
If you’ve been using the tilt controls, you might not notice much of a differ-ence in the tilted and untilted views unless you have the Terrain feature turned on. Look at your Layers pane and make sure that there’s a check mark in the Terrain check box. Then fly on over to some nice mountainous area like the one in Figure 3-3 and tilt things again.
One of the drawbacks to Google Earth (or any satellite view, for that matter) is that you are looking at things from an unfamiliar perspective. Even when looking at your own house or apartment building, the view lacks the “normal” orientation, in which we view things from the ground and buildings rise above the plane of our vision.
Figure 3-3:
Mountains spring to life with the Terrain layer and tilt controls.
43
When you use the tilt controls with the Terrain layer activated, the buildings are still flat images as seen from space.
For the larger cities, Google Earth has an answer: The major buildings have been added as three-dimensional models in a layer of their own. Figure 3-4 shows Manhattan without and with the 3D Buildings layer activated.
The compass and status bar
The compassis the circle in the upper-right corner, with the N at the top. If you’d rather not have it onscreen, choose View➪Compass from the menu. Turning off the compass does notturn off the navigation controls. They will still appear as usual.
The status baris the line of information at the bottom of the screen that pro-vides the
Latitude, longitude, and elevation of your mouse pointer
Percentage of the image that has so far flowed into your computer
Altitude of your viewpoint
To gain a little more screen area, choose View➪Status Bar from the menu. Figure 3-5 shows Google Earth with all possible distractions removed from the viewing area.
Figure 3-4:
Tilted view of Manhattan without the 3D Buildings layer (left) and with it (right).
The Bigger They Are: Figuring Sizes
with the Scale and Ruler
You have two ways to measure things in Google Earth: the Scale Legend and the Ruler. The Ruler is the more versatile of the two, but the Scale Legend requires no action beyond turning it on.
Using the Scale Legend
Normal maps have a scale printed on them that shows you, for instance, that 100 miles in the real world equals 1 inch on the map. Google Earth has one, too, and it constantly keeps track of the changes in the scale as you zoom in and out (see Figure 3-6). To turn it on (or off), choose View➪Scale Legend from the menu.
Using the Ruler
The Ruler can measure either a line or a path that you draw onscreen. A path,
in this case, is a series of connected lines.
Figure 3-5:
Clear the viewing area.
45
Lines
To measure the distance between two points, you need to use the Line option. Here’s how:
1. Click the Show Ruler button on the toolbar (the vertical ruler icon).
2. In the Ruler dialog box that appears (as shown in Figure 3-7), click the Line tab.
3. Click the start point in the viewing area and then click the end point.
A line appears between them with the distance displayed in the Ruler dialog box.
4. To change the unit of measurement, click the Length drop-down list (see Figure 3-8).
You can choose anything from centimeters to nautical miles to smoots.
5. To erase the line, click the Clear button. Figure 3-7:
Working with lines.
Scale Legend
Figure 3-6:
The Scale Legend.
You can also just start to draw another line. The first one disappears when you do.
If the Mouse Navigation check box is selected, holding down the mouse button and moving the mouse moves the image as usual. If you deselect it, that same mouse movement simply draws a line while the world stands still. This setting affects the mouse onlywhen you’re using the Ruler.
Paths
Paths work much the same way as lines do. The exceptions are that in Step 2 of the preceding step list, you click the Path tab and essentially repeat Step 3 several times. To draw a path, you click the starting point, click an intermedi-ate point, click another intermediintermedi-ate point, and so on, defining the waypoints along the path until you finally reach the end point.
As you add new segments to the path, the length of the total path is shown in the Ruler dialog box (see Figure 3-9).
Paths and lines are separate things. Although you can have only one line drawn at a time, you can have both a line and a path onscreen together (see Figure 3-10). Although beginning a new line will delete the old one, the path remains unaffected while you do so.
Figure 3-8: Set the measure-ment method.
47
Chapter 3: Adjusting Your View on the World
Miles and meters and sm