Netwatch Installation
For Windows
Netwatch is a program designed to monitor a Powerware UPS unit using the ConnectUPS-Web or Bestlink-Web interfaces and MGE UPS unit using the Network Management Card over a network. The UPS is assigned an IP address and each computer to be shut down will have Netwatch installed on it for
monitoring and shutdown.
The first step in installing the Netwatch software is configuring the Web adapter with its IP address and connecting it to the network. After that is complete, run the Netwatch setup program and you will see a screen shown in Figure 1.
Figure 1
Clicking on the “Next” button will bring up Figure 2. This is just general program information similar to what is in this document.
Figure 2
Click “Next” again to come to Figure 3. This is about Licensee Agreement. Please read it carefully and if you agree with the agreement click I accept the terms of the license agreement and click “Next”. If you do not agree with the license agreement click cancel.
Figure 3
Figure 4 shows about Destination Location. This is where you can set the path where the Netwatch files will be installed to. Select the appropriate directory and click “Next”.
Figure 5 gives you a chance to review the information of where the files are to go. If everything is OK, click “Next” to continue installation.
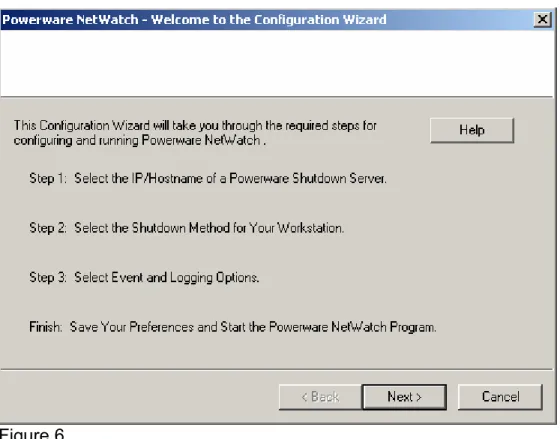
Figure 6 outlines the next steps in the installation process. Click “Next” to proceed.
Figure 6
On the next screen, shown in Figure 7, you are given several options. Clicking on the first option will cause Netwatch to poll the network for any Web/ SNMP/ NMC adapters (UPS’s) that are on the network (see Figure 8). If the UPS is on a different subnet from the computer, you can manually enter the IP address by clicking on option two (see Figure 9). Option three brings up the information in Figure 10.
Figure 7
Select the UPS that you want to monitor (if the UPS has multiple load segments, you will want to choose the load segment that the computer is plugged into. See the UPS User Guide for load segment information). Continue by clicking “OK” and go on to Figure 11.
Type the IP address of the UPS to monitor in the box and click OK, then go on to Figure 10.
Figure 10
The information in Figure 10 should be discussed with your Network
Administrator. Some firewalls block the UPD ports that Netwatch uses by default and they may need to be changed for security reasons. You can choose our standard default ports, have Netwatch randomly choose a port, or manually configure your own port to use. You can also select the check box to use NAT to assist with communications through a firewall. Clicking “OK” will take you back to the IP address screen in Figure 8.
Figure 11
Once the network settings and address have been chosen, you will see the screen in Figure 11. This is where you will choose how the shutdown is
controlled. By default, the Shutdown Controlled by Powerware server is selected. This means that the setup for shutting down the computers is in the Web adapter (see the Web adapter User Guide for more information). If you select the
Shutdown after a xx Minute Power Failure, the computer will shut down after the UPS has been running on battery power for xx
minutes. This setting will be overridden by the Web adapter settings if they are set to shut things down before the Netwatch timeout. Also, if the UPS gets to a Low Battery point before the Netwatch timeout, the Web adapter will tell the Netwatch to shut down the computer.
The Execute a Batch File option will cause whatever command file (batch or script or executable) listed to be run before shutdown occurs. Be sure to set the timing so that the command has time to run before the UPS gets to Low Battery and that the “Required Execution Time” is set properly to give the command enough time to finish before the shutdown is started.
Figure 12
After setting the shutdown options, you are presented with Figure 12 showing the Event Logging options. This screen shows the default settings of logging the event messages into the system log and also displaying a pop-up message on the screen notifying the user. You can also have Netwatch send out a Broadcast Message over the network to systems not running Netwatch, like an IT persons workstation, to notify them of events happening with this UPS.
Figure 13 once again gives you the chance to review the Netwatch settings and verify that everything is set the way you want. Click “Finish” to install the files and start Netwatch.
Figure 13
After the files are installed and Netwatch starts, you will see a notification (if the “Display Netwatch Event Messages on the Desktop” was not unchecked in Figure 12) as shown in Figure 14. This is the format that all Netwatch Event Notifications will take.
Figure 14
Netwatch is now installed and running. If you need to make changes to these settings, you can access the configuration through the Netwatch Control Panel. On Windows XP, 2003 Server, Vista and 2008, you will need to stop and restart the Powerware Netwatch service in the services control panel.