(SUCH AS TRANSLATION, TRANSFORMATION, OR ADAPTATION) WITHOUT THE EXPRESS WRITTEN PERMISSION OF CITRIX SYSTEMS, INC.
ALTHOUGH THE MATERIAL PRESENTED IN THIS DOCUMENT IS BELIEVED TO BE ACCURATE, IT IS PRESENTED WITHOUT WARRANTY OF ANY KIND, EXPRESS OR IMPLIED. USERS MUST TAKE ALL RESPONSIBILITY FOR THE USE OR APPLICATION OF THE PRODUCT(S) DESCRIBED IN THIS MANUAL. CITRIX SYSTEMS, INC. OR ITS SUPPLIERS DO NOT ASSUME ANY LIABILITY THAT MAY OCCUR DUE TO THE USE OR APPLICATION OF THE PRODUCT(S) DESCRIBED IN THIS DOCUMENT. INFORMATION IN THIS DOCUMENT IS SUBJECT TO CHANGE WITHOUT NOTICE. COMPANIES, NAMES, AND DATA USED IN EXAMPLES ARE FICTITIOUS UNLESS OTHERWISE NOTED.
The following information is for FCC compliance of Class A devices: This equipment has been tested and found to comply with the limits for a Class A digital device, pursuant to part 15 of the FCC rules. These limits are designed to provide reasonable protection against harmful interference when the equipment is operated in a commercial
environment. This equipment generates, uses, and can radiate radio-frequency energy and, if not installed and used in accordance with the instruction manual, may cause harmful interference to radio communications. Operation of this equipment in a residential area is likely to cause harmful interference, in which case users will be required to correct the interference at their own expense.
Modifying the equipment without Citrix' written authorization may result in the equipment no longer complying with FCC requirements for Class A digital devices. In that event, your right to use the equipment may be limited by FCC
regulations, and you may be required to correct any interference to radio or television communications at your own expense.
You can determine whether your equipment is causing interference by turning it off. If the interference stops, it was probably caused by the NetScaler Request Switch™ 9000 Series equipment. If the NetScaler equipment causes
interference, try to correct the interference by using one or more of the following measures: Move the NetScaler equipment to one side or the other of your equipment.
Move the NetScaler equipment farther away from your equipment.
Plug the NetScaler equipment into an outlet on a different circuit from your equipment. (Make sure the NetScaler equipment and your equipment are on circuits controlled by different circuit breakers or fuses.)
Modifications to this product not authorized by Citrix Systems, Inc., could void the FCC approval and negate your authority to operate the product.
BroadCom is a registered trademark of BroadCom Corporation. Fast Ramp, NetScaler, and NetScaler Request Switch are trademarks of Citrix Systems, Inc. Linux is a registered trademark of Linus Torvalds. Internet Explorer, Microsoft, PowerPoint, Windows and Windows product names such as Windows NT are trademarks or registered trademarks of the Microsoft Corporation. NetScape is a registered trademark of Netscape Communications Corporation. Red Hat is a trademark of Red Hat, Inc. Sun and Sun Microsystems are registered trademarks of Sun Microsystems, Inc. Other brand and product names may be registered trademarks or trademarks of their respective holders.
Software covered by the following third party copyrights may be included with this product and will also be subject to the software license agreement: Copyright 1998 © Carnegie Mellon University. All rights reserved. Copyright © David L.
Mills 1993, 1994. Copyright © 1992, 1993, 1994, 1997 Henry Spencer. Copyright © Jean-loup Gailly and Mark Adler.
Copyright © 1999, 2000 by Jef Poskanzer. All rights reserved. Copyright © Markus Friedl, Theo de Raadt, Niels Provos,
Dug Song, Aaron Campbell, Damien Miller, Kevin Steves. All rights reserved. Copyright © 1982, 1985, 1986,
1988-1991, 1993 Regents of the University of California. All rights reserved. Copyright © 1995 Tatu Ylonen, Espoo,
Finland. All rights reserved. Copyright © UNIX System Laboratories, Inc. Copyright © 2001 Mark R V Murray. Copyright
1995-1998 © Eric Young. Copyright © 1995,1996,1997,1998. Lars Fenneberg. Copyright © 1992. Livingston
Enterprises, Inc. Copyright © 1992, 1993, 1994, 1995. The Regents of the University of Michigan and Merit Network,
Inc. Copyright © 1991-2, RSA Data Security, Inc. Created 1991. Copyright © 1998 Juniper Networks, Inc. All rights
reserved. Copyright © 2001, 2002 Networks Associates Technology, Inc. All rights reserved. Copyright (c) 2002
Networks Associates Technology, Inc. Copyright 1999-2001© The Open LDAP Foundation. All Rights Reserved.
Copyright © 1999 Andrzej Bialecki. All rights reserved. Copyright © 2000 The Apache Software Foundation. All rights
reserved. Copyright (C) 2001-2003 Robert A. van Engelen, Genivia inc. All Rights Reserved. Copyright (c) 1997-2004 University of Cambridge. All rights reserved. Copyright (c) 1995. David Greenman. Copyright (c) 2001 Jonathan Lemon. All rights reserved. Copyright (c) 1997, 1998, 1999. Bill Paul. All rights reserved. Copyright (c) 1994-1997 Matt Thomas.
All rights reserved. Last Updated: August 2011
Preface...9
Formatting Conventions for NetScaler Documentation . . . .9
Documentation Available on the NetScaler Appliance . . . 10
Getting Service and Support . . . 11
NetScaler Documentation Feedback . . . .11
1 Introduction...13
Web Application Security. . . .14
Known Web Attacks. . . .15
Unknown Web Attacks. . . .16
How The Application Firewall Works. . . 17
Application Firewall Features. . . 20
The Application Firewall User Interfaces. . . 20
2 Configuring the Application Firewall...23
Enabling the Application Firewall. . . 25
To enable the application firewall by using the NetScaler command line. . . 25
To enable the application firewall by using the configuration utility. . . .25
The Application Firewall Wizard. . . 26
Opening the Wizard. . . .26
The Wizard Screens. . . 26
To configure the Application Firewall: Initial Configuration. . . .30
To configure the Application Firewall: Enabling Blocking for Signatures. . . .31
To configure the Application Firewall: Enabling and Configuring advanced protection. . . .31
To configure the Application Firewall: Creating A Policy. . . .32
Manual Configuration. . . .33
Manual Configuration By Using the Configuration Utility. . . 33
To create and configure a signatures object. . . 33
To create and configure a profile. . . 34
To configure a relaxation or rule. . . .36
To create and configure a policy. . . .39
To bind an Application Firewall policy. . . .40
Manual Configuration By Using the NetScaler Command Line. . . .40
To create a profile by using the NetScaler command line. . . .40
To configure a profile by using the NetScaler command line. . . .41
To create and configure a policy. . . .42
To bind an Application Firewall policy. . . .43
PCRE Character Encoding Format. . . .43
3 Signatures...47
Manually Configuring the Signatures Feature. . . .49
To Create a Signatures Object from a Template. . . .49
To Configure a Signatures Object. . . .49
Updating a Signatures Object. . . .52
To Update a Signatures Object. . . .52
Updating a Signatures Object from a Supported Vulnerability Scanning Tool. . . .53
To Import and Update Signatures from a Vulnerability Scanning Tool. . . .53
The Signatures Editor. . . .54
Parameters for the Signature Editor. . . .54
To add a signature by using the Signatures Editor. . . .55
To modify a signature by using the Signatures Editor. . . .55
To add a signature rule category. . . .56
Signature Rule Patterns. . . .57
To configure a signature rule pattern. . . .58
4 Advanced Protections...61
Top-Level Advanced Protections. . . .63
HTML Cross-Site Scripting Check. . . .63
HTML SQL Injection Check. . . .66
Buffer Overflow Check. . . .69
Cookie Consistency Check. . . .70
Data Leak Prevention Checks. . . .73
Credit Card Check. . . .73
Safe Object Check. . . .74
Advanced Form Protection Checks. . . .76
Field Formats Check. . . .76
Form Field Consistency Check. . . .78
CSRF Form Tagging Check. . . .80
URL Protection Checks. . . .83
Start URL Check. . . .83
Deny URL Check. . . .86
XML Protection Checks. . . .87
XML Format Check. . . .87
XML Denial-of-Service Check. . . .88
XML Cross-Site Scripting Check. . . .90
XML SQL Injection Check. . . .92
XML Attachment Check. . . .94
Web Services Interoperability Check. . . .95
XML Message Validation Check. . . .96
XML SOAP Fault Filtering Check. . . .97
5 Policies...99
Firewall Policies. . . .100
To create an Application Firewall rule (expression) by using the configuration utility . . . .100
The Add Expression Dialog Box. . . .102
Auditing Policies. . . .103
To create an auditing server by using the NetScaler command line. . . .103
Example. . . .104
To modify or remove an auditing server by using the NetScaler command line. . . . .104
Example. . . .104
Parameters for configuring an auditing server. . . .104
Example. . . .105
To create or configure an auditing server by using the configuration utility. . . .106
To create an auditing policy by using the NetScaler command line. . . .106
Example. . . .107
To configure an auditing policy by using the NetScaler command line. . . .107
Example. . . .107
Parameters for an auditing policy. . . .107
To configure an auditing policy by using the configuration utility. . . .108
6 Imports...109
HTML Error Object. . . 110
XML Error Object. . . .112
XML Schema. . . 112
WSDL. . . .112
To import a file or object by using the NetScaler command line. . . .112
Example. . . .113
Parameters for Importing a File or Object. . . .113
To import a file or object by using the configuration utility. . . .113
To export a file or object. . . .114
To edit a file or object. . . .114
7 Global Configuration...117
Engine Settings. . . .118
To configure engine settings by using the NetScaler command line. . . .118
Example. . . .118
Parameters for configuring engine settings. . . .118
To configure engine settings by using the configuration utility. . . .119
Confidential Fields. . . 120
To add a confidential field by using the NetScaler command line. . . .121
Example. . . .121
To modify a confidential field by using the NetScaler command line. . . .121
Example. . . .121
To remove a confidential field by using the NetScaler command line. . . .122
Parameters for configuring a confidential field. . . .122
To configure a confidential field by using the configuration utility. . . .122
Examples. . . .123
Field Types. . . .124
To add a field type by using the NetScaler command line. . . .125
Example. . . .125
To modify a field type by using the NetScaler command line. . . .125
Example. . . .125
To remove a field type by using the NetScaler command line. . . .125
Parameters for configuring a field type. . . .126
To configure a field type by using the configuration utility. . . .126
Examples. . . .127
8 Logs, Statistics, and Reports...129
The Application Firewall Logs. . . 130
The Application Firewall Statistics. . . .132
The PCI DSS Report. . . .132
Learn about the Citrix® NetScaler® collection of documentation, including information
about support options and ways to send us feedback.
In This Preface:
w Formatting Conventions for NetScaler Documentation w Documentation Available on the NetScaler Appliance w Getting Service and Support
w NetScaler Documentation Feedback
For information about new features and enhancements for this release, see the Citrix NetScaler 9.3 Release Notes at http://support.citrix.com/article/CTX128669.
Formatting Conventions for NetScaler
Documentation
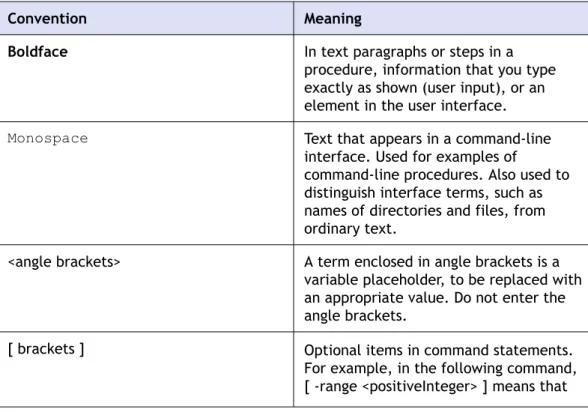
The NetScaler documentation uses the following formatting conventions.
Table 1. Formatting Conventions
Convention Meaning
Boldface In text paragraphs or steps in a procedure, information that you type exactly as shown (user input), or an element in the user interface.
Monospace Text that appears in a command-line
interface. Used for examples of
command-line procedures. Also used to distinguish interface terms, such as names of directories and files, from ordinary text.
<angle brackets> A term enclosed in angle brackets is a variable placeholder, to be replaced with an appropriate value. Do not enter the angle brackets.
[ brackets ] Optional items in command statements. For example, in the following command, [ -range <positiveInteger> ] means that
Convention Meaning
you have the option of entering a range, but it is not required:
add lb vserver <name> <serviceType>
<IPAddress> <port> [ -range <positiveInteger>]
Do not type the brackets themselves. | (vertical bar) A separator between options in braces or
brackets in command statements. For example, the following indicates that you choose one of the following load balancing methods: <lbMethod> = ( ROUNDROBIN | LEASTCONNECTION | LEASTRESPONSETIME | URLHASH | DOMAINHASH | DESTINATIONIPHASH | SOURCEIPHASH | SRCIPDESTIPHASH | LEASTBANDWIDTH | LEASTPACKETS | TOKEN | SRCIPSRCPORTHASH | LRTM | CALLIDHASH | CUSTOMLOAD )
… (ellipsis) You can repeat the previous item or items in command statements. For example, /route:<DeviceName>[ ,…] means you can type additional
<DeviceNames> separated by commas.
Documentation Available on the NetScaler
Appliance
A complete set of Citrix® NetScaler® documentation (PDF format) is available on the
Documentation tab of your NetScaler appliance and from http://support.citrix.com/. (Most of the documents require Adobe Reader, available at http://adobe.com/.)
To view the documentation
1. From a Web browser, log on to the NetScaler. 2. Click the Documentation tab.
3. To view a short description of each document, hover your cursor over the title. To open a document, click the title.
Getting Service and Support
Citrix® offers a variety of resources for support with your Citrix environment, including
the following:
w The Knowledge Center is a self-service, Web-based technical support database that contains thousands of technical solutions, including access to the latest hotfixes, service packs, and security bulletins.
w Technical Support Programs for both software support and appliance maintenance are available at a variety of support levels.
w The Subscription Advantage program is a one-year membership that gives you an easy way to stay current with the latest product version upgrades and enhancements. w Citrix Education provides official training and certification programs on virtually all
Citrix products and technologies.
For more information about Citrix services and support, see the Citrix Systems Support Web site at http://www.citrix.com/lang/English/support.asp.
You can also participate in and follow technical discussions offered by the experts on various Citrix products at the following sites:
w http://community.citrix.com w http://twitter.com/citrixsupport
NetScaler Documentation Feedback
You are encouraged to provide feedback and suggestions so that we can enhance the documentation. You can send email to [email protected]. In the subject line, specify "Documentation Feedback." Please include the title of the guide and the page number in the email message.
You can also provide feedback through the Knowledge Center at http:// support.citrix.com/.
To provide feedback at the Knowledge Center home page
1. Go to the Knowledge Center home page at http://support.citrix.com/.
2. On the Knowledge Center home page, under Products, expand NetScaler, and then click the NetScaler release for which you want to provide feedback.
3. On the Documentation tab, click the guide name, and then click Article Feedback. 4. On the Documentation Feedback page, complete the form, and then click Submit.
Introduction
Topics:
• Web Application Security
• How The Application Firewall
Works
• Application Firewall Features
• The Application Firewall User
Interfaces
The Citrix® Application Firewall™ prevents security breaches,
data loss, and possible unauthorized modifications to web sites that access sensitive business or customer information. It does so by filtering both requests and responses, examining them for evidence of malicious activity, and blocking those that exhibit such activity. Your site is protected not only from common types of attacks, but also from new, as yet unknown attacks. In addition to protecting web servers and web sites from unauthorized access and misuse by hackers and malicious programs, the application firewall provides protection against security vulnerabilities in legacy CGI code or scripts, other web frameworks, web server software, and the underlying operating systems.
The Citrix Application Firewall is available as a stand-alone appliance, or as a feature on a Citrix NetScaler® appliance or
NetScaler VPX™ virtual appliance. In the application firewall
documentation, the term application firewall appliance refers to the platform on which the application firewall is running, regardless of whether that platform is a dedicated firewall appliance, a NetScaler appliance on which other features have also been configured, or a NetScaler VPX virtual appliance, To use the application firewall, you must create at least one security configuration to block connections that violate the rules that you set for your protected web sites. The number of security configurations that you might want to create depends on the complexity of your web site. In many cases, one is sufficient. You can probably use the defaults for the global settings, which affect all security configurations, but you can change the global settings if necessary.
Web Application Security
Web application security is that part of network security that covers computers and programs that communicate by using the HTTP and HTTPS protocols. This is an extremely broad area in which security flaws and weaknesses abound. Operating systems on both servers and clients have security issues and are vulnerable to attack. Web server software and web site enabling technologies such as CGI, Java and
JavaScript have underlying vulnerabilities. Browsers and other client applications that communicate with web-enabled applications also have vulnerabilities. Web sites that use any technology but the simplest of HTML, including any site that allows interaction with visitors, often have vulnerabilities of their own.
In the past, a breach in security was often just an annoyance, but today that is seldom the case. For example, attacks in which a hacker gained access to a web server and made unauthorized modifications to (defaced) a web site used to be common. They were usually launched by hackers who had no motivation beyond demonstrating their skills to fellow hackers. Most current security breaches, however, are motivated by a desire for money. The majority attempt to accomplish one or both of the following goals: to obtain sensitive and potentially valuable private information, or to obtain unauthorized access to and control of a web site or web server.
Certain forms of web attacks focus on obtaining private information. These attacks are often possible even against web sites that are secure enough to prevent an attacker from taking full control. The information that an attacker can obtain from a web site can include customer names, addresses, phone numbers, social security numbers, credit card numbers, medical records, and other private information. The attacker can then use this information or sell it to others. Much of the information obtained by such attacks is protected by law, and all of it by custom and expectation. A breach of this type can have extremely serious consequences for customers whose private information is compromised. At best, these customers will have to exercise vigilance to prevent others from abusing their credit cards, opening unauthorized credit accounts in their name, or appropriating their identities outright (identity theft). At worst, the customers may face ruined credit ratings or even be blamed for criminal activities in which they had no part.
Other web attacks are aimed at obtaining control of (or compromising) your web site or the server on which it operates, or both. A hacker who gains control of a web site or server can use it to host unauthorized content, act as a proxy for content hosted on another web server, provide SMTP services to send unsolicited bulk email, or provide DNS services to support such activities on other compromised web servers. Most web sites that are hosted on compromised web servers promote questionable or outright fraudulent businesses. For example, the majority of phishing web sites and child pornography web sites are hosted on compromised web servers.
Protecting your web sites and web services against these attacks requires a multilayered defense capable of both blocking known attacks with identifiable characteristics and protecting against unknown attacks, which can often be detected because they look different from the normal traffic to your web sites and web services.
Known Web Attacks
The first line of defense for your web sites is protection against the large number of attacks that are known to exist and have been observed and analyzed by web security experts. Common types of attacks against HTML-based web sites include:
w Buffer overflow attacks. Sending an extremely long URL, extremely long cookie, or
other extremely long bit of information to a web server in hopes of causing it or the underlying operating system to hang, crash, or provide the attacker with access to the underlying operating system. A buffer overflow attack can be used to gain access to unauthorized information, to compromise a web server, or both. w Cookie security attacks. Sending a modified cookie to a web server, usually in
hopes of obtaining access to unauthorized content by using falsified credentials. w Forceful browsing. Accessing URLs on a web site directly, without navigating to the
URLs by means of hyperlinks on the home page or other common start URLs on the web site. Individual instances of forceful browsing may simply indicate a user who bookmarked a page on your web site, but repeated attempts to access nonexistent content, or content that users should never access directly, often represent an attack on web site security. Forceful browsing is normally used to gain access to unauthorized information, but can also be combined with a buffer overflow attack in an attempt to compromise your server.
w Web form security attacks. Sending inappropriate content to your web site in a
web form. Inappropriate content can include modified hidden fields, HTML or code in a field intended for alphanumeric data only, an overly long string in a field that accepts only a short string, an alphanumeric string in a field that accepts only an integer, and a wide variety of other data that your web site does not expect to receive in that web form. A web form security attack can be used either to obtain unauthorized information from your web site or to compromise the web site outright, usually when combined with a buffer overflow attack.
Two specialized types of attacks on web form security deserve special mention:
w SQL injection attacks. Sending an active SQL command or commands in a web form
or as part of a URL, with the goal of causing an SQL database to execute the command or commands. SQL injection attacks are normally used to obtain unauthorized information.
w Cross-site scripting attacks. Using a URL or a script on a web page to violate the
same-origin policy, which forbids any script from obtaining properties from or modifying any content on a different web site. Since scripts can obtain information and modify files on your web site, allowing a script access to content on a different web site can provide an attacker the means to obtain unauthorized information, to compromise a web server, or both.
Attacks against XML-based web services normally fall into at least one of the following two categories: attempts to send inappropriate content to a web service, or attempts to breach security on a web service. Common types of attacks against XML-based web services include:
w Malicious code or objects. XML requests that contain code or objects that can
either directly obtain sensitive information or can give an attacker control of the web service or underlying server.
w Badly-formed XML requests. XML requests that do not conform to the W3C XML
specification, and that can therefore breach security on an insecure web service. w Denial of service (DoS) attacks. XML requests that are sent repeatedly and in high
volume, with the intent of overwhelming the targeted web service and denying legitimate users access to it.
In addition to standard XML-based attacks, XML web services and Web 2.0 sites are also vulnerable to SQL injection and cross-site scripting attacks, as described below: w SQL injection attacks. Sending an active SQL command or commands in an
XML-based request, with the goal of causing an SQL database to execute that command or commands. As with HTML SQL injection attacks, XML SQL injection attacks are normally used to obtain unauthorized information.
w Cross-site scripting attacks. Using a script included in an XML based application to
violate the same-origin policy, which does not allow any script to obtain properties from or modify any content on a different application. Since scripts can obtain information and modify files by using your XML application, allowing a script access to content belonging to a different application can give an attacker the means to obtain unauthorized information, to compromise the application, or both. Known web attacks can usually be stopped by filtering web site traffic for specific characteristics (signatures) that always appear for a specific attack and should never appear in legitimate traffic. This approach has the advantages of requiring relatively few resources and posing relatively little risk of false positives. It is therefore a valuable tool in fighting attacks on web sites and web services, and configuring basic signature protections that intercept most known web attacks is easy to do.
Unknown Web Attacks
The greatest threat against web sites and applications does not come from known attacks, but from unknown attacks. Most unknown attacks fall into one of two
categories: newly-launched attacks for which security firms have not yet developed an effective defense (zero day attacks), and carefully-targeted attacks on a specific web site or web service rather than many web sites or web services (spear attacks). These attacks, like known attacks, are usually intended to obtain sensitive private
information, compromise the web site or web service and allow it to be used for further attacks, or both of those goals.
Zero-day attacks are a major threat to all users. These attacks are usually of the same types as known attacks; zero-day attacks often involve injected SQL, a cross-site script, a cross-site request forgery, or another type of attack similar to known attacks. In most cases, they target vulnerabilities that the developers of the targeted software, web site, or web service either are unaware of or have just learned about. Security firms have therefore usually not developed defenses against these attacks, and even if they have, users have usually not obtained and installed the patches or performed the workarounds necessary to protect against these attacks. The time between discovery of a zero-day attack and availability of a defense (the vulnerability window) is shrinking,
but perpetrators can still count on hours or even days in which many web sites and web services lack any specific protection against the attack.
Spear attacks are a major threat, but to a more select group of users. A common type of spear attack, a spear phish, is usually targeted at customers of a specific bank or financial institution, or (less commonly) at employees of a specific company or organization. Unlike other phishes, which are often crudely written forgeries that a user with any familiarity with the actual communications of that bank or financial institution can recognize, spear phishes are letter perfect and extremely convincing. They can contain information specific to the individual that, at first look, no stranger should know or be able to obtain. The spear phisher is therefore able to convince his or her target to provide the requested information, which the phisher can then use to loot accounts, to process illegitimately obtained money from other sources, or to gain access to other, even more sensitive information.
Both of these types of attack have certain characteristics that can usually be detected, although not by using static patterns that look for specific characteristics, as do standard signatures. Detecting these types of attacks requires more sophisticated and more resource-intensive approaches, such as heuristic filtering and positive security model systems. Heuristic filtering looks, not for specific patterns, but for patterns of behaviors. Positive security model systems model the normal behavior of the web site or web service that they are protecting, and then block connections that do not fit within that model of normal use. URL based and web-form based security checks profile normal use of your web sites, and then control how users interact with your web sites, using both heuristics and positive security to block anomalous or unexpected traffic. Both heuristic and positive security, properly designed and deployed, can catch most attacks that signatures miss. However, they require considerably more resources than do signatures, and you must spend some time configuring them properly to avoid false positives. They are therefore usually used, not as the primary line of defense, but as backups to signatures or other less resource-intensive approaches.
By configuring these advanced protections in addition to signatures, you create a hybrid security model, which enables the application firewall to provide comprehensive protection against both known and unknown attacks.
How The Application Firewall Works
When you install the application firewall, you create an initial security configuration, which consists of a policy, a profile, and a signatures object. The policy is a rule that identifies the traffic to be filtered, and the profile identifies the patterns and types of behavior to allow or block when the traffic is filtered. The simplest patterns, which are called signatures, are not specified within the profile, but in a signatures object that is associated with the profile.
A signature is a string or pattern that matches a known type of attack. The application firewall contains over a thousand signatures in seven categories, each directed at attacks on specific types of web servers and web content. Citrix updates the list with new signatures as new threats are identified. During configuration, you specify the signature categories that are appropriate for the web servers and content that you need to protect. Signatures provide good basic protection with low processing
overhead. If your applications have special vulnerabilities or you detect an attack against them for which no signature exists, you can add your own signatures.
The more advanced protections are called security checks. A security check is a more rigorous, algorithmic inspection of a request for specific patterns or types of behavior that might indicate an attack or constitute a threat to your protected web sites and web services. It can, for example, identify a request that attempts to perform a certain type of operation that might breach security, or a response that includes sensitive private information such as a social security number or credit card number. During configuration, you specify the security checks that are appropriate for the web servers and content that you need to protect. The security checks are restrictive. Many of them can block legitimate requests and responses if you do not add the appropriate exceptions (relaxations) when configuring them. Identifying the needed exceptions is not difficult if you use the adaptive learning feature, which observes normal use of your web site and creates recommended exceptions.
The application firewall can be installed as either a Layer 3 network device or a Layer 2 network bridge between your servers and your users, usually behind your company’s router or firewall. It must be installed in a location where it can intercept traffic between the web servers that you want to protect and the hub or switch through which users access those web servers. You then configure the network to send requests to the application firewall instead of directly to your web servers, and responses to the application firewall instead of directly to your users. The application firewall filters that traffic before forwarding it to its final destination, using both its internal rule set and your additions and modifications. It blocks or renders harmless any activity that it detects as harmful, and then forwards the remaining traffic to the web server. The following figure provides an overview of the filtering process.
Note: The figure omits the application of a policy to incoming traffic. It illustrates a security configuration in which the policy is to process all requests. Also, in this configuration, a signatures object has been configured and associated with the profile, and security checks have been configured in the profile.
Figure 1-1. A Flowchart of Application Firewall Filtering
As the figure shows, when a user requests a URL on a protected web site, the application firewall first examines the request to ensure that it does not match a signature. If the request matches a signature, the application firewall either displays the error object (a web page that is located on the application firewall appliance and which you can configure by using the imports feature) or forwards the request to the designated error URL (the error page). Signatures do not require as many resources as do security checks, so detecting and stopping attacks that are detected by a signature before running any of the security checks reduces the load on the server.
If a request passes signature inspection, the application firewall applies the request security checks that have been enabled. The request security checks verify that the request is appropriate for your web site or web service and does not contain material that might pose a threat. For example, security checks examine the request for signs indicating that it might be of an unexpected type, request unexpected content, or contain unexpected and possibly malicious web form data, SQL commands, or scripts. If the request fails a security check, the application firewall either sanitizes the request
and then sends it back to the NetScaler appliance (or NetScaler VPX virtual appliance), or displays the error object. If the request passes the security checks, it is sent back to the NetScaler appliance, which completes any other processing and forwards the request to the protected web server.
When the web site or web service sends a response to the user, the application firewall applies the response security checks that have been enabled. The response security checks examine the response for leaks of sensitive private information, signs of web site defacement, or other content that should not be present. If the response fails a security check, the application firewall either removes the content that should not be present or blocks the response. If the response passes the security checks, it is sent back to the NetScaler appliance, which forwards it to the user.
Application Firewall Features
The basic application firewall features are policies, profiles, and signatures, which provide a hybrid security model as described in Known Web Attacks on page 15, Unknown Web Attacks on page 16, and How The Application Firewall Works on page 17. Of special note is the learning feature, which observes traffic to your protected
applications and recommends appropriate configuration settings for certain security checks.
The imports feature manages files that you upload to the application firewall. These files are then used by the application firewall in various security checks, or when responding to a connection that matches a security check.
You can use the logs, statistics, and reports features to evaluate the performance of the application firewall and identify possible needs for additional protections.
The Application Firewall User Interfaces
All models in the Citrix NetScaler Application Delivery product line can be configured and managed from the Citrix NetScaler command line interface or the web-based configuration utility. However, the configuration utility provides a more complete interface. Not all application firewall configuration tasks can be performed at the command line. Also, the configuration utility provides access to a wizard that reduces the complexity of configuring the applicaton firewall. Unlike most wizards, the
application firewall wizard can serve as your primay interface to the application firewall. The command line interface is a modified UNIX shell based on the FreeBSD bash shell. To configure the Application Firewall from the command line interface, you type commands at the prompt and press the Enter key, just as you do with any other Unix shell. For instructions for using the command line inerface, see the Citrix NetScaler Command Reference Guide
The screen has two main areas. The panel on the left, called the navigation pane, contains a navigation tree, with which you navigate to the screens on which you configure the features that are installed on your appliance. The screens to which you navigate appear to the right of the navigation pane, in the details pane.
When you access the configuration utility, the details pane displays the System Overview screen, as shown in Figure 1. If, in the navigation pane, you click plus sign next to the Application Firewall folder, the Application Firewall node expands to include the main application firewall elements that you can configure. If you click the first element, Profiles, the details pane displays the configured profiles, if any profiles have been configured. At the bottom of the details pane, you can click Add to
configure a new profile. Other buttons at the bottom of the details pane are grayed out until you select an existing profile. Screens for the other elements work in the same way. If, instead of expanding the application firewall node, you click the node itself, the details pane displays different options, one of which is the application firewall wizard. Citrix recommends that you use the wizard for initial configuration, and many users use it almost exclusively. It includes most of the functionality that is available elsewhere in the configuration utility.
For information and instructions on accessing the configuration utility, see the Citrix NetScaler Getting Started Guide.
Configuring the Application Firewall
Topics:
• Enabling the Application
Firewall
• The Application Firewall
Wizard
• Manual Configuration
To configure the Citrix Application Firewall™, Citrix
recommends that you use a browser to connect to the configuration utility. When the connection is established, verify that the application firewall is enabled, and then run the application firewall wizard, which prompts you for configuration information. You do not have to provide all of the requested information the first time you use the wizard. Instead, you can accept default settings, perform a few relatively straightforward configuration tasks to enable important features, and then allow the application firewall to collect important information to help you complete the configuration.
For example, when the wizard prompts you to specify a rule for selecting the traffic to be processed, you can accept the default, which selects all traffic. When it presents you with a list of signatures, you can enable the appropriate categories of signatures and turn on the collection of statistics for those signatures. For this initial configuration, you can skip the advanced protections (security checks). The wizard automatically creates the appropriate policy, signatures object, and profile (collectively, the security configuration) , and binds the policy to global. The application firewall then begins filtering connections to your protected web sites, logging any connections that match one or more of the signatures that you enabled, and collecting statistics about the connections that each signature matches. After the application firewall processes some traffic, you can run the wizard again and examine the logs and statistics to see if any of the signatures that you have enabled are matching
legitimate traffic. After determining which signatures are identifying the traffic that you want to block, you can enable blocking for those signatures. If your web site or web service is not complex, does not use SQL, and does not have access to sensitive private information, this basic security configuration will probably provide adequate protection.
You may need additional protection if, for example, your web site is dynamic. Content that uses scripts may need protection against cross-site scripting attacks. Web content that uses SQL —such as shopping carts, many blogs, and most content management systems—may need protection against SQL injection attacks. Web sites and web services that collect
sensitive private information such as social security numbers or credit card numbers may require protection against unintentional exposure of that information. Certain types of web-server or XML-server software may require protection from types of attacks tailored to that software. Another consideration is that specific elements of your web sites or web services may require different protection than do other elements. Examining the application firewall logs and
statistics can help you identify the additional protections that you might need.
After deciding which advanced protections are needed for your web sites and web services, you can run the wizard again to configure those protections. Certain security checks require that you enter exceptions (relaxations) to prevent the check from blocking legitimate traffic. You can do so
manually, but it is usually easier to enable the adaptive learning feature and allow it to recommend the necessary relaxations. You can use the wizard as many times as
necessary to enhance your basic security configuration and/or create additional security configurations.
The wizard automates some tasks that you would have to perform manually if you did not use the wizard. It automatically creates a policy, a signatures object, and a profile, and assigns them the name that you provided when you were prompted for the name of your configuration. The wizard also adds your advanced-protection settings to the profile, binds the signatures object to the profile, associates the profile with the policy, and puts the policy into effect by binding it to Global.
A few tasks cannot be performed in the wizard. You cannot use the wizard to bind a profile to a bind point other than Global. If you want the profile to apply to only a specific part of your configuration, you must manually configure the binding. You cannot configure the engine settings or certain other global configuration options in the wizard. While you can configure any of the advanced protection settings in the wizard, if you want to modify a specific setting in a single security check, it may be easier to do so on the manual configuration screens in the configuration utility.
Enabling the Application Firewall
Before you can create an application firewall security configuration, you must make sure that the application firewall feature is enabled.
w If you are configuring a dedicated Citrix Application Firewall appliance, the feature is already enabled. You do not have to perform either of the procedures described here.
w If you have a Citrix NetScaler appliance but have not previously configured the application firewall, you need to enable the application firewall feature before you configure it.
w If you are upgrading a NetScaler appliance from a previous version of the NetScaler operating system to the current version, you may need to enable the application firewall feature before you configure it.
w If you are installing a new application firewall appliance or NetScaler appliance, you do not need to perform this procedure.
Note: If you are upgrading a NetScaler appliance or NetScaler VPX virtual appliance from a previous version, you may need to update the licenses on your appliance before you can enable this feature.
You can enable the application firewall by using the NetScaler command line or the configuration utility.
To enable the application firewall by using the
NetScaler command line
At the NetScaler command prompt, type:
enable ns feature AppFW
To enable the application firewall by using the
configuration utility
1. In the navigation pane, expand System and click Settings.
2. In the Settings pane, under Modes & Features, click basic features.
3. In the Configure Basic Features dialog box, select the Application Firewall check box.
The Application Firewall Wizard
Unlike most wizards, the Application Firewall wizard is designed not just to simplify the initial configuration process, but also to modify previously created configurations and to maintain your Application Firewall setup. A typical user runs the wizard multiple times, skipping some of the screens each time.
Opening the Wizard
To run the Application Firewall wizard, first open the configuration utility. Next, in the navigation pane, expand Application Firewall, and then in the details pane click Application Firewall Wizard. (For more information about the configuration utility, see The Application Firewall User Interfaces on page 20.) Then:
1. In the navigation pane, click the Application Firewall folder icon.
2. In the details pane, under Getting Started, click Application Firewall Wizard. The first screen of the wizard appears.
3. To advance to the next screen, click Next.
The Wizard Screens
The Application Firewall wizard displays the following screens, in the following order: 1. Introduction screen. Provides an introduction to the Application Firewall wizard.
There is nothing that you can configure on this screen.
2. Specify Name screen. On this screen, when creating a new security configuration, you specify the name that the wizard is to assign to the configuration. The name can begin with a letter, number, or the underscore symbol, and can consist of from one to 31 letters, numbers, and the hyphen (-), period (.) pound (#), space ( ), at (@), equals (=), colon (:), and underscore (_) symbols. Choose a name that makes it easy for others to tell what content your new security configuration protects.
Note: Because the wizard uses this name for both the policy and the profile, it is limited to 31 characters. Manually created policies can have names up to 127 characters in length.
When creating an existing configuration, you select Modify Existing Configuration and then, in the Name drop-down list, select the name of the existing
configuration that you want to modify.
Note: Only policies that are bound to global or to a bind point appear in this list; you cannot modify an unbound policy by using the Application Firewall wizard. You must either manually bind it to Global or a bind point, or modify it manually. (For manual modification, in the configuration utility's Application Firewall --> Policies --> Firewall pane, select the policy and click Open).
You also select a profile type on this screen. The profile type determines the types of advanced protection (security checks) that can be configured. Because certain kinds of content are not vulnerable to certain types of security threats, restricting the list of available checks saves time during configuration. The types of
Application Firewall profiles are:
• Web Application (HTML). Any HTML-based Web site that does not use XML or Web 2.0 technologies.
• XML Application (XML, SOAP). Any XML-based Web service.
• Web 2.0 Application (HTML, XML, REST). Any Web 2.0 site that combines HTML and XML-based content, such as an ATOM-based site, a blog, an RSS feed, or a wiki.
Note: If you are unsure which type of content is used on your Web site, you can choose Web 2.0 Application to ensure that you protect all types of Web
application content.
3. Specify Rule screen. On this screen, you specify the policy rule that defines the traffic to be examined by this security configuration. If you are creating an initial configuration to protect your Web sites and Web services, you can simply accept the default value, true, which selects all web traffic .
If you want this security configuration to examine, not all HTTP traffic that is routed through the appliance, but specific traffic, you can write a policy rule specifying the traffic that you want it to examine. Rules are written in Citrix NetScaler expressions language, which is a fully functional object-oriented programming language.
• For a simple description of using the NetScaler expressions syntax to create Application Firewall rules, and a list of useful rules, see Firewall Policies on page 100.
• For a detailed explanation of how to create policy rules in NetScaler
expressions syntax, see the Citrix Policy Configuration and Reference Guide. 4. Select Signature Protections screen. On this screen, you select the categories of
signatures that you want to use to protect your web sites and web services. The default categories are:
• CGI. Protection against attacks on web sites that use CGI scripts in any language, including PERL scripts, Unix shell scripts, and Python scripts. • Cold Fusion. Protection against attacks on web sites that use the Adobe
Systems® ColdFusion® Web development platform.
• FrontPage. Protection against attacks on web sites that use the Microsoft®
FrontPage® Web development platform.
• PHP. Protection against attacks on web sites that use the PHP open-source Web development scripting language.
• Client side. Protection against attacks on client-side tools used to access your protected web sites, such as Microsoft Internet Explorer, Mozilla Firefox, the Opera browser, and the Adobe Acrobat Reader.
• Microsoft IIS. Protection against attacks on Web sites that run the Microsoft Internet Information Server (IIS).
• Miscellaneous. Protection against attacks on other server-side tools, such as Web servers and database servers.
If you are creating a new security configuration, the signature categories that you select are enabled, and by default they are recorded in a new signatures object. The new signatures object is assigned the same name that you entered on the
Specify name screen as the name of the security configuration.
If you have previously configured signatures objects and want to use one of them as the signatures object associated with the security configuration that you are creating, click Select Existing Signature and select a signatures object from the
Signatures list.
If you are modifying an existing security configuration, you can click Select
Existing Signature and assign a different signatures object to the security
configuration.
5. Select Signature Actions screen.On this screen, you select the actions associated with the signature categories that you selected on the Select signature
protections screen. If you are creating an initial configuration, you might want to
accept the defaults, which enable the Log and Stats actions but not the Block action. You can decide later, after reviewing the collected logs and statistics, which signatures you should use to block traffic, and then enable the Block action for those signatures. Signatures are designed to catch specific known attacks on your web sites, and therefore they have extremely low false positive rates. However, with any new configuration, you should probably observe how the settings you chose are working before you use them to block traffic.
If you select More for one of the signature categories, the Configure Actions for
Signatures dialog box appears. Its contents are the same as the contents of the Modify Signatures Object dialog box, as described in To Configure a Signatures Object on page 49.
If the signatures object has already logged connections, you can click Logs to display the syslogs for the category, as described in Logs, Statistics, and Reports. 6. Select Advanced Protections screen. On this screen, you choose the advanced
protections (also called security checks or simply checks) that you want to use to protect your web sites and web services. The checks are divided into categories. Which categories are available (and which checks are available within a category) depends on the profile type that you chose on the Specify Name screen. All checks are available for Web 2.0 Application profiles. If you chose that profile type, the
Select advanced protections screen displays the following categories of security
checks:
• Top--level protections (Some checks appear at the top level, not in any category.) • Data Leak Prevention Protections
• Advanced Form Protections • URL Protections
• XML Protections
To display the individual checks in a category, click the icon to the left of the category. To apply a security check to your filtered data, select the check box next to the name of the security check. For descriptions of the security checks see Advanced Protections on page 61 and its subtopics.
7. Select Advanced Actions screen. On this screen, you configure the actions for the advanced protections that you have enabled.
Note: If no advanced protections are enabled, the Wizard skips the Advanced Actions screen and goes directly to the Summary screen.
The actions that you can configure are:
• Block. Block connections that match the signature. Disabled by default. • Log. Log connections that match the signature for later analysis. Enabled by
default.
• Stats. Maintain statistics, for each signature, that show how many connections it matched and provide certain other information about the types of
connections that were blocked. Disabled by default.
• Learn. Observe traffic to this Web site or Web service, and use connections that repeatedly violate this check to generate recommended exceptions to the check, or new rules for the check. Available only for some checks.
To enable or disable an action for a check, in the list, select or clear the check box for that action to the right of that check.
To configure other parameters for those checks that have them, in the list, click the blue chevron to the far right of that check. In the dialog box that appears, configure the parameters. These vary from check to check. You can also select a check and, at the bottom of the dialog box, click Open to display a dialog box for modifying any of the options for that check. These dialog boxes also vary from check to check. Most of them include a Checks tab and a General tab. If the check supports relaxations, the Checks tab includes an Add button, which opens yet another dialog box, in which you can specify a relaxation for the check. A relaxation is a rule for exempting specified traffic from the check. For information about the settings available for a check, see the detailed description of that check.
To review the recommendations generated by the learning engine for a specific check, select that check and then click Learned Violations to open the Manage
Learned Rules dialog box for that check. For more information on how learning
works and how to configure exceptions (relaxations) or deploy learned rules for a check, see Manual Configuration By Using the Configuration Utility on page 33 under To configure and use the learning feature
To view all logs for a specific check, select that check, and then click Logs. 8. Summary screen. On this screen, you review your configuration choices to verify
that they are what you want. If you want to make changes, you click Back until you have returned to the appropriate screen, and make your changes. If the configuration is as you want it, you click Finish to save it , and then click Exit to close the Application Firewall wizard.
Following are four procedures that show how to perform specific types of configuration by using the Application Firewall wizard.
To configure the Application Firewall: Initial
Configuration
1. In the navigation pane, click Application Firewall.
2. In the details pane, under Getting Started, click Application Firewall Wizard. 3. On the Application Firewall wizard, Introduction screen, in the lower right-hand
corner, click Next.
4. On the Specify Name screen, in the Name text box, type a name for your new security configuration, and from the Type drop-down list, select the type of security configuration. Then, click Next.
5. On the Specify Rule screen, click Next again.
Note: The default rule, true, protects all Web traffic that is sent via your NetScaler appliance or VPX. You can create specific security configurations to protect specific parts of your Web sties or Web applications later.
6. On the Select Signature Protections screen, select check boxes to specify the groups of signatures that are appropriate for protecting the content on your protected web sites, and then click Next.
For more information about signatures, see Signatures on page 47
7. On the Select Signature Actions screen, select or clear the associated check boxes to choose the signature actions that you want for each signature category that you selected in the previous step, and then click Next.
8. On the Select Advanced Protections screen, click Next again.
You typically do not need to configure the security checks during initial configuration. 9. On the Summary screen, review your choices to verify that they are what you
want. Then, click Finish, or click Back to return to a previous screen and make changes. When you are finished, click Exit to close the Application Firewall wizard.
To configure the Application Firewall: Enabling
Blocking for Signatures
1. In the navigation pane, click Application Firewall.
2. In the details pane, under Getting Started, click Application Firewall Wizard. 3. On the Application Firewall wizard, Introduction screen, in the lower right-hand
corner, click Next.
4. On the Specify Name screen, select Modify Existing Configuration and, in the Name drop-down list, choose the security configuration that you created during simple configuration, and then click Next.
5. In the Specify Rule screen, click Next again.
6. In the Select Signature Protections screen, click Next again.
7. In the Select Signature Actions screen, enable blocking for your chosen signatures by selecting the Block check box to the left of each of those signature.
For more information about which signatures to consider for blocking and how to determine when you can safely enable blocking for a signature, see Signatures on page 47
8. In the Select advanced protections screen, click Next.
9. On the Summary screen, review your choices to verify that they appear correct. Then, click Finish, or click Back to return to theSelect Signature Actions screen and make changes. When you are finished, click Exit to close the Application Firewall wizard.
To configure the Application Firewall: Enabling and
Configuring advanced protection
1. In the navigation pane, click Application Firewall.
2. In the details pane, under Getting Started, click Application Firewall Wizard. 3. On the Application Firewall wizard, Introduction screen, in the lower right-hand
corner, click Next.
4. On the Specify Name screen, select Modify Existing Configuration and, in the Name drop-down list, choose the security configuration that you created during simple configuration. Then, click Next.
5. On the Specify Rule screen, click Next again.
6. On the Select Signature Protections screen, click Next. 7. On the Select Signature Actions screen, click Next again.
8. On the Select advanced protections screen, select the check box beside each security check that you want to enable, and then click Next.
For information about the security checks, see Advanced Protections on page 61 and its subtopics.
9. On the Select Deep Actions screen, select check boxes to specify the actions that you want the Application Firewall to perform for each security check, and then click Next.
For general information about the actions, see Advanced Protections on page 61 and its subtopics. For information about the learning feature, which is available for some security checks, see Manual Configuration By Using the Configuration Utility on page 33.
10. On the Summary screen, review your choices to verify that they appear correct. Then, click Finish, or click Back to return to theSelect Signature Actions screen and make changes. When you are finished, click Exit to close the Application Firewall wizard.
To configure the Application Firewall: Creating A
Policy
The following procedure describes how to use the Application Firewall wizard to create a specialized security configuration to protect only specific content. In this case, you create a new security configuration instead of modifying the initial configuration. This type of security configuration requires a custom rule, so that the policy applies the configuration to only the selected Web traffic.
1. In the navigation pane, click Application Firewall.
2. In the details pane, under Getting Started, click Application Firewall Wizard. 3. On the Application Firewall wizard, Introduction screen, in the lower right-hand
corner, click Next.
4. On the Specify Name screen, type a name for your new security configuration in the Name text box, select the type of security configuration from the Type drop-down list, and then click Next.
5. On the Specify Rule screen, enter a rule that matches only that content that you want this Web application to protect, and then click Next.
For a description of policies and policy rules, see Policies on page 99.
6. On the Select Signature Protections screen, choose the appropriate groups of signatures to protect the content on your protected web sites by selecting the check box beside each group of signatures, and then click Next.
For detailed information about signatures, see Signatures on page 47.
7. On the Select Signature Actions screen, select or clear the associated check boxes to choose the signature actions that you want for each signature category that you selected in the previous step, and then click Next.
For a detailed description of actions, see , see Signatures on page 47.
8. In the Select Advanced Protections screen, select the check box beside each security check that you want to enable, and then click Next.
For detailed information about the security checks, see Advanced Protections on page 61 and its subtopics.
9. In the Select Advanced Actions screen, select check boxes to specify the actions that you want the Application Firewall to perform for each security check. Then, click Next.
For information about each security check to help you determine which actions to enable, see the Advanced Protections section.
10. On the Summary screen, review your choices to verify that they appear correct. Then, click Finish, or click Back to return to theSelect Signature Actions screen and make changes. When you are finished, click Exit to close the wizard.
Manual Configuration
If you want to bind a profile to a bind point other than Global, you must manually configure the binding. Also, certain security checks require that you either manually enter the necessary exceptions or enable the learning feature to generate the
exceptions that your Web sites and Web services need. Some of these tasks cannot be performed by using the application firewall wizard.
If you are familiar with how the application firewall works and prefer manual
configuration, you can manually configure a signatures object and a profile, associate the signatures object with the profile, create a policy with a rule that matches the web traffic that you want to configure, and associate the policy with the profile. You then bind the policy to Global, or to a bind point, to put it into effect, and you have created a complete security configuration.
For manual configuration, you can use the configuration utility (a graphical interface) or the command line. Citrix recommends that you use the configuration utility. Not all configuration tasks can be performed at the command line. Certain tasks, such as enabling signatures and reviewing learned data, must be done in the configuration utility. Most other tasks are easier to perform in the configuration utility.
Manual Configuration By Using the Configuration
Utility
If you need to configure the Application Firewall feature manually, Citrix recommends that you use the configuration utility. For a description of the configuration utility, see The Application Firewall User Interfaces on page 20 .
To create and configure a signatures object
Before you can configure the signatures, you must create a new signatures object from the appropriate default signatures object template. Assign the copy a new name, and then configure the copy. You cannot configure or modify the default signatures objects directly. The following procedure provides basic instructions for configuring a
signatures object. For more detailed instructions, see Manually Configuring the Signatures Feature on page 49 If you need to create your own, user defined signatures, see The Signatures Editor on page 54.
1. In the navigation pane, expand Application Firewall, and then select Signatures. 2. In the details pane, select the signatures object that you want to use as a
template, and then click Add. Your choices are:
• * Default Signatures. Contains the signatures rules, the SQL injection rules, and the cross-site scripting rules.
• * XPath Injection. Contains all of the items in the * Default Signatures, and in addition contains the XPath injection rules.
3. In the Add Signatures Object dialog box, type a name for your new signatures object, click OK, and then click Close.
The name can begin with a letter, number, or the underscore symbol, and can consist of from one to 31 letters, numbers, and the hyphen (-), period (.) pound (#), space ( ), at (@), equals (=), and underscore (_) symbols.
4. Select the signatures object that you created, and then click Open.
5. In the Modify Signatures Object dialog box, set the Display Filter Criteria options at the left to display the filter items that you want to configure.
As you modify these options, the results that you specify are displayed in the
Filtered Results window at the right. For more information about the categories of
signatures, see Signatures on page 47.
6. In the Filtered Results area, configure the settings for a signature by selecting and clearing the appropriate check boxes.
7. When finished, finished, click Close.
To create and configure a profile
The main task in configuring a profile is configuring the security checks. If you need additional information before completing some of the steps in this procedure, see Advanced Protections on page 61 and its subtopics.
1. In the navigation pane, expand Application Firewall, and then select Profiles. 2. In the details pane, click Add.
3. In the Create Application Firewall Profile dialog box, type a name for your profile.
The name can begin with a letter, number, or the underscore symbol, and can consist of from one to 31 letters, numbers, and the hyphen (-), period (.) pound (#), space ( ), at (@), equals (=), colon (:), and underscore (_) symbols.
4. Choose the profile type from the drop-down list.
The profile types are HTML (for HTML-based Web sites), XML (for XML-based Web services) and Web 2.0 (for blogs, RSS feeds, wikis, and other sites that contain both HTML and XML).