OPEN-XCHANGE
SERVER
Published Tuesday, 14 July 2009 v.6.10 rev 1
Copyright© 2006-2009 OPEN-XCHANGE Inc. , This document is the intellectual property of Open-Xchange Inc., The document may be copied in whole or in part, provided that each copy contains this copyright notice. The information contained in this book was compiled with the utmost care. Never-theless, erroneous statements cannot be excluded altogether. Open-Xchange Inc., the authors and the translators are not liable for possible errors and their consequences. The names of software and hardware used in this book may be registered trademarks; they are used without warranty of free us-ability. Open-Xchange Inc. generally follows the spelling conventions of the manufacturers. The repro-duction of brand names, trade names, logos, etc. in this book (even without special marking) does not justify the assumption that such names can be considered free (for the purposes of trademark and brand name regulations).
Table of Contents
Preface vii
1 Benefits of Groupware Solutions. . . 1
2 Working with the Groupware. . . 3
3 Now we're ready to go. . . 4
1 The Open-Xchange Server Start Page 5 1.1 Logging-in and Logout. . . 5
1.2 The Start Page. . . 6
1.3 The Module bar. . . 6
1.4 Folder structure. . . 8
1.5 The Panel. . . 8
1.6 The content area. . . 10
1.7 Mini calendar. . . 12
1.8 I n f o B o x . . . 12
1.9 Folder management. . . 12
2 E-Mails 13 2.1 The panel functions in the E-Mail module. . . 13
2.2 Views of the E-Mail module. . . 13
2.3 The search function. . . 15
2.4 The QuickInfos. . . 15
2.5 E-Mail Hover. . . 15
2.6 Reading E-Mail messages. . . 16
2.7 Adding E-Mail contact to address book. . . 16
2.8 Show source. . . 16
2.9 E-Mail attachments. . . 16
2.10 Replying to E-Mail messages. . . 17
2.11 Composing new E-Mails. . . 17
2.12 Managing E-Mail signatures. . . 22
2.13 Append vCard. . . 22
2.14 Forwarding E-Mails. . . 22
2.15 E-Mail status. . . 23
2.16 Moving and copying E-Mail messages. . . 23
2.17 Marking E-Mail messages as spam or ham. . . 23
2.18 Deleting E-Mail messages. . . 24
2.19 Printing E-Mails. . . 24
2.20 Marking E-Mail messages with flags. . . 24
2.21 Sharing an E-Mail folder. . . 24
2.22 E-Mail directory overview. . . 25
2.23 E-Mail overview. . . 26
3 Contacts 27 3.1 Contact types and access. . . 27
3.2 Contacts - Views. . . 30
3.4 Creating Contacts. . . 34 3.5 Editing contacts. . . 39 3.6 Deleting contacts. . . 39 3.7 Printing contacts. . . 40 3.8 Duplicating contacts. . . 41 3.9 Moving contacts. . . 42 3.10 Copying contacts. . . 43
3.11 Marking contacts with flags. . . 44
3.12 Searching for contacts. . . 45
3.13 Combining contacts in distribution lists. . . 45
3.14 Creating distribution lists. . . 46
3.15 Editing, deleting, printing distribution lists. . . 49
3.16 Duplicating, moving, copying distribution lists. . . 49
4 Calendar 51 4.1 Appointment Types and Access. . . 51
4.2 Calendar - views and time ranges. . . 55
4.3 Calendar Hover. . . 68 4.4 Creating appointments. . . 68 4.5 Confirming appointments. . . 77 4.6 Editing appointments. . . 78 4.7 Deleting appointments. . . 80 4.8 Printing appointments. . . 81
4.9 Moving appointments to other folders. . . 82
4.10 Marking appointments with flags. . . 83
4.11 Searching for appointments. . . 84
5 Tasks 87 5.1 Task types and access. . . 87
5.2 Tasks - Views. . . 89 5.3 Tasks hover. . . 92 5.4 Creating tasks. . . 92 5.5 Editing tasks. . . 99 5.6 Deleting tasks. . . 100 5.7 Printing tasks. . . 100 5.8 Moving tasks. . . 101 5.9 Duplicating tasks. . . 102
5.10 Marking tasks with flags. . . 103
5.11 Searching for tasks. . . 104
6 InfoStore 105 6.1 Opening InfoStore. . . 105
6.2 InfoStore - Views. . . 105
6.3 InfoStore hover. . . 106
6.4 Creating InfoStore objects. . . 107
6.5 Editing InfoStore objects. . . 107
6.6 Deleting InfoStore objects. . . 108
6.7 Printing InfoItems. . . 109
6.8 Moving InfoItems. . . 110
6.9 Locking InfoStore objects. . . 111
6.10 Sending InfoStore objects. . . 112
6.12 Search function. . . 112
7 WebDAV Scenario - Access to the Document Server 115 7.1 Accessing the Document Server under Linux. . . 115
7.2 Accessing the Document Server under Windows XP. . . 115
7.3 Accessing the Document Server under Windows Vista . . . 117
8 Settings 121 8.1 Changing user data. . . 121
8.2 Administration. . . 122 8.3 I m p o r t . . . 124 8.4 E x p o r t . . . 134 8.5 Global Options. . . 135 8.6 Private Tags. . . 136 8.7 Folder Management. . . 137 8.8 Permissions Management. . . 138 8.9 Publish&Subscribe. . . 140
8.10 Options for the Start page . . . 141
8.11 Email module options. . . 142
8.12 Calendar module options. . . 149
8.13 Contacts Module Options. . . 150
8.14 Tasks module options. . . 151
8.15 InfoStore module options. . . 151
8.16 Public and Shared Folders. . . 151 Index 153
Preface
Congratulations and thank you for buying Open-Xchange Server. Open-Xchange Server is a new communication solution based on the combination of an efficient E-Mail server and a compre-hensive groupware solution. It will make your daily work easier if you are a freelancer, and more efficient if you are working in a team or a group. Since Open-Xchange is a web based software solution it allows you to work from anywhere. You can always and everywhere access your groupware to see your current E-Mail messages, appointments, tasks and other informative entries, and bookmarks as well as your company's documents at a glance.
If some of the functionalities described in this manual are missing in your groupware version, please contact your administrator or hoster. Since this is a modularized groupware it is always possible to add further modules or functionalities by purchasing an upgrade.
Introduction
Since the application of IT systems in companies has brought massive changes to the enterprise processes, more and more of these processes rely on electronic data processing. Tasks which used to be performed in close personal collaboration are now carried out asynchronously, in different locations and not exclusively with persons of the own enterprise. In order to meet the resulting demands for coordination, communication and high quality standards within and beyond the enterprise, a requirement profile has developed that is met by a unified software solution called groupware
1. Benefits of Groupware Solutions
Open-Xchange Server is a powerful web-based groupware solution, can be used with the newest AJAX technologies and rich clients such as Outlook, and stands on a robust Linux platform.
1.1. Taking Care of Customer Relationship
Most enterprises have recognized that customer relationships play a special role for company success. No customer likes to repeat his requests over and over to different employees or to hear the response “my colleague isn't in and, unfortunately, I don't know when he'll be back”. The speed of market changes requires a quick and adaptable enterprise structure that is able to resist the competitive pressures. The increasingly flatter structures (teamwork and project work) place higher demands on communication and coordination of the involved parties. The optimal company organization plays a central role for communication and information flow, both for enterprise-internal processes as well as for the collaboration with customers, suppliers or business partners. It is vital to avoid breaks in communication structures, to close information gaps and to accelerate the flow of information.
1.2. What can Groupware do for You?
Groupware solutions such as Open-Xchange Server can help you better and quicker coordinate spatially distributed employees by allocating tasks or by supplying the compulsory appointment calendar.
The new version of Open-Xchange Server represents an absolutely new groupware concept. The individual functions are not controlled via menus anymore. Instead, the panel shows the most important functions in every module at one glance. All functions that are used less often are accessible via a single click, because the panel is expandable. Thus, you can pull up all functions with just a few clicks - no more awkward searching the menu bars for the functions you need, which would take two clicks in each case. The introduction of the panel means increased ease of use and better overview.
With InfoStore, the central information pool of Open-Xchange Server, information can be retrieved or made accessible to others at any time. Thanks to the version control of InfoStore, no informa-tion gets lost and can be accessed at any time. Public folders, for instance, allow you to make address data available to the whole company or a group of people. All modifications of these data are made immediately available to everybody. This reduces duplication of data and mainte-nance.
1.3. Keeping the Overview
In your company there are certainly other organizational tasks which are perhaps also tied to a schedule, e.g., resource management. How often do you need conference rooms, prepare beamers for meetings or reserve cars? With resource management, you can better organize meetings or control resource utilization.
1.4. Functionality
Open-Xchange Server continues the successful concept of an efficient mail and groupware server, and offers besides additional functionalities in the form of an efficient groupware solution. On the server side you have a secure and powerful platform with Open-Xchange Server and a Linux server.
1.5. System Requirements
In order to successfully use Open-Xchange Server, you should keep some settings and system requirements in mind.
1.5.1. Resolution/screen size
The minimum display resolution for Open-Xchange Server is 1024x768. A higher resolution allows to display more information at once. This increases the ease of use. Please refer to Section 1.1, “Logging-in and Logout”.
1.5.2. Browser requirements Internet Explorer 7 Internet Explorer 8 Firefox (2.++) SeaMonkey (1.++) Safari 3.1 1.5.3. Additional requirements
Cookies must be activated JavaScript must be activated Popup windows must be allowed
It is also important to know that all page information shown in the browser is always newly generated by the application server. Hence, it is absolutely necessary that the browser's navigation elements are not used, because the latter may show only "stale" data from the browser-internal cache. While the "back" button is useful for quickly pulling up information from the previous page, it should not be used if you directly enter new information. Within the groupware it is better to exclusively rely on the GUI of Open-Xchange Server with its own navigation elements.
1.6. Security
Security certainly plays a dominant role in your company. With Open-Xchange Server you have decided on the right solution. The security aspect becomes especially important when you communicate with your colleagues, partners and customers via the Internet. However, security
is above all a question of the client side. With PCs on the client side, widespread e-mail clients and groupware clients (rich clients) in particular pose a known security problem.
Also web servers that do not - like Apache - build on a relatively safe Linux platform represent a known weak spot that an attacker can possibly use to gain access to the underlying operating system core. For external access, Open-Xchange Server supports SSL encryption (the standard for banks) that ensures worldwide safe access to company-internal data from any PC.
2. Working with the Groupware
For increasing and cementing user acceptance it is absolutely necessary that users work as effi-ciently and completely as possible with the groupware. Only if all available modules are used efficiently, in accordance with operational requirements, a solution like this really pays off. Sticky notes, secondary applications, external address books, telephone CD, fax directories and mobile phone address books or wall calendars should become history. Every instance of data duplication not only represents unnecessary time expense, but it also undermines the concept of a compre-hensive groupware solution with central data storage. Think of yourselves as a team and do so with all your might.
2.1. Keep the Overview
It is crucial that your users always keep the overview and are able to decide how the pieces of the daily information flood are to be prioritized. The start page provides each user with a first overview by grouping all relevant information for the day.
2.2. Using the tools for real
Right after logging in, the user can see on the start page whether new E-Mail messages have ar-rived, whether tasks or appointments need to be tended to, or whether new documents are available. Thus, every user quickly gets an overview of changes in the information state in the company, independent of personal preferences and priorities. Every users can of course use this page also as a stepping stone into the individual sections to learn more detailed information or to work on any pertinent tasks.
The drag-and-drop function is also very efficient. By drawing the mouse you can, for instance, quickly and easily move appointments in the calendar or move E-Mails into other folders, etc. If you consistently use this function, your everyday work can be organized very easily and you can again concentrate on the essentials.
2.3. Privacy
In spite of team philosophy, the ingenious user and group management of Open-Xchange Server guarantees that private and personal information and data of every user is completely safe in contrast to public.
2.4. International Functionality
Open-Xchange Server is geared to the needs of internationally operating companies in many respects. The groupware interface is provided in German, English and French. When logging in to the groupware the user can select one of the three languages.
2.4.1. Time zone and date
In the setup section you can define in which time zone you are currently working. Existing ap-pointments are automatically displayed correctly when the time zone is changed. This way you always keep the complete overview even for appointments abroad.
2.4.2. International character sets
The web front end completely supports UTF-8 character sets. Entries via the web front end can be made with foreign characters. Emails can be sent with UTF-8 encoded characters.
3. Now we're ready to go
If the functionality of the E-Mail server made you decide to handle your E-Mail with Open-Xchange Server, we hope that this introduction is able to impress you with the functionality of a powerful groupware.
The following pages will give you detailed documentation of all functions of Open-Xchange Server. The expected enthusiasm of your colleagues is guaranteed to automatically motivate the remaining ones, and the switch to your new intranet on the basis of Open-Xchange Server will happen all on its own.
Chapter 1. The Open-Xchange Server
Start Page
After logging-in successfully you will see the start page of Open-Xchange Server. Before describing the Start Page in greater details, please find some general information as well an an overview of how to log-in and logout.
1.1. Logging-in and Logout
1.1.1. Logging-in
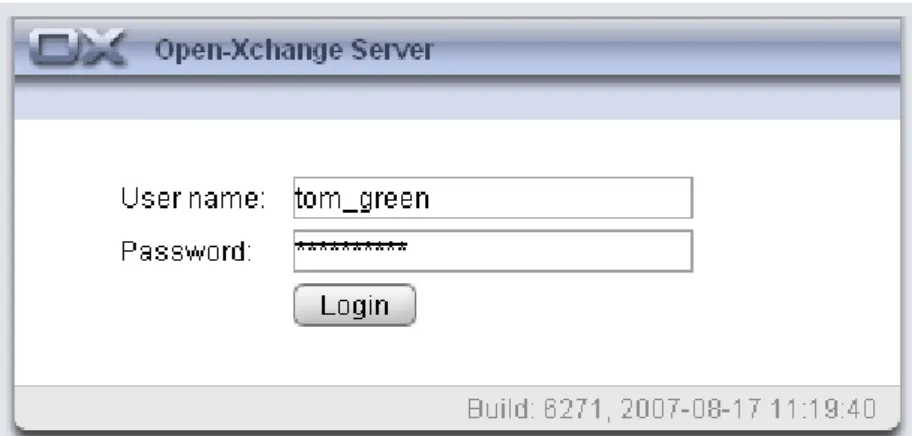
By logging-in you authenticate yourself as a user with your log-in name. After logging-in you can access all shared objects. After opening the groupware you will see a log-in form with a user name and a password. Please note that the fields are case sensitive. If you enter wrong log-in information, an error message will be displayed. Repeat the log-in steps making sure you type in correct log-in data.
Figure 1.1. Logging-in in the Open-Xchange Server web interface.
Screen resolution
Open-Xchange Server requires a minimum screen resolution of 1024 x 768. Higher screen resolution will make the use of Open-Xchange Server more comfortable. A lower screen resolution can affect the display of the functions available in the panel. Fewer functions could be displayed at a glance. You can expand all functions step by step using the arrows shown in the panel. It is recommended to deactivate the InfoBox in the general options and to expand the folder tree via the drag point below the folder tree. Switching the module bar to the icon view also saves space. Please refer to Section 1.3, “The Module bar”.
1.1.2. Logout
When you complete your session you must logout from the groupware. To do so, click on the Logout button in the upper right corner of the groupware interface.
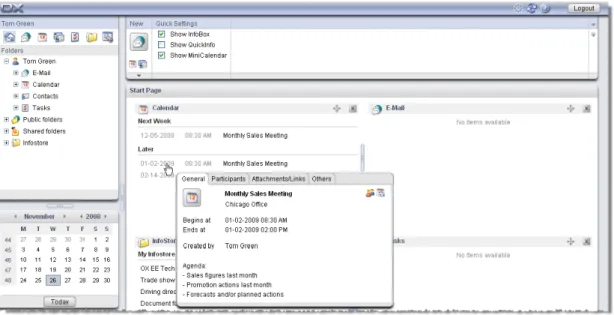
1.2. The Start Page
After logging-in via the groupware interface, you will immediately be informed about your new appointments or tasks. If you have been invited to an appointment, you will see a pop-up window. In this pop-up window you can see a short description of the appointment, and either confirm it or decline.
The Start page provides you with an overview of some important data. The Start page serves as an overview of the appointments and tasks of the current day. By default, the first five entries are displayed. The number of the displayed elements can be changed in the options for the Start page.
Additionally, you will be informed whether other users have set up appointments with you or created new tasks. You can also see entries made in the InfoStore as well as notifications about the new or unread E-Mail messages. Information about individual modules is provided in section Section 1.3, “The Module bar”
Figure 1.2. The Open-Xchange Server Start Page
The Start page is divided in many sections. In the title bar, which stays the same for all modules, you will find the basic functions of Open-Xchange Server. A Progress icon that is animated if an activity is in progress and with which you can download new data from the server, as well as icons to open the Settings window and the Help. Furthermore, you will find a logout icon, with which you can logout from the system if you want to leave Open-Xchange Server.
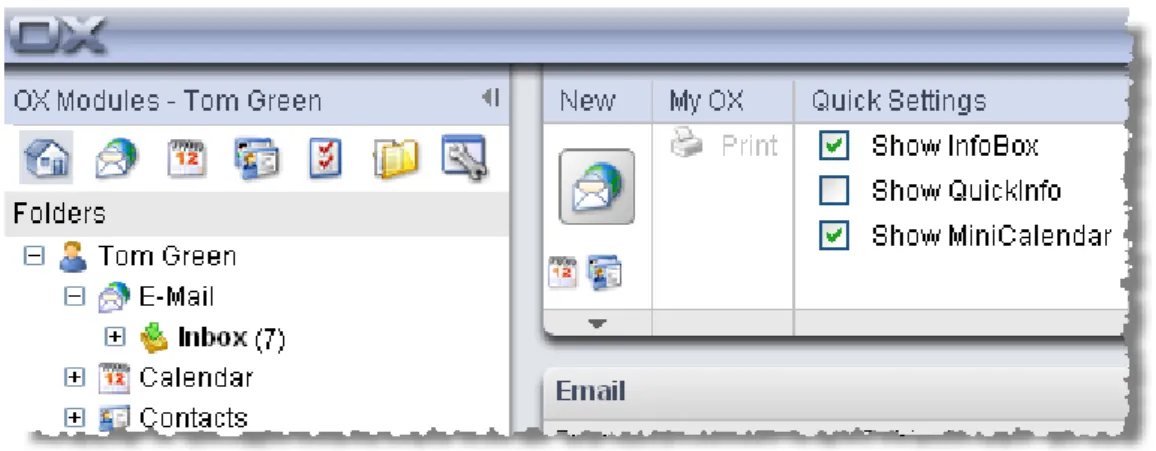
1.3. The Module bar
Under the Menu bar on the left side of your screen, you can see the module bar of the groupware. Using the corresponding icons, you can access directly any of Open-Xchange Server modules.
Figure 1.3. Module bar
The module bar can be expanded via a small arrow in the upper right corner of the module bar. The module icons will be arranged next to each other as opposed to one under the other if you left-click the arrow. In addition, the complete side bar is collapsed. You can change the view any time by clicking on the arrow.
1.3.1. The Start Page
A click on the Start icon takes you back to the Start page.
1.3.2. The Email module
Email - a click on the Email icon takes you to the horizontal split view of your E-Mail inbox. In the Email module you can manage and compose your E-Mail messages. For further information, refer to Chapter 2, E-Mails
1.3.3. The Calendar module
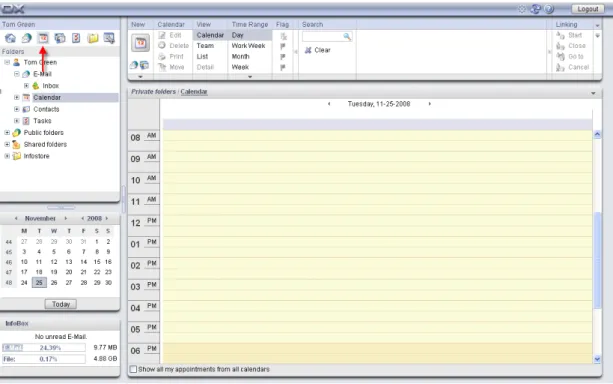
A click on the Calendar icon takes you immediately to your calendar day view. In the Calendar module you can manage your personal appointments, your team's appointments and all shared and public appointments, and information about them. For further information, refer to Chapter 4, Calendar
1.3.4. The Contacts module
A click on the Contacts icon takes you directly to the address view of your and your company's contact lists. You can always change the default view settings in the Preferences of the module. In the Contacts module you can manage your personal contacts and all shared and public contacts and information about them: business and private addresses, phone and fax numbers, etc. For further information, refer to Chapter 3, Contacts.
1.3.5. The Tasks module
A click on the Tasks icon takes you to the H Split view of pending tasks list. You can always change the default view settings in the Preferences of the module. In the Tasks module you can manage your personal tasks and all shared and public actions and data pertaining to them: start date, end date, status, importance, members, etc. For further information, please refer to Chapter 5, Tasks.
1.3.6. The InfoStore module
A click on the InfoStore icon takes you to the InfoStore list view. In the InfoStore module, you can make your own documents, contributions or bookmarks available for your colleagues, or benefit from the knowledge of others. For further information, refer to Chapter 6, InfoStore
1.4. Folder structure
Below the module's title bar you can see a folder structure providing an overview of the Open-Xchange folders' content. If you want to have a better overview and sort your contacts, appoint-ments and tasks by certain aspects, create a subfolder under each folder. An example is shown in the figure below.
Figure 1.4. Folder Structure
Detailed information on folder management as well as access rights management is provided in the chapter Settings in section Section 8.8, “Permissions Management”.
1.5. The Panel
In the panel you will find all central functions available in each module. The panel is located below the title bar. From the panel you can always access all important functions directly. You can view all other functions by clicking on the small arrow located under the displayed functions. Clicking the arrow will expand the panel. Depending on the number of functions, more or fewer clicks will be necessary. The panel replaces the menu bar and thus the complicated search and navigation through a menu.
Figure 1.5. Panel functions
1.5.1. Icons for creating objects
In the upper right section of the window you can compose new E-Mails in the New section by clicking on the Email icon. The arrow located below the icons provides you with further options. Additionally, here you can open a dialog window that allows you to create distribution lists.
1.5.2. Drag-and-drop
You can make your daily work much more efficient by using the drag-and-drop function. By drawing the mouse you can, for instance, quickly and easily move appointments in the calendar or move E-Mails into other folders, etc. If you consistently use this function, your everyday work can be organized very easily and you can again concentrate on the essentials.
1.5.3. Context menu
In the modules E-mail, Appointments, Contacts, Tasks, and InfoStore the most important functions can also be accessed via the context menu.
To open the context menu, select one or more objects and right-click on one of those objects. When consequently using the context menu a great number of mouse clicks can be avoided. In the E-mail module you can for example answer, forward or delete an e-mail via the context menu.
1.5.4. Shortcut keys
In the modules E-mail, Appointments, Contacts, Tasks, and InfoStore some functions can also be activated via shortcut keys.
E.g. in the E-mail module a selected e-mail can be deleted with the Del key.
1.5.5. Quick Settings
In the Quick Settings you can view the QuickInfos and the InfoBox by selecting the appropriate check box.
1.5.5.1. The QuickInfos
The QuickInfos are particularly useful initially and can be deactivated later. The QuickInfos display information on individual functions when you move your mouse over them. These are displayed in the gray field below the panel. You can either view or hide the QuickInfos. To do so, select or deselect the check box next to the QuickInfos panel function.
1.5.5.2. InfoBox
When activated, the InfoBox is displayed under the folder structure. It displays the status of your inbox and informs you about your mailbox usage. To show or hide the InfoBox in the panel, select or deselect the check box next to the InfoBox panel function. If you close the InfoBox by clicking on the close button in the upper right corner of the window, you have to reactivate the InfoBox function to view it again.
1.6. The content area
1.6.1. The module panes
Figure 1.6. Content area including module panes
Below the panel the content area is shown. The content area is split in several module panes that display several entries. As default the following module panes are displayed:
• The E-Mail module pane displays the most recent unread E-Mails showing the sender, the subject, the date and time of the delivery.
• The Calendar module pane shows your current appointments i.e. today's appointments, ap-pointments for the next two days, apap-pointments for next week or later. For each appointment the date, time, and description is shown.
• The Tasks module pane shows the current tasks i.e. today's tasks, tasks for the next two days, tasks for next week or later. For each task the subject, date and priority is shown.
• The InfoStore module pane shows the current InfoStore entries i.e. InfoStore entries from your own InfoStore and from other users' shared InfoStore folders.
Following functions are accessible from the module panes:
• Clicking on a module pane entry opens the respective module and shows the entry in the detail view.
• If you move the mouse pointer over a module pane entry a hover is shown after a short delay. Information on hovers can be found in Section 1.6.2, “Hover”
The module panes can be customized:
• You can change the width of a module pane. To do so use the drag point between the module panes.
• You can change the position of the module panes. To move a module pane click on the Move icon and drag the pane to the wanted position. As you move the mouse you will see the layout changes. To finish, release the mouse button.
• You can determine which module panes to display and the number of elements to be displayed in a module pane. For more information please read the Options chapter.
• You can integrate UWA modules in module panes. An UWA module dynamically displays infor-mation from the internet like your local weather forecast. Inforinfor-mation on how to set up and display UWA modules can be found in Section 8.10.2, “UWA Modules”
1.6.2. Hover
Figure 1.7. Hover in a module pane
A hover displays details on the entry the mouse pointer hovers over. How to use a hover:
• To display a hover position the mouse pointer over an entry in the content area. After a short delay the hover is displayed.
• As long as the mouse pointer remains on the entry or within the hover the hover is displayed. • With the tabs in the upper part of the hover you can display different information.
• To close the hover move the mouse pointer outside the hover. The content area
Further information on hover contents can be found in the single module chapters. Information on how to configure hovers can be found in Configuring hovers
1.7. Mini calendar
In the lower part of the Start page you can see the mini calendar, which allows you to quickly view appointments from a particular date or from a particular period of time.
The mini calendar shows you not only the current date and the current calendar week, but also allows you to access your appointments from a particular date directly. For example, if you select December 23, 2007, you will see all appointments from that date displayed in the Calendar day view. If you select a whole week instead of a particular date, you will see all your appointments for that week in the Calendar week view. Double-click the desired day in the calendar to create a new appointment for that day. A window will open where you can set up a new appointment. The current day will be displayed with a frame around it and highlighted in a particular color while all the other days for which appointments were set up will be displayed in bold. If in the mini calendar you click a different day than the current one, the current day will remain framed and the last selected one will be highlighted in color. More detailed information on Calendar and Appointment management is provided in Chapter 4, Calendar.
1.8. InfoBox
The InfoBox, located below the mini calendar, contains information about new E-Mail messages and the current mailbox usage.
1.9. Folder management
Folder management serves as the company's folder system that allows you to create new entries in the calendar, contacts, tasks, documents, bookmarks and other informative entries. Individual elements are organized in a directory structure to allow for a better overview. To switch to one of the displayed folders, click on it with your left mouse button. Further details about folder management are provided in Chapter 8, Settings
Chapter 2. E-Mails
Click on the E-Mail icon in the navigation bar to open the E-Mail administration web interface of Open-Xchange Server. There, you can comfortably handle all your E-Mail correspondence using your web browser. Alternatively, you can also open the E-Mail module directly by clicking on any E-Mail folder in the folder tree.
When having set up additional E-Mail accounts each account gets an E-Mail folder in the folder tree. Information on how to set up additional E-Mail accounts can be found in Section 8.11.3, “Additional E-Mail accounts”.
In the E-Mail module, you can read E-Mails, write new E-Mails or manage your existing E-Mail messages.
Figure 2.1. Overview of the E-Mail module
2.1. The panel functions in the E-Mail module
All common E-Mail functions, as, for instance, composing, responding, and forwarding of E-Mails are available via the panel. These are described below in more detail. Via the panel, you can also switch the display to the E-Mail module and set flags. More details on flags can be found in Section 2.20, “Marking E-Mail messages with flags”. Furthermore, there is also a search function. By clicking on the small arrow in the upper right-hand corner, you can activate the Show QuickInfo option. In the following sections we will discuss the individual functions in more detail.
2.2. Views of the E-Mail module
When you select the E-Mail icon, the overview window on the right opens the E-Mail module in the H Split view. In the panel you can switch the display mode for the E-Mail module. Select for this one of the functions in the View section.
When viewing a HTML E-Mail with links to external graphics, those graphics are not displayed by default. This is to protect your privacy. Above the Subject field a respective warning is displayed. To display the graphics click on Load graphics.
Information on how to configure this setting can be found in Block pre-loading of externally linked images?.
If there is a suspect E-Mail that is a potential phishing mail with fraudulent content a warning will be displayed above the E-Mail header.
The title bar of the overview window displays the current path to the folder you selected in the folder tree. You can navigate in the path by clicking on the underlined parts of the path. The path is followed by the parenthesized number of E-Mails in the current E-Mail folder. If there are unread E-Mails their number is displayed as well.
2.2.1. H Split
The Mail listing in the horizontal split view shows the sender and the subject of individual E-Mails, the date the E-Mails were received as well as their size and the flags. More details on flags can be found in Section 2.20, “Marking E-Mail messages with flags”.
In the H Split view, the selected E-Mail is always displayed below the E-Mail listing. By clicking on an E-Mail with the left mouse button, you can open and read this E-Mail.
If you select an E-Mail from the list by clicking on it, you can then scroll up or down with the keyboard keys Arrow up or Arrow down.
2.2.2. V Split
The E-Mail listing in the vertical split view shows the sender and the subject of individual E-Mails, the date the E-Mails were received as well as their size and the flags. More details in flags can be found in Section 2.20, “Marking E-Mail messages with flags”.
In the V Split, the contents of the currently selected E-Mail is displayed on the right of the E-Mail listing. By clicking on an E-Mail with the left mouse button, you can open and read this E-Mail. If you select an E-Mail from the list by clicking on it, you can then scroll up or down with the keyboard keys Arrow up or Arrow down.
2.2.3. List view
The list simply displays a listing of multiple E-Mails in the overview window for quick management. The Mail listing shows the sender, the subject, the date of receipt as well as the size of the E-Mail and the flags. More details on flags can be found in Section 2.20, “Marking E-E-Mail messages with flags”.
In order to open a specific E-Mail, you have to open it in the H Split view or V Split viewby select-ing it with the left mouse button and clickselect-ing on the respective function in the View panel section. You can also open the E-Mail with a double click. In that case, however, it will be opened in a separate window instead of the overview window.
If you select an E-Mail from the list by clicking on it, you can then scroll up or down with the keyboard keys Arrow up or Arrow down.
2.3. The search function
You search for specific E-Mails or senders using the Search function from the panel section with the same name. This searches the currently opened folder for all characters that you enter into the Search field. With the search function you can search E-Mails for specific words or display all E-Mails from a specific sender. If you want to hide the search function, click on the small arrow in the upper right-hand corner of the panel. If you click on the arrow, the Search option will be displayed to the left of it. If you deactivate the check box, the search function remains hidden. Of course, you can always activate the check box again to show the search function.
If you want to search for a specific sender, enter either the name of the sender you are looking for into the Search field, or wildcards (the characters * or ?), or combinations of parts of the name and wildcards - you can ignore capitalization here.
After entering your search query, click on the Search icon to start the search. In your search query you can use wildcards as follows:
• Me or Me* => all terms from the currently opened folder that begin with "Me".
• M???r => all terms from the currently opened folder that contain precisely 3 characters between "M" and "r" (e.g., when you are searching for a specific sender: Maier, Meier or Meyer - but not Mair or Müller).
As soon as the search is completed, only the E-Mails matching the search criterion are displayed. If you want to reset the E-Mail display after a search to display all E-Mails from the currently open folder again, click on Clear in the Search panel section.
This removes your previously entered search criterion from the Search field as well as the resulting filtering of the displayed E-Mails - thus, all E-Mails from the currently open folder are displayed again.
2.4. The QuickInfos
The QuickInfos show additional information for enhanced usability. These are displayed for many functions underneath the panel as soon as you hover over them with your mouse cursor. The QuickInfos can be activated in the E-Mail module by clicking on the small arrow in the upper right-hand corner of the panel. This displays the option Show QuickInfo on the left of the arrow. Activate the check box next to the option if you want to activate the QuickInfos.
2.5. E-Mail Hover
Hovers are available in H split, V split and list view. Information on how to use hovers can be found in Section 1.6.2, “Hover”. A hover consists of the following tabs:
• The General tab contains: The E-Mail module icon. •
• The subject and the sender of the E-Mail.
• The status icon that shows whether an E-Mail was read and answered.
• The E-Mail body. Depending on the size of the E-Mail text the hover only displays the first lines. When clicking on the text once further lines will be shown. A second click displays the complete text. When clicking a third time you will go back to the original view.
• The Attachments tab. The number in brackets indicates the number of attachments. If the E-Mail contains attachments following elements will be displayed for each attachment:
• The attachment's name, size, and type. • Icons for opening and saving the attachment.
Information on how to configure the hovers can be found in Configuring hovers.
2.6. Reading E-Mail messages
There are several ways for you to read E-Mails. In both the H Split and the V Split view, you just need to click on the desired E-Mail with the left mouse button. It is then displayed in the detail window below or next to the list. Double-clicking on an E-Mail opens this E-Mail in a new window. This makes especially very long E-Mails easier to read.
The minus or plus signs on the left side of the subject allow to open or close the E-Mail header.
2.7. Adding E-Mail contact to address book
E-mail addresses can be added to the address book via drag and drop or the context menu. Click on the E-Mail address in the From field and drag the address to your contact folder or right click on the E-Mail address and activate Add to address book. The new contact window opens. If you read an E-Mail with a sender address that is not saved in the contacts folders this address will automatically be saved in the Collected addresses folder. You can deactivate this function in the E-Mail settings, please refer to Automatically save E-Mail addresses in the Collected ad-dresses folder?.
2.8. Show source
To read the source data of an E-Mail select the E-Mail and click on the panel function Show source. As an alternative you can also activate the function Show source in the context menu. The source data will be displayed in a new window. Via the context menu you can copy the content to the cache.
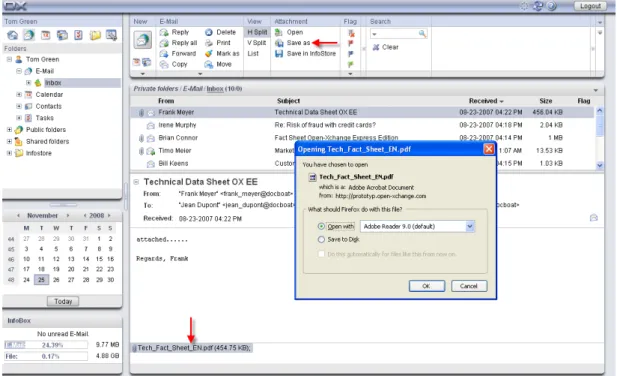
2.9. E-Mail attachments
A paper clip icon in the first column of the E-Mail listing indicates whether an E-Mail includes an attachment. Switch to the H Split or V Split view in order to open or save the attachment. The E-Mail message is opened in the overview window and the attachment is displayed in the bottom section of the window. If the attachment is not a compressed or archive file, you can open it with a double click or with the relevant panel function. If you want to save the attachment, click on the name of the attachment with the left mouse button and select Save as in the panel. This opens a dialog box where you can either open the attachment directly or select a location for saving. The dialog box can look differently depending on browser and browser settings.
Figure 2.2. Saving E-Mail attachments
You can also save the attachment in InfoStore. Simply click on Save in InfoStore in the panel. In the dialog box that opens then you can give a title to the new item and select an InfoStore folder for saving the attachment by clicking on the Folder button.
As an alternative you can also activate the functions Open, Save and Save in InfoStore via the context menu. To do so select the attachment and then right-click on it.
If the attachment size exceeds the allowed quota, you will receive an E-Mail with a link to the InfoStore. The attachment file is stored there for a defined period.
2.10. Replying to E-Mail messages
You reply to an E-Mail message by selecting the desired E-Mail and then clicking on the Reply option under Mail in the panel. If the CC field holds other recipients and you also want to reply to them, select Reply all. In the E-Mail settings you can choose whether recipients should be entered in the "To" or "CC" field, please also refer to When "Reply all":. In both cases, the E-Mail is opened in an editing window. Compose your reply and then click on the icon under Send. Other options, as adding attachments or formatting text, can be found in the section Section 2.11, “Composing new E-Mails”.
As an alternative you can also activate the functions Reply and Reply all via the context menu.
2.11. Composing new E-Mails
In order to write a new E-Mail, click on the E-Mail icon underneath the New panel entry. This opens a window where you can write your new E-Mail.
In the v split and list view you can also open the New E-Mail window by double-clicking on the empty field below the E-Mail list.
2.11.1. To
Enter the E-Mail address of the recipient into the To input field. If the message should be sent to several recipients, enter the E-Mail addresses into the field separated by commas. Recipients in the To line can see which other recipients were entered in the To and CC fields. The recipients entered under To cannot, however, see any recipients who are entered into the BCC field. If you enter two or more characters of an E-Mail address you will get a list with E-Mail addresses that contain those characters. The list is sorted after the frequency an E-Mail address is used by you. Internal users are listed first though. Select the wanted recipient by left-clicking on it or by se-lecting it with the arrow keys. It only works though if the respective option is activated. Please refer to Enable auto completion of E-Mail addresses?. You can search for specific recipients by clicking on the To button. This opens a dialog box with a Search field. Enter the name of the recipient or the initial letters and start the search via Go. The field underneath shows a listing of the search results. Select the desired recipient with a left click and then click on Add To. With OK you accept the selection and close the window.
If the Search all contact folders control field is activated, addresses are searched for in all contact folders. To search in a specific contact folder deactivate the control field. Then click on the Contact folders button. Select a contact folder.
If you compose an E-Mail with a sender address that is not saved in the contacts folders this address will automatically be saved in the Collected addresses folder. You can deactivate this function in the E-Mail settings, please refer to Automatically save E-Mail addresses in the Collected addresses folder?.
2.11.2. CC
To display the Cc field, activate the checkbox "Cc" field in the panel section View.
If you want to send a copy of the E-Mail to another recipient as an FYI, enter the relevant E-Mail address into the CC field. CC stands for carbon copy. If you want to enter multiple E-Mail address-es, you have to separate them by commas. Recipients entered in the CC line can see the addresses of the other recipients. Only recipients entered under BCC cannot be seen by recipients who are entered into the CC field. You can search for E-Mail addresses by clicking on the CC button. This opens a dialog box with a Search field. Enter the name of the user who is supposed to receive a copy of the E-Mail or the initial letters and start the search via Go. The field underneath shows a listing of the search results. Select the desired recipient with a left click and then click on Add To. With OK you accept the selection and close the window.
2.11.3. BCC
To display the Bcc field, activate the checkbox "Bcc" field in the panel section View.
E-Mail addresses entered in the BCC field are hidden from the other recipients. This is a so-called Blind Carbon Copy. In this field you can enter the E-Mail addresses of people to whom you want to send a copy of the current E-Mail for information. If you want to enter multiple E-Mail address-es, you have to separate them by commas. Recipients entered into the BCC line are not visible to the recipients in the To and CC fields. You can search for E-Mail addresses by clicking on the BCC button. This opens a dialog box with a Search field. Enter the name of the user who is supposed to receive a Blind Carbon Copy of the E-Mail or the initial letters and start the search via Go. The field underneath shows a listing of the search results. Select the desired recipient with a left click and then click on Add To. With OK you accept the selection and close the window.
2.11.4. E-Mail attachments
Via the Attachment panel section you can add attachments to your E-Mail. In order to insert an attachment click on the Add function. This opens a dialog box where you can select a file from your folder structure via the Browse button. The file to be attached are added to the list with Add. Once you have made your choice, confirm and save it with OK. If you want to cancel the selection and close the window, click on Cancel.
2.11.5. Priority
To display the checkbox Priority activate the Options field in the panel section View.
Via the Priority select list you can assign a priority to the message. This is shown to the recipient. Thus, the recipient knows how important the message is or how urgently a response is expected. There are three priority levels: Low, Normal, High. E-Mail with Low or High priority are displayed with a black or red exclamation mark respectively.
2.11.6. E-Mail delivery receipt
To display the checkbox Receipt notification activate the Options field in the panel section View.
If you want to receive a delivery receipt from the recipient, activate the Delivery receipt check box. Then, the recipient is asked upon opening the E-Mail whether a delivery receipt should be sent. If the recipient does not refuse, you as the sender will receive a confirmation that your E-Mail has reached the recipient.
2.11.7. E-Mail draft
The panel function Save draft allows you to save an E-Mail for later editing. cThe E-Mail is moved into the Custom Drafts folder. If you want to edit it later, open the Custom Drafts folder, select the desired E-Mail and click on the Edit draft panel function. After you switch to the drafts folder, this function is available in the E-Mail panel section.
2.11.8. Auto-save E-Mail draft
While composing an E-Mail the text is automatically saved in the drafts folder in regular intervals. As soon as the E-Mail was sent the automatically saved draft will be deleted. This is to prevent loss of data. If the browser crashes while composing an E-Mail the last saved draft remains on the system.
You can activate or deactivate this function and define the intervals for the auto-save function. Information can be found in Auto-save E-Mail draft?.
2.11.9. HTML-Editor for E-Mail messages
You can format your text using the tool bar underneath the subject. The tool bar will only be visible if the option for formatting E-Mails as HTML is activated in the E-Mail options. Please refer to Format message as. Several icons and list boxes are available to you then.
2.11.9.1. Delete text
To delete your entered text and create a new one click on the sheet symbol New document. Your entries will be reset and you can newly create the E-Mail.
2.11.9.2. Font
This drop-down list lets you manually set the font within an E-Mail.
2.11.9.3. Size
You can define the font size of a text section using the drop-down list in the editor. You can choose from font sizes ranging from 1 to 7 for the preinstalled fonts. 1 is the smallest and 7 is the largest font size.
2.11.9.4. Formatting
Bold You can use this button to mark individual text sections in your E-Mail in bold. Italics You can use this button to mark individual text sections in your E-Mail in italics. Underline You can use this button to underline individual text sections in your E-Mail. Crossed out You can use this button to cross out individual text sections in your E-Mail.
Align Left You can use this button to align individual text sections against the left margin. Center You can use this button to center individual text sections.
Align Right You can use this button to align individual text sections against the right margin.
Justify Full You can use this button to justify individual text sections.
Select text color You can use this button to change the color of the font in sections of text. First mark the section of text you want in a different color and then press this button. Then choose one of the colors offered by the color chart that opens up. The hexadecimal number is a typical six-figure hexadecimal number. By manually editing the source text, you can choose from an even wider range of text colors.
sELECT Background color You can use this button to change the background color for sections of text. First mark the section of text you want in a different color and then press this button. Then choose one of the colors offered by the color chart that opens up. The hexadecimal number is a typical six-figure hexadecimal number. By manually editing the source text, you can choose from an even wider range of background colors. Cut With this icon you can cut previously marked text and copy it to the clipboard. Copy With this icon you can copy previously marked text.
Paste With this icon you can paste text from the clipboard.
Unordered List You can use this button to include text sections into a bulleted list. Ordered List You can use this button to include text sections into a numbered list. Indent/Outdent Unfortunately, you cannot use the tab key when writing an E-Mail in HTML mode. As an alternative, you can use the buttons Indent and Outdent to achieve the effect. The former is nearly the same as pressing the Tab key. The latter deletes or decreases the indentation previously added to the E-Mail.
Redo/Undo These two arrows allow you to undo or redo your changes.
Insert/edit image You can insert pictures into your text with this button. Clicking on it opens a dialog box where you can enter a link to an image or browse to a picture on your local hard drive. If you confirm your selection with Insert, the image is pasted in the text.
Insert/edit link To add working Internet or E-Mail addresses to your text, use the In-sert/edit link icon. Clicking on the icon opens a small window where you can enter the new address. Click on the Insert button for the link to be inserted into your E-Mail. With the icon Unlink you can remove the link.
Insert horizontal ruler By selecting this icon you paste a horizontal line into your text field.
Insert special character Clicking on this icon opens a select window offering several special characters. You insert one of these characters by clicking on it with the left mouse button. The character is pasted into your text field at the location of your cursor.
2.11.10. Copying web site contents
You can copy a web pages's content to an E-Mail. To do so select the complete web page content by using the <ctrl>+<a> key combination. Copy the content to the clipboard by using the <ctrl>+<c> key combination. In the E-Mail window paste the text by using the <ctrl>+<v> key combination.
Note: On Mac systems use the <cmd> key instead of <ctrl>.
Note: Depending on the web page's structure some formattings might not be kept.
2.11.11. Sending E-Mail messages
To send the E-Mail message click on the icon in the Send panel section.
Note: If there is no subject text a warning is displayed. To send the E-Mail with a subject enter the subject text and click OK. If you do not enter a text, the E-Mail is sent with the subject "(No subject)". To abort the action click on Cancel.
2.12. Managing E-Mail signatures
E-Mail signatures usually consist of salutations and contact data that you need in most E-Mail messages. To avoid having to enter a signature by hand into every new E-Mail, you can automat-ically add a signature to your E-Mails. Signatures are created, deleted and managed in the webmail client's Settings subfolder. The Mail folder contains a subfolder Signatures for this purpose. More details are available in the "Settings" chapter underSection 8.11.2, “Email Signatures” When you are writing an E-Mail you can select the desired signature via a select list. If you do not want to insert a signature, select No signature.
2.13. Append vCard
To display the checkbox Append vCard activate the Options field in the panel section View. To append a vcard to your E-Mail activate Append vcard. The vcard includes your contact data as entered in the global address book. Further information on the address book can be found in Section 3.1.2, “Public contacts”
2.14. Forwarding E-Mails
If you want to send a specific E-Mail from your inbox to somebody else, use the Forward panel function for this purpose. Select the desired E-Mail and click on the forwarding function. This opens a window where you can enter the recipient. Follow the same procedure as during writing and sending of a new E-Mail.
As an alternative you can also activate the function Forward via the context menu.
If you want to forward several E-Mails at once, you can mark the wanted E-Mails and then click on Forward. The E-Mails are sent as attachments in a new E-Mail.
2.15. E-Mail status
You can change the status of an E-Mail in the panel. For this, click on Mark as. This opens a select list with several options. For instance, if you want to mark an E-Mail which you have already read as unread, select the option Unread. This causes the E-Mail to be displayed in bold again. You can also mark an E-Mail to which you have replied as Unanswered. This is useful, for instance, when the E-Mail contains several open issues that you cannot all address immediately.
The envelope icon shows you the current status of an E-Mail. It is displayed in every list view. If you have already replied to an E-Mail, the envelope shows a green arrow. If the E-Mail was read, it shows an open envelope. If the E-Mail still has not been unread, however, it shows a closed envelope.
2.16. Moving and copying E-Mail messages
If you want to copy an E-Mail or move it into another folder, select the desired E-Mail and select the relevant option in the panel. This opens a directory window where you can specify a location for the E-Mail or the E-Mail copy. If you want to cancel the process, click on the cross in the upper right-hand corner. Once you have selected a final destination via mouse click, the E-Mail or the copy is placed there and the window is closed.
2.16.1. Moving E-Mails via drag-and-drop
As an alternative to the approach described above, you can also move E-Mails via drag-and-drop. For this, select the E-Mail(s) to be moved, hold the mouse button and drag them in the folder tree to the desired destination folder and release the mouse button there.
When you release the mouse button and thus select the desired target folder, all selected E-Mails are moved into this E-Mail folder.
While you are moving something via drag-and-drop, an icon is displayed next to the cursor. This icon indicates your moving permissions. You can move E-Mails only into your E-Mail folders. If, for instance, you try to move E-Mails into a contact folder, a red icon is displayed next to the cursor. This icon indicates that this operation cannot be performed. A green icon, on the other hand, symbolizes that the operation is possible.
2.17. Marking E-Mail messages as spam or ham
To mark E-Mails as spam select one or more E-Mails and click on the panel function Spam. As an alternative the fuction Spam can also be activated from the context menu.
The E-Mails will be moved to the Spam folder.
To undo your action, select one or more E-Mails in the Spam folder and click on the panel function Ham. You can also activate the Ham function in the context menu.
The E-Mails will be moved to the Inbox folder.
Note: The Ham function moves the E-Mails back to the Inbox folder, even if the E-Mails were copied to other folders before being marked as spam.
2.18. Deleting E-Mail messages
If you want to delete an E-Mail, select the desired E-Mail and click on the Delete panel function. You can also delete selected E-Mails with the Del key or via the context menu.
The deleted E-Mails will be crossed out in the list view. Additionally, the E-Mails will be marked as deleted by a respective symbol.
To delete the complete content of an E-Mail folder right-click in the folder in the folder tree and select the option Empty folder. By default, E-Mails deleted like this are moved into the Custom Trash folder. You can also irretrievably delete E-Mails. Learn more about this under Permanently remove deleted E-Mails?.
2.19. Printing E-Mails
To print the content of an E-Mail, select the E-Mail in any wanted view or open the E-Mail by double-clicking on it. In the panel click on Print.
To print a list of E-Mails select several E-Mails in any wanted view. In the panel click on Print.
2.20. Marking E-Mail messages with flags
Flags are colored markings that you can use to mark different E-Mails for better differentiation: you could, for example, mark all business partners with a green flag, all coworkers in your depart-ment with a red flag and all remaining coworkers of the company with a blue flag. The colorful flags enable you to recognize immediately to which type of E-Mail a specific E-Mail belongs. Flags are displayed in all views - in the List view they are shown in their own column and in the V Split and H Split views they are displayed in the title bar of the E-Mail . The colors of the flags do not have a predetermined meaning in Open-Xchange Server. Thus, you can freely decide what a specific type of flag means for you.
2.20.1. Marking E-Mail messages with flags
If you would like to mark E-Mails from your personal E-Mail folders or from public or other users' shared E-Mail folders (provided you have relevant access rights) with a flag, you need to display the relevant E-Mails in the List, H Split or V Split view first.
Then, select the E-Mails you wish to mark (for multi-selections hold either the Ctrl key or the Shift key) and click on the flag you would like to assign to these E-Mails in the Flag section of the Panel: including the flags from the menu - see the below screenshot - there are ten different flags available to you. Please note that you need relevant access rights for marking E-Mails from public or other users' shared E-Mail folders.
As a result, all selected E-Mails are marked with the selected flag.
2.21. Sharing an E-Mail folder
Users can share their personal E-Mail folders with specific other users or user groups. You can not share the Inbox folder. It is possible though to share subfolders of the Inbox folder. For more information on sharing folders please refer to the section Section 8.8, “Permissions Man-agement”.
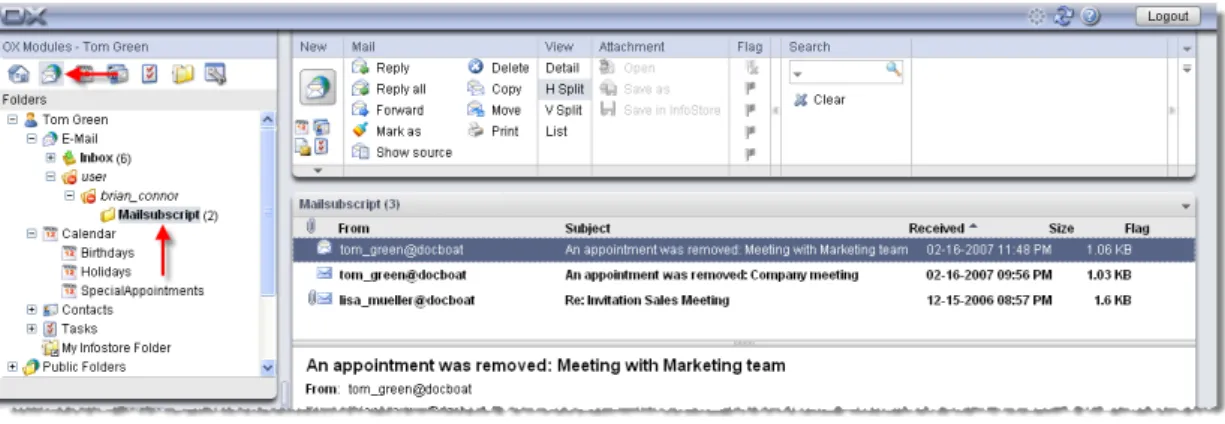
In order to access other users' shared E-Mail folders you first have to subscribe the wanted folder. The following scenario assumes that the user "brian_connor" shared his E-Mail folder "mailsubscript".
To subscribe the "mailsubscript" folder click the Inbox folder in the folder tree or right-click another personal E-Mail folder. In the context menu select Subscribe folder. In the pop-up window Subscribe folder open the folder tree below User and tom.green. Activate the control box of the folder "mailsubscript".
Figure 2.4. View subscribed E-Mail folder
Public and shared E-Mail folders
Thanks to the flexible folder structure of Open-Xchange Server, you can access and/or manage E-Mail from public and/or other users' shared E-Mail folders in addition to your personal appointments. Depending on the access rights you have been granted, you can display, create, edit or delete E-Mails in public or other users' shared folders.
The paragraph Section 8.16, “Public and Shared Folders” in the Options chapter in this user's guide describes the difference between public and shared folders. It explains how public folders are created, how personal folders are shared, and how appropriate access rights are defined for other users.
2.22. E-Mail directory overview
The left section of the webmail client consists of two parts. The lower part contains an overview about the hierarchically structured E-Mail directory. By default, you can directly click on the following contents and folders:
Account name - The top entry in this section shows the name of the account under which you are currently logged in.
Inbox - You can think of the Inbox folder as the mailbox for your E-Mail account. It contains all the E-Mails that have reached your account. By clicking on this folder with your mouse, you will see the contents of the inbox in the overview section. The horizontal split view is the standard view.
Custom Drafts - The Custom Drafts folder holds drafts of E-Mail messages that you want to finish and send later. By clicking on this folder with your mouse, you will see the contents of the drafts folder in the overview section. The horizontal split view is the standard view.
Custom Sent - The Custom Sent folder contains all the E-Mails you have sent through your account. By clicking on this folder with your mouse, you will see the contents of the sent folder in the overview section. The horizontal split view is the standard view. Custom Trash - The folder Custom Trash represents the recycle bin of your web mail client. All the E-Mails you have deleted from your other folders are automatically placed here. If you delete messages from this folder, they will be permanently erased. By clicking on this folder with your mouse, you will see the contents of the trash folder in the overview section. The horizontal split view is the standard view.
Another folder - If available, additional folders are displayed in this overview. These are folders you can create for yourself, for example to save your own private E-Mails there. To create additional folders, go to your personal configuration settings for the intranet portal.
2.23. E-Mail overview
The tabular listing of the E-Mails in an E-Mail folder shows the information row by row. In each row you can find all relevant information for a given E-Mail message. The first column displays the E-Mail priority. A red exclamation mark indicates an E-Mail with high priority, a blue arrow indicates an E-mail with low priority. The second column of each E-Mail shows you whether or not you have read the message displayed in the webmail client. The envelope in the second column shows whether the E-Mail has already been opened or not. A closed envelope symbol indicates that this E-Mail has a status of unread. Unread E-Mails are also marked in bold. Previ-ously read E-Mails are shown in normal type instead of bold. Once you have replied to a message, this is shown by a green arrow on the envelope in the second column. If the message has an at-tachment, the message is marked with a paper clip icon in the first column.
The sender of the E-Mail is shown in the third column. Here, the sender's E-Mail address is dis-played. If you are in the Sent folder, this column shows the E-Mail address of the recipient instead of the sender. The fourth column in the table displays the subject line for each E-Mail. This allows you to quickly find a specific E-Mail from the E-Mail list.
The next two columns show the date of when the Mail was received and the file size of the E-Mail together with its attachments.
The last column shows possibly existing flags for the single E-Mails. Flags can be used to mark objects.
You can easily sort the E-Mails in the list according to the different columns. For this, click on the relevant column header according to which you would like to sort. As a result, an arrow ap-pears to the right of the header. It shows whether the listing is sorted in ascending or descending order. If you want to change the sort order, click on the arrow. The columns From and Subject are sorted alphabetically. The column Received is sorted according to date and Size is sorted according to the size of the message. The flags will be sorted according to the priority. If you click on the field between the attachment icon and the column From your E-Mails will be sorted according to unread and read messages.
If the sender has selected the field Delivery receipt during the writing of the message, the re-cipient sees a popup window when the E-Mail message is opened, asking Do you want to send a delivery receipt?. With OK you confirm this query, while No closes the window and no con-firmation is send to the sender.
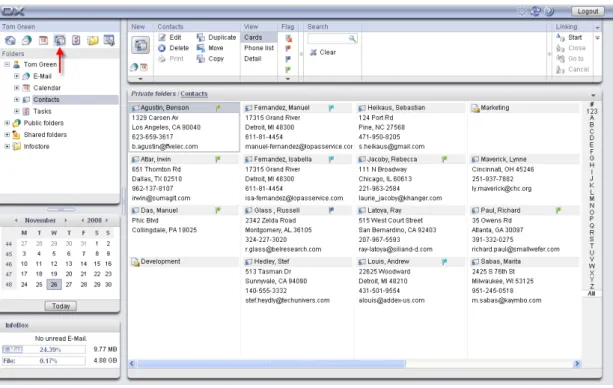
Chapter 3. Contacts
The Contacts module allows you to manage contacts - personal, public, and shared by other users - as well as the corresponding contact information: business and private addresses, phone and fax numbers, etc. You can associate as many attachments as you wish with your contacts, you can collect internal and external contacts into distribution lists and search for contacts using various criteria.
Figure 3.1. The Contacts module
3.1. Contact types and access
Open-Xchange Server allows you to administer individual contacts as well as collections of contacts via distribution lists. The latter is helpful, for example, if you would like to send some information via E-Mail to all staff members of a department: instead of sending this E-Mail to many individual contacts, you address your message only to the relevant distribution list.
This ensures that all of the appropriate contacts receive your communication. Since a distribution list is simply a special type of contact, all of the following remarks apply equally to individual contacts as well as distribution lists, unless specifically stated otherwise. You can find further in-formation about the usage of distribution lists under Section 3.13, “Combining contacts in distri-bution lists” in this chapter.
3.1.1. Personal contacts
Your personal contacts comprise all of your business partners - customers, vendors, etc. - as well as your private contacts such as friends and acquaintances.
When you open the Contacts module via the Contacts icon in the module toolbar, you will always see your personal contacts (individual contacts as well as distribution lists) from the Contacts
folder. Alternatively, you can also open the Contacts folder directly via the folder tree by clicking on this folder in the folder tree.
If you have created additional contact folders within your personal folder in order to effectively manage many contacts from different categories (see the example below), you can access these contact folders only via the folder tree.
Figure 3.2. Personal contact folders
Creating additional folders
The flexible folder structure of Open-Xchange Server allows you to create further contact folders in your personal contact folder as well as in other users' shared or public folders -provided you have appropriate access rights. This simplifies the management of multiple different contacts. Section Section 8.7, “Folder Management” of the Settings chapter in this user's guide describes how additional folders are created within your personal folders as well as in other users' shared or public folders.
3.1.2. Public contacts
Among the public contacts you will find all internal and external employees of your organization who are registered as users of Open-Xchange Server. In addition, the administrator as well as other users (provided they have suitable access rights) can create further public contact folders for common use in the company. This improves teamwork and helps avoid duplication of data. In order to access public contact folders and their contents (contacts and distribution lists), you expand the public folders entry in the folder tree and then click on the contact folder that you would like to open in the Contacts module: for example the Global address book folder holding all users of Open-Xchange Server - as shown in the following figure.
Figure 3.3. Public contact folders
Opening folders via the folder tree
Since the folder tree always displays all personal folders and accessible shared folders of other users, you can quickly navigate from any folder or module of Open-Xchange Server to another folder.
Simply click on the desired folder in the folder tree: This activates the appropriate module for the selected folder - Email, Calendar, Contacts, Tasks or InfoStore - and displays the content of the selected folder.
3.1.3. Shared contacts
In addition to public contact folders, all users can share their personal contact folders with spe-cific other users or user groups.
In order to access other users' shared contacts, expand the entry Shared Folders in the folder tree as well as the entry for the user whose contact folder you would like to open. Afterward, click on one of the contact folders this user has shared with you. Similar to accessing public contact folders, the Contacts module opens and displays the content of the selected contact folder.
Figure 3.4. Shared contact folders
Public and shared contact folders
Thanks to the flexible folder structure of Open-Xchange Server you can access and manage your personal contacts and also public contacts as well as other users' contact folders that