Dell™ PowerVault™ Modular Disk
Storage Manager CLI Guide
Notes and Notices
NOTE: A NOTE indicates important information that helps you make better use of your computer.
NOTICE: A NOTICE indicates either potential damage to hardware or loss of data and tells you how to avoid the problem.
____________________
Information in this document is subject to change without notice. © 2008 Dell Inc. All rights reserved.
Reproduction of these materials in any manner whatsoever without the written permission of Dell Inc. is strictly forbidden.
Trademarks used in this text: Dell, the DELL logo, and PowerVault are trademarks of Dell Inc.; Microsoft, Internet Explorer, and Windows are either registered trademarks or trademarks of Microsoft Corporation in the United States and/or other countries.
Other trademarks and trade names may be used in this document to refer to either the entities claiming the marks and names or their products. Dell Inc. disclaims any proprietary interest in trademarks and trade names other than its own.
Contents
1
About the Command Line Interface
. . . .13
How to Use the Command Line Interface. . . 14
Usage Notes . . . 15
CLI Commands . . . 16
Command Line Parameters . . . 18
Formatting Considerations . . . 24
Detailed Error Reporting . . . 24
Exit Status . . . 25
Usage Examples. . . 27
2
About the Script Commands
. . . .29
Script Command Structure . . . 30
Script Command Synopsis . . . 32
Recurring Syntax Elements . . . 34
Usage Guidelines . . . 40
3
Configuring a Storage Array
. . . .43
Configuring a Storage Array. . . 44
Determining What is on Your Storage Array. . . . 44
Saving a Configuration to a File . . . 47
Using the Create Virtual Disk Command . . . 48
Using the Auto Configure Command . . . 53
Modifying Your Configuration. . . 55
Setting the Storage Array Password. . . 56
Setting Up SMTP and SNMP Alerts . . . 56
Setting the RAID Controller Module Clocks . . . . 57
Setting the Storage Array Host Type. . . 57
Setting Modification Priority . . . 58
Assigning Global Hot Spares. . . 59
4
Using the Snapshot Feature
. . . .61
Using Host Servers to Create an Initial Snapshot Virtual Disk . . . 63
Creating a Snapshot Virtual Disk . . . 63
Enabling the Snapshot Virtual Disk Feature . . . . 64
Creating a Snapshot Virtual Disk with User-Assigned Physical Disks . . . 64
Preparing Host Servers to Create an Initial Snapshot Virtual Disk. . . 65
Creating the Initial Snapshot Virtual Disk . . . 66
Creating a Snapshot Virtual Disk with Software-Assigned Physical Disks. . . 67
Creating a Snapshot Virtual Disk by Specifying a Number of Physical Disks . . . 69
User-Defined Parameters . . . 70
Names of Snapshot Virtual Disks and Repository Virtual Disks . . . 72
Changing Snapshot Virtual Disk Settings . . . 73
Stopping and Deleting a Snapshot Virtual Disk . . . . 74
Re-creating the Snapshot Virtual Disk . . . 75
Preparing Host Servers to Re-create a Snapshot Virtual Disk . . . 75
Re-creating a Snapshot Virtual Disk. . . 76
5
Using the Virtual Disk Copy Feature
. . . .77
Creating a Virtual Disk Copy . . . 78
Enabling the Virtual Disk Copy Feature . . . 79
Determining Virtual Disk Copy Candidates . . . . 79
Creating a Virtual Disk Copy . . . 79
Preparing Host Servers to Create a Virtual Disk Copy. . . 80
Copying the Virtual Disk . . . 81
Viewing Virtual Disk Copy Properties . . . 82
Changing Virtual Disk Copy Settings . . . 83
Recopying a Virtual Disk . . . 84
Preparing Host Servers to Recopy a Virtual Disk . . . 85
Recopying the Virtual Disk . . . 86
Stopping a Virtual Disk Copy . . . 87
Removing Copy Pairs . . . 87
Interaction with Other Features. . . 88
Storage Partitioning . . . 88
6
Maintaining a Storage Array
. . . .91
Routine Maintenance . . . 91
Running a Media Scan . . . 91
Running a Consistency Check . . . 93
Resetting a RAID Controller Module . . . 94
Enabling RAID Controller Module Data Transfer. . . 94
Resetting Battery Age . . . 94
Removing Persistent Reservations. . . 94
Synchronizing RAID Controller Module Clocks. . . 95
Locating Physical Disks . . . 95
Performance Tuning . . . 95
Monitoring Performance. . . 96
Changing RAID Levels . . . 97
Changing Segment Size . . . 97
Defragmenting a Disk Group . . . 98
Troubleshooting and Diagnostics. . . 98
Collecting Physical Disk Data . . . 98
Diagnosing a RAID Controller Module . . . 99
Recovery Operations . . . . 100
Setting RAID Controller Module Operational Mode . . . . 100
Changing RAID Controller Module Ownership . . . . 101
Initializing a Physical Disk . . . . 101
Reconstructing a Physical Disk . . . . 102
Initializing a Virtual Disk . . . . 102
7
Script Commands
. . .105
Command Formatting Rules. . . . 106
Commands Listed by Function . . . . 108
Disk Group Commands. . . . 108
Enclosure Commands . . . . 109
Host Topology Commands . . . . 109
iSCSI Commands. . . . 109
Physical Disk Commands. . . . 110
RAID Controller Module Commands. . . . 111
Session Command . . . . 111
Show String Command. . . . 111
Snapshot Commands. . . . 111
Storage Array Commands . . . . 111
Virtual Disk Commands . . . . 113
Virtual Disk Copy Commands . . . . 113
Commands Listed Alphabetically. . . . 114
Accept Storage Array Pending Topology . . . . . 114
Activate Storage Array Firmware . . . . 114
Autoconfigure Storage Array . . . . 115
Autoconfigure Storage Array Hot Spares . . . . . 116
Check Disk Consistency . . . . 117
Clear Physical Disk Channel Statistics. . . . 118
Clear Storage Array Configuration. . . . 118
Clear Storage Array Event Log. . . . 119
Clear Storage Array Firmware Pending Area . . . 119
Clear Virtual Disk Reservations . . . . 120
Create Disk Group . . . . 120
Additional Information . . . . 121
Create Host. . . . 122
Create Host Group . . . . 123
Create iSCSI Initiator. . . . 125
Create RAID Virtual Disk (Automatic Physical Disk Select). . . . 126
Create RAID Virtual Disk (Free Capacity Base Select) . . . . 128
Create RAID Virtual Disk (Manual Physical Disk Select). . . . 130
Create Snapshot Virtual Disk. . . . 133
Create Virtual Disk Copy . . . . 137
Delete Disk Group . . . . 139
Delete Host . . . . 140
Delete Host Group . . . . 140
Delete Host Port . . . . 141
Delete iSCSI Initiator . . . . 141
Delete Virtual Disk . . . . 142
Diagnose RAID Controller Module . . . . 143
Disable Storage Array Feature. . . . 146
Download Enclosure Management Module Firmware . . . . 146
Download Physical Disk Firmware. . . . 147
Download Storage Array Firmware/NVSRAM . . . 148
Download Storage Array NVSRAM . . . . 149
Download Storage Array Physical Disk Firmware . . . . 150
Enable RAID Controller Module . . . . 151
Enable Storage Array Feature Key. . . . 151
Recopy Virtual Disk Copy. . . . 152
Recover RAID Virtual Disk . . . . 153
Additional Information . . . . 155
Re-create Snapshot . . . . 156
Remove Virtual Disk Copy . . . . 158
Remove Virtual Disk LUN Mapping. . . . 159
Repair Virtual Disk Consistency . . . . 160
Reset Storage Array Battery Install Date . . . . . 161
Reset Storage Array iSCSI Baseline. . . . 162
Reset Storage Array SAS PHY Baseline. . . . 162
Reset Storage Array Virtual Disk Distribution . . . 162
Revive Disk Group . . . . 163
Revive Physical Disk . . . . 163
Save Enclosure Log Data . . . . 164
Save Physical Disk Channel Fault Isolation Diagnostic Status . . . . 164
Syntax . . . . 164
Save Physical Disk Log. . . . 165
Save RAID Controller Module NVSRAM. . . . 165
Save Storage Array Configuration. . . . 166
Save Storage Array Events . . . . 167
Save Storage Array iSCSI Statistics. . . . 168
Save Storage Array Performance Statistics. . . . 169
Save Storage Array SAS PHY Counts . . . . 169
Save Storage Array State Capture. . . . 170
Save Storage Array Support Data . . . . 170
Set Controller. . . . 170
Additional Information . . . . 172
Set Disk Group . . . . 173
Set Enclosure Attribute . . . . 174
Set Enclosure Identification . . . . 175
Set Foreign Physical Disk to Native . . . . 176
Set Host . . . . 176
Set Host Group. . . . 178
Set Host Port . . . . 179
Set iSCSI Initiator . . . . 179
Set iSCSI Target Properties . . . . 180
Set Physical Disk Channel Status . . . . 182
Set Physical Disk Hot Spare . . . . 182
Set RAID Controller Module . . . . 183
Syntax . . . . 183
Syntax Element Statement Data . . . . 185
Additional Information . . . . 187
Set Session. . . . 188
Set Snapshot Virtual Disk . . . . 189
Set Storage Array . . . . 191
Set Storage Array Enclosure Positions . . . . 192
Set Storage Array ICMP Response . . . . 193
Set Storage Array iSNS Server IPv4 Address . . . 194
Set Storage Array iSNS Server IPv6 Address . . . 195
Set Storage Array iSNS Server Listening Port . . . 195
Set Storage Array iSNS Server Refresh . . . . 196
Set Storage Array Learn Cycle. . . . 197
Set Storage Array Time. . . . 197
Set Unnamed Discovery Session . . . . 198
Set Virtual Disk . . . . 198
Set Virtual Disk Copy . . . . 203
Show Current iSCSI Sessions . . . . 203
Show Disk Group. . . . 204
Show Host Ports . . . . 205
Show Physical Disk. . . . 205
Show Physical Disk Channel Statistics . . . . 207
Show Physical Disk Download Progress. . . . 208
Show RAID Controller Module . . . . 208
Show RAID Controller Module NVSRAM . . . . . 209
Show Storage Array . . . . 210
Show Storage Array Autoconfigure . . . . 212
Show Storage Array Host Topology . . . . 214
Show Storage Array LUN Mappings . . . . 214
Show Storage Array Negotiation Defaults. . . . . 214
Show Storage Array Pending Topology . . . . 215
Show String . . . . 216
Show Unconfigured iSCSI Initiators . . . . 216
Show Virtual Disk . . . . 217
Show Virtual Disk Action Progress . . . . 218
Show Virtual Disk Copy . . . . 219
Show Virtual Disk Copy Source Candidates. . . . 220
Show Virtual Disk Copy Target Candidates . . . . 220
Show Disk Group Import Dependencies. . . . 220
Show Virtual Disk Performance Statistics. . . . . 221
Show Virtual Disk Reservations . . . . 222
Start Disk Group Blink . . . . 223
Start Disk Group Defragment . . . . 223
Start Enclosure Blink. . . . 223
Start iSCSI DHCP Refresh . . . . 224
Start Physical Disk Channel Fault Isolation Diagnostics. . . . 224
Syntax . . . . 224
Start Physical Disk Blink . . . . 226
Start Physical Disk Initialize . . . . 226
Start Physical Disk Reconstruction . . . . 227
Start Storage Array Blink . . . . 227
Start Disk Group Import/Export . . . . 227
Start Virtual Disk Initialization . . . . 228
Stop Disk Group Blink . . . . 229
Stop Enclosure Blink. . . . 229
Stop iSCSI Session. . . . 229
Syntax . . . . 229
Stop Physical Disk Blink . . . . 229
Stop Physical Disk Channel Fault Isolation Diagnostics. . . . 230
Stop Snapshot . . . . 230
Stop Storage Array Physical Disk Firmware
Download. . . . 231
Stop Virtual Disk Copy . . . . 231
A Sample Script Files
. . . .233
Configuration Script Example 1 . . . . 233
Configuration Script Example 2 . . . . 236
About the Command Line Interface
This guide is intended for system administrators, developers, and engineers who need to use the command line interface (CLI) tool and its associated commands and script files. Selected CLI commands perform functions that you can also access from the Modular Disk (MD) Storage Manager, which is the graphical user interface (GUI) to the storage array. See the User’s Guide, which describes the Storage Manager software that is used to create and manage multiple storage arrays. For additional information, see the hardware and software manuals that shipped with your system.NOTE: Always check for updates on support.dell.com and read the updates first because they often supersede information in other documents.
NOTE: CLI commands do not have interactive warnings for destructive commands.
The command line interface (CLI) is a software tool that enables storage array installers, developers, and engineers to configure and monitor storage arrays. Using the command line interface, you can issue commands from an operating system prompt, such as the Microsoft® Windows® command prompt (C:\) or a Linux operating system terminal.
Each command performs a specific action for managing a storage array or returning information about the status of a storage array. You can enter individual commands, or run script files when you need to perform operations more than once (such as installing the same configuration on several storage arrays). A script file can be loaded and run from the command line interface. You can also run commands in an interactive mode. Interactive mode enables you to connect to a specific storage array and rapidly enter a command, determine the effect on the storage array, and then enter a new command. The command line interface gives you direct access to a script engine utility in the Dell™ PowerVault™ Modular Disk Storage Manager software (MD Storage Manager). The script engine reads the commands, or runs a script file, from the command line and performs the operations instructed by the commands.
You can use the command line interface to perform the following functions: • Directly access the script engine and run commands in interactive mode or
using a script file.
• Create script command batch files to be run on multiple storage arrays when you need to install the same configuration on different storage arrays.
• Run script commands on a storage array directly connected to a host, a storage array connected to a host by an Ethernet, or a combination of both.
• Display configuration information about the storage arrays.
• Add storage arrays to and remove storage arrays from the management domain.
• Perform automatic discovery of all storage arrays attached to the local subnet.
• Add or delete Simple Network Management Protocol (SNMP) trap destinations and email alert notifications.
• Specify the mail server and sender email address or Simple Mail Transport Protocol (SMTP) server for alert notifications.
• Direct the output to a standard command line display or to a named file.
How to Use the Command Line Interface
Using the CLI commands, you can access the script engine, specify which storage array receives the script commands, and set operation environment parameters.
A CLI command consists of the following elements: • The term SMcli
• Storage array identifier • Parameters
The following syntax is the general form of a CLI command:
SMcli storageArray parameters script-commands;
The script commands are the storage array configuration commands. "About the Script Commands" on page 29 presents an overview of the script
commands. "Script Commands" on page 105 provides definitions, syntax, and parameters for the script commands.
Usage Notes
If you enter SMcli and a storage array name but do not specify CLI parameters, script commands, or a script file, the command line interface runs in interactive mode. Interactive mode enables you to run individual commands without prefixing the commands with SMcli. You can enter a single command, view the results, and enter the next command without typing the complete SMcli string. Interactive mode is useful for determining configuration errors and quickly testing configuration changes.
If you enter SMcli without any parameters or with an incorrect parameter, the script engine returns usage information.
NOTE: The SMcli command is installed under the client directory of the selected path during a management station install of the MD Storage Manager software.
NOTE: The SMcli command should be a component of the system environment command path.
SMcli Invokes the command line interface storageArray Host name or IP address of the storage array
parameters CLI parameters that define the environment and purpose for the command
script-commands One or more script commands or the name of a script file containing script commands
CLI Commands
This section lists the CLI commands you can use to perform the following functions:
• Identify storage arrays. • Set passwords. • Add storage arrays.
• Specify communication parameters.
• Enter individual script configuration commands. • Specify a file containing script configuration commands.
The following are general forms of the CLI commands, showing the parameters and terminals used in each command. Table 1-1 lists definitions for the parameters shown in the CLI commands.
SMcli host-name-or-IP-address [ host-name-or-IP-address] [-c "command; {command2};"]
[-n storage-array-name | -w WWID]
[-o outputfile][-p password][-e][-S]
SMcli host-name-or-IP-address
[host-name-or-IP-address] [-f scriptfile]
[-n storage-array-name | -w WWID]
[-o outputfile] [-p password] [-e] [-S]
Table 1-1. Command Name Conventions
Parameter Definition
a|b pipe symbol indicating alternative ("a" or "b") italicized-words terminals
[...] (square brackets) zero or one occurrence {...} (curly brackets) zero or more occurrences
<...> (angle brackets) occurrence exceeds maximum limit of 30 characters (a|b|c) choose only one of the alternatives
SMcli (-n storage-array-name | -w WWID) [-c "command; {command2};"]
[-o outputfile][-p password][-e][-S]
SMcli (-n storage-array-name | -w WWID)
[-f scriptfile]
[-o outputfile] [-p password] [-e] [-S]
SMcli (-n storage-array-name | -w WWID)
[-o outputfile][-p password][-e][-S]
SMcli -a email:email-address
[host-name-or-IP-address1
[host-name-or-IP-address2]]
[-n storage-array-name | -w WWID | -h host-name |
-r (host_sa | direct_sa)]
[-I information-to-include][-q frequency][-S]
SMcli -x email:email-address
[host-name-or-IP-address1
[host-name-or-IP-address2]]
[-n storage-array-name | -w WWID | -h host-name |
-r (host_sa | direct_sa)] [-S]
SMcli (-a | -x) trap:community,
host-name-or-IP-address [host-name-or-IP-address1
[host-name-or-IP-address2]]
[-n storage-array-name | -w WWID | -h host-name |
-r (host_sa | direct_sa)] [-S]
SMcli -d [-w][-i][-s][-v][-S]
SMcli -m host-name-or-IP-address -F email-address
[-g contactInfoFile][-S]
SMcli -A [host-name-or-IP-address
[host-name-or-IP-address]] [-S]
SMcli -X (-n storage-array-name | -w WWID |
-h host-name)
Command Line Parameters
Table 1-2. Command Line ParametersParameter Definition
host-name-or-IP-address Specify either the host name or the Internet Protocol (IP) address of an in-band managed storage array (IPv4 or iPv6) or an out-of-band managed storage array (IPv4 only).
• If you manage a storage array by using a host connected directly to the storage array (in-band storage
management), you must use the -n parameter if more than one storage array is connected to the host. • If you manage a storage array through an Ethernet
connection (out-of-band storage management), you must specify the host-name-or-IP-address of the redundant array of independent disks (RAID) controller modules.
• If you have previously configured a storage array in the graphical user interface (GUI) of the MD Storage Manager, you can specify the storage array by its user-supplied name by using the-n parameter.
-A Use to add a storage array to the configuration files. If you do not follow the -A parameter with a
host-name-or-IP-address, automatic discovery scans the local subnet for storage arrays.
-a Use to add an SNMP trap destination or an email address alert destination.
• When adding an SNMP trap destination, the SNMP community is automatically defined as the community name for the trap and the host is the IP address or Domain Name Server (DNS) host name of the system to which the trap should be sent.
• When adding an email address for an alert destination, the email-address is the email address to which to send the alert message.
-c Use to indicate that you are entering one or more script commands to run on the specified storage array. Terminate each command by using a semicolon (;).
You cannot place more than one -c parameter on the same command line. You can include more than one script command after the -c parameter.
-d Use to display the contents of the script configuration file. -e Use to disable syntax checking when executing the current
CLI command.
-F (uppercase) Use to specify the email address from which all alerts will be sent.
-f (lowercase) Use to specify a file name containing script commands intended to run on the specified storage array.
This parameter is similar to the -c parameter in that both are intended for running script commands. The -c parameter allows you to execute individual script commands. The -f parameter allows you to execute script commands contained in a file.
NOTE: By default, any errors encountered when running the script commands in a file are ignored, and the file continues
to run. To override this behavior, use the set session
errorAction=stop command in the script file.
Table 1-2. Command Line Parameters (continued)
-g Use to specify an ASCII file that contains email sender contact information to include in all email alert
notifications. The CLI assumes the ASCII file is text only, without delimiters or any expected format. A typical file contains the following information:
• Name • Title • Company • Phone • Pager
NOTE: You can use any file name that your operating system
supports. You must not use userdata.txt. Some operating
systems reserve userdata.txt for system information.
-h Use with the -a and -x parameters to specify the host name that is running the SNMP agent to which the storage array is connected.
-I Use to specify the type of information to be included in the email alert notifications. The following are valid information arguments:
•eventOnly— Only event information is included in the email.
•profile— Event and array profile information is included in the email.
•supportBundle— Event and support bundle information is included in the email.
NOTE: You can enter only one information argument each time you execute the command. If you want all of the information, you must run the command three times.
-i Use with the -d parameter to display the IP address of the known storage arrays.
-m Use to specify the host name or IP address of the email server from which to send email alert notifications. Table 1-2. Command Line Parameters (continued)
-n Use to specify the name of the storage array on which to run the script commands. This name is optional when you use host-name-or-IP-address; however, if you are using the in-band method for managing the storage array, you must use the -n parameter if more than one storage array is connected to the host at the specified address. The storage array name is required when
host-name-or-IP-address is not used; however, the name of the storage array configured for use in the MD Storage Manager GUI (that is, listed in the configuration file) must not be a duplicate name of any other configured storage array.
-o Use with the -c or -f parameter to specify a file name for all output text that is a result of running the script
commands.
-p Use to specify the password for the storage array on which to run commands. A password is not necessary under the following conditions:
• A password has not been set on the storage array. • The password is specified in a script file that is running. • The storage array password is specified by using the-c
parameter and the set session password=password
command.
Table 1-2. Command Line Parameters (continued)
-q Use to specify how frequently to include additional profile or support bundle information in the email alert
notifications. An email alert notification that contains at least the basic event information is always generated for every critical event. If you set the-Iparameter to
eventOnly, the only valid argument for -q is everyEvent. If you set the-Iparameter to either profile or
supportBundle, this information is included with the emails with the frequency specified by the-qparameter. Valid frequency arguments are:
•everyEvent— Information is returned with every email alert notification.
•2— Information is returned no more than once every two hours.
•4— Information is returned no more than once every four hours.
•8— Information is returned no more than once every eight hours.
•12— Information is returned no more than once every 12 hours.
•24— Information is returned no more than once every 24 hours.
-r Use with the -a or -x parameter to specify the name of a management station. The name of a management station can be either direct_sa (out-of-band storage array) or
host_sa (in-band storage arrays [host-agent]). The-r parameter enables you to set or change the alert
notifications for all storage arrays under each management station.
Table 1-2. Command Line Parameters (continued)
-S (uppercase) Use to suppress the informational messages describing command progress that appear when running script commands. (Suppressing informational messages is also called silent mode.) This parameter suppresses the following messages:
• Performance syntax check • Syntax check complete • Executing script
• Script execution complete • SMcli completed successfully
-s (lowercase) Use with the -d parameter to display the alert settings in the configuration file.
-v Use with the -d parameter to display the current global status of the known devices in the storage array configuration file. (The configuration file lists all of the devices in a storage array configuration and the relationship between the devices. Use the configuration file to reconstruct a storage array.)
-X (uppercase) Use to delete a storage array from the configuration file. (The configuration file lists all of the devices in a storage array configuration and the relationship between the devices. Use the configuration file to reconstruct a storage array.)
-x (lowercase) Use to remove an SNMP trap destination or an email address alert destination. The community is the SNMP community name for the trap, and the host is the IP address or DNS host name of the system to which you want the trap sent.
-? Use this parameter to display usage information about the CLI commands.
Table 1-2. Command Line Parameters (continued)
Formatting Considerations
Quotation marks (" ") used as part of a name or label require special consideration when you run the CLI and script commands on a Microsoft® Windows® operating system. The following explains the use of quotation marks in names while running CLI and script commands on Windows. When quotation marks (" ") are part of an argument, you must insert a backslash (\) before each quotation mark character unless you are in interactive mode. For example:
-c "set storageArray userLabel=\"Engineering\";" where Engineering is the storage array name.
You cannot use quotation marks (" ") as part of a character string (also called string literal) within a script command. For example, you cannot enter the following string to set the storage array name to "Finance"Array:
-c "set storageArray userLabel= \"\"Finance\"Array\";"
On a Linux operating system, the delimiters around names or labels are single quotation marks (‘ ’). The Linux versions of the previous examples are:
-c ‘set storageArray userLabel="Engineering";’
Detailed Error Reporting
Error data collected from an error encountered by the CLI is written to a file. Detailed error reporting under the CLI works as follows:
• If the CLI must abnormally end execution or abort script command execution, error data is collected and saved before the CLI aborts. • The CLI automatically saves the error data by writing the data to a file
with a standard name.
• The CLI does not have any provisions to avoid overwriting an existing version of the file containing error data.
For error processing, errors appear as two types: • Parameter or syntax errors you might enter
When the CLI encounters either type of error, it writes information describing the error directly to the command line and sets a return code. Depending on the return code, the CLI might also write additional information about which parameter caused the error. The CLI also writes information about what command syntax was expected to help you identify any syntax errors you might have entered.
When an exception occurs while executing a command, the CLI
automatically saves the error information to a file named excprpt.txt. The CLI attempts to place excprpt.txt in the directory specified by the system property devmgr.datadir, which by default is the "client/data" directory under the main installation directory in Windows and the /var/opt/SM directory in Linux. If for any reason the CLI cannot place the file in the devmgr.datadir -specified directory, the CLI saves the excprpt.txt file in the same directory from which the CLI is running. You cannot change the file name or location. The excprpt.txt file is overwritten every time an exception occurs. To save the information in the excprpt.txt file, you must to copy the information to a new file or directory.
Exit Status
After you run a CLI command or a CLI and script command, status is displayed that indicates the success of the operation defined by the command. The status values are shown in Table 1-3.
Table 1-3. Exit Status Status Value Meaning
0 The command terminated without an error.
1 The command terminated with an error. Error information is also displayed.
2 The script file does not exist.
3 An error occurred while opening an output file. 4 A storage array is not at the specified address. 5 Addresses specify different storage arrays.
6 A storage array name does not exist for the host agent connected. 7 The storage array name was not at the specified address.
8 The storage array name was not in the configuration file. 10 A management class does not exist for the storage array. 11 A storage array was not found in the configuration file. 12 An internal error occurred.
13 Invalid script syntax was found.
14 The RAID controller module was unable to communicate with the storage array.
15 A duplicate argument was entered. 16 An execution error occurred.
17 A host was not at the specified address.
18 The World Wide Identifier (WWID) was not in the configuration file.
19 The WWID was not at the address. 20 An unknown IP address was specified.
21 The event monitor configuration file was corrupted.
22 The storage array was unable to communicate with the event monitor.
23 The RAID controller module was unable to write alert settings. 24 The wrong management station was specified.
25 The command was not available.
26 The device was not in the configuration file.
27 An error occurred while updating the configuration file. 28 An unknown host error occurred.
29 The sender contact information file was not found. 30 The sender contact information file could not be read. 31 The userdata.txt file exists.
32 An invalid -I value in the email alert notification was specified. 33 An invalid -fvalue in the email alert notification was specified. Table 1-3. Exit Status (continued)
Usage Examples
The following examples show how to enter CLI commands on a command line. The examples show the syntax, form, and, in some examples, script commands. Examples are shown for both Windows and Linux operating systems. The usage for the -c parameter varies depending on your operating system. On Windows operating systems, put quotation marks (" ") around the script command following the -c parameter. On Linux operating systems, put single quotation marks (‘ ’) around the script command following the -c parameter.
NOTE: See "Script Commands" on page 105 for descriptions of the script commands used in the following examples.
This example shows how to change the name of a storage array. The original name of the storage array is Payroll_Array. The new name is Finance_Array. Windows:
SMcli -n "Payroll_Array" -c "set storageArray userLabel=\"Finance_Array\";"
Linux:
SMcli -n ‘Payroll_Array’ -c ‘set storageArray userLabel="Finance_Array";’
This example shows how to delete an existing virtual disk and create a new virtual disk on a storage array. The existing virtual disk name is
Stocks_<_Bonds. The new virtual disk name is Finance. The RAID
controller module host names are finance1 and finance2. The storage array is protected and requires the password TestArray.
Windows:
SMcli finance1 finance2 -c "set session password= \"TestArray\"; delete virtualDisk [\"Stocks_<_ Bonds\"]; create virtualDisk physicalDiskCount[3] raidLevel=5 capacity=10 GB userLabel=\"Finance\"; show storageArray healthStatus;"
Linux:
SMcli finance1 finance2 -c ‘set session password= "TestArray"; delete virtualDisk
physicalDiskCount[3] raidLevel=5 capacity=10 GB userLabel="Finance"; show storageArray
healthStatus;’
This example shows how to run commands in a script file named scriptfile.scr on a storage array named Example. The -e parameter runs the file without checking syntax. Executing an SMcli command without checking syntax enables the file to run more quickly; however, the SMcli command may not execute correctly if the syntax is incorrect.
SMcli -n Example -f scriptfile.scr -e
This example shows how to run commands in a script file named scriptfile.scr on a storage array named Example. In this example, the storage array is protected by the password My_Array. Output, as a result of commands in the script file, goes to file output.txt.
Windows:
SMcli n Example f scriptfile.scr p "My_Array" -o -output.txt
Linux:
SMcli n Example f scriptfile.scr p ‘My_Array’ -o -output.txt
This example shows how to display all storage arrays that are currently discovered in the current configuration. The command in this example returns the host name of each storage array.
SMcli -d
If you want to know the IP address of each storage array in the configuration, add the -i parameter to the command.
About the Script Commands
You can use the script commands to configure and manage a storage array. The script commands are distinct from the command line interface (CLI) commands; however, you enter the script commands using the command line interface. You can enter individual script commands, or run a file of script commands. When entering an individual script command, include it as part of a CLI command. When running a file of script commands, include the file name as part of a CLI command. The script commands are processed by a script engine that performs the following functions:
• Verifies command syntax • Interprets the commands
• Converts the commands to the appropriate protocol-compliant commands, which is, in turn, run by the RAID controller module • Passes the commands to the storage array
At the storage array, the redundant array of independent disks (RAID) controller modules in the storage array runs the script commands. The script engine and script commands support the storage array configuration and management operations listed in Table 2-1. Table 2-1. Configuration and Management Operations
Operation Activities
Virtual disk, disk group configuration
Creating, deleting, and setting priority; labeling; setting physical disk composition when creating virtual disks; setting segment size; and setting media scan control
Physical disk configuration Configuring the hot spare RAID controller module
configuration
Defining virtual disk ownership, changing mode settings, defining network settings, and setting host port IDs
Script Command Structure
All script commands have the following structure:
command operand-data {statement-data}
where command identifies the action to be performed, operand-data represents the storage array component to configure or manage (such as a RAID controller module, physical disk, or disk group), and statement-data is what you want to do to the component (such as, specifying the RAID level or availability of a disk group).
The general form of the syntax for operand-data is as follows:
(object-type | allobject-types | [qualifier]
(object-type [identifier] {object-type
[identifier]} | object-types [identifier-list]))
An operand-data object can be identified four ways: • The object types and object qualifiers
• The all parameter General storage array configuration
Resetting a configuration to defaults, labeling, checking the health status, setting the time of day, clearing the Major Event Log, and setting the media scan rate
NVSRAM configuration Downloading and modifying the user configuration region at the bit and byte level, displaying nonvolatile static random access memory (NVSRAM) values Product identification Retrieving the enclosure profile display data Battery management Setting the battery installation date
Firmware management Downloading RAID controller module, enclosure management module (EMM), and physical disk firmware
Table 2-1. Configuration and Management Operations (continued)
• Brackets
• A list of identifiers
NOTE: You can use any combination of alphanumeric characters, hyphens, and underscores for the names. Command names can have a maximum of 30 characters. If you exceed the maximum character limit, replace square brackets ([ ]) with angle brackets (< >) to overcome this limitation.
Use an object type when the command is not referencing a specific object. The all parameter means all objects of the specified type in the storage array (for example, allVirtualDisks).
To perform a command on a specific object, use brackets to identify the object (for example, virtualDisk[engineering]). Specify a subset of objects with a list of identifiers in brackets (for example, virtualDisks[sales engineering marketing]). In a list of identifiers, use a blank space as the delimiter. A qualifier is necessary if you want to include additional information to describe the objects.
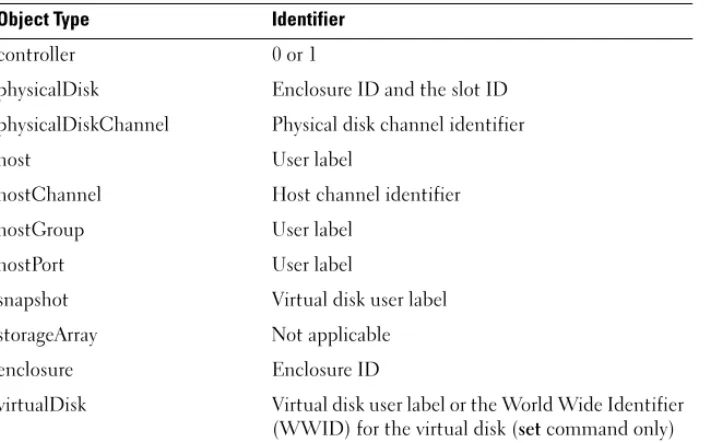
Table 2-2 lists the object type and identifiers associated with the object types. Table 2-2. Object Types and Identifiers
Object Type Identifier
controller 0 or 1
physicalDisk Enclosure ID and the slot ID physicalDiskChannel Physical disk channel identifier
host User label
hostChannel Host channel identifier
hostGroup User label
hostPort User label
snapshot Virtual disk user label
storageArray Not applicable
enclosure Enclosure ID
virtualDisk Virtual disk user label or the World Wide Identifier (WWID) for the virtual disk (set command only)
Statement data is in the form of attribute=value (such as raidLevel=5), an attribute name (such as batteryInstallDate), or an operation name (such as consistencyCheck).
Script Command Synopsis
Because you can use the script commands to define and manage the different aspects of a storage array (such as host topology, physical disk configuration, RAID controller module configuration, virtual disk definitions, and disk group definitions), the actual number of commands is extensive. The commands, however, fall into general categories that are reused when you apply the commands to the different aspects of a storage array.
Table 2-3 lists the general form of the script commands and provides a definition of each command.
virtualDiskCopy Target virtual disk and, optionally, the source virtual disk user labels
diskGroup Virtual disk group number
Table 2-3. General Form of the Script Commands Command Syntax Description activate object
{statement-data}
Sets up the environment so that an operation can take place or performs the operation if the environment is already correctly set up. autoConfigure
storageArray{statement-data}
Automatically creates a configuration based on parameters specified in the command.
check object {statement-data} Starts a synchronous operation to report on errors in the object.
clear object {statement-data} Discards the contents of some attribute of an object. This is a destructive operation that cannot be reversed.
create object {statement-data} Creates an object of the specified type. Table 2-2. Object Types and Identifiers (continued)
deactivate object {statement-data}
Removes the environment for an operation. delete object Deletes a previously created object. diagnose object
{statement-data}
Runs a test and displays the results. disable object
{statement-data}
Prevents a feature from operating. download object
{statement-data}
Transfers data to the storage array or hardware associated with the storage array.
enable object {statement-data}
Allows a feature to operate. recopy object
{statement-data}
Restarts a virtual disk copy operation by using an existing virtual disk copy pair. You can change attributes before the operation is restarted. recover object
{statement-data}
Re-creates an object from saved configuration data and the statement attributes (similar to the create
command.) recreate object
{statement-data}
Restarts a snapshot operation using an existing snapshot virtual disk. You can change attributes before the operation is restarted.
remove object {statement-data}
Removes a relationship from between objects. repair object {statement-data} Repairs errors found by the check command. reset object {statement-data} Returns the hardware or object to an initial state. resume object Starts a suspended operation. The operation begins
where it left off when suspended.
revive object Forces the object from the Failed to the Optimal state. Use only as part of an error recovery procedure. save object {statement-data} Writes information about the object to a file. set object {statement-data} Changes object attributes. All changes are completed
when the command returns. Table 2-3. General Form of the Script Commands (continued)
Recurring Syntax Elements
Recurring syntax elements are a general category of variables and parameters you can use in one or more script commands. The recurring syntax is used in the general definitions of the script commands that are listed in "Script Commands" on page 105. Table 2-4 lists the recurring syntax and the syntax values that you can use with the syntax.
show object {statement-data} Displays information about the object.
start object {statement-data} Starts an asynchronous operation. You can stop some operations after they have started. You can query the progress of some operations.
stop object {statement-data} Stops an asynchronous operation. suspend object
{statement-data}
Suspends an operation. You can then restart the suspended operation, and it continues from the point at which it was suspended.
Table 2-4. Recurring Syntax Elements
Recurring Syntax Syntax Value
raid-level (0 | 1 | 5| 6)
snapshot-repository-raid-level (1 | 5 | 6)
capacity-spec integer-literal [KB | MB | GB | TB | Bytes]
segment-size-spec integer-literal
boolean (TRUE | FALSE)
user-label string-literal
user-label-list user-label {user-label}
create-raid-vol-attr-value-list create-raid-virtual disk-attribute-value-pair
{create-raid-virtual disk-attribute-value-pair}
Table 2-3. General Form of the Script Commands (continued) Command Syntax Description
create-raid-virtual disk-attribute-value-pair capacity=capacity-spec | owner=(0 | 1) |
segmentSize=integer-literal RAID controller module-enclosureId (0–99)
slot-id (0–31)
port-id (0–127)
physical disk-spec enclosureID, slotID
physical disk-spec-list physical disk-spec {physical disk-spec} enclosure-id-list enclosureID {enclosureID}
hex-literal 0x hexadecimal-literal
virtual disk-group-number integer-literal
filename string-literal
error-action (stop | continue)
physical disk-channel-identifier (1 | 2)
physical disk-channel-identifier-list physical disk-channel-identifier {physical disk-channel-identifier} host-channel-identifier (01 | 02 | 11 | 12)
physical disk-type (Serial Attached SCSI [SAS] | Serial Advanced Technology Attachment [SATA])
feature-identifier (snapshot | virtualDiskCopy) repository-spec instance-based-repository-spec |
count-based-repository-spec ethernet-port-options IPV4Address=ipv4-address|
IPV4ConfigurationMethod=[(static | dhcp)] |
IPV4GatewayIP=ipv4-address|
IPV4SubnetMask=ipv4-address| Table 2-4. Recurring Syntax Elements (continued)
iscsi-host-port-options IPV4Address=ipv4-address | IPV6LocalAddress=ipv6-address | IPV6RoutableAddress=ipv6-address | IPV6RouterAddress=ipv6-address | enableIPV4= boolean | enableIPV6=boolean | enableIPV4Vlan=boolean | enableIPV6Vlan=boolean | enableIPV6Priority=boolean | enableIPV6Priority=boolean | IPV4ConfigurationMethod=(static | dhcp) | IPV6ConfigurationMethod=(static | auto) | IPV4GatewayIP= ipv4-address | IPV6HopLimit=integer | IPV6NdDetectDuplicateAddress= integer | IPV6NdReachableTime=integer | IPV6NdRetransmitTime=integer | IPV6NdTimeOut=integer | IPV4Priority=integer | IPV6Priority=integer | IPV4SubnetMask=ipv4-address | IPV4VlanID=integer | IPV6VlanID=integer | maxFramePayload=integer | tcpListeningPort=tcp-port-id| NOTE: You must set the enableIPV4 parameter or the enableIPV6 parameter to TRUE to ensure that the specific IPV4 or IPV6 setting is applied.
NOTE: The IPV6 address space is 128 bits. It is represented by eight 16-bit hexadecimal blocks separated by colons. You may drop leading zeros, and use a double colon to represent consecutive blocks of zeroes.
Table 2-4. Recurring Syntax Elements (continued)
instance-based-repository-spec repositoryRAIDLevel= repository-raid-level
repositoryPhysicalDisks=(physical disk-spec-list)
[enclosureLossProtect=boolean] repositoryDiskGroup=virtual-disk-group-number
[freeCapacityArea=integer-literal] Specify repositoryRAIDLevel with repositoryPhysicalDisks. Do not specify RAID level or physical disks with a disk group. Do not set enclosureLossProtect
when specifying a disk group.
NOTE: For enclosure loss protection to work, each physical disk in a disk group must be on a separate enclosure. If you set enclosureLossProtect=TRUE and have selected more than one physical disk from any one enclosure, the storage array returns an error. If you set
enclosureLossProtect=FALSE, the storage array performs operations, but the disk group you create might not have enclosure loss protection.
NOTE: To determine if a free capacity
area exists, issue the show diskGroup
command.
count-based-repository-spec repositoryRAIDLevel= repository-raid-level
repositoryPhysicalDiskCount= integer-literal
[physicalDiskType=physical disk-type] [enclosureLossProtect=boolean]
WWID string-literal.
For hostPort identifiers this is a 16-digit hex number without any colon delimiters.
Table 2-4. Recurring Syntax Elements (continued)
nvsram-offset hexadecimal-literal
host-type string-literal | integer-literal
nvsram-byte-setting nvsram-value
(0x hexadecimal | integer-literal) nvsram-bit-setting nvsram-mask, nvsram-value
(0x hexadecimal, 0x hexadecimal | integer-literal) ipv4-address (0–255).(0–255).(0–255).(0–255) ipv6-address (0-FFFF):(0-FFFF):(0-FFFF): (0-FFFF):(0-FFFF):(0-FFFF): (0-FFFF):(0-FFF) autoconfigure-vols-attr-value-list autoconfigure-vols-attr-value-pair {autoconfigure-vols-attr-value-pair} autoconfigure-vols-attr-value-pair physicalDiskType=physical disk-type|
raidLevel=raid-level | diskGroupWidth=integer-literal | diskGroupCount=integer-literal | virtualDisksPerGroupCount= integer-literal| hotSpareCount=integer-literal | segmentSize=segment-size-spec NOTE: The physicalDiskType parameter is not required if only one type of physical disk is in the storage array. If you use the
physicalDiskTypeparameter, you must
also use the hotSpareCount and
diskGroupWidth parameters. If you do not
use the physicalDiskType parameter, the
configuration defaults to SAS physical disks.
NOTE: The virtualDisksPerGroupCount
parameter is the number of equal-capacity virtual disks per disk group.
Table 2-4. Recurring Syntax Elements (continued)
create-virtual-disk-copy-attr-value-list create-virtual-disk-copy-attr-value-pair {create-virtual-disk-copy-attr-value-pair} create-virtual-disk-copy-attr-value-pair copyPriority=highest | high | medium |
low | lowest |
targetReadOnlyEnabled=boolean recover-raid-virtual-disk-attr-value-list recover-raid-virtual-disk-attr-value-pair
{recover-raid-virtual-disk-attr-value-pair} recover-raid-virtual-disk-attr-value-pair owner=(0 | 1)
Table 2-5. Range of Values for Recurring Syntax Elements
Recurring Syntax Syntax Values
IPV4Priority 0 to 7
IPV4VlanID 1 to 4094
IPV6Priority 0 to 7
IPV6VlanID 1 to 4094
IPV6HopLimit 0 to 255 (default value is 64)
IPV6NdDetectDuplicateAddress 0 to 256
IPV6NdReachableTime 0 to 65535 (default value is 30000 milliseconds)
IPV6RetransmitTime 0 to 65535 (default value is 1000 milliseconds)
IPV6NDTimeOut 0 to 65535 (default value is 3000 milliseconds) Table 2-4. Recurring Syntax Elements (continued)
Usage Guidelines
The following list provides guidelines for writing script commands on the command line:
• You must end all commands with a semicolon (;).
• You can enter more than one command on a line, but you must separate each command with a semicolon (;).
• You must separate each base command and its associated primary and secondary parameters with a space.
• The script engine is case sensitive.
• You can add comments to your scripts to make it easier for you and future users to understand the purpose of the script commands. (For information on how to add comments, see "Adding Comments to a Script File" on page 41.)
NOTE: While the CLI and script commands are not case sensitive, user labels (such as for virtual disk, hosts, or host ports) are case sensitive. If you try to map to an object identified by a user label, you must enter the user label exactly as it is defined, or the CLI and script commands will fail.
NOTE: You can use any combination of alphanumeric characters, hyphens, and underscores for the names. Command names can have a maximum of 30 characters. If you exceed the maximum character limit, replace square brackets ([ ]) with angle brackets (< >) to overcome this limitation.
maxFramePayload 1500
NOTE: The maxFramePayload parameter is shared between IPv4 and IPv6. The payload portion of a standard Ethernet frame is set at 1500 bytes, and a jumbo Ethernet frame is set at 9000 bytes. When using jumbo frames, make sure that all of the devices contained in the network path can handle the larger frame size.
tcpListeningPort (tcp-port-id) 3260, or 49,152 to 65,536 The default value is 3260. Table 2-5. Range of Values for Recurring Syntax Elements (continued)
NOTE: The capacity parameter returns an error if you specify a value greater than or equal to 10 without a space separating the numeric value and its unit of measure.
(For example, 10GB will return an error, but 10 GB will not return an error).
Adding Comments to a Script File
You can add comments to a script file in three ways.1 The script engine interprets as a comment any text typed after two forward slashes (/ /) until an end-of-line character is reached. If the script engine does not find an end-of-line character in the script after processing a comment, an error message is displayed, and the script operation is terminated. This error commonly occurs when a comment is placed at the end of a script and you did not press the Enter key.
// Deletes the existing configuration. clear storageArray Configuration;
2 The script engine interprets any text typed between / * and * / as a comment. If the script engine does not find both a beginning and ending comment notation, an error message is displayed, and the script operation is terminated.
/* Deletes the existing configuration */ clear storageArray Configuration;
3 Use the show statement to embed comments in a script file that you want to display while the script file is running. Enclose the text you want to display in quotation marks (" ").
show "Deletes the existing configuration"; clear storageArray Configuration;
Configuring a Storage Array
This chapter explains how to run script commands from the command line to create a virtual disk from a group of physical disks and how to configure a redundant array of independent disks (RAID) storage array. This chapter assumes that you understand basic RAID concepts and terminology. Before configuring the storage array, become familiar with the concepts of physical disks, disk groups, virtual disks, host groups, hosts, and RAID controller modules. Additional information about configuring a storage array and related definitions is in the online help, the Installation Guide, the MD Storage Manager User’s Guide, and the Owner’s Manual.
Configuring a RAID storage array requires caution and planning to ensure that you define the correct RAID level and configuration for your storage array. The main purpose in configuring a storage array is to create virtual disks
addressable by the hosts from a collection of physical disks. The commands described in this chapter enable you to set up and run a RAID storage array. Additional commands are also available to provide more control and
flexibility. Many of these commands, however, require a deeper understanding of the firmware as well as various structures that need to be mapped. Use all of the command line interface (CLI) commands and script commands with caution.
The following sections in this chapter show some, but not all, of the CLI and script commands. The purpose of showing these commands is to explain how you can use the commands to configure a storage array. The presentation in this chapter does not explain all possible usage and syntax for the commands. (For complete definitions of the commands, including syntax, parameters, and usage notes, see "Script Commands" on page 105.)
This chapter contains examples of CLI and script command usage. The command syntax used in the examples is for a host running a Microsoft® Windows® operating system. As part of the examples, the complete C:\ prompt and DOS path for the commands are shown. Depending on your operating system, the prompt and path construct will vary.
For most commands, the syntax is the same for all Windows and Linux operating systems, as well as for a script file. Windows operating systems, however, have an additional requirement when entering names in a
command. On Windows, you must enclose the name between two backslashes (\) in addition to other delimiters. For example, the following name is used in a command that runs under Windows:
[\"Engineering\"]
For a Linux system when used in a script file, the name appears as: ["Engineering"]
Configuring a Storage Array
When you configure a storage array, you can maximize data availability by ensuring that data is quickly accessible while maintaining the highest level of data protection possible. The speed at which a host can access data is affected by the disk group RAID level and the segment size settings. Data protection is determined by the RAID level, hardware redundancy (such as global hot spares), and software redundancy (such as the Snapshot feature).
In general, you configure a storage array by defining the following entities: • A disk group and associated RAID level
• The virtual disks
• Which hosts have access to the virtual disks
This section explains how to use the script commands to create a configuration from an array of physical disks.
Determining What is on Your Storage Array
Even when you create a configuration on a previously unconfigured storage array, you still need to determine the hardware and software features that must be included with the storage array. When you configure a storage array with an existing configuration, you must ensure that your new configuration does not inadvertently alter the existing configuration, unless you are reconfiguring the entire storage array. For example, to create a new disk group on unassigned physical disks, you must determine which physical disks are available. The commands described in this section enable you to determine the components and features in your storage array.
The show storageArray command returns the following general information about the components and properties of the storage array:
• A detailed profile of the components and features in the storage array • The battery age
• The default host type (which is the current host type) • Other available host types
• The hot spare locations
• The identifiers for enabled features
• The logical and physical component profiles
• The time to which both RAID controller modules are set
• The RAID controller module that currently owns each virtual disk in the storage array
To return the most information about the storage array, run the show storageArray command with the profile parameter. The following is an example of the complete CLI and script command running on Windows:
client>smcli 123.45.67.89 -c "show storageArray profile;"
This example identifies the storage array by the dummy IP address 123.45.67.89. You can also identify the storage array by name.
The show storageArray profile command returns detailed information about the storage array. The information is presented in several screens on a display. You might need to increase the size of your display buffer to see all of the information. Because this information is so detailed, you might want to save the output to a file. To save the output to a file, enter the command as shown in the following example:
client>smcli 123.45.67.89 -c "show storageArray profile;" -o c:\folder\storageArrayprofile.txt
In this example, the name folder is the folder in which you choose to place the profile file, and storageArrayprofile.txt is the name of the file. You can choose any folder and any file name.
NOTICE: When you write information to a file, the script engine does not check to determine if the file name already exists. If you choose the name of a file that already exists, the script engine writes over the information in the file without warning.
When you save the information to a file, you can use the information as a record of your configuration and as an aid during recovery.
To return a brief list of the storage array features and components, use the summary parameter. The command is similar to the following example:
client>smcli 123.45.67.89 -c "show storageArray summary;"
The summary information is also returned as the first section of information when you use the profile parameter.
The following show commands return information about the specific components of a storage array. The information returned by each of these commands is the same as the information returned by the show storageArray profile command, but is constrained to the specific component. (The following commands are not complete commands. For information about a command, see the referenced section next to the command.)
• show controller ("RAID Controller Module Commands" on page 111) • show physicalDisks ("Show Physical Disk" on page 205)
• show physicalDiskchannels stats ("Show Physical Disk Channel Statistics" on page 207)
• show storageArray hostTopology ("Show Storage Array Host Topology" on page 214)
• show storageArray lunmappings ("Show Storage Array LUN Mappings" on page 214)
• show allVirtualDisks ("Show Virtual Disk" on page 217) • show diskGroup ("Show Disk Group" on page 204)
• show virtualDisk reservations ("Show Virtual Disk Reservations" on page 222)
The following commands also return information about a storage array: • show storageArray autoConfigure ("Show Storage Array Autoconfigure" on
page 212)
• show controller NVSRAM ("Show RAID Controller Module NVSRAM" on page 209)
• show storageArray unreadableSectors ("Show Storage Array Unreadable Sectors" on page 215)
• show virtualDiskCopy sourceCandidates ("Show Virtual Disk Copy Source Candidates" on page 220)
• show virtualDiskCopy targetCandidates ("Show Virtual Disk Copy Target Candidates" on page 220)
• show virtualDisk performanceStat ("Show Disk Group Import Dependencies" on page 220)
For descriptions of the show commands, including examples of the information returned by each command, see "Script Commands" on page 105. Other commands can help you learn about your storage array. To see a list of the commands, see "Commands Listed by Function" on page 108. These commands are organized by the storage array activities that the commands support. (Examples include virtual disk commands, host commands, enclosure commands, and others).
Saving a Configuration to a File
NOTICE: When you write information to a file, the script engine does not check to determine if the file name already exists. If you choose the name of a file that already exists, the script engine writes over the information in the file without warning.
After you have created a new configuration or if you want to copy an existing configuration for use on other storage arrays, you can save the configuration to a file. To save the configuration, use the save storageArray configuration command. Saving the configuration creates a script file that you can run on the command line. The following syntax is the general form of the command:
save storageArray configuration file="filename" [(allconfig | globalSettings=(TRUE | FALSE)) | virtualDiskConfigAndSettings=(TRUE | FALSE) | hostTopology=(TRUE | FALSE) | lunMappings=(TRUE | FALSE)]
You can choose to save the entire configuration or specific configuration features. The command for setting this parameter value looks like the following example:
client>smcli 123.45.67.89 -c "save storageArray configuration file=
\"c:\folder\\storageArrayconfig1.scr\";"
In this example, the name folder is the folder in which you choose to place the configuration file, and storageArrayconfig1.scr is the name of the file. Choose any folder and any file name. MD Storage Manager uses the file extension .scr when it creates the configuration file.
Using the Create Virtual Disk Command
The create virtualDisk command enables you to create new virtual disks in the storage array in three ways:
• Create a new virtual disk while simultaneously creating a new disk group to which you assign the physical disks.
• Create a new virtual disk while simultaneously creating a new disk group to which the MD Storage Manager software assigns the physical disks. • Create a new virtual disk in an existing disk group.
You must have unassigned physical disks in the disk group. You do not need to assign the entire capacity of the disk group to a virtual disk.
Creating Virtual Disks with User-Assigned Physical Disks
When you create a new virtual disk and assign the physical disks to use, the MD Storage Manager software creates a new disk group. The RAID controller module firmware assigns a disk group number to the new disk group. The following syntax is the general form of the command:
create virtualDisk physicalDisks=
(enclosureID0,slotID0...enclosureIDn,slotIDn)
raidLevel=0 | 1 | 5 | 6)userLabel=
"virtualDiskName" [capacity=virtualDiskCapacity owner=(0 | 1) segmentSize=segmentSizeValue] [enclosureLossProtect=(TRUE | FALSE)]
NOTE: The capacity, owner, segmentSize, and enclosureLossProtect parameters are optional. You can use one or all of the optional parameters as needed to help define your configuration. You do not, however, need to use any optional parameters.
The userLabel parameter is the name to give to the virtual disk. The virtual disk name can be any combination of alphanumeric characters, hyphens, and underscores. The maximum length of the virtual disk name is 30 characters. Spaces are not allowed. You must put quotation marks (" ") around the virtual disk name.
The physicalDisks parameter is a list of the physical disks that you want to use for the disk group. Enter the enclosure ID and slot ID of each physical disk that you want to use. Put parentheses around the list. Separate the enclosure ID and slot ID of a physical disk by a comma. Separate each enclosure ID and slot ID pair by a space. For example:
(0,0 0,1 0,2 0,3 0,4)
The capacity parameter defines the size of the virtual disk. You do not have to assign the entire capacity of the physical disks to the virtual disk. You can later assign any unused space to another virtual disk.
The owner parameter defines the RAID controller module to which you want to assign the virtual disk. If you do not specify a RAID controller module, the RAID controller module firmware determines the owner of the virtual disk. The segmentSize parameter is the same as described for the autoConfigure storageArray command. See "Using the Auto Configure Command" on page 53.
The enclosureLossProtect parameter turns on or turns off enclosure loss protection for the disk group. (For a description of how enclosure loss protection works, see "Enclosure Loss Protection" on page 52.) Example of Creating Virtual Disks with User-Assigned Physical Disks client>smcli 123.45.67.89 -c "create virtualDisk physicalDisks=(0,0 0,1 0,2) raidLevel=5 userLabel= \"Engineering_1\" capacity=20 GB owner=0;"
NOTE: The capacity parameter returns an error if you specify a value greater than or equal to 10 without a space separating the numeric value and its unit of measure.