SiteBuilder
SiteBuilder Manual
Table of contents
SiteBuilder Manual ... 2
Table of contents ... 2
What is SiteBuilder? ... 4
Tips for building a great site ... 4
Getting started ... 4
Templates and Designs ... 4
Templates ... 5
Editing or changing templates on an existing site ... 5
Multi-page and Express templates... 5
Design ... 6
Navigating SiteBuilder ... 7
Using the picture gallery ... 11
Adding and editing text ... 13
Adding new text to the page ... 13
Editing existing text... 14
Using the text editor... 14
Adding Images to your website... 16
Adding Hyperlinks ... 17
Site Add-ons ... 18
What add-ons are available? ... 18
Adding your Site Add-On to the page ... 21
Working with tables ... 22
Adding a new table ... 23
Adding content to your table ... 25
Editing your table ... 25
Copying, moving, and deleting items ... 27
Copying and moving items ... 27
Deleting items ... 28
Creating new pages ... 28
Site navigation ... 29
Changing the appearance of the navigation menu ... 30
Using images on your navigation menu ... 31
Adding keyword and description MetaTags ... 32
Publishing your site ... 33
Previewing your site ... 33
Working with multiple sites ... 34
Creating a new site ... 34
Publishing another site ... 34
Promoting your site ... 35
Choose your keywords carefully ... 36
Add a Site Map ... 36
Promote your site ... 37
What is SiteBuilder?
SiteBuilder is an easy to use website creation tool, allowing you to design and build a great looking website effortlessly and easily without any technical skills.
Tips for building a great site
Although with SiteBuilder you can design and build your website “on the fly”, by spending some time planning your site you can dramatically improve the overall design and feel. Before you start creating your website, consider the following questions:
What is the purpose of your site? Do you just want to share information between friends, drive sales to your business, or to improve your business’ online presence?
What information do you want to provide for your visitors?
It’s also a good idea to visit some of your favourite sites and note what you like and dislike about each site. Keep all this information in mind as you start to plan your own site.
At this point, you may want to sketch an informal site map. A site map is a rough list of the pages you would like to use in your site, how they will link to each other, and a brief description of what content you’ll provide on each page. A little time here can save you a lot of time later on!
Getting started
By now you will have an idea about how you would like your website to look and feel, with this in mind we can get started using the SiteBuilder interface and start building your website.
Templates and Designs
While at first glance, templates and designs appear to do the same thing, there are differences in how they work and can be used. Templates control the content, layout and pages of your sites, while designs control the graphics, fonts, colours and general look and feel of your site.
Templates
This allows you to use a template and create your website, without the need to think about design elements such as colours and fonts, until later on.
There are 8 different templates you can use to create the website you want. Each template coming with a large number of designs.
The template layouts you can choose from are as follows:
Editing or changing templates on an existing site
To change the template on an existing web page simply view the web page in SiteBuilder and click Change Look then Change the layout to view a list of new templates.
Multi-page and Express templates
When you first log into SiteBuilder you will be offered three options: Start from scratch with a blank site
Start with an Express Site template
Express Sites: This is the quickest way of getting a website online. This will create a short 1 page website. Just select what you would like to do, answer some questions then select a design to get a webpage published in minutes.
Multi-page template: This allows you to create a multipage website quickly and easily. Select how you want to use your site. Then select what you would like to have on each page. SiteBuilder will then select templates for each page you require. Choose a design, and then add your content.
Blank Site: This way allows you to fully customise your site from the start.
Quick tip: Even if you select an express site, or multipage site you can fully customise this again at a later date. If this is a new website, create a quick Express site to show that your website is coming soon. Then replace this with your complete website whenever you are ready.
Once you have chosen the template you want for your website, you can select a design to match.
Design
Designs control the graphics, fonts, colours and the general look and feel of your website, with over 300 designs it’s easy to find one that will suit you.
To help you choose a design, they have been split into different categories, select the category that suits your website and browse through the available designs. Remember, you can always change the design at a later date of you want.
Quick tip: Any designs with a symbol in the corner show that the design is customisable. Click the image in the corner to find out which parts of the design you can alter.
Navigating SiteBuilder
When you first log into SiteBuilder you will be asked if you want to create a new website. Once you have created a site, each time you log into SiteBuilder you will be directed to the “all my sites” page. This page will show you all of the sites you have created within your SiteBuilder control panel.
Under each website you will also be informed when each site was last edited and published.
It can be useful to have a duplicate copy of your website within SiteBuilder. This way you can update one copy of your website while keeping an unaltered copy as a backup if required.
Note: While you can have several websites created within SiteBuilder you are only able to publish one website at a time.
All my sites toolbar:
Name Description
Web Site Tools This shows you additional options for building your website. At the time of release this contains links to site promotion and to Advanced Options. However this may change as more tools become available.
Advanced Options
This screen provides you with an overview of your websites and all the other files (picture gallery’s etc) that you have uploaded with SiteBuilder. From here you can see how much space is used by each of these sections. You can also delete a website, or make a copy of an existing site from this screen.
Disk Space Shows you how much disk space your websites and gallery are using. You can also delete a website, or create a duplicate copy of an existing website.
Picture Gallery The picture gallery is a special area where you can upload images for your website. The picture gallery is explained in more detail later. From this screen you can view all images uploaded to your gallery, and delete any images that you don’t need any more.
Site Promotion The Site Promotion screen allows you to send an email to interested parties once you have published your website. This email, will contain a link to your website.
Log Out Will log you out of the SiteBuilder control panel.
Help Shows additional help files and support on SiteBuilder. Note: Some of the features described in these help files are not available within your version of SiteBuilder.
If you click on your website you will be taken to the edit page screen. From here you can add and remove email content, or change the website design and layout. The toolbar on this edit page screen has a number of options that are not available on other screens.
Edit webpage toolbar
Name Description
Add Text Add text to your site. SiteBuilder features a rich text editor which allows you to enter and format your additional content.
Add picture Add images from your picture gallery to your page. You can choose an image you have already uploaded, or upload and use a new picture on your website.
Add link Add a hyperlink to another page on your site, or to another URL on an external site elsewhere on the internet. You can even create a mail link, which will open your visitor's email software on their computer so they can send an email to an address you have specified.
Add table Add a table to your page to display data or help your page layout. There is a table gallery that lets you choose from ready-made tables, or create your own from scratch.
Site Add-ons Displays buttons on your website where you can add additional features. These features are explained in more detail later in this manual.
Add page Add a new page to your site. The new page wizard allows you to select the template for the web page, and how the new page should appear within the navigation bar.
Change look This option allows you to change the template, change the design, or to edit the existing design. You can choose to change only the page you are on, or all the pages within your website.
Move Items Move content or images from one area of your web page to another quickly and easily.
Copy items Copy content or images from one area of your web page to another quickly and easily.
Delete Items This option allows you to delete content or images on your web page.
Preview Site Opens your site in a new window so that you can preview what it will look like when it is published.
Publish to Web Publish your site to the internet with the click of a button.
Promote Site The Site Promotion screen allows you to send an email with a link to your site to interested parties once you have published your website.
Site Organiser Provides and overview of each webpage on your site, allowing you to rename, copy, or delete a page on your site. You can also change the site navigation or the design of a particular web page.
All my Sites Returns you to the All my Sites page detailed above. This page shows you each of the websites you have created in SiteBuilder, and shows which sites have been published and when each site was last edited.
Log Out Will log you out of the SiteBuilder control panel.
Help Shows additional help files and support on SiteBuilder. Note: Some of the features described in these help files are not available within your version of SiteBuilder.
While you will be spending a lot of time on the edit page screen, most modern websites also have a large number of images and yours can too. With this in mind you may also spend some time within your picture galleries.
Using the picture gallery
The picture gallery is a single segment of SiteBuilder where you can upload, manage and delete your images. Images must be uploaded into a picture gallery before you can add them to your website
You can access the Picture Gallery by clicking the Picture Gallery icon at the bottom of the page.
Quick tip: When we say you must upload an image, this is essentially making a copy of an image from your personal computer to the SiteBuilder control panel.
By default, SiteBuilder includes two picture galleries. You can, however, create more galleries to manage and maintain your pictures if needed. This is useful for when you start to grow your site and more images are uploaded.
When you navigate to the picture gallery, you will see a screen as follows.
From this screen, you can view your galleries, or upload images into a gallery of your choice. When uploading images, you can choose to upload them individually, or in bulk.
To upload images individually select Single Picture Upload, and to upload multiple images at the same time select Bulk Picture Upload. You will need a recent version of Java installed on your computer to use the bulk upload option, whereas the single picture upload will work with all computers.
Important: Before you upload any images, make sure their filename contains only numbers and letters. Filenames that contain spaces, full stops, or special characters (such as !ӣ$%^&*) may not load correctly.
If you choose to upload images individually you can also create a new gallery to store your images within. Select an existing gallery from the drop down menu, or enter the name of your new gallery in the text box provided.
To upload an image, click on the Browse button provided then navigate to the image on your local machine.
Quick tip: You can upload up to ten images at the same time using this method.
You can upload .gif, .jpg, .jpeg and .zip files to your picture gallery.
Quick tip: Keep an eye on the file size for each image. Large photographs can take up a lot of space within your SiteBuilder control panel and will slow your site down as visitors attempt to view them. It is good practice to keep images as small as possible.
Click Done when you have chosen all files. It may take a short time to upload the images.
Adding and editing text
Each template comes complete with pre-populated content that you can edit. Alternatively you can enter new text in any section that you want.
Adding new text to the page
Step 1
Click the Add Text icon.Step 2
You will see several Add it here buttons on the page to show where text can beStep 3
Use the text editor to enter your text. You can format the text, change the text colour, add images, and much more. For more information see Using the text editor below.Step 4
Click Done when you are happy with your text. You can change it again at any time.Editing existing text
Step 1
To edit any existing text, click the Edit Text button next to the section of text you wantto edit. This will bring up the text editor.
Step 2
Make your changes using the text editor.Step 3
Click Done to save your changes.Using the text editor
The text editor allows you to enter and format text into your website. It is a graphical interface that is similar in layout to other text editors such as word.
The interface
The interface of the text editor should be familiar, as it is similar to word processors (such as Microsoft Word) and email software (such as Microsoft Outlook or Windows Mail).
The first toolbar contains buttons for formatting your text, changing the font and text colour, inserting links, and adding pictures and special characters.
The second toolbar allows you to copy and paste text, search for text within the editor, align text, create bullet and numbered lists, indent text, undo recent changes, edit the HTML source for your code, and check your spelling.
Quick tip: It is recommended that you don’t copy text directly from
Microsoft Word, because it contains extra formatting information which is not compatible with SiteBuilder. In these cases it’s a good idea to copy the text into Notepad first, which will stop any errant characters entering your website.
There is also a third toolbar which is hidden by default. You can view the toolbar by clicking the Show/Hide advanced features button on the right of the first toolbar.
The Advanced features toolbar provides some extra features, such as the ability to add and modify tables, horizontal rules, and anchors.
The spell checker
The spell checker can be switched on and off from the Toggle Spellchecker button on the second toolbar. If enabled any spelling mistakes it locates will be underlined with a red wavy line. Click the word to see a menu of alternative words to choose from.
You can change the language used by the spell checker by clicking the down-facing arrow next to the Toggle spellchecker button.
Adding Images to your website
You can add images to your website by clicking the Add Picture button in the edit page toolbar at the foot of the screen. Once you have pressed this, a number of buttons will appear within your web page. Click where on your web page you would like to add your image.
Once you have selected where you would like to insert your image you will be taken to the picture gallery screen. Select the picture gallery you would like to choose your images from in the drop down menu provided.
At the foot of the screen is a list of the images that you have already uploaded to your picture gallery. If you want to add a picture that you have already uploaded, tick the box under the picture, then click Choose Pictures.
by clicking Simple Picture Upload. Full details on uploading images can be found in the picture gallery chapter.
Once you have selected your image you will see a final page that will allow you to see how it is to be displayed. There are a number of options on this screen:
Display size: Allows you to control how big you want the image to appear on your website.
Alignment: Choose the alignment of the image within your web page and how close to the picture you would like the text to display.
Title and caption: Any text you add to the title will be displayed above your image, while anything that you enter in the caption text box will be displayed below the image. ALT Text is text that will be displayed in the event that the picture cannot be viewed on the website.
Picture frame: Allows you to add a border around your image.
Picture Linking: You can add links from your image from this section. You can link your picture to another web page, another website, or to a larger version of the image.
Once you have decided how the image is to be displayed on your site, click Done to insert the image to your website.
Adding Hyperlinks
A hyperlink is a clickable link which will direct your visitors to another page on your site, or another web address anywhere on the internet. You can also create an email link which, when your visitor clicks it, will open their email software and allow them to send an email to a predefined email address.
Step 1
Click the Add link button on the toolbar at the foot of the page.Step 2
Choose where you would like to place the link by clicking an Add it here button.Step 3
You will then be asked to select what type of link you would like to create from the following options: To another web page (URL) – Enter a web address for any site on the web To a mail message – Specify an email address, and when your visitors click
the link their email software will open so they can contact you.
page.
Depending on the option you chose in Step 3 you will also be asked to type a web address or email address, or select from a list of your existing pages.
If you are creating a link to another website you can also set the page to open in a new window so your visitor doesn’t lose your website.
Step 5
If you want to change the formatting options for your link, you have the option tochange the font, the size, and the alignment of your link. You can also emphasize the text by making it bold, italic, or underlined.
Step 6
Click Done to add the link to your page.Site Add-ons
Site Add-Ons provide an excellent way to extend the capabilities of your website. You can insert contact forms, a guestbook, page counters, videos, a site map, news and RSS feeds, search fields, coupons, and much more all at the click of a button.
What add-ons are available?
The following add-ons are available through SiteBuilder, and are divided into four main categories.
Business Tools
PayPal: Accept online payments with PayPal
Coupon Builder: Create coupons for your customers to print out and receive discounts.
Forms: Create a form so your customers can contact you directly from the website.
Amazon Item Listing: List products from the Amazon website, and receive money via their affiliate program if anyone makes a purchase after clicking the link on your site.
Photo Gallery: Add a photo gallery of thumbnails, which can be clicked to reveal the full size image.
Sound: Add audio to your site.
Video: Add a video.
Flash: Add an Adobe Flash animation to your site.
File Download: Provide a link for your visitors to download a file.
Add Your Own HTML: Extend the possibilities further by adding your own HTML code. This is recommended for advanced users only.
Important: If you have chosen an Add-on that requires you to upload a file, such as sound, video, or Flash, make sure the filename contains only numbers and letters. Filenames that contain spaces, full stops, or special characters (such as !ӣ$%^&*) may not load correctly.
Interactive Features
Weather Viewer: Display the current weather conditions, and allow visitors to check their local area.
People Search: Ideal for personal websites, allow your visitors to find and connect with other internet users.
Guestbook: Add a guestbook for your visitors to sign.
Lycos Search: Web search using the Lycos search engine.
Site Search: Add a search box to allow visitors to search your site, or the web.
Hotbot Search: Allow your users to search using the Hotbot search engine.
Cool Content
Moreover News Feed: Add news headlines from Moreover’s website.
Date and Time Stamp: Add the current date and time.
Page Counter: A count of all visitors to the page, which automatically updates each time the page is loaded.
Animated Cursors: Add an animated cursor.
Auto Last Updated Stamp: Keep your customers informed of site changes by adding a date and time stamp, which automatically updates each time you publish the site.
improve your search engine rankings.
Loan Calculator: Add a loan calculator to your site.
Mortgage Calculator: Add a mortgage calculator to your site.
Adding your Site Add-On to the page
Step 1
Click Site Add-Ons at the foot of the page.Step 2
Choose a location on the page by clicking an Add it here button.Step 3
Choose a category from the list. You can switch between categories with the tabs atthe top of the page.
Step 5
You will be presented with the options required to configure your selected add-on. These vary depending on the add-on you have selected. If you require assistance simply click the Help icon at the bottom of the window.Quick tip: More information on adding the most popular add-ons is available online at http://www.yourwebsiteandemail.com/sitebuilder/.
Step 6
Click Done to insert your new add-on into your page.You can edit the configuration at any time by clicking the Edit Site Add-On button underneath the add-on.
Working with tables
Tables are a useful way of displaying data, and can also be used to help you lay out elements on your page. They can be fully customised, and SiteBuilder also includes a Table Gallery which contains various predefined templates to help you match your table to the style of your website.
Adding a new table
Adding a table to your page couldn’t be easier.
Step 1
Click Add Table at the foot of the page.Step 2
You will see several Add it here buttons on the page to show where your table canbe added. Click one of these buttons to choose where to place your table.
Step 3
You will have the option to base your new table on a predefined template, or to createa new table from scratch.
Step 4
This step will differ depending on whether you choose to create your table from thegallery or build your own.
Choose from the gallery
The table will be added to your page. You can now customise the design fully and add your own content.
Build your own
You can customise your new table with the following options:
Number of columns: Choose how many columns your table will have.
Number of rows: Choose how many rows your table will have.
Table border: You can choose if your table has a border. You can also set the width and colour.
Cell padding: This will add space between the table cells and the border of the table.
Cell border: Choose if each table cell will also have its own border.
Table width: Choose how wide your table will appear on the page. This can be a percentage of the page (your table will resize if the browser is resized) or a set number of pixels.
Printer friendly version: Show a link to a version of the table that can be easily printed.
Text settings: Set the font, text size and colour, and other text formatting options.
Quick tip: You can change these settings at any time after the table has been created.
Click Done to add the table to your page.
Adding content to your table
When adding content (such as text, links, images, and site add-ons) to your page, you will see an Add it here button in each available cell of your table. Simply select the relevant button and your content will be placed within the table.
Editing your table
There are several options to customise your table, such as the ability to change the appearance of your table, add new rows or columns, or modify the height of rows or width of columns within the table.
Step 1
Click on Edit table under the table you wish to modify.Step 2
There are a large number of table options, so we’ll break them down into sections.Columns and rows
Add column: Add new columns to your table
Add row: Add new rows to your table.
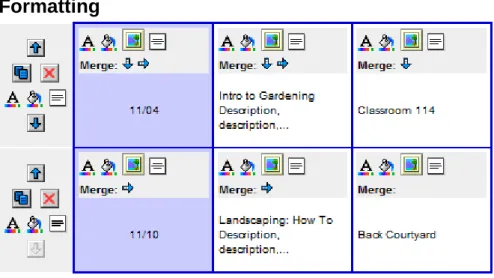
Formatting
Reorder rows and columns: Use the arrows to shift columns left and right, and rows up and down to change their order of appearance.
Duplicate or delete rows and columns: Allows you to create a copy or delete the selected row or column.
Colours and alignment: Change the text or background colour, and the horizontal and vertical alignment of text within the cell.
Insert picture: Insert a picture from your Picture Gallery into the selected cell.
Merge cell: Merge the selected cell into the cell directly underneath or to the right.
Table options
Table border: Choose whether your table has a border, and set its width and colour.
Cellpadding: Add space between the table cells and the border of the table.
Cell border: Choose if each table cell will also have its own border.
Table background color: Set a colour for the table background.
Table width: Choose how wide your table will appear on the page. This can be a percentage of the page (your table will resize if the browser is resized) or a set number of pixels.
Printer friendly version: Show a link to a version of the table that can be easily printed.
Text settings: Set the font, text size and colour, and other text formatting options.
Step 3
When you have finished, click Done to save your changes.Copying, moving, and deleting items
From time to time you may want to copy, move, or delete items (such as text, links, images, site add-ons, and tables) from your page. SiteBuilder provides some useful tools for achieving this.Copying and moving items
Step 1
Click on either the Move Items or Copy Items buttons at the foot of the page.Step 2
Tick the boxes to the right of the items you would like to copy or move and clickContinue. You can select several items at the same time.
Step 3
Select where you would like to place the items by clicking a Copy it here or Move ithere button. You can copy or move items to another location on the same page, or you can use your page navigation to select a location on another page in your site.
Deleting items
Step 1
Click on the Delete Items button at the foot of the page.Step 2
Tick the boxes to the right of the items you would like to delete and click Done. Youcan delete several items at the same time.
The items you selected will be removed from the page.
Important: It is not possible to recover deleted items.
Creating new pages
Adding a new page in SiteBuilder couldn’t be easier.
Step 2
Click on Add Page.Step 3
Enter a title for the new page, and whether you would like it to appear on yourNavigation Bar or not.
Step 4
Click Done to add the new page.Note: Depending on your SiteBuilder plan you may be limited to the number of pages you can add. If you receive a warning message informing you that you have reached your page allowance, you may need to upgrade your SiteBuilder plan.
Site navigation
SiteBuilder makes it very easy to create a full set of navigation options, without taking up too much room on the page.
You can create submenus that popup when the mouse is moved over an items parent entry, allowing you to divide your site up into a few segments. You can also customise the appearance of the Navigation menu.
Step 1
Click on the Site Organiser icon at the bottom of the page.Step 2
Click on Navigation Bar Properties.Step 3
You can re-order your navigation as you wish by dragging the boxes. If you place abox under another, slightly indented, then it will appear as a popup when the mouse is moved over its parent page.
In the example above the “Contact me” page is being dragged under the “About me page”. Because it is indented it will appear as a popup menu option when the visitor
hovers over “About me” in the navigation menu.
If you don’t want a page to be displayed on the navigation bar, simply drag it across to the Pages not shown in the Navigation Bar box on the right of the page.
Step 4
When you are finished click Done.Changing the appearance of the navigation menu
You can change the font and text colour of your Navigation bars. The options you can change may depend on the template you have chosen for your site.
Step 1
Click Change Look at the bottom of the page.Step 2
Choose the option to Edit your existing design.Step 3
Scroll down to the section titled Navigation. You will see several options for changingthe text appearance.
Text color for the navigation links: Change the colour of the links.
Selected page text color for navigation links: Change the colour of the selected page in the menu.
Background color of navigation submenus: Change the background colour of the popup sub menus.
Text color of navigation submenus: Change the colour of the text on the navigation sub menus.
Rollover Background color of navigation submenus: Change the background colour of the link when the mouse hovers over it. This only applies to the popup sub menus.
when the mouse hovers over it. This only applies to the popup sub menus.
Step 4
Click Done to save your changes.Using images on your navigation menu
If you want to use your own images, rather than text, in the navigation menus you can do so. There are several benefits to this method:
The font you use doesn't need to be installed on the end user's machine, so you can be a lot more creative with your menus. With a text menu you are limited to only a few fonts that are installed on all machines.
You can incorporate icons or images.
You can use several colours and text effects such as drop shadow and gradients (if your image editing software supports these).
Step 1
Click on Site Organiser at the bottom of the page.Step 3
Click the Select button images link at the top of the page under the title.Step 4
You will now see each item in your navigation menu, along with three image optionsfor each:
Default image: Select the image to display for this item.
Rollover image: (Optional) If you want the image to change when the mouse is hovered over it, you can specify the image here.
Selected image: (Optional) If you want a different image to display for the selected page, then specify it here.
To add your own image, click the Picture Gallery button. SiteBuilder only supports the following image types:
JPEG (*.jpeg, *.jpg)
GIF (*.gif)
Compressed ZIP archives (*.zip) containing your image(s)
Step 5
Click Done to save your changes when you are finished.Adding keyword and description
MetaTags
Metatags help describe your website to search engines and may help to improve your website's search engine rankings. They are easy to add to your SiteBuilder web pages.
Step 2
Click Page Properties for the page you want to add metatags to.Step 3
Scroll down and enter a description for the page in the Description Meta Tag textfield. This text is displayed by most search engines under the page name in their search results.
Step 4
Enter your keywords, separated by commas, in the Keyword Meta Tag text field.There is a limit of 200 characters.
Step 5
Click Done to save your changes.Publishing your site
When you are ready to make your new site available on the internet you need to publish it. You can preview your site before you publish it, which will give you an idea of exactly how your site will appear when published.
Previewing your site
To preview your site, simply press the Preview Site icon at the foot of the page when editing your website.
Your site will appear in another window exactly as it will appear when published. However, no-one else will have access to the site until it’s published.
Publishing the site
When you are ready to publish your new site, or changes to your existing site, simply click Publish to Web at the bottom of the page when editing your site.
The site may take several minutes to publish.
Working with multiple sites
With SiteBuilder you can publish multiple sites to subfolders on your domain name. This allows you to create micro-sites with different appearances, navigation, and content.
Creating a new site
Step 1
Click on All My Sites at the foot of the page to see a list of your existing sites.Step 2
Select a new site template from the Create a new site drop down list and click Go.Step 3
The options that follow will depend on the template you selected. You will be asked toenter information specific to your new website, such as your company name and address.
Publishing another site
The first site you publish in SiteBuilder will publish to your domain name. Any subsequent sites that are published will be located in subfolders which you can specify.
Step 1
Click on Publish to Web to publish your site.Step 2
Enter a name for your site into the URL text field and click Publish now! Thesubfolder is part of the web address people will type to visit your site.
For example, if you enter “subfolder” in the text field, people would visit your site at
http://www.yourdomain.com/subfolder.
Note: The subfolder should contain only letters and numbers. Make sure there are no spaces or special characters.
Your website may take several minutes to publish.
Promoting your site
If you want to get the maximum possible potential from your website a little time and planning can really help you build your online presence and develop your brand.
One of the greatest challenges you will face with your new website is trying to encourage your customers to visit you. Unfortunately there is no guaranteed method for making your website popular, but there are a number of techniques you can use to improve your search engine rankings.
Choose your keywords carefully
You can specify your own keywords on each page, which search engines will use to index your site.
Choosing keywords for your site always appears easier than it actually is. The first thing to consider is what search terms people may use to search for your site. It is always best to ask a few friends what keywords they may use as quite often you will find them different than the keywords you were expecting. The other thing to take into consideration is competition from other websites. Some keywords are hotly contested by many of the largest companies in the world.
If you ran a second hand book store in Edinburgh for example, initially you may want to concentrate on the keyword “books”. However you will also be in competition with books.google.com, barnesandnoble.com, nytimes.com, abebooks.com and amazon.com. While you are technically on a level playing field with these big companies, they can afford to hire teams of dedicated specialists working on keeping their rankings as high as possible. If you want to spend some time running your business then it may be better to concentrate on other areas.
“Books” is a very generic term encompassing a number of products that you may not supply anyway, so by specializing with your keywords you will be able to compete in a less heavily contested market for services that more match your services. The keyword phrase “rare books” or “classic books” will be easier to work with when trying to achieve high rankings in these slightly more specialized searches.
Choosing your keywords is always a balance between having keywords that customers use, and keywords that you can compete with in the market. If we take the previous example for instance, we may have considered “precious books” as a good keyword. This would be very easy to attain high search engine ranking for, but what’s the point in having a high ranking for “precious books” if no-one will use these keywords to make a search?
To find out how to add your keywords, see the chapter Adding keyword and
description MetaTags on page 32.
Add a Site Map
A site map is simply a page with links to all other pages on your site. Adding a site map to your site not only helps your customers find their way around, but it also helps
search engines index and rank your pages. A search engine robot will examine your site, look for the site map, and will follow any links it finds. It will mark links directly on your website with high importance, encouraging the search engine to index your entire site, and therefore potentially improving your search position.
You can add a Site Map to any page through SiteBuilder’s Site Add-Ons. See the chapter Site Add-ons on page 18.
Promote your site
SiteBuilder includes a handy feature to help you let your customers know about your newly published site.
Step 1
From the All my sites page (if you are not on this page click the All my sites icon atthe foot of the page) click Announce your site.
Step 2
Choose the site you want to promote. You will only be able to select your site if it isalready published.
Step 3
Enter the email addresses of the people you would like to notify of your new site,separated by a comma.
Enter your name and email address, and the message you would like to send to your customers.
Step 4
Click Send to send the mail.Troubleshooting
This chapter contains some troubleshooting advice if you encounter problems whilst using SiteBuilder.
Text is not displaying properly
Pre-formatted text copied from MS Word (or other word processor application) and pasted into SiteBuilder is sometimes incorrectly formatted on your SiteBuilder web pages.
While it is often useful to paste pre-formatted text into your SiteBuilder web page, this sometimes causes problems.
SiteBuilder is designed to accept pre-formatted text, including tables, from applications like MS Word. Pre-formatted text pasted from these applications contains "hidden" XML and HTML references (tags). Problems are caused by malformed code in the text that is pasted.
that is malformed. The malformed code causes errors in the SiteBuilder application, resulting in the incorrect formatting.
Where your pre-formatted copy causes problems, the safer option is to remove the formatting and paste the plain text into SiteBuilder. Any copy which could contain malformed code, should be treated in the following manner.
First paste the text into an ASCII text editor, like notepad. Save as a text only file and close the file.
Re-open the file, copy the text (which you should now see without any formatting) and paste it into your SiteBuilder web page.
Images take a long time to load
While SiteBuilder is able to display your images at different sizes, it is not able to resize the image file itself. If images are taking a long time to load on your pages, you should check the size of the image files themselves.
It is good practice to ensure your images are optimised for the internet before you upload them to your SiteBuilder gallery. To do this you will need some image editing software such as PhotoShop or PaintShop Pro. Here are some tips to help you optimise your images for your site.
Resize the images to the exact size you want them to appear on the page, rather than uploading the image and selecting the size through SiteBuilder.
Save the file using the best format for the picture type. The main file formats used on the web are GIF and JPEG, which use different compression methods. Typically JPEG images are best for photographs, whilst GIF images are best for drawn imagery, diagrams, and icons.
If your image editing software supports it, try to optimise your images for the web. You can usually reduce the quality of the images slightly in order to also reduce the file size.
Quick tip: If you don’t have any image editing software already, there are
plenty of free products available. Just perform a web search for “image editing software”.
SiteBuilder uses a picture gallery to arrange and organise the pictures on your website. There are two likely reasons for images that do not display properly: the filenames contain invalid characters, or the gallery needs to be reset.
The filename may contain invalid characters
Make sure that the filename of any images contains only numbers and letters. Spaces, full stops, and special characters (such as !ӣ$%^&*) are likely to cause problems to your site both within SiteBuilder and when published to a web server.
The gallery may need to be reset
Step 1
Log into SiteBuilder. If you are already logged in click All My Sites at the foot of thepage.
Step 2
Click the link marked Pictures not displaying properly? Click here for help in theHelp & Tips box.
Step 3
Click OK to reset your picture gallery, then Finish to close the tool, a dialogue boxmay appear, asking if you want to close the window, press Yes.
Step 4
Click on your site in the list, and then click on the Publish to Web button at thebottom of the page to re-publish your site.
This may take several minutes to complete.
SiteBuilder gives a “Java.lang.NullPointerException” error
when using a web form
SiteBuilder allows you to create custom forms on your website that allow people to submit information to you. However, you may receive the following error when submitting the form on your website:
This problem is often caused by invalid characters within the form. The names of the form items built with SiteBuilder cannot use the following characters:
Non-alphanumeric characters (e.g. £, %, &)
Spaces
New lines
If you are receiving a Java.lang.NullPointerException error, you should log into SiteBuilder and check for any invalid characters. When you have removed the invalid characters republish your site and try using the form again.