Winterm
™3000 Series Windows
®-based Terminal
Winterm 3000 Series
Windows
®
-based Terminal Users
Guide
883630-01 Rev. A February 2000
iii
Copyright Notice
© 2000 Wyse Technology Inc. All rights reserved.
This manual and the software and firmware described in it are copyrighted. You may not reproduce, transmit, transcribe, store in a retrieval system, or translate into any language or computer language, in any form or by any means, electronic, mechanical, magnetic, optical, chemical, manual or otherwise, any part of this publication without express written permission.
Trademarks
WYSE is a registered trademark and Winterm is a trademark of Wyse Technology Inc.
ICA 3 is a registered trademark and MetaFrame is a trademark of Citrix Systems Inc.
Microsoft and Windows are registered trademarks of Microsoft Corporation. All other products are trademarks and/or registered trademarks of their respective companies.
The Energy Star emblem does not represent endorsement of any product or service.
Specifications subject to change without notice.
Restricted Rights Legend
Use, duplication, or disclosure by the Government is subject to restrictions as set forth in subparagraph (c)(1)(ii) of the Rights in Technical Data and Computer Software clause at 252.227-7013.
Patents
Ordering Information
For availability, pricing, and ordering information in the United States and Canada, call 1-800-GET-WYSE (1-800-438-9973). In all other countries, contact your sales representative.
Wyse Technology Inc. 3471 North First Street
v
EULA for Microsoft® Windows® CE Operating System for
Windows-based Terminal Devices
IMPORTANT—READ CAREFULLY
This End User License Agreement (EULA) is a legal agreement between you (either an individual or a single entity) and the manufacturer
(MANUFACTURER) of the special purpose computing device (SYSTEM) you acquired which includes certain Microsoft software product(s) installed on the SYSTEM and/or included in the SYSTEM package (SOFTWARE). The SOFTWARE includes computer software, the associated media, any printed materials, and any online or electronic documentation. By installing, copying or otherwise using the SOFTWARE, you agree to be bound by the terms of this EULA. If you do not agree to the terms of this EULA, MANUFACTURER and Microsoft Licensing, Inc. (MS) are unwilling to license the SOFTWARE to you. In such event, you may not use or copy the SOFTWARE, and you should promptly contact MANUFACTURER for instructions on return of the unused product(s) for a refund.
Software License
The SOFTWARE is protected by copyright laws and international copyright treaties, as well as other intellectual property laws and treaties. The SOFTWARE is licensed, not sold.
1. Grant of License
SOFTWARE includes software already installed on the SYSTEM (SYSTEM SOFTWARE) and, if included in the SYSTEM package, software contained on the CD-ROM disk and/or floppy disk(s) labeled “Desktop Software for Microsoft Windows CE” (DESKTOP SOFTWARE). This EULA grants you the following rights to the SOFTWARE:
• SYSTEM SOFTWARE
You may use the SYSTEM SOFTWARE only as installed in the SYSTEM. • DESKTOP SOFTWARE
• Use of Windows CE Operating System for Windows-based Terminal Devices with Microsoft Windows NT Server, Terminal Server Edition If the SOFTWARE is Windows CE operating system for Windows-based Terminal devices, the following special provisions apply. In order to use the SYSTEM in connection with Windows NT Server, Terminal Server Edition, you must possess (1) a Client Access License for Windows NT Server, Terminal Server Edition and (2) an end user license for Windows NT Workstation or an end user license agreement for Windows NT Workstation for Windows-based Terminal Devices (please refer to the end user license agreement for Windows NT Server, Terminal Server Edition for additional information).
MANUFACTURER may have included a Certificate of Authenticity for Windows NT Workstation for Windows-based Terminal Devices with the SYSTEM. In that case, this EULA constitutes an end user license for the version of Windows NT Workstation for Windows-based Terminal Devices indicated on such Certificate of Authenticity.
• Back-up Copy
If MANUFACTURER has not included a back-up copy of the SYSTEM SOFTWARE with the SYSTEM, you may make a single back-up copy of the SYSTEM SOFTWARE. You may use the back-up copy solely for archival purposes.
2. Description of Other Rights and Limitations • Speech/Handwriting Recognition
If the SYSTEM SOFTWARE includes speech and/or handwriting recognition component(s), you should understand that speech and handwriting recognition are inherently statistical processes; that recognition errors are inherent in the processes; that it is your responsibility to provide for handling such errors and to monitor the recognition processes and correct any errors. Neither
MANUFACTURER nor its suppliers shall be liable for any damages arising out of errors in the speech and handwriting recognition processes.
• Limitations on Reverse Engineering, Decompilation and Disassembly You may not reverse engineer, decompile, or disassemble the SYSTEM SOFTWARE, except and only to the extent that such activity is expressly permitted by applicable law notwithstanding this limitation.
• Single SYSTEM
vii
• Single EULA
The package for the SYSTEM SOFTWARE may contain multiple versions of this EULA, such as multiple translations and/or multiple media versions (e.g., in the user documentation and in the software). Even if you receive multiple versions of the EULA, you are licensed to use only one (1) copy of the SYSTEM SOFTWARE.
• Rental
You may not rent or lease the SOFTWARE. • Software Transfer
You may permanently transfer all of your rights under this EULA only as part of a sale or transfer of the SYSTEM, provided you retain no copies, you transfer all of the SOFTWARE (including all component parts, the media, any upgrades or backup copies, this EULA and, if applicable, the Certificate(s) of Authenticity), and the recipient agrees to the terms of this EULA. If the SOFTWARE is an upgrade, any transfer must include all prior versions of the SOFTWARE. • Termination
Without prejudice to any other rights, MANUFACTURER or MS may terminate this EULA if you fail to comply with the terms and conditions of this EULA. In such event, you must destroy all copies of the SOFTWARE and all of its component parts.
3. Upgrades
If the SYSTEM SOFTWARE and this EULA are provided separate from the SYSTEM by MANUFACTURER and the SYSTEM SOFTWARE is on a ROM chip, CD ROM disk(s) or floppy disk(s), and labeled “For ROM Upgrade Purposes Only” (“ROM Upgrade”), you may install one copy of the ROM Upgrade onto the
SYSTEM as a replacement copy for the SYSTEM SOFTWARE originally installed on the SYSTEM and use it in accordance with Section 1 of this EULA.
4. Copyright
All title and copyrights in and to the SOFTWARE (including but not limited to any images, photographs, animations, video, audio, music, text and “applets,”
incorporated into the SOFTWARE), the accompanying printed materials, and any copies of the SOFTWARE, are owned by MS or its suppliers (including Microsoft Corporation). You may not copy the printed materials accompanying the
5. Product Support
Product support for the SOFTWARE is not provided by MS, its parent corporation, Microsoft Corporation, or their affiliates or subsidiaries. For product support, please refer to MANUFACTURER’s support number provided in the documentation for the SYSTEM. Should you have any questions concerning this EULA, or if you desire to contact MANUFACTURER for any other reason, please refer to the address provided in the documentation for the SYSTEM.
6. Export Restrictions
You agree that you will not export or re-export the SOFTWARE to any country, person, or entity subject to U.S. export restrictions. You specifically agree not to export or re-export the SOFTWARE: (i) to any country to which the U.S. has embargoed or restricted the export of goods or services, which as of March 1998 include, but are not necessarily limited to Cuba, Iran, Iraq, Libya, North Korea, Sudan and Syria, or to any national of any such country, wherever located, who intends to transmit or transport the products back to such country; (ii) to any person or entity who you know or have reason to know will utilize the SOFTWARE or portion thereof in the design, development or production of nuclear, chemical or biological weapons; or (iii) to any person or entity who has been prohibited from participating in U.S. export transactions by any federal agency of the U.S. government.
If the SOFTWARE is labeled “North America Only Version” above, on the Product Identification Card, or on the SOFTWARE packaging or other written materials, then the following applies: The SOFTWARE is intended for distribution only in the United States, its territories and possessions (including Puerto Rico, Guam, and U.S. Virgin Islands) and Canada. Export of the SOFTWARE from the United States is regulated under “EI controls” of the Export Administration Regulations (EAR, 15 CFR 730-744) of the U.S. Commerce Department, Bureau of Export Administration (BXA). A license is required to export the SOFTWARE outside the United States or Canada. You agree that you will not directly or indirectly, export or re-export the SOFTWARE (or portions thereof) to any country, other than Canada, or to any person or entity subject to U.S. export restrictions without first obtaining a
Commerce Department export license. You warrant and represent that neither the BXA nor any other U.S. federal agency has suspended, revoked or denied your export privileges.
7. Note on Java Support
The SYSTEM SOFTWARE may contain support for programs written in Java. Java technology is not fault tolerant and is not designed, manufactured, or intended for use or resale as on-line control equipment in hazardous environments requiring fail-safe performance, such as in the operation of nuclear facilities, aircraft navigation or communication systems, air traffic control, direct life support
ix
8. Limited Warranty • Limited Warranty
MANUFACTURER warrants that the SOFTWARE will perform substantially in accordance with the accompanying written materials for a period of ninety (90) days from the date of receipt. Any implied warranties on the SOFTWARE are limited to ninety (90) days. Some states/jurisdictions do not allow limitations on duration of an implied warranty, so the above limitation may not apply to you. • Customer Remedies
MANUFACTURER’S and its suppliers’ entire liability and your exclusive remedy shall be, at MANUFACTURER’S option, either (a) return of the price paid, or (b) repair or replacement of the SOFTWARE that does not meet the above Limited Warranty and which is returned to MANUFACTURER with a copy of your receipt. This Limited Warranty is void if failure of the SOFTWARE has resulted from accident, abuse, or misapplication. Any replacement SOFTWARE will be warranted for the remainder of the original warranty period or thirty (30) days, whichever is longer.
• No Other Warranties
EXCEPT AS EXPRESSLY PROVIDED IN THE LIMITED WARRANTY
SECTION ABOVE, THE SOFTWARE IS PROVIDED TO THE END USER “AS IS” WITHOUT WARRANTY OF ANY KIND, EITHER EXPRESSED OR IMPLIED, INCLUDING, BUT NOT LIMITED TO, WARRANTIES OF NON- INFRINGEMENT, MERCHANTABILITY, AND/OR FITNESS FOR A PARTICULAR PURPOSE. THE ENTIRE RISK OF THE QUALITY AND PERFORMANCE OF THE SOFTWARE IS WITH YOU.
• No Liability for Consequential Damages
MANUFACTURER OR MANUFACTURER’S SUPPLIERS, INCLUDING MS AND ITS SUPPLIERS, SHALL NOT BE HELD TO ANY LIABILITY FOR ANY DAMAGES SUFFERED OR INCURRED BY THE END USER (INCLUDING, BUT NOT LIMITED TO, GENERAL, SPECIAL, CONSEQUENTIAL OR INCIDENTAL DAMAGES INCLUDING DAMAGES FOR LOSS OF BUSINESS PROFITS, BUSINESS INTERRUPTION, LOSS OF BUSINESS
INFORMATION AND THE LIKE), ARISING FROM OR IN CONNECTION WITH THE DELIVERY, USE OR PERFORMANCE OF THE SOFTWARE.
If you acquired this EULA in the United States, this EULA is governed by the laws of the State of Washington.
If this EULA was acquired outside the United States, then local law may apply. Should you have any questions concerning this EULA, please contact the MANUFACTURER of your SYSTEM.
U.S. GOVERNMENT RESTRICTED RIGHTS
xi
FCC Statement
This equipment has been tested and found to comply with the limits for either Class A or Class B digital devices (refer to “Terminal Requirements Compliance”), digital devices, pursuant to Part 15 of the FCC Rules. These limits are designed to provide reasonable protection against harmful interference in a residential installation. This equipment generates, uses, and can radiate radio frequency energy and, if not installed and used in accordance with the instructions, may cause harmful interference to radio communications. However, there is no guarantee that interference will not occur in a particular installation. If this equipment does cause harmful interference to radio or television reception, which can be determined by turning the equipment off and on, the user is encouraged to try to correct the interference by one or more of the following measures:
• Reorient or relocate the receiving antenna.
• Increase the separation between the equipment and the receiver.
• Connect the equipment in to an outlet on a circuit different from that to which the receiver is connected.
• Consult the dealer or an experienced radio/TV technician for help.
Caution
Changes or modifications not covered in this manual must be approved in writing by the manufacturer’s Regulatory Engineering department. Changes or modifications made without written approval may void the user’s authority to operate the equipment.
Terminal Requirements Compliance
Models 3200LE, 3320SE, 3350SE, 3360SE, and 3720SE terminals meet Class B requirements.
Canadian DOC Notices
Refer to the previous section, “Terminal Requirements Compliance,” to find out what model terminal each of the statements below refers to.
Class A
This digital apparatus does not exceed the Class A limits for radio noise emissions from digital apparatus set out in the Radio Interference Regulations of the
Le présent appareil numérique n’émet pas de bruits radioélectriques dépassant les limites applicables aux appareils numériques de la classe A prescrites dans le Réglement sur le brouillage radioélectrique édicté par le Ministère des
Communications du Canada.
Class B
This digital apparatus does not exceed the Class B limits for radio noise emissions from digital apparatus set out in the Radio Interference Regulations of the
Canadian Department of Communications.
Le présent appareil numérique n’émet pas de bruits radioélectriques dépassant les limites applicables aux appareils numériques de la classe B prescrites dans le Réglement sur le brouillage radioélectrique édicté par le Ministère des
Communications du Canada.
IEC/EN Notice
This product conforms to the requirements of IEC950 and EN60950.
This product conforms to requirements of EN55022 for Class A equipment or EN55022 for Class B equipment (refer to “Terminal Requirements Compliance”).
Cable Notice
xiii
Control No. 075B
License Agreement
YOU SHOULD CAREFULLY READ THE FOLLOWING TERMS AND
CONDITIONS BEFORE USING THIS SOFTWARE (TOGETHER WITH ANY SUPPLIED DOCUMENTATION, HEREAFTER "SOFTWARE"), WHICH IS OWNED BY WYSE TECHNOLOGY INC.OR ITS LICENSORS. USING THIS SOFTWARE INDICATES YOUR ACCEPTANCE OF THE FOLLOWING TERMS AND
CONDITIONS. WYSE LICENSORS ARE INTENDED THIRD PARTY BENEFICIARIES UNDER THIS AGREEMENT.
Grant
You may use the Software in or in conjunction with Your Wyse manufactured hardware (Terminal). You have the right to use this Software by loading it onto a computer containing the capability of transferring the Software (in whole or in part) to the Wyse manufactured hardware. You may use the Software in this fashion as many times as necessary, so long as such use is always in conjunction with the Wyse Terminal . You may transfer ownership of the Terminal and equipment, including the right to use the Software to another party so long as that party agrees to accept these terms and conditions.
YOU MAY NOT USE, COPY, MODIFY, TRANSLATE OR TRANSFER THE SOFTWARE, OR MODIFICATION THEREOF, IN WHOLE OR IN PART, EXCEPT AS EXPRESSLY PROVIDED FOR IN THIS LICENSE. YOU MAY NOT
DECOMPILE, REVERSE ENGINEER OR OTHERWISE DECODE OR ALTER THE SOFTWARE.
Disclaimer of Warranty
This Software is provided, "AS IS", and is delivered with no warranties, either express or implied.
SOME STATES DO NOT ALLOW LIMITATIONS ON HOW LONG AN IMPLIED WARRANTY LASTS SO THE ABOVE LIMITATION MAY NOT APPLY TO YOU. THIS WARRANTY GIVES YOU SPECIFIC LEGAL RIGHTS. YOU MAY ALSO HAVE OTHER RIGHTS WHICH VARY FROM STATE TO STATE.
Limit of Liability
UNDER NO CIRCUMSTANCES SHALL WYSE BE LIABLE FOR LOSS OF DATA, COST OF COVER, OR ANY INCIDENTAL OR CONSEQUENTIAL DAMAGES, HOWEVER CAUSED AND ON ANY THEORY OF LIABILITY. THESE
LIMITATIONS SHALL APPLY EVEN IF WYSE OR ITS RESELLER HAS BEEN ADVISED OF THE POSSIBILITY OF SUCH DAMAGES, AND
NOTWITHSTANDING ANY FAILURE OF ESSENTIAL PURPOSE OF ANY LIMITED REMEDY PROVIDED HEREIN.
YOU AGREE THAT THESE ARE THE ONLY APPLICABLE TERMS OF AGREEMENT BETWEEN US COVERING SOFTWARE AND THAT THEY SUPERSEDE ANY OTHER COMMUNICATIONS (ORAL OR WRITTEN) BETWEEN US RELATING TO THE SOFTWARE.
Export Restrictions
You agree You will not export or transmit the Software to any country to which export is restricted by applicable US law or regulation without the written approval of the appropriate US Government organization.
U.S. Government Restricted Rights
The Software is provided with RESTRICTED RIGHTS. Use, duplication or
Contents
About the User’s Guide
Guide Overview xvii Guide Conventions xviii
Text Format xviii
User Interface Menu Control xix
1
Introducing the 3000 Series Windows-based Terminals
Models Summary 1 3200LE Terminal 2 3320SE Terminal 3 3350SE Terminal 4 3360SE Terminal 5 3720SE Terminal 6
3000 Series WBT Terminal Features 7
2
General Terminal Information
Version and Copyright Information 10 Network Information 11
3
Display Configuration
Display Screen Resolution 14 Energy Savers 16
4
Keyboard and Mouse Configuration
5
Managing Connections
Configuring a Connection 22 Making a Connection 22 Ending a Connection 23 Shutting Down the Terminal 23
6
Multiple Sessions
Setting Up Multiple Sessions 25 Managing Multiple Sessions 25 Manipulating Multiple Sessions 26
7
Getting Help
Troubleshooting Your Terminal 27
List of Figures
1-1 3200LE Terminal 2 1-2 3320SE Terminal 3 1-3 3350SE Terminal 4 1-4 3360SE Terminal 5 1-5 3720SE Terminal 6
2-1 General Properties Sheet 10 2-2 SysInfo Properties Sheet 11 3-1 Display Properties Sheet 13 4-1 Input Properties Sheet 17
5-1 Winterm Connection Manager 21 5-2 Shutdown Window Dialog Box 23
List of Tables
1 Text Format xviii
2 User Interface Menu Control xix 1-1 Terminal Features 7
3-1 Display Screen Resolution 14 3-2 Energy Savers 16
4-1 Keyboard 18 4-2 Mouse 20
5-1 Connections Properties Sheet 22 5-2 Shutdown Window Dialog Box 24 7-1 Troubleshooting a Terminal 27
About the Users Guide
The Winterm 3000 Series Windows-based Terminal Users Guide contains the information you will need to use and troubleshoot a WBT (Windows-based Terminal). This guide is written for users and covers the Models 3200LE, 3320SE, 3350SE, 3360SE, and 3720SE terminals.
Guide Overview
The users guide consists of the following chapters: • Introducing the 3000 Series Windows-based Terminals • General Terminal Information
• Display Configuration
• Keyboard and Mouse Configuration • Managing Connections
• Multiple Sessions • Getting Help
This guide contains information about: • WBT features and management • The user interface
• Getting help
Note
Guide Conventions
Text Format
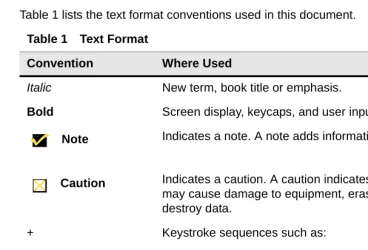
Table 1 lists the text format conventions used in this document. Table 1 Text Format
Convention Where Used
Italic New term, book title or emphasis. Bold Screen display, keycaps, and user input.
Note Indicates a note. A note adds information.
Caution Indicates a caution. A caution indicates actions that may cause damage to equipment, erase files, or destroy data.
+ Keystroke sequences such as:
Ctrl+Alt+Del
| Instructions about invoking a menu such as:
xix
User Interface Menu Control
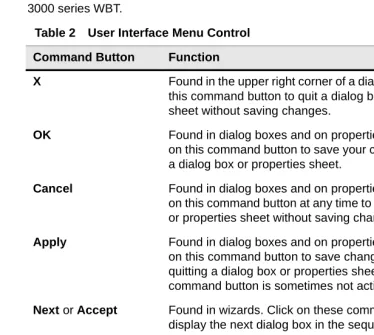
Table 2 describes the command buttons used for user interface menu control on a 3000 series WBT.
Table 2 User Interface Menu Control
Command Button Function
X Found in the upper right corner of a dialog box. Click on this command button to quit a dialog box or properties sheet without saving changes.
OK Found in dialog boxes and on properties sheets. Click on this command button to save your changes and quit a dialog box or properties sheet.
Cancel Found in dialog boxes and on properties sheets. Click on this command button at any time to quit a dialog box or properties sheet without saving changes.
Apply Found in dialog boxes and on properties sheets. Click on this command button to save changes without quitting a dialog box or properties sheet. This command button is sometimes not activated.
Next or Accept Found in wizards. Click on these command buttons to display the next dialog box in the sequence.
Back Found in wizards. Click on this command button to return to the previous dialog box.
1
Introducing the 3000 Series
Windows-based Terminals
Winterm 3000 series WBTs (Windows-based Terminals) are terminals that display windows rather than the classic text-based display. They are designed to connect to Windows 2000 servers via RDP (Remote Desktop Protocol), to Windows NT servers via ICA (Independent Computing Architecture), or to legacy servers using various terminal emulations such as TN3270 or TN5250.
RDP is the Windows CE-based presentation service protocol for connecting to Windows terminal servers. ICA is the presentation service protocol for Windows NT servers. Both allow an application’s user interface to execute on a Windows-based terminal while the application’s logic executes on the server.
Models Summary
There are five models of Winterm 3000 series terminals:
• Modular type, Models 3200LE, 3320SE, 3350SE, and 3360SE • Integrated-CRT type, Model 3720SE
Note
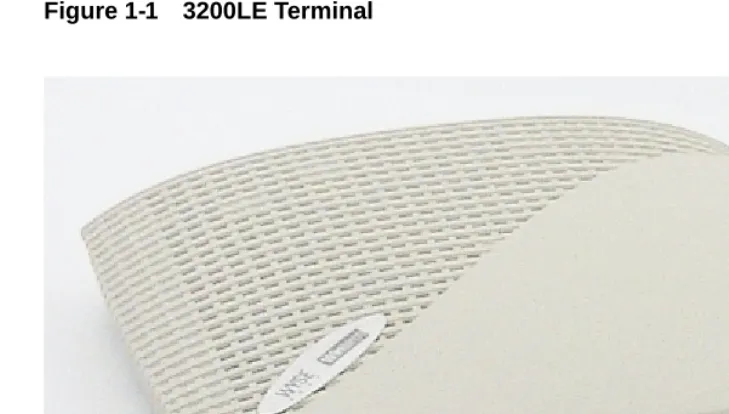
3200LE Terminal
The Model 3200LE terminal is the entry-level modular-type 3000 Series terminal. The connections for peripherals such as the monitor, keyboard, and mouse are on the back of the terminal. The following figure shows a Model 3200LE modular terminal.
Figure 1-1 3200LE Terminal
The following items are provided with Model 3200LE terminals: • Power supply
• Power cord
• Keyboard (with domestic versions only) • Mouse
Introducing the 3000 Series Windows-based Terminals
3
3320SE Terminal
The Model 3320SE terminal is a standard modular-type 3000 series terminal. The connections for peripherals such as the monitor, keyboard, and mouse are on the back of the terminal. The following figure shows a standard modular terminal.
Figure 1-2 3320SE Terminal
The following items are provided with Model 3320SE terminals: • Power supply and power cord
• Desktop mounting stand • Cable shroud and cable clip
• Keyboard (with domestic versions only) and mouse • Installation and user information
Note
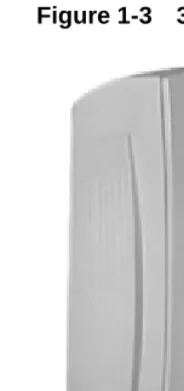
3350SE Terminal
The Model 3350SE terminal is a standard modular-type 3000 series terminal. The connections for peripherals such as the monitor, keyboard, and mouse are on the back of the terminal. The following figure shows a Model 3350SE terminal.
Figure 1-3 3350SE Terminal
The following items are provided with Model 3350SE terminals: • Power supply and power cord
• Cable shroud and cable clip
• Keyboard (with domestic versions only) and mouse • Installation and user information
Note
Introducing the 3000 Series Windows-based Terminals
5
3360SE Terminal
The Model 3360SE terminal is a standard modular-type 3000 Series terminal. The connections for peripherals such as the monitor, keyboard, and mouse are on the back of the terminal. The following figure shows a Model 3360SE modular terminal.
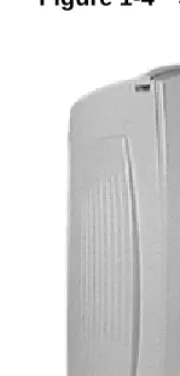
Figure 1-4 3360SE Terminal
The following items are provided with Model 3360SE terminals: • Power supply and power cord
• Desktop mounting stand • Cable shroud and cable clip
• Keyboard (with domestic versions only) and mouse • Installation and user information
Note
3720SE Terminal
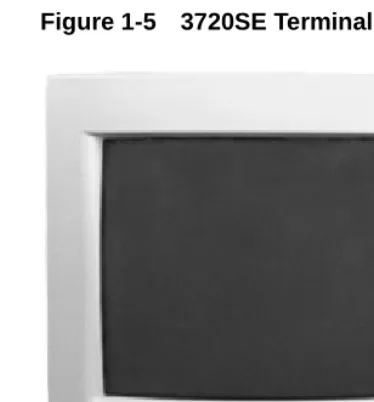
Model 3720SE, the terminal described below, is the standard Integrated-CRT 3000 series terminal. The connections for peripherals such as keyboard and mouse are on the back of the terminal. The following figure shows an integrated-CRT terminal.
Figure 1-5 3720SE Terminal
The following items are provided with Model 3720SE terminals: • Power cord
Introducing the 3000 Series Windows-based Terminals
7
3000 Series WBT Terminal Features
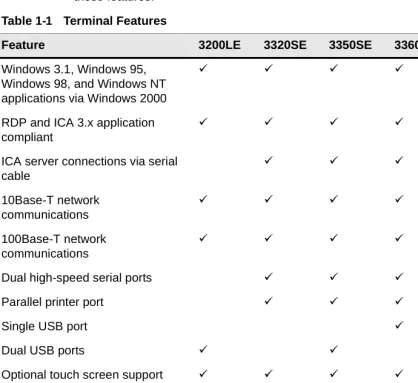
Each model WBT comes with its own set of features. The following table outlines these features.
Table 1-1 Terminal Features
Feature 3200LE 3320SE 3350SE 3360SE 3720SE
Windows 3.1, Windows 95, Windows 98, and Windows NT applications via Windows 2000
á á á á á
RDP and ICA 3.x application compliant
á á á á á
ICA server connections via serial cable á á á á 10Base-T network communications á á á á á 100Base-T network communications á á á á á
Dual high-speed serial ports á á á á
Parallel printer port á á á á
Single USB port á
Dual USB ports á á
Optional touch screen support á á á á
Support for monochrome or color monitor
á á á á
Desktop (standard) or
wall-mounted (optional) housing
á á á á
2
General Terminal Information
When you turn on your WBT the Winterm Connection Manager displays. From the connection manager you can access general terminal information. Press F2 on your keyboard. The Terminal Properties dialog box displays. In this dialog box there are two of nine properties sheets that provide general information about your WBT. They are the General properties sheet and the SysInfo properties sheet. The following sections discuss these properties sheets.
Note
If you turn on your WBT and the Setup Wizard displays, contact your system administrator. If you are a system administrator, see the administrators guide.
Note
See “Managing Conections” in this guide for more information about the Winterm Connection Manager.
Note
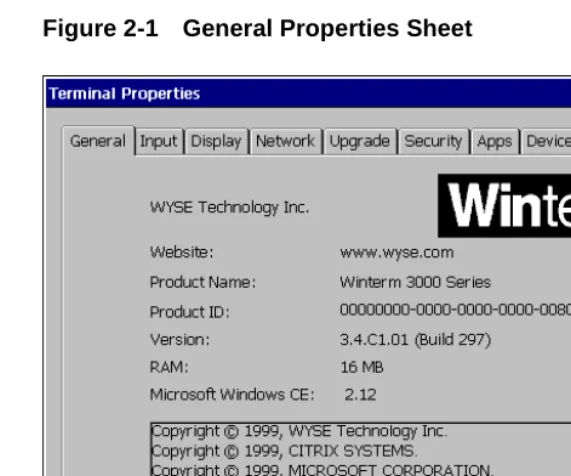
Version and Copyright Information
The General properties sheet includes information about the current software on your terminal and copyright statements. See Figure 2-1. The General properties sheet is the default for the dialog box.
Figure 2-1 General Properties Sheet
Read the information on this sheet. Click on OK to return to the Winterm Connection Manager. By default Cancel and Apply are deactivated.
Note
The amount of available RAM shown on this properties sheet depends on the model of terminal in use.
Caution
General Terminal Information
11
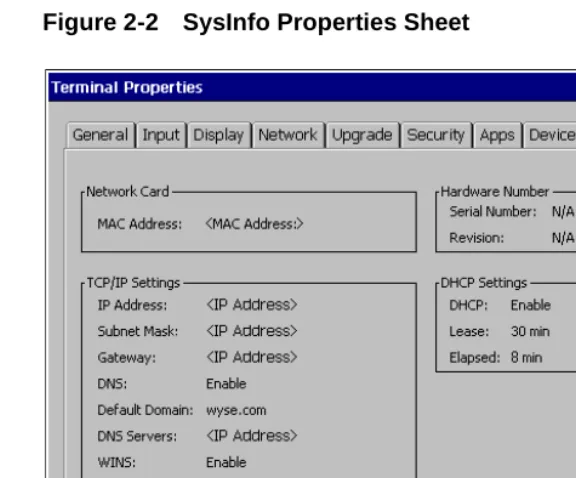
Network Information
The SysInfo properties sheet contains network information. See Figure 2-2.
Figure 2-2 SysInfo Properties Sheet
3
Display Configuration
From the Winterm Connection Manager you can configure your terminal’s display. Press F2 on your keyboard. The Terminal Properties dialog box displays. In this dialog box is a properties sheet you can use for adjusting your display. It is the Display properties sheet. With it you can configure display screen resolution and turn on the energy savers functions. Figure 3-1 shows this properties sheet.
To invoke this properties sheet click on the Display tab in the Terminal Properties dialog box.
Display Screen Resolution
This section discusses display screen resolution referring to Figure 3-1 and using Table 3-1.
Table 3-1 Display Screen Resolution
Display Properties Sheet
Area Called... To Use...
Desktop Area and Refresh Frequency
The scrolling list box displays the current terminal display screen resolution. Scroll and click on a selection to change the
resolution. The default is 640 x 480 @ 60 Hz. Test
Click on this command button to test the setting selected in the above scrolling list box. The following dialog box displays:
Display Configuration
15
To finish, click on Apply then Close or OK. The following dialog box displays:
You can also click on Cancel to cancel any changes and return to the Winterm Connection Manager.
After five seconds the following dialog box displays:
Follow the instructions in the dialog box. If you click on Yes, you will return to the Display properties sheet.
If you click on No, the following dialog box will display:
Follow the instructions in the dialog box. Table 3-1 Display Screen Resolution
Display Properties Sheet
Energy Savers
This section discusses energy saving features, referring to Figure 3-1 and using Table 3-2.
To finish, click on Apply then Close, or OK. The following dialog box displays:
You can also click on Cancel to cancel any changes and return to the Winterm Connection Manager.
Table 3-2 Energy Savers
Display Properties Sheet Area
Called... To Use...
Enable Energy Savers Click on this check box to activate the energy saver functions. When you check this box, all three functions in the group box are activated:
Screen Saver
Click on this radio button to enable the screen saver. By default this function is not activated.
Turn Off Monitor
Click on this radio button to use this function as an energy saver. The function works by shutting off the terminal’s display rather than displaying a screen saver. By default this function is not activated. When Enable Energy Savers is activated, this function is enabled.
Wait
4
Keyboard and Mouse
Configuration
From the Winterm Connection Manager you can configure your terminal’s keyboard and mouse. Press F2 on your keyboard. The Terminal Properties dialog box displays. In this dialog box is a properties sheet you can use for setting up your keyboard and mouse. It is the Input properties sheet. Figure 4-1 shows this properties sheet.
To invoke this properties sheet click on the Input tab.
Keyboard
This section discusses configuring your keyboard, referring to Figure 4-1 and using Table 4-1.
Table 4-1 Keyboard
Input Properties Sheet
Area Called... To Use...
Keyboard Use this group box to configure your keyboard: Locale
Use this scroll list to select a language for the keyboard: • Belgian Dutch
• Belgian French • Brazilian (ABNT) • Canadian Eng (Multi) • Canadian FR (Multi) • Canadian French • Danish
• Dutch • English (UK) • English (US) • Finnish • French • German
• Italian • Italian (142) • Japanese • Latin American • Norwegian • Portuguese • Spanish
• Spanish Variation • Swedish
• Swiss French • Swiss German • US International
Keyboard and Mouse Configuration
19
To finish, click on Apply then Close to apply the changes you made and return to the Winterm Connection Manager.
Note
An IEPC keyboard is required for any language other than English (US). The keyboard layouts are different for each of the languages listed above.
NumLock On Boot
Click on this check box to enable the Num Lock function on your keyboard. When checked, the keyboard will boot up with the Num Lock function enabled.
Character Repeat The group box used to set the keyboard character repeat parameters:
Repeat Delay
Use this slider control to adjust the repeat delay of keyboard characters. Repeat Delay determines how quickly the same character will appear on screen when typed more than once. Repeat Rate
Use this slider control to adjust the repeat rate of a keyboard character. Repeat Rate determines how quickly the same character will appear on screen when the associated key is held down.
Table 4-1 Keyboard, Continued
Input Properties Sheet
Mouse
This section discusses configuring your mouse referring to Figure 4-1 and using Table 4-2.
To finish, click on Apply then Close to apply the changes and return to the Winterm Connection Manager.
Table 4-2 Mouse
Input Properties Sheet Area
Called... To Use...
Mouse Use the following dialog box to configure mouse attributes. Properties...
Click on this command button to invoke the Mouse Properties dialog box. Use it to set your mouse properties.
Button Configuration Select from:
• Right-handed • Left-handed
to choose which button you will use on your mouse. The default is Right-handed.
Pointer Acceleration
Use this slider control to adjust the acceleration of the mouse.
Pointer Speed
5
Managing Connections
The Winterm Connection Manager is designed to help you manage your network connections. The manager consists of the Connections properties sheet and the Configure properties sheet. With it you can configure, make, and end connections, and gracefully shut down the terminal. Figure 5-1 shows the Winterm Connection Manager.
Figure 5-1 Winterm Connection Manager
Note
If you turn on your WBT and the Setup Wizard displays, contact your system administrator. If you are a system administrator, see the administrators guide.
Configuring a Connection
The functions of the Configure properties sheet are used to add, modify and delete connections. See your system administrator or the administrators guide for more information about configuring connections.
Making a Connection
The functions of the Connections properties sheet (see Figure 5-1) are used to: • Make terminal connections
• Display the status of a connection • End a connection
• Shut down the terminal gracefully
Note
The Connections properties sheet is the default sheet displayed by the Winterm Connection Manager.
Table 5-1 identifies and describes each of functions of the properties sheet. Table 5-1 Connections Properties Sheet
Function Description
Connection Name This application window lists the connections that you can use. Default RDP Connection and Default ICA Connection are the default connections for the window.
Note
See the administrators guide for information about creating connections.
Managing Connections
23
Ending a Connection
Click on the End command button to end the connection process. When you press the End button and the connection is active, the End Task dialog displays. The End command button is enabled when one or more sessions become active.
Shutting Down the Terminal
Use the Shutdown Window dialog box to log off, shut down, or shut down and restart the terminal. Figures 5-2 shows the Shutdown Window dialog box.
Figure 5-2 Shutdown Window Dialog Box
Status This list shows the status of the connection. If a connection is live, the status for that connection will be Active. If a connection is not live, the list will show a blank.
Connect Click on the Connect command button to make the highlighted connection. Click on a connection in the Connection Name list box to highlight it. You can also double-click on a selection to make a connection.
End See Ending a Connection.
Shutdown See Shutting Down the Terminal. Table 5-1 Connections Properties Sheet
Click on the Shutdown command button in the Winterm Connection Manager to invoke this dialog box. The following table describes the functions of this dialog box.
Table 5-2 Shutdown Window Dialog Box
Function Description
Logout Click on this radio button to invoke the Terminal Login dialog box. By default this command button is not activated. You must enable the terminal’s security function to activate this radio button.
Note
See the administrators guide or your system administrator for more information about logging out.
Shutdown the Terminal
Click on this radio button to shut down the terminal without restarting it. A dialog box displays after you initiate this action. It prompts you about whether you want to continue. By default this radio button is activated and enabled.
Shutdown and Restart
6
Multiple Sessions
Setting Up Multiple Sessions
To start multiple sessions:
1. Click on a connection in the Connection Name list in the Winterm Connection Manager to launch your first session. (See “Managing Connections” for more information about configuring connection parameters).
2. Press Ctrl+Alt+End while the connection is live to return to the Winterm Connection Manager.
3. Click on another connection in the Connection Name list to launch another session.
Managing Multiple Sessions
Your terminal is designed to handle up to 15 active sessions. The number of active sessions you can have with your terminal is dependent on the following factors: • Model number
• Amount of RAM
• The types of connections open • What type of account you have
Note
With RDP connections you can not run multiple sessions.
Manipulating Multiple Sessions
With a session or multiple sessions open, you can toggle between sessions. To toggle between sessions:
• Press Ctrl+Alt+↑ to proceed to the previous session. • Press Ctrl+Alt+↓ to proceed to the next session.
7
Getting Help
Getting Help provides solutions to problems that may occur while you are using your terminal.
Troubleshooting Your Terminal
Troubleshooting Your Terminal, Table 7-1, lists some common problems and the solutions to those problems.
Table 7-1 Troubleshooting a Terminal
Problem Solution
When you turn on the terminal nothing happens.
1. Ensure that the power cord is connected to the power connector on the terminal’s back panel.
2. Ensure that the power cord is plugged into an AC outlet that works.
When you turn on the terminal the screen remains blank and the power indicator light remains orange.
1. Turn the terminal off then on again.
2. Ensure that the power cord is connected to the power connector on the terminal’s back panel.
3. Ensure that the power cord is plugged into an AC outlet that works.
During power up the following message displays:
Keyboard testing failed
When you turn on the terminal, the Winterm Connection Manager or the WBT Setup Wizard appears, but the mouse does not function.
Ensure that the mouse cord is connected to the terminal’s back panel.
You are not able to make a network
connection using the Winterm Connection Manager.
1. Verify that the network cable is connected to the network connector properly.
2. Verify that the network cable is connected to a hub or other network outlet.
3. Check with your network system administrator to ensure that the DHCP server for your subnet is functioning properly.
While connected to a server the keyboard and the mouse freeze.
The connection to the server may be broken. 1. Turn the terminal off, then on again. 2. Make another connection.
If you can not make the connection again: 1. Verify that the network cable is connected
properly.
2. Check with your network system
administrator to ensure that you are using the correct network cable.
Table 7-1 Troubleshooting a Terminal, Continued
Getting Help
29
Note
If any other error messages are displayed, you have any other problems, or you cannot find a solution in this table, contact your network system administrator. You are not able to print using the parallel
port.
1. Make sure that the printer is plugged into the AC outlet and turned on.
2. Check the cable connection between the printer and the terminal.
3. Ensure that the printer is on line. 4. Ensure that the printer is properly
configured in the print manager. 5. Ensure that the printer has not been
paused.
You are not able to print using the serial port. 1. Make sure that the printer is plugged into the AC outlet and turned on.
2. Check the cable connection between the printer and the terminal.
3. Ensure that the printer is on line. 4. Ensure that the printer is properly
configured in the print manager. 5. Ensure that the printer has not been
paused. Table 7-1 Troubleshooting a Terminal, Continued
Index
31
Index
Numerics
100Base-T 7 10Base-T 7C
Control keysCtrl+Alt+Down Arrow 26 Ctrl+Alt+End 25
to
26 Ctrl+Alt+Up Arrow 26 F2 9,
13,
17D
Dialog boxes
Mouse Properties 20 Shutdown Window 23 Terminal Login 24
Terminal Properties 9
,
13,
17Winterm Connection Manager 9
,
13,
17 Display screen resolution 13E
Energy savers 13
Entry-level modular-type terminal 2
F
Functions
Character Repeat 19 Connect 23
Desktop Area and Refresh Frequency 14 Enable Energy Savers 16
End 23 Keyboard 18 Logoff 24 Repeat Delay 19 Repeat Rate 19
Reset the Terminal Factory Default Property Settings 10 Screen Saver 16
Shutdown and Restart 24 Shutdown the Terminal 24
Test 14
Turn Off Monitor 16 Wait 16
I
ICA 1
Independant Computing Architecture 1 Integrated-CRT model number
3720SE 1
L
Logging off the terminal 24
M
Modular model numbers 3200LE 1
3320SE 1 3350SE 1 3360SE 1
P
Parallel port 7 PCMCIA 7 Properties sheets Configure 21 Connections 21 Display 13 General 9 Input 17 SysInfo 9
R
RAM 10 RDP 1Remote Desktop Protocol 1
S
Serial port 7
Shutting down and restarting the terminal 24 Shutting down the terminal 24
T
TN3270 1 TN5250 1 Touch screen 7
U
USB port 7
W
Wall mount 7 WBT xvii
,
1WBT model numbers 3200LE xvii 3320SE xvii 3350SE xvii 3360SE xvii 3720SE xvii Windows 2000 1 Windows 3.1 7 Windows 95 7 Windows 98 7 Windows CE 1 Windows NT 1
Windows-based terminal 1 Wizards
Written and published by:
Wyse Technology Inc., February 2000
Created using FrameMaker®, Acrobat®, and Magellan™