Citrix NetScaler SDX Administration
Guide
Copyright and Trademark Notice
© CITRIX SYSTEMS, INC., 2011. ALL RIGHTS RESERVED. NO PART OF THIS DOCUMENT MAY BE
REPRODUCED OR TRANSMITTED IN ANY FORM OR BY ANY MEANS OR USED TO MAKE DERIVATIVE WORK (SUCH AS TRANSLATION, TRANSFORMATION, OR ADAPTATION) WITHOUT THE EXPRESS WRITTEN PERMISSION OF CITRIX SYSTEMS, INC.
ALTHOUGH THE MATERIAL PRESENTED IN THIS DOCUMENT IS BELIEVED TO BE ACCURATE, IT IS PRESENTED WITHOUT WARRANTY OF ANY KIND, EXPRESS OR IMPLIED. USERS MUST TAKE ALL RESPONSIBILITY FOR THE USE OR APPLICATION OF THE PRODUCT(S) DESCRIBED IN THIS MANUAL. CITRIX SYSTEMS, INC. OR ITS SUPPLIERS DO NOT ASSUME ANY LIABILITY THAT MAY OCCUR DUE TO THE USE OR APPLICATION OF THE PRODUCT(S) DESCRIBED IN THIS DOCUMENT. INFORMATION IN THIS DOCUMENT IS SUBJECT TO CHANGE WITHOUT NOTICE. COMPANIES, NAMES, AND DATA USED IN EXAMPLES ARE FICTITIOUS UNLESS OTHERWISE NOTED.
The following information is for FCC compliance of Class A devices: This equipment has been tested and found to comply with the limits for a Class A digital device, pursuant to part 15 of the FCC rules. These limits are designed to provide reasonable protection against harmful interference when the equipment is operated in a commercial
environment. This equipment generates, uses, and can radiate radio-frequency energy and, if not installed and used in accordance with the instruction manual, may cause harmful interference to radio communications. Operation of this equipment in a residential area is likely to cause harmful interference, in which case users will be required to correct the interference at their own expense.
Modifying the equipment without Citrix' written authorization may result in the equipment no longer complying with FCC requirements for Class A digital devices. In that event, your right to use the equipment may be limited by FCC
regulations, and you may be required to correct any interference to radio or television communications at your own expense.
You can determine whether your equipment is causing interference by turning it off. If the interference stops, it was probably caused by the NetScaler appliance. If the NetScaler equipment causes interference, try to correct the interference by using one or more of the following measures:
Move the NetScaler equipment to one side or the other of your equipment. Move the NetScaler equipment farther away from your equipment.
Plug the NetScaler equipment into an outlet on a different circuit from your equipment. (Make sure the NetScaler equipment and your equipment are on circuits controlled by different circuit breakers or fuses.)
Modifications to this product not authorized by Citrix Systems, Inc., could void the FCC approval and negate your authority to operate the product.
BroadCom is a registered trademark of BroadCom Corporation. Fast Ramp, NetScaler, and NetScaler Request Switch are trademarks of Citrix Systems, Inc. Linux is a registered trademark of Linus Torvalds. Internet Explorer, Microsoft, PowerPoint, Windows and Windows product names such as Windows NT are trademarks or registered trademarks of the Microsoft Corporation. NetScape is a registered trademark of Netscape Communications Corporation. Red Hat is a trademark of Red Hat, Inc. Sun and Sun Microsystems are registered trademarks of Sun Microsystems, Inc. Other brand and product names may be registered trademarks or trademarks of their respective holders.
Software covered by the following third party copyrights may be included with this product and will also be subject to the software license agreement: Copyright 1998 © Carnegie Mellon University. All rights reserved. Copyright © David L.
Mills 1993, 1994. Copyright © 1992, 1993, 1994, 1997 Henry Spencer. Copyright © Jean-loup Gailly and Mark Adler.
Copyright © 1999, 2000 by Jef Poskanzer. All rights reserved. Copyright © Markus Friedl, Theo de Raadt, Niels Provos,
Dug Song, Aaron Campbell, Damien Miller, Kevin Steves. All rights reserved. Copyright © 1982, 1985, 1986,
1988-1991, 1993 Regents of the University of California. All rights reserved. Copyright © 1995 Tatu Ylonen, Espoo,
Finland. All rights reserved. Copyright © UNIX System Laboratories, Inc. Copyright © 2001 Mark R V Murray. Copyright
1995-1998 © Eric Young. Copyright © 1995,1996,1997,1998. Lars Fenneberg. Copyright © 1992. Livingston
Enterprises, Inc. Copyright © 1992, 1993, 1994, 1995. The Regents of the University of Michigan and Merit Network,
Inc. Copyright © 1991-2, RSA Data Security, Inc. Created 1991. Copyright © 1998 Juniper Networks, Inc. All rights
reserved. Copyright © 2001, 2002 Networks Associates Technology, Inc. All rights reserved. Copyright (c) 2002
Networks Associates Technology, Inc. Copyright 1999-2001© The Open LDAP Foundation. All Rights Reserved.
Copyright © 1999 Andrzej Bialecki. All rights reserved. Copyright © 2000 The Apache Software Foundation. All rights
reserved. Copyright (C) 2001-2003 Robert A. van Engelen, Genivia inc. All Rights Reserved. Copyright (c) 1997-2004 University of Cambridge. All rights reserved. Copyright (c) 1995. David Greenman. Copyright (c) 2001 Jonathan Lemon. All rights reserved. Copyright (c) 1997, 1998, 1999. Bill Paul. All rights reserved. Copyright (c) 1994-1997 Matt Thomas.
All rights reserved. Copyright © 2000 Jason L. Wright. Copyright © 2000 Theo de Raadt. Copyright © 2001 Patrik
Lindergren. All rights reserved. Last Updated: March 2012
Contents
Preface...9
Formatting Conventions for NetScaler Documentation . . . .9
Documentation Available on the NetScaler Appliance . . . 10
Getting Service and Support . . . 11
NetScaler Documentation Feedback . . . .11
1 Introduction...13
Getting Started with the Management Service User Interface. . . .14
Logging on to the Management Service User Interface. . . 14
To log on to the Management Service user interface. . . .14
Provisioning NetScaler Instances. . . 15
Managing the Home Page. . . 15
2 Managing and Monitoring the NetScaler SDX Appliance...17
Modifying the Network Configuration of the SDX Appliance. . . .18
To modify the network configuration of the SDX appliance. . . .18
Changing the Password of the Default User Account. . . .18
To change the password of the default user account. . . 19
Configuring Clock Synchronization. . . 19
To configure an NTP server. . . .19
To enable NTP synchronization . . . .20
To modify Authentication options . . . 20
Managing Licenses. . . .21
To upload a license file to the SDX appliance. . . .21
To apply the licenses that have been uploaded to the SDX appliance. . . .22
To create a backup by downloading a license file. . . .22
Managing Interfaces. . . .22
To configure an interface. . . .23
To reset the parameters of an interface to their default values. . . 23
Enabling VLAN Filtering. . . .23
To enable VLAN filtering on an interface. . . 24
To view the SSL certificate on the Management Service. . . 24
Viewing the Properties of the NetScaler SDX Appliance. . . .25
Viewing Real-Time Appliance Throughput. . . .26
Viewing Real-Time CPU and Memory Usage. . . .27
Viewing CPU Usage for All Cores. . . .27
Restarting the Appliance. . . .27
To restart the appliance. . . .27
Shutting Down the Appliance. . . .27
To shut down the appliance. . . .27
Modifying the Time Zone on the Appliance. . . .28
To modify the time zone on the appliance. . . .28
Modifying System Settings. . . .28
To modify system settings. . . .28
3 Configuring the Management Service...29
Managing Client Sessions. . . .30
Configuring User Accounts. . . .30
To configure a user account. . . .30
To remove a user account. . . .31
Configuring Policies. . . .31
To specify the number of days for which logged data is pruned. . . .32
To specify the number of backups that the appliance must retain. . . .32
Restarting the Management Service. . . .32
To restart the Management Service . . . .32
Upgrading the Management Service. . . .32
Uploading the Management Service Build and Documentation Files. . . .33
To upload the Management Service build file. . . .33
To create a backup by downloading a Management Service build file. . . .33
To upload the Management Service documentation file. . . .33
To create a backup by downloading a Management Service documentation file. . . .33
Upgrading the Management Service to a Later Version. . . .34
To upgrade the Management Service. . . .34
Upgrading the XenServer Software. . . .34
Uploading the XenServer Build Files. . . .34
To upload the XenServer build file. . . .34
To create a backup by downloading a XenServer build file. . . .35
Upgrading the XenServer Software to a Later Version. . . .35
To upgrade the XenServer software. . . .35 Contents
Removing Management Service Files. . . .35
To remove a Management Service file. . . .35
Generating a Tar Archive for Technical Support. . . .35
To generate the tar archive for technical support. . . .36
To download the tar archive for technical support. . . .36
4 Provisioning NetScaler Instances...37
Creating Admin Profiles. . . .38
To create an admin profile. . . .38
Uploading NetScaler .Xva Images. . . .39
To upload a NetScaler .xva file. . . .39
To create a backup by downloading a NetScaler .xva file. . . .39
Adding a NetScaler Instance. . . .40
To provision a NetScaler instance. . . .42
5 Configuring and Managing NetScaler Instances ...45
Creating a Mapped IP Address or a Subnet IP Address on a NetScaler Instance. . . .46
To add a MIP or SNIP on a NetScaler instance. . . .46
Saving the Configuration. . . .46
To save the configuration on a NetScaler instance. . . .47
Installing SSL Certificates. . . .47
Uploading the Certificate File to the SDX Appliance. . . .47
To upload SSL certificate files to the SDX appliance. . . .47
To create a backup by downloading an SSL certificate file. . . .47
Uploading SSL Key Files to the SDX Appliance. . . .48
To upload SSL key files to the SDX appliance. . . .48
To create a backup by downloading an SSL key file. . . .48
Installing an SSL Certificate on a NetScaler Instance. . . .48
To install SSL certificates on a NetScaler instance. . . .49
Upgrading a NetScaler Instance. . . .49
Uploading the NetScaler Software Image, Documentation, and XVA Files. . . .49
To upload a NetScaler software image. . . .50
To create a backup by downloading a NetScaler build file. . . .50
To upload a NetScaler documentation file. . . .50
To create a backup by downloading a NetScaler documentation file. . . .50
To upload a NetScaler XVA file. . . .51
To create a backup by downloading a NetScaler XVA file. . . .51
Upgrading Multiple NetScaler VPX Instances. . . .51
To upgrade a NetScaler VPX instance image. . . .51 Citrix NetScaler SDX Administration Guide
Managing a NetScaler Instance. . . .52
To start, stop, delete, or restart a NetScaler instance. . . .52
Removing NetScaler Instance Files. . . .52
To remove NetScaler instance files. . . .52
Applying the Administration Configuration. . . .53
To apply the admin configuration on a NetScaler instance. . . .53
6 Monitoring NetScaler Instances...55
Viewing the Properties of the NetScaler Instance. . . .56
To view the properties of NetScaler VPX instances. . . .56
Viewing the Running and Saved Configuration of a NetScaler Instance. . . .58
To view the running and saved configuration of a NetScaler instance. . . .58
Pinging a NetScaler Instance. . . .58
To ping a NetScaler instance. . . .58
Tracing the Route of a NetScaler Instance. . . .58
To trace the route of a NetScaler instance. . . .59
Rediscovering a NetScaler Instance. . . .59
To rediscover a NetScaler instance. . . .59
7 Using Logs to Monitor Operations and Events...61
Viewing Audit Logs. . . .62
To view audit logs. . . .62
Viewing Task Logs. . . .63
To view the task log. . . .63
Viewing Task Device Logs. . . .63
To view the task device log. . . .63
Viewing Task Command Logs. . . .64
To view the task command log. . . .64
Viewing Events. . . .64
To view the events. . . .64 Contents
Preface
Learn about the Citrix® NetScaler® collection of documentation, including information
about support options and ways to send us feedback. In This Preface:
w Formatting Conventions for NetScaler Documentation
w Documentation Available on the NetScaler Appliance
w Getting Service and Support
w NetScaler Documentation Feedback
For information about new features and enhancements for this release, see the Citrix
NetScaler 9.3 Release Notes at http://support.citrix.com/article/CTX128669.
Formatting Conventions for NetScaler
Documentation
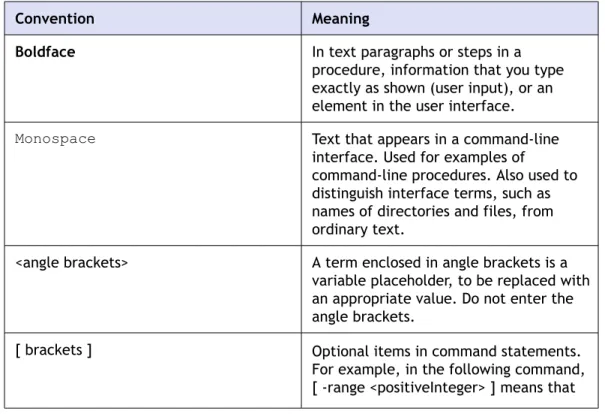
The NetScaler documentation uses the following formatting conventions. Table 1. Formatting Conventions
Convention Meaning
Boldface In text paragraphs or steps in a
procedure, information that you type exactly as shown (user input), or an element in the user interface.
Monospace Text that appears in a command-line interface. Used for examples of
command-line procedures. Also used to distinguish interface terms, such as names of directories and files, from ordinary text.
<angle brackets> A term enclosed in angle brackets is a
variable placeholder, to be replaced with an appropriate value. Do not enter the angle brackets.
[ brackets ] Optional items in command statements.
For example, in the following command, [ -range <positiveInteger> ] means that
Convention Meaning
you have the option of entering a range, but it is not required:
add lb vserver <name> <serviceType> <IPAddress> <port> [ -range
<positiveInteger>]
Do not type the brackets themselves.
| (vertical bar) A separator between options in braces or
brackets in command statements. For example, the following indicates that you choose one of the following load balancing methods: <lbMethod> = ( ROUNDROBIN | LEASTCONNECTION | LEASTRESPONSETIME | URLHASH | DOMAINHASH | DESTINATIONIPHASH | SOURCEIPHASH | SRCIPDESTIPHASH | LEASTBANDWIDTH | LEASTPACKETS | TOKEN | SRCIPSRCPORTHASH | LRTM | CALLIDHASH | CUSTOMLOAD )
… (ellipsis) You can repeat the previous item or
items in command statements. For example, /route:<DeviceName>[ ,…] means you can type additional
<DeviceNames> separated by commas.
Documentation Available on the NetScaler
Appliance
A complete set of Citrix® NetScaler® documentation (PDF format) is available on the
Documentation tab of your NetScaler appliance and from http://support.citrix.com/. (Most of the documents require Adobe Reader, available at http://adobe.com/.) To view the documentation
1. From a Web browser, log on to the NetScaler. 2. Click the Documentation tab.
3. To view a short description of each document, hover your cursor over the title. To open a document, click the title.
Getting Service and Support
Citrix® offers a variety of resources for support with your Citrix environment, including
the following:
w The Knowledge Center is a self-service, Web-based technical support database that contains thousands of technical solutions, including access to the latest hotfixes, service packs, and security bulletins.
w Technical Support Programs for both software support and appliance maintenance are available at a variety of support levels.
w The Subscription Advantage program is a one-year membership that gives you an easy way to stay current with the latest product version upgrades and enhancements.
w Citrix Education provides official training and certification programs on virtually all Citrix products and technologies.
For more information about Citrix services and support, see the Citrix Systems Support Web site at http://www.citrix.com/lang/English/support.asp.
You can also participate in and follow technical discussions offered by the experts on various Citrix products at the following sites:
w http://community.citrix.com
w http://twitter.com/citrixsupport
NetScaler Documentation Feedback
You are encouraged to provide feedback and suggestions so that we can enhance the documentation. You can send an email to [email protected]. In the subject line, specify "Documentation Feedback" .Please include the title of the guide and the page number in the email message.
You can also provide feedback through the Knowledge Center at http:// support.citrix.com/.
To provide feedback at the Knowledge Center home page
1. Go to the Knowledge Center home page at http://support.citrix.com/.
2. On the Knowledge Center home page, under Products, expand NetScaler, and then click the NetScaler release for which you want to provide feedback.
3. On the Documentation tab, click the guide name, and then click Article Feedback. 4. On the Documentation Feedback page, complete the form, and then click Submit.
Chapter 1
Introduction
Topics:
• Getting Started with the Management Service User Interface
• Managing the Home Page
The Citrix® NetScaler® SDX appliance is a multi-tenant
platform on which you can provision and manage multiple virtual instances of NetScaler. The SDX appliance addresses cloud computing and multi-tenancy requirements by allowing a single administrator to configure and manage the appliance and delegate the administration of each hosted NetScaler instance to tenants. The SDX appliance enables the SDX appliance administrator to provide each tenant the following benefits:
w One complete NetScaler instance. Each instance is given the following resources:
• Dedicated CPU and memory resources. • A separate space for NetScaler entities.
• The independence to run the NetScaler release and build of their choice.
• Lifecycle independence.
w A completely isolated network. Traffic meant for a particular instance is sent only to that instance.
Note: Layer 2 (L2) mode, link aggregation control protocol (LACP), and virtual MAC (VMAC) addresses are not supported on the NetScaler instances provisioned on the NetScaler SDX appliance.
The Citrix NetScaler SDX appliance provides a Management Service that is pre-provisioned on the appliance. The Management Service provides a user interface (HTTP and HTTPS modes) and an API to configure, manage, and monitor the appliance, the Management Service, and the NetScaler instances. A Citrix self-signed certificate is pre-packaged for HTTPS support. It is recommended that you use the HTTPS mode to access the Management Service user interface.
Getting Started with the Management Service
User Interface
To begin configuring, managing, and monitoring the appliance, the Management Service, and the NetScaler instances, you need to connect to the Management Service user interface by using a browser, and then provision the NetScaler instances on the appliance.
Logging on to the Management Service User Interface
You can connect to the Management Service user interface by using one of the following supported browsers:
w Internet Explorer
w Google Chrome
w Apple Safari
w Mozilla Firefox
To log on to the Management Service user interface
1. In your Web browser address field, type one of the following:http://Management Service IP Address or
https://Management Service IP Address
2. On the Login page, in User Name and Password, type the user name and password of the Management Service. The default user name and password are nsroot and nsroot. However, Citrix recommends that you change the password after initial configuration. For information about changing the nsroot password, see Changing the Password of the Default User Account on page 18.
3. Click Show Options, and then do the following:
a. In the Start in list, select the page that must be displayed immediately after you log on to the user interface. The available options are Home, Monitoring, Configuration, Documentation, and Downloads. For example, if you want the Management Service to display the Configuration page when you log on, select Configuration in the Start in list.
b. In Timeout, type the length of time (in minutes, hours, or days) after which you want the session to expire. The minimum timeout value is 15 minutes.
The Start in and Timeout settings persist across sessions. Their default values are restored only after you clear the cache.
4. Click Login to log on to the Management Service user interface. Chapter 1 Introduction
Provisioning NetScaler Instances
You can provision one or more NetScaler instances on the SDX appliance by using the Management Service. The number of instances that you can install depends on the license you have purchased. If the number of instances added is equal to the number specified in the license, the Management Service does not allow provisioning more NetScaler instances.
For information about provisioning NetScaler instances, see Provisioning NetScaler Instances on page 37.
Managing the Home Page
The Management Service Home page provides you with a high-level view of the performance of the SDX appliance and the NetScaler instances provisioned on your appliance. SDX appliance and NetScaler instance information is displayed in gadgets that you can add and remove depending on your requirement.
The following gadgets are available on the Home page by default. System Resources
Displays the total number of CPU cores, total number of SSL cores, number of free SSL cores, total memory, and free memory on the appliance.
System CPU | Memory Usage (%)
Displays the percentage of CPU and memory utilization of the appliance in graphical format.
System Throughput (Mbps)
Displays the total throughput of the SDX appliance for incoming and outgoing traffic in a graph that is plotted in real time and updated at regular intervals.
NetScaler Instances
Displays the properties of the NetScaler instances. The properties displayed are Name, VM State, Instance State, IP Address, Rx (Mbps), Tx (Mbps), HTTP Req/s, and CPU Usage (%) and Memory Usage (%).
Note: On first log on, the Home page does not display any data related to the NetScaler instances because you have not provisioned any instances on your appliance.
You can do the following on the Home page: View and hide NetScaler instance details
You can view and hide the details of a particular NetScaler instance by clicking the name of the instance in the Name column. You can also click Expand All to expand all the instance nodes and Collapse All to collapse all the instance nodes.
Add and remove gadgets
You can also add gadgets to view additional system information.
To add these gadgets, click the arrow (<<) button at the top right corner of the Home page, enter keywords in the search box, and then click Go. The allowed characters are: a-z, A-Z, 0-9, ^, $, *, and _. Click Go without typing any characters in the search box to display all the gadgets that are available. After the gadget is displayed, click Add to dashboard.
Currently, you can add the following gadgets to the Home page: Hypervisor Details
The Hypervisor Details gadget displays details about XenServer uptime, edition, version, iSCSI Qualified Name (IQN), product code, serial number, build date, and build number.
Licenses
The Licenses gadget displays details about the SDX hardware platform, the
maximum number of NetScaler instances supported on the platform, the maximum supported throughput in Mbps, and the available throughput in Mbps.
If you remove a gadget that is available on the Home page by default, you can add them back to the Home page by performing a search for the gadget, as described earlier.
Chapter 2
Managing and Monitoring the NetScaler
SDX Appliance
Topics:
• Modifying the Network Configuration of the SDX Appliance
• Changing the Password of the Default User Account
• Configuring Clock Synchronization
• Managing Licenses
• Managing Interfaces
• Enabling VLAN Filtering
• Viewing the SSL Certificate on the Management Service
• Viewing the Properties of the NetScaler SDX Appliance
• Viewing Real-Time Appliance Throughput
• Viewing Real-Time CPU and Memory Usage
• Viewing CPU Usage for All Cores
• Restarting the Appliance
• Shutting Down the Appliance
• Modifying the Time Zone on the Appliance
• Modifying System Settings
After your SDX appliance is up and running, you can perform various tasks to manage and monitor the appliance from the Management Service user interface.
w Modify the Network Configuration of the SDX Appliance
w Change the Password of the Default User Account
w Manage Licenses
w Manage Interfaces
w View the Properties of the NetScaler SDX Appliance
w View Real-Time Appliance Throughput
w View Real-Time CPU and Memory Usage
w View CPU Usage for All Cores
w Restart the Appliance
w Shut Down the Appliance
w Modify the Time Zone on the Appliance
Modifying the Network Configuration of the
SDX Appliance
You can modify the network configuration details that you provided for the NetScaler SDX appliance during initial configuration.
To modify the network configuration of the SDX
appliance
1. In the navigation pane, click System.
2. In the System pane, under Setup Appliance, click Network Configuration. 3. In the Modify Network Configuration dialog box, specify values for the following
parameters:
• Interface*—The interface through which clients connect to the Management Service. Possible values: 0/1, 0/2. Default: 0/1.
• XenServer IP Address*—The IP address of the XenServer.
• Management Service IP Address*—The IP address of the Management Service. • Netmask*—The netmask for the subnet in which the SDX appliance is located. • Gateway*—The default gateway for the network.
• DNS Server—The IP address of the DNS server. * A required parameter
4. Click OK.
Changing the Password of the Default User
Account
The default user account provides complete access to all features of the Citrix
NetScaler SDX appliance. Therefore, to preserve security, the nsroot account should be used only when necessary, and only individuals whose duties require full access should know the password for the nsroot account. Citrix recommends changing the nsroot password frequently. If you lose the password, you can reset the password to the default by reverting the appliance settings to factory defaults , and you can then change the password.
You can change the password of the default user account in the Users pane. In the Users pane, you can view the following details:
Name
Lists the user accounts configured on the SDX appliance. Chapter 2 Managing and Monitoring the NetScaler SDX Appliance
Permission
Displays the permission level assigned to the user account.
To change the password of the default user account
1. On the Configuration tab, in the navigation pane, expand System, and then click Users.
2. In the Users pane, click the default user account, and then click Modify.
3. In the Modify System User dialog box, in Password and Confirm Password, enter the password of your choice.
4. Click OK.
Configuring Clock Synchronization
You can configure your NetScaler SDX appliance to synchronize its local clock with a Network Time Protocol (NTP) server. As a result, the clock on the SDX appliance has the same date and time settings as the other servers on your network. The clock
synchronization configuration does not change if the appliance is restarted, upgraded, or downgraded. However, the configuration does not get propagated to the secondary NetScaler instance in a high availability setup.
Note: This functionality is only available in releases 9.3.e and 10.
The clock is synchronized immediately if you add a new NTP server or change any of the authentication parameters. You can also explicitly enable and disable NTP synchronization.
Note: If you do not have a local NTP server, you can find a list of public, open access, NTP servers at the official NTP site, http://www.ntp.org. Before configuring your NetScaler to use a public NTP server, be sure to read the Rules of Engagement page (link included on all Public Time Servers pages).
To configure an NTP server
1. In the navigation pane, expand System, and then click NTP Servers. 2. In the details pane, do one of the following:
• To add a new NTP server, click Add.
• To modify settings for an existing NTP server, select the NTP server, and then click Open.
3. In the Create NTP Server or Configure NTP Server dialog box, set the following parameters:
• Server Name/IP Address*—The domain name of the NTP server or the IP address of the NTP server. The name or IP address cannot be changed for an existing NTP server.
• Minimum Poll Interval— The minimum number of seconds after which the NTP server must poll the NTP messages, expressed as a power of 2. Minimum value: 4 (2^4=16 seconds). Maximum value: 6 (2^6=64 seconds). Default: 6 (2^6=64 seconds).
• Maximum Poll Interval— The maximum number of seconds after which the NTP server must poll the NTP messages, expressed as a power of 2. Minimum value: 10 (2^10=1024 seconds). Maximum value: 17 (2^17=36 hours). Default : 10 (2^10=1024 seconds).
• Key Identifier—The key to be used for the specified server. This key identifier should be added to the list of Trusted Key IDs in the Authentication Parameters. Minimum value: 1. Maximum value: 65534.
Note: Do not add if Autokey is selected.
• Autokey—Use the Autokey protocol for the specified server.
• Preferred—Synchronize with this server first. Applicable if more than one server is configured.
*A required parameter
4. Click Add, and then click Close.
5. In the details pane, verify that the settings displayed for the NTP server that you just created are correct.
To enable NTP synchronization
1. In the navigation pane, expand System, and then click NTP Servers. 2. In the details pane, click NTP Synchronization.
3. In the NTP Synchronization dialog box, select Enable NTP Sync. 4. Click OK, and then click Close.
To modify Authentication options
1. In the navigation pane, expand System, and then click NTP Servers. 2. In the details pane, click Authentication Parameters.
3. In the Modify Authentication Options dialog box, set the following parameters: • Authentication—Enable NTP authentication. Possible values: YES, NO. Default:
YES.
• Trusted Key IDs—The trusted key IDs. While adding an NTP server, you select a key identifier from this list. Minimum value: 1. Maximum value: 65534.
• Revoke Interval—The interval between re-randomization of certain
cryptographic values used by the Autokey scheme, as a power of 2, in seconds. Default value: 17 (2^17=36 hours).
• Automax Interval—The interval between regeneration of the session key list used with the Autokey protocol, as a power of 2, in seconds. Default value: 12 (2^12=1.1 hours).
4. Click OK, and then click Close.
Managing Licenses
The SDX instance pack license determines the maximum number of NetScaler instances that can be hosted on the appliance, and is obtained as a license file. Installing the license involves uploading the license file from a client computer to the SDX appliance and then applying the license. You can upload a license file to the SDX appliance and apply the license in the License Files pane. You can also download a license file to a local computer as a backup.
In the License Files pane, you can view the following details: Name
The name of the license file. Last Modified
The date and time at which the license file was last modified. Size
The size of the license file, in bytes.
Note: If you want to upgrade the platform license, remove the old license files from the Management Service and upload the new license files, and then click Apply Licenses. With this, you can ensure that you remove the license files that you no longer need.
To upload a license file to the SDX appliance
1. On the Configuration tab, in the navigation pane, expand System, and then click Licenses.
2. In the License Files pane, click Upload. The Upload button is unavailable when a license file is selected.
3. In the Upload License File dialog box, do the following: a. Click Browse.
b. Navigate to the folder that contains the license file you want to upload, and then double-click the license file.
c. Click Upload.
To apply the licenses that have been uploaded to
the SDX appliance
1. On the Configuration tab, in the navigation pane, expand System, and then click Licenses.
2. In the License Files pane, click Apply Licenses. 3. In the Confirm message box, click Yes.
To create a backup by downloading a license file
1. In the License Files pane, select the file you want to download, and then click Download.
2. In the File Download message box, click Save.
3. In the Save As message box, browse to the location where you want to save the file, and then click Save.
Managing Interfaces
You can configure interface settings in the Interfaces pane. You can also reset interface parameters to their default values.
In the Interfaces pane, you can view the following interface settings for each interface on the SDX appliance:
Port
The interface ID. State
The state of the interface. UP indicates that the interface is receiving traffic normally, while DOWN indicates a network issue because of which the interface is unable to send or receive traffic.
Speed
Specifies the Ethernet speed for the interface, in Mb/s. Possible values: 10, 100, 1000, and 10000.
Duplex
Specifies the duplex setting for the interface. Possible values: Full, Half, NONE. Default: NONE.
To configure an interface
1. On the Configuration tab, in the navigation pane, expand System, and then click Interfaces.
2. In the Interfaces pane, click the interface that you want to configure, and then click Modify.
3. In the Modify Interface dialog box, under Link Speed and Flow Control, specify values for the following parameters:
• Auto Negotiation*—Specifies whether auto-negotiation is enabled on the interface. Possible values: ON, OFF. Default: OFF.
• Speed* • Duplex*
• Flow Control Auto Negotiation*—Specifies whether auto-negotiation is performed for flow control parameters.
• Rx Flow Control*—Specifies whether or not Rx flow control is enabled. • Tx Flow Control*—Specifies whether or not Tx flow control is enabled. * A required parameter
4. Click OK, and then click Close.
To reset the parameters of an interface to their
default values
1. On the Configuration tab, in the navigation pane, expand System, and then click Interfaces.
2. In the Interfaces pane, click the interface that you want to reset, and then click Reset.
Enabling VLAN Filtering
VLAN filtering provides segregation of data between NetScaler VPX instances that share a physical port. For example, if you have configured two NetScaler VPX instances on two different VLANs and you enable VLAN filtering, one instance cannot view the other instance's traffic. If VLAN filtering is disabled, all of the instances can see the tagged or untagged broadcast packets, but the packets are dropped at the software level. If VLAN filtering is enabled, each tagged broadcast packet reaches only the instance that belongs to the corresponding tagged VLAN. If none of the instances belong to the corresponding tagged VLAN, the packet is dropped at the hardware level (NIC). If VLAN filtering is enabled on an interface, a limited number of tagged VLANs can be used on that interface (63 tagged VLANs on a 10G interface and 32 tagged VLANs on a 1G interface). A VPX instance receives only the packets that have the configured VLAN
IDs. Restart the NetScaler VPX instances associated with an interface if you change the state of the VLAN filter from DISABLED to ENABLED on that interface.
VLAN filtering is enabled by default on the NetScaler SDX appliance. If you disable VLAN filtering on an interface, you can configure up to 4096 VLANs on that interface.
Note: VLAN filtering is available only on a NetScaler SDX appliance running XenServer version 6.0.
To enable VLAN filtering on an interface
1. On the Configuration tab, in the navigation pane, expand System, and then click Interfaces.
2. In the Interfaces pane, click VLAN Filter.
3. In the Enable/Disable VLAN Filter dialog box, click Add to enable VLAN filtering on an interface.
4. Optionally, select Reboot associated Instances. 5. Click OK.
Viewing the SSL Certificate on the Management
Service
The Management Service uses an SSL certificate for secure client connections. You can view the details of this certificate, such as validity status, issuer, subject, days to expire, valid from and to dates, version, and serial number.
Note: This functionality is only available in releases 9.3.e and 10.
To view the SSL certificate on the Management
Service
1. In the navigation pane, click System.
2. In the System pane, click View SSL Certificate. The certificate details are displayed.
Viewing the Properties of the NetScaler SDX
Appliance
You can view system properties such as the number of CPU and SSL cores, total
available memory and free memory, and various product details on the Configuration tab. To view the properties of the NetScaler SDX appliance, click the Configuration tab. You can view the following information about system resources, Hypervisor, License, and System:
Total CPU Cores
The number of CPU cores on the SDX appliance. Total SSL Cores
The total number of SSL cores on the SDX appliance. Free SSL Cores
The total number of SSL cores that have not been assigned to a NetScaler instance. Total Memory (GB)
Total appliance memory in gigabytes. Free Memory (GB)
Free appliance memory in gigabytes. Hypervisor Uptime
Time since the appliance was last restarted, in number of days, hours, and minutes. Hypervisor Edition
The edition of XenServer that is installed on the SDX appliance. Hypervisor Version
The version of Xenserver that is installed on the SDX appliance. iSCSI IQN
The iSCSI Qualified Name. Hypervisor Product Code
The product code of the XenServer. Hypervisor Serial Number
The serial number of the XenServer. Hypervisor Build Date
The build date of the XenServer. Hypervisor Build Number
The build number of the XenServer. Platform
The hardware platform of the NetScaler SDX appliance, based on the installed license.
Maximum NetScaler Instances
The maximum number of instances that you can set up on the SDX appliance, based on the installed license.
Maximum Throughput (Mbps)
The maximum throughput that can be achieved on the appliance, based on the installed license.
Available Throughput (Mbps)
The available throughput based on the installed license. Platform
The hardware platform. Product
The NetScaler product. Build
The NetScaler build running on the SDX appliance. IP Address
The IP address of the Management Service. Host ID
The XenServer host ID. System ID
The XenServer system ID. Serial Number
The XenServer serial number. System Time
System time displayed in Day Month Date Hours:Min:Sec Timezone Year format. Uptime
Time since the Management Service was last restarted, in number of days, hours, and minutes.
BIOS version BIOS version.
Viewing Real-Time Appliance Throughput
The total throughput of the SDX appliance for incoming and outgoing traffic is plotted in real time in a graph that is updated at regular intervals. By default, throughputs for both incoming and outgoing traffic are plotted together on the graph.
To view the throughput of the SDX appliance, on the Monitoring tab, in the navigation pane, expand Monitoring, and then click Throughput.
Viewing Real-Time CPU and Memory Usage
You can view a graph of CPU and memory usage of the appliance. The graph is plotted in real time and updated at regular intervals.
To view the CPU and memory usage of the SDX appliance, on the Monitoring tab, in the navigation pane, expand Monitoring, and then click CPU / Memory Usage.
Viewing CPU Usage for All Cores
You can view the usage of each CPU core on the NetScaler SDX appliance. The CPU Cores Usage pane displays the following details:
Core Number
The CPU core number. CPU Usage
The percent usage of the CPU core.
To view the CPU usage for all the cores on the SDX appliance, on the Monitoring tab, in the navigation pane, expand Monitoring, and then click CPU Core Usage.
Restarting the Appliance
The Management Service provides an option to restart the SDX appliance. During the restart, the appliance shuts down all hosted NetScaler instances, and then restarts XenServer. When XenServer restarts, it starts all hosted NetScaler instances along with the Management Service.
To restart the appliance
1. On the Configuration tab, in the navigation pane, click System. 2. In the System pane, click Reboot Appliance.
Shutting Down the Appliance
You can shut down the NetScaler SDX appliance from the Management Service.
To shut down the appliance
1. On the Configuration tab, in the navigation pane, click System. 2. In the System pane, click Shutdown Appliance.
Modifying the Time Zone on the Appliance
You can modify the time zone of the Management Service and the Xen Server. The default time zone is UTC.To modify the time zone on the appliance
1. On the Configuration tab, in the navigation pane, click System. 2. In the System pane, under System Settings, click Change Time Zone.
3. In the Modify Time Zone dialog box, select a time zone from the list, and then click OK.
Modifying System Settings
For security reasons, you can specify that the Management Service and a NetScaler VPX instance should communicate with each other only over a secure channel. You can also restrict access to the Management Service user interface. Clients can log on the Management Service user interface only by using https.
To modify system settings
1. On the Configuration tab, in the navigation pane, click System.
2. In the System pane, under System Settings, click Change System Settings. 3. In the Modify System Settings dialog box, select https from the list.
4. Optionally, to restrict secure-only access to the Management Service, select Secure Access only.
5. Click OK.
Chapter 3
Configuring the Management Service
Topics:
• Managing Client Sessions
• Configuring User Accounts
• Configuring Policies
• Restarting the Management Service
• Upgrading the Management Service
• Upgrading the XenServer Software
• Removing Management Service Files
• Generating a Tar Archive for Technical Support
The Management Service lets you manage client sessions and perform configuration tasks, such as creating and managing user accounts and tweaking backup and pruning policies according to your requirements. You can also restart the Management Service and upgrade the version of the
Management Service. You can further create tar files of the Management Service and the XenServer and send it to technical support.
w Manage Client Sessions
w Configure User Accounts
w Configure Policies
Managing Client Sessions
A client session is created when a user logs on to the Management Service. You can view all the client sessions on the appliance in the Sessions pane.
In the Sessions pane, you can view the following details: User Name
The user account that is being used for the session. IP Address
The IP address of the client from which the session has been created. Port
The port being used for the session. Login Time
The time at which the current session was created on the SDX appliance. Last Activity Time
The time at which user activity was last detected in the session. Session Expires In
Time left for session expiry.
To view client sessions, on the Configuration tab, in the navigation pane, expand System, and then click Sessions.
To end a client session, in the Sessions pane, click the session you want to remove, and then click End Session.
You cannot end a session from the client that has initiated that session.
Configuring User Accounts
A user logs on to the NetScaler SDX appliance to perform appliance management tasks. To allow a user to access the appliance, you must create a user account on the SDX appliance for that user. Users are authenticated locally, on the appliance.
Important: The password applies to the SDX appliance, Management Service, and XenServer. Do not change the password directly on the XenServer.
To configure a user account
1. In the navigation pane, expand System, and then click Users.
The Users pane displays a list of existing user accounts, with their permissions. 2. In the Users pane, do one of the following:
• To create a user account, click Add. Chapter 3 Configuring the Management Service
• To modify a user account, select the user, and then click Modify.
3. In the Create System User or Modify System User dialog box, set the following parameters:
• Name*—The user name of the account. The following characters are allowed in the name: letters a through z and A through Z, numbers 0 through 9, period (.), space, and underscore (_). Maximum length: 128. You cannot change the name. • Password*—The password for logging on to the appliance.
• Confirm Password*—The password.
• Permission*—The user's privileges on the appliance. Possible values:
w Superuser—The user can perform all administration tasks related to the Management Service.
w Readonly—The user can only monitor the system and change the password of the account.
Default: superuser. *A required parameter
4. Click Create or OK, and then click Close. The user that you created is listed in the Users pane.
To remove a user account
1. On the Configuration tab, in the navigation pane, expand System, and then click Users.
2. In the Users pane, select the user account, and then click Delete. 3. In the Confirm message box, click OK.
Configuring Policies
To keep the size of logged data within manageable limits, the SDX appliance runs backup and data-pruning policies automatically at a specified time.
The prune policy runs at 00:00 A.M every day and specifies the number of days of data to retain on the appliance. By default, the appliance prunes data older than 3 days, but you can specify the number of days of data that you want to keep. Only event logs, audit logs, and task logs are pruned.
The backup policy runs at 00:30 A.M. every day and creates a backup of logs and configuration files. By default, the policy retains three backups, but you can specify the number of backups you want to keep.
To specify the number of days for which logged data
is pruned
1. On the Configuration tab, in the navigation pane, click System. 2. In the System pane, under Policy Administration, click Prune Policy.
3. In the Modify Prune Policy dialog box, in Data to keep (days), specify the number of days of data that the appliance must retain at any given time.
4. Click OK.
To specify the number of backups that the appliance
must retain
1. On the Configuration tab, in the navigation pane, click System. 2. In the System pane, under Policy Administration, click Backup Policy.
3. In the Modify Backup Policy dialog box, in #Previous Backups to retain, specify the number of backups that the appliance must retain at any given time.
4. Click OK.
Restarting the Management Service
You can restart the Management Service from the System pane. Restarting the Management Service does not affect the working of the NetScaler instances. The NetScaler instances continue to function during the Management Service restart process.
To restart the Management Service
1. On the Configuration tab, in the navigation pane, click System.
2. In the System pane, under System Administration, click Reboot Management Service.
Upgrading the Management Service
The process of upgrading the Management Service involves uploading the build file of the target build and the documentation file to the SDX appliance, and then upgrading the Management Service.
Uploading the Management Service Build and
Documentation Files
You can upload the Management Service build and documentation files from a client computer to the SDX appliance. You can also download build and documentation files to a local computer as a backup.
To upload the Management Service build file
1. In the navigation pane, expand Management Service, and then click Software Images.
2. In the Software Images pane, click Upload.
3. In the Upload Management Service Software Image dialog box, click Browse, navigate to the folder that contains the build file, and then double-click the build file.
4. Click Upload.
To create a backup by downloading a Management Service
build file
1. In the Software Images pane, select the file you want to download, and then click Download.
2. In the message box, from the Save list, select Save as.
3. In the Save As message box, browse to the location where you want to save the file, and then click Save.
To upload the Management Service documentation file
1. In the navigation pane, expand Management Service, and then click SoftwareImages.
2. In the Software Images pane, on the Documentation Files tab, click Upload. 3. In the Upload Management Service Documentation File dialog box, click Browse,
navigate to the folder that contains the documentation file, and then double-click the file.
4. Click Upload.
To create a backup by downloading a Management Service
documentation file
1. In the Software Images pane, select the file you want to download, and then click Download.
2. In the message box, from the Save list, select Save as.
3. In the Save As message box, browse to the location where you want to save the file, and then click Save.
Upgrading the Management Service to a Later Version
After you have uploaded the Management Service image to the SDX appliance, use this image to upgrade the version of the Management Service.
To upgrade the Management Service
1. In the navigation pane, click System.2. In the System pane, under System Administration, click Upgrade Management Service.
3. In the Upgrade Management Service dialog box, in Build File, select the file of the build to which you want to upgrade the Management Service.
4. In Documentation File, select the documentation file you want to use during upgrade.
5. Click OK.
Upgrading the XenServer Software
You need to upgrade to a later version of the XenServer software to enable
functionality of some features, such as VLAN filtering, L2 mode, and VMAC support. The process of upgrading the XenServer software involves uploading the build file of the target build to the Management Service, and then upgrading the XenServer software.
Note: This functionality is only available in releases 9.3.e and 10.
Uploading the XenServer Build Files
You can upload the XenServer build files from a client computer to the SDX appliance. You can also download the build files to a local computer as a backup.
To upload the XenServer build file
1. In the navigation pane, expand Management Service, and then click XenServer Files.
2. In the ISO Images pane, click Upload.
3. In the Upload XenServer ISO Image File dialog box, click Browse, navigate to the folder that contains the build file, and then double-click the build file.
4. Click Upload.
To create a backup by downloading a XenServer build file
1. In the ISO Images pane, select the file you want to download, and then clickDownload.
2. In the message box, from the Save list, select Save as.
3. In the Save As message box, browse to the location where you want to save the file, and then click Save.
Upgrading the XenServer Software to a Later Version
You can upgrade to the latest version of the XenServer software. The upgrade process may take up to 20 minutes. Before upgrading the software, upload the ISO image file to the appliance. The current version of the software is displayed in the Upgrade
XenServer dialog box.
To upgrade the XenServer software
1. In the navigation pane, click System.2. In the details pane, click Upgrade XenServer.
3. In the Upgrade XenServer dialog box, select the Image file from the list. 4. Click OK, and then click Close.
Removing Management Service Files
You can remove any unneeded Management Service build and documentation files from the SDX appliance.
To remove a Management Service file
1. On the Configuration tab, in the navigation pane, expand Management Service, and then click the file that you want to remove.
2. In the details pane, select the file name, and then click Delete.
Generating a Tar Archive for Technical Support
You can use the Technical Support option to generate a tar archive of data and statistics for submission to Citrix technical support. This tar can be generated for the Management Service or the XenServer, or for both at the same time. You can then download the file to your local system and send it to Citrix technical support. In the Technical Support pane, you can view the following details.Name
The name of the tar archive file. The file name indicates whether the tar is for the Management Service or the XenServer.
Last Modified
The date when this file was last modified. Size
The size of the tar file.
To generate the tar archive for technical support
1. On the Configuration tab, in the left pane, expand Diagnostics, and then click Technical Support.
2. In the Technical Support pane, click Generate Technical Support File.
3. In the Generate Technical Support File dialog box, in Mode, specify whether you want to archive data of the XenServer, the Management Service, or both. If you want to archive for both at the same time, select Appliance.
4. Click OK.
To download the tar archive for technical support
1. In the Technical Support pane, select the technical support file that you want to download, and then click Download.
2. In the File Download message box, click Save.
3. In the Save As message box, browse to the location where you want to save the file, and then click Save.
Chapter 4
Provisioning NetScaler Instances
Topics:
• Creating Admin Profiles
• Uploading NetScaler .Xva Images
• Adding a NetScaler Instance
You can provision one or more NetScaler instances on the SDX appliance by using the Management Service. The number of instances that you can install depends on the license you have purchased. If the number of instances added is equal to the number specified in the license, the Management Service does not allow provisioning more NetScaler instances.
To provision NetScaler instances on the SDX appliance, first, you need to define an admin profile to attach to the NetScaler instance. This profile specifies the user credentials that are used by the Management Service to provision the NetScaler instance and later, to communicate with the instance to retrieve configuration data. You can also use the default admin profile. Next, you need to upload the .xva image file to the Management Service. After uploading the .xva file, you can begin adding NetScaler instances using the Management Service. The Management Service implicitly deploys the NetScaler instances on the SDX appliance and then downloads configuration details of the instances.
Note: By default, an .xva image file based on the NetScaler 9.3 release is available on the SDX appliance.
Creating Admin Profiles
Admin profiles specify the user credentials that are used by the Management Service when provisioning the NetScaler instances, and later when communicating with the instances to retrieve configuration data. The user credentials specified in an admin profile are also used by the client when logging on to the NetScaler instances through the CLI or the configuraiton utility.
The default admin profile for an instance specifies a user name of nsroot, and the password is also nsroot. This profile cannot be modified or deleted. However, you should override the default profile by creating a user-defined admin profile and attaching it to the instance when you provision the instance. The Management Service administrator can delete a user-defined admin profile if it is not attached to any NetScaler instance.
Important:
Do not change the password directly on the NetScaler VPX instance. If you do so, the instance becomes unreachable from the Management Service. To change a password, first create a new admin profile, and then modify the NetScaler instance, selecting this profile from the Admin Profile list.
To change the password of NetScaler instances in a high availability setup, first change the password on the instance designated as the secondary node, and then change the password on the instance designated as the primary node. Remember to change the passwords only by using the Management Service.
To create an admin profile
1. On the Configuration tab, in the navigation pane, expand NetScaler Configuration, and then click Admin Profiles.
2. In the Admin Profiles pane, click Add.
3. In the Create Admin Profile dialog box, set the following parameters:
• Profile Name*—Name of the admin profile. The default profile name is nsroot. You can create user-defined profile names.
• User Name—User name used to log on to the NetScaler instances. The user name of the default profile is nsroot and cannot be changed.
• Password*—The password used to log on to the NetScaler instance. Maximum length: 31 characters.
• Confirm Password*—The password used to log on to the NetScaler instance. * A required parameter
4. Click Create, and then click Close. The admin profile you created appears in the Admin Profiles pane.
If the value in the Default column is true the default profile is the admin profile. If the value is false, a user-defined profile is the admin profile.
If you do not want to use a user-defined admin profile, you can remove it from the Management Service. To remove a user-defined admin profile, in the Admin Profiles pane, select the profile you want to remove, and then click Delete.
Uploading NetScaler .Xva Images
You have to upload the NetScaler .xva files to the SDX appliance before provisioning the NetScaler instances. You can also download an .xva image file to a local computer as a backup. The .xva image file format is: NSVPX-XEN-ReleaseNumber-BuildNumber_nc.xva
Note: By default, an .xva image file based on the NetScaler 9.3 release is available on the SDX appliance.
In the NetScaler XVA Files pane, you can view the following details. Name
Name of the .xva image file. The file name contains the release and build number. For example, the file name NSVPX-XEN-9.3-25_nc.xva refers to release 9.3 build 25. Last Modified
Date when the .xva image file was last modified. Size
Size, in MB, of the .xva image file.
To upload a NetScaler .xva file
1. On the Configuration tab, in the navigation pane, expand NetScaler Configuration, and then click XVA Files.
2. In the NetScaler XVA Files pane, click Upload.
3. In the Upload NetScaler Instance XVA dialog box, click Browse and select the XVA image file that you want to upload.
4. Click Upload. The XVA image file appears in the NetScaler XVA Files pane after it is uploaded.
To create a backup by downloading a NetScaler .xva
file
1. In the NetScaler Build Files pane, select the file that you want to download, and then click Download.
2. In the File Download message box, click Save.
3. In the Save As message box, browse to the location where you want to save the file, and then click Save.
Adding a NetScaler Instance
When you add NetScaler instances from the Management Service, you need to provide values for some parameters, and the Management Service implicitly configures these settings on the NetScaler instances.
NSVLAN is a VLAN to which the subnet of the NetScaler management IP (NSIP) address is bound. The NSIP subnet is available only on interfaces that are associated with the NSVLAN.Typically, the Management Service and the NetScaler VPX instance are in the same subnetwork and communication is over a management interface. However, if the Management Service and the instance are in different subnetworks, to route the traffic we need to optionally specify a VLAN tag at the time of provisioning a NetScaler VPX instance so that the instance can be reached over the network when it starts. For this type of provisioning, specify settings in the NSVLAN tab in the Provision NetScaler Wizard. On the NSVLAN tab, if you select tagged, make sure that management interfaces 0/1 and 0/2 are not added.
Note:
You can configure an NSVLAN only from VPX XVA build 9.3-53.4 and later.
Layer 2 (L2) mode, link aggregation control protocol (LACP), and virtual MAC (VMAC) addresses are not supported on the NetScaler instances provisioned on the NetScaler SDX appliance.
Citrix recommends that you restart all instances to avoid performance degradation if you modify the resource allocation on any instance.
Name*
The host name assigned to the NetScaler instance. IP Address*
The NetScaler IP (NSIP) address at which you access a NetScaler instance for management purposes. A NetScaler instance can have only one NSIP. You cannot remove an NSIP address.
Netmask*
The subnet mask associated with the NSIP address. Gateway*
The default gateway that you must add on the NetScaler instance if you want access through SSH or the configuration utility from an administrative workstation or laptop that is on a different network.
XVA File*
The .xva image file that you need to provision. This file is required only when you add a NetScaler instance.
Feature License*
Specifies the license you have procured for the NetScaler. The license could be Standard, Enterprise, and Platinum.
Admin Profile*
The profile you want to attach to the NetScaler instance. This profile specifies the user credentials that are used by the Management Service to provision the NetScaler instance and later, to communicate with the instance to retrieve configuration data. The user credentials used in this profile are also used while logging on to the
NetScaler instance by using the GUI or the CLI. It is recommended that you change the default password of the admin profile. This is done by creating a new profile with a user-defined password. For more information, see Creating Admin Profiles on page 38.
Description
Add a description or comments related to the administrator profile. Total Memory (MB)*
The total memory allocated to the NetScaler instance. #SSL Cores*
Number of SSL cores assigned to the NetScaler instance. SSL cores cannot be shared. The instance is restarted if you modify this value.
Throughput (Mbps)*
The total throughput allocated to the NetScaler instance. The total used throughput should be less than or equal to the maximum throughput allocated in the SDX license. If the administrator has already allocated full throughput to multiple instances, no further throughput can be assigned to any new instance. Packets per second*
The total number of packets received on the interface every second. CPU
Assign a dedicated core or cores to the instance or the instance shares a core with other instance(s).
User Name*
The root user name for the NetScaler instance administrator. This user has superuser access, but does not have access to networking commands to configure VLANs and interfaces. (List of non-accessible commands will be listed here in later versions of this document)
Password*
The password for the root user. Confirm Password*
The password for the root user. Shell/Sftp/Scp Access*
The access allowed to the NetScaler instance administrator. Interface Settings
This specifies the network interfaces assigned to a NetScaler instance. You can assign interfaces to an instance. For each interface, if you select Tagged, specify a VLAN ID.