SWsoft, Inc.
OpenVZ
User's Guide
Version 2.7.0-8
ISBN: N/A SWsoft Inc
13755 Sunrise Valley Drive Suite 325
Herndon, VA 20171 USA
Tel: +1 (703) 815 5670 Fax: +1 (703) 815 5675
Copyright © 2005 by SWsoft, Inc. This material may be distributed only subject to the terms and conditions set forth in the Open Publication License, V1.0 or later (the latest version is presently available at
http://www.opencontent.org/openpub/).
Distribution of substantively modified versions of this document is prohibited without the explicit permission of the copyright holder.
Distribution of the work or derivative of the work in any standard (paper) book form for commercial purposes is prohibited unless prior permission is obtained from the copyright holder.
Linux is a registered trademark of Linus Torvalds. OpenVZ and Virtuozzo are trademarks of SWsoft, Inc. Red Hat is a registered trademark of Red Hat Software, Inc. UNIX is a registered trademark of The Open Group.
Intel, Pentium, and Celeron are registered trademarks of Intel Corporation. SSH and Secure Shell are trademarks of SSH Communications Security, Inc. MegaRAID is a registered trademark of American Megatrends, Inc.
3
Contents
Preface
7
About This Guide ...7
Who Should Read This Guide ...7
Organization of This Guide ...8
Documentation Conventions...8
Typographical Conventions...9
Shell Prompts in Command Examples ...9
General Conventions ...10
Feedback ...10
OpenVZ Philosophy
11
About OpenVZ Software ...11What is OpenVZ...11
OpenVZ Applications...12
Distinctive Features of OpenVZ ...12
OS Virtualization...13
Network Virtualization ...13
Templates ...13
Resource Management ...14
Main Principles of OpenVZ Operation...15
Basics of OpenVZ Technology ...15
Understanding Templates ...17
Understanding Licenses...18
OpenVZ Configuration...18
Hardware Node Availability Considerations ...19
Installation and Preliminary Operations
20
Installation Requirements ...20System Requirements ...20
Network Requirements ...22
Installing and Configuring Host Operating System on Hardware Node...23
Choosing System Type...23
Disk Partitioning...24
Finishing OS Installation ...26
Installing OpenVZ Software ...27
Downloading and Installing OpenVZ Kernel...27
Configuring Boot Loader...27
Setting sysctl parameters ...27
Downloading and Installing OpenVZ Packages ...29
Installing OS Templates ...29
Operations on Virtual Private Servers
31
Creating and Configuring New Virtual Private Server ...31Before you Begin...31
Choosing Virtual Private Server ID...32
Choosing OS Template...33
Contents 4
Configuring Virtual Private Server...34
Starting, Stopping, Restarting, and Querying Status of Virtual Private Server ...37
Listing Virtual Private Servers...39
Deleting Virtual Private Server...40
Running Commands in Virtual Private Server ...41
Managing Templates
42
Template Lifecycle ...42Listing Templates ...44
Working with VPS...45
Managing Resources
46
What are Resource Control Parameters? ...46Managing Disk Quotas ...47
What are Disk Quotas? ...48
Disk Quota Parameters ...48
Turning On and Off Per-VPS Disk Quotas ...49
Setting Up Per-VPS Disk Quota Parameters ...50
Turning On and Off Second-Level Quotas for Virtual Private Server ...51
Setting Up Second-Level Disk Quota Parameters ...52
Checking Quota Status ...53
Managing CPU Share ...53
Managing System Parameters...55
Monitoring System Resources Consumption ...57
Monitoring Memory Consumption...59
Managing VPS Resources Configuration ...60
Splitting Hardware Node Into Equal Pieces ...61
Validating Virtual Private Server Configuration ...62
Advanced Tasks
63
Determining VPS ID by Process ID ...64Changing System Time from VPS...64
Accessing Devices from Inside Virtual Private Server...66
Moving Network Adapter to Virtual Private Server ...68
Enabling VPN for VPS ...69
Loading iptables Modules...69
Loading iptables Modules to Hardware Node ...70
Loading iptables Modules to Particular VPSs ...70
Rebooting Virtual Private Server...71
Troubleshooting 72
General Considerations...73Kernel Troubleshooting ...75
Using ALT+SYSRQ Keyboard Sequences ...75
Saving Kernel Fault (OOPS) ...76
Finding Kernel Function That Caused D Process State...77
Problems with VPS Management ...77
Failure to Create VPS ...77
Failure to Start VPS...78
Failure to Access VPS From Network...78
Failure to Log In to VPS...79
Problems with VPS Operation ...79
Contents 5
Reference
80
Configuring OpenVZ...81
Matrix of OpenVZ Configuration Files ...81
Managing OpenVZ Scripts...87
OpenVZ Command Line Interface ...91
Matrix of OpenVZ Command Line Utilities ...91
vzctl ...92
vzlist ...100
vzquota ...104
Template Management Utilities ...110
Supplementary Tools...112
Glossary
115
Index
117
6
Table of Figures
Figure 1: OpenVZ Technology ...15
Figure 2: Fedora Core Installation - Choosing System Type...23
Figure 3: Fedora Core Installation - Choosing Manual Partitioning...24
Figure 4: Fedora Core Installation - Disk Druid...25
Figure 5: Fedora Core Installation - Disabling Firewall and SELinux...26
7
C
H A P T E R1
Preface
In This Chapter
About This Guide... 7
Who Should Read This Guide... 7
Organization of This Guide... 8
Documentation Conventions... 8
Feedback ... 10
About This Guide
This guide is meant to provide comprehensive information on OpenVZ– high-end server virtualization software for Linux-based computers. The issues discussed in this guide cover the necessary theoretical conceptions as well as practical aspects of working with OpenVZ. The guide will familiarize you with the way to create and administer Virtual Private Servers
(sometimes also called Virtual Environments, or VEs) on OpenVZ-based Hardware Nodes and to employ the command line interface for performing various tasks.
Familiarity with Red Hat Linux Operating System and certain Linux administrator’s skills are desirable for a person reading the guide. You can obtain some useful information regarding OS installation issues from http://www.redhat.com/docs/manuals/linux/.
Who Should Read This Guide
Preface 8
Organization of This Guide
Chapter 2, OpenVZ Philosophy, is a must-read chapter that helps you grasp the general principles of OpenVZ operation. It provides an outline of OpenVZ architecture, of the way OpenVZ stores and uses configuration information, of the things you as administrator are supposed to perform, and the common way to perform them.
Chapter 3, Installation and Preliminary Operations, dwells on all those things that must be done before you are able to begin the administration proper of OpenVZ. Among these things are a customized installation of Linux on a dedicated computer (Hardware Node, in OpenVZ terminology), OpenVZ installation, preparation of the Hardware Node for creating Virtual Private Servers on it, etc.
Chapter 4, Operations on Virtual Private Servers, covers those operations that you may perform on a VPS as on a single entity: creating and deleting Virtual Private Servers, starting and stopping them, etc.
Chapter 5, Managing Templates, shows you the way to handle OpenVZ templates properly – create and install templates and template updates on the Hardware Node, add them to and remove from Virtual Private Servers, etc.
Chapter 6, Managing Resources, zeroes in on configuring and monitoring the resource control parameters for different VPSs. These parameters comprise disk quotas, CPU and system resources. Common ways of optimizing your VPSs configurations are suggested at the end of the chapter.
Chapter 7, Advanced Tasks, enumerates those tasks that are intended for advanced system administrators who would like to obtain deeper knowledge about OpenVZ capabilities.
Chapter 8, Troubleshooting, suggests ways to resolve common inconveniences should they occur during your work with the OpenVZ software.
Chapter 9, Reference, is a complete reference on all OpenVZ configuration files and Hardware Node command-line utilities. You should read this chapter if you do not understand a file format or looking for an explanation of a particular configuration option, if you need help for a particular command or looking for a command to perform a certain task.
Documentation Conventions
Preface 9
Typographical Conventions
The following kinds of formatting in the text identify special information.
Formatting
convention Type of Information Example
Special Bold Items you must select, such as menu options, command buttons, or items in a list.
Go to the QoS tab.
Titles of chapters, sections, and subsections.
Read the Basic Administration chapter.
Italics Used to emphasize the importance of a point or to introduce a term.
Such servers are called Hardware Nodes.
Monospace The names of commands, files, and directories.
Use vzctl start to start a VPS. Monospace
Italics
Used to designate a command line or a file name placeholder, which is to be replaced with a real value.
Type vzctl destroy vpsid.
Preformatted On-screen computer output in your
command-line sessions; source code in XML, C++, or other programming languages.
Saved parameters for VPS 101
Monospace
Bold What you type, contrasted with on-screen computer output.
# rpm –q vzctl
CAPITALS Names of keys on the keyboard. SHIFT, CTRL, ALT
KEY+KEY Key combinations for which the user must press and hold down one key and then press another.
CTRL+P, ALT+F4
Shell Prompts in Command Examples
Command line examples throughout this guide presume that you are using the Bourne-again shell (bash). Whenever a command can be run as a regular user, we will display it with a dollar sign prompt. When a command is meant to be run as root, we will display it with a hash mark prompt:
Preface 10
General Conventions
Be aware of the following conventions used in this book.
Chapters in this guide are divided into sections, which, in turn, are subdivided into subsections. For example, Documentation Conventions is a section, and General Conventions is a subsection.
When following steps or using examples, be sure to type double-quotes ("), left single-quotes (`), and right single-quotes (') exactly as shown.
The key referred to as RETURN is labeled ENTER on some keyboards.
The root path usually includes the /bin, /sbin, /usr/bin and /usr/sbin directories, so the steps in this book show the commands in these directories without absolute path names. Steps that use commands in other, less common, directories show the absolute paths in the examples.
Feedback
If you spot a typo in this guide, or if you have thought of a way to make this guide better, we would love to hear from you!
11
C
H A P T E R2
OpenVZ Philosophy
In This Chapter
About OpenVZ Software ... 11
Distinctive Features of OpenVZ ... 12
Main Principles of OpenVZ Operation ... 15
Hardware Node Availability Considerations ... 19
About OpenVZ Software
What is OpenVZ
OpenVZ is a complete server automation and virtualization solution developed by SWsoft. OpenVZ creates multiple isolated Virtual Private Servers (VPSs) on a single physical server to share hardware and management effort with maximum efficiency. Each VPS performs and executes exactly like a stand-alone server for its users and applications as it can be rebooted independently and has its own root access, users, IP addresses, memory, processes, files, applications, system libraries, and configuration files. Light overhead and efficient design of OpenVZ makes it the right virtualization choice for production servers with live applications and real-life data.
The basic OpenVZ VPS capabilities are:
Dynamic Real-time Partitioning – Partition a physical server into tens of VPSs, each with full dedicated server functionality.
Resource Management – Assign and control VPS resource parameters and re-allocate resources in real-time.
OpenVZ Philosophy 12
OpenVZ Applications
OpenVZ provides a comprehensive solution for Hosting Service Providers allowing them to:
Have hundreds of customers with their individual full-featured virtual private servers (Virtual Private Servers) sharing a single physical server;
Provide each customer with a guaranteed Quality of Service;
Transparently move customers and their environments between servers, without any manual reconfiguration.
If you administer a number of Linux dedicated servers within an enterprise, each of which runs a specific service, you can use OpenVZ to consolidate all these servers onto a single computer without losing a bit of valuable information and without compromising performance. Virtual Private Servers behave just like an isolated stand-alone server:
Each VPS has its own processes, users, files and provides full root shell access;
Each VPS has its own IP addresses, port numbers, filtering and routing rules;
Each VPS can have its own configuration for the system and application software, as well as its own versions of system libraries. It is possible to install or customize software packages inside a VPS independently from other VPSs or the host system. Multiple distributions of a package can be run on one and the same Linux box.
In fact, hundreds of servers may be grouped together in this way. Besides the evident advantages of such consolidation (increased facility of administration and the like), there are some you might not even have thought of, say, cutting down electricity bills by times!
OpenVZ proves invaluable for IT educational institutions that can now provide every student with a personal Linux server, which can be monitored and managed remotely. Software development companies may use virtual environments for testing purposes and the like.
Thus, OpenVZ can be efficiently applied in a wide range of areas: web hosting, enterprise server consolidation, software development and testing, user training, and so on.
Distinctive Features of OpenVZ
OpenVZ Philosophy 13
OS Virtualization
From the point of view of applications and Virtual Private Server users, each VPS is an independent system. This independency is provided by a virtualization layer in the kernel of the host OS. Note that only an infinitesimal part of the CPU resources is spent on virtualization (around 1-2%). The main features of the virtualization layer implemented in OpenVZ are the following:
VPS looks like a normal Linux system. It has standard startup scripts, software from vendors can run inside VPS without OpenVZ-specific modifications or adjustment;
A user can change any configuration file and install additional software;
Virtual Private Servers are fully isolated from each other (file system, processes, Inter Process Communication (IPC), sysctl variables);
Processes belonging to a VPS are scheduled for execution on all available CPUs. Consequently, VPSs are not bound to only one CPU and can use all available CPU power.
Network Virtualization
The OpenVZ network virtualization layer is designed to isolate VPSs from each other and from the physical network:
Each VPS has its own IP address; multiple IP addresses per VPS are allowed;
Network traffic of a VPS is isolated from the other VPSs. In other words, Virtual Private Servers are protected from each other in the way that makes traffic snooping impossible;
Firewalling may be used inside a VPS (the user can create rules limiting access to some services using the canonical iptables tool inside the VPS). In other words, it is possible to set up firewall rules from inside a VPS;
Routing table manipulations are allowed to benefit from advanced routing features. For example, setting different maximum transmission units (MTUs) for different destinations, specifying different source addresses for different destinations, and so on.
Templates
An OS template in OpenVZ is basically a set of packages from some Linux distribution used to populate one or more VPSs. With OpenVZ, different distributions can co-exist on the same hardware box, so multiple OS templates are available. An OS template consists of system programs, libraries, and scripts needed to boot up and run the system (VPS), as well as some very basic applications and utilities. Applications like a compiler and an SQL server are usually not included into an OS template.
OpenVZ Philosophy 14
Resource Management
OpenVZ Resource Management controls the amount of resources available to Virtual Private Servers. The controlled resources include such parameters as CPU power, disk space, a set of memory-related parameters. Resource management allows OpenVZ to:
Effectively share available Hardware Node resources among VPSs;
Guarantee Quality-of-Service (QoS) in accordance with a service level agreement (SLA);
Provide performance and resource isolation and protect from denial-of-service attacks;
OpenVZ Philosophy 15
Main Principles of OpenVZ
Operation
Basics of OpenVZ Technology
In this section we will try to let you form a more or less precise idea of the way the OpenVZ software operates on your computer. Please see the figure below:
Phys ic al Ser v e r (H ar dwar e No de) #3 Network Hardware Host Operating System
OpenVZ Layer OpenVZ Templates root user user Application Software V ir tua l P ri v at e Se rv er root user user Application Software V irt ual Pri v at e Se rv er root user user Application Software Vi rtu a l Pr iv at e S e rv er P h ys ic a l Ser v e r (H ar dwar e N ode ) #2 Network Hardware Host Operating System
OpenVZ Layer OpenVZ Templates root user user Application Software V irtua l P ri v ate Se rv er root user user Application Software V irtua l P ri v ate Se rv er P h y s ica l Se rv er ( H ar dw are N o d e ) # 1 Network Hardware Host Operating System
[image:15.595.100.524.247.524.2]OpenVZ Templates root user user Application Software V ir tual P riv ate Ser v e r root user user Application Software V ir tual P riv ate Ser v e r OpenVZ Layer
Figure 1: OpenVZ Technology
This figure presumes that you have a number of physical servers united into a network. In fact, you may have only one dedicated server to effectively use OpenVZ for the needs of your network. If you have more than one OpenVZ-based physical server, each one of the servers will have a similar architecture. In OpenVZ terminology, such servers are called Hardware Nodes
(or HN, or just Nodes), because they represent hardware units within a network.
OpenVZ is installed on Fedora Core 3 or 4 or Red Hat Enterprise Linux 4 configured in a certain way. For example, such customized configuration shall include the creation of a /vz
OpenVZ Philosophy 16
OpenVZ is installed in such a way that you will be able to boot your computer either with OpenVZ support or without it. This support is presented as “OpenVZ” in your boot loader and shown as OpenVZ Layer in the figure above.
However, at this point you are not yet able to create Virtual Private Servers. A Virtual Private Server is functionally identical to an isolated standalone server, having its own IP addresses, processes, files, users, its own configuration files, its own applications, system libraries, and so on. Virtual private servers share the same Hardware Node and the same OS kernel. However, they are isolated from each other. A Virtual Private Server is a kind of ‘sandbox’ for processes and users.
Different Virtual Private Servers can run different versions of Linux (for example, SuSE 9.2 or Fedora Core 4 and many others). Each VPS can run its own version of Linux. In this case we say that a VPS is based on a certain OS template. OS templates are packages shipped with OpenVZ. Before you are able to create a Virtual Private Server, you should install the corresponding OS template in OpenVZ. This is displayed as OpenVZ Templates in the scheme above.
OpenVZ Philosophy 17
Understanding Templates
A template is a VPS building block. An OS template is a set of packages needed to operate a VPS. Templates are usually created right on your Hardware Node; all you need is template tools (vzpkg) and template metadata.
Template metadata
Template metadata are information about a particular OS template. It contains:
a list of packages included in this template (in the form of package names);
location of (network) package repositories;
distribution-specific scripts needed to be executed on various stages of template installation;
public GPG key(s) needed to check signatures of packages;
All this information is contained in a few files installed into the
/vz/template/osname/osrelease/config/ directory. For example, the metadata for the Fedora Core 4 template are installed into the /vz/template/fedora-core/4/config/ directory.
Along with template metadata, a few OpenVZ-specific packages are usually provided; they are installed into the /vz/template/osname/osversion/vz-addons/ directory.
Template cache
Template metadata provide enough information to create an OS template. During the OS template creation, the needed package files are downloaded from the network repository to the Hardware Node and installed into a temporary VPS, which is then packed into a gzipped tarball called the template cache.
The template cache is used for fast VPS provisioning – basically, it is a pre-created VPS, so all that is needed to create a VPS is to untar this file. The template cache files are stored in the
/vz/template/cache/ directory.
Any template cache becomes obsolete with time as new updates are released for the given distribution. Naturally, there is a way to quickly update the template cache as well as all the previously created VPSs with the newest updates.
While you are able to perform all kinds of tasks within a Virtual Private Server including building rpm packages and installing them, OpenVZ provides an easy and far more efficient way of installing the applications you need on VPSs. The same way as you install an OS template on the OpenVZ system in order to create any number of Virtual Private Servers on its basis and share its resources, you can install applications in OpenVZ in order to share package files among any number of VPSs. You can then add these applications to any number of Virtual Private Servers.
OpenVZ Philosophy 18
Understanding Licenses
The OpenVZ software consists of the OpenVZ kernel and user-level tools, which are licensed by means of two different open source licenses.
The OpenVZ kernel is based on the Linux kernel, distributed under the GPL terms, and is licensed under GNU GPL version 2. The license text can be found at
http://openvz.org/documentation/licenses/gnu-gpl.
The user-level tools (vzctl, vzquota, and vzpkg) are licensed under the terms of the QPL license. The license text can be found at http://openvz.org/documentation/licenses/qpl.
OpenVZ Configuration
OpenVZ allows you to flexibly configure various settings for the OpenVZ system in general as well as for each and every Virtual Private Server. Among these settings are disk and user quota, network parameters, default file locations and configuration sample files, and others.
OpenVZ stores the configuration information in two types of files: the global configuration file
/etc/sysconfig/vz and VPS configuration files /etc/sysconfig/vz-scripts/vpsid.conf. The global configuration file defines global and default parameters for VPS operation, for example, logging settings, enabling and disabling disk quota for VPSs, the default configuration file and OS template on the basis of which a new VPS is created, and so on. On the other hand, a VPS configuration file defines the parameters for a given particular VPS, such as disk quota and allocated resources limits, IP address and host name, and so on. In case a parameter is configured both in the global OpenVZ configuration file, and in the VPS configuration file, the VPS configuration file takes precedence. For a list of parameters constituting the global configuration file and the VPS configuration files, turn to the Reference chapter.
OpenVZ Philosophy 19
Hardware Node Availability
Considerations
Hardware Node availability is more critical than the availability of a typical PC server. Since it runs multiple Virtual Private Servers providing a number of critical services, Hardware Node outage might be very costly. Hardware Node outage can be as disastrous as the simultaneous outage of a number of servers running critical services.
In order to increase Hardware Node availability, we suggest you follow the recommendations below:
Use RAID storage for critical VPS private areas. Do prefer hardware RAID, but software mirroring RAID might suit too as a last resort.
Do not run software on the Hardware Node itself. Create special Virtual Private Servers where you can host necessary services such as BIND, FTPD, HTTPD, and so on. On the Hardware Node itself, you need only the SSH daemon. Preferably, it should accept connections from a pre-defined set of IP addresses only.
20
C
H A P T E R3
Installation and Preliminary Operations
The current chapter provides exhaustive information on the process of installing and deploying your OpenVZ system including the pre-requisites and the stages you shall pass.
In This Chapter
Installation Requirements... 20 Installing and Configuring Host Operating System on Hardware Node... 23 Installing OpenVZ Software ... 27
Installation Requirements
After deciding on the structure of your OpenVZ system, you should make sure that all the Hardware Nodes where you are going to deploy OpenVZ for Linux meet the following system (hardware and software) and network requirements.
System Requirements
Installation and Preliminary Operations 21
Hardware Compatibility
The Hardware Node requirements for the standard 32-bit edition of OpenVZ are the following:
IBM PC-compatible computer;
Intel Celeron, Pentium II, Pentium III, Pentium 4, Xeon, or AMD Athlon CPU;
At least 128 MB of RAM;
Hard drive(s) with at least 4 GB of free disk space;
Network card (either Intel EtherExpress100 (i82557-, i82558- or i82559-based) or 3Com (3c905 or 3c905B or 3c595) or RTL8139-based are recommended).
The computer should satisfy the Red Hat Enterprise Linux or Fedora Core hardware requirements (please, see the hardware compatibility lists at www.redhat.com).
The exact computer configuration depends on how many Virtual Private Servers you are going to run on the computer and what load these VPSs are going to produce. Thus, in order to choose the right configuration, please follow the recommendations below:
CPUs. The more Virtual Private Servers you plan to run simultaneously, the more CPUs you need.
Memory. The more memory you have, the more Virtual Private Servers you can run. The exact figure depends on the number and nature of applications you are planning to run in your Virtual Private Servers. However, on the average, at least 1 GB of RAM is recommended for every 20-30 Virtual Private Servers;
Disk space. Each Virtual Private Server occupies 400–600 MB of hard disk space for system files in addition to the user data inside the Virtual Private Server (for example, web site content). You should consider it when planning disk partitioning and the number of Virtual Private Servers to run.
A typical 2–way Dell PowerEdge 1650 1u–mountable server with 1 GB of RAM and 36 GB of hard drives is suitable for hosting 30 Virtual Private Servers.
Software Compatibility
The Hardware Node should run either Red Hat Enterprise Linux 3 or 4, or Fedora Core 3 or 4, or CentOS 3.4 or 4. The detailed instructions on installing these operating systems for the best performance of OpenVZ are provided in the next sections.
Installation and Preliminary Operations 22
Network Requirements
The network pre-requisites enlisted in this subsection will help you avoid delays and problems with making OpenVZ for Linux up and running. You should take care in advance of the following:
Local Area Network (LAN) for the Hardware Node;
Internet connection for the Hardware Node;
Valid IP address for the Hardware Node as well as other IP parameters (default gateway, network mask, DNS configuration);
At least one valid IP address for each Virtual Private Server. The total number of addresses should be no less than the planned number of Virtual Private Servers. The addresses may be allocated in different IP networks;
Installation and Preliminary Operations 23
Installing and Configuring Host
Operating System on Hardware
Node
This section explains how to install Fedora Core 4 on the Hardware Node and how to configure it for OpenVZ. If you are using another distribution, please consult the corresponding installation guides about the installation specifics.
Choosing System Type
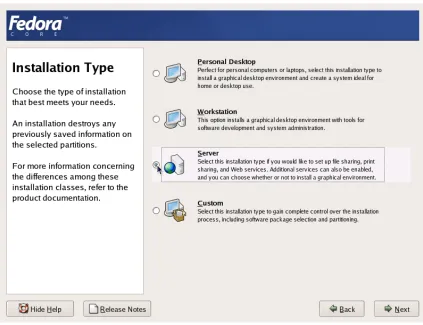
[image:23.595.100.523.346.671.2]Please follow the instructions from your Installation Guide when installing the OS on your Hardware Node. After the first several screens, you will be presented with a screen specifying the installation type. OpenVZ requires Server System to be installed, therefore select “Server” at the dialog shown in the figure below.
Figure 2: Fedora Core Installation - Choosing System Type
Installation and Preliminary Operations 24
Disk Partitioning
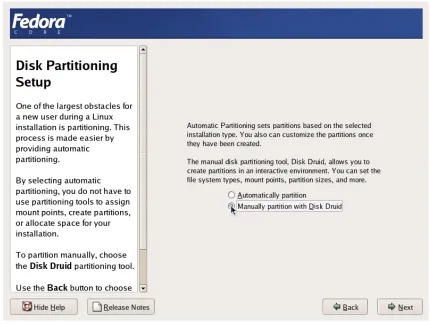
[image:24.595.96.526.189.513.2]On the Disk Partitioning Setup screen, select Manual partition with Disk Druid. Do not choose automatic partitioning since this type of partitioning will create a disk layout intended for systems running multiple services. In case of OpenVZ, all your services shall run inside Virtual Private Servers.
Figure 3: Fedora Core Installation - Choosing Manual Partitioning
Create the following partitions on the Hardware Node:
Partition Description Typical size
/ Root partition containing all Hardware Node operating system files
2-4 Gb
swap Paging partition for the Linux operating system 2 times RAM
Installation and Preliminary Operations 25
It is suggested to use the ext3 file system for the /vz partition. This partition is used for holding all data of the Virtual Private Servers existing on the Hardware Node. Allocate as much disk space as possible to this partition. It is not recommended to use the reiserfs file system as it is proved to be less stable than the ext3, and stability is of paramount importance for OpenVZ-based computers.
[image:25.595.101.524.241.563.2]The root partition will host the operating system files. The server set of Fedora Core 4 occupies approximately 1 GB of disk space, so 1 GB is the minimal size of the root partition. The size of the swap partition shall be two times the size of physical RAM installed on the Hardware Node. The figure below presents a system with a 12 GB SCSI hard drive.
Figure 4: Fedora Core Installation - Disk Druid
Installation and Preliminary Operations 26
Finishing OS Installation
After the proper partitioning of your hard drive(s), proceed in accordance with your OS Installation Guide.
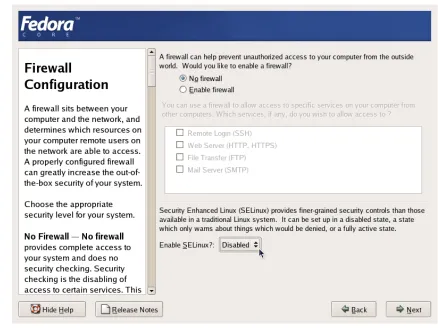
While on the Network Configuration screen, you should ensure the correctness of the Hardware Node’s IP address, host name, DNS, and default gateway information. If you are using DHCP, make sure that it is properly configured. If necessary, consult your network administrator. On the Firewall Configuration screen, choose No firewall. Option Enable SELinux should be set to
[image:26.595.87.525.248.576.2]Disabled.
Figure 5: Fedora Core Installation - Disabling Firewall and SELinux
Installation and Preliminary Operations 27
Installing OpenVZ Software
Downloading and Installing OpenVZ Kernel
First of all, you should download the kernel binary RPM from
http://openvz.org/download/kernel/. You need only one kernel RPM, so please choose the appropriate kernel binary depending on your hardware:
If there is more than one CPU available on your Hardware Node (or a CPU with hyperthreading), select the vzkernel-smp RPM.
If there is more than 4 Gb of RAM available, select the vzkernel-enterprise RPM.
Otherwise, select the uniprocessor kernel RPM (vzkernel-version).
Next, you shall install the kernel RPM of your choice on your Hardware Node by issuing the following command:
# rpm -ihv vzkernel-name*.rpm
Note: You should not use the rpm –U command (where -U stands for "upgrade"); otherwise, all the kernels currently installed on the Node will be removed.
Configuring Boot Loader
In case you use the GRUB loader, it will be configured automatically. You should only make sure that the lines below are present in the /boot/grub/grub.conf file on the Node:
title Fedora Core (2.6.8-022stab029.1) root (hd0,0)
kernel /vmlinuz-2.6.8-022stab029.1 ro root=/dev/sda5 quiet rhgb initrd /initrd-2.6.8-022stab029.1.img
However, we recommend that you configure this file in the following way:
Change Fedora Core to OpenVZ (just for clarity, so the OpenVZ kernels will not be mixed up with non OpenVZ ones).
Remove all extra arguments from the kernel line, leaving only the root=... parameter. At the end, the modified grub.conf file should look as follows:
title OpenVZ (2.6.8-022stab029.1) root (hd0,0)
kernel /vmlinuz-2.6.8-022stab029.1 ro root=/dev/sda5 initrd /initrd-2.6.8-022stab029.1.img
Setting sysctl parameters
There are a number of kernel limits that should be set for OpenVZ to work correctly. OpenVZ is shipped with a tuned /etc/sysctl.conf file. Below are the contents of the relevant part of
Installation and Preliminary Operations 28
# On Hardware Node we generally need
# packet forwarding enabled and proxy arp disabled net.ipv4.ip_forward = 1
net.ipv4.conf.default.proxy_arp = 0 # Enables source route verification net.ipv4.conf.all.rp_filter = 1 # Enables the magic-sysrq key kernel.sysrq = 1
# TCP Explict Congestion Notification #net.ipv4.tcp_ecn = 0
# we do not want all our interfaces to send redirects net.ipv4.conf.default.send_redirects = 1
net.ipv4.conf.all.send_redirects = 0
Please edit the file as described. To apply the changes issue the following command:
# sysctl -p
Alternatively, the changes will be applied upon the following reboot.
It is also worth mentioning that normally you should have forwarding (net.ipv4.ip_forward) turned on since the Hardware Node forwards the packets destined to or originating from the Virtual Private Servers.
Installation and Preliminary Operations 29
Downloading and Installing OpenVZ Packages
After you have successfully installed and booted the OpenVZ kernel, you can proceed with installing the user-level tools for OpenVZ.
You should install the following OpenVZ packages:
vzctl: this package is used to perform different tasks on the OpenVZ Virtual Private Servers (create, destroy, start, stop, set parameters etc.).
vzquota: this package is used to manage the VPS quotas.
vzpkg: this package is used to work with OpenVZ templates.You can download the corresponding binary RPMs from http://openvz.org/download/utils/. On the next step, you should install these utilities by using the following command:
# rpm –Uhv vzctl*.rpm vzquota*.rpm vzpkg*.rpm
Note: During the packages installation, you may be presented with a message telling you that
rpm has found unresolved dependencies. In this case you have to resolve these dependencies first and then repeat the installation.
Now you can launch OpenVZ. To this effect, execute the following command:
# /etc/init.d/vz start
This will load all the needed OpenVZ kernel modules. During the next reboot, this script will be executed automatically.
Installing OS Templates
Template (or package set) is a set of package files to be installed into a VPS. Operating system templates are used to create new Virtual Private Servers with a pre-installed operating system. Therefore, you are bound to download at least one OS template from
http://openvz.org/download/template/ and install it.
OS template metadata contain the information needed to create a template cache. You have to specify an OS template on the VPS creation, so you need to install the metadata for at least one OS template and prepare the template cache.
For example, this is how the template preparation for Fedora Core 3 will look like:
# rpm –ihv vztmpl-fedora-core-3-1.0-2.noarch.rpm
Preparing... ########################################### [100%] 1: vztmpl-fedora-########################################### [100%]
# vzpkgcache
Creating cache for fedora-core-3 OS template Setting up install process
<…some output skipped for clarity…>
Packing cache file fedora-core-3.tar.gz ... Cache file fedora-core-3.tar.gz [130M] created.
Installation and Preliminary Operations 30
You can also use one of the already pre-cached OS templates available at
http://openvz.org/download/template/cache/ for the VPS creation. To this effect, you should download the corresponding OS template and place it to the /vz/template/cache
31
C
H A P T E R4
Operations on Virtual Private Servers
This chapter describes how to perform day-to-day operations on separate Virtual Private Servers taken in their wholeness.
Note: We assume that you have successfully installed, configured, and deployed your OpenVZ system. In case you have not, please turn to Chapter 3 providing detailed information on all these operations.
In This Chapter
Creating and Configuring New Virtual Private Server ... 31 Starting, Stopping, Restarting, and Querying Status of Virtual Private Server ... 37 Listing Virtual Private Servers... 39 Reinstalling Virtual Private Server ... 40 Deleting Virtual Private Server ... 40 Running Commands in Virtual Private Server... 41
Creating and Configuring New
Virtual Private Server
This section guides you through the process of creating a Virtual Private Server. We assume that you have successfully installed OpenVZ and at least one OS template. If there are no OS templates installed on the Hardware Node, turn to the Managing Templates chapter first.
Before you Begin
Before you start creating a Virtual Private Server, you should:
Check that the Hardware Node is visible on your network. You should be able to connect to/from other hosts. Otherwise, your Virtual Private Servers will not be accessible from other computers.
Check that you have at least one IP address per Virtual Private Server and the addresses belong to the same network as the Hardware Node or routing to the Virtual Private Servers has been set up via the Hardware Node.
To create a new Virtual Private Server, you have to:
choose the new Virtual Private Server ID;
choose the OS template to use for the Virtual Private Server;
Operations on Virtual Private Servers 32
Choosing Virtual Private Server ID
Every Virtual Private Server has a numeric ID, also known as VPS ID, associated with it. The ID is a 32-bit integer number beginning with zero and unique for a given Hardware Node. When choosing an ID for your Virtual Private Server, please follow the simple guidelines below:
ID 0 is used for the Hardware Node itself. You cannot and should not try to create a Virtual Private Server with ID 0.
OpenVZ reserves the IDs ranging from 0 to 100. Though OpenVZ uses only ID 0, different versions might use additional Virtual Private Servers IDs for internal needs. To facilitate upgrading, please do not create Virtual Private Servers with IDs below 101.
The only strict requirement for a VPS ID is to be unique for a particular Hardware Node. However, if you are going to have several computers running OpenVZ, we recommend assigning different VPS ID ranges to them. For example, on Hardware Node 1 you create Virtual Private Servers within the range of IDs from 101 to 1000; on Hardware Node 2 you use the range from 1001 to 2000, and so on. This approach makes it easier to remember on which Hardware Node a Virtual Private Server has been created, and eliminates the possibility of VPS ID conflicts when a Virtual Private Server migrates from one Hardware Node to another.
Another approach to assigning VPS IDs is to follow some pattern of VPS IP addresses. Thus, for example, if you have a subnet with the 10.0.x.x address range, you may want to assign the 17015 ID to the VPS with the 10.0.17.15 IP address, the 39108 ID to the VPS with the 10.0.39.108 IP address, and so on. This makes it much easier to run a number of OpenVZ utilities eliminating the necessity to check up the VPS IP address by its ID and similar tasks. You can also think of your own patterns for assigning VPS IDs depending on the configuration of your network and your specific needs.
Before you decide on a new VPS ID, you may want to make sure that no VPS with this ID has yet been created on the Hardware Node. The easiest way to check whether the VPS with the given ID exists is to issue the following command:
# vzlist -a 101
VPS not found
Operations on Virtual Private Servers 33
Choosing OS Template
Next, you shall decide on which OS template you want to base the new VPS. There might be several OS templates installed on the Hardware Node; use the vzpkgls command to find out the templates installed on your system:
# vzpkgls
fedora-core-3 fedora-core-4 centos-4
Creating Virtual Private Server
After the VPS ID and the installed OS template have been chosen, you can create the VPS private area with the vzctl create command. The private area is the directory containing the private files of the given VPS. The private area is mounted to the /vz/root/vpsid/
directory on the Hardware Node and provides VPS users with a complete Linux file system tree. The vzctl create command requires only the VPS ID and the name of the OS template as arguments; however, in order to avoid setting all the VPS resource control parameters after creating the private area, you can specify a sample configuration to be used for your new Virtual Private Server. The sample configuration files are residing in the /etc/sysconfig/vz-scripts directory and have names with the following mask: ve-config_name .conf-sample. The most commonly used sample is the ve-vps.basic.conf-sample file; this sample file has resource control parameters suitable for most web site Virtual Private Servers. Thus, for example, you can create a new VPS by typing the following string:
# vzctl create 101 --ostemplate fedora-core-4 -–config vps.basic
Creating VPS private area VPS private area was created
In this case, OpenVZ will create a Virtual Private Server with ID 101, the private area based on the fedora-core-4 OS template, and configuration parameters taken from the
ve-vps.basic.conf-sample sample configuration file.
If you specify neither an OS template nor a sample configuration, vzctl will try to take the corresponding values from the global OpenVZ configuration file /etc/sysconfig/vz. So you can set the default values in this file using your favorite text file editor, for example:
DEF_OSTEMPLATE="fedora-core-4" CONFIGFILE="vps.basic"
and do without specifying these parameters each time you create a new VPS. Now you can create a VPS with ID 101 with the following command:
# vzctl create 101
Creating VPS private area: /vz/private/101 VPS is mounted
Postcreate action done VPS is unmounted
Operations on Virtual Private Servers 34
In principle, now you are ready to start your newly created Virtual Private Server. However, typically you need to set its network IP address, host name, DNS server address and root
password before starting the Virtual Private Server for the first time. Please see the next subsection for information on how to perform these tasks.
Configuring Virtual Private Server
Configuring a Virtual Private Server consists of several tasks:
Setting Virtual Private Server startup parameters;
Setting Virtual Private Server network parameters;
Setting Virtual Private Server user passwords;
Configuring Quality of Service (Service Level) parameters.
For all these tasks, the vzctl set command is used. Using this command for setting VPS startup parameters, network parameters, and user passwords is explained later in this subsection. Service Level Management configuration topics are dwelled upon in the Managing Resources chapter.
Setting Startup Parameters
The following options of the vzctl set command define the VPS startup parameters:
onboot and capability. To make the Virtual Private Server 101 automatically boot at Hardware Node startup, issue the following command:
# vzctl set 101 --onboot yes --save
Operations on Virtual Private Servers 35
Setting Network Parameters
In order to be accessible from the network, a Virtual Private Server shall be assigned a correct IP address and host name; DNS server addresses shall also be configured. The session below illustrates setting the Virtual Private Server 101 network parameters:
# vzctl set 101 --hostname test101.my.org --save
Hostname for VPS set: test101.my.org Saved parameters for VPS 101
# vzctl set 101 --ipadd 10.0.186.1 --save
Adding IP address(es): 10.0.186.1 Saved parameters for VPS 101
# vzctl set 101 --nameserver 192.168.1.165 --save
File resolv.conf was modified Saved parameters for VPS 101
This command will assign VPS 101 the IP address of 10.0.186.1, the host name of test101.my.org, and set the DNS server address to 192.168.1.165. The –-save flag saves all the parameters to the VPS configuration file.
You can issue the above commands when the Virtual Private Server is running. In this case, if you do not want the applied values to persist, you can omit the –-save option and the applied values will be valid only until the Virtual Private Server shutdown.
To check whether SSH is running inside the Virtual Private Server, use vzctl exec, which allows executing any commands in the Virtual Private Server context.
# vzctl start 101
[This command starts VPS 101, if it is not started yet]
# vzctl exec 101 service sshd status
sshd is stopped
# vzctl exec 101 service sshd start
Starting sshd: [ OK ]
# vzctl exec 101 service sshd status
sshd (pid 16036) is running...
The above example assumes that VPS 101 is created on the Fedora Core template. For other OS templates, please consult the corresponding OS documentation.
For more information on running commands inside a VPS from the Hardware Node, see the
Operations on Virtual Private Servers 36
Setting root Password for VPS
By default, the root account is locked in a newly created VPS, and you cannot log in. In order to log in to the VPS, it is necessary to create a user account inside the Virtual Private Server and set a password for this account or unlock the root account. The easiest way of doing it is to run:
# vzctl start 101
[This command starts VPS 101, if it is not started yet]
# vzctl set 101 --userpasswd root:test
In this example, we set the root password for VPS 101 to “test”, and you can log in to the Virtual Private Server via SSH as root and administer it in the same way as you administer a standalone Linux computer: install additional software, add users, set up services, and so on. The password will be set inside the VPS in the /etc/shadow file in an encrypted form and will not be stored in the VPS configuration file. Therefore, if you forget the password, you have to reset it. Note that --userpasswd is the only option of the vzctl set command that never requires the --save switch, the password is anyway persistently set for the given Virtual Private Server.
Operations on Virtual Private Servers 37
Starting, Stopping, Restarting, and
Querying Status of Virtual Private
Server
When a Virtual Private Server is created, it may be started up and shut down like an ordinary computer. To start Virtual Private Server 101, use the following command:
# vzctl start 101
Starting VPS ... VPS is mounted
Adding IP address(es): 10.0.186.101 Hostname for VPS 101 set: test.my.org VPS start in progress...
To check the status of a VPS, use the vzctl status vpsid command:
# vzctl status 101
VPS 101 exist mounted running
Its output shows the following information:
Whether the VPS private area exists;
Whether this private area is mounted;
Whether the Virtual Private Server is running.
In our case, vzctl reports that VPS 101 exists, its private area is mounted, and the VPS is running. Alternatively, you can make use of the vzlist utility:
# vzlist 101
VPSID NPROC STATUS IP_ADDR HOSTNAME 101 20 running 10.0.186.101 test.my.org
Still another way of getting the VPS status is checking the /proc/vz/veinfo file. This file lists all the Virtual Private Servers currently running on the Hardware Node. Each line presents a running Virtual Private Server in the <VPS_ID> <reserved> <number_of_processes> <IP_address> format:
# cat /proc/vz/veinfo
101 0 20 10.0.186.1 0 0 48
This output shows that VPS 101 is running, there are 20 running processes inside the VPS, and its IP address is 192.168.1.1. Note that second field is reserved; it has no special meaning and should always be zero.
The last line corresponds to the VPS with ID 0, which is the Hardware Node itself. The following command is used to stop a Virtual Private Server:
# vzctl stop 101
Stopping VPS ... VPS was stopped VPS is unmounted
# vzctl status 101
Operations on Virtual Private Servers 38
vzctl has a two-minute timeout for the VPS shutdown scripts to be executed. If the VPS is not stopped in two minutes, the system forcibly kills all the processes in the Virtual Private Server. The Virtual Private Server will be stopped in any case, even if it is seriously damaged. To avoid waiting for two minutes in case of a Virtual Private Server that is known to be corrupt, you may use the --fast switch:
# vzctl stop 101 --fast
Stopping VPS ... VPS was stopped VPS is unmounted
Make sure that you do not use the --fast switch with healthy VPSs, unless necessary, as the forcible killing of VPS processes may be potentially dangerous.
The vzctl start and vzctl stop commands initiate the normal Linux OS startup or shutdown sequences inside the Virtual Private Server. In case of a Red Hat-like distribution, System V initialization scripts will be executed just like on an ordinary computer. You can customize startup scripts inside the Virtual Private Server as needed.
To restart a Virtual Private Server, you may as well use the vzctl restart command:
# vzctl restart 101 Restarting VPS
Stopping VPS ... VPS was stopped VPS is unmounted Starting VPS ... VPS is mounted
Operations on Virtual Private Servers 39
Listing Virtual Private Servers
Very often you may want to get an overview of the Virtual Private Servers existing on the given Hardware Node and to get additional information about them - their IP addresses, hostnames, current resource consumption, etc. In the most general case, you may get a list of all VPSs by issuing the following command:
# vzlist -a
VPSID NPROC STATUS IP_ADDR HOSTNAME 101 8 running 10.101.66.1 vps101.my.org 102 7 running 10.101.66.159 vps102.my.org 103 - stopped 10.101.66.103 vps103.my.org
The -a switch tells the vzlist utility to output both running and stopped VPSs. By default, only running VPSs are shown. The default columns inform you of the VPS IDs, the number of running processes inside VPSs, their status, IP addresses, and hostnames. This output may be customized as desired by using vzlist command line switches. For example:
# vzlist -o veid,diskinodes.s -s diskinodes.s
VPSID DQINODES.S 1 400000 101 200000 102 200000
Operations on Virtual Private Servers 40
Deleting Virtual Private Server
You can delete a Virtual Private Server that is not needed anymore with the vzctl destroy
VPS_ID command. This command removes the Virtual Private Server private area completely and renames the VPS configuration file and action scripts by appending the .destroyed
suffix to them.
A running VPS cannot be destroyed with the vzctl destroy command. The example below illustrates destroying VPS 101:
# vzctl destroy 101
VPS is currently mounted (umount first)
# vzctl stop 101
Stopping VPS ... VPS was stopped VPS is unmounted
# vzctl destroy 101
Destroying VPS private area: /vz/private/101 VPS private area was destroyed
# ls /etc/sysconfig/vz-scripts/101.*
/etc/sysconfig/vz-scripts/101.conf.destroyed /etc/sysconfig/vz-scripts/101.mount.destroyed /etc/sysconfig/vz-scripts/101.umount.destroyed
# vzctl status 101
VPS 101 deleted unmounted down
If you do not need the backup copy of the VPS configuration files (with the .destroyed
Operations on Virtual Private Servers 41
Running Commands in Virtual
Private Server
Usually, a Virtual Private Server administrator logs in to the VPS via network and executes any commands in the VPS as on any other Linux box. However, you might need to execute commands inside Virtual Private Servers bypassing the normal login sequence. This can happen if:
You do not know the Virtual Private Server login information, and you need to run some diagnosis commands inside the VPS in order to verify that it is operational.
Network access is absent for a Virtual Private Server. For example, the VPS administrator might have accidentally applied incorrect firewalling rules or stopped SSH daemon.
OpenVZ allows you to execute commands in a Virtual Private Server in these cases. Use the
vzctl exec VPS_ID command for running a command inside the VPS with the given ID. The session below illustrates the situation when SSH daemon is not started:
# vzctl exec 101 /etc/init.d/sshd status
sshd is stopped
# vzctl exec 101 /etc/init.d/sshd start
Starting sshd:[ OK ]
# vzctl exec 101 /etc/init.d/sshd status
sshd (pid 26187) is running...
Now VPS users can log in to the VPS via SSH.
When executing commands inside a Virtual Private Server from shell scripts, use the vzctl exec2 command. It has the same syntax as vzctl exec but returns the exit code of the command being executed instead of the exit code of vzctl itself. You can check the exit code to find out whether the command has completed successfully.
If you wish to execute a command in all running VPSs, you can use the following script:
# for i in `vzlist –o veid -H`; do \
echo "VPS $i"; vzctl exec $i <command>; done
where <command> is the command to be executed in all the running VPSs. For example:
# for i in `vzlist –o veid -H`; do\
echo "VPS $i"; vzctl exec $i uptime; done
VPS 101
2:26pm up 6 days, 1:28, 0 users, load average: 0.00, 0.00, 0.00 VPS 102
2:26pm up 6 days, 1:39, 0 users, load average: 0.00, 0.00, 0.00
42
C
H A P T E R5
Managing Templates
A template is basically a set of packages from some Linux distribution used to populate a VPS. An OS template consists of system programs, libraries, and scripts needed to boot up and run the system (VPS), as well as some very basic applications and utilities. Applications like a compiler and an SQL server are usually not included into an OS template.
In This Chapter
Template Lifecycle ... 42 Listing Templates... 44 Working with VPS ... 45
Template Lifecycle
A template cache is an OS template installed into a VPS and then packed into a gzipped tar archive. This allows to speed up the creation of a new Virtual Private Server: instead of installing all the packages comprising a Linux distribution, vzctl just unpacks the archive.
Template metadata
are a set of files containing the information needed to recreate the
Managing Templates 43
List of packages this template comprises
Locations of (network) package repositories
Scripts needed to be executed on various stages of template installation
Public GPG key(s) needed to check signatures of packages
Additional OpenVZ-specific packages
In order to operate with a template, you should first create its metadata (available from
http://openvz.org/download/template/metadata/). The the vzpkgcache utility should be run in order to actually create the template cache. It downloads all the packages this template comprises from the network repositories for the given distribution and installs these packages to a temporary VPS, which is then packed into a tar archive to be used later during the creation of new VPSs.
Since this process involves downloading a lot of files (about 400 files, up to 200 Mb in total for a typical distribution) from the Internet, it might be sped up using a snapshot of an already fetched repository for a given distribution. Such snapshots are available from
http://openvz.org/download/template/repocache/, they are to be unpacked into the
/vz/template directory. Please note that this step is optional.
In case a template cache (i.e. a tar archive) already exists, vzpkgcache tries to bring it up to date by applying the latest updates available from a distribution repository. Since nowadays Linux distributions are updated quite frequently, it makes sense to run this utility from time to time, or at least before doing mass VPS creation.
If there is no need to process all templates, template names can be specified after vzpkgcache
in the command line, e.g. the following command creates or updates the cache for the Fedora Core 4 template only:
# vzpkgcache fedora-core-4
Managing Templates 44
Listing Templates
The vzpkgls utility allows you to list the templates installed on the Hardware Node. They may be already used or not used by certain VPSs:
# vzpkgls
fedora-core-4 centos-4
As you see, the fedora-core-4 and centos 4 templates are available on the Hardware Node. Note that some of them might not be cached yet. To see only those templates that are cached (and thus are ready to be used for creating a VPS), use the --cached flag with
vzpkgls:
# vzpkgls –-cached
fedora-core-4
Considering the previous output, this means that the centos-4 template is just installed and is not cached yet.
Specifying a VPS number as a parameter, this command prints the template used by the specified VPS:
# vzpkgls 101
Managing Templates 45
Working with VPS
If you need to update an already existing VPS with the newer packages available from distribution repositories or install some packages that are not part of the template, use the
vzyum command, which is a simple yum wrapper. For example, to update the VPS with ID 123, run:
# vzyum 123 update
This will find, download, and install all the available updates.
As you may have noticed, a lot of applications are not installed with an OS template. They are to be installed separately, using the vzyum utility. For example, if you need the MySQL server inside VPS 123, use the following command:
# vzyum 123 install mysql-server
Here, vzyum will call the yum package manager and provide it with all the paths to the repositories suitable for the distribution installed into the VPS. Yum will calculate the dependencies, present you with a list of packages to install/update/remove based on what you have asked for and, if confirmed, run a transaction to actually perform all the needed steps. For more information, see the yum manual page (man 8 yum).
If the package you want to install is already available on Hardware Node, you can use the
vzrpm utility to install it into a VPS, e.g.:
# vzrpm 123 –ihv mypackage-1.0-2.i386.rpm
This will install the mypackage RPM to VPS 123.
46
C
H A P T E R6
Managing Resources
The main goal of resource control in OpenVZ is to provide Service Level Management or Quality of Service (QoS) for Virtual Private Servers. Correctly configured resource control settings prevent serious impacts resulting from the resource over-usage (accidental or malicious) of any Virtual Private Server on the other Virtual Private Servers. Using resource control parameters for Quality of Service management also allows to enforce fairness of resource usage among Virtual Private Servers and better service quality for preferred VPSs, if necessary.
In This Chapter
What are Resource Control Parameters?... 46 Managing Disk Quotas... 47 Managing CPU Share... 53 Managing System Parameters ... 55 Managing VPS Resources Configuration ... 60
What are Resource Control
Parameters?
The system administrator controls the resources available to a Virtual Private Server through a set of resource management parameters. All these parameters are defined either in the OpenVZ global configuration file (/etc/sysconfig/vz), or in the respective VPS configuration files (/etc/sysconfig/vz-scripts/VPSID.conf), or in both. You can set them by manually editing the corresponding configuration files, or by using the OpenVZ command-line utilities. These parameters can be divided into the disk, network, CPU, and system categories. The table below summarizes these groups:
Group Description Parameter names Explained in
Disk This group of parameters determines disk quota in OpenVZ. The OpenVZ disk quota is realized on two levels: the VPS level and the per-user/group level. You can turn on/off disk quota on any level and configure its settings.
DISK_QUOTA, DISKSPACE, DISKINODES, QUOTATIME, QUOTAUGIDLIMIT
Managing Disk Quotas
CPU This group of parameters defines the CPU time different VPSs are guaranteed to receive.
Managing Resources 47
System This group of parameters defines various aspects of using system memory, TCP sockets, IP packets and like parameters by different VPSs.
avnumproc, numproc, numtcpsock,
numothersock,
vmguarpages, kmemsize, tcpsndbuf, tcprcvbuf, othersockbuf,
dgramrcvbuf, oomguarpages,
lockedpages, shmpages, privvmpages,
physpages, numfile, numflock, numpty, numsiginfo,
dcachesize, numiptent
Managing System Parameters
Managing Disk Quotas
This section explains what disk quotas are, defines disk quota parameters, and describes how to perform disk quota related operations:
Turning on and off per-VPS (first-level) disk quotas;
Setting up first-level disk quota parameters for a Virtual Private Server;
Turning on and off per-user and per-group (second-level) disk quotas inside a Virtual Private Server;
Setting up second-level quotas for a user or for a group;
Checking disk quota statistics;
Managing Resources 48
What are Disk Quotas?
Disk quotas enable system administrators to control the size of Linux file systems by limiting the amount of disk space and the number of inodes a Virtual Private Server can use. These quotas are known as per-VPS quotas or first-level quotas in OpenVZ. In addition, OpenVZ enables the Virtual Private Sever administrator to limit disk space and the number of inodes that individual users and groups in that VPS can use. These quotas are called per-user and per-group quotas or second-level quotas in OpenVZ.
By default, OpenVZ has first-level quotas enabled (which is defined in the OpenVZ global configuration file), whereas second-level quotas must be turned on for each Virtual Private Server separately (in the corresponding VPS configuration files). It is impossible to turn on second-level disk quotas for a Virtual Private Server if first-level disk quotas are off for that Virtual Private Server.
The disk quota block size in OpenVZ is always 1024 bytes. It may differ from the block size of the underlying file system.
OpenVZ keeps quota usage statistics and limits in /var/vzquota/quota.vpsid - a special quota file. The quota file has a special flag indicating whether the file is “dirty”. The file becomes dirty when its contents become inconsistent with the real VPS usage. This means that when the disk space or inodes usage changes during the VPS operation, these statistics are not automatically synchronized with the quota file, the file just gets the “dirty” flag. They are synchronized only when the VPS is stopped or when the HN is shut down. After synchronization, the “dirty” flag is removed. If the Hardware Node has been incorrectly brought down (for example, the power switch was hit), the file remains “dirty”, and the quota is re-initialized on the next VPS startup. This operation may noticeably increase the Node startup time. Thus, it is highly recommended to shut down the Hardware Node properly.
Disk Quota Parameters
The table below summarizes the disk quota parameters that you can control. The File column indicates whether the parameter is defined in the OpenVZ global configuration file (G), in the VPS configuration files (V), or it is defined in the global configuration file but can be overridden in a separate VPS configuration file (GV).
Parameter Description File
disk_quota Indicates whether first-level quotas are on or off for all VPSs or for a separate VPS.
GV
diskspace Total size of disk space the VPS may consume, in 1-Kb blocks. V
diskinodes Total number of disk inodes (files, directories, and symbolic links) the Virtual Private Server can allocate.
V
quotatime The grace period for the disk quota overusage defined in seconds. The
Virtual Private Server is allowed to temporarily exceed its quota soft limits for no more than the QUOTATIME period.
V
quotaugidlimit Number of user/group IDs allowed for the VPS internal disk quota. If
set to 0, the UID/GID quota will not be enabled.
Managing Resources 49
Turning On and Off Per-VPS Disk Quotas
The parameter that defines whether to use first-level disk quotas is DISK_QUOTA in the OpenVZ global configuration file (/etc/sysconfig/vz). By setting it to “no”, you will disable OpenVZ quotas completely.
This parameter can be specified in the Virtual Private Server configuration file (/etc/sysconfig/vz-scripts/vpsid.conf) as well. In this case its value will take precedence of the one specified in the global configuration file. If you intend to have a mixture of Virtual Private Servers with quotas turned on and off, it is recommended to set the
DISK_QUOTA value to “yes” in the global configuration file and to “no” in the configuration file of that VPS which does not need quotas.
The session below illustrates a scenario when first-level quotas are on by default and are turned off for Virtual Private Server 101:
[checking that quota is on]
# grep DISK_QUOTA /etc/sysconfig/vz
DISK_QUOTA=yes
[checking available space on /vz partition]
# df /vz
Filesystem 1k-blocks Used Available Use% Mounted on /dev/sda2 8957295 1421982 7023242 17% /vz
[editing VPS configuration file to add DISK_QUOTA=no]
# vi /etc/sysconfig/vz-scripts/101.conf
[checking that quota is off for VPS 101]
# grep DISK_QUOTA /etc/sysconfig/vz-scripts/101.conf
DISK_QUOTA=no
# vzctl start 101
Starting VPS ... VPS is mounted
Adding IP address(es): 192.168.1.101 Hostname for VPS set: vps101.my.org VPS start in progress...
# vzctl exec 101 df
Filesystem 1k-blocks Used Available Use% Mounted on simfs 8282373 747060 7023242 10% /
As the above example shows, the only disk space limit a Virtual Private Server with the quotas turned off has is the available space and inodes on the partition wh