Installation Guide for Host Encyclopedia and Host
Construction
r7.6
This documentation (the “Documentation”) and related computer software program (the “Software”) (hereinafter collectively referred to as the “Product”) is for the end user’s informational purposes only and is subject to change or withdrawal by CA at any time.
This Product may not be copied, transferred, reproduced, disclosed, modified or duplicated, in whole or in part, without the prior written consent of CA. This Product is confidential and proprietary information of CA and protected by the copyright laws of the United States and international treaties.
Notwithstanding the foregoing, licensed users may print a reasonable number of copies of the Documentation for their own internal use, and may make one copy of the Software as reasonably required for back-up and disaster recovery purposes, provided that all CA copyright notices and legends are affixed to each reproduced copy. Only authorized employees, consultants, or agents of the user who are bound by the provisions of the license for the Software are permitted to have access to such copies.
The right to print copies of the Documentation and to make a copy of the Software is limited to the period during which the license for the Product remains in full force and effect. Should the license terminate for any reason, it shall be the user’s responsibility to certify in writing to CA that all copies and partial copies of the Product have been returned to CA or destroyed.
EXCEPT AS OTHERWISE STATED IN THE APPLICABLE LICENSE AGREEMENT, TO THE EXTENT PERMITTED BY APPLICABLE LAW, CA PROVIDES THIS PRODUCT “AS IS” WITHOUT WARRANTY OF ANY KIND, INCLUDING
WITHOUT LIMITATION, ANY IMPLIED WARRANTIES OF MERCHANTABILITY, FITNESS FOR A PARTICULAR PURPOSE OR NONINFRINGEMENT. IN NO EVENT WILL CA BE LIABLE TO THE END USER OR ANY THIRD PARTY FOR ANY LOSS OR DAMAGE, DIRECT OR INDIRECT, FROM THE USE OF THIS PRODUCT, INCLUDING WITHOUT LIMITATION, LOST PROFITS, BUSINESS INTERRUPTION, GOODWILL, OR LOST DATA, EVEN IF CA IS EXPRESSLY ADVISED OF SUCH LOSS OR DAMAGE.
The use of this Product and any product referenced in the Documentation is governed by the end user’s applicable license agreement.
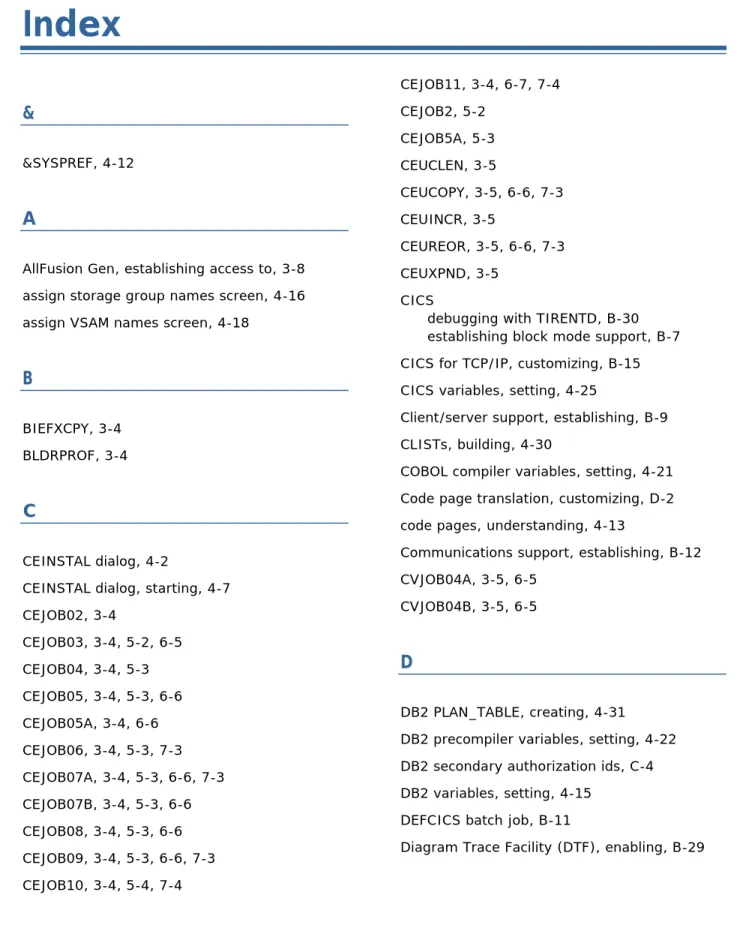
Contents
Chapter 1: Installation Overview
Runtime Changes...1-1 Install Prerequisites...1-2 Installation Process Overview ...1-3
Chapter 2: Preparing to Install
Installation Process Overview ...2-1 Reviewing Cover Letters and PMLs...2-1 CA Common Services...2-1 Technical Requirements...2-5 Site Variables Worksheets...2-5 AllFusion Gen Library Name Variables...2-5 JCL Variables...2-7 Encyclopedia Variables...2-8 DB2 Database Variables...2-9 COBOL Compiler Variables...2-10 DB2 Subsystem Variables...2-11 Datacom Subsystem Variables...2-11 CICS Variables...2-12 IMS Variables...2-12 RPROF Variables...2-13 Master Checklist...2-15 AllFusion Gen Requirements...2-15 AllFusion Gen Optional Requirements ...2-15 Required for Host Construction Facility...2-15
Chapter 3: Building Software Libraries
Uploading and Installing ...3-1 Establish ISPF Library Concatenation...3-6 ISPLLIB or STEPLIB...3-7 LIBDEF...3-7 Procedure...3-7 Establish Access to AllFusion Gen...3-8
Other ISPF Considerations... 3-8 Evaluate Return Codes... 3-9
Chapter 4: Establishing the Environment
Prerequisites... 4-1 Define Installation Variables... 4-2 Using Saved Parameters to Configure the Environment... 4-2 TILPARMS ... 4-2 Modifying TILPARMS... 4-2 TILTAB50... 4-4 How Space Parameters Are Created... 4-4 Origins of TILTAB50... 4-5 How TILTAB50 Is Used ... 4-5 Effect of a Missing TILTAB50... 4-6 Relationship between TILTAB50 and TILPARMS... 4-6 Tasks to Define Installation Variables... 4-7 Start the CEINSTAL Dialog... 4-7 Set Library Names... 4-9 Edit Job Cards... 4-10 Set JCL Variables... 4-11 Set Encyclopedia Variables...4-12 Define Regional Settings... 4-13 Set DB2 Variables... 4-15 Assign Storage Group Names ... 4-16 Assign VSAM Names... 4-18 Set Target System Variables... 4-19 Verify Installation Variables... 4-29 Save Installation Variables...4-29 Display System Information... 4-30 Build CLISTs... 4-30 Build Sample Utility JCL ... 4-31 Create a DB2 PLAN_TABLE (Optional)... 4-31 Encyclopedia Number for Multiple Encyclopedias...4-31 Where Do You Go From Here? ...4-32
Chapter 5: Creating a New Encyclopedia
Prerequisites...5-1 Build SQL and JCL...5-2 Run Jobs to Create the Encyclopedia...5-2 Test Encyclopedia Functions...5-6 RUNSTATS, Rebind AllFusion Gen Packages and Image Copy...5-7 Package Bind...5-7 CEJOB07A—BINDPACK...5-8 CEJOB07B—BINDPLAN...5-9 Enable User Access...5-10 Where Do You Go From Here?...5-10
Chapter 6: Upgrading an Encyclopedia in Place
Prerequisites...6-1 Considerations ...6-2 Build SQL and JCL...6-2 Schema Release Levels ...6-3 Transition Guidelines...6-3 Model Conversion...6-4 Cross-Model Functionality...6-4 Dynamic Program Call Compatibility Feature ...6-4 Run Upgrade Jobs...6-5 Enable User Access...6-8 Where Do You Go From Here?...6-8
Chapter 7: Populating a Host Encyclopedia
Copying Data to a Host Encyclopedia ...7-1 Prerequisites...7-1 Build JCL and SQL...7-2 Unload and Load ...7-3 Enable User Access...7-5 Display License Information...7-6 Copying Models to a Host Encyclopedia ...7-6 Download/Upload Method ...7-7 Cross-Copying Models ...7-9 Example 1...7-10 Example 2...7-10 Where Do You Go From Here?...7-10
Chapter 8: Installing the z/OS API
Preparing for Installation ... 8-1 Upload and Install the API... 8-2
Appendix A: Sizing an Encyclopedia
DASD Requirements...A-1 Sizing an Encyclopedia... A-2 AllFusion Gen Encyclopedias ... A-2 How to Estimate Larger Encyclopedia Sizes ...A-2 How to Create Storage Group Parameters... A-9 How to Create VSAM Parameters...A-9
Appendix B: Configuring IMS and CICS
Runtime DLLs and LE...B-1 AllFusion Gen requires PDSE... B-2 Threadsafe ... B-2 Install Gen Runtime Load Library Modules ...B-4 Execution Load Library: IMS ... B-4 Execution Load Library: CICS... B-4 Define IMS Block Mode Applications...B-5 Define APPLCTN and TRANSACT Macros... B-5 Define PSBs...B-6 Activate a PSB for MPP Processing... B-6 Define CICS Block Mode Applications...B-7 Define User Transactions ... B-7 Define User Load Modules... B-8 Map Transactions to DB2 Plans... B-8 Enable XCTL... B-8 Enable Error Messages...B-9 Establish Client/Server Support...B-9 Customize Code Page Translation ... B-9 Define Server Transactions and Programs...B-10
Debugging Applications...B-29 Diagram Trace Facility ...B-29 Debugging Dynamic Runtime...B-30 TIRCRUNC...B-30 TIRCRUNI...B-31
Appendix C: Using Encyclopedia Exits
Types of Exits...C-1 Common Encyclopedia Exits...C-2 TICINSTX ...C-2 TICJCLX, TICGENB2, TICGENB4 and TIRGENB2...C-2 DB2 Secondary Authorization IDs...C-4 TICINSTX ...C-4 TICGENB2 and TIRGENB2 Skeletons ...C-6 TICGENB4...C-7 TICJCLX...C-7 TICEXBPK...C-8 TICEXBPL ...C-9
Appendix D: Setting Model Code Pages
Customizing Code Page Translation...D-2 Customizing the Code Page Translation Table for Your Environment...D-3 MKCRUN JCL ...D-4 Code Page Translation Tables ...D-5
Chapter 1: Installation Overview
AllFusion® Gen supports model-based development of application solutions. The Host Encyclopedia is the repository for information captured by the AllFusion Gen workstation toolsets. It may also serve as a central repository, which is networked with one or more client/server encyclopedias.
The Host Encyclopedia contains tools for managing, distributing, merging and controlling versioning and access to the business models.
The Host Construction enables code generation and installation for block mode or batch applications, or server modules that run on the z/OS environment. If you are installing the Host Encyclopedia and Host Construction, you should have a working knowledge of z/OS, DB2, ISPF and JCL. You may also need the knowledge of CICS, Datacom or IMS if you select either of these environments as an AllFusion Gen target.
The following guides may also help you understand and use the Host Encyclopedia:
Release Summary Block Mode Design Guide Encyclopedia API
Host Encyclopedia Construction Guide Host Encyclopedia Guide
Host Encyclopedia Public Interface Host Encyclopedia Subsetting Guide Host Encyclopedia Version Control
Runtime Changes
The z/OS runtime has changed considerably in the last two releases of AllFusion Gen. AllFusion Gen r7.6 z/OS runtime is LE conformant; it uses standard LE call interface routines, is fully re-entrant and threadsafe. These runtimes were changed to exploit LE storage management within the
assembler routines, eliminating the need for frequent calling of GETMAIN and FREEMAIN. Most of the runtime routines are now implemented as DLLs, so a single copy is shared by multiple AllFusion Gen applications.
Install Prerequisites
These changes pertain more to the AllFusion Gen runtimes. For more information, see Host Encyclopedia Construction Guide.
The TSOAE environment used by the z/OS IT and the Application Test Facility is now a 31-bit, LE compliant application. The use of 24-bit storage was changed to be limited to those TSO and I/O functions that require being addressed below the 16-MB line. This version of TSOAE provides virtual storage constraint relief for testing and implementing large AllFusion Gen applications within TSO and batch.
Install Prerequisites
Before installing AllFusion Gen, make sure you have fulfilled the following prerequisites:
Verified all the required operating system components are installed. For more information, see the Technical Requirements document on the CA support website.
Identified an individual who has the technical skill and authority to install DB2 and ISPF applications.
Identified a distinct DB2 authorization ID for AllFusion Gen.
Identified the TSO environment settings required for access to AllFusion Gen.
Identified the ISPF changes required for AllFusion Gen.
It is recommended that you check with IBM regarding the support of DB2 releases.
Note:The terms COBOL, COBOL/390 and COBOL for z/OS all refer to the version of COBOL specified in the AllFusion Gen Technical Requirements document.
Installation Process Overview
Installation Process Overview
Installing and populating the Host Encyclopedia is a multi-step process. The process begins with reviewing the installation materials, installing CA License Management Program (LMP) keys, and unloading JCL. The install process ends with running a test to ensure all Host Encyclopedia components are installed properly.
The basic steps for installing the encyclopedia are: 1. Installation Prerequisites
a.
Review the installation package cover letter and any ProductMaintenance Letters (PML) included with the installation package for pertinent installation information.
b.
Fulfill installation prerequisites and fill in worksheet information.c.
Add the CA LMP execution keys to CAIRIM. See CA Common Servicesin “Preparing to Install” in this guide. 2. Upload and Install from CD or zip file
The first step in installing the AllFusion Gen Host Encyclopedia is to move the relevant software and data from the delivery media onto the host. For a detailed explanation of these steps, see the chapter, “Building Software Libraries” in this guide.
3. Establish ISPF concatenation for the Host Encyclopedia. 4. Install and Configure
After the libraries are allocated and the software copied, perform the following tasks:
a. Run the CEINSTAL dialog.
Installation Process Overview
5. Create and Populate the Encyclopedia
There are two ways to create and populate an AllFusion Gen Encyclopedia: a. Upgrade an Encyclopedia.
When you upgrade an Encyclopedia, you perform all the necessary conversions and updates that are required to bring the existing information forward into the new release of the Encyclopedia. (For complete instructions, see “Upgrading an Encyclopedia in Place.”) b. Create and Populate a New Encyclopedia.
If you choose to create a new Encyclopedia and populate with either existing or new data, you perform the following steps:
1. Fulfill the prerequisites, then build SQL and JCL.
2. Run the installation jobs, then test the new Encyclopedia. 3. Execute RUNSTATS, copy, and rebind the AllFusion Gen plans. For complete instructions, see “Creating a New Encyclopedia.” Populate the Encyclopedia using one or more of the following methods (see “Populating a Host Encyclopedia”):
1. Copy data tables from an existing Encyclopedia to the new Encyclopedia.
2. Copy models from an old Encyclopedia to a new Encyclopedia. 3. Upload new models created in the Toolset.
6. Configure Host Construction Environment
If you use the Host Construction option to generate and install applications for IMS or CICS, follow the instructions in the appendix, “Configuring IMS and CICS.”
Chapter 2: Preparing to Install
Installation Process Overview
The best way to ensure a successful installation is to prepare effectively. Preparing the host environment with the CA Common Services software, fulfilling the technical requirements and completing the checklists and worksheets in this chapter will prepare you for a successful installation.
Reviewing Cover Letters and PMLs
Review cover letters and Product Maintenance Letters (PMLs) in your AllFusion Gen installation package before initiating the installation process. These letters contain additional information not found in this guide.
Important! If the cover letter or PML’s instructions conflict with this guide, use the instructions in the PML.
CA Common Services
The CA Common Services media and its installation is described in the CA Common Services Getting Started guide.
Note:Release requirements for CA Common Services become dated or obsolete. CA recommends staying current with your CA Common Services maintenance.
Installation Process Overview
The following table explains the CA Common Services: Service Description CAIRIM (Resource
Initialization Manager)
Eliminates the need for user SVCs and other installation requirements commonly encountered when installing systems software by providing a common driver for a collection of dynamic initialization routines.
CA LMP (License Management Program)
Automated software tracking and validation service. Required by all CA products. CA LMP is a
subcomponent of and is installed with CAIRIM. CAISSF (Standard
Security Facility)
Allows CA solutions to offer standardized security interfaces without regard for the particular needs of underlying access control software. CAISSF invokes AllFusion Gen security features. CAISSF is a
subcomponent of and is installed with CAIRIM. CA-C Runtime CA-C is the C language runtime engine for C
language-based solutions. CAICCI (Common
Communication Interfaces)
Allows software solutions to work together across platforms, making the software more powerful. CAIENF (Event
Notification Facility)
Insulates software solutions from changes in the operating system and environment.
Since other CA products also require various CA Common Services, the components you need for AllFusion Gen may be installed at your site. Check with your systems group.
Installation Process Overview
CA LMP Keys
AllFusion Gen Host Encyclopedia requires CA LMP keys. CA LMP keys are valid across product releases but not across CPUs. If you are running a prior release of the products and you are installing it on the same CPU, you can skip this section. If you are installing a new product, or you are installing on a different CPU, you must install CA LMP keys.
Examine the CA LMP Key Certificates you received with your installation package. You should have a key certificate for every product you are installing that requires one.
Fields Descriptions
Product Name The trademarked or registered name of the CA product licensed for the designated site and CPUs.
Supplement The reference number of your license for the particular product, in the format nnnnnn-nnn. This format differs slightly inside and outside North America. In rare situations, it may not be provided.
Expiration Date
The date (MONTH dd, yyyy as in January 15, 2005) your license for the product expires.
Technical Contact
The name of the technical contact at your site that is responsible for the installation and maintenance of the designated product. CA addresses all CA LMP correspondence to this person.
MIS Director The name of the director of MIS, or the person who performs that function at the site. If the title but not the individual’s name is indicated on the Certificate, supply the actual name when correcting and verifying the certificate.
CPU Location The address of the building where the CPU is installed. Execution Key An encrypted code required by CA LMP for product
initialization. During the installation, it is referred to as the LMP code.
Product Code A two-character code corresponding to this particular product. CPU ID The code identifying the specific CPU for which installation of
your product is valid.
If your site is already running software from CA, your systems group probably is already running a CAS9 proc (cataloged procedure). If so, add the CA LMP keys for the products you are installing to the CA LMP keys already being used.
Installation Process Overview
The CAS9 proc runs the CAIRIM program which uses a KEYS DD statement. The KEYS DD statement should point to your CA LMP keys. The KEYS DD statement usually points to a member named KEYS in a PARMLIB or OPTLIB. Each line contains the information from one key certificate. If the information does not fit on one line, code a hyphen in column 72 for a continuation character.
The parameter structure for member KEYS is shown next:
PROD(pp) DATE(ddmmmyy) CPU(tttt-mmmm/ssssss) LMPCODE(kkkkkkkkkkkkkkk)
Note:The parentheses in the parameter list are required. Parameter Definition
pp Required. The two-character product code. For any given CA LMP software solution, this code agrees with the product code already in use by the CAIRIM initialization parameter for earlier releases of the product.
ddmmmyyy The CA LMP licensing agreement expiration date.
tttt-mmmm Required. The CPU type and model on which the CA LMP
software solution is to run. If the CPU type or the model require less than four characters, insert blank spaces for the unused characters.
ssssss Required. The serial number of the CPU on which the CA LMP
software solution is run. kkkkkkkkkkkkk
kk
Required. The execution key is provided on the Key Certificate shipped with each CA LMP software solution.
This is an example of a control card for the CA LMP execution software parameter:
PROD(BD) DATE(15JAN02) CPU(3090-600 /370623) LMPCODE(52H2K06130Z7RZ6)
Note:This is an example only, the CA LMP execution key is invalid. For more information about CA LMP execution key definition, see the CA Common Services Getting Started.
Site Variables Worksheets
Technical Requirements
Before you install AllFusion Gen, you must fulfill all of the pertinent technical requirements listed in the Technical Requirements document on the support website. To avoid potential problems, be sure to review this document carefully and verify that all system requirements have been met.
Site Variables Worksheets
You need all of the information on the following worksheets during software installation. Most of this information requires system knowledge and some insight into where your company is going in the future with regard to capacity, growth, application usage, distribution, deployment and volume.
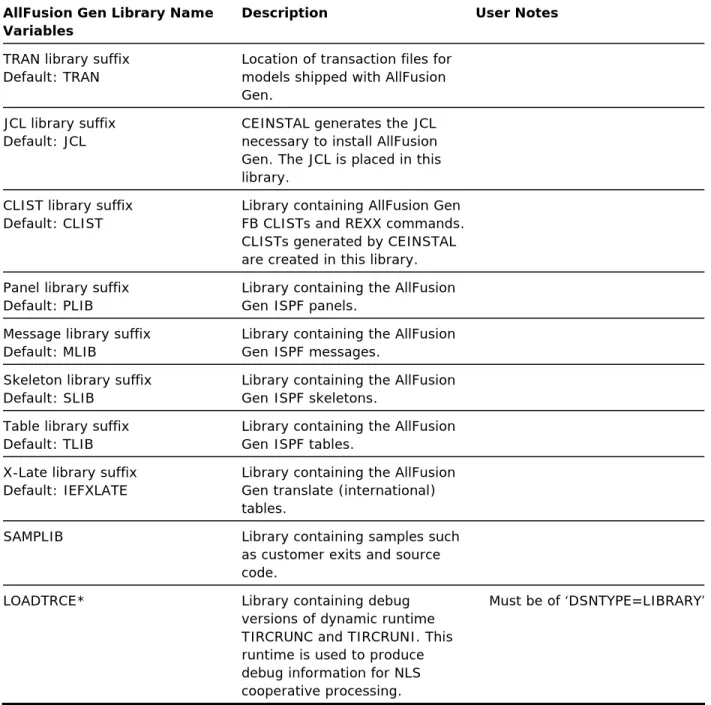
AllFusion Gen Library Name Variables
The following table describes the AllFusion Gen library name variables. AllFusion Gen Library Name
Variables
Description User Notes
Data set prefix Default: CA.MVSHE
All AllFusion Gen libraries must share the same prefix. The prefix can be one or more nodes, but the total length of a data set name (prefix plus suffix) cannot exceed 44 characters.
Load library suffix Default: LOAD*
Library containing AllFusion Gen executables and runtime
modules.
Must be of ‘DSNTYPE=LIBRARY’
DBRM library suffix Default: DBRM
Library containing AllFusion Gen DBRMs. (DBRMs that correspond to the modules linked into AllFusion Gen executables.) SQL library suffix
Default: SQL
CEINSTAL generates the SQL necessary to install AllFusion Gen. The SQL is placed in this library.
EGEN library suffix Default: EGEN
Site Variables Worksheets
AllFusion Gen Library Name Variables
Description User Notes
TRAN library suffix Default: TRAN
Location of transaction files for models shipped with AllFusion Gen.
JCL library suffix Default: JCL
CEINSTAL generates the JCL necessary to install AllFusion Gen. The JCL is placed in this library.
CLIST library suffix Default: CLIST
Library containing AllFusion Gen FB CLISTs and REXX commands. CLISTs generated by CEINSTAL are created in this library. Panel library suffix
Default: PLIB
Library containing the AllFusion Gen ISPF panels.
Message library suffix Default: MLIB
Library containing the AllFusion Gen ISPF messages.
Skeleton library suffix Default: SLIB
Library containing the AllFusion Gen ISPF skeletons.
Table library suffix Default: TLIB
Library containing the AllFusion Gen ISPF tables.
X-Late library suffix Default: IEFXLATE
Library containing the AllFusion Gen translate (international) tables.
SAMPLIB Library containing samples such
as customer exits and source code.
LOADTRCE* Library containing debug
versions of dynamic runtime TIRCRUNC and TIRCRUNI. This runtime is used to produce debug information for NLS cooperative processing.
Must be of ‘DSNTYPE=LIBRARY’
Note: * - Ensure the data sets are allocated as PDSE (DSNType = LIBRARY) data sets.
Site Variables Worksheets
JCL Variables
The following table describes the JCL variables.
JCL Variables Description User Notes
Jobcard No default
Job card included in the generated JCL to perform various installation tasks. TSOID of installer
No Default
Used to prefix the names of the temporary data sets built and used during installation
Used in several places
Disk unit Default: SYSDA
Disk unit used in the generated JCL to perform various
installation tasks. Tape unit
Default: 3480
Tape unit used in the generated JCL to perform various
installation tasks. SYSOUT class
Default: *
SYSOUT class used in the generated JCL to perform various installation tasks. DB2 STEPLIBs
No default
If specified, these libraries are included in a STEPLIB in the generated JCL to perform various installation tasks. If your site has included the DB2
libraries in the system LINKLIST, do not specify them in a
STEPLIB. z/OS STEPLIBs
No default
If specified, this library is included in a STEPLIB in the generated JCL to perform various installation tasks. If your site has included the z/OS runtime libraries in the system LINKLIST, do not specify a STEPLIB.
Site Variables Worksheets
Encyclopedia Variables
The following table describes the encyclopedia variables.
Encyclopedia Variables Description User Notes
Site name Default:
YOUR_COMPANY_NAME
This field is for information purposes only.
Encyclopedia name Default: HOST01
This is the name of the
encyclopedia. It must be a unique value to prevent cross
encyclopedia enqueues. Install Construction
Default: Y
This field is used to determine if Construction is installed.
Administrator TSOID Default: TSO user ID
Identifies person doing the install. Administrator Name
Default:
System Administrator
This field is for information purposes only.
PLAN Prefix
Default: HEPL (4 byte limit)
AllFusion Gen DB2 plan names are prefixed by this field. Plan prefixes make plan names unique in a DB2 subsystem, allowing different versions of AllFusion Gen software to run against the same AllFusion Gen database.
Schema Identifier Mandatory value: 9.1.A5
This field identifies the schema. Do not change this value. User data set UNIT type
Default: SYSDA
All user data sets created by AllFusion Gen are allocated using this unit.
User data set prefix Default: &SYSPREF
All user data sets created by AllFusion Gen are prefixed by this field, for example standard error, standard out.
Site Variables Worksheets
DB2 Database Variables
The following table describes the DB2 database variables. DB2 Database Variables Description User Notes Collection ID
Default: DBCOLLID
DB2 collection ID used in bind processing.
DB2 subsystem ID Default: DSN
Identifier of the DB2 subsystem. Explicit creator ID
No default
If specified, encyclopedia tables and indexes are qualified using this ID. Explicit creator ID and
secondary authorization ID are mutually exclusive.
Secondary authorization ID No default
If specified, current SQLID is set to this ID before the encyclopedia tables and indexes are defined. Secondary authorization ID and explicit creator ID are mutually exclusive.
Schema DB name Default: HOSTS
Name of the schema database. Data DB name
Default: HOSTD
Name of the encyclopedia database.
Public Interface DB name Default: HOSTP
Name of the public interface database.
Data set storage type Default: S
Space for AllFusion Gen database can be allocated using storage groups or VSAM data sets: S—storage group allocation V—VSAM allocation.
Encyclopedia Initial size Default: S
S—small M—medium
Site Variables Worksheets
DB2 Database Variables Description User Notes Secondary storage factor
Default: 0
Defines secondary space allocation in relation to primary allocation. (0 to 1.0 times primary allocation.) Storage Group Names
No default
If you select storage group space allocation, you must know the names of the groups you want to use.
VSAM Volume Names No default
If you select VSAM space allocation, you must specify the volume names for VSAM data sets.
COBOL Compiler Variables
The following table describes the COBOL compiler variables. COBOL Compiler Variables Description User Notes Compiler name
Default: IGYCRCTL
Name of the COBOL compiler. Size parameter
No default
Amount of space for the compiler SIZE parameter; can be specified in kilobytes (for example, 4096 KB), bytes (for example, 4194304), or as MAX. Compiler load library
Default: IGY.SIGYCOMP
Name of the library containing the compiler used by the environment and various support modules for COBOL.
Compiler lib in linklist? Default: N
Flag indicating whether the compiler library is defined in the system linklist.
Compiler Static runtime library Default: CEE.SCEELKED
Name of library containing static runtime modules for COBOL. Compiler Dynamic runtime
library
Name of library containing z/OS LE dynamic runtime modules.
Site Variables Worksheets
DB2 Subsystem Variables
The following table describes the DB2 subsystem variables. DB2 Subsystem Variables Description User Notes DB2 precompiler name
Default: DSNHPC
Name of the DB2 compiler. DB2 link library
Default: DB2.SDSNLOAD
Name of the DB2 link library containing the DB2 precompiler and various support modules. Link lib in linklist?
Default: N
Flag indicating if the DB2 link library is defined in the system linklist.
Datacom Subsystem Variables
The following table describes the Datacom subsystem variables. Datacom Subsystem
Variables
Description User Notes
Datacom preprocessor name Default: DBXMMPR
Name of the Datacom preprocessor.
Datacom MUF name Default: DCMMUF
Name of the Datacom MUF. This name must be specified by the customers.
Datacom libraries Defaults:
CAI.DCM.CUSLIB CAI.DCM.CAILIB
Name of the Datacom CUSLIB and CAILIB data sets. These libraries contain the Datacom preprocessor, customized modules, and various support modules.
Datacom CICS libraries. Defaults:
CAI.DCM.CICS.CUSLIB CAI.DCM.CICS.CAILIB
Name of the Datacom libraries containing CICS support modules. Note: Each Datacom z/OS
subsystem can have a maximum of twenty (20) Datacom MUF names (and associated load data sets). Each MUF name must have four (4) data sets associated with it.
Site Variables Worksheets
CICS Variables
The following table describes the CICS variables.
CICS Variables Description User Notes
CICS load library
Default: CICS.SDFHLOAD
Name of CICS load library. z/OS static link library
Default: CEE.SCEELKED
z/OS static link library. CICS Flag
Default: N
Flag indicating if the CICS system targeted to run AllFusion Gen applications runs on the same CPU as AllFusion Gen. This variable is only used by applications targeting DB2 to decide where and when the DB2 BIND is done.
Y-- BIND can be performed by the Host Encyclopedia.
N-- You must do a manual BIND on the other CPU.
IMS Variables
The following table describes the IMS variables.
IMS Variables Description User Notes
IMS resident load library Default: IMS.RESLIB
Load library containing IMS modules.
Maximum segment size Default: 1280
Maximum segment size of IMS messages.
Site Variables Worksheets
IMS Variables Description User Notes
IMS shares CPU with this TSO? Default: N
Indicates if the IMS system targeted to run AllFusion Gen applications runs on the same CPU as the Host Encyclopedia. This variable is only used by applications targeting DB2 to decide where and when the DB2 BIND is done.
Y—BIND can be performed by the Host Encyclopedia.
N—You must do a manual BIND on the other CPU.
CPIC Interface Load Lib Name of the system library that contains the CPIC interface modules. Usually this library is SYS1.CSSLIB (a required z/OS data set).
RPROF Variables
The following table describes the RPROF variables.
RPROF Variables Description User Notes
DB2 subsystem Default: DB2
DB2 subsystem identifier of the subsystem where you want to create an RPROF table. Explicit creator ID
No default
If specified, RPROF table and index are qualified using this ID.
Explicit creator ID and secondary authorization ID are mutually exclusive.
Secondary authorization ID No default
If specified, the current SQLID is set to this ID before RPROF table and index are defined.
Secondary authorization and explicit creator ID are mutually exclusive.
DB name Default: RPROF
Name of the database in which the RPROF table is to be built.
Site Variables Worksheets
RPROF Variables Description User Notes
Storage Type Default: S
Space for the RPROF database is allocated using storage groups or VSAM data sets.
S — storage group allocation V — VSAM allocation.
VCAT No default
If you select VSAM as the type of database storage, you must specify the VCAT name to be used when creating the VSAM data sets. Volume
No default
If you select VSAM space allocation, you must specify the volume names when creating the VSAM data sets.
RPROF initial size Default: 350 4 KB pages (VSAM), 1400 1 KB pages (storage group)
Primary size of tablespace that contains the RPROF table.
RPROF Secondary size Default: 0
Secondary space allocation of tablespace containing the RPROF table.
RPROFI1 Initial size Default: 350 4 KB pages (VSAM), 1400 1 KB pages (storage group)
Primary size of RPROF index.
RPROFI1 Secondary size Default: 0
Secondary space allocation of RPROF index.
Master Checklist
Master Checklist
This list identifies the hardware and software that must be in place in your environment before installing AllFusion Gen Host Encyclopedia and Host Construction Toolset. For further details of the required items, see the AllFusion Gen Technical Requirements document available on the CA support website: ca.com. From the main menu, select Gen as your product. The document is under Product Information.
All required items on the Master Checklist must be complete before installing AllFusion Gen.
AllFusion Gen Requirements
The following tasks are to be checked for before installing the AllFusion Gen Host Encyclopedia and Host Construction Toolset.
All operating system prerequisites are satisfied. DASD requirements are satisfied.
DB2 Program Temporary Fixes (PTFs) are applied to DB2. AllFusion Gen Encyclopedia Parameters are captured.
AllFusion Gen Optional Requirements
Workstation-to-mainframe communications.
Required for Host Construction Facility
These requirements are needed only if you are installing Host Construction. Check the IMS or the CICS box or both.
IMS environment requirements are satisfied. CICS environment requirements are satisfied.
COBOL requirements must be satisfied before source code can be compiled.
Chapter 3: Building Software Libraries
This chapter explains how to unload the software used to build and run the programs that install the AllFusion Gen Host Encyclopedia. The z/OS Host Encyclopedia software is delivered in a zip file on a Windows™ compatible CD. Important! The IBM utility TRSMAIN (also referred to as the TERSE utility by IBM) is required to install all CA AllFusion Gen products and PTFs. If your site has this utility available, copy it into the AllFusion Gen LOAD data set. If your site does not have this utility, use the following URL address to obtain the TRSMAIN (TERSE) utility, and then copy it into the AllFusion Gen LOAD data set.http://techsupport.services.ibm.com/390/trsmain.html
The TRSMAIN/TERSE is a free/copyrighted IBM utility and thus, cannot be redistributed. The utility can only be downloaded from IBM by each individual customer.
Uploading and Installing
The steps you need to complete for installing the software libraries are listed next. This installation assumes you are using a Windows compatible
Workstation. Workstation directories and z/OS data set prefixes are provided as examples. For more information on how to complete these steps, see the chapter "Preparing to Install.”
1. Obtain the ‘AllFusion Gen Encyclopedia Server Option for z/OS r7.6’ Installation CD. The CD contains a zip file named GenHEr76.zip. 2. Expand the zip file from the CD onto the Workstation.
Copy the GenHEr76.zip file from the CD onto the Workstation. Extract the contents of the file to:
– C:\genhe\GenHEr76.ctl (Install-Control) – C:\genhe\GenHEr76.mvs (Install-File) – C:\genhe\GenHEr76.txt (Install Readme file)
Uploading and Installing
3. Allocate INSTJCL file on TSO.
Allocate installation JCL data sets on z/OS as follows: – Data set name : ‘cai.mvshe.INSTJCL’
– LRECL = 80 – DSORG = PO – RECFM = FB
4. Transfer the Install Control File from the Workstation to z/OS.
Transfer the Install Control File, in BINARY, from the Workstation to z/OS. The GenHEr76.ctl file needs to be transferred from c:\genhe to ‘cai.mvshe.INSTJCL(HEINST0)’.
5. Customize JCL HEINST0.
Add Jobcard and customize the JCL ‘cai.mvshe.INSTJCL(HEINST0)’ (See instructions inside JCL).
Submit the JCL member HEINST0 to create the following three new JCL members:
– 'cai.mvshe.INSTJCL(HEINST1)' – 'cai.mvshe.INSTJCL(HEINST2)' – 'cai.mvshe.INSTJCL(HEINST3)'
This job should end with a COND CODE =0 6. Customize JCL HEINST1.
Add Jobcard and customize JCL ‘cai.mvshe.INSTJCL(HEINST1)’ (See instructions inside JCL).
Submit the JCL member HEINST1 to allocate z/OS data set : ‘cai.mvshe.INSTFILE’
This job should end with a COND CODE =0 7. Transfer Install File from the Workstation to z/OS
Transfer (ftp) the Install-File, in BINARY, from the Workstation to z/OS. The GenHEr76.mvs file needs to be transferred from C:\genhe to 'cai.mvshe.INSTFILE'.
8. Expand the INSTFILE data set into a PDS.
Uploading and Installing
9. Expand the INSTPDS file members into z/OS Data sets.
Add jobcard and customize JCL ‘cai.mvshe.INSTJCL(HEINST3)’ (See instructions inside JCL).
Submit JCL member HEINST3 to read each member of the ‘cai.mvshe.INSTPDS’ data set and create z/OS AllFusion Gen installation data sets ‘cai.mvshe.XXXXXX’.
This job should end with a COND CODE =0
Read as Input Create AllFusion Gen Data set 'cai.mvshe.INSTPDS(H#CLISTX)' 'cai.mvshe.CLIST' 'cai.mvshe.INSTPDS(H#DBRMXX)' 'cai.mvshe.DBRM' 'cai.mvshe.INSTPDS(H#EGENXX)' 'cai.mvshe.EGEN' 'cai.mvshe.INSTPDS(H#JCLXXX)' 'cai.mvshe.JCL' 'cai.mvshe.INSTPDS(H#LOADTR)' 'cai.mvshe.LOADTRCE' 'cai.mvshe.INSTPDS(H#LOADXX)' 'cai.mvshe.LOAD' 'cai.mvshe.INSTPDS(H#MLIBXX)' 'cai.mvshe.MLIB' 'cai.mvshe.INSTPDS(H#PLIBXX)' 'cai.mvshe.PLIB' 'cai.mvshe.INSTPDS(H#PTFCTL)' 'cai.mvshe.PTFCNTL' 'cai.mvshe.INSTPDS(H#SAMPXX)' 'cai.mvshe.SAMPLIB' 'cai.mvshe.INSTPDS(H#SLIBXX)' 'cai.mvshe.SLIB' 'cai.mvshe.INSTPDS(H#SQLXXX)' 'cai.mvshe.SQL' 'cai.mvshe.INSTPDS(H#TLIBXX)' 'cai.mvshe.TLIB' 'cai.mvshe.INSTPDS(H#TRANXX)' 'cai.mvshe.TRAN' 'cai.mvshe.INSTPDS(H#XLATEX)' 'cai.mvshe.IEFXLATE'
Note: All Gen LOAD data sets are installed as PDSE (DSNTYPE=LIBRARY) and must stay that way.
Uploading and Installing
This following table provides a comprehensive list of all AllFusion Gen JCL members and a brief description of the jobs they perform. These members are created during the installation and upgrade processes.
JCL Member Job Description
BIEFXCPY Performs a batch cross-copy by executing CLISTs IEFDOWN and IEFUP.
BLDRPROF Builds RPROF tables and indexes. (Each DB2 subsystem used for applications generated by AllFusion Gen should have an RPROF table.)
If a DB2 subsystem contains only CICS (that is, no IMS or TSO), you may consider using a TSQ RPROF instead. CEJOB02 Allocates VSAM data sets for encyclopedia tables and
indexes. (if VSAM data sets are allocated.) CEJOB03 Executes a DB2 BIND for dynamic SQL processing
program TIUUSQL by executing CLIST IEFBIND. CEJOB04 Creates all DB2 objects for a new Host Encyclopedia. CEJOB05
CAJOB05
Loads the AllFusion Gen schema tables with meta-model data. Executes the IBM’s DB2 Load utility.
Performs the same task as CEJOB05 using CA’s Fast Load utility.
CEJOB05A Relaxes schema migration rules. CEJOB06
CAJOB06
Executes the DB2 RUNSTATS utility for all Host Encyclopedia tables.
Updates DB2 catalog statistics similar to CEJOB06 using CA’s PDASTAT utility.
CEJOB07A Binds DBRMs into packages. CEJOB07B Binds AllFusion Gen plans.
CEJOB08 Grants to PUBLIC, both DB2 EXECUTE authority on AllFusion Gen plans and DB2 SELECT authority on Public Interface table views.
Uploading and Installing
JCL Member Job Description
CEUCLEN Runs a special version of the model delete function that deletes all objects not related to a model (orphan objects).
CEUCOPY
CAUCOPY
Runs the DB2 COPY utility to take a full image-copy of Encyclopedia tablespaces. This job is also used to create a new Encyclopedia. This member was created as sample utility JCL.
Runs the CA DB2 QUICK COPY utility to take a full image-copy of Encyclopedia tablespaces. This job is also used to create a new Encyclopedia. This member was created as sample utility JCL.
CEUINCR
CAUINCR
Runs the DB2 COPY utility to take an incremental image-copy of Encyclopedia tablespaces.
Runs CA DB2 QUICK COPY utility to take an incremental image-copy of Encyclopedia tablespaces.
CEUREOR CAUREOR
Runs the DB2 REORG utility on tablespaces. Runs CA DB2 RAPID REORG utility on tablespaces. CEUXPND Expands table and indexspaces.
CVJOB04A Upgrades DB2 objects to AllFusion Gen r7.6 objects: Gen 6.5 to Gen r7.6
CVJOB04B Upgrades DB2 objects to AllFusion Gen r7.6 objects: Gen r7 to Gen r7.6
Gen r7.5 to Gen r7.6 LAPPHELP
CAPPHELP
Runs IBM DB2 LOAD utility to load the application
Help Model data.
Runs CA DB2 Fast Load utility to load the
application Help Model data.
USERLIB Allocates libraries used in testing Host Construction. Can also be used as a model for user allocation of
construction libraries. For a list of the libraries allocated by USERLIB, see “Testing Host Construction.”
Note: Any load library must be allocated as
Uploading and Installing
If a DB2 subsystem contains only CICS (that is, no IMS or TSO), you may consider using a TSQ RPROF instead.
You must have IBM utilities to execute the following jobs. CEJOB05 CEJOB06 CEUCOPY CEUREOR CEUINCR LAPPHELP
If you are using utilities from other vendors, you must customize these jobs accordingly. You can also use the equivalent job that uses Unicenter DB2 products.
You must have Unicenter DB2 products to execute the following jobs: CAJOB05 CAJOB06 CAUCOPY CAUREOR CAUINCR CAPPHELP
You can use the equivalent job that uses IBM DB2 utilities. If you are using utilities from other vendors, you must customize these jobs accordingly.
Establish ISPF Library Concatenation
The ISPF environment must be established before AllFusion Gen can be used. The encyclopedia libraries can be allocated using a logon CLIST, a logon PROC, or the ISPF LIBDEF facility. In all cases, if the logon is used primarily for the encyclopedia, certain libraries must be first in the concatenation.
Important! Do not include AllFusion Gen data sets from releases prior to r7.6 in the ISPF logon concatenation. Including data sets from releases prior to r7.6 may produce unpredictable results or cause errors to occur.
Uploading and Installing
ISPLLIB or STEPLIB
A combination of ISPLLIB or STEPLIB can be used to allocate the required AllFusion Gen software libraries and the required z/OS program product runtime libraries (such as LE, DB2, and ISPF).
If DB2 or LE libraries are not in the linklist, allocate them through a STEPLIB DD or the ISPLLIB DD in the logon CLIST or in the TSO logon procedure.
LIBDEF
If you use the ISPF LIBDEF facility, note these restrictions:
LIBDEF is not supported for the SYSPROC DD. Consequently, you must include the AllFusion Gen CLIST library in the SYSPROC concatenation of a logon CLIST or a TSO logon PROC.
Do not use LIBDEF to allocate the required load libraries. AllFusion Gen programs make dynamic calls to LE runtime routines. Using LIBDEF to allocate ISPLLIB results in an S806 module not found abend. This is a limitation of ISPF LIBDEF.
There are two CLIST exits for LIBDEF: TIELIBDF and TIELIBFR.
– TIELIBDF is called at the beginning of various AllFusion Gen functions.
TIELIBDF dynamically allocates ISPPLIB, ISPMLIB, ISPTLIB, and ISPSLIB.– TIELIBFR is called at the end of some Host Encyclopedia functions and
can be used to free libraries allocated using LIBDEF. TIELIBDF and TIELIBFR contain examples of how to use LIBDEF to allocate and free libraries.Procedure
1. Allocate the following libraries:
DDNAME Description AllFusion Gen Library Short Name
SYSPROC CLIST libraries CLIST
ISPPLIB ISPF Panel libraries PLIB ISPMLIB ISPF Message libraries MLIB ISPTLIB ISPF Table libraries TLIB
Uploading and Installing
DDNAME Description AllFusion Gen Library Short Name
ISPPROF ISPF User Profile library (not applicable) ISPSLIB ISPF Skeleton libraries SLIB
2. Create and test the logon CLIST or PROC. (Contact the System Administrator if you need assistance for this step or the next step.) 3. If using LIBDEF, modify and test TIELIBDF.
Establish Access to AllFusion Gen
You must provide an ISPF entry point to AllFusion Gen by modifying an existing ISPF menu. The modified ISPF menu must provide an option that executes the CLIST TICPYRIT to display the CA AllFusion Gen copyright panel, for example, CMD (%TICPYRIT).
Other ISPF Considerations
Review the default flag in the TSO command table (ISPTCM) header to determine if the command processor entries for the following TSO commands must be added to the ISPTCM:
TSOAE—required by the TSO testing facility.
EXECSQL—(Optional) a dynamic SQL utility for diagnostics and problem correction.
Most sites do not need to change these commands but, if you modify the ISPTCM defaults, you must add the commands shown.
No modification is required if the default flag setting in the ISPTCM header is B’...1’. This indicates a BLDL is used to determine if a command processor or a CLIST is entered. If your ISPTCM table has a different setting in the header, add a command processor ENTRY for the TSOAE and EXECSQL commands. See the ISPF documentation for more information.
Important! Insufficient available space in the ISPPROF profile data set can cause unpredictable results.
Uploading and Installing
Evaluate Return Codes
During the installation process, you may see return codes of 0 and 4. These return codes do not adversely affect the installation process. If the return code is not 0 or 4, check your system output to ensure that the installation was successful. For example, CEJOB04 may return a code of 8 if the database already exists, but the rest of the job completes normally. In this case, you should check the DB2 SYSPRINT. (See the IBM documentation for additional information about return codes.)
Return codes of 8, 12, and 16 may indicate problems with the installation. These return codes may indicate that:
The data set is full.
You are out of directory blocks in the load library. The block size of the load library is wrong. A file was defined improperly.
Chapter 4: Establishing the Environment
Establishing a site-specific environment for AllFusion Gen requires six tasks. The tasks are:1. Define the installation variables, or pre-populate the installation variables using an existing TILPARMS member.
2. Verify the installation variables.
3. Save the installation variables in TILPARMS, which is an external JCL library member.
4. Build the AllFusion Gen CLISTs. 5. Build sample utility JCL (Optional).
6. Create a DB2 PLAN_TABLE if one does not exist. This chapter explains how to complete each of these tasks.
Prerequisites
Before you proceed with setting up the environment, you should have completed the following tasks:
1. Read and completed the site variables worksheets. 2. Upload and Install from CD.
Define Installation Variables
Define Installation Variables
The installation dialog CLIST named CEINSTAL specifies installation
parameters. This CLIST modifies the installation jobs by substituting variable values specific to your site. The next time you start CEINSTAL, all your site-specific variables are available.
Note:Installation variables are saved in the ISPF profile pool and this pool is associated only with the TSO user ID executing CEINSTAL. When you build installation JCL and SQL, CEINSTAL uses the ISPF profile pool variables. You must use the same TSO user ID until the parameters are saved to the external JCL data set member TILPARMS. If there is an earlier version of the Host Encyclopedia software on your system you probably already have a TILPARMS. For instructions on how to use an existing TILPARMS member, see “Using Saved Parameters to Configure the Environment.”
Using Saved Parameters to Configure the Environment
The following sections explain how to use the saved parameters to configure the environment.
TILPARMS
The CEINSTAL dialog provides an option to save variables to an external data set: CAI.MVSHE.JCL(TILPARMS). If you are not installing the Host
Encyclopedia for the first time, you probably already have a set of installation parameters defined in TILPARMS. These parameters can be retrieved,
modified, and verified for the new installation.
Modifying TILPARMS
Use the following procedure to modify the parameters stored in an existing TILPARMS:
1. Copy the TILPARMS member into the JCL data set for the new installation. 2. Edit TILPARMS as follows:
Using Saved Parameters to Configure the Environment
SASCI3 index was new for AllFusion Gen r7.
Therefore, TILPARMS copied from an earlier Gen release will not have an entry for SASCI3. To ensure this index is created for r7.6, locate the line containing SASCI2, and then create a new entry SASCI3 below it as shown in the following example:
...
# SCHM I SASCI2 0 1200 0 480 0 6 SASCI2 # SCHM I SASCI3 0 1200 0 480 0 6 SASCI3 <-- New
....
The CICS Socket load library is not required to build generated applications so it has been removed. It is used by the AllFusion Gen runtimes and only included in the relevant DLL. Therefore, if a
TILPARMS copied from an earlier Gen release contains an entry for the CICS Socket load library TCPIP.SEZATCP you can delete it.
3. Go to the AllFusion Gen Main Menu and type TSO %CEINSTAL on the command line. Then press Enter to display the Encyclopedia Maintenance Menu.
4. Select option 1 and press Enter to display the Installation Variables Management Menu.
5. Select option 1 and press Enter to display the Set Library Names screen. 6. Set the Data set Prefix to point to your new data sets on the Set Library
Names screen.
7. Verify that the JCL library suffix is correct, then press F3 to return to the Installation Variables Management Menu.
8. You are now ready to read in the TILPARMS member that you edited. You do this by selecting option 12. Retrieve variables from external data set. 9. At this point, you should step through options 2 through 9 to accept (F2)
and save (F6) the edits you made to TILPARMS. When you select option 7 or 8 (one or the other, depending on the type of storage you are using), you build the TILTAB50 table that is explained in “TILTAB50.”
10. After you are satisfied that all your settings are correct, select option 10, Check variables, to verify the validity of the settings, then save the new settings (if you want to keep them) to TILPARMS by selecting option 11. Save variables to external data set.
TILTAB50
TILTAB50
TILTAB50 is a TSO/ISPF table that stores space parameters used to create DB2 tables and indexes for Host Encyclopedia installation.
How Space Parameters Are Created
Values entered in three fields of the Set DB2 Variables screen are used to create space parameters. These fields are:
Data set Storage Type—Entering S in this field defines Storage Groups and opens the Assign Storage Group Names screen. Entering V in this field defines VSAM and opens the Assign VSAM Names screen.
Encyclopedia Initial Size Secondary Storage Factor
Storage Groups
The parameters on the Assign Storage Group Names screen were created from the values entered in the following fields of the Set DB2 Variables screen:
Data set Storage Type=S Encyclopedia Initial Size=S Secondary Storage Factor=0.5
VSAM
The parameters on the Assign VSAM Names screen were created from the values entered in the following fields of the Set DB2 Variables screen.
Data set Storage Type=V Encyclopedia Initial Size=S Secondary Storage Factor=0.5
TILTAB50
Origins of TILTAB50
The default source values for TILTAB50 are stored in the AllFusion Gen
skeleton library (SLIB) member TILTAB50. This default source TILTAB50 is not used in processing.
Space parameters are stored in a new TILTAB50 table in the AllFusion Gen Table library (TLIB) member TILTAB50. If there is an existing TILTAB50 table, it is deleted.
Important! If one of the sizing fields on the Set DB2 Variables screen is changed (Data set storage type, Encyclopedia initial size, or Secondary storage factor), TILTAB50 is reset to the new values based on the new input and on defaults stored in the skeleton library (SLIB). Any previously stored values are lost.
Note:If you do not have the AllFusion Gen TLIB (table library) in your concatenation, TILTAB50 is not found resulting in a TABLE OPEN ERROR on the Installation Variables Management Menu.
How TILTAB50 Is Used
During the creation of installation JCL and SQL, the space parameters stored in TILTAB50 become input to CEJOB02 for VSAM and to SQL CRNEWSP and CRNEWIX (used by CEJOB04) for Storage Groups.
A Sample DB2 DDL used to create AllFusion Gen DASC Table is shown next.
CREATE TABLESPACE DASC IN GEN75D
USING STOGROUP STO03 (STO03=Storage Group Table DASC) PRIQTY 19200 (Primary Space in 1K records)
SECQTY 9600 (Secondary Space in 1K records) LOCKSIZE ANY
SEGSIZE 64
A sample VSAM JCL of AllFusion Gen DASC Table is shown next.
DEFINE CLUSTER +
(NAME(’AACC2.DSNDBC.GEN75.DASC.I0001.A001’) + LINEAR +
REUSE +
VOL(BDS001) + (BDS001 is VSAM data set volume) RECORDS(4800 2400) + (4800=primary space in 4K pages) SHR(3.3) ) + (2400=secondary space in 4K pages) DATA +
TILTAB50
Effect of a Missing TILTAB50
There must always be a TILTAB50 member in the TLIB library. If TILTAB50 is missing, variable checking will fail. A TILTAB50 table must be created before processing can continue.
To create a new TILTAB50 table, open the Assign Storage Group Names screen or the Assign VSAM Names screen and press F2, F3, or F6.
Relationship between TILTAB50 and TILPARMS
All installation variables entered during the CEINSTAL dialog (through the options of the Installation Variables Management Menu), including those stored in the TILTAB50 table, can be saved for later retrieval. The saved variables are stored in a JCL library member named TILPARMS. For more information on how TILPARMS can be used to install variables or to restore variables to previously saved values, see “TILPARMS.”
If you use the Retrieve Variables option on the Installation Variables
Management Menu, all CEINSTAL variables stored in TILPARMS are retrieved. (Existing TILPARMS variables are overwritten.) If TILTAB50 does not exist, it is created (based on the values in TILPARMS) when you select option 7, Assign Storage Group name, or option 8, Assign VSAM names from the Installation Variables Management Menu. If TILTAB50 already exists, it is replaced when you select one of those two options.
Tasks to Define Installation Variables
Tasks to Define Installation Variables
There are multiple subtasks within the task of defining installation variables. These subtasks are:
1. Start the CEINSTAL dialog. 2. Set library names.
3. Edit job cards. 4. Set JCL variables.
5. Set Encyclopedia variables. 6. Define regional settings. 7. Set DB2 variables.
8. Assign storage group names. 9. Assign VSAM names.
10. Set target system variables.
Each of these subtasks is explained in the following sections.
Start the CEINSTAL Dialog
To begin the variable definition process, start the CEINSTAL dialog from the AllFusion Gen Main Menu, using the following procedure.
1. Log on to TSO/ISPF and the ISPF Main Menu appears.
2. Select AllFusion Gen and press Enter. The CA logo and copyright screen appears.
3. Press Enter to display the Main Menu.
Main Menu
COMMAND == >
Select one of the options below, then press ENTER. 1. Host Encyclopedia functions
2. Public Interface functions 3. Host Encyclopedia reports 4. Application system functions 5. Environment specification F1=Help F3=Exit F12=Cancel
Tasks to Define Installation Variables
4. Type TSO %CEINSTAL on the command line and press Enter. The Host Encyclopedia Maintenance Menu appears.
Host Encyclopedia Maintenance Menu COMMAND == >
Select one of the options below, and then press ENTER. 1. Installation Variables Management Menu
2. Build Encyclopedia Clists (TIUGLOB, TIRCFIGS, TIXGLOB) 3. Build Sample Encyclopedia Utility JCL
4. Build JCL/SQL for new Encyclopedia Installation
5. Build Unload/Load JCL to copy an existing Host Encyclopedia ’Data Tables’ to a new Host Encyclopedia
6. Build JCL/SQL to Upgrade In-Place an existing Host Encyclopedia to a new Host Encyclopedia
F. Fix Management menu
5. Select option 1 and press Enter. The Installation Variables Management Menu displays, as follows.
Installation Variables Management COMMAND== >
Select options 1-9 in sequence, then check variables and save. 1. Set library names
2. Edit JOB cards 3. Set JCL variables
4. Set encyclopedia variables 5. Regional settings
6. Set DB2 variables 7. Assign Storage Group name 8. Assign VSAM names
9. Set target system variables 10. Check variables
11. Save variables to external dataset (JCL member TILPARMS) 12. Retrieve variables from external dataset (JCL member TILPARMS) 13. Clear variables from userid ISPF profile pool
F1=Help F3=Exit
Note:Options 7 and 8 on the Installation Variables Management Menu are mutually exclusive.
Use this menu to define site-specific variables. Options 1 through 9 on this menu are explained as you complete the task of defining your site’s variables. The next three tasks explain you learn how to verify and save variables (also driven by this menu). You build CLISTs next.
Tasks to Define Installation Variables
Function Keys
The following function keys apply to CEINSTAL dialogs in which you can enter parameters.
Note: Your ISPF profile session must be set to 24 PF-keys for these to work properly.
Key Function F1 (Help) Displays Help for that screen
F2 (Accept) Verifies the variables and saves them to the user’s ISPF profile pool. The verification process may check if data sets exist or a DB2 subsystem exists and so on. If errors are found, messages are displayed on an Activity Display screen.
F3 (Exit) Saves the information to the user’s ISPF profile pool and exits the screen.
F6 (Save) Saves the information to the user’s ISPF profile pool without exiting the screen.
F12 (Cancel) Exits the screen without making any changes to the ISPF profile pool.
Set Library Names
The library names created by the installation (from CD) must be the same as those displayed by CEINSTAL. The following procedure describes how to confirm that the library names match.
1. Select option 1 on the Installation Variables Management Menu and press Enter. The Set Library Names screen appears.
Set library names COMMAND == >
Enter or verify the software libraries dataset prefix and suffixes. Dataset prefix CAI.MVSHE_______________ Dataset suffixes: LOAD LOAD_______ DBRM DBRM_______ SQL SQL_________ EGEN EGEN_______ TRAN TRAN_______ JCL JCL__________ CLIST CLIST________ Panel PLIB_________ Message MLIB________ Skeleton SLIB_________ Table TLIB_________ X-Late Tables IEFXLATE____ F1=Help F2=Accept F3=Exit F6=Save F12=Cancel
Tasks to Define Installation Variables
2. Accept the defaults on the Set Library Names screen, or type new values to ensure the library references are the same names that were created by the installation (from CD).
3. Press F2 to verify and save the entered variables in a working copy of the user’s ISPF profile pool.
4. When verification is complete, press Enter to exit the Activity Display screen. The Set Library Names screen appears. If verification fails, validate the library names and make sure they match the names created during install.
5. Press F3 to exit the screen. The Installation Variables Management Menu appears.
AllFusion Gen installations are delivered with a fixed block CLIST library. A variable block CLIST library can be created by doing the following:
1. Install the fixed block CLIST library 2. Allocate a variable block CLIST library
3. Use a PDS data set copy utility or ISPF 3.3 to copy the members from the fixed block CLIST library to the variable block CLIST library.
4. Use the variable block CLIST library in the software allocation. 5. Delete the fixed block CLIST library.
Edit Job Cards
This option places you in ISPF edit mode for a member called JOBCARD, which is stored in the skeleton library. The following procedure explains how to edit Job Cards.
1. Select option 2 on the Installation Variables Management Menu and press Enter. The Edit Job Card screen appears.
EDIT ---- CAI.MVSHE.SLIB(JOBCARD) – 01.03 --- COLUMNS 001 072
COMMAND == > SCROLL == > CSR ******************************* TOP OF DATA ******************************** //CEJob JOB CARD INFO HERE
//*
//* COPY IN JOBCARDS FROM SOME OTHER LIBRARY //*
Tasks to Define Installation Variables
2. Create valid job cards for your site, using these considerations: The job cards are included in each installation job built.
The USER parameter must be the installer’s TSO user ID (some installation jobs use this ID to confirm authorization).
The REGION parameter must be at least 4096 KB.
3. When your job cards are complete, press F3 to save the information and exit the screen. The Installation Variables Management Menu appears.
Set JCL Variables
Use this option to define the values that are used in building installation JCL. The following procedure explains how to set JCL variables.
1. Select option 3 on the Installation Variables Management Menu and press Enter. The Set JCL Variables screen appears.
Set JCL Variables COMMAND == >
Enter the installation job step JCL variables and any required STEPLIB Dataset names.
Installer TSOID DAACADB_ DISK UNIT SYSDA _____ Tape Unit 3480 ______ SYSOUT class *
Steplibs used only in installation batchjob JCL.
DB2 STEPLIB __________________________________ (optional) DB2 STEPLIB __________________________________ (optional) z/OS steplib1 _____________________________ _____ (optional) z/OS steplib2 _______________________________ ___ (optional) OTHER STEPLIB _________________________________ (optional) WARNING: Only provide DB2 and/or z/OS steplibs if required at Your site.
F1=Help F2=Accept F3=Exit F6=Save F12=Cancel
2. Verify and complete the fields on the Set JCL Variables screen, using these considerations:
The TSO user ID is required. It is prefixed to the names of the temporary data sets built and used during installation.
The installation process includes data sets specified here and data sets allocated in the installer’s TSO session to the STEPLIB DD or the ISPLLIB DD into the installation’s JCL STEPLIB. This can result in duplicate data set names in the STEPLIB concatenation in the installation JCL. No action is required if this occurs.
3. Press F2 to verify and save the entered variables in a working copy of the user’s ISPF profile pool.
Tasks to Define Installation Variables
4. When verification ends, press Enter to exit the screen. 5. Press F3 to exit the screen.
Note: The z/OS runtime parameters HEAP, ANYHEAP and THREADHEAP, which specify locations for certain types of storage, must be defined with the
ANYWHERE parameter specified to ensure that storage used by AllFusion Gen processes can be acquired above the line.
Set Encyclopedia Variables
Use this option to capture global values for AllFusion Gen as described in the following procedure.
1. Select option 4 on the Installation Variables Management Menu and press Enter. The Set Encyclopedia Variables screen appears.
Set Encyclopedia Variables COMMAND == >
Enter or verify encyclopedia variables for the current installation. Site name YOUR_COMPANY_NAME___________
Encyclopedia name HOST001_ Encyclopedia ID 1________ Install construction Y
Administrator TSOID TSO user ID
Administrator name SYSTEM_ADMINISTRATOR__________ PLAN prefix HEPL
Schema identifier 9.1.A5 User dataset prefix &SYSPREF User dataset UNIT type SYSDA
User dataset suffix ___________________________(Optional)
Enter or verify optional variables used in model crosscopy or conversion Old PLAN prefix PL00 (Optional)
Old Schema identifier 9.0.A2 (Optional) Old load library ___________________________ F1=Help F2=Accept F3=Exit F6=Save F12=Cancel
2. Complete the fields on the Set Encyclopedia Variables screen, based on the following considerations:
The Encyclopedia Name must be unique to prevent z/OS enqueues. &SYSPREF is defined to create temporary data sets from the Encyclopedia user’s TSO ID.
The Schema Identifier must be 9.1.A5. Do not change this value. The PLAN Prefix is used to construct plan names for AllFusion Gen.
Tasks to Define Installation Variables
3. Press F2 to verify and save the entered variables in a working copy of the user’s ISPF profile pool.
4. When the verification is complete, press Enter to exit the Activity Display screen.
5. Press F3 to exit the screen.
Define Regional Settings
The value you select from this screen defines the default Encyclopedia code page that is loaded into the DXCPID table during installation.
Understanding Regional Settings and Code Pages
There are some important aspects of code pages and the DXCPID table that you should understand before selecting a regional setting.
All new models are stored in the encyclopedia in the code page associated with the regional setting you select. Existing models maintain their original code page association.
The DXCPID table lists all the possible code page values supported by AllFusion Gen and the corresponding code page value in which new models are translated and stored in the Host Encyclopedia.
If your country is not listed on the Regional Settings screen, select the Other option.
All American and Western European code pages are based on a Latin-1 character set and can be successfully translated from one to the other. Countries based on character sets other than Latin-1 often have only one valid code page. The defaults defined in the DXCPID table will handle these countries regardless of the selection made on the Regional Settings screen. For example, Japan has three regional settings from which to choose: 930, 939, or Other (which exports both code page 930 and code page 939).
Loading a DBCS BiDi (Double-Byte Character Set, BiDirectional) code page and a non-Western European Latin (such as Turkish) encyclopedia code page entry into DXCPID is not affected by the selection you make in the Regional Settings screen.
For an explanation of the code page translation table, see Code Page Translation in the chapter Encyclopedia Communications in the CSE Guide. For a full explanation of code page functionality, see the National Language Support Reference Manual, Volume II published by IBM.