OCS Virtual image
User guide
Version: 1.3.1 Viking Edition Publication date: 30/12/2012
Page | 1
Table of Contents
1. Introduction... 2
2. The OCS virtualized environment composition... 2
3. What do you need? ... 2
4. Software installation ... 3
4.1 VirtualBox installation ... 3
4.2 Importing the OCS virtual image ... 6
5. OCS configuration... 9
5.1 Running the OCS virtual machine... 9
5.2 Stopping the OCS virtual machine... 10
5.3 Initializing the OCS environment... 11
5.3 Test your application ... 13
5.4 Glassfish notes... 14
5.4.1 Administrator account... 14
5.4.2 Change the administrator account... 15
6. Accessing your files ... 16
Page | 2
1. Introduction
The current guide explains how to use the virtualized OCS environment.
The main goal of the OCS virtualized version is to provide an entire OCS environment installed and preconfigure.
It gives the possibility to a user, with a minimal IT knowledge, to test the OCS application. It's up to you to modify the defined configuration and fit it to your specific needs.
2. The OCS virtualized environment composition
The OCS virtualized environment is composing by:- A Linux server (Ubuntu server 12.4.1 LTS – http://www.ubuntu.com/).
- A preconfigure open source database (MySql – http://dev.mysql.com/downloads/). - An open source java application server (Glassfish – http://glassfish.java.net/)
- The OCS application (Viking edition – https://joinup.ec.europa.eu/software/ocs/release/all). Additionally, a SSH and SFTP connections are configure to let you access the Linux server.
3. What do you need?
In order to use the OCS Virtualized environment, you must download and install VirtualBox (https://www.virtualbox.org/). VirtualBox is a virtualization product running in Windows, Linux, OSX, and Solaris.
You must also download and install the OCS virtual machine (ocs-vm) from Joinup. (https://joinup.ec.europa.eu/software/ocs/release/all).
Page | 3
4. Software installation
4.1 VirtualBox installation
To install VirtualBox, run the installer you have previously downloaded. Follow the steps displayed on the installation window.
Figure 1 VirtualBox installation wizard Don't custom the installation.
Page | 4
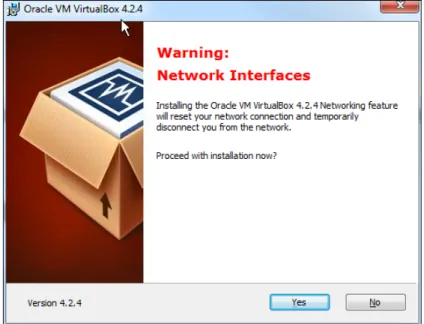
If you receive a warning about the network interfaces, accept it and proceed with the installation.
Figure 3 select "yes"
During the installation, you will receive notifications about the installation of additional components (USB, network service).
Accept the installation of those components.
Figure 4 install the universal serial bus
Page | 5
At the end of the installation, check the start option and finish the installation process.
Figure 6 check the start Oracle VM VirtualBox
VirtualBox is started.
Page | 6
4.2 Importing the OCS virtual image
In order to use the OCS virtualized environment, you must import the OCS virtual machine ( ocs-vm.ova file) in the VirtualBox manager.
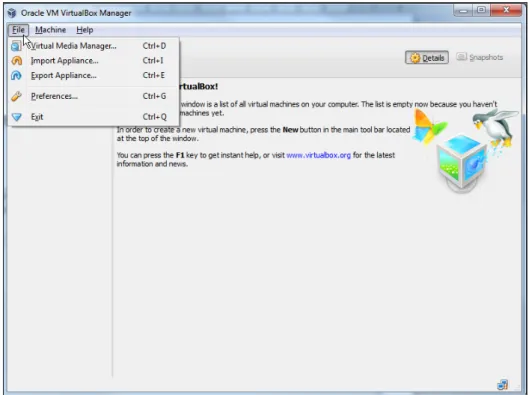
Start the VirtualBox manager (see figure 7). In the file menu, select "import Appliance".
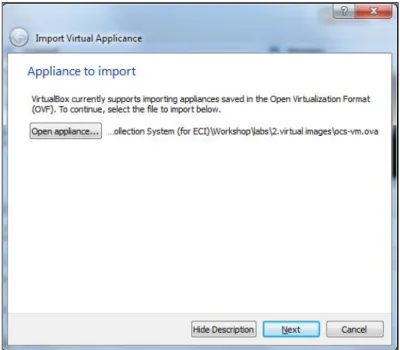
Figure 8 go to the file menu to import appliance In the import appliance window, select "Open Appliance".
Page | 7
Select the ocs-vm.ova file and open it.
Figure 10 open the ocs-vm.ova appliance Click on next to see the appliance settings.
Page | 8
Select import to launch the import process. Don't modify any settings parameters.
Figure 12 accept the default settings and import
Figure 13 import process
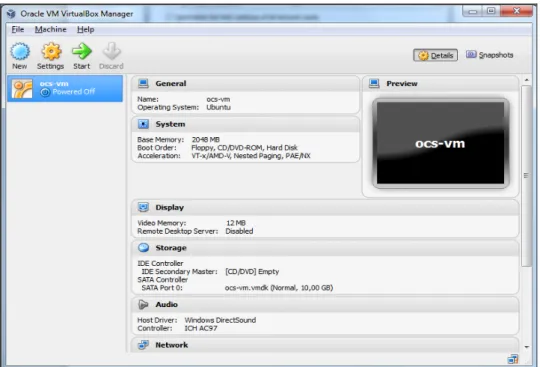
After a few minutes (depending of your computer), the OCS virtual machine will be imported in the VirtualBox manager.
Page | 9
5. OCS configuration
5.1 Running the OCS virtual machine
To run the OCS virtual machine, select it in the left list (see figure 14)
Figure 15 powered off and push the start button.
Figure 16 the start button from the top bar Or, you can also double click on the ocs-vm entry in the list.
A new window appears with your running virtual image.
Page | 10
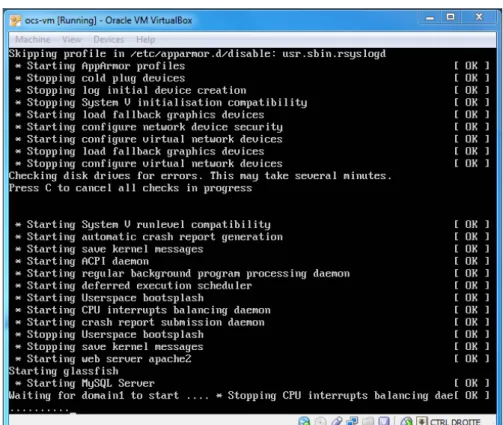
Wait a minute until you see the VirtualBox console.
Figure 18 your virtual image is ready to use
5.2 Stopping the OCS virtual machine
To stop the OCS virtual image, click the cross on the top right corner and power off the machine.
Page | 11
5.3 Initializing the OCS environment
At this point, the OCS virtualized environment is running. The OCS web application is also started.But, if you try to use it, you will receive an applicative error.
Figure 20 the OCS application is not yet initialized
To solve that error, you must initialize your OCS environment.
Open a browser and go to: http://your.virtual.machine.IP (i.e.: http://192.168.56.101) and click on the "Go to the OCS initialisation page" link.
Important remark: Your virtual image IP is displayed in the virtual image console (see figure 18).
Page | 12
You will arrive on the OCS environment initialization page.
Figure 22 OCS initialization wizard This wizard can be executed only once.
You are free to choose the organizer username you want.
The hashed password and the public key must be generated by the crypto tool. If you don't know how it works, take a look at the crypto tool documentation.
The Linux user password length must be at least 10 characters length and must contain at least 1 symbol and 1 upper case letter and 1 lower case letter and 1 number.
Remark: Don't try with inconsistent values, it doesn't work.
When you have correctly fill the form's fields, launch the initialization by pressing the start button.
Page | 13
5.3 Test your application
Now, you can test the application.Open a browser and go to the public site: http://YourVirtualMachineIP:8080/oct-web-public (i.e.: http://192.168.56.101:8080/oct-web-public/)
Or, open a browser and go the administration site: http://YourVirtualMachineIP:8080/ oct-web-admin
(i.e.: http://192.168.56.101:8080/oct-web-admin/)
Figure 23 administration site
Page | 14
5.4 Glassfish notes
5.4.1 Administrator account
The OCS application is deployed under Glassfish.
To access the Glassfish administration console, open a browser and go to:
https://YourVirtualMachineIP:4848/ (i.e.: https://192.168.56.101:4848/)
Figure 25 Glassfish administration console login
By default, an administrative account is defined: - user name: admin
- password: admin
Page | 15
5.4.2 Change the administrator account
Before changing your administrator password, you must be log in the administration console. Enter the default credentials (admin/admin) and select login.
When you are logged in, you have access to your server and domain configuration.
Figure 26 define a new administrator password The steps to change the administrator password are:
- in the tree on the left, select "domain" (1)
- select the right tab "administrator password" (2) - enter a new password and confirm it (3)
Page | 16
6. Accessing your files
The OCS virtualized environment give the possibility to access the files generated by the OCS application (i.e. exported encrypted signature).
To access those files, you will install an sftp client or an ftp client able to use the sftp protocol. A good choice is Filezilla (http://filezilla-project.org/).
Inside your sftp client, define a new connection with the following parameters: Host: Your virtual image IP (i.e. 192.168.56.101)
Port: 22
Protocol: SFTP – SSH File Transfer Protocol User: ocs (in lower case)
Password: you have define a new password during the OCS environment initialization (see figure 22 – linux user account)
All the files exported by the application are present in the ocsfilestore folder.
Figure 27 ocsfilestore Figure 28 ocsfilestore content
Page | 17
7. Hardware specifications
The OCS virtual image is configured to run on a computer with at least 4 GB of memory. By default, the OCS image uses the half of that memory amount (2 GB).
If your computer is equipped with 2 GB, you have the possibility to reduce the memory amount use by the OCS image.
Remark: under of 1 GB of memory allocated to the OCS image, the virtual image should be instable.
When your virtual image is powered off, select the system settings and change the base memory value (1024 = 1 GB).