Cumulus 8.1
marks of Canto, registered in the U.S. and other countries.
Apple, Mac, Macintosh and QuickTime are registered trademarks of Apple Com-puter, Inc. , registered in the U.S. and other countries.
Microsoft, Windows, Windows Vista, and Windows NT are either trademarks or registered trademarks of the Microsoft Corporation in the U.S. and other coun-tries.
Other third-party product and company names mentioned in this document are trademarks or registered trademarks of their respective holders.
Feedback?
Tell us what you think about this manual. We welcome all of your comments and suggestions.
Please e-mail comments to [email protected] or via fax at + 49-30-390 48 555.
TABLE OF CONTENTS 3
Intro
7Cumulus . . .
8This Administrator Guide . . .
8Organization . . . .8
Cross-Platform Issues . . . .9
User Interface Item Conventions. . . .9
Cumulus Step by Step. . . .9
Understanding Cumulus . . .
9How Cumulus Works . . .
11The Cumulus Client/Server Architecture . . . 11
The Cumulus Administrator . . . 12
Cumulus Clients. . . 12
Finding Help . . .
12Online Help . . . 12
Canto Online . . . 13
Getting Started
15The Cumulus Server . . .
16The Cumulus Administrator . . .
16Initial Tasks and Their Order . . . 16
Logging On as Cumulus Administrator . . . 16
Working Smart . . .
17Name a Catalog Manager . . . 17
Develop an Effective File Naming Convention . . . 18
Develop an Effective Folder Naming Convention . . . . 18
Cross-Platform Catalog Use. . . 19
Multiple Catalogs & Servers. . . 19
Providing Catalogs . . .
19Creating New Catalogs . . . 20
Adding Existing Catalogs . . . 21
Catalog Availability . . . 21
Going On. . .
23Configuring the Mail Notifier . . . 24
Default User Settings . . . 25
Managing Catalogs
27Catalog Settings. . .
28• OVERVIEW: CATALOG SETTINGS- - - 29
Employing a Central Asset Location . . . 30
Customizing Field Properties. . . 32
• OVERVIEW: FIELD PROPERTIES - - - - 34
Field Formulas . . . 36
Field Linking . . . 41
Adding Fields. . . 42
Creating a Custom Field . . . 43
Editing a String List Field . . . 44
Preparing Catalogs for Special
Purposes . . .
46Optimizing Standard Metadata Format Support. . . 46
Configuring Web Links. . . 46
Securing Catalogs . . .
47 Journaling Catalogs. . . 48 Database Mirroring . . . 49New Catalogs . . .
53 Creating Catalogs. . . 53 Catalog Templates. . . 54Catalog Maintenance. . .
56Catalog Size and Performance . . . 56
Compressing Catalogs . . . 57
Backing Up Catalogs . . . 57
Preparing Catalogs for Special Metadata . . . 58
Copying Catalogs. . . 58 Repairing Catalogs. . . 58 Renaming Catalogs . . . 60 Deleting Catalogs. . . 60 Dividing Catalogs . . . 60 Merging Catalogs. . . 61 Migrating Catalogs . . . 62
Using Server Console Modules . . . .
63Logging of Catalog Activities . . . 63
The Activity Monitor . . . 64
Archiving Information . . .
64The Importance of Updating Asset References . . . 65
About Archiving on CD-ROM . . . 65
Creating Hybrid CD-ROMs . . . 65
Server Console
67Overview. . .
68Opening the Server Console. . .
68Using Server Console for Multiple Cumulus Servers . . 70
Backup Manager . . .
70Mail Manager . . .
71• OVERVIEW: MAIL MANAGER - - - - 71
• User Interface Visual Overview Page
Remote Admin . . .
72Cumulus Server Status. . . 72
Cumulus Server Settings. . . 72
• OVERVIEW: CUMULUS SERVER SETTINGS- - - 73
License. . . 74
Remote Admin via Web Browser. . . 74
FileSharing Info Settings . . . 76
Report Manager . . .
78Requirements . . . 79
Working with the Report Manager . . . 79
Scheduler Manager. . .
81Setting Up a Scheduler Task . . . 82
Provided Scheduler Actions . . . 84
Set Manager. . .
86Managing Users
87User Management. . .
88The Users Catalog . . . 88
Modes . . . 88
User Manager . . .
90The Users List . . .
90Creating Users. . . 90
Duplicating, Editing and Deleting Users. . . 92
User Properties . . .
92• OVERVIEW: USER PROPERTIES – GENERAL & ADDITIONAL FIELDS - - - 93
User Identification . . . 93
Simple Mode: Permissions. . .
94Advanced Mode: Permissions. . .
95Catalogs. . . 95
Permissions . . . 96
Server Permissions . . . 102
Live Filtering™ . . . 104
Working with the Role-Based
Mode. . .
106Switching to Role-Based Mode . . . 106
Creating New Roles . . . 107
Duplicating, Editing and Deleting Roles. . . 108
Actions for User Manager. . .
108Importing User Data. . . 108
Client Groups . . . 109
Checking the Users Catalog . . . 110
Copying User Settings . . . 111
LDAP Authentication Method . . . .
113User Password Authentication . . . 113
User Fields . . . 114
Cumulus Roles . . . 114
Security Aspects. . . 116
Configuring Vault
117How Cumulus Vault Works . . .
118Vault Server . . . 118
Vault and Catalogs . . . 118
Vault and Asset Handling Sets . . . 119
Behind the Scenes . . . 119
Installation . . .
120Vault Server on Another Computer . . . 120
How to Make Vault Work . . .
121Configuring the Vault Server . . .
121Specifying the Cumulus Vault Administrator . . . 121
Activating Vault and Specifying the Vault Storage Location . . . 122
Implementing Cumulus Vault . . . .
124Opening a Workgroup Catalog . . . 124
Preparing Catalogs for Vault . . . 125
Linking Catalogs to Vault . . . 126
Configuring Asset Handling Sets for Vault. . . 129
User Access to Vault . . . 130
Adding Already Cataloged Assets to Vault . . . 130
Administration Utilities . . .
131Managing Non-cataloged Assets Stored in Vault . . . . 131
Update Folder Information . . . 134
Redirecting Asset References . . . 136
Troubleshooting
139Factors Influencing Performance .
140 Server Speed and Available Memory. . . 140Use of a Non-Dedicated Server . . . 140
Storage Media Type . . . 140
Number of Records . . . 140
Hard Disk Fragmentation . . . 140
Common Problems and Solutions
141 Slow Catalog Performance . . . 141Maximum Catalog Size . . . 141
Changing Thumbnail Appearance . . . 141
Exporting Catalog Information. . . 141
Dealing with Unexpected Categories . . . 142
Working with DCS Separation Files . . . 142
Cataloging OPI System Files . . . 142
Accessing Support Information Online . . . 142
Special Problems and Solutions. . .
142Different Port Numbers. . . 142
Damaged Field Index. . . 143
TABLE OF CONTENTS 5
Appendix
145AssetProcessor Parameters . . .
146Pixel Image Converter . . . 146
ZIP Processor. . . 147
DCS . . . 148
OPI. . . 148
PDF PageMerge AssetProcessor (optional) . . . 148
QXP Server AssetProcessor (optional) . . . 148
Generic Asset Processor (optional). . . 149
Sample EJaPs Folder. . .
151Technical Support and Liability . . . 151
Glossary
153This chapter offers a brief introduction to the Cumulus Digital Asset Management System. Cumulus can store any type of digital media assets, including all types of documents, images, audio, video, layouts from publishing programs, presentations, and PDF files. Once assets are stored, Cumulus becomes a central media repository from which you and your co-workers can view, locate, search, organize, copy, move, categorize, and otherwise manipulate the cataloged assets. Once you've settled on a process for storing and retrieving your digital assets that works for you, the process can be automated, further enhancing the efficiency of your workflows.
In this chapter, you will learn how Cumulus can help you manage your media assets, the theory behind the Cumulus client/server architecture, and the structure of this manual.
Cumulus
Canto offers different editions of Cumulus: • Cumulus Workgroup Edition
• Cumulus Enterprise Edition
The different editions of Cumulus are designed to meet the needs of any-one who wants to keep track of their digital media. To meet individual workflow needs, Canto has developed a range of additional add-on prod-ucts. For more information on Cumulus products, see Canto’s website (www.canto.com.)
This Administrator Guide
The Administrator guide is one of three manuals that are provided with a Cumulus edition:
• The Installation Guides describe how to install Cumulus Workgroup or Cumulus Enterprise.
• The Administrator Guide (this manual) describes how to manage users and catalogs.
• The Client User Guide covers how to use Cumulus for Windows or Mac OS X to catalog and manage media assets. This guide includes the descriptions on how to set up Cumulus sets and templates. All manuals are provided as PDF files and can be downloaded from Canto’s website.
Organization
To give you the quickest access to the topic you’re looking for, this guide cov-ers only those subjects that are the exclusive domain of the Cumulus Admin-istrator. Everything else you need to know about managing your assets with Cumulus can be found in the Client User Guide.
This Administrator Guide covers the following topics:
• “Getting Started” – Covers a few basic guidelines about working with Cumulus and how to provide catalogs for your workgroup. (See “Getting Started” chapter, starting on page 15.)
• “Managing Catalogs” – Describes how catalogs manage the media assets stored on your system, how to define the properties of individ-ual catalogs and how to maintain the catalog files (copy, compress, back up, divide, merge, etc.). (See “Managing Catalogs” chapter, starting on page 27.)
• “Server Console” – Describes how to use the Server Console that pro-vides utilities for performing Cumulus’ administrative tasks. (See “Server Console” chapter, starting on page 67.)
• “Managing Users” – Covers how to make catalogs available to users, and how to set individual user permissions. (See “Managing Users” chapter, starting on page 87.)
• Cumulus Vault – Describes how to configure catalogs for use with the Vault. (See “Configuring Vault” chapter, starting on page 117.) This guide also contains a chapter on solving a few problems that may arise (see “Troubleshooting” chapter, starting on page 139), and a glossary to give you a quick reference to some of the terms used in this manual (see “Glossary” chapter starting on page 153). The Appendix provides
informa-UNDERSTANDING CUMULUS 9
tion on on parameters for Cumulus AssetProcessors and information on the Sample EJaPs folder included with any Cumulus Client installation.
Cross-Platform Issues
Cumulus is a cross-platform application, meaning that it runs on Win-dows® and Mac® OS X (Macintosh®) systems. Though the program’s fea-tures are identical in each version, portions of the user interface differ due to operating system or keyboard conventions. These differences are denoted or explained when necessary and assumed otherwise (e.g., the difference between “maximizing” a window in Windows, and “zooming” a window in the Mac OS X is not explained).
This icon denotes what pertains to Mac OS X only. This icon denotes what pertains to Windows only.
User Interface Item Conventions
To differentiate user interface items – buttons, menus, text fields, etc.– from surrounding text, those items are displayed in bold. For example:
“Click the Open button.”
To differentiate menu hierarchies, the
>
character is used. For example: “Select File>
Open to open a file.”This example means to select the Open item from the File menu.
Cumulus Step by Step
Instructional steps are identified by the following structure:
1. This would be the first instruction. The mouse icon makes it easy to identify.
2. The final instruction has a border beneath it, indicating that there are no further steps.
Understanding Cumulus
To get started with Cumulus, you need to understand only a few basic concepts. Cumulus creates special files called catalogs, which Cumulus uses to keep track of your valuable assets. As you catalog your assets, Cumulus creates special catalog entries called records that represent the assets to be managed. Each record contains vital searchable information about the asset it represents. To make searching and retrieving records easier, Cumulus lets you organize and classify records into logical groups called categories. Any individual set of records comprises a collection. A collection is a way of looking at catalog(s).
Assets
An asset in Cumulus is simply any one cataloged file or data stream. A video clip, an audio clip, an image, or a page layout document are exam-ples of files that are commonly cataloged in Cumulus. But the word file suggests an asset that is stored on a digital medium like a hard-disk or CD-ROM. What if the asset is a record in a database? This is not a file per se, but
as far as Cumulus is concerned, it is a data stream that can be cataloged, kept track of and accessed.
Catalogs
Like a filing cabinet, Cumulus catalogs serve as storage locations for asset collections. You can have as many catalogs as you like. Catalogs are cross-platform compatible, so it doesn’t matter what type of computer is used to create a catalog. Catalogs are explained in detail starting on page 27.
Categories
Like folders in a filing cabinet, Cumulus categories serve to organize assets (files). But here the similarities end. Assets can appear in any num-ber of Cumulus categories at one time. Categories are explained in detail in the Client User Guide.
Records
Records represent assets. Each record represents one asset. Records hold information on the asset, such as file size, type, location, creation date, and much more. Cumulus allows the creation of customizable record fields, which can contain almost any sort of information you desire. Since these user-defined record fields are also fully searchable, you can tailor Cumulus to fit your requirements. Record fields are explained in detail starting on page 28. It’s very important to draw the distinction between records and assets. Records are part of Cumulus catalogs; assets are not. Records represent assets.
Collections
Collections are like snapshots from your open catalog. When you work with your assets in Cumulus, you’re viewing a constantly changing group of records. Without collections, each view of this group would be lost as soon as it was changed. Collections, however, enable you to capture any particular set of records and save it as you see it—all without disrupting your workflow. For example, you can modify the viewing attributes of your records in innumerable ways, add or delete records, select the infor-mation that appears with each record, and so on. Once you see some-thing you like or could use again, save it as a collection and recall it whenever you need it. You can even send your collection as an attach-ment to an e-mail message in one easy step.
A collection also acts as your temporary workspace in Cumulus, meaning that changes made to your collections do not affect the content of your catalogs. Even deleting a record from a collection does not remove it from the catalog (unless you really want it to, which you can do, too). Col-lections are explained in detail in the Client User Guide.
HOW CUMULUS WORKS 11
How Cumulus Works
Cumulus features a client/server architecture in which individual users (or clients) access the server application across a network.
The Cumulus Client/Server Architecture
The overall client/server architecture is simple. The Cumulus Server is installed on a server computer in the network. The Cumu-lus Clients are then installed on computers that have access to the computer running the Cumulus Server.
The communication between Clients and Server is handled via the Internet-standard TCP/IP, enabling Clients to access Cumulus cat-alogs from within the office or anywhere else in the world. Since Cumulus is cross-platform compatible, both Mac OS X and Win-dows Clients can access catalogs administered by any Cumulus Server. The only restriction is that the Client has to have TCP/IP access to the computer running the Server.
You don’t have to specify which computers are running the Cumulus Client application. The Cumulus Server allows as many Clients to connect as the number of Clients you purchased, no matter where they’re trying to connect from.
The Cumulus Architecture
Cumulus can be seen as "middleware" as it communicates between the levels of the employed operating systems, storage devices and databases and the user interface level. The main compo-nents of Cumulus are the metadata server, an asset server and a processor server. These components can be installed on different computers with different operating systems.
The Cumulus Administrator
The Cumulus Administrator has to perform the following tasks:
• Installing the Cumulus Server application on a server computer in the network. (See Installation Guide.)
• Registering your Cumulus configuration and activating the software. (See Installation Guide.)
• Configuring the Cumulus Server – employing the Remote Admin utility. (See “Remote Admin,” p. 72)
The Cumulus Administrator is responsible for the following tasks: • Providing catalogs to Cumulus Clients by creating new catalogs or
adding existing ones to the list of catalogs administered by the Cumulus Server. (See “Providing Catalogs,” p. 19.)
• Configuring each catalog’s settings to meet the specific needs of the workgroup. (See “Catalog Settings,” p. 28.)
• Making catalogs available or unavailable to Cumulus Clients and defin-ing individual user permissions. (See “Managdefin-ing Users,” p. 87.) • Maintaining the catalog files themselves, including tasks such as
opti-mizing catalog performance, backing up and restoring catalogs, repair-ing catalogs, etc. (See “Catalog Maintenance,” p. 56.)
The permission to perform these tasks can be given to other users. The Cumulus Administrator has all these permissions by default and is the one who is responsible that the permissions are given according to the specific needs of the workgroup.
Cumulus Clients
Cumulus Clients access workgroup catalogs by logging onto the Cumulus Server and opening catalogs administered by the Server. Once logged on, they have access to all of the functions described in the Client User Guide (provided, of course, that the Cumulus Administrator has not restricted their permissions to use these functions).
Finding Help
If you have a question that is not answered in this guide, there are a number of additional resources to check:
Online Help
Cumulus includes a help system. Access it via the Help menu or the Help buttons provided in dialog windows. Similar to other help systems, sub-jects are organized by contents and index, and are searchable. The Cumulus help system is based on HTML pages that can be viewed with any standard Web browser. However, if you employ any pop up blockers, the display of the help system may not be possible.
TIP: Recommend your Cumulus Client users to load Cumulus help online from the Canto website, where the latest updates will always be available. (Help > Source > Online)
FINDING HELP 13
Canto Online
The Canto website (www.canto.com) contains many resources of value to you as a Cumulus user. Among them Canto's User 2 User Support Forums. These forums are non-moderated bulletin boards hosted on the Canto website. Canto support does not answer questions here, the forums are user to user only. Feel free to use the forums to discuss any problems you may be having using Cumulus and receive help from other Cumulus users.
This chapter covers some topics important for getting your Cumulus configuration up and running. Since your workgroup needs Cumulus catalogs to access, this chapter gives you a few guidelines about effective catalog administration, as well as information on how to provide catalogs to your workgroup.
The Cumulus Server
Once installed, as default the Cumulus Server is launched “invisibly” every time the computer it’s running on is started up. Most administrative actions can be performed from a Cumulus Client application logged on as Cumulus Administrator to the Server. Before you can log on from a Cli-ent, however, you have to register the Cumulus software and maybe con-figure the Cumulus Server properties. You concon-figure the properties of a Cumulus Server using the Remote Admin module. For details on the Remote Admin module, see “Remote Admin,” p. 72”.
The Cumulus Administrator
To administer Cumulus, there has to be a user account which functions as the Cumulus Administrator. This user account is created during the installation of the Cumulus Server with the default name cumulus. There is only one Cumulus Administrator, but to provide your workgroup with extra flexibility in managing catalogs, Cumulus permits more than one user to act as Cumulus Administrator simultaneously. It does not, however, permit more than one user to open a catalog as Administrator at the same time. Each one simply needs to enter the user name of the Cumulus Administrator when connecting to the Cumulus Server.
Initial Tasks and Their Order
The sections that follow describe how to log on as Administrator and then how to provide catalogs as this is the next step to be performed. This should be done before you set up any Cumulus Client users as you can only allow them access to catalogs that are provided by the Cumulus Server. For a description on how to set up users, see “Managing Users,” p. 87. However, before you let your Cumulus Clients work with these cat-alogs you should set up the catcat-alogs as well. For a description on how to set up catalogs, see “Catalog Settings,” p. 28.
For general information on the responsibilities of the Cumulus Adminis-trator, see “The Cumulus AdminisAdminis-trator,” p. 12.
Logging On as Cumulus Administrator
Before you can begin managing your workgroup’s catalogs, you have to log onto the Server as Cumulus Administrator from a Cumulus Client application.
To log on as Cumulus Administrator:
1. From any Cumulus Client, select File
>
Connect to Server. The Connect to Serverdialog box appears.2. In the Server field, select or enter the name of the Cumulus Server, you want to connect to.
If you are logging on from the same computer as the Server is installed, you can type in localhost. If more than one Cumulus Serv-ers are available to you, click on the arrow to get a list displayed. This list contains the names/IP addresses of all currently active Dialog to connect to the Cumulus Server
WORKING SMART 17
Cumulus Servers in the network. If necessary, edit the IP address of the Cumulus Server by selecting another one from the drop-down list. The IP address can be either a numbered address or the name of the Cumulus Server (e.g., cumulus.canto.com).
NOTE >>> To be able to connect to the Server, every Client must specify a port number. By default, Cumulus automatically deter-mines an open port number and configures it for both Server and Clients (see “Remote Admin,” p. 72). Change the port number only to avoid a conflict with other server software. If the port number is changed, all Clients need to be informed of this fact or they will not be able to log on. <<<
3. Under Connect as, enable Registered User.
4. Type the user name of the Cumulus Administrator in the Name field and the corresponding password in the Password field. (See “The Cumulus Administrator,” p. 16, for information on the iden-tity of the Cumulus Administrator.)
5. Click OK.
The Catalog Accesswindow appears.
The Catalog Access window lists all catalogs currently administered by the Cumulus Server and is the starting point for performing numerous administrative tasks.
By clicking buttons found in this dialog box, you can:
• open a catalog and modify its properties (see “Catalog Settings,” p. 28)
• create new catalogs (see “Creating New Catalogs,” p. 20).
• add existing catalogs to the list of those administered by the Cumu-lus Server (see “Adding Existing Catalogs,” p. 21).
• remove catalogs from this list. Then they are not administered by the Cumulus Server.
• determine which catalogs should be shared and be available to Cumulus Clients in general. The individual access permissions of Cumulus Clients for catalogs are defined employing the User Man-ager module (see “User ManMan-ager,” p. 90).
• publish catalogs to the Internet (only available if a Cumulus Internet solution is installed with your Cumulus configuration).
Working Smart
Before you jump into providing catalogs for your workgroup, it’s a good idea to become familiar with a few guidelines that will make your work with Cumulus as efficient and effective as possible.
Name a Catalog Manager
It’s best to assign one person in your workgroup to manage assets and Cumulus catalogs. Having one manager helps keep things consistent and provides your workgroup with a recognized source for asset and catalog information.
The Catalog Access window – starting point for numerous administrative tasks
For the catalog manager to be able to effectively manage workgroup cat-alogs, this user has to log on to the Cumulus Server as the Cumulus Administrator. For details on acting as the Cumulus Administrator, see “The Cumulus Administrator,” p. 16.
Develop an Effective File Naming Convention
Even though Cumulus makes it easy to keep track of assets with its thumbnail previews and wealth of search options, there is no substitute for a well planned filing system. There will be times that you must access files without the convenience of the Cumulus interface. For example, when writing scripts to enable Cumulus to automate the workflow, a consistent and predictable filing system can not only save many hours of script debugging, but it can also enable functionality that might not oth-erwise be possible.
How you name your files will depend on how you use them. A news agency may decide to name incoming news stories prefixed with the cur-rent date and affixed with the file type:
2003-06-01-ElectionResults.txt 2003-06-01-ElectionResults.tif
Using the date in this order lists the files chronologically when sorted alphabetically. It also makes it easier for Cumulus scripts to select files based on a date range.
A Web design group may choose to include an image’s file size in its name to make entering HTML size tags more convenient:
MainPageBanner200x50.gif
Or, to use this manual as an example, file names for screen shots of menus and dialog boxes each begin with either “M_” or “W_” to identify the plat-form from which the images come. For example, the file name for the Mac OS File menu is: M_FileMenu.tif. Its Windows counterpart is called: W_FileMenu.tif
Using the two file name prefixes not only helps differentiate the files at a glance, but also helps to make the filing system more predictable. From this example, you can probably guess the file names of most images in this document. Consistency and predictability are key to developing a naming convention that will serve you and your workgroup well.
Develop an Effective Folder Naming
Convention
Apply an equally clear naming convention to your folder (directory) struc-tures. Cumulus can use your folder hierarchy to create categories when cataloging assets. It is a real time saver if your folder structure helps to identify your assets.
Some users may choose to store assets in folders based on file type rather than project name. A sound clip of audience applause, for example, may be used in many projects, but it will always be a sound clip. You can use Cumulus’ categories to associate assets with one or more projects.
PROVIDING CATALOGS 19
Cross-Platform Catalog Use
Though the catalogs that Cumulus creates are completely cross-platform compatible, it is up to you to use a catalog file naming convention com-patible with each platform which you plan to use for your catalogs. Keep in mind that catalog names and catalog file names are two different things. For cross-platform purposes, you need only be concerned with catalog file names. (see “Renaming Catalogs,” p. 60, for catalog naming information.)
Consult your operating system’s documentation for details on the range of characters that can be used. In the meantime, here are a few tips:
• Windows uses a backslash (\) to differentiate folder hierarchies. Mac OS users should avoid using this character in their catalog names. (The Mac OS uses a colon (:) to differentiate folder hierarchies, but this character is not allowed in files name on either platform, so it is of no real concern.)
• Windows file names can be up to 255 characters in length. Mac OS file names must be 31 characters or less.
Characters that are safe for use on all Cumulus platforms include all upper and lower case letters, all numbers, the hyphen (-), and the underscore ( _ ).
Multiple Catalogs & Servers
You may want to use separate servers for different departments within your organization. Although each server can manage one or more cata-logs, you must have a separate copy of Cumulus for each server. When evaluating your media management needs, consider the following questions:
• How many Clients will access the catalog?
• How many assets do you need to manage, today and in the future? • Where will the cataloged assets be stored? Who should have access
to the cataloged assets (for example, to modify them)?
• Does the media archive contain logically unrelated groups of assets? • Do different groups of people use different groups of assets? Or do
the documents themselves fall into multiple categories?
Providing Catalogs
Catalogs to be shared by your workgroup must be administered by the Cumulus Server, which means that they must appear in the list of cata-logs administered by the Server (in the Catalog Access window). Catacata-logs administered by the Cumulus Server have to be stored locally on the computer running the Server application. So before you jump into pro-viding catalogs for your workgroup, make sure that you create or note the location(s) that will house the catalogs you provide.
You have a couple of options for providing catalogs to be administered by the Cumulus Server. You can either create new catalogs or add exist-ing catalogs to the list in the Catalog Access window. If you add catalogs from previous Cumulus versions, you should migrate them to the current Cumulus format. The sections that follow describe how to provide cata-logs to your workgroup using any of these routes.
Creating New Catalogs
The first step in creating new workgroup catalogs is to create or note the location where they will be stored on the computer running the Cumulus Server. So if you haven’t already done so, do that now.
Then you can log on to the Cumulus Server from any Cumulus Client and tell the Server where the catalog is to be stored and what you want to call it. To create new catalogs for your workgroup:
1. Log on as Cumulus Administrator to the Cumulus Server (see “Logging On as Cumulus Administrator,” p. 16).
2. In the Catalog Access window, click New.
If available you can use a catalog template for the new catalog.
(For more information on catalog template, see “New Catalogs,” p. 53.)
3. Select the desired template from the drop down menu and click OK.
The New Catalog dialog box appears.
4. In the Enter remote path to catalog field, either
– type the full path to the catalog, including the name you would like to call it – using the path and file naming conventions of the operating system where your Cumulus Server is installed. OR
– click the Browse button to select a location for the catalog and then enter the name for the catalog. (The area you are allowed to browse is defined in the Cumulus Server Settings).
NOTE >>> While you can create a catalog from any Cumulus Cli-ent, the path you define here refers to a location on the computer running the Cumulus Server. <<<
5. Click OK.
The new catalog now appears in the catalog list of the Catalog Access window.
PROVIDING CATALOGS 21
Adding Existing Catalogs
Catalogs to be administered by the Cumulus Server must be stored locally on the computer running the Server application. So before you add a catalog for your workgroup, make sure to note the location where it is currently stored on that computer, or move it to the desired location. You can then log on to the Cumulus Server from any Cumulus Client and tell the Server where the catalog can be found.
Catalogs created with Cumulus 6 versions can be used with Cumulus 7. Catalogs created with Cumulus versions earlier than 6 must be migrated before they can be used with Cumulus 7. (See “Migrating Catalogs,” p. 62, for more information.)
To add an existing Cumulus catalog to the list:
1. Log on as Cumulus Administrator to the Cumulus Server (see “Logging On as Cumulus Administrator,” p. 16).
2. In the Catalog Access dialog box, click Add. The Add Catalog dialog box appears.
3. In the Enter remote path to catalog field, either
– click the Browse button to select the catalog. (The area you are allowed to browse is defined in the Cumulus Server Settings). OR
– type the full path to the location where the catalog is currently stored, including the name of the catalog – using the path and file naming conventions of the operating system where your Cumulus Server is installed.
NOTE >>> While you can add a catalog from any Cumulus Client, the path you enter here refers to a location on the computer run-ning the Cumulus Server. <<<
4. Click OK.
The added catalog appears in the catalog list of the Catalog Access window.
Your catalogs are now administered by the Cumulus Server and can be accessed by Cumulus Clients.
Catalog Availability
There are two levels of catalog access to keep in mind when managing user permissions:
• Catalog availability – Determines whether or not a catalog is avail-able for sharing at all. If availavail-able, the catalog is availavail-able to every Cli-ent who connects to the Server, unless you define specific user access restrictions.
• User permissions – Determines how a catalog is shared. You can define which access permissions users have. (See “User Properties,” p. 92.)
Making Catalogs Available
Just because a catalog appears in the list of catalogs administered by the Cumulus Server, it doesn’t mean that it can be shared by your workgroup. You first have to make each catalog available before it can be accessed by Clients.
To make a catalog available to Clients in general:
1. Log on as Cumulus Administrator to the Cumulus Server (see “Logging On as Cumulus Administrator,” p. 16).
The Catalog Access window appears. You can see which catalogs are accessible to clients by selecting a catalog and noting whether the Share Catalog option is checked for that catalog. 2. Select the catalog you wish to make available to Clients and
enable Share Catalog.
A dialog asks you to confirm the change of the sharing status of the catalog in question.
3. Confirm the change.
The catalog is now available to every Client who has got the respective permissions, see “User Properties,” p. 92.
Making Catalogs Unavailable
There are two ways to make a catalog unavailable to Clients. Both are done from the Catalog Access window. You can:
• temporarily deactivate it in the list of catalogs administered by the Cumulus Server by disabling Share Catalog. A dialog box appears asking you to confirm the change of the sharing status of the catalog in question.
• permanently remove it from the list of catalogs administered by the Cumulus Server by clicking Remove. The catalog is not deleted, but is no longer administered by the Cumulus Server.
To make a catalog unavailable to Clients in general:
1. Log on as Cumulus Administrator to the Cumulus Server (see “Logging On as Cumulus Administrator,” p. 16).
The Catalog Access window appears. You can see which catalogs are accessible to clients by selecting a catalog and noting whether the Share Catalog option is checked for that catalog. 2. Select the catalog you wish to make unavailable to clients and
disable Share Catalog. A dialog box appears asking you to con-firm the change of the sharing status of the catalog in question. 3. Click OK.
The catalog still appears in the list of catalogs administered by the Cumu-lus Server, but it is no longer available to be shared by Clients.
GOING ON 23
To remove a catalog from the list of catalogs administered by the Cumu-lus Server:
1. Log on as Cumulus Administrator to the Cumulus Server (see “Logging On as Cumulus Administrator,” p. 16).
The Catalog Access window appears.
2. Select the catalog you wish to remove from the list and click Remove.
If the catalog to be removed isbeing used by a Client, a dialog box appears in which you can determine the length of time the Clients have before they will be disconnected. This dialog box also lets you send these Clients a message on the impending dis-connection.
3. Click OK.
The catalog is removed from the list in the Catalog Access window, but is not deleted from the system.
Going On
As Cumulus Administrator, you are responsible
• for setting up these catalogs to meet the needs of your workgroup. To find out how, see “Managing Catalogs,” p. 27.
• for creating Cumulus Client users and giving them the permissions for accessing catalogs and functions as it best suits your workflow. To find out how, see “User Properties,” p. 92.
• for providing View Sets, Asset Handling Sets, Actions, and Metadata Templates to the Cumulus Client users that meet the specific needs of your workgroup. To find out how to define these sets, see the Client User Guide.
The Cumulus Administrator can also give other Client users the permis-sions to define these items. Since Cumulus 6.5, you can have users with very individual permissions. For example, you can have users who have the permissions to define shared Asset Handling Sets or the permis-sions to define shared View Sets and others who are allowed to do both. This enables big organizations to delegate these tasks to different users, e.g. from different departments. However, as the Cumulus Administrator knows best about the fields included in the catalogs, it’s also the Cumulus Administrator who knows best how to set up View Sets that meet the specific needs of the workgroup and fit the catalogs used by the workgroup. Again it’s the Cumulus Administrator who knows best about the Asset Handling modules that are used by the workgroup and that’s why the Cumulus Administrator is the one who knows best how to set up Asset Handling Sets that are ideal for the workflow. The same goes for Actions and Metadata Templates. How-ever, since Cumulus 6.5, it is up to you either to take over these tasks yourself or to train other users so that they can take on these tasks. • for configuring the mail notification function if you want to enable your
users to take advantage of the Mail Notifier as a Trigger Action. See below to find out how.
Configuring the Mail Notifier
To enable your users to employ the Mail Notifier as a Trigger Action, the mail notification function has to be configured for your installation. The configuration file to set up the mail notification is named MailCon-fig.xml. You can find the file in the conf folder inside your Cumulus Server installation folder.
The MailConfig.xml file contains the parameters necessary for sending out mail notifications to your users who have provided an e-mail address that is stored in the user’s properties in the Users catalog or – if you use LDAP as authentication method with Cumulus Enterprise or a permis-sions add-on product – in LDAP.
To make the function work, you have to replace the following parameter value placeholders in the file with your real values. You must change:
• the address of the employed mail host: Replace the parameter value for the parameter
mail.mycompany.com
with the address of the desired (and valid) SMTP mail host.
If using SMTP or SMTP-after-POP3 authentication, replace also
smtpuser and smtppassword
with your user name and password for the SMTP server athentica-tion.
• If using SMTP-after-POP3 authentication, replace
mail.mycompany.com and pop3user and pop3password
with the POP3 server address, user name and password for POP3 authentication.
• the e-mail address of the sender to be used for sending out e-mails: Replace the parameter value for the parameter
mysender
with the desired (and valid for sending) e-mail address.
These configurations are mandatory to make the function work. The Cumulus Server does not need to be stopped and started again after changing this configuration file.
The configuration file also contains pre-configured messages. You can customize these if you want to. You can easily change the wording and content of these messages. Just follow the instructions given in the com-ments of the MailConfig.xml file. The sent mail notification can include an URL link to the record of the changes asset. If this URL link is to be included in any message, you have to replace the following link parame-ters in the messages with your real values:
• my_web_app_server
Replace with the DNS name or IP address of the server running your Web Publisher Pro/Internet Client Pro web application including the port number (e.g. 192.168.0.1:8080)
• my_web_app
Replace with the name of the your Web Publisher Pro/Internet Client Pro web application (e.g. CumulusE)
• my_cumulus_server
GOING ON 25
Default User Settings
However, the Cumulus Administrator has all permissions by default and is the only one who can define the User Settings before other Cumulus Client users start working with a new Cumulus installation. This is possible because all settings are centrally stored at the Cumulus Server. The Cumulus Server installation folder includes a conf folder that houses fold-ers where the settings are stored. The Usfold-ers folder holds the individual folders of Cumulus Clients (named as their login names) where their indi-vidual settings are stored. The Server folder holds the shared settings that can be used by all Cumulus Clients.
When a Client user logs in to a new Cumulus installation for the first time, all settings are taken from the DefaultUser folder. However, only then, as with logging in for the first time, an individual folder is created in the Users folder for each Client user to store her/his individual settings. When logging in next time, the settings from this individual folder will be taken.
Customizing Default User Settings
In case the Cumulus Administrator wants the Client users to have default User Settings that differ from those Canto provides, there is an easy way to prepare this before a Client user logs in to a new Cumulus installation for the first time. In order to do this, log in as Cumulus Administrator and define the User Settings as you want them to be for Cumulus Client users to start with. Then save them and close the Preferences windows (or even quit the Cumulus application). The User Settings are stored in the Cumulus Admin-istrator’s folder (default: cumulus) that is located in the Users folder (found in the conf folder of the Cumulus Server installation folder).
Then copy the ModulePreferences.xml & ModulePreferences.pack files from the Cumulus Administrator’s folder to the folder of the default user (named defaultuser, located in a subfolder of the Users folder found in options subfolder of the conf folder of the Cumulus Server installation folder). E.g. under Windows: C:\program files\Canto\Cumulus Enterprise Server \conf\Options\Users/ %7b98ca1422-0171-4d1d-8b84-8cdda4ab70ae%7d\defaultuser
and under Mac OS: /usr/local/Cumulus_Enterprise_Server/conf/Options/Users/ %7b98ca1422-0171-4d1d-8b84-8cdda4ab70ae%7d/defaultuser
TIP: Copying the User Settings of a Selected User for Other Users The User Manager module offers a function that lets you copy user settings from one user to another. In that case the User Settings for the Cumulus application as set in the Preferences window are cop-ied. For details see “Copying User Settings,” p. 111.
Default User Settings with Roles
If you employ the role-based mode of the User Manager, Cumulus offers the possibilty to provide different initial settings for the different roles. Each role created with the User Manager has its own folder located in the Users folder, and if a user assigned to certain roles logs in for the first time, she/he will get her/his indivudual user folder which contains the settings provided by the role’s folder. If the role’s folder does not contain certain settings they are taken from the DefaultUser folder. If a user is assigned to more than one role, the settings from the assigned roles will be added and merged before copied to the indivudual user folder.
To make use of this feature you must copy the desired settings ( e.g. Mod-ulePreferences.xml & ModulePreferences.pack) to the roles’ folders.
Managing Catalogs
This section describes how to set the catalog settings to suit your needs and offers some suggestions for effective cataloging strategies, also it covers some catalog maintenance issues.
Catalog Settings
Fundamental changes can be made to each catalog by modifying its set-tings. These settings have no effect on catalogs other than on the one for which they are set. It’s important to consider a catalog’s settings when the catalog is new, before you add records to it.
PRECONDITIONS: To modify a catalog’s settings, you must have the appropriate Administrator permissions (Permissions > Administrator Per-missions > Modify Catalog Settings.) To view a catalog’s settings, you must have the appropriate Administrator permissions (Permissions > Administrator Permissions > View Catalog Settings.)
To access the settings of a catalog:
1. Make sure the collection window containing the catalog is the active window in Cumulus. If you have more than one catalog opened in the active collection window, the Catalog Settings window provides a list from which you can select the catalog you want to modify.
2. Select Cumulus/ Edit > Preferences. 3. Click Catalog Settings.
The Catalog Settings window is displayed. If the active collection window contains more than one catalog, select the catalog you want to modify under Catalogs.
The settings for the selected catalog are displayed in the Catalog Settings window.
The Catalog Settings window controls several important factors that come into play while managing assets. The options are divided into the following sections:
• General – Catalog location and name, sharing options and options on a central location for the assets.
• Record Fields – Displays the record fields that the catalog contains. You can add or delete fields and customize selected fields. This allows you to organize the information that can be stored on an asset in its record. Remember, metadata retrieved from assets while cataloging can only be stored if the corresponding record fields are included in the catalog.
• Category Fields – Displays the category fields that the catalog con-tains. You can add or delete fields and customize the fields. • Mirroring – Displays the current mirroring settings for the catalog.
You can activate mirroring and define the database that serves as the mirror. (For more information on mirroring, see “Database Mirroring,” p. 49.)
• Permissions Summary – Shows what permissions each user or role has for the catalog. You can only view the information, for editing you have to employ the User Manager of the Server Console. See “Overview: Catalog Settings”, below, for an overview of the options available from this window.
CATALOG SETTINGS 29
Overview: Catalog Settings
The Catalog Settings window has three sections that provide access to each of its options. The options that are set from this window are specific to the active/selected catalog. They have no effect on other catalogs.
General Section
Catalog
1. Catalog file name, as seen from the Windows desktop/ Mac OS Finder (not edit-able from here).
2. Catalog name. Defaults to file name, can be changed. (See “Renaming Cata-logs,” p. 60, for details. Note that catalogs cannot be renamed while set to use the Cumulus Vault in Always and Exclusive mode.)
3. Displays the catalog format
4. Displays the catalog size (actual size/maximum size).
5. Prevents the creation of new categories that share names with existing catego-ries.
6. Activates journaling for the catalog. (See “Journaling Catalogs” on page 48.) IMPORTANT NOTE >>> Do not employ journaling and mirroring for the same catalog! Use one of the mechanisms depending on how the catalog is used.: (See “Securing Catalogs,” p. 47, for more information.) <<<
Sharing
7. Enabling this option makes a catalog available to Cumulus Clients. 8. Enabling this option is the first step to publishing a shared catalog on the
Inter-net.
Copy Asset to Central Location
9. If activated, newly cataloged assets can or will be copied to the selected Central Asset Location – depending on the selected mode.
10. Displays the selected Central Asset Location 11. Opens a dialog for selecting the Central Asset Location.
12. Opens a dialog for selecting the mode for copying asset to the Central Asset Location.
– As Set in Asset Handling Set – the Asset Handling Set employed for catalog-ing decides if assets are copied to the selected Central Location.
– Always – Assets are always copied to the selected Central Location, regardless of the Asset Handling Set settings.
– Always and Exclusive – Assets are always copied to Vault and their asset stor-age location is Vault exclusively. (This option is available only if Vault is selected as Central Asset Location.)
NOTE >>> Duplicates control with Central Asset Location!
For controlling duplicates with Central Asset Location activated, the record fields Orig-inal Asset Identifier, OrigOrig-inal Asset Name and OrigOrig-inal Asset Reference are required. You have to add these fields to catalogs with Central Asset Location activated if you also want duplicates control. <<<
Record and Category Fields Section
1. Field name. 2. Field type.
3. Overview on how the field is used for sorting and searching. 4. Opens a menu for selecting the columns to be displayed on this tab. 5. Opens dialog for defining field properties. For details see “Overview: Field
Prop-erties,” p. 34.
NOTE >>> Catalog Name, Record ID and Category ID are so-called virtual fields. These fields are meant to be used for display and processing purposes only. Therefore you cannot define their properties. <<<
6. Opens dialog for selecting the field to be added. 7. Removes the selected field from the list.
Mirroring Section
IMPORTANT NOTE >>> Do not employ journaling and mirroring for the same cata-log! Use one of the mechanisms depending on how the catalog is used.: (See “Secur-ing Catalogs,” p. 47, for more information.)<<<
1. Activates mirroring for the catalog. (See “Setting up a Catalog for Mirroring” on page 52.)
2. Selects the database system used for mirroring the catalog.
3. Defines the actual database used for mirroring the catalog. The displayed fields depend on the on the selected database system.
4. Displays information on the actual mirroring process. For more information on mirroring, see “Database Mirroring,” p. 49.
1 4 5 8 7 6 2 3 9 12 11 10 5 6 7 2 1 3 4 2 3 1 4
Employing a Central Asset Location
A Central Asset Location is a single storage location used to store specific digital assets. Employing a Central Asset Location ensures your assets remain accessible to all, and can more easily be accounted for. Cumulus lets you choose between different types of Central Asset Locations:
• File System – Any standard file system location can be used as a Cen-tral Asset Location. The most common example is a network file server. This type is supported by the Asset Storage Modules for the operating systems.
• Internet (FTP) Servers – If you need to keep files accessible from an Internet FTP server, you can choose an FTP server as Central Asset Location. This option is less popular for works-in-progress because of performance and other limitations associated with this type of server access; but when archiving assets, this option can be ideal. This type is supported by the URL AssetStore.
• Cumulus Vault – This type provides asset check in/out and version control services not available with the other two types. The file sys-tem on the Vault Server machine physically stores the assets kept in the Vault, but Cumulus Vault controls access to the files, which enables it to offer these advanced services not available when using the file system directly. This type is supported by the Vault AssetStore. A Central Asset Location is chosen as a catalog property setting. Each cat-alog can have its own Central Asset Location. What the best choice is depends on how the catalog is used. For more best practice information on Central Asset Locations, see the tutorial “Understanding Central Asset Locations in Cumulus” from Canto's “Exploring Series.”
PRECONDITIONS: To set up a Central Asset Location for a catalog, you must have the appropriate Administrator permissions (Permissions > Administrator Permissions > Modify Central Asset Location (option for the Modify Catalog Settings permission.)
To configure a catalog to employ a Central Asset Location:
1. Make sure the collection window containing the catalog is the active window in Cumulus.
Permissions Summary
Shows what permissions each user or role has for the catalog.
NOTE>>>You can only view the information, for editing you have to employ the User Manager of the Server Console.<<<
1. Lists the users and roles managed by the Cumulus Users catalog. 2. Displays the permissions the above selected user/role has for the catalog. 3. Displays the sets, actions, queries, and templates available for the above
selected user/role with that catalog.
Overview: Catalog Settings
3
1
CATALOG SETTINGS 31
2. Select Cumulus/ Edit > Preferences. 3. Click Catalog Settings.
The Catalog Settings window is displayed. If the active collection window contains more than one catalog, select the catalog you want to edit under Catalogs.
4. Click General.
5. Under Copy Assets to Central Location, enable Use Central Asset Location.
The next step is to choose where to store the copies and which Asset Storage module you want to use.
6. Click Browse. The Choose an Asset Storage Module dialog opens.
7. Select the desired module and click OK. The next steps depend on the selected module:
• Selecting the URL AssetStore opens a window for entering a URL.
Enter a valid URL of an existing FTP directory and click OK. • Selecting a File System AssetStore opens a window to select a
folder. Browse for the folder you want the asset to be stored in and then click OK
• Selecting the Vault AssetStore opens the Select Remote Mod-ule dialog.
Select the computer running the file system or the Vault Server from the Computer field. Your next step is to decide whether you want the assets to be stored directly in the folder of the Vault Server or in a subfolder nested in the Vault Server folder. Such a subfolder is called a Vault Folder.
Select the desired option. If you decided on Use Vault Server Directly, your next step is to click OK.
If you decided on Use Vault Folder, the list for selecting this folder is activated. Then your next step is to select the Vault Folder you want the asset to be stored in and click OK. NOTE >>> If a catalog is set as exclusive for a Vault Folder this folder cannot be used as a central asset storage location for any
other catalog. If you want a catalog to be set as exclusive, you have to create a new Vault Folder for it. <<<
8. Select the mode for copying assets to the central asset storage location chosen above. The mode determines when the Central Asset Location is used:
• As Set in Asset Handling Set – the Asset Handling Set employed for cataloging decides if assets are copied to the selected Central Location.
• Always – Assets are always copied to the selected Central Loca-tion, regardless of the Asset Handling Set used.
• Always and Exclusive (available with Vault AssetStore only) – Assets are always copied to Vault and their asset storage loca-tion is exclusively Vault.
9. Click Apply to save your changes and select the next catalog you want to set up for a Central Asset Location.
OR
Click OK to save your changes and close the Preferences window.
When users catalog assets to this catalog from now on, the asset can be copied or will be copied to the selected Central Asset Location.
NOTE >>> Central Asset Locations and Asset Handling Sets
Every Asset Handling Set that is to be used with a Central Asset Location (for cataloging or access), must be configured with the Central Asset Location’s corresponding asset storage module activated. So, activate the Mac OS and Windows AssetStore modules for file system locations, the URL AssetStore for FTP locations and the Vault AssetStore for Vault locations. <<<
Customizing Field Properties
The properties of a catalog field can be extensively customized. You can define:
• whether the field can be edited
• whether the field values should be based on formulas
• whether and how the field is indexed for sorting and searching. • whether and how the record field is linked with the asset and its
metadata fields.
To access the properties of a record field:
1. Make sure the collection window containing the catalog is the active window in Cumulus.
2. Select Cumulus/ Edit > Preferences. 3. Click Catalog Settings.
The Catalog Settings window is displayed. If the active collection window contains more than one catalog, select the catalog you want to edit under Catalogs.
4. Click Record Fields or Category Fields. This displays a list of the current record or category fields included in the catalog.
CATALOG SETTINGS 33
6. Check the Sorting, Contain Search and User Editable options for the field and activate the desired options. (See “Record and Cate-gory Fields Section,” p. 29, for all available options.)
7. Click the Properties button. This brings up a dialog in which you can set the properties for the field. The properties depend on the field type. (See “Overview: Field Properties,” p. 34, for all available options.)
8. Define the properties as you want them. NOTE >>> If you have changed the record field’s name, press the Enter key or click in another field, before you click OK. <<<
9. Click OK to close the Field Properties window. This brings you back to the fields list.
TIP: Editing Field Properties of Multiple Record Fields At Once Certain field properties can be activated or deactivated for multiple fields at once. On the record fields list, select the fields and use the alternate (right) mouse button to open a context menu. The menu options match the field properties you can (de)activate for multiple fields at once.
Selecting a menu item opens a submenu that offers Enable and Dis-able options. Select the desired option and the field property will be enabled/disabled for your selection of fields. If your selection of fields includes a field type that does not have the selected property, this field will just be ignored.
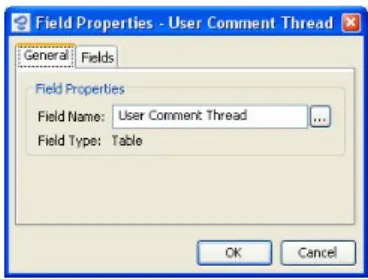
Overview: Field Properties
The Field Properties window reflects the field type. Most properties are the same but certain field types, e.g. an Audio field cannot be used for indexing and an initial value does not make any sense. That’s why the properties dialog for this field type does not provide these fields.
General Tab
Field Properties
1. Field name. You can use this field to edit a field’s name.
2. Opens the Field Name Editor to enter the field name in other languages as well. Is useful in multilingual environments.
3. Displays the Field type.
4. With String List Fields only: If activated, the users can select multiple values for this field in the Info View or the Information window. The values are dis-played with check boxes. NOTE >>> Whether this option is activated or not influences the available indexing options. If activated, the field can be indexed for contain-searching but not for sorting. <<<
Indexing
The options available depend on the field type.
5. Field can be used for sorting and searching. (Equivalent to the Sort/Search check box in the Field List column.)
6. The index for sorting records can be set language dependent. Depending on language selected for running the Client application the sorting will follow the rules of the language. Activate the languages your users run the Client application in. Then a language specific sorting index will be created for each of the selected languages. And if the Client application is started in one of these languages, a language specific sorting of records can be provided. 7. Field can be used for searching by means of the operators “contain” or
“doesn’t contain.” (Equivalent to the Contain-Search check box in the Field List column.)
8. If activated, searching the contents of String fields can be speeded up signifi-cantly. Use this option with care because it enlarges the catalog size. The optimization of the search index requires more memory in the catalog and therefore activating this option is only recommended for fields with little data content.
9. If activated, Cumulus provides an additional search function for the Find window and the Advanced Find window. You can search for whole words, not just for matching strings. Enclose the word you are searching for in single quotation marks and Cumulus will only find the records that contain the exact word. For example searching for copy will find records containing the words copy as well as copyright, copyhold, copyfree and so on. Searching for ‘copy’ will find records containing the word copy only.
Additional Options
10. Field will be included in the Record pane’s drop-down list for sorting 11. Field will be offered as search criteria in the drop-down lists of Find windows
and filter definitions.
Field Values Tab
The values of fields can either be defined by the user or be based on formulas. 1. If activated, the field value can be defined by the user.
2. Fills the field with an initial value (as defined in the field to the right). (See “Ini-tial Value for Fields,” p. 35, for details.)
3. Allows user to edit the field contents. (Equivalent to the User Editable check box in the Field List column.)
4. If activated for a field, the field should be filled with metadata when the metadata are edited. In the Information window or view the field name is dis-played in red and marked with an asterisk (*). (For details, see “Mandatory Fields,” p. 35.)
5. With Cumulus Enterprise or permissions add-on products only:
The Allow User to Edit property is enhanced by the option to restrict editing to specified users and roles only. If the Restrict Edit option is activated, you must add those users to the list you want to permit editing the field. Click the appropriate button (Add User or Add Role. Note that the Add User button is available only if you have the Browse for Users permission.) These buttons open a corresponding dialog. For adding users, you can search for available users. The possible search criteria depend on the authentication method (see above). Default search criteria is the login name. Enter the search value (a matching string) and click the Find button. The result of this search is listed below. Select the user(s) you want and click OK. The users are added. When adding roles, Cumulus will list the available roles. Select the role(s) you want and click OK. The roles are added.
6. If activated, the field values are based on the formulas defined below. For details on how to define such formulas, see “Field Formulas,” p. 36.
3 1 2 4 5 7 8 6 9 10 11 1 2 3 4 5 6
CATALOG SETTINGS 35
Defining Field Values
The values of fields can either be defined by the user or be based on for-mulas. If defined by the user, a field can have an initial value and you can allow users to edit it or even force them to edit it (mandatory fields).
Initial Value for Fields
To add a default text to a field (e.g. the Notes field) of all newly cataloged assets in a certain catalog, you have to enable the option Initial Value for the field and enter the text you want to have as default. If the asset’s metadata already contain a value for this field, the initial value will be ignored.
As the initial value of a String List field must be one of the terms you entered for the String List, you do not enter the initial value but select a term from the list provided when clicking the button next to the field. The initial value of a Boolean field is “false” if the Active option is not checked. If you activate this option, the initial value is set to “true”.
Mandatory Fields
If the Mandatory Field option is activated for a field, the field must be filled with metadata when the metadata are edited. In windows or views where you can edit metadata the field name is displayed in red and marked with an asterisk (*). If the field is empty when saving after editing, the user will get a reminding message. Either the user fills in all mandatory fields or any changes made will be discarded. Note that only mandatory fields included in the current view are checked.
String List Editor Tab
This tab is provided for String List fields only. See “Editing a String List Field,” p. 44, for details.)
Field Linking Tab
Linking
1. When cataloging assets, the selected record field will be filled automatically. (Read One: only the first matching field will be used).
2. When updating records, the selected record field will be filled automatically. (Read One: only the first matching field will be used).
NOTE >>> Do not activate this option if you want to keep the additional information you have entered. <<<
3. Before updating records, existing values will be removed from the selected record field. Allows to refresh the field’s contents from new asset values, with-out accumulating unnecessary metadata in the field.
4. Any changes in field contents will be written back to the asset, if the file for-mat and the filter for the asset forfor-mat support this function and if Always or
Silently is enabled under Writing Metadata to Assets in the Asset Handling Set used.
NOTE >>> Only if this option is activated for IPTC fields the IPTC information edited in Cumulus can be written back. <<<
Link Matching Fields
5. List of fields with the same GUID (globally unique identifier) or name and type that can fill data into the record field. If activated the asset field will fill the record field.
6. Activates/deactivates the selected field for matching.
7. If a new Filter module is added that provides any matching fields, these fields will be added and activated automatically.
Also Link Following Fields
8. List of fields that are also linked. Use the Add/Remove buttons to add/remove fields to/from this list.
9. Opens a dialog to select the field to be added. 10. Removes the selected field from the list.
Overview: Field Properties
8 10 6 1 2 3 4 7 9 5