Teach Yourself
InterBase
This tutorial takes you step-by-step through the process of creating and using a database using the InterBase Windows ISQL dialog. You learn to create data structures that enforce referential integrity constraints and maintain security. You populate your tables, create triggers and stored procedures, and learn a number of techniques for retrieving the data with precision.
There are five parts in this tutorial.
CIn Part I, you learn how to use this tutorial, you start the InterBase server and log in to it, and you
create a user and a database.
CIn Part II, you learn the fundamentals of database deisgn and how to work in the InterBase Windows
ISQL environment; you create the data structures for your database, and you learn a little about how to recover from errors.
CIn Part III, you put data into the database (you populate it). CIn Part IV, you get the data out again (you access or retrieve it).
CIn Part IV, you work with database security, and create some triggers and stored procedures to
PART I GETTING STARTED ■ Topic: USING THIS TUTORIAL
Part I
Getting Started
In Part I, you perform the following actions:
CCheck whether the Local InterBase server is running CStart the Local InterBase server
CLog on to a server from the InterBase Server Manager and create a new user on the server COpen InterBase Windows ISQL and create a new database on a server
Using this tutorial
Throughout this tutorial, you are instructed to enter SQL statements manually at the beginning of each new topic in order to give you hands-on experience with it. Then you are instructed to read in one of the SQL scripts that accompany this tutorial document. Following these steps allows you to create a database that is complex enough to be interesting without excessive keyboarding. The database that you create in this tutorial is, in fact, the EMPLOYEE database that is used as the Example database for InterBase and that is referenced throughout the InterBase document set.
Finding the files you need
As you reach the places in this tutorial that tell you to read in a script file, use the script files (*.sql) that are in the \doc\Tutorial\ directory on your InterBase CDROM.
This tutorial document and the accompanying SQL script files are also available on the InterBase web site at http://www.interbase.com/.
Typographic conventions
This tutorial document and the SQL scripts that accompany it use the following typographic conventions:
· Database names, keywords, and domain names are in ALL CAPS. · Table names have initial caps and are in italic.
· Names of columns, indexes, stored procedures, and triggers are lowercase italic. · File and path names are in italic.
PART I GETTING STARTED ■ Topic: STARTING THE LOCAL INTERBASE SERVER
Reading and typing capitals
Line breaks
CLine breaks are added within example statements to make them easy to read and understand. They
are not required.
CWhen you’re entering statements in InterBase Windows ISQL you don’t have to follow the line breaks
in the examples. Enter ones that make it easy for you to keep track of what you’re doing. InterBase ignores line breaks within input SQL statements.
Understanding which parts to do
This tutorial contains some code examples that you are not supposed to enter into the TUTORIAL
database. In other places, it gives the text of code that you are supposed to enter: these are your action items. To make things clear, parts that you are supposed to actually enter are all preceded by headings with a
"
symbol, as in the following example:"
Example of an action item headActions that you are supposed to perform are always preceded by a head like the one above. Don’t enter examples that are not preceded by this type of heading.
Starting the Local InterBase server
Only one instance of the InterBase server can run at a time, so to work on this tutorial, you need to check whether InterBase is running and start it if necessary.
"
Start the serverTo check whether InterBase is running On Windows 95 platforms, an icon appears in the tray when InterBase is running. This is also true when InterBase is running as an application on Windows NT. When InterBase running as a service on Windows NT platforms, there is no icon. To check whether InterBase is running as a service on NT, right-click on a blank area of the Windows Taskbar, choose Task Manager from the menu, and look for ibguard.exe or ibserver.exe in the Processes pane. Type of entry Case sensitivity
SQL statements When you’re entering SQL statements into InterBase Windows ISQL, you can ignore the capitalization. The conventions listed above are to make it easy to read and understand the examples. You can enter the exercises in all lower case if you prefer.
Strings Strings (anything inside of quotation marks) are case sensitive. There are a lot of strings in single quotes in this tutorial, and you must enter the case exactly as it’s shown.
External references When you refer to something outside of InterBase, such as a filename, the reference is case sensitive.
PART I GETTING STARTED ■ Topic: ATTACHING TO A SERVER FROM SERVER MANAGER
Attaching to a server from Server Manager
The text of this tutorial assumes that you are working on the Local InterBase server. If you want to work on a remote server, you must have the password for a valid InterBase user on that server.
Note In this part of the tutorial, you connect to a server using the InterBase Server Manager, because your next task is to create a new user on that server. You must be working in Server Manager to create a user. Throughout the rest of this tutorial, you will connect to a server from the InterBase Windows IQSL dialog, since that’s where you do most of the work of creating, populating, using, and
maintaining a database.
In this exercise, you connect as the SYSDBA user, since that is the only user who can create new user accounts. You create a user called TUTOR, which is the account you will use for the rest of these exercises.
"
Log in to a server from Server Manager1. Open the InterBase Server Manager by choosing it from the InterBase folder on the Start menu.
2. To log in to the Local InterBase server, click the Server Login button or choose File | Server Login to display the InterBase Login dialog.
3. Click the Local Engine radio button and fill in the password for the SYSDBA user. By default, this password is masterkey. If you have changed the password (highly recommended!), use the current password. Click OK. In either case, you must log on as SYSDBA in order to create a new user account.
Server Login button
PART I GETTING STARTED ■ Topic: CREATING A NEW USER
An icon for the local server appears in the left pane of Server Manager.
Creating a new user
The rest of this tutorial assumes that you are user TUTOR and that your password is tutor4ib. In this next exercise, you create user TUTOR.
"
Create a new userIn the previous section, you opened Server Manager and attached to a server as an existing user. Now you create a new user, TUTOR. Note InterBase ships by default with one user, SYSDBA, defined. 1. In Server Manager, choose Tasks | User Security to display the InterBase Security dialog or click
the User Security button.
The User Security button
PART I GETTING STARTED ■ Topic: CREATING A NEW USER
2. In the InterBase Security dialog, click the Add User button to display the User Configuration dialog.
3. Type TUTOR in the User Name field and tutor4ib in the Password and Confirm Password fields.
4. Click OK to close the User Configuration dialog. Click OK to close the InterBase Security dialog.
You have now created a user on the server you’re logged into. Users are defined server-wide and can connect to any database that resides on that server. Tables within these databases have additional security, however. Being able to connect to a database won’t do you much good if you don’t have privileges on any of its tables.
5. Now choose File | Exit. Choose Yes when InterBase asks you if you want to log out from all servers and exit Server Manager.
Note If you want to logout from a server without exiting Server Manager, choose File | Server Logout or click the Server Logout button .
PART I GETTING STARTED ■ Topic: CREATING A DATABASE
Creating a database
Now that you have used Server Manager to create a valid user name, you are ready to use InterBase Windows ISQL to create the TUTORIAL database that you will use for the exercises in this tutorial. InterBase databases are stored in files that, by convention, have a.gdb extension.
"
Create the TUTORIAL database1. Open InterBase Windows ISQL by choosing it from the InterBase folder on the Start menu.
Note If you’re working in Server Manager, you can open InterBase Windows ISQL by choosing
Tasks | Interactive ISQL or clicking the button.
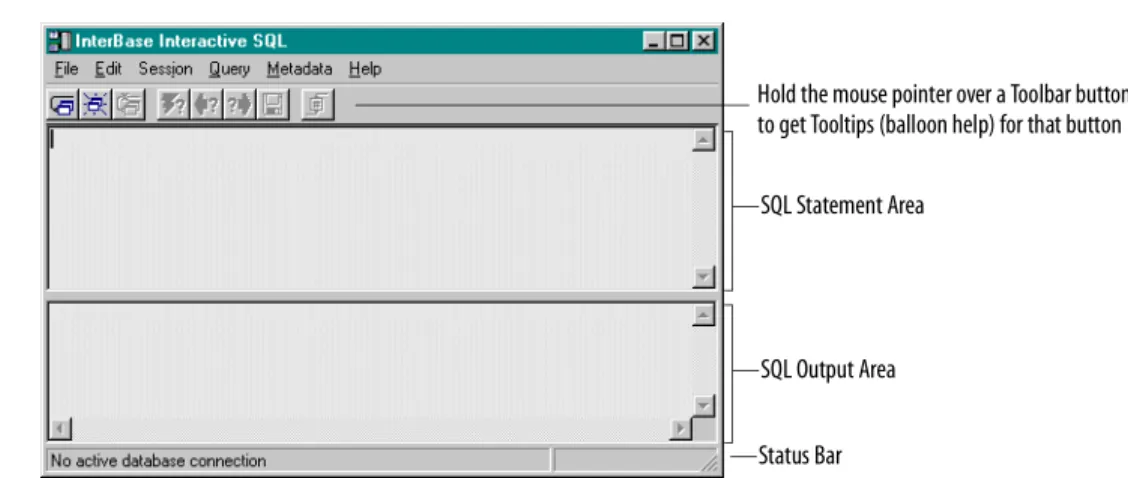
FIGURE 1 The InterBase Windows ISQL dialog
This dialog is described in more detail in “Using InterBase Windows ISQL” on page 12. 2. Choose a location for your TUTORIAL database. This example and the SQL script files use
C:\interbase5\tutorial\tutorial.gdb. If you choose a different location, you must edit the
CONNECT statement in the SQL script files to reflect the new location. (You’re instructed how to do this a little later.)
3. Choose File | Create Database or click the Create Database button to display the Create Database dialog.
Hold the mouse pointer over a Toolbar button to get Tooltips (balloon help) for that button
SQL Statement Area
SQL Output Area
Status Bar
Create Database button
NOTE: Be sure you log in as user TUTOR for the remaining exercises in this tutorial.
PART I GETTING STARTED ■ Topic: CREATING A DATABASE
Notice that this looks a lot like the dialog you saw when you connected to a server from Server Manager. But there’s a difference: InterBase Windows ISQL combines logging in to a server with attaching to a database. Creating a database is a special case of this: you log in to a server, create a database, and attach to the new database all in one dialog.
4. Choose Local Engine.
5. In the Database field, type the full path to your new database, including the file name: C:\interbase5\tutorial\tutorial.gdb
6. Type TUTOR in the User Name field. You can type it in lower case; it displays in caps anyway. The User Name field displays the login of the last user who connected, so in the future, you may find this field already filled in correctly.
7. Enter the tutor4ib password in the Password field.
8. You can ignore the Role field. Click OK to create the TUTORIAL database. Its filename is tutorial.gdb.
You’ve now created a database named TUTORIAL that belongs to user TUTOR. You’re also logged in to the server and connected to the new database. Look at the Status Bar at the bottom of the InterBase Windows ISQL window: you should see the path and name of the database you just created. Whenever you’re connected to a database, the name and path appear in the Status Bar.
"
Disconnecting from a database1. Choose File | Disconnect from Database or click the Disconnect button.
2. When InterBase queries whether you want to disconnect from the database, choose Yes. The Status Bar now tells you that there is no active database connection.
Disconnect button
PART II DATA DEFINITION ■ Topic: DATABASE DESIGN
Part II
Data Definition
In Part II, you perform the following actions:
CTake a quick look at data modeling CCreate some domains
CExecute SQL scripts
CCreate three tables and a view CView object definitions CAlter a table
CCreate, modify and drop indexes
Database design
The crucial first step in constructing any database is database design. This step is so important that volumes have been written about it. You can’t create a functional, efficient database without first thinking through its components and desired functionality in great detail. Chapter 2 of the Data Definition Guide provides a good introduction to the topic.
A quick look at data modeling
This following list provides a brief and simple overview of the process of designing a database: 1. Determine data content.
What information needs to be stored? In thinking about this, look at it from the point of view of the end users: What groups of end users will access the database? What information will they need to retrieve? What questions will they be asking of the database?
2. Group types of data together.
Information items tend to group naturally together. Later, when you create tables in the database, you create one table for each group of data items. The granularity with which you divide the mass of information into groups depends on factors such as the quantity and complexity of the information your database must handle. The goal is to have each item of information in only one place. The process of identifying such groups is called normalization. Identify entities and their attributes. In this tutorial, for example, one type of entity is the project. A project’s attributes are its ID number, name, description, leader’s name, and product. Later in this tutorial, you will see that there is a table named Project that has columns named proj_id, proj_name, proj_desc, team_leader, and product.
PART II DATA DEFINITION ■ Topic: DATABASE DESIGN
3. Design the tables.
Determine what tables you will create, what columns will be in each table, and what type of data each column will contain. If you have identified your entities and their attributes carefully, each entity will correspond to a table and each attribute will be a column in that table. This is the point where you decide on the datatype for each column, as well. Is the data numeric or text? If it’s numeric, what is the expected range of values? If it’s text, how long a string do you need to accommodate? Identify an appropriate datatype for each column. InterBase’s supported datatypes are discussed in Chapter 4 of the Data Definition Guide.
4. Consider the interdependencies of your table columns.
You can’t sell an item, for example, unless you have it in inventory. You can’t deliver it unless it’s in stock. You create primary keys and foreign keys to maintain these dependencies. This is called maintaining database integrity. Other mechanisms for maintaining database integrity and security include CHECK constraints, and using GRANT and ROLE statements to control access to tables.
The
TUTORIAL
database
The TUTORIAL database that you create in this tutorial is, in fact, an exact copy of the EMPLOYEE
database that is used for examples throughout the InterBase document set. The TUTORIAL database is a generic business database. Imagine, for the purposes of this tutorial, that you are responsible for creating a database for this company. In the data modeling phase, you identify the following entities (information groups):
You will see, as you progress through this tutorial, that the TUTORIAL database contains ten tables that correspond exactly to the ten items above. To get an overview now, you can look at an article about the EMPLOYEE database, since the EMPLOYEE database and the finished TUTORIAL database are identical. Go to http://www.interbase.com/tech/exampledb/exampledb.html on the InterBase website.
departments jobs countries customers
employees projects employee projects sales
PART II DATA DEFINITION ■ Topic: AN OVERVIEW OF SQL
An overview of SQL
SQL statements fall into two major categories:
CData definition language (DDL) statements CData manipulation language (DML) statements
DDL statements define, change, and delete the structures that hold data. These include the database itself, tables, and other elements that are part of the database such as domains, indexes, triggers, stored procedures, roles, and shadows. Collectively, the objects defined with DDL statements are known as metadata. DDL statements begin with the keywords CREATE, ALTER, and DROP. For example,
CREATE TABLE defines a table, ALTER TABLE modifies an existing table, and DROP TABLE deletes a table.
DML statements manipulate data within these data structures. The four fundamental DDL statements are INSERT, UPDATE, DELETE, and SELECT. INSERT adds data to a table, UPDATE modifies existing data, and
DELETE removes data. The SELECT statement retrieves or queries information from the database. It is the most important—and most complex—of all the SQL statements, because it is the means by which you access all the information that you have so meticulously stored.
In Part II of this tutorial, you use several DDL statements—CREATE DOMAIN, CREATE TABLE, ALTERTABLE,
CREATE VIEW, and CREATE INDEX—to create data structures for your TUTORIAL database. In Part III, you use the DML statements INSERT, UPDATE, and DELETE to add data to your database and modify it. Part
IV teaches you the all-important SELECT statement—also a DML statement. In Part V, you learn two advanced DDL statements, CREATEPROCEDURE and CREATE TRIGGER.
Using InterBase Windows ISQL
This section describes how to use the InterBase Windows ISQL graphical interface to enter, execute, and commit SQL statements..
The database you’re connected to Server: “Local” or server name
Status Bar SQL Statement Area
SQL Output Area
Hold the mouse pointer over a Toolbar button to get Tooltips (balloon help) for that button
PART II DATA DEFINITION ■ Topic: AN OVERVIEW OF SQL
Entering SQL statements in the SQL Statement Area
You enter SQL statements by typing them in the SQL Statement area.
CYou don’t need to end statements with a terminator, such as the semicolon, when you are using
InterBase Windows ISQL. However, the terminator is not prohibited and doesn’t cause a problem. You can, for example, copy and paste statements from scripts (where they must have terminators) and run them without removing the terminators.
CInterBase SQL statements are not case sensitive. You can enter all SQL statements in lowercase if you
prefer.
CAnything inside quotation marks is case sensitive and must be entered as shown. CInterBase ignores line breaks within statements. They are for your convenience only. CYou must execute each statement before entering the next one.
Executing statements
There are three ways to execute a statement in InterBase Windows ISQL:
CYou can choose Query | Execute
CYou can click the Execute Query button ( ) CYou can press w-u
You must execute each statement before entering the next one.
Note Although this method of entering SQL statements by hand one at a time is an option in InterBase, users often use SQL scripts (data definition files) as a more convenient way of entering data. See “Running an SQL script” on page 17 for more information.
Committing your work
Until you commit your work, your transaction is said to be active. Work associated with an active transaction is not yet visible to other users. You often want to enter an entire group of related items before committing, so that misleading intermediate states are never visible. When you commit, your transaction changes to a committed state and the work you did in that transaction becomes visible to other users. When you are creating metadata, however, you usually want to commit each data structure as you complete the DDL statement. (See page 12 for a discussion of DDL and DML statements.)
The InterBase Windows ISQL environment provides an Autocommit feature that automatically commits any DDL statement when you execute it. The Autocommit feature does not apply to DML statements such as INSERT, UPDATE, DELETE, and SELECT. The Autocommit feature is enabled by default in InterBase.
PART II DATA DEFINITION ■ Topic: CREATING DOMAINS
"
Check session settingsTo check the status of the Autocommit feature and other session settings, follow these steps: 1. Choose Session | Basic Settings to display the Basic ISQL Set Options dialog.
2. Check to see that the Auto Commit DDL box is checked. If necessary, enable the feature. For further information on how to use InterBase Windows ISQL, see the Operations Guide.
Creating domains
A domain is a customized column definition that you use to create tables. When you create a table, you specify the characteristics of each column in the table. Often, across the tables in a database, there will be several columns that have the same characteristics. Rather than entering the same complex definition for each column, you can create a name for the collection of characteristics. This named set of column characteristics is called a domain. You can use this domain name in a column definition rather than typing out the full definition.
IMPORTANT If you are going to use domains in your column definitions, you must create the domains before you use them in table definitions.
Column characteristics include:
CDatatype
CDefault value: a literal value, NULL, or the name of the current user (USER)
CNullability: NOT NULL prohibits NULL values in the column (columns are nullable by default)
CCHECK constraints: checks that the value being entered meets specified criteria
CCharacter set and optional collation order (output sort order for CHAR and VARCHAR columns)
When you specify a column, only a column name and datatype are required. All other characteristics are optional.
PART II DATA DEFINITION ■ Topic: CREATING DOMAINS
"
Connect to the TUTORIAL database1. In InterBase Windows ISQL, choose File | Connect to Database or click the Connect button. 2. Choose Local Engine.
3. In the Database field, type the complete path to the database:
C:\interbase5\tutorial\tutorial.gdb
Shortcuts You can skip this step if the correct path and name is already showing. If another name is showing, but you have attached to this database recently, you can choose it from the dropdown Database list. If it’s not on the dropdown list and you’ve forgotten the exact name and path of the database, you can click the Browse button to locate it.
4. Type TUTOR in the User Name field and type tutor4ib in the Password field. The Role field does not require an entry. The Role parameter is optional and is discussed in “Access privileges” on page 63.
5. Choose OK.
TIP Look in the Status Bar to confirm that you are connected to the TUTORIAL database.
Entering metadata statements
In this exercise, you use the CREATE DOMAIN statement to create domains that you will use later to specify column datatypes.
"
Create some domainsIn the following exercise you define four domains. The first three specify only a datatype. The fourth one is more complex. In each case, the domain will be useful for several different columns, not just the column for which it is named.
You should be connected to the TUTORIAL database when you begin this exercise.
1. Begin by defining a domain called FIRSTNAME that has a datatype of VARCHAR(15). Type the following code in the SQL Statement Area and execute it.
CREATE DOMAIN FIRSTNAME AS VARCHAR(15) The Connect
PART II DATA DEFINITION ■ Topic: DATA DEFINITION FILES
2. Now create two more domains, LASTNAME and EMPNO. Execute each statement before entering the next one.
CREATE DOMAIN LASTNAME AS VARCHAR(20) CREATE DOMAIN EMPNO AS SMALLINT
Each statement appears in the SQL Output Area after it executes.
3. Next, enter and execute the following code to define a domain for department numbers. The domain is defined as a three-character string. In addition to the datatype, it includes check constraints to ensure that the department number is either “000”, alphabetically between “0” and “999”, or NULL. Pay attention to parentheses and quotes as you enter this: CREATE DOMAIN DEPTNO AS CHAR(3)
CHECK (VALUE = '000'
OR (VALUE > '0' AND VALUE <= '999') OR VALUE IS NULL)
TIP When you’re typing an SQL statement that has parentheses, take a moment to count the left
parentheses and the right parentheses and make sure that there are the same number of each. Mismatched parentheses are a major source of errors in SQL code. In the example above, there are nested parentheses: the CHECK clause is enclosed in parentheses because it contains three parts
(“AOR B OR C”) and the second part of the clause has parentheses because it also contains multiple parts (“AAND B”).
The CREATE DOMAIN statement above is divided into several lines to make it easy for humans to follow
the syntax. InterBase ignores the line breaks when parsing the statement. Enter the whole statement before executing it.
Note You don’t need to commit your work, because CREATE statements are DDL (data definition language) statements. You turned Autocommit DDL on in the Session Settings earlier in this tutorial, so all these DDL statements have been committed automatically.
Data definition files
Since you’ve already created several domains, you can use an SQL script—also called a data definition file—to create the rest of the domains. A data definition file is a text file that contains SQL statements. It can be executed in InterBase Windows ISQL and is typically created with a text editor such as Notepad.
It is often convenient to create a data definition file rather than typing each statement directly into InterBase Windows ISQL, because the text editor provides you with an editing environment and the script provides a resusable record of what was entered. In practice, most data definition is
accomplished using data definition files.
IMPORTANT Every SQL script must begin with a CONNECT statement. The CONNECT statement specifies a database name including the complete path, a user name, and password. The SQL scripts that accompany this tutorial begin with the following CONNECT statement:
PART II DATA DEFINITION ■ Topic: RUNNING AN SQL SCRIPT
Running an SQL script
Before running an ISQL script, it is good practice to open the file in a text editor and check that the
CONNECT statement provides the correct server, database, user name, and password. Edit the
information if necessary.
The remaining domain definitions that are needed for your TUTORIAL database are in the Domains.sql
data definition file. In this section of the tutorial, you execute that file to create the remaining domain definitions.
"
Run the Domains.sql script1. Open Domains.sql in a text editor and make sure that the CONNECT statement specifies the correct path, database name, user name, and password.
2. Notice that the file contains many descriptive passages that are commented out. The convention for comments is exactly like that for the C language: comments begin with /* and end with */.
3. Look through the file and notice that each SQL statement ends with a semicolon (;). Semicolons are required at the end of each statement in a data definition file. They are not required when you type statements directly into InterBase Windows ISQL.
4. In InterBase Windows ISQL, choose File | Run an ISQL Script. InterBase Windows ISQL asks if you want to commit your work. Choose Yes. The Execute ISQL Script File dialog displays:
5. Navigate to the location where you have stored the tutorial SQL files and highlight Domains.sql. Click Open.
6. A dialog box appears, asking if you want to save the results to a file. Click No, since you want to see the results in the SQL Output Area of the ISQL window.
(If you choose Yes, InterBase Windows ISQL prompts you for a filename in which to store the output. No output appears in the SQL Output Area.)
InterBase reads the file and executes each statement and posts a message that says “Script completed successfully.”
Troubleshooting If you receive a message stating that there are errors, click the Details button and read the information; it is often useful. Also check that the CONNECT information (database, user, and password) in the script file is correct.
PART II DATA DEFINITION ■ Topic: RUNNING AN SQL SCRIPT
7. To confirm that the domains now exist, choose Metadata | Show, select Domain from the View Information On list, and click OK.
You should see all the domains defined for the database displayed in the SQL Output area. (Note: If you were not connected to tutorial.gdb before running the script, you will need to connect now before the Show command is available.) You should see the following domains:
PART II DATA DEFINITION ■ Topic: CREATING TABLES
Creating tables
A table is a data structure consisting of an unordered set of rows, each containing a specific number of columns. Conceptually, a database table is like an ordinary table. Much of the power of relational databases comes from defining the relations among the tables.
The CREATE TABLE statement has the following general form:
CREATE TABLE tablename (colname1 characteristics[, colname2 characteristics, …] [, tableconstraint …])
CCharacteristics must include a datatype and can also include several other things. See “Creating
domains” on page 14 for a list of column characteristics.
CA table constraint can be a CHECK, UNIQUE,FOREIGN KEY, or PRIMARY KEY constraint on one or more
columns.
For the full syntax of the CREATE TABLE statement, see the Language Reference. In the following steps, you create three of the ten tables for the TUTORIAL database.
"
Create the Country tableThe first table—the Country table—has only two columns. The column definitions are separated by commas. For each column, the first word is the column name and the following words are
characteristics. The first column, country, has the COUNTRYNAME domain and in addition is NOT NULL
and a primary key. Primary keys are discussed in a following section of this tutorial. 1. In InterBase Windows ISQL, attach to tutorial.gdb as TUTOR, if you are not connected
already.
2. Enter the following CREATE TABLE statement. The layout below is for ease of reading; the line endings are not required:
CREATE TABLE Country (
country COUNTRYNAME NOT NULL PRIMARY KEY, currency VARCHAR(10) NOT NULL)
Notice that the collection of column definitions is surrounded by parentheses and that the columns are separated by commas.
3. Execute the statement (click the button or press w-u). If you entered the code without errors, it appears in the SQL Output Area.
"
Create the Department tableNext, you create the Department table. This table has only two columns to begin with. Later, you use
the ALTER TABLE command to add to it. Type in the complete SQL statement and then execute it:
CREATE TABLE Department (
dept_no DEPTNO NOT NULL PRIMARY KEY, department VARCHAR(25) NOT NULL UNIQUE)
The dept_no column is the primary key for the table and is therefore UNIQUE. Primary keys are discussed on page 21. Notice that the department column value must be unique and that neither column can be null.
PART II DATA DEFINITION ■ Topic: CREATING TABLES
"
Create the Job tableNow you create the more complex Job table. This definition includes CHECK constraints, PRIMARY KEY
and FOREIGN KEY constraints and a BLOB datatype for storing descriptive text. The text following the code discusses these new elements.
1. Enter the following CREATE TABLE statement in the SQL Statement Area. Type in the whole statement and then execute it.
CREATE TABLE Job (job_code JOBCODE NOT NULL, job_grade JOBGRADE NOT NULL,
job_country COUNTRYNAME NOT NULL, job_title VARCHAR(25) NOT NULL, min_salary SALARY NOT NULL, max_salary SALARY NOT NULL,
job_requirement BLOB SUB_TYPE TEXT SEGMENT SIZE 400, language_req VARCHAR(15)[1:5],
CONSTRAINT pkjob PRIMARY KEY (job_code, job_grade, job_country),
CONSTRAINT fkjob FOREIGN KEY (job_country) REFERENCES Country (country), CHECK (min_salary < max_salary))
The CHECK constraint at the end checks that the minimum salary is less than the maximum salary.
The three-column primary key guarantees that the combination of the three columns identifies a unique row in the table.
The foreign key checks that any country listed in the Job table also exists in the Country table.
The BLOB datatype used for the job_requirement column is a dynamically sizable datatype that has no specified size and encoding. It is used to store large amounts of data such as text, images, sounds, and other multimedia content.
2. To check that the tables now exist in the database, choose Metadata | Show, choose Table from the View Information On list, and choose OK. The SQL Output Area should list three tables: Country, Department, and Job.
PART II DATA DEFINITION ■ Topic: CREATING TABLES
Primary keys and foreign keys
The Job table definition includes a primary key and a foreign key.
CA primary key is a column or group of columns that uniquely identify a row. Every table should have
a primary key. No table can have more than one primary key. The PRIMARY KEY characteristic can be specified as part of a column definition, as in the first column of the Country table, or it can be specified as a separate clause of the CREATE TABLE statement, as in the statement that creates the Job table. The primary key in the Job table is made up of three columns: job_code, job_grade, and job_country. While a value can appear more than once in any of these columns taken individually, the fact that they are collectively a primary key means that the three values taken together cannot occur in more than one row.
CA foreign key is a column or set of columns in one table whose values must have matching values in
the primary key of another (or the same) table. A foreign key is said to reference its primary key. Foreign keys are a mechanism for maintaining data integrity. In the Job table, for example, any country listed in the job_country column must also exist in the Country table. By stating that the job_country column of the Job table is a foreign key that references the country column of the Country table, you are guaranteeing this, because InterBase will return an error if a value is entered the job_country column that does not have a matching entry in the country column of the Country table.
You can declare a constraint such as UNIQUE, FOREIGN KEY, or PRIMARY KEY either as part of a column definition, or as a table constraint following the column definitions. The syntax varies slightly depending on which you choose. See the Language Reference for details.
You declared the primary key constraint as part of a column definition in the Country and
Department tables. For the Job table, you declared the primary key, foreign key, and check constraints at the table level. Functionally, the effect is the same.
Cascading referential integrity constraints
When you create a foreign key, you are saying that the value in the foreign key must also exist in the primary key that it references. What happens if later, the value in the referenced primary key changes or is deleted? The cascading referential integrity constraints, new in InterBase 5, let you specify what should happen. Your choices are to take no action, to propagate (cascade) the change to the foreign key column, to set the foreign key to its default, or to set it to NULL.
If you are specifying the foreign key as part of the column definition, the syntax is this:
CREATE TABLE table_name (column_name datatype FOREIGN KEY REFERENCES other_table(columns)
[ON UPDATE {NO ACTION | CASCADE | SET DEFAULT | SET NULL}] [ON DELETE {NO ACTION | CASCADE | SET DEFAULT | SET NULL}], [, more columns defs])
If you are specifying the foreign key as a table-level constraint, the syntax is nearly the same except that you have to identify the column for which it is being defined, so the syntax becomes:
CREATE TABLE table_name (column_defs,
FOREIGN KEY (column_name) REFERENCES other_table(columns) [ON UPDATE {NO ACTION | CASCADE | SET DEFAULT | SET NULL}] [ON DELETE {NO ACTION | CASCADE | SET DEFAULT | SET NULL}], [, more table constraints])
A little later, you will use ALTER TABLE to add columns and table constraints to the Department table, including some cascading referential integrity constraints.
PART II DATA DEFINITION ■ Topic: BACKING UP A DATABASE
Naming constraints
When you declare a constraint at either the column level or the table level, you have the option of naming the constraint using the optional CONSTRAINT keyword, followed by a constraint name. When
a constraint is named, you can drop it using the ALTER TABLE statement. In the Job table definition, two of the constraints have names “pkjob” and “fkjob”), but the CHECK constraint does not have a name (although it could have). When you alter the Department table a little later, you will add two named constraints.
Computed columns
When you are creating a table, you can define columns whose value is based on the values of one or more other columns in the table. The computation can include any arithmetic operations that are appropriate to the datatypes of the columns. Open Tables.sql and look at the following column definition for the Employee table:
full_name COMPUTED BY (last_name || ', ' || first_name)
The value of the full-name column consists of the value in the same row of the last_name column plus a comma plus the value of the first_name column.
Look at the new_salary column of the Salary_history table.
new_salary COMPUTED BY (old_salary + old_salary * percent_change / 100)
To find the value of new_salary, InterBase multiplies the value of old_salary by the value of percent_change, divides the result by 100, and adds that to the original value of old_salary.
Backing up a database
This is a good time to back up your database, because you’ve finished entering some tables. In the next part of the tutorial, you run a script to create more tables. Throughout this tutorial, you will be instructed to back up your database frequently. That way, if you run into difficulties, you can restore the last correct version and try again.
In a production database, a full backup and restore performs several functions:
CIt preserves your data by making a copy of both the data and the data structures (metadata). CIt improves database performance by balancing indexes and performing garbage collection on
outdated records.
CIt reclaims space occupied by deleted records, and packs the remaining data.
CWhen you restore, it gives you the option of changing the database page size and of distributing the
database among multiple files or disks.
IMPORTANT If you restore a database to a name that is already in use, be sure that no users are connected to it at
the time you restore. For this tutorial, it is sufficient to close InterBase Windows ISQL and make sure that there are no connections to the database from Server Manager.
PART II DATA DEFINITION ■ Topic: BACKING UP A DATABASE
"
Back up your databaseBefore you begin, create a subdirectory called backups. If you are using the recommended directory path for this tutorial, your backups would be in C:\interbase5\tutorial\backups.
1. Open Server Manager by choosing it from the InterBase folder on the Start menu. 2. Log in as TUTOR to the server where your TUTORIAL database is located. (See “Attaching to
a server from Server Manager” on page 5 if you’ve forgotten how to do this.)
3. Click the Backup button ( ) or choose Tasks | Backup to display the Database Backup dialog.
4. In the Backup File or Device field, name your backup file Tutor1.gbk and include the complete path to it. Your entry should look like this:
C:\interbase5\tutorial\backups\tutor1.gbk
By convention, backups have a .gbk extent, but it is not required. Enable Verbose Output in order to see a detailed description of what InterBase does when it backs up a database. Choose OK. 5. InterBase posts a dialog describing its progress. When the process is complete, dismiss the
PART II DATA DEFINITION ■ Topic: CREATING TABLES WITH A SCRIPT
Creating tables with a script
You’ve created several tables manually now and begin to understand what’s involved. To avoid having to type in all of the table definitions, you should now run the Tables.sql script.
"
Run the Tables.sql scriptBefore you leave the topic of tables, look over the remaining table definitions in Tables.sql to be sure that you understand them. Pay particular attention to the Employee table, which is complex and is central to this database. Notice, in particular, the complex CHECK constraint on the salary column in
that table. It states that the salary entered for an employee has to be greater than the minimum salary for the employee’s job (specified by job_code, job_grade, and job_country) and less than the corresponding maximum.
1. Run the Tables.sql script to enter the remaining table definitions into the TUTORIAL
database. As before, check first that the database path, user name, and password are correct in the CONNECT statement at the beginning of the file. Then choose File | Run an ISQL Script, select the Tables.sql file, and choose Open.
2. Use the Metadata | Show command to check that you now have ten tables in the TUTORIAL
database.
Time to back up If you have successfully run Tables.sql, this is a good time to back up your database to Tutor2.gbk.
PART II DATA DEFINITION ■ Topic: TROUBLESHOOTING
Troubleshooting
If you made any typing mistakes when you were entering the domain definitions, you’ll get an error message when you run the Tables.sql script or when you are defining the tables manually. InterBase posts a message that looks like this:
Look in the SQL Output area for more information. The SQL Output area echoes the contents of the script. If there were problems with a particular table, the SQL code for that table is followed by an error message such as the following:
Statement failed, SQLCODE = -607 Dynamic SQL Error
-SQL error code = -607 -Invalid command
-Specified domain or source column does not exist
To understand the problem, follow these steps:
1. Read the error text. In this case, it says that the specified domain does not exist. You probably made an error in typing the domain name.
2. Choose Metadata | Show and choose Domains in the View Information On list. Choose OK. InterBase lists the domains in the SQL Output Area.
3. You defined four domains by hand: FIRSTNAME, LASTNAME, EMPNO, and DEPTNO. Look for each of these in the list of domains and make sure that their names are spelled correctly. It’s likely that you will find one that is misspelled.
4. Drop the incorrect domain by entering and executing the following command:
DROP DOMAIN domainname
5. Recreate the domain using the CREATE DOMAIN statement. 6. Run the Tables.sql script again.
If this isn’t the problem, continue with these steps:
7. Look right above the message text to see which table has the problem. Note which domains are used in that table. Do they include any of the four domains that you entered by hand?
8. Choose Metadata | Show and choose Domains in the View Information On list. Type the name of the first hand-entered domain that you noted in step 7 in the Object Name box and choose OK. InterBase displays the domain’s definition in the SQL Output Area. 9. Compare the displayed definition with the definition given in this document (the one that
you typed). Continue checking each of the four hand-entered domains until you find one that has a problem.
10. Drop the domain as described in step 4 above, and then re-enter it correctly. Run the Tables.sql script again.
PART II DATA DEFINITION ■ Topic: VIEWING AN OBJECT DEFINITION
Viewing an object definition
You can see the definition of any object in a database using the Show command from the Metadata menu. You’ve already used Metadata | Show to list what domains and tables exist. Now you use it in a different way to get information about a specific object.
"
View the definition of the Department tableTo refresh your memory of the current Department table definition, follow these steps: 1. Choose Metadata | Show from the InterBase Windows ISQL menus.
2. Choose Table from the View Information On list
3. Type department in the Object Name field. Case doesn’t matter.
4. Click OK. InterBase displays the definition of the Department table in the SQL Output Area.
Altering tables
You can change the structure of existing tables with the ALTER TABLE statement. In the previous section of the tutorial, you created a simple Department table. Now you use the ALTER TABLE statement to add to this table. The syntax for altering a table—in simplified form—is:
ALTER TABLE table_name operation [, operation]
where each operation is one of the following:
ADD column
ADD tableconstraint DROP column
DROP CONSTRAINT constraintname
Notice that you can drop a constraint only if you gave it a name at the time you created it.
"
Alter the Department tableYou now add five new columns (head_dept, mngr_no, budget, location, and phone_no) and two foreign key constraints to the Department table that you created earlier.
1. Type the following code into the SQL Statement Area of the InterBase Windows ISQL dialog:
ALTER TABLE Department ADD head_dept DEPTNO, ADD mngr_no EMPNO, ADD budget BUDGET,
ADD location VARCHAR(15),
ADD phone_no PHONENUMBER DEFAULT ‘555-1234’, ADD FOREIGN KEY (mngr_no)
PART II DATA DEFINITION ■ Topic: MORE TROUBLESHOOTING
More troubleshooting
If you receive error messages when you are altering tables or inserting data, use the Metadata | Show
command as your resource.
CShow the definition for each table that you entered by hand and compare the output to the SQL code
that this document instructs you to enter.
CWhen you find a problem, you can either drop the table and recreate it, or use ALTER TABLE to drop a
column and then add the column again with the correct definition. If you misspelled the name of the table itself, you must drop the table and recreate it.
CThe DROP TABLE statement has the following syntax:
DROP TABLE tablename
CTo change a column definition, first drop it using the ALTER TABLE statement: ALTER TABLE tablename DROP columnname
CThen add the column back in using the ALTER TABLE statement again: ALTER TABLE tablename ADD columnname columndef
If you made any typing errors when creating the domains and tables, you will get errors when you try to insert data by hand or to run the Inserts.sql and Update.sql scripts. If you follow the steps above, you will be able to fix your errors and run the scripts successfully. The remainder of the tutorial is less demanding, in that it focuses on the SELECT command. Once you detect and fix any errors in the domain and table definitions, you will get the correct results from your SELECT statements.
Creating views
A view is a virtual table that contains selected rows and columns from one or more tables or views. InterBase stores only the definition of a view. The contents of a view are essentially pointers to data in the underlying tables. When you create a view, you are not copying data from the source tables to the view. You are looking at the original data.
A view often functions as a security device, because you can give people permissions on a view but not on the underlying tables. Thus, the people can access a defined part of the data (the part defined in the view), but the rest of the data remains private.
In the following exercise, you use the CREATE VIEW statement to create a phone list by choosing the employee number, first name, last name, and phone extension from the Employee table and the employee’s location and department phone number from the Department table. Views are frequently created to store an often-used query or set of queries in the database.
You can select from a view just as you can from a table. Other operations are more restricted. See “Working with Views” in the Data Definition Guide for more on views.
PART II DATA DEFINITION ■ Topic: CREATING INDEXES
"
Create the Phone_list view1. Enter the following statement to create the Phone_list view from selected columns in the Employee and Department tables.
CREATE VIEW Phone_list AS
SELECT emp_no, first_name, last_name, phone_ext, location, phone_no FROM Employee, Department
WHERE Employee.dept_no = Department.dept_no
The WHERE clause tells InterBase how to connect the rows: the dept_no column in the Department
table is a foreign key that references the dept_no column in the Employee table. Both columns are
UNIQUE and NOT NULL, so the dept_no value in a Department row uniquely identifies a row in the Employee table. (In case you’re wondering, the dept_no column in the Employee table is UNIQUE
because all primary key columns automatically acquire the UNIQUE property.)
Notice that when the same column name appears in two tables in a query, you reference the columns by giving both the table name and the column name, joined by a period:
table_name.column_name
2. Now look at the structure of the Phone_list view by choosing Metadata | Show->View and type phone_list in the Object Name field. You should see the following output:
Creating Indexes
An index is based on one or more columns in a table. It orders the contents of the specified columns and stores that information on disk in order to speed up access to those columns. Although they improve the performance of data retrievals, indexes also take up disk space and can slow inserts and updates, so they are typically used on frequently queried columns. Indexes can also enforce
uniqueness and referential integrity constraints.
InterBase automatically generates indexes on UNIQUE and PRIMARY KEY columns. See the Data Definition Guide for more information about constraints.
PART II DATA DEFINITION ■ Topic: CREATING INDEXES
"
Create the namex indexDefine an index for the Employee table, by entering the following code:
CREATE INDEX namex ON Employee (last_name, first_name)
This statement defines an index called namex for the last_name and first_name columns in the Employee table.
Preventing duplicate index entries
To define an index that eliminates duplicate entries, include the UNIQUE keyword in CREATE INDEX. After
a UNIQUE index is defined, users cannot insert or update values in indexed columns if the same values already exist there.
For unique indexes defined on multiple columns, such as prodtypex in the example below, the same value can be entered within individual columns, but the combination of values entered in all columns of the index must be unique for each row
You cannot create a UNIQUE index on columns that already contain non-unique values.
"
Create a UNIQUE indexCreate a unique index named prodtypex, on the Project table by entering the following:
CREATE UNIQUE INDEX prodtypex ON Project (product, proj_name)
Specifying index sort order
By default, SQL stores an index in ascending order. To make a descending sort on a column or group of columns more efficient, use the DESCENDING keyword to define the index.
"
Create the budgetx DESCENDING indexEnter and execute the following code to create an index called budgetx that is in descending order:
PART II DATA DEFINITION ■ Topic: CREATING INDEXES
Modifying indexes
To change an index definition—which columns are indexed, sort order, or UNIQUE requirement—you must first drop the index and then create a new index.
"
Alter the namex indexUse Metadata | Show->Index->namex to view the current definition of the namex index.
In the following steps, you redefine the namex index that you created earlier to include the UNIQUE
keyword.
1. Enter and execute the following DROP INDEX statement:
DROP INDEX namex
2. Enter and execute the following line to redefine namex so that it includes the UNIQUE
keyword:
CREATE UNIQUE INDEX namex ON Employee (last_name, first_name)
Time to back up If you have successfully altered the Department table definition, created the phone_list view, created the three indexes, and altered the namex index, this is a good time to back up your database to Tutor3.gbk.
PART III POPULATING THE DATABASE ■ Topic: INSERTING DATA
Part III
Populating the Database
In the preceding exercises, you created the structure of your database: domains, tables, a view, and three indexes. In the following exercises, you use the INSERT statement to populate (add data to) the database that you created in previous steps. Then you use UPDATE and DELETE statements to
manipulate the data.
Inserting data
The INSERT statement is the mechanism by which you store one or more rows of data in an existing
table. In its simplest form, the syntax is:
INSERT INTO table_name [(columns)] VALUES (values)
If you don’t specify column names, InterBase inserts the supplied values into columns in the order in which they were defined, and there must be as many values as there are columns in the table. When you specify columns, you supply the values in the order you name the columns. Columns not specified are given default values or NULL values, depending on the column definitions.
The values supplied can be constants or can be calculated. In embedded SQL, they can also be variables.
An important variation of this syntax is one that allows you to add rows to a table by selecting rows from another table. The two tables must have columns occurring in the same order for this to work. The syntax for this form is:
INSERT INTO table_name (columns) SELECT columns FROM table_name WHERE conditions
See the Language Reference for a full description of INSERT.
"
Insert data using column values1. Enter and execute the following code to add a row to the Country table:
INSERT INTO Country(country, currency) VALUES (‘USA’, ‘Dollar’) Reminder Anything you type inside the quotation marks is case sensitive. 2. Enter and execute the following line to add a row to the Department table:
INSERT INTO Department
(dept_no, department, head_dept, budget, location, phone_no) VALUES ('000', 'Corporate Headquarters', NULL, 1000000, 'Monterey',
'(408) 555-1234')
Notice that strings are all enclosed in single quotes, while numeric values are not. The department number and default phone number, for example, are strings, not numeric values.
3. The next row of data for the Department table is similar to the previous one. To simplify entry, click the Previous Query button. This redisplays the previous query in the SQL Statement Area.
The Previous Query button
PART III POPULATING THE DATABASE ■ Topic: INSERTING DATA
4. Now substitute into the previous query so that it reads as follows and execute the statement.
INSERT INTO Department
(dept_no, department, head_dept, budget, location, phone_no) VALUES ('100', 'Sales and Marketing', '000', 200000, 'San Francisco',
'(415) 555-1234')
Notice that the new value for head_dept is a string, not a numeric value.
5. Check the accuracy of your insertions by entering and executing each of the following statements in turn. Examine the output to make sure it matches the instructions above.
SELECT * from Country SELECT * from Department
In Part IV of this tutorial, you learn (much!) more about the important SELECT statement.
"
Read in the remaining data1. To read the remaining data into the Country, Job, Department, and Employee tables, open Inserts.sql in a text editor, make sure that the CONNECT statement has the correct
information, and read it into the database using File | Run an ISQL Script.
2. Now enter and execute each following statement in turn to confirm that data has been entered into each table.
SELECT * FROM Country
There should be 14 entries in the Country table. If this one is correct, the others probably are, too. Now run three more SELECT statements. Remember, you must execute each one before proceeding to the next.
SELECT * FROM Job SELECT * FROM Employee SELECT * FROM Department
Time to back up If you have successfully entered three INSERTs and run the Inserts.sql script, this is a good time to back up your database to Tutor4.gbk.
PART III POPULATING THE DATABASE ■ Topic: UPDATING DATA
Updating data
You use UPDATE statements to change values for one or more rows of data in existing tables.
Using
UPDATE
A simple update has the following syntax:
UPDATE table
SET column = value WHERE condition
The UPDATE statement changes values for columns specified in the SET clause; columns not listed in
the SET clause are not changed. To update more than one column, list each column assignment in the
SET clause, separated by a comma. The WHERE clause determines which rows to update. If there is no
WHERE clause, all rows are updated.
For example, the following statement would increase the salary of salespeople by $2,000, by updating the salary column of the Employee table for rows where the value in the job_code column is “sales.” (Don’t do this yet.)
UPDATE Employee
SET salary = salary + 2000 WHERE job_code = 'Sales'
"
Executing and committingCFor the rest of this tutorial, execute each statement after entering it. You will no longer be explicitly
instructed to do so.
CIn addition, execute a COMMIT statement after executing a DML statement (INSERT, DELETE, UPDATE, and
SELECT). DDL statements—CREATE, ALTER, and DROP—don’t need manual commits because you have
enabled Auto Commit DDL in InterBase Windows ISQL’s Session Basic Settings.
"
Update data in the Employee tableTo make a more specific update, make the WHERE clause more restrictive. Enter the following code to increase the salaries only of salespeople hired before January 1, 1992:
UPDATE Employee
SET salary = salary + 2000
WHERE job_code = 'Sales' AND hire_date < '01-JAN-1992'
A WHERE clause is not required for an update. If the previous statements did not include a WHERE
PART III POPULATING THE DATABASE ■ Topic: UPDATING DATA
"
Run the Updates.sql script1. Open the Updates.sql file in a text editor and look it over. It contains UPDATE statements that set values for the mngr_no column in the Department table, it creates some salary history records for the Employee table, and it updates the Customer table by setting the status of two customers to “on hold” by entering an asterisk in the on_hold column. Close the file when you have finished examining it.
2. In InterBase Windows ISQL, choose File | Run an ISQL script and run the Updates.sql file. As always, choose Yes when asked if you want to commit previous work and No to saving the output to a file.
Updating to a NULL value
Sometimes data needs to be updated before all the new values are available. You can indicate unknown data by setting values to NULL. This works only if a column is nullable, meaning that it is
not defined as NOT NULL.
Suppose that in the previous example, the department number of salespeople hired before 1992 is changing but the new number is not yet known. You would update salaries and department numbers as follows:
UPDATE Employee
SET salary = salary + 2000, dept_no = NULL
WHERE job_code = 'Sales' AND hire_date < '01-Jan-1992'
Time to back up If you have successfully run the Updates.sql script and performed the manual update, this is a good time to back up your database to Tutor5.gbk.
Using a subquery to update
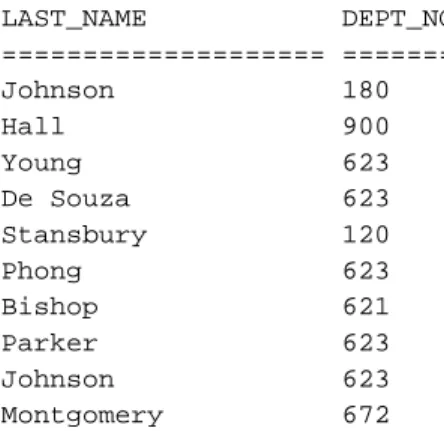
The search condition of a WHERE clause can be a subquery. Suppose you want to change the manager of all employees in the same department as Katherine Young. One way to do this is to first determine Katherine Young’s department number (don’t do this yet):
SELECT dept_no FROM Employee
WHERE full_name = 'Young, Katherine'
This query returns “623” as the department. Then, using 623 as the search condition in an UPDATE, you change the manager number of all the employees in the department with the following statement:
UPDATE Department SET mngr_no = 107 WHERE dept_no = '623'
A more efficient way to perform the update is to combine the two previous statements using a subquery. A subquery is one in which a SELECT clause is used within the WHERE clause to determine which rows to update.
PART III POPULATING THE DATABASE ■ Topic: DELETING DATA
"
Update Department using a subquery1. So that you can see the results of this exercise, begin by entering the following query to show you the manager number of Katherine’s department before you make the update:
select mngr_no from department where dept_no = '623'
This returns 15. (If you select first_name and last_name from the Employee table where emp_no equals 15, you will see that the manager of department 623 is Katherine herself.)
2. Enter the following UPDATE statement with a subquery to simultaneously find out Katherine’s department number and assign a new manager number to that department:
UPDATE Department SET mngr_no = 107
WHERE dept_no = (SELECT dept_no FROM Employee WHERE full_name = 'Young, Katherine')
The rows returned by the SELECT statement within the parentheses are the rows that the UPDATE
statement acts on.
3. Execute and commit the UPDATE statement you just entered.
4. Now run the query in step 1 again to see the change. The manager of department 623 is manager number 107, rather than 15.
5. This isn’t a change we want to keep, so enter and execute the following statement to reinstate Katherine Young as manager of department 123:
UPDATE Department SET mngr_no = 15 WHERE dept_no = ‘623’
Deleting data
To remove one or more rows of data from a table, use the DELETE statement. A simple DELETE has the following syntax:
DELETE FROM table WHERE condition
As with UPDATE, the WHERE clause specifies a search condition that determines the rows to delete. Search conditions can be combined or can be formed using a subquery.
IMPORTANT The DELETE statement does not require a WHERE clause. However, if you do not include a WHERE
clause, you delete all the rows of a table.
"
Delete a row from Sales (and put it back)In this exercise, you first look to see what orders are older than a certain date. Then you delete those sales from the Sales table and check to see that they are gone.
1. In InterBase Windows ISQL, choose File | Commit Work to commit your work to date. 2. Enter the following SELECT statement to see what sales were ordered prior to 1992:
SELECT * FROM Sales WHERE order_date < '31-DEC-1991'
There should be only one order returned. Notice that the SELECT statement requires that you specify columns. You can also use “*” to specify all columns.
PART III POPULATING THE DATABASE ■ Topic: DELETING MORE PRECISELY
3. Enter the following DELETE statement. To make it easier, you can display the previous
SELECT statement and substitute DELETE for “SELECT *”. You can use either the Previous
Statement button or w-P to display previous statements:
DELETE FROM Sales WHERE order_date < '31-DEC-1991'
Notice that the DELETE statement does not take any column specification. That’s because it deletes all columns for the rows you have specified.
4. Now repeat your original SELECT query. There should be no rows returned.
5. Oops. You just realized that you didn’t want to delete that data after all. Fortunately, you committed previous work before executing this statement, so choose File | Rollback Work and click OK at the prompt. This “undoes” all statements that were executed since the last Commit.
6. Perform the SELECT again to see that the deleted row is back.
Deleting more precisely
You can restrict deletions further by combining search conditions. For example, enter the following statement to delete records of everyone in the sales department hired before January 1, 1992:
DELETE FROM Employee
WHERE job_code = 'Sales' AND hire_date < '01-Jan-1992'
You can try entering this statement, but you’ll get an error because there’s a foreign key column in the Employee_project table that references the Employee table. If you were to delete these rows, some values in the Employee_project table would no longer have matching values in the Employee table, violating the foreign key constraint that says any employee who has a project must also have an entry in the Employee table.
In addition, you can use subqueries to delete data, just as you use them to update. The following statement would delete all rows from the Employee table where the employees were in the same department as Katherine Young.
DELETE FROM Employee
WHERE dept_no = (SELECT dept_no FROM Employee WHERE full_name = 'Young, Katherine')
Again, you cannot actually execute this statement because it would violate foreign key constraints on other tables.
Time to back up Now that you have created your database and its tables and finished inserting and updating data, this is a good time to back up your database to Tutor6.gbk.
PART IV RETRIEVING DATA ■ Topic: OVERVIEW OF SELECT
Part IV
Retrieving Data
The SELECT statement lies at the heart of SQL because it is how you retrieve the information you have
stored. There is no use in creating and populating data structures if you cannot get the data out again in usable form. You’ve seen some simple forms of the SELECT statement in earlier exercises. In this part of the tutorial you get further practice with the SELECT statement.
Overview of
SELECT
Part III presented the simplest form of the SELECT statement. The full syntax is much more complex. Take a minute to look at the entry for SELECT in the Language Reference. Much of SELECT’s power comes from its rich syntax.
In this chapter, you learn a core version of the SELECT syntax:
SELECT [DISTINCT] columns FROM tables
WHERE <search_conditions>
[GROUP BY column [HAVING <search_condition>]] [ORDER BY <order_list>]
The SELECT syntax above has six main keywords. A keyword and its associated information is called a
clause. The clauses above are:
You have already used SELECT statements to retrieve data from single tables. However, SELECT can also retrieve data from multiple tables, by listing the table names in the FROM clause, separated by commas.
Clause Description
SELECTcolumns Lists columns to retrieve
DISTINCT Optional keyword that eliminates duplicate rows
FROMtables Identifies the tables to search for values
WHERE <search_conditions> Specifies the search conditions used to limit retrieved rows to a subset of all available rows
GROUP BYcolumn Groups rows retrieved according the value of the specified column
HAVING <search_conditions> Specifies search condition to use with GROUP BY clause
ORDER BY <order_list> Orders the output of a SELECT statement by the specified columns