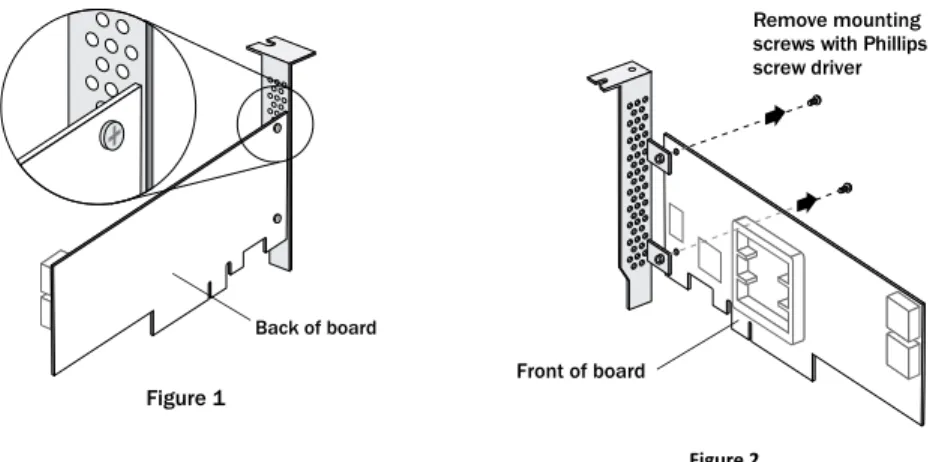
Serial Attached SCSI RAID Controllers Installation. CDP A Rev. A Issue: July 15, 2013
Full text
Figure
Outline
Related documents
The seventeen nozzles were tested for far-field noise and a few data were presented here on the effect of aspect ratio, bevel length, and chevron count and penetration.. The sound
Segala Puji kehadirat Allah SWT atas Rahmat, Nikmat dan Taufik-Nya, sehingga dapat diselesaikannya tesis yang berjudul “Persepsi Anggota Organisasi Kepemudaan Terhadap
specifically examines re-incarceration in jails and other temporary custodial facilities – an experience previously neglected in research on incarceration and employment – and, as
Empowerment, meaningful learning, scaffolding, concepts and propositions, concept maps, creativity, knowledge models, New Model..
The D2200sb Storage Blade delivers direct attached storage for c-Class servers, with support for up to twelve hot plug small form factor (SFF) SAS hard disk drives or SAS/SATA SSDs
SATA devices include initiators (controllers or hosts) and targets (hard drives, optical disk drives, and solid-state drives).. The initiator attaches to one or more targets
This includes but is not restricted to: acting as a liaison between APNS committees and the APNS executive committee, and giving monthly reports to the executive committee... Page
This helps facility pro- fessionals gain a quicker, more intuitive grasp of their energy consumption and demand patterns for real-time decision making at the facility level,
