DISPLAYLINK
Template Editor 1.5
For Matrix and Video Display Systems
Software User Guide
Colorado Time Systems Corporate Office 1551 East 11th Street Loveland, CO 80537 USA Sales : 800-279-0111 or +1 970-667-1000 Service: 800-287-0653 x256 or +1 970-667-1000 x256 Service Fax: 970-667-1032 Web: www.coloradotime.com Email: [email protected]
Template Editor v1.5 Users Guide F855 Rev. 0404
Table of Contents
1 Introduction
Introduction . . . .1-1
2 Template Definition and Use
Making New Templates . . . .2-1 Installing Templates . . . .2-1 Using Templates . . . .2-1 Using Quick Messages . . . .2-2 Writing Standalone Templates . . . .2-2
3 Using Template Editor
Designing Templates . . . .3-1 Set Display Size . . . .3-1 Set Color Palette . . . .3-1 Split Board . . . .3-2 Open/Close Properties . . . .3-2 Multi Timer Operation . . . .3-2 Selecting Data Types . . . .3-3 Default Data Types . . . .3-3 Choosing Font Style, Size and Color . . . .3-3 Positioning Text, Data Types and Graphics . .3-4 Zoom Levels . . . .3-5 Saving New Templates . . . .3-5 Opening Existing Templates . . . .3-5
4 Reference Information
Template Editor Menus . . . .4-1 Windows . . . .4-2 Comprehensive Data Type Listing . . . .4-7 Default Types . . . .4-7 Swimming . . . .4-8 Diving . . . .4-9 Pace Clock . . . .4-10 Water Polo . . . .4-10 Synchronized Swimming . . . .4-11 Team Scores . . . .4-12 Baseball . . . .4-12 Football . . . .4-12 Basketball . . . .4-13 Hockey . . . .4-15 Volleyball . . . .4-16 Wrestling . . . .4-16 Soccer . . . .4-17 Technical Support . . . .4-18
1
Introduction
Template Editor is a Windows®-based program designed to work with
DisplayLink display software from Colorado Time Systems. Template Editor enables you to design and change templates on your display. With Template Editor you can create templates that will show various types of information (timing data, scores, team names, time of day, quick messages) on your display. The easy-to-use editing features let you change fonts, font sizes, colors and data positioning.
You may create a large number of templates, each customized to meet your display specifications and personal preferences.
Template Editor, version 1.5, operates under Microsoft®Windows NT 4.0
2
Template Definition and Use
Your DisplayLink software comes with pre-defined templates, installed on your system, that were designed specifically for your display size and scoreboard application(s). The templates are files with .tpl as the exten-sion. The following chapters of this manual walk you through the process of making new templates with Template Editor.
Installing new or updated templates is done through DisplayLink. Select Template | Install Template… in the DisplayLink main menu bar. You can not install a new template from Template Editor—only DisplayLink. Next, type in the path and filename in the Filename window or use the Browse button to locate the .TPL file. Select the proper Folder in your DisplayLink library that you want the file saved under. Press OK. The template file will now be saved in your Library.
Templates are used to display scoreboard data from external sources. Once your templates have been saved to your DisplayLink Library, they are easy to use. Double click on a template from your Library or drag it and drop it on top of the Active Display window. The display will immediately change to show the desired template with its real time display data.
You can jump back and forth between templates, graphics and slide shows by simply dragging and dropping the desired icon from the Library to the Active Display.
Figure 1A-Main DisplayLink Window Toolbar
Making New Templates
Using Templates
Some templates have a Message Center in them. In these Templates, you are able to display custom messages while the Template is being used. To do this select theTemplate | Quick Message menu option in the Main DisplayLink window. This will bring up a Text Entry window with a pre-view area set to the size of your Message Center. Just type in the text you want to see in you Message Center and hit the OK button. The message will immediately be sent to your display.
Template Data
The following devices and programs are currently available to send data into DisplayLink templates:
External PC running one of the following programs: External GameLink Console
External ASCII text sources
Standalone templates are used when a display is being used without a DisplayLink computer and interface software. A special standalone tem-plate can be downloaded to the display letting the display know where to place data from from the external GameLink keyboard or the CTS sports timer.
Standalone mode is not the normal mode of operation for these displays. It should be used only when the DisplayLink computer is unavailable or can-not be used for some reason.
To use the standalone mode, you need to create special standalone tem-plates for each sport to be programmed through the external keyboard or the CTS sports timer.
Create a template using the standard methods. To save it as a standalone template simply click on the “Write Standalone Template” option located under the Filemenu of Template Editor.
Using Quick Messages
3
Using Template Editor
Use the Template Editor to design new templates for use with
DisplayLink software. Templates are needed whenever you are importing data from a secondary input device (sports timer, keyboard, other soft-ware) to show on your display.
A template tells the DisplayLink software where to position the informa-tion on to your display. You can create templates to display numerous types of data such as competitor names, times, place, scores, time of day, balls, strikes, outs, touchdowns, field position and quick messages.
Always create new templates that match your display size. To find out the size of your display in pixels, look in the About menu option on your DisplayLink main window. Your display size will be written in number of pixels wide by number of pixels high. (Example: 192x80 or 96x80). The display size in Template Editor is whatever is set for DisplayLink. Display Size is located under Options | Display Sizeon the Template Editor main menu bar. Setting the correct display size will ensure that you will create templates that are perfectly suited for your display. Create templates that match the color palette of your display. Always use the color palette that matches your display type, as using an incorrect color palette may cause problems with how your template will be viewed on your display.
The only exception to this is for standalone templates. These special tem-plates, which are used only when DisplayLink isnot used, should always be created in yellow, regardless of the actual display colors.
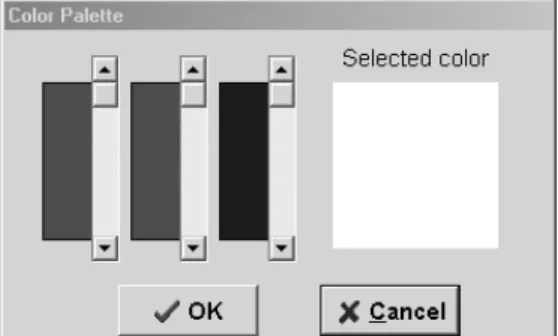
To set the color palette, select Options | Color Palettefrom the Template Editor main window bar.
Set Display Size
Set Color Palette
Designing Templates
The Split board option under Options | Split Boardlets you divide the board in half vertically or horizontally. This is especially useful when you are creating templates that use timing data from two sports timers. Choose between the normal mode (no split), Horizontal or Vertical split. The Properties Window option under Options | Properties Windowin the Template Editor main menu bar lets you open or close the Properties Window.
The Properties Window lets you view the pixel coordinates for a selected data type on your template. You can choose to have this window open or closed. A check9mark will appear next to the option Properties Window when the window is open. Uncheck the option if you want to close the Properties window. If you don’t see the Properties window even though the box is checked, it is behind another window.
Template Editor lets you select between one or two timers when choosing Swimming and Diving timer data types. This capability lets you design templates for use with multiple timers. If you want to show timing data from two swim meets occurring simultaneously on a single display, you can create a template using both Timer #1 and Timer #2 data types. The Default data type portion of the main Template Editor window lists the data types that are available to choose from. These data types repre-sent the type of information that you wish to include in your template.
Split Board
Open/ Close Properties
Window
Multi Timer
Operation
Selecting Data Types
Figures 3-B Properties Window
Default Data Types
Choosing Font Style,
Size and Color
The number and types of data type tab sections will be determined by the DisplayLink sports modules you have loaded on your computer. For a com-plete listing of the available data types, please see the Comprehensive Data Type Listing section of this manual located on page 4-7.
Default Data Types include:
Static Text- static text lets you place any style of text on your template. This is used only for text that will not move or change such as data headers (Home, Guest, Balls, Times, Scores, Name, Place, etc…).
Time of Day- this data type enables you to show the time of day on your template. This data type reads the time of day from your DisplayLink comput-er’s time of day. To reset the time you must go into the Date/Time feature in your Control Panel in the Settings portion of your Start menu on your com-puter.
Message- this data type is for quick messaging. This enables you to reserve a line or section of your display for showing messages without having to change your template. If your template contains a Message data type, you will be able to use the Quick Message feature located under Template | Quick Message
menu on the DisplayLink main window.
Graphic - this data type is used for adding a graphic file (.bmp, .jpg, .gif) to your template. Use this data type to place a graphic of your school's mascot or sponsor's logo on a template. You can place more than one graphic on any tem-plate. Select the graphic file name through the Properties window.
Animation- this data type is used to add an animation file (.avi, .mov) to your template. You can combine an animation with a graphic or multiple graphics on one template. You cannot, however, use more than one animation on a single template. Select the animation file name through the Properties window.
You can design templates using any True Type font that is already installed on your DisplayLink computer. Typically sans-serif fonts, such as Arial, work best. When showing sports timing, a fixed-width font usually looks best. In addition to true type fonts, you will have DisplayLink specific fonts as well. These are all fixed-width fonts.
DisplayLink 3x5- uses a 3 pixel x 5 pixel configuration to create small characters.
DisplayLink 5x7- uses a 5 pixel x 7 pixel configuration to create medium-small characters.
DisplayLink 7x9- uses a 7 pixel x 9 pixel configuration to create medium-large characters.
DisplayLink 11x13- uses a 11 pixel x 13 pixel configuration to create large characters.
DisplayLink 15x17- uses a 15 pixel x 17 pixel configuration to create very large characters.
The font you choose should be based on the size of your display and the amount and type of information you wish to display from your template. A
large size font (Arial 12 point) will take up more space than a small sized font (DisplayLink 3x5).
Note:Each DisplayLink font is a specific size that cannot be changed. If you want a larger or smaller size, choose another DisplayLink font. In addition to font style and size, Template Editor lets you choose the color your data will be displayed. Remember to select strong contrasting colors if you want your information to be read easily on your display.
The best contrasting colors are:
Bright red text on black Bright green text on black Bright amber text on black Yellow text on black White text on black
To change a data type’s color, font style or size, simply select the data type from the template designer window. The data type will turn white when it is properly selected. Click on the new color, style or size. The data type should automatically take on the characteristics you have applied.
Note:If you change the font or fonts size of a data type field you may have to readjust the width of the field to fit.
You may select different font styles, sizes and colors for each data type on your template. However, you can not have different styles within one data type. For example, you can position a quick message at the top of your template using DisplayLink 5x7 font and color of red. Underneath the quick message, you can use data types for competitor name, place, affilia-tion and time using DisplayLink 3x5 font and color green.
The Template Editor enables you to create templates containing various data types including text, scoring and timing information, meet manage-ment data, game statistics and graphics. Each of these data types can be positioned anywhere on your template. The positioning tools enable you to center, right justify or left justify your data fields. In addition, they let you easily position your field to the top, bottom, left or right of your display. To move or reposition a data type, simply select the data type (it will be highlighted in red when it is properly selected) and click on the appropri-ate positioning button or use the arrow keys to move it up, down, right or left.
Positioning Text, Data
Types and Graphics
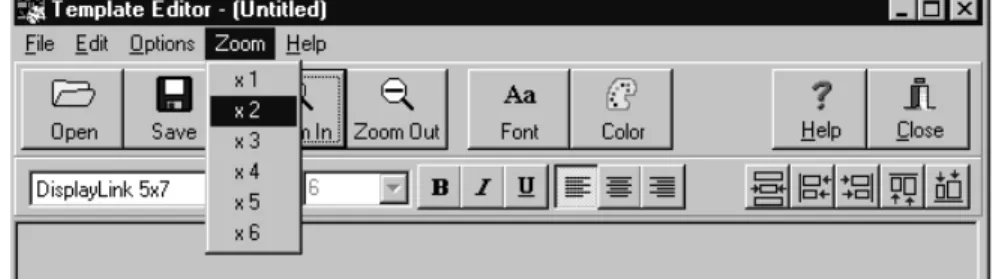
Use the Zoom buttons or the Zoom option under the main Template Editor menu bar to increase or decrease the viewable space of your design area. Increasing the viewable space of the design area will help you place and align data types more easily.
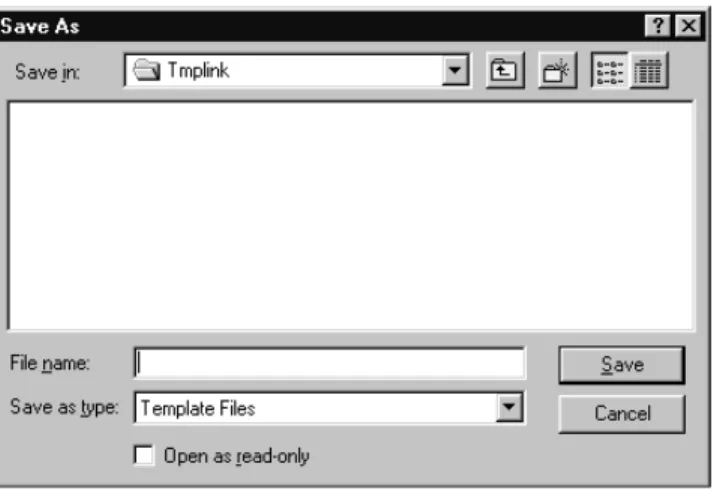
Save your new template by clicking on the Save or Save As command under the File menu option on the Template Editor main menu. A window will appear prompting you to select a folder where your template will be stored. Type a template name into the Name field and click OK to save the template to your hard drive.
Template Editor lets you open existing templates (.TPL files) and make changes to them. You can create a large number of templates to use with your display and DisplayLink software.
Note:Template Editor will only open DisplayLink 3.x template files. If you receive an error that the .TPL you are trying to edit is a DisplayLink 2.0 file, simply open it in DisplayLink 3.x and you will be prompted to con-vert it to a 3.x file.
Creating new templates is very easy when you use an existing template as a guide. Open an existing template by clicking on File | Openin the Template Editor main window. Click on the Save As command to save a second copy of the opened template file. Rename the file and click OK. Now make your changes to the second template file and click Save when finished.
Note:If you open and existing file, make changes to it and then click Save, you will overwrite the original file.
To change data types in an existing template, simply select the data type you wish to delete from the Template Designer area. The data type will be highlighted in red when selected. Next, right click your mouse on a select-ed data type to select-edit or delete the field.
Zoom Levels
Saving New Templates
Figure 3-C Zoom Window
4
Reference
New Select New to open a blank template and begin designing it from scratch.
Open Select Open to edit a previously designed template that is saved to your computer’s hard drive.
Save Select when you want to save changes to a template for future use.
SaveAs Choose Save As when you want to save changes to a tem-plate without losing the original temtem-plate design.
Write Standalone Template
Choose this option when you want to save your new tem-plate as a standalone type. Standalone temtem-plates are not the standard template type. They are only used when the DisplayLink computer is unavailable.
Exit Exit will close the Template Editor program.
Copy Use this command to copy selected data type from the Design Area
Cut Use this command to cut selected data type from the Design Area.
Paste Use this command to paste a copied data type to the Design Area.
Undo Use this to undo your previous command.
Display Size Click on Display Size to set your display attributes con-cerning its number of pixels. You can determine your dis-play size by clicking on the About menu option in the main window bar of DisplayLink.
Note: Always set Template Editor to the size of your display.
Color PaletteThis option will let you change the color palette of your template. Make sure to match the Template editor color palette with the same colors that make up your display.
File Menu
Edit Menu
Options Menu
Zoom Menu
Help Menu
Main DisplayLink
Window
Install Template
Window
Design Grid Change the size of the design grid or eliminate it using this option.
Split Board This option lets you divide your Design Area into halves either on a vertical axis or horizontal.
Properties Window
This option will let you open or close the Properties Window
The zoom menu lets you enlarge the Design Area by zooming in up to six times the normal size. Use the zoom buttons or menu options to position and align data types in your template.
Contents Opens the online Help file for Template Editor
About Template Editor
Tells you about the version of Template Editor that you are using.
This is your main control point for DisplayLink, the display interface soft-ware.
The Install Template window allows you to install new or updated Templates into your Library. Newly installed templates will show up in the Library folder that you select. Install Template is accessed through the main menu bar of DisplayLink, not the Template Editor.
Windows
This is the main control point for the Template Editor.
This window shows all of the fonts that are loaded on your computer and are available for use in Template Editor.
Main Template Editor
Window
Font Window
Figures 4-B DisplayLink Install Template Window
Figures 4-C Main Template Editor Window
Template Design
Area
Display Size
Window
Color Palette
Window
This area represents the usable space on your display. Its size is governed by the pixel dimensions of your display.
The Display Size window appears when you select Options | Display Size. Use it to change the pixel configuration of the template design area. Make sure that your template design area matches the actual size of your display.
Note:If you don’t know the size of your display you can locate the size in DisplayLink. Open DisplayLink and click on the Aboutbutton. The size of your display will be shown there.
This window appears when you select Options | Color Palettefrom the main menu bar. Select the color palette that matches your actual display.
Figures 4-F Display Size Window Figures 4-E Template Design Area
The Multiple Items window appears when you select a data type that usu-ally has more than one field associated with it such as Lane Number or Team Name. Type in the number of fields and the starting number to automatically place multiple copies of the data type on to your template.
Right click your mouse on a selected data type to edit or delete the field.
This window appears when you right click on a selected Static Text data field and choose “Edit Static Text.”
Multiple Items Window
Edit Data Types
Window
Edit Static
Text Window
Figures 4-H Edit Data Types Window Figures 4-G Multiple Items Window
This window appears when you right click on a selected Quick Message data field and choose “Edit Quick Message.”
The Properties window details the properties associated with a selected data type in your template. The height and width properties refer to the number(s) of pixels the data type uses in each dimension. The top and left properties refer to the number of the pixel (X & Y coordinates) that the data type starts on. Use the Properties window to align your data types to specific pixels on your dis-play.
When using a graphic or animation data type, select the file name of the graphic or animation file from the Properties Window.
Edit Quick
Messages
Window
Properties
Window
Figures 4-K Properties Window Figures 4-J Edit Quick Message Window
This window appears when you click on File | Save orSave As com-mand in the main Template Editor menu bar. Use the Save As comcom-mand to rename an existing file in order to create two similar, but different tem-plate files.
Global Time of Day This refers to your time of day as set in the Control Panel of your PC.
Quick Message Quick message is a one or multi-line text area that can be added to your templates to enable quick messaging within DisplayLink.
Static Text Static text lets you add a line of a text message that will always appear on your template. For example, this could be used to show a tournament title or sponsor’s name on the top line of a display used for a basketball game.
Graphic The Graphic data type is used to add a graphic file (.bmp, .jpg, .gif) to your template. Use this data type to place a graphic of your school's mascot or sponsor's logo on a template. You can place more than one graphic on any template. Be aware of the pixel size of your graphic. Remember that the entire template pixel size can not be larger than the pixel size of your display. Select the graphic file name through the Properties window.
Animation The Animation data type is used to add an anima-tion file (.avi, .mov) to your template. You can com-bine an animation with a graphic or multiple graphics on one template. You can not, however,
Save or Save As
Window
Default Types
Figures 4-L Save As Window
use more than one animation on a single template. Select the animation file name through the
Properties window.
Event Number This is usually a 1 to 3 digit number that denotes the event. The data is read into the template from either the swim timer or from the DisplayLink swim meet information window. Often the Event Number is positioned near the top of the score-board next to the name of the event.
Heat Number This is usually a 1 to 2 digit number that denotes the current heat of an event. The data is read from either the swim timer or from information in the DisplayLink swim meet information window. The Heat Number is typically positioned next to the Event number.
Record Time The Record Time is the current record (pool, state, national, world) for that event as set in the swim timer. It can require up to 8 characters of space on your template. For example, a 15:00.03 record time for a 1500 freestyle. The number of pixels that 8 characters use depends on the size of the font.
Lane Number The lane number refers to the particular lane a specific swimmer is assigned. It usually only takes up 1 character of space unless a 10- or 12-lane pool is being used.
Name The name data type refers to the name of the swimmer who is competing in a particular heat and lane number.
Affiliation The affiliation data type refers to the 3 -5 charac-ter listing of the swimmer’s team or club name. This information is coming directly from the DisplayLink swim meet information window.
Place The place data type denotes the finishing or split place of the swimmer.This information comes directly from the swim timer.
Time This is the time data type for the split and finish-ing times as recorded by the swim timer. The cumulative splits are shown by default in this field during the race. The data comes through the swim timer from the touchpads. Plan to set aside up to 8 character spaces in your template so that the time 59:59:59 can fit. If you are using the DisplayLink 5x7 font, this data type would use 40 pixels spaces in width.
Lengths The lengths data type refers to the number of lengths of the pool the swimmers have swum as specified by the swim timer. This data type is not often used since most spectators already know this type of information.
Home Score This is the home team’s score as set by the swim timer.
Guest Score 1 This is the first guest team’s score as set by the swim timer.
Guest Score 2 This is the second guest team’s score as set by the swim timer.
Guest Score 3 This is the third guest team’s score as set by the swim timer.
Time of Day This is the time of day that is set by the swim timer and not by the PC. Use the Global Time of Day data type in the Default folder for the PC time.
Event Title This is the title of the event.
Lane 1 - 12 Lap SplitThe lap splits for individual lanes can be shown in this field with a System 6 or later swim timer.
Judge Number The Judge Number is a multiple field. There can be up to 10 judges.
Judge Score The Judge Score must correspond with a particular Judge Number 1-10. The actual scores come from the swim timer.
Degree of Difficulty The Degree of Difficulty is set in the swim timer.
Round This refers to the current round of dives as speci-fied in the timer.
Award This refers to the award given for a dive.
Current Diver Number
This is typically a two digit number set in the Diving software.
Current Diver Total Score
This diving score is set in the sports timer and refers to the total score for the current diver.
Lead Diver Number This is the number of the lead diver as specified in the diving software.
Lead Diver Total Score
This is the lead diver’s total score as specified in the diving software.
Dive Number This is the number for the current dive as specified in the diving software.
Dive Position This is the position of the current dive as specified in the diving software.
Lead Diver Name This is the name of the lead diver. It is set in the Diving Meet Information window in DisplayLink.
Current Diver NameThis is the name of the current diver as set in the Diving Meet Information window of DisplayLink. All of the Pace Clock data types obtain their data from the sports timer or pace clock controller. The Pace Clock data types include:
Lane This is the pool lane that is assigned a particular pace clock set or workout.
Reps This refers to the number of repetitions in a set.
Time This refers to the time for each repetition. All of the data for waterpolo comes from the Water polo software and not from DisplayLink. Traditionally water polo teams are designated Blue and White. They can also be designated Dark and Light.. The Water Polo data types include:
Game Time The current time on the game clock.
Period The current period of the game.
Shot Time The time left on the shot clock.
Blue Score, White Score
The scores for the respective teams.
Blue Player Penalties 1-7 White Player Penalties 1-7 Blue Player Penalties 8-13 White Player Penalties 8-13 Blue Player A-C Number
This is the player number(s) for up to three ejected players on the Blue team.
Pace Clock
Blue Player A-C Time
This is the time(s) left in the ejection for up to three players on the Blue team.
White Player A-C Number
This is the player number(s) for up to three ejected players on the White team.
White Player A-C Time
This is the time(s) left in the ejection for up to three players on the White team.
Timeout Time This is the time remaining in the current timeout.
Blue Team Player Number
This is the cap number for the Blue team player for the following two items:
Blue Team Player Points Blue team high scorer’s point total
Blue Team Player Fouls Blue team player’s number of fouls
White Team Player Number
This is the cap number for the White team player for the following two items:
White Team Player Points White team high scorer’s point total
White Team Player Fouls White team player’s number of fouls All of the Synchronized Swimming data comes from the synchronized swimming software. The Synchronized Swimming data types include:
Panel This is the panel number.
Judge Number This is the judge’s number.
ID Number This is the ID number of the swimmer.
Figure Number This is the number for the current figure as set in the Synchro software.
Figure Score This is the score for the current swimmer after completing the figure.
Routine Number This refers to the number of the current routine.
Tech Score This is the score for technical difficulty.
Artistic Score This is the score for artistic impression.
Routine Time This is the routine’s running time.
Synchronized
Swimming
This set of team scores comes from the AquaLink module of DisplayLink and not from the sports timer. The Team Scores data types include:
Team Name Up to ten team names can be maintained in the AquaLink Team Scores window.
Team Score Up to ten team scores can be maintained in the AquaLink Team Scores window.
The data for each baseball data type comes from the Baseball Module of DisplayLink. The Baseball data types include:
Guest Team Name The guest team’s name.
Home Team Name The home team’s name.
Guest Total Runs The total runs scored by the guest team.
Home Total Runs The total runs scored by the home team.
Guest Inning Runs The total number of runs scored in the current inning by the guest team.
Home Inning Runs The total number of runs scored in the current inning by the home team.
Guest Hits Total number of hits by the guest team.
Home Hits Total number of hits by the home team.
Guest Errors Total number of errors by the guest team.
Home Errors Total number of errors by the home team.
Outs Number of outs for the team at bat.
Balls Number of balls for the batter.
Strikes Number of strikes for the batter.
The data for each football data type comes from the Football Module of DisplayLink. The Football data types include:
Quarter The current quarter of the game.
Ball On The yardline that the ball is spotted on.
Down The current down.
Yards To Go Yards to go to a first down.
Home Score The home team’s score.
Team Scores
Baseball
Guest Score The guest team’s score.
Home Time-outs The remaining number of time outs available to the home team.
Guest Time-outs The remaining number of time outs available to the guest team.
Game Time The running game clock.
Home Team Name Home team’s name.
Guest Team Name Guest team’s name.
Left Possession Arrow Home team’s possession arrow indicator.
Right Possession Arrow Guest team’s possession arrow indicator. The data for each basketball data type comes from the Basketball Module of DisplayLink. The Basketball data types include:
Period The current period of the game.
Home Score The current score for the home team.
Guest Score The current score for the guest team.
Game Time The game's remaining time.
Shot Clock The shot clock's remaining time.
Home Team Name The home team’s name.
Guest Team Name The guest team’s name.
Left Possession Arrow Indicates the home team's possession.
Right Possession Arrow Indicates the guest team's possession.
Home Bonus A dot that indicates when the home team is in the bonus.
Guest Bonus A dot that indicates when the guest team is in the bonus.
Home Team Fouls The number of fouls made by the home team.
Guest Team Fouls The number of fouls made by the guest team.
Player Number The jersey number of the player who com-mitted the current foul.
Player Fouls The number of fouls the current player has committed.
Home Player Number The jersey number of the home player who committed the current foul.
Guest Player Number The jersey number of the guest player who committed the current foul.
Home Player Fouls The number of fouls the current home player has committed.
Guest Player Fouls The number of fouls the current guest player has committed.
Home Player Points The number of points the current home player has made.
Guest Player Points The number of points the current guest player has made.
Timeout Time The time remaining in the current time-out.
Home Team Full Timeouts The number of full timeouts remaining for the home team.
Guest Team Full Timeouts The number of full timouts remaining for the guest team.
Home Team 30 Second Timeouts The number of 30 second timeouts remaining for the home team.
Guest Team 30 Second Timouts The number of 30 second timeouts remaining for the guest team.
Left Timeout Arrow An arrow which points left to indicate the home team has called timeout.
Right Timeout Arrow An arrow which points right to indicate the guest team has called timeout.
The data for each hockey data type comes from the Hockey Module of DisplayLink. The Hockey data types include:
Period The current period of the game.
Home Score The current score for the home team.
Guest Score The current score for the guest team.
Game Time The game's remaining time.
Home Team Name The home team’s name.
Guest Team Name The guest team’s name.
Home Shots on Goal The number of shots on goal made by the home team.
Guest Shots on Goal The number of shots on goal made by the guest team.
Home Player 1 The jersey number of the first home player in the penalty box.
Guest Player 1 The jersey number of the first guest player in the penalty box.
Home Player 2 The jersey number of the second home player in the penalty box.
Guest Player 2 The jersey number of the second guest player in the penalty box.
Home Player 1 Penalty Time The remaining penalty time of the home player #1
Guest Player 1 Penalty Time The remaining penalty time of the guest player #1
Home Player 2 Penalty Time The remaining penalty time of the home player #2
Guest Player 2 Penalty Time The remaining penalty time of the guest player #2
The data for each volleyball data type comes from the Volleyball Module of DisplayLink. The volleyball data types include:
Game The current game of the match.
Home Score The current score for the home team.
Guest Score The current score for the guest team.
Game Time The game's running time, or other general purpose count up or count down time. Can be used for warmup time or intermission, for example.
Home Team Name The home team’s name.
Guest Team Name The guest team’s name.
Home Games Won Tracks the number of games won by the home team.
Guest Games Won Tracks the number of games won by the guest team.
Home Timeouts The number of timeouts remaining for the home team.
Guest Timeouts The number of timeouts remaining for the guest team.
Timeout Time The time remaining in the current timeout.
Left Timeout Arrow An arrow pointing left indicating which team called timeout.
Right Timeout Arrow An arrow pointing right indicating which team called timeout.
Home Serving Arrow An indicator that the home team is serving.
Guest Serving Arrow An indicator that the guest team is serving.
The data for each wrestling data type comes from the Wrestling Module of DisplayLink. The wrestling data types include:
Period The current game of the match.
Home Team Score The current score for the home team.
Guest Team Score The current score for the guest team.
Volleyball
Game Time The match's remaining time.
Home Team Name The home team’s name.
Guest Team Name The guest team’s name.
Weight Class Displays the current weight class.
Home Competitor Name The name of the competitor for the home team in the current match.
Guest Competitor Name The name for the competitor for the guest team in the current match.
Home Match Score The score for the home team in the current match.
Guest Match Score The score for the guest team in the current match.
Riding Time Match The net riding time in the current match.
Home Riding An arrow indicating that the home team has the advantage in riding time.
Guest Riding An arrow indicating that the guest team has the advantage in riding time.
The data for each soccer data type comes from the Soccer Module of DisplayLink. The Soccer data types include:
Period The current period of the game.
Home Score The current score for the home team.
Guest Score The current score for the guest team.
Game Time The game's running time.
Home Team Name The home team’s name.
Guest Team Name The guest team’s name.
Home Shots on Goal The number of shots on goal made by the home team.
Guest Shots on Goal The number of shots on goal made by the guest team.
CTS Tech Support:
Phone: 800-287-0653, x256 or 970-667-1000, x256 Fax: 970-667-1032
Email: [email protected] Web: www.coloradotime.com
Shop online: http://secure.coloradotime.com
Template Editor v1.5 Users Guide F855 Rev. 0404