TOSHIBA
Telecommunication Systems DivisionMultimedia Contact Center
Installation and Integration Guide
Title Page
Publication Information
Toshiba America Information Systems, Inc.Telecommunication Systems Division
Publication Information
Toshiba America Information Systems, Inc., Telecommunication Systems Division, reserves the right, without prior notice, to revise this information publication for any reason, including, but not limited to, utilization of new advances in the state of technical arts or to simply change the design of this document. Further, Toshiba America Information Systems, Inc., Telecommunication Systems Division, also reserves the right, without prior notice, to make such changes in equipment design or components as engineering or manufacturing methods may warrant.
CIX-IG-MCCWC-VB Version B, November 2010
Our mission to publish accurate, complete, and user accessible documentation. At the time of printing, the information in this document was as accurate and current as was reasonably possible. However in the time required to print and distribute this manual additions, corrections, or other changes may have been made. To view the latest version of this or other documents please refer to the Toshiba FYI web site.
Toshiba America Information Systems shall not be liable for any commercial losses, loss of revenues or profits, loss of goodwill, inconvenience, or exemplary, special, incidental, indirect or consequential
damages whatsoever, or claims of third parties, regardless of the form of any claim that may result from the use of this document.
THE SPECIFICATIONS AND INFORMATION PROVIDED HEREIN ARE FOR INFORMATIONAL PURPOSES ONLY AND ARE NOT A WARRANTY OF ACTUAL PERFORMANCE, WHETHER
EXPRESSED OR IMPLIED. THE SPECIFICATIONS AND INFORMATION ARE SUBJECT TO CHANGE WITHOUT NOTICE. ACTUAL PERFORMANCE MAY VARY BASED ON INDIVIDUAL
CONFIGURATIONS, USE OF COLLATERAL EQUIPMENT, OR OTHER FACTORS.
© Copyright 2009~2010
This document is copyrighted by Toshiba America Information Systems, Inc. with all rights reserved. Under the copyright laws, this document cannot be reproduced in any form or by any means—graphic, electronic, or mechanical, including recording, taping, photocopying, without prior written permission of Toshiba. No patent liability is assumed, however, with respect to the use of the information contained herein.
Trademarks
Strata, SmartMedia, SD (Secure Digital) and CIX are registered trademarks of Toshiba Corporation. Net Phone, eManager, My Phone Manager and Info Manager are registered trademarks of Toshiba America Information Systems, Inc.
Windows and Microsoft are registered trademarks of Microsoft.
TOSHIBA AMERICA INFORMATION SYSTEMS, INC. (
“
TAIS
”
)
Telecommunication Systems Division License AgreementIMPORTANT: THIS LICENSE AGREEMENT (“AGREEMENT”) IS A LEGAL AGREEMENT BETWEEN YOU (“YOU”) AND TAIS. CAREFULLY READ THIS LICENSE AGREEMENT. USE OF ANY SOFTWARE OR ANY RELATED INFORMATION (COLLECTIVELY, “SOFTWARE”) INSTALLED ON OR SHIPPED WITH A TAIS DIGITAL SOLUTIONS PRODUCT OR OTHERWISE MADE AVAILABLE TO YOU BY TAIS IN WHATEVER FORM OR MEDIA, WILL CONSTITUTE YOUR ACCEPTANCE OF THESE TERMS, UNLESS SEPARATE TERMS ARE PROVIDED BY THE SOFTWARE SUPPLIER. IF YOU DO NOT AGREE WITH THE TERMS OF THIS LICENSE AGREEMENT, DO NOT INSTALL, COPY OR USE THE SOFTWARE AND PROMPTLY RETURN IT TO THE LOCATION FROM WHICH YOU OBTAINED IT IN ACCORDANCE WITH APPLICABLE RETURN POLICIES. EXCEPT AS OTHERWISE AUTHORIZED IN WRITING BY TAIS, THIS SOFTWARE IS LICENSED FOR DISTRIBUTION THROUGH TAIS AUTHORIZED CHANNELS ONLY TO END-USERS PURSUANT TO THIS LICENSE AGREEMENT.
1. License Grant. The Software is not sold; it is licensed upon payment of applicable charges. TAIS grants to you a personal, non-transferable and non-exclusive right to use the copy of the Software provided under this License Agreement. You agree you will not copy the Software except as necessary to use it on one TAIS system at a time at one location. Modifying, translating, renting, copying, distributing, printing, sublicensing, transferring or assigning all or part of the Software, or any rights granted hereunder, to any other persons and removing any proprietary notices, labels or marks from the Software is strictly prohibited except as permitted by applicable law; you agree violation of such restrictions will cause irreparable harm to TAIS and provide grounds for injunctive relief, without notice, against you or any other person in possession of the Software. You and any other person whose possession of the software violates this License Agreement shall promptly surrender possession of the Software to TAIS, upon demand. Furthermore, you hereby agree not to create derivative works based on the Software. TAIS reserves the right to terminate this license and to immediately repossess the software in the event that you or any other person violates this License Agreement. Execution of the Software for any additional capabilities require a valid run-time license.
2. Intellectual Property. You acknowledge that no title to the intellectual property in the Software is transferred to you. You further acknowledge that title and full ownership rights to the Software will remain the exclusive property of TAIS and/or its suppliers, and you will not acquire any rights to the Software, except the license expressly set forth above. You will not remove or change any proprietary notices contained in or on the Software. The Software is protected under US patent, copyright, trade secret, and/or other proprietary laws, as well as international treaties. Any transfer, use, or copying of the software in violation of the License Agreement constitutes copyright infringement. You are hereby on notice that any transfer, use, or copying of the Software in violation of this License Agreement constitutes a willful infringement of copyright.
3. No Reverse Engineering. You agree that you will not attempt, and if you employ employees or engage contractors, you will use your best efforts to prevent your employees and contractors from attempting to reverse compile, reverse engineer, modify, translate or disassemble the Software in whole or in part. Any failure to comply with the above or any other terms and conditions contained herein will result in the automatic termination of this license and the reversion of the rights granted hereunder back to TAIS.
4. Limited Warranty. THE SOFTWARE IS PROVIDED “AS IS” WITHOUT WARRANTY OF ANY KIND. TO THE MAXIMUM EXTENT PERMITTED BY APPLICABLE LAW, TAIS AND ITS SUPPLIERS DISCLAIM ALL WARRANTIES WITH REGARD TO THE SOFTWARE, EITHER EXPRESS OR IMPLIED, INCLUDING, BUT NOT LIMITED TO, THE WARRANTY OF NON-INFRINGEMENT OF THIRD PARTY RIGHTS, THE WARRANTY OF YEAR 2000 COMPLIANCE, AND THE IMPLIED WARRANTIES OF MERCHANTABILITY AND FITNESS FOR A PARTICULAR PURPOSE. THE ENTIRE RISK AS TO THE QUALITY AND PERFORMANCE OF THE SOFTWARE IS WITH YOU. NEITHER TAIS NOR ITS SUPPLIERS WARRANT THAT THE FUNCTIONS CONTAINED IN THE SOFTWARE WILL MEET YOUR REQUIREMENTS OR THAT THE OPERATION OF THE SOFTWARE WILL BE UNINTERRUPTED OR ERROR-FREE. HOWEVER, TAIS WARRANTS THAT ANY MEDIA ON WHICH THE SOFTWARE IS FURNISHED IS FREE FROM DEFECTS IN MATERIAL AND WORKMANSHIP UNDER NORMAL USE FOR A PERIOD OF NINETY (90) DAYS FROM THE DATE OF DELIVERY TO YOU.
5. Limitation Of Liability. TAIS’ ENTIRE LIABILITY AND YOUR SOLE AND EXCLUSIVE REMEDY UNDER THIS LICENSE AGREEMENT SHALL BE AT TAIS’ OPTION REPLACEMENT OF THE MEDIA OR REFUND OF THE PRICE PAID. TO THE MAXIMUM EXTENT PERMITTED BY APPLICABLE LAW, IN NO EVENT SHALL TAIS OR ITS SUPPLIERS BE LIABLE TO YOU FOR ANY CONSEQUENTIAL, SPECIAL, INCIDENTAL OR INDIRECT DAMAGES FOR PERSONAL INJURY, LOSS OF BUSINESS PROFITS, BUSINESS INTERRUPTION, LOSS OF BUSINESS INFORMATION/DATA, OR ANY OTHER PECUNIARY LOSS OF ANY KIND ARISING OUT OF THE USE OR INABILITY TO USE THE SOFTWARE, EVEN IF TAIS OR ITS SUPPLIER HAS BEEN ADVISED OF THE POSSIBILITY OF SUCH DAMAGES. IN NO EVENT SHALL TAIS OR ITS SUPPLIERS BE LIABLE FOR ANY CLAIM BY A THIRD PARTY.
6. State/Jurisdiction Laws. SOME STATES/JURISDICTIONS DO NOT ALLOW THE EXCLUSION OF IMPLIED WARRANTIES OR LIMITATIONS ON HOW LONG AN IMPLIED WARRANTY MAY LAST, OR THE EXCLUSION OR LIMITATION OF INCIDENTAL OR CONSEQUENTIAL DAMAGES, SO SUCH LIMITATIONS OR EXCLUSIONS MAY NOT APPLY TO YOU. THIS LIMITED WARRANTY GIVES YOU SPECIFIC RIGHTS AND YOU MAY ALSO HAVE OTHER RIGHTS WHICH VARY FROM STATE/JURISDICTION TO STATE/JURISDICTION.
7. Export Laws. This License Agreement involves products and/or technical data that may be controlled under the United States Export Administration Regulations and may be subject to the approval of the United States Department of Commerce prior to export. Any export, directly or indirectly, in contravention of the United States Export Administration Regulations, or any other applicable law, regulation or order, is prohibited.
8. Governing Law. This License Agreement will be governed by the laws of the State of California, United States of America, excluding its conflict of law provisions.
9. United States Government Restricted Rights. The Software is provided with Restricted Rights. The Software and other materials provided hereunder constitute Commercial Computer Software and Software Documentation and Technical Data related to Commercial Items. Consistent with F.A.R. 12.211 and 12.212 they are licensed to the U.S. Government under, and the U.S. Government’s rights therein are restricted pursuant to, the vendor’s commercial license.
10. Severability. If any provision of this License Agreement shall be held to be invalid, illegal or unenforceable, the validity, legality and enforceability of the remaining provisions hereof shall not in any way be affected or impaired.
11. No Waiver. No waiver of any breach of any provision of this License Agreement shall constitute a waiver of any prior, concurrent or subsequent breach of the same or any other provisions hereof, and no waiver shall be effective unless made in writing and signed by an authorized representative of the waiving party.
12. Supplier Software. The Software may include certain software provided by TAIS suppliers. In such event, you agree that such supplier may be designated by TAIS as a third party beneficiary of TAIS with rights to enforce the Agreement with respect to supplier’s software.
YOU ACKNOWLEDGE THAT YOU HAVE READ THIS LICENSE AGREEMENT AND THAT YOU UNDERSTAND ITS PROVISIONS. YOU AGREE TO BE BOUND BY ITS TERMS AND CONDITIONS. YOU FURTHER AGREE THAT THIS LICENSE AGREEMENT CONTAINS THE COMPLETE AND EXCLUSIVE AGREEMENT BETWEEN YOU AND TAIS AND SUPERSEDES ANY PROPOSAL OR PRIOR AGREEMENT, ORAL OR WRITTEN, OR ANY OTHER COMMUNICATION RELATING TO THE SUBJECT MATTER OF THIS LICENSE AGREEMENT.
Toshiba America Information Systems, Inc. Telecommunication Systems Division 9740 Irvine Boulevard
Irvine, California 92618-1697 United States of America
DSD 020905
T
Toshiba America Information Systems, Inc.
Telecommunication Systems Division
End-User Limited Warranty
Toshiba America Information Systems, Inc., (“TAIS”) warrants that this telephone equipment manufactured by Toshiba (except for fuses, lamps, and other consumables) will, upon delivery by TAIS or an authorized TAIS dealer to a retail customer in new condition, be free from defects in material and workmanship for twenty-four (24) months after delivery, except as otherwise provided by TAIS in the TAIS warranty accompanying the products or posted on TAIS’s website. Products which are not manufactured by Toshiba but are purchased from Toshiba, will be subject to the warranty provisions provided by the equipment manufacturer, unless TAIS notifies the end-user of any additional warranty provisions in writing.
This warranty is void (a) if the equipment is used under other than normal use and maintenance conditions, (b) if the equipment is modified or altered, unless the modification or alteration is expressly authorized by TAIS, (c) if the equipment is subject to abuse, neglect, lightning, electrical fault, or accident, (d) if the equipment is repaired by someone other than TAIS or an authorized TAIS dealer, (e) if the equipment’s serial number is defaced or miss-ing, or (f) if the equipment is installed or used in combination or in assembly with products not supplied by TAIS and which are not compatible or are of inferior quality, design, or performance.
The sole obligation of TAIS or Toshiba Corporation under this warranty, or under any other legal obligation with respect to the equipment, is the repair or replacement of such defective or missing parts as are causing the malfunc-tion by TAIS or its authorized dealer with new or refurbished parts (at their opmalfunc-tion). If TAIS or one of its autho-rized dealers does not replace or repair such parts, the retail customer’s sole remedy will be a refund of the price charged by TAIS to its dealers for such parts as are proven to be defective, and which are returned to TAIS through one of its authorized dealers within the warranty period and no later than thirty (30) days after such malfunction, whichever first occurs.
Under no circumstances will the retail customer or any user or dealer or other person be entitled to any direct, special, indirect, consequential, or exemplary damages, for breach of contract, tort, or otherwise. Under no circum-stances will any such person be entitled to any sum greater than the purchase price paid for the item of equipment that is malfunctioning.
To obtain service under this warranty, the retail customer must bring the malfunction of the machine to the atten-tion of one of TAIS’ authorized dealers within the applicable warranty period and no later than thirty (30) days after such malfunction, whichever first occurs. Failure to bring the malfunction to the attention of an authorized TAIS dealer within the prescribed time results in the customer being not entitled to warranty service.
THERE ARE NO OTHER WARRANTIES FROM EITHER TOSHIBA AMERICA INFORMATION SYSTEMS, INC., OR TOSHIBA CORPORATION WHICH EXTEND BEYOND THE FACE OF THIS WARRANTY. ALL OTHER WARRANTIES, EXPRESS OR IMPLIED, INCLUDING THE WARRANTIES OF MERCHANTABILITY, FITNESS FOR A PARTICULAR PURPOSE, AND FITNESS FOR USE, ARE EXCLUDED.
No TAIS dealer and no person other than an officer of TAIS may extend or modify this warranty. No such modifi-cation or extension is effective unless it is in writing and signed by the Vice President and General Manager, Tele-communication Systems Division.
Contents
Organization...ii
Related Documents/Media... iii
Chapter 1 – Overview
System Requirements... 2
ACD Server Hardware Requirements ... 2
ACD Server Software Requirements ... 2
Chat user client requirement ... 3
Assumptions ... 3
Architecture ... 4
Setup Requirements ... 5
Licenses ... 5
Chapter 2 – Installing Web Callback
Prerequisites ... 7
Installation ... 7
Upgrading Multimedia Contact Center ... 15
Chapter 3 – Configuring Multimedia Contact Center
Starting MMQ Administration ... 17
Routing Configuration ... 19
Routing... 21
Chapter 4 – Web Service Interface
Web Callback Service Interface ... 25
Installing the Web Callback Widget ... 27
Installing the Web Callback Widget using ASP.NET... 28
Installing the Web Callback Widget using PHP... 31
Installing the Web Callback Widget using Java ... 31
Update the Web Config File ... 33
Installing Chat ... 34
Requirements... 34
Web Server ... 34
Database... 34
Web Components ... 35
Building the Database ... 36
Chat contact Center application Configuration... 37
Chat History ... 38
Contents Chapter 5 – ACD, MIS, Insight and TASKE
Web Callback Installation & IntegrationGuide 11/10
ii
Chapter 5 – ACD, MIS, Insight and TASKE
ACD Changes ... 45
Group Flags ... 46
Multi Media Tab... 47
MIS... 48
Insight ... 49
TASKE ... 51
Chapter 6 – Reports
Insight Reports ... 53
Taske Reports... 56
Multimedia Queuing Admin Reports ... 57
Types of Reports... 59
Registration and Delivery Report ... 61
Records... 62
Registration Records... 62
Delivery Records... 63
Registration & Delivery Records ... 64
Appendix – Troubleshooting
Trace ... 65
Trace settings... 65
Introduction
This document provides information on integrating Multimedia Contact Center features with Strata ACD and serves as a supplement to the Strata CIX Automatic Call Distribution (ACD) Installation Guide. Information pertaining to the integration of the Multimedia Contact Center features are contained in this document.
Organization
•
Chapter 1 – Overview gives you a general description of the Multimedia Contact Center service and basic operations.•
Chapter 2 – Installing Web Callback contains information on how to install the Multimedia Contact Center service on the MAS or server that contains Net Server.•
Chapter 3 – Configuring Multimedia Contact Center provides instructions on using MMQ Admin to configure web callback routing.•
Chapter 4 – Web Service Interface provides instructions on installing the Toshiba provided sample web callback widget.•
Chapter 4 – Web Service Interface provides instructions on installing the Chat.•
Chapter 5 – ACD, MIS, Insight and TASKE provides instructions on configuring ACD, MIS and third party applications, such as Insight and TASKE.•
Chapter 6 – Reports provides information on generating web callback reports and records using MMQ software.•
Appendix – Troubleshooting provides information on troubleshooting Multimedia Contact Center using Traces.Introduction Related Documents/Media
Web Callback Installation & IntegrationGuide 11/10
iii
Related Documents/Media
Note Some documents listed here may appear in different versions on the Toshiba FYI web site, or in print. To find the most current version, check the version/date in the Publication Information on the back of the document’s title page.
You can find additional detailed information about Strata CIX ACD in the following companion documents:
•
Strata CIX ACD Call Center Solutions General Description provides a system overview, available hardware, and features of the Strata Call Center solutions.•
Strata CIX ACD Installation Guide provides installation and maintenance requirements and procedures for ACD management.•
Strata CIX ACD System Administrator Guide provides set up and operating instructions for Strata ACD System Administrator software.•
Strata CIX ACD Agent/Supervisor User Guide provides procedures on managing and handling incoming calls that are automatically connected to ACD agent groups.•
Strata CIX Telephone User Guides – IP5000-series Telephone User Guide, DP5000-series Telephone User Guide, and IPT/DKT Telephone User Guide. These guides provide the procedures necessary to operate the telephones.For authorized users, the Toshiba FYI web site contains all current documentation and enables you to view, print, and download current publications.
Overview
1
The Multimedia Contact Center service enables users to place a callback or chat request from the customer’s website. This service gives users easy access to the contact center via the web.Most types of browsers are supported, including on the Mac.
The Multimedia Contact Center service easily integrates with a customer’s existing web pages. Web Callback is set up similar to the current voice based callback and the call center has the same ability to generate reports they currently use. Chat can also be easily integrated with a customer's web page and is integrated with Strata ACD system.
Multimedia Contact Center service has the following features:
•
Supports routing of requests to different ACD groups based on information entered by the users such as callback number, extension, name, and any additional custom information such as subject, notes, etc that is passed on the extra info field.•
Filters duplicate callback requests to the same callback number and extension•
Limits number of requests in ACD queue•
Separates initial queue priority for request•
Supports virtual ACD queue (no corresponding CIX pilot DN)•
Supports web callback counting similar to regular callback counting in TASKE / INSIGHT•
Includes additional web callback statistics reports•
Strata Call Manager can show the user information such as name and/or subject collected through the web page when the request is made to an agent.•
Ready made web widget provided for Web Callback (include source codes, for ASP.NET, JAVA, and PHP)•
Automatic insertion of customizable initial/ending/canned messages for ChatThe basic Web callback widget that can be used on a customer’s webpage. The widget can be customized for customers. See figures 1 and 2.
Overview
System Requirements
2
Web Callback Installation & IntegrationGuide 11/10Figure 2 Customized Toshiba Technical Services Callback screen
System Requirements
ACD Server Hardware Requirements
Web Callback application can be installed on MAS or MicroMAS running Strata ACD. To run it on the customer provided PC with Strata ACD, the following is the minimum requirement.
•
Pentium® or Celeron® processor – 2.0GHz or above•
20GB hard drive•
1GB memory (2GB preferred)ACD Server Software Requirements
•
Microsoft Windows Server 2003 or Windows XP Professional•
IIS v. 5.0 or later•
Net Server v. 4.7.3 or higher•
ACD v. 2.4.9 or higher•
Strata Call manager v. 7.0.2.7 or higher•
Web Callback licenseNoteWeb callback updates the Strata ACD configuration database. Therefore, if the database is restored to the system with the old version of ACD software by the Backup and Restore program, Strata ACD will not work.
Assumptions
Chat user client requirement
The following browsers have been tested to work with Chat Contact Center application:
•
Internet Explorer 6/7/8•
Firefox 3.6•
Safari 5.0.1•
Opera 10.6•
Chrome 7.0Assumptions
•
Installing dealer has an understanding of web, email and Toshiba ACD technologies and experience building Data networks and applications.•
The Multimedia Contact Center implementation may require the skill / knowledge of the internetOverview Architecture
4
Web Callback Installation & IntegrationGuide 11/10Architecture
The set up of the Multimedia Contact Center function consists of three key elements:
1.
Installing the Web service on the server or MAS that has Net Server. 2. Configuring the Web service using the Multimedia Queuing Admin tool.3. Installing the Web Callback or Chat function on the customer’s web server using the provided sample widget.
The following diagram shows the setup for this new feature:
Figure 3 System diagram with Multimedia Contact Center Service
Strata Call Manager Toshiba’s
Web Service
ACD NetServer
`
User
`
Agent
`
Supervisor
VA Customer’s Web Server [ + Web Callback Widget and Chat]NetServer
MIS
LEVEL 2 OAI
CIX MMQDB
Setup Requirements
Setup Requirements
The following are general setup requirements to for web callback:
•
Web Service application should be installed on the same server or MAS as Net Server with the Web Callback component checked. It can be installed on another server when the Web Callback component in the installer is unchecked.•
The Net Server version is 4.7.3 or higher•
ACD version is 2.4.9 or higher•
Has the virtual lines configured in ACD groups and virtual VA ports configured in MIS (“ACD, MIS, Insight and TASKE” on page 45)•
The Web Server has TCP/IP connectivity with the MAS.•
Strata Call Manager 7.0.2.7 or higher•
If using TASKE or INSIGHT, configure virtual lines and virtual VA ports in TASKE/INSIGHT•
IIS version is 5 or higher and has been installed•
Install Toshiba Web Service•
Configure Web callback routing•
If using the sample callback widget, install the sample on your existing web server and add the widget onto your web page.Licenses
Web Callback service or Chat requires the following licenses to be activated. LICMAS-MMMQCBK or ACD-MMQ-CBK license depending on Strata ACD server types, MAS or standalone ACD server. By activating the license, both Chat application and Web callback can be activated. License can be purchased by one of the following bundle parts.
Part numbers for MAS and MicroMAS and standalone ACD
LICMAS-MMQBDL
Multimedia queuing – Web callback and Chat for MAS
Provides users with the ability to request the call back on the web page and Chat. The system will distribute the request to the agent and make a callback call to the user or establish the Chat session. License for the system (LICMAS-MMQCBK) is required per system and included. Includes up to three hours of Technical Support hours which must be used within 90 days after the purchase. Requires the enhanced ACD system.
ACD-MMQ-BDL
Multimedia queuing – Web callback and Chat for ACD
Provides users with the ability to request the call back on the web page and Chat. The system will distribute the request to the agent and make a callback call to the user or establish the Chat session. License for the system (ACD-MMQ-CBK) is required per system and included. Includes up to three hours of Technical Support hours which must be used within 90 days after the purchase. Requires the enhanced ACD system.
Overview Licenses
6
Web Callback Installation & IntegrationGuide 11/10Multimedia Contact Center service requires the enhanced Strata ACD system; the basic system is not supported. To upgrade to the enhanced system from the existing basic system, all basic agents must be converted to enhanced agents by LICMAS-UPGREN1 for MAS systems or ACD-UPGR-ENHD1 for standalone systems.
Web Callback requires that the Strata ACD system be covered by a valid maintenance licence. Otherwise, Web callback software goes into demo mode and technical support will not be provided.
Installing Web Callback
2
Multimedia Contact Center service including Web Callback and/or Chat requires Web Callback software (web service) to be installed.
Prerequisites
The following must be installed and running before installing the Web Callback software. This software must be installed on the same MAS or server running Net Server.
1.
Make sure Net Server has been upgraded to version 4.7 or higher 2. Make sure ACD has been upgraded to version 2.4 or higher 3. Make sure IIS has been installedInstallation
1.
Download and run the Toshiba Web Callback executable file.2. Determine the location to save the files. The default is “%TEMP%\Toshiba Web Callback” folder.
Installing Web Callback Installation
8
Web Callback Installation & IntegrationGuide 11/10The progress bar displays.
3. The following screen displays if you run the installer before. Skip this step when running the installation for the first time.
Installation
The installation screens are as follows:
4. If .NET 3.5 SP1 has not been installed, the following screen displays. Click Accept.
Installing Web Callback Installation
10
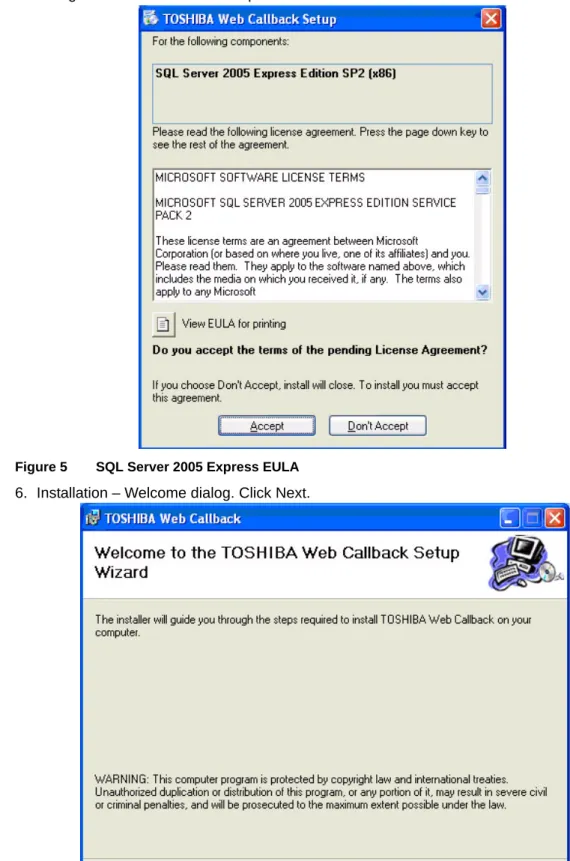
Web Callback Installation & IntegrationGuide 11/105. If SQL Server 2005 Express – TAISSQLEXP instance has not been installed, the following dialog will be shown. Click Accept.
Figure 5 SQL Server 2005 Express EULA
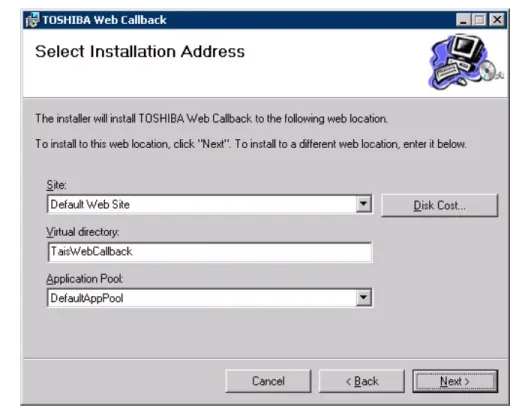
6. Installation – Welcome dialog. Click Next.
Installation
7. Always check the box when running the installer on the Net Server.
It is also possible to run Web Service on a separate server. In this case, the same installer needs to run again on the separate server. When running Web Service on the separate server, uncheck the box so that it does not install unnecessary components.
NoteThe MMQDB is optional, however, this database must be installed only on the Net Server machine.
Installing Web Callback Installation
12
Web Callback Installation & IntegrationGuide 11/109. Change the location if the Web Service is on a server other than the Net Server. Specify the Net Server IP address. The default Net Server connection is 127.0.0.1 (localhost) and port number 8767. Click “Next” to continue.
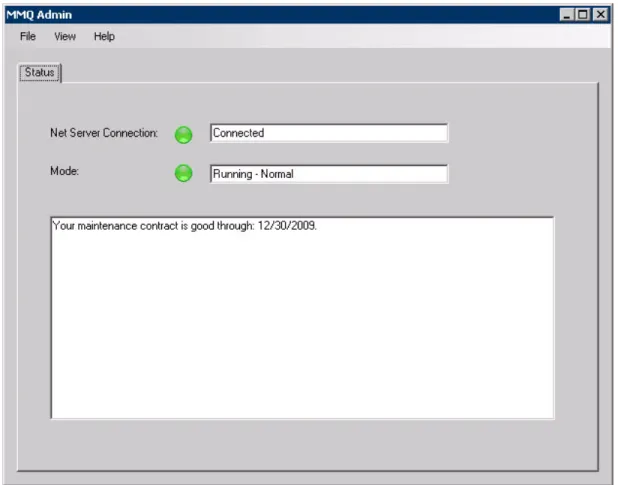
10. Installation address selection dialog. In this dialog, set the site and virtual directory for the Web
Service. For Windows Server 2003, it sets Application Pool.
Installation
Figure 7 Web Service Setting Dialog (Windows XP)
Figure 8 Web Service Setting Dialog (Windows Server 2003)
11. Click Next to confirm the installation and continue.
Installing Web Callback Installation
14
Web Callback Installation & IntegrationGuide 11/10The Installation progress displays.
Figure 10 Installation progress
12. Click Close when installation is done.
Figure 11 Installation complete dialog.
13. Once, the software has been installed. Run the configuration to set the routing option for Web
Callback and Chat.
Important! This feature requires new license key; otherwise, the feature is running in demo mode for an hour.
Upgrading Multimedia Contact Center
Upgrading Multimedia Contact Center
The upgrade procedure is very similar to the Installation procedure with a few exceptions. If you have a previous version of the Web service and want to upgrade to a newer version, ensure that MMQ Admin is closed before starting the upgrade.
Follow the same procedures as the Installation. The screens are similar to the base installation, except there will not be any prerequisite screens that display. Examples of these are EULA for .NET Framework or SQL Server 2005 Express.
Configuring Multimedia Contact Center
3
Once you have installed the Web service, the Multimedia Queuing (MMQ) Administration software is automatically installed on the server or MAS.
MMQ Administration provides the user interface to connect the MAS or server running the Web Callback service to the customers web server. The following can be performed using the MMQ administration software:
•
Displaying service status•
Managing Web Callback and chat routing•
Generating Web Callback reports•
Managing the connection to the Net ServerStarting MMQ Administration
There are two ways to access MMQ Administration:1.
Click Start > All Programs > Toshiba > Strata ACD > MMQ Admin. or2. Open the Net Server console, select Services tab, right click on MMQDB (shown below), then select Show Service window (Figures 13) displays..
Configuring Multimedia Contact Center Starting MMQ Administration
18
Web Callback Installation & IntegrationGuide 11/10Figure 13 Net Server connection screen
This screen displays the following information:
•
Net Server Connection – displays the status of MMQDB connection to Net Server. MMQDB is part of the MMQ admin that access the database.Routing Configuration
Routing Configuration
Use the Multimedia Queuing (MMQ) Admin set up the appropriate routing.
1.
From the main menu, click File > Login. The Login screen displays (shown below). 2. Enter “admin”as the password to log in.The Web Callback Routing tab (Figure 15) displays, and also the Reports menu option is enabled when clicking View > Reports.
Figure 14 MMQ Admin Login
Configuring Multimedia Contact Center Routing Configuration
20
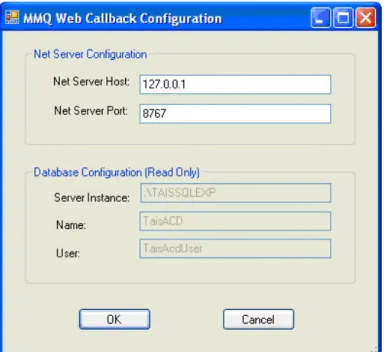
Web Callback Installation & IntegrationGuide 11/103. Select View > Settings to change the Net Server Host and Net Server Port for MMQDB. The following screen displays.
Figure 16 Net Server Configuration
Parameters Descriptions
Net Server Host
This field displays the default local host IP address. There is no need to change it, unless the local host IP address has changed.
Net Server Port This is the default Net Server port. It can be changed if needed.
Database Configuration The parameters in this section are read only and cannot be changed.
Routing Configuration
Routing
The routing for the Web Callback and Chat request is set in the Web Callback Routing tab. The routing selection follows a simple rule. It traverses down the list try to find the first match.
Figure 17 Web Callback Routing
The criteria consist of the following fields:
Columns Descriptions
Key Field
Refers to the Name field in the widget (see Figure 13 on page 18). This verifies the incoming request based on the predefined selections such as <<CALLBACK>>, <<EXTENSION>>, <<NAME>>, <DEFAULT>, or any string.
• <<CALLBACK>> is to check the callback number field against the matched string.
• <<EXTENSION>> is to check extension field against the matched string. <<NAME>> is to check name field against the matched string.
• <DEFAULT> means use this if all else is not matched. This can also be specified if it does not meet criteria.
• Any other string, the system will search extra info field for this key field.
Matched String
Pattern to search. In this search pattern, all characters are compared literally (case insensitive) with exception of the following two characters: * and +. * is interpreted as matching with any zero or more characters, and + is interpreted as matching with any one character.
ACD Group From the drop select the appropriate ACD group. ACD group to use (or Blocked – to reject the request)
Configuring Multimedia Contact Center Routing Configuration
22
Web Callback Installation & IntegrationGuide 11/10Figure 18 Adding Route Criteria
Figure 19 Edit Route Criteria dialog
Buttons Descriptions
Add
Click on a criteria row, then Add to add a criteria above the current one. The Add Route Criteria dialog box displays. Enter the appropriate information, then click OK (see Figure 18).
Edit Click on a row to edit the criteria. Click OK on the Edit screen that pops up. See figure 19.
Delete Click this button to delete a criteria row.
Apply Click this button to save and apply all the changes made to the routing screen.
Cancel Click to cancel to erase any unsaved changes. Up
Use these buttons to move the criteria rows. Down
Routing Configuration
NoteIt is strongly recommended to assign a dedicated group to a Web callback and Chat different from voice ACD groups to generate reports for each service easily. Agents can be configured to login to multiple groups of voice, Web callback, and Chat. See Section 5 of this document on ACD Group configuration.
Add / Edit Fields
and Buttons Descriptions
Key Field Select the Key field criteria from the drop down. Matching String Enter the matching string as explained on page 21. ACD Group Select the group from the drop down.
OK Click this button to accept the changes made to the Add/Edit dialog boxes. Cancel Click to cancel changes made in the Add/Edit dialog boxes.
Web Service Interface
4
Web Callback and/or Chat requires a web form on the customer’s web server, and it will send a request to web service (Web Callback software).
Web Callback Service Interface
This is the interface provided by the Web service.Method: TsdCallback Parameters:
name – type string Callback user name callbackNumber – type string
Callback number extension – type string
Extension number if any schedule – type datetime
Time to do the callback (for future release). For now, set to current date time. extraInfo – type string
Text string in the following format: <Key1>=<Value1></tab><KeyN>=<ValueN></tab>. The maximum length would be 255 characters. These key-value pairs can be used as the input for routing the request to a specific ACD Group.
Return value: ReturnCode structure
•
ResultCode – type integer•
Description – type string Possible ReturnCode:Result Code Description
1 Success
0 Earlier request is still pending. Duplicate request detected.
-1 Service is not available.
Please try it later.
Possible causes are Net Server is not reachable, ACD is not running. MMQDB Windows Service is not running.
-2 No queue is configured to
handle this request. Web Callback routing blocks this user.
-3 Queue is full. Reaching the maximum web callback requests for the selected ACD queue.
Web Service Interface Web Callback Service Interface
26
Web Callback Installation & IntegrationGuide 11/10-4 Service is not ready! Please
try it later.
Web Service is still initializing such as getting the routing rules.
-5 Service failure. Please try it
later.
Possible causes are: general errors such as memory allocation, some software
exceptions).
-6 Demo mode expired! Need either Web Callback license or up-to-date Maintenance license.
-7 Queue is disabled. Please try
it later. ACD group is disabled.
-8 Queue is not found. Please try
it later.
ACD group set in web callback routing is no longer valid.
-9 Queue is currently closed.
Please try it later. Out of ACD group working schedule.
-10 Request schedule is far in the
future.
The specified callback time is too far in the future.
-11 No one is servicing the queue. No agent or supervisor login to take calls.
Installing the Web Callback Widget
Installing the Web Callback Widget
In order to easily implement web callback service, Toshiba provides the sample web widget in ASP.NET, Java and PHP provides a web callback widget that can be easily added into an existing web page. Below is a picture of the sample Web Callback widget:
To set up the Web Callback widget on your web server
1.
Add the following HTML string to your existing web page to show the widget:<iframe src=”http://<yourWcbkWidgetServer>/WcbkWidget/” frameborder=”0” width=”410” height=”260”></iframe>
This string should be added to the HTML page where you want the Web Callback box to display after the widget is installed.
Where:
<yourWcbkWidgetServer>: points to your WebCallback widget server. In case of .NET or PHP, this would be the web server host. In case of Java, this could be Tomcat server URL
(<host>:8080).
2. The Web Callback widget can be installed using one of three ways: ASP.NET version, PHP version or Java version (described in the sections that follow).
For web servers running Windows OS & IIS, it is recommended to use ASP.NET version. For web server running Linux & Tomcat, it is recommended to use PHP or Java.
Web Service Interface
Installing the Web Callback Widget
28
Web Callback Installation & IntegrationGuide 11/10Installing the Web Callback Widget using ASP.NET
ASP.NET version can be found under “Sample Web Server\DotNetVersion” folder.
Run setup.exe under “Sample Web Server\DotNetVersion\WcbkTestDotNetSetup\Release folder.
Important! Before you install this .NET version, make sure that IIS has installed and .NET Framework 3.5 SP1 has been installed. If you have not installed these, please install IIS first and then the .NET Framework.
When you run this widget setup.exe, the following installation screens display. Follow the directions that display on the screens.
Web Service Interface
Installing the Web Callback Widget
Installing the Web Callback Widget
Installing the Web Callback Widget using PHP
PHP version can be found under “Sample Web Server\PHPVersion” folder.
To install
•
Install IIS or Apache•
Create WcbkWidget virtual directory that points to “PhpWebCallback” folder•
Set the default document for this virtual directory to be index.php•
Edit WCBTest.php file found under “PhpWebCallback folder. Search for “localhost” string. Change this “localhost” to point to your Net Server (where you install Toshiba Web Callback Service).The source code is provided in case you want to customize the widget. To build the sample, you need NetBeans IDE and NuSOAP.
Installing the Web Callback Widget using Java
Java version can be found under “Sample Web Server\JavaVersion” folder where the installation files were extracted.
To try this sample, do the following:
1.
Open the project using NetBeans IDE2. Update Web Service References to point to Web Service client of your Toshiba WebCallback Service.
Web Service Interface
Installing the Web Callback Widget
32
Web Callback Installation & IntegrationGuide 11/10To update:
1.
Delete the existing Web Service reference, and add the new Web Service Client.2. In the Web Service Client dialog, select WSDL URL and provide URL that hosts the web services, such as http://<yourWebServicehost>/TaisWebCallback/Service.asmx?WSDL
3. Build the project 4. Deploy the project
The source code is provided in case you want to customize the widget. To build the sample, you need NetBeans IDE and Tomcat.
Installing the Web Callback Widget
Update the Web Config File
Update the web.config file if you installed the widget on a web server that is different from the one where WebCallback service and Net Server were installed.
To update the web.config file
1.
Use notepad.exe to edit web.config file under “\linetpub\wwwroot\wcbktest” folder. 2. Look for the following string:”<add key="WebCallback.Service" value="http://localhost/TaisWebCallback/Service.asmx"/>”.
3. Change “localhost” to point to the WebCallback service/Net Server machine.
4. The source code is provided in case you want to customize the widget. To build the sample, you need Visual Studio 2008 and Visual Studio 2008 Web Deployment Projects.
Notes
When installing this widget in the same server as Microsoft CRM 4.0, please set the following:
1.
Add the following subsections into <system.web> section of WcbkWidget web.config file (located in “netpub/wwwroot/WcbkWidget” folder):<compilation defaultlanguage="c#"> <assemblies>
<clear/>
<add assembly="*" /> </assemblies> </compilation> <httpModules> <clear/> </httpModules>
2. Make sure the “Internet Guest Account” has permission to access “inetpub/wwwroot/ WcbkWidget” folder.
Web Service Interface Installing Chat
34
Web Callback Installation & IntegrationGuide 11/10Installing Chat
In order to use Chat contact center application, the Chat server applications must be installed on the customer provided web server.
Requirements
The customer must prepare the following web server environment to implement Chat contact center.
Web Server
PHP
Most Linux-based Web host services support PHP natively.
If the customer is hosting their own Windows based Web Server, there are two options for implementing PHP:
1.
If IIS is already installed, PHP support can be added. There are two steps to installing PHP•
Install Microsoft Fast CGI support. Microsoft FastCGI can be downloaded at http:// www.iis.net/download/fastcgi.•
Install PHP. PHP can be downloaded at http://php.net/downloads.php.2. If IIS is not installed, or the customer is not comfortable with modifying their current IIS implementation, an easy way to implement PHP is to download and install WAMP. WAMP stands for Windows, Apache, MySQL and PHP, and comes in one simple installer.
IP Connectivity
The Web Server must have IP connectivity to the server running the Web Callback service (usually the MAS).
NAT port-forwarding is adequate this application. The Web Server must be able to submit requests to a URL that routes to the Web Callback server.
Database
Toshiba Call Center Chat can be configured to interface with either MySQL or Microsoft SQL Server.
MySQL
MySQL is open source and freely downloadable at http://dev.mysql.com/downloads/mysql/. If using a WAMP implementation, MySQL will already be residing on the computer.
Microsoft SQL Server
Installing Chat
Web Components
Microsoft Internet Information Server (IIS)
Follow the instructions below to install for Microsoft IIS.
1.
Extract the webchat and webchat_admin folders to your C:\Inetpub folder.2. Open IIS Administration (Control Panel > Administrative Tools > Internet Information Services) 3. Right-click on Default Web Site, and select New > Virtual Directory
4. Under Alias, enter webchat. 5. Click Next
6. In the Directory field, browse to C:\Inetpub\webchat. 7. Select Read, Run and Execute.
8. Click Next
9. Right-click on Default Web Site, and select New > Virtual Directory 10.. Under Alias, enter webchat_admin.
11. In the Directory field, browse to C:\Inetpub\webchat_admin. 12.Click Next
13.Select Read, Run and Execute. 14.Click Next
15.Right-click the webchat virtual directory and select Properties. 16.Select the Documents tab.
17.Click Add and enter the default document name of index.php. 18.Click Okay.
19.Click Okay to close the virtual directory properties.
20.Right-click the webchat_admin virtual directory and select Properties. 21.Select the Documents tab.
22.Click Add and enter the default document name of index.php. 23.Click Okay.
24.Click Okay to close the virtual directory properties.
Apache Web Server
Follow the instructions below to install for Apache environment.
NoteApache web server and Apache Tomcat are not the same thing. Apache Tomcat is designed applications written in Java and JSP, and is not compatible with PHP based applications.
1.
Extract the webchat and webchat admin folders to the <Apache Path>\www\ folder (Windows) or to the public_html folder (Linux).2. If necessary, modify the httpd.conf to allow access to the new folders. For example:
<Directory “C:/wamp/www/webchat”> Options Indexes FollowSymLinks AllowOverride all
Order Allow, Deny Allow from all </Directory>
Web Service Interface Installing Chat
36
Web Callback Installation & IntegrationGuide 11/10Options Indexes FollowSymLinks AllowOverride all
Order Allow,Deny Allow from all </Directory>
Building the Database
Chat contact center applications requires the database to hold the configuration information and the actual chat activities. MySQL or MS SQL server is supported. The database must be provided by the customer. Follow the instructions below to configure the database.
MySQL
1.
Browse to http://yourserver/webchat_admin/install.php. 2. Select the MySQL radio button.3. Enter the IP address or host name of the database server, the user name and password of the user that has rights to create databases.
4. Enter the name for the Web Chat database, or leave it at the default value of “webchat”. 5. Click the Build Database button.
6. Confirm that you really want to do this by clicking OK.
7. The next page shows the database and table creation process. If an error occurs connecting to or logging into the database, correct the setting and try again.
8. When the database and tables are built, click Next.
9. Follow the instructions to modify the Web Chat configuration files.
Microsoft SQL Server
1.
Create a database in SQL Server named “webchat”.2. Create a user for the webchat database that has Create, Insert, Delete, Update and Select rights, or is configured as the db_owner.
3. Browse to http://yourwebserver.com/webchat_admin/install.php. 4. Select the MSSQL radio button.
5. Enter the IP address or host name of the database server, the user name and password of the user that has rights to the webchat database.
6. Enter the name for the Web Chat database, or leave it at the default value of “webchat”. 7. Click the Build Tables button.
8. Confirm that you really want to do this by clicking OK.
9. The next page shows the database and table creation process. If an error occurs connecting to or logging into the database, correct the setting and try again.
10.When the tables are built, click
11. Next, edit the following two configuration parameter files, setting the following values to match your database settings:
•
webchat/config.php•
webchat_admin/config.php EXAMPLE:$db_type = ‘mysql’;
$hostname = ‘dbserver1.mydomain.local’; $username = ‘webchat_user’;
Installing Chat
$database = ‘webchat’;
The following parameter (found only in webchat/config.php) sets the URL or IP address of the server running the Web callback service. Generally, this service will be running on the MAS. If the Web Chat website is hosted externally, this will need to point to a public IP address that has port 80 port-forwarded through the firewall to the MAS.
$mmq_server = ‘stratamas01.mydomain.com’;
Chat contact Center application Configuration
Administration Tools
1.
Browse to http://yourwebserver.com/webchat_admin/index.php, to log into the Web Chat Administration. Enter the User Name and Password.User Name: admin Password: Admin
Web Service Interface Installing Chat
38
Web Callback Installation & IntegrationGuide 11/10Chat History
When you click the Chat history on the main window, the following chat history screen displays. Click an entry to display an entire chat conversation.
Installing Chat
Canned Responses
Chat Contact center applications provides the canned message feature. It can be defined for each department, and multiple departments can be defined.
When you click the Canned Responses menu, the following screen is displayed to configure the canned message.
Parameter Description
Department Department name can be added, edited, or deleted. Greeting
Greeting is automatically sent to the chat requester when the agent accept the chat request. Customer name (Cust Name) and agent name (Agent Name) can be automatically inserted to the greeting message.
Goodbye When the chat session is over, the farewell message can be automatically sent to the user. Customer name and agent name can be inserted in the message.
Buttons
Any messages can be defined as a canned message, and the agent can use it during the chat session. A message can be associated with a short text button label so that the agent can pick from a button easily.
Web Service Interface Installing Chat
40
Web Callback Installation & IntegrationGuide 11/10Strata Call Manager (SCM)
Setting Chat Pop up with the Phone Operation
Chat window can be automatically popped up on Agent's PC using SCM. Chat request is delivered as a call to an Agent, and when answering the call, the Agent can specify whether to accept the request or not.
To pop the Web Chat on the Agent’s PC, an action must be defined to collect the call information and pass the parameters to the Agent Chat application.
1.
Near the top of Strata Call Manager, select the Actions tab and then select the Personal Call Handler icon.2. Triggering Event: ACD Call Ringing 3. Refer to the Rule as: Pop Web Chat 4. Click Add Action.
5. From the Type dropdown list. select Pop External Web Browser. 6. For the Name, enter Pop Chat.
7. In the URL field, enter:
http://yourdomain.com/webchat/startchat.php?id=%X(“chatid”)&cust_name=%X(“caller”) NoteSubstitute your domain name in place of yourdomain.com.
8. Click Save.
9. Under 3. Actions, select Pop Chat from the Immediately list. 10.In the Extra Info field, enter the word “type”.
Installing Chat
Web Service Interface Installing Chat
42
Web Callback Installation & IntegrationGuide 11/10Setting up the Chat pop up with Visual Basic (VB) Application
As an option, small VB application can be provided as-is to accept the Chat request from the PC instead of the phone. The picture (shown right) shows the main screen of the VB application, and the Agent can click a button to process the Chat request without touching the phone. In order to setup the application, the new SCM action and Personal Call Handler needs to be defined as follows:
1.
Near the top of Strata Call Manager, select the Actions tab and then select the Personal CallHandler icon.2. Triggering Event: ACD Call Ringing (shown below). 3. Refer to the Rule as: Pop Chat App
Installing Chat
The following screen displays.
5. From the Type. select Run Another Program. 6. For the Name, enter Pop Chat App.
7. In the Program EXE, specify the location of the application, for example, C:\Program Files\TAIS\ChatApp\ChatApp.exe
8. In Parameters, enter the URL with the %X parameter as follows, for example, http:// myserver.com/webchat/startchat.php?id=%X(“chatid”)&cust_name=%X(“caller”)
ACD, MIS, Insight and TASKE
5
After the Multimedia Contact Center is installed and configured, the following configuration changes must incorporated in the ACD, MIS, Insight and TASKE applications.
Important!
•
Refer to the following ACD manuals•
ACD System Administrator Guide for ACD•
Strata CIX ACD Installation GuideACD Changes
The following are the screen captures that have changed in the ACD software version that supports Multimedia Contact Center. The changes to this screen are circled below. Only changes pertaining to Multimedia Contact Center are explained in this section.
After ACD Agents have been assigned under the ACD Agents tab, you can create ACD Groups. Web Callback and/or Chat request can be assigned either to its dedicated group or other groups that handle incoming call queues. When it is assigned to the dedicated queue, the virtual group may be used.
To add a new ACD Group
1.
From the ACD System Administrator window, click the ACD Groups tab. The group summary appears on the tab.2. Select Edit, New Record or click the Edit or Add action button. The Add/Edit ACD Group window displays. You can access the General, Call Management, Agents, Supervisors, Alarms/ Notifications, Miscellaneous, and Multi Media tab screens.
ACD, MIS, Insight and TASKE ACD Changes
46
Web Callback Installation & IntegrationGuide 11/104. The New ACD Group screen displays. The Group Flags (circled) in the General tab and a Multi Media tab have been added to this screen (shown below).
Figure 20 Adding a new ACD Group
Group Flags
•
Virtual Group – Check this box to indicate whether or not this ACD Group is a virtual group or not. If it is checked, it means the ACD group is a virtual group that only exists in ACD, and not in CIX. Virtual group may be used only when the group handles Web Callback request only. This check box can only be set during creation of ACD Group. Once, it is set, the only way to change it is to delete the ACD group and add the group again with different setting.ACD Changes
Multi Media Tab
This tab contains the Web Callback information.
Figure 21 New ACD Group tab - “Multi Media”
Parameters Descriptions
Initial Priority Level
Enter a value to set the initial priority level for Web Callback request.
Possible values: 0~99. A larger numbers means a higher priority. Maximum Queued
Enter a value to set the maximum web callback request entries in the queue.
Possible values: 1~256 First Virtual Line
Enter a value to set the virtual line to be used in generating web callback events for TASKE/INSIGHT.
Possible values: 451 ~ 499 Number of lines
Enter a value to set the number of virtual lines to used in generating web callback events for TASKE/INSIGHT. Possible values: 1 ~24
MIS
For TASKE or Insight to properly count web callback calls, virtual VA ports must to be configured in MIS. Virtual VA ports are extensions only and exist in MIS, and TASKE/INSIGHT that are marked as VA ports. There are no actual corresponding VA ports in CIX configuration.
To set this virtual port in MIS
1.
Access MIS by clicking Net Server > MIS, then right click the Show Service Window (shown below).2. From the MIS Server main menu, select File > Show Virtual VA Ports (shown below).
3. The Virtual VA Ports dialog box displays (shown below).
The default values are 9441 under First Port with a port count of 5, which equals 9441~ 9445.
Important! Make sure these VA ports do not conflict with existing DN or VA ports. These virtual VA ports must be are properly configured in TASKE/INSIGHT as VA ports. Other-wise, web callback will not be counted properly by TASKE/INSIGHT.
Insight
1.
Make sure that L9451 ~ L9499 are configured as analog Lines corresponding with the virtual lines defined in the Multimedia tab of the ACD group. L9451 is equivalent to ACD virtual line 451 on the Multimedia tab.ACD, MIS, Insight and TASKE Insight
50
Web Callback Installation & IntegrationGuide 11/102. Make sure that E9441 ~ E9445 are configured as VA Ports which means they are added as extensions with “Voice Mail Enabled property” checked. These correspond to the Virtual VA ports configured in the MIS application.
TASKE
TASKE
1.
Make sure that Trunks T451 ~ T499 are configured, or at least any of the virtual lines that were defined on the Multimedia tab in ACD group configuration. See below.2. Make sure that the virtual VA ports defined in MIS are also defined in TASKE Extensions, and they are defined as Announcement Port type. See below.
Reports
6
Web callback and Chat activities can be reported by Insight or Taske MIS software. In addition, MMQ admin software can provide reports for Multimedia Contact Center activities.
Regardless of the types of reports used, it is strongly recommended to assign a dedicated ACD group to Web call back and Chat so that reports can be easily generated for the particular service (ACD group).
Please see Section 3 of this document to configure a separate ACD queue for each application.
Insight Reports
Web callback report
Agent Group Traffic report shows the Web Callback and the regular voice callback calls. It shows the callback offered, answered and canceled counts based on the result of the cal handling.
Reports TASKE
54
Web Callback Installation & IntegrationGuide 11/10Realtime supervisor display shows the callback offered, answered, and canceled counts.
Chat report
Agent Group Traffic report shows the total number of Chat requested. In this report, all Chat requests are counted as Canceled regardless how the request is actually processed.
TASKE
In order to capture the time spent on the Chat request, Agent Event Report may be used. The total accepted Chat requests can be reported by Agent Traffic Report. The agent can be automatically placed on Unavailable state with the reason code=Chat, and it can be used to identify the Agent Chat activities. The agent needs to go Available when the chat session is over. Therefore, the time between Unavailable and Available can show the time spent for the Chat. In order to use this feature, the agent must go Unavailable when accepting a Chat request, and as the result, the agent cannot accept other chat request or ACD call.
Supervisor realtime display can show the realtime statistics for the Chat request. Please note that all Chat request are counted as Canceled regardless of how the chat request is actually
processed.
Chat Request All Chat requests are counted as Cancelled even if it is processed by an agent
Reports TASKE
56
Web Callback Installation & IntegrationGuide 11/10Taske Reports
Web callback report
Queue report shows the Web Callback activities, and Web Callback request is counted as the Inteflow call. When it is processed by the agent, it is counted as an outbound call.
Chat report
Queue report shows the total number of Chat requested. In this report, all Chat requests are counted as Abandoned calls regardless how the request is actually processed.
In order to capture the time spent on the Chat request, Agent/Agent Group Unavailable Reason Report may be used. I summarizes the total number of processed Chat requests and time spent for Chat requests.
The agent can be automatically placed on Unavailable state with the reason code=Chat, and it can be used to identify the Agent Chat activities. The agent needs to go Available when the chat session is over. Therefore, the time between Unavailable and Available can show the time spent for the Chat.
TASKE
In order to use this feature, the agent must go Unavailable when accepting a Chat request, and as the result, the agent cannot accept other chat request or ACD call. If it is necessary to change the title of the report, for example, to "Chat duration and unavailable reason". reports can be exported in Excel format and can be customized.
Multimedia Queuing Admin Reports
Use the Multimedia Queuing (MMQ) Admin to view Multimedia Contact Center reports and records. These reports provide different kinds of information. The registration reports display information as to when the Callback requests come in and delivery reports contain information as to when the calls were delivered to the agent and when the agent either accepted or rejected the web callback request.
The following reports can be generated for the web callback:
•
Registration report – This report provides web callback or chat registration statistics per time interval and per ACD group.•
Delivery report – This report provides web callback delivery statistics per time interval and per ACD group.•
Registration & Delivery report – This report provides registration and delivery statistics per time interval and per ACD group.•
Registration records – This report provides list of registration records grouped by ACD group, and registration status.•
Delivery records – This report provides list of delivery records grouped by ACD group, and delivery status.•
Registration & Delivery records – This report provides list of registration and delivery records grouped by ACD group, registration status and delivery status.Reports TASKE
58
Web Callback Installation & IntegrationGuide 11/10
To generate reports
1.
Click Start > All Programs > Toshiba > Strata ACD > MMQ Admin.or Open the Net Server console, select Services tab, right click on MMQDB, then select Show
Service window.
The Login screen displays.
2. Enter “admin”as the password to log in. The default username/password is Admin/admin Reports is enabled under View > Reports
3. Select View > Reports.
4. Select the type of report; set the report
5. Enter the From and To fields. Select by clicking on the month or entering a number or using the up and down arrows within the boxes.
TASKE
Types of Reports
Registration Report
The report contains the following columns:
•
Start Period – Start time of the interval period for the reported data.•
ACD Group – ACD Group•
Queued – Number of web callback or chat requests successfully queued.•
Duplicate – Number of the web callback or chat requests rejected due to duplicate request.•
QFull – Number of the web callback or chat requests rejected due to queue is full.•
Blocked – Number of the web callback or chat requests rejected due to routing (blocked).•
Unavailable – Number of the web callback or chat requests rejected due to service not ready.•
General Error – Number of the web callback or chat requests rejected due to internal error.•
Total – Total web callback or chat requests for the periodNoteThe row with light blue highlight contains the sum of ACD groups data within that period and the other rows show the intervals with activity.