7th – 11th March, 2005 DRTC, Bangalore Paper: E
DSpace Administration
ARD Prasad
Documentation Research and Training Centre Indian Statistical Institute
Bangalore 560059
Abstract
This paper describes the various steps involved in
administering DSpace, like creating and maintaining
Communities and Collections, E-People; authorizing E-People
to submit to the Collections; creating and maintaining
1. Introduction
DSpace administration involves a whole range of tasks the administrator has to perform for successful creation and maintenance of a digital repository. When we first configure a digital repository using DSpace, we begin with creating Communities and collections. While creating communities and collections, we also have to take a decision with regard to whom or which group can submit digital items to each collection. In addition, we also have to take a decision on who or which groups of members (E-people) are authorized to review, approve and modify metadata of submissions.
2.
Communities and Sub-communities
In DSpace, a digital repository is organized in terms of communities and collections and optionally one can create sub-communities under each community and also any number of levels of sub-communities under each sub-community. In other words, communities and sub-communities can be arranged hierarchically. One can use ‘Dewey Decimal Classification (DDC) system and any other classification system depending on how you would like to organize your digital repository. For example, a digital repository of a university can be like
Philosophy Logic Epistemology Metaphysics Indian Philosophy Heterodox system Lokayata Jainism Buddhism Orthodox system Nyaya Vaiseshika Sociology … … Economics … …
Under each community or sub-community one can have any number of collections. Collections can NOT be subdivided into sub-collections. Ultimately, it is to the collections, authors submit digital documents (items).
Note: The communities and collections need not be subject-wise as shown in the above example. It can be anything, depending on how you would like organize your repository. For example, a digital repository of a software company can have communities like –
Administration Marketing Projects
The above communities can have collections under each community.
3. Collections
Collections can be created under communities or sub-communities. One way of organizing collections is by type of digital documents, they hold. For example, one can have collections like
Pre-prints
Presentations (PPTs)
Thesis Movies Photographs
But again, there is no hard and fast rule, that the collections be named like the above. You can choose anything keeping in view, the way your users expect it to be.
It is strongly advised that the administrator of a digital repository spends considerable time on the design aspect of his digital repository, as it is not good idea to modify/ delete communities or collections once the Digital Library is launched.
4. Items
Each collection in a DSpace Digital Repository is populated with items, also called digital objects or digital documents. An item may have one or more bitstreams. In other words, an item can be a bundle of bitstreams (files). An author (submitter) can upload more than one file for single document. For example, if a submitter wants to upload a thesis having many chapters and each chapter is a PDF file, he can upload all the PDF files together to be considered as one digital item. One can also submit a set of html files and mention which should be considered as the primary file, so that when the digital item is opened by any end-user, the primary file would be displayed first. Later the user can navigate through hyperlinks in the html files. In these cases, each file is considered as a bitstream, and all the files together constitute a digital item.
5. Bitstream
Bitstreams in DSpace are the files having digital content. The bitstreams can be plain text files, or html files, audio or video files. In fact, DSpace accepts many file formats like PDF, MS-WORD, PostScript, mpeg, jpeg, tiff, gif etc. as bitstreams.
6.
Steps in Administration
Some steps in performing the DSpace Administration are essential and some are optional. These steps have been enumerated here.
Essential Steps:
1) Create Users who will act as reviewers, metadata editors, approvers 2) Create Communities
3) Create Collections
4) Create Collection authorizations
Optional Steps:
1) Creating Sub-communities 2) Creation of Groups
3) Modifying Dublin Core Registry (Discouraged)
4) Adding additional file formats to Bitstream Format Registry 5) Modifying or Deleting Digital Items
6) Handling News
7.
How to login as Administrator
For example: http://drtc.isibang.ac.in/dspace/dspace-admin
a) The ‘http’ can be ‘https’ if the repository is configure over a Secure Socket Layer (SSL). Ex: https://drtc.isibang.ac.in/dspace/dspace-admin
b) Sometimes, you may have to use port number after the host name, if the repository is configured on Tomcat or JBoss. Ex: http://drtc.isibang.ac.in:8080 (Where 8080 is the port number)
c) Sometimes, it might have been configured on SSL with a port number, in which case the URL may look like: https://drtc.isibang.ac.in:8443/dspace/dspace-admin
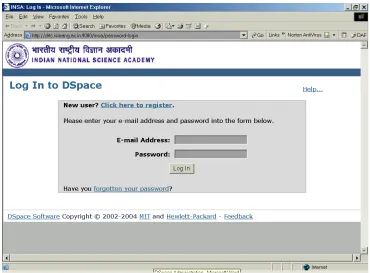
Once the repository page is open you will see the login screen. It is looks like the login screen of any member of the digital repository.
Fig. 1 Login Screen
Here, you should enter your e-mail address and the password. DSpace will respond only if you are the Administrator. Otherwise, you will see a message stating ‘Authorization Required’ and ‘You do not have permission to perform the action you just attempted’.
Note: The administrator account is created at the time of DSpace installation, using the following command
$DSPACE_HOME/bin/create-administrator
Here, DSPACE_HOME is the directory where DSpace is installed, it could be ‘/dspace’ or ‘/home/dspace’ or any other directory.
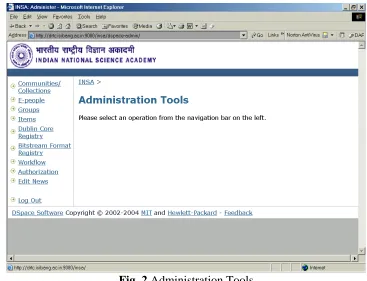
Fig. 2 Administration Tools
8.
How to Create Initial Members
Normally, anyone can become a member of a digital repository using ‘My DSpace’ in the left hand side menu of the first screen of the digital repository. However, it is desirable to have some initial members, who can take the responsibility of reviewing and approving. Though it is not mandatory to have members initially, to configure a digital repository for the first time, it is convenient to create some members or groups. When we first create communities and collections, the process can be completed by assigning who or which group is authorized to submit or review or modify metadata. Following are the steps the administrator should follow to add members to a digital repository.
Once the administrator has logged in, click ‘E-People’ on left hand side menu in the above Fig. 2. Then the following screen appears
In the above screen, click ‘Add EPerson’ button, then you will get the following screen
Fig. 4 Creating a new user
In the screen (Fig. 4), enter the e-mail address, last name, first name etc, and click(tick) the square box opposite to ‘Can Log In:’ option. You can ignore ‘Require Certificate:’ option. Once, the details are filled in click ‘Save Edits’ button. This take you back to the earlier screen. You can verify, whether the system as added the new member by clicking, ‘Select E-person’. Then a new screen (Fig. 5) appears and you can check whether the new member is added.
Fig. 5 E-People
NOTE: Normally, an administrator need not use the facility of creating members. However, setting passwords for each member should be done by the member himself, using the ‘Forgotten password’ facility in the login screen (Fig. 1).
9.
How to Create Communities, Sub-communities
Firstly, you have to login as administrator, once you see the screen with ‘Administration Tools’ (Fig. 2), click ‘Communities/ Collection’. Then the “Edit Communities and Collection” screen appears (Fig. 6)
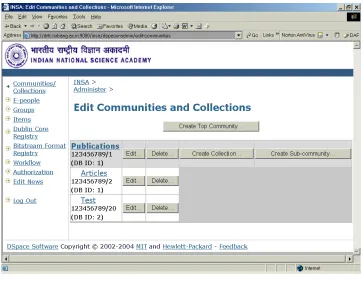
Fig. 6 Creation Communities and Collections
To create a top level (first order in hierarchy of communities), you can click the button ‘Create Top Community’. This is equivalent to creating communities like Philosophy, Sociology, Economics etc. in our example in the earlier section. If you wish to create sub-communities under a community, you should click ‘Create Sub-community’. This is to create sub-communities like ‘Logic’, ‘Epistemology’, ‘Metaphysics’. Creation of a community or sub-community involves providing
1) A name to the community (mandatory)
2) A short description of the community (optional)
3) An introductory text (in html format) about the community (optional) 4) A copyright note (optional)
5) Text (in html) to be appeared on the right column of the Digital repository page (optional)
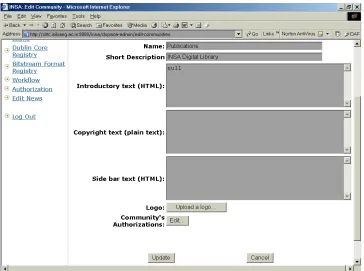
Fig. 7 Fields in Collection creation
In the screen in Fig. 7
• Except the name of the community field, the rest of the fields are optional. • You can enter a 'short description', which will appear on the community list
page below the community name, and should be one or two sentences of plain text describing the community.
• The 'introductory text,' 'side bar' and 'copyright text' fields are displayed on the community's home page. Please remember, the introductory text field and the side bar text field should be filled with appropriate html tags. If you do now want anything to be displayed, you should provide at least a minimum html tags like ‘<html></html>, otherwise the word ‘null’ will appear on the community page.
• To add a logo to be displayed on the community's home page, click on the Upload Logo button.
• On the next screen either type in a path to the logo file or browse to the logo file.
• Click on the Upload button.
• When all information for the Community Page is entered, click on the Create button.
Note: The Community will be given a default READ policy to anonymous group. Presently, since administration is done centrally, this tool doesn't have a lot of use--usually you will just add READ permission for the Anonymous group just after you create a community, and leave it at that. This permission is applied to the community's logo if there is one.
In a similar fashion, sub-communities are created. When you ‘create sub-community’ the same screen appears, which allows you to describe a sub-community.
10.
How to create Collections
Creating collections is essential. However, to create a collection you should first have created a community. Collections can appear under a community or sub-community. In other words, a community can have a combination of sub-communities and collections. Again under each sub-community there can be sub-sub-communities and/or collections. However, collection can not sub-divided into sub-collections.
It is the collections that hold digital items (also referred as digital documents, or digital objects).
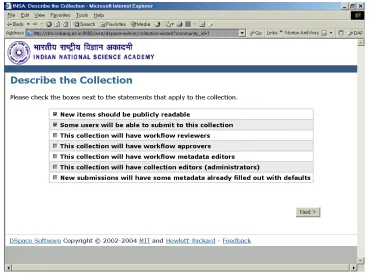
To create a collection you should click ‘Create Collection’ in fig. 6, which display the following screen.
Fig. 8 Collection Policy
By default, the first two, viz. ‘New items should be publicly readable’ and ‘Some users will be able to submit to this collection’, options are ticked. Before choosing the other options, the DSpace administrator should have clear idea of the workflow. DSpace allows you to create upto 3 workflows. It is not a good idea to avoid defining workflows. These workflows allow you create a kind of moderation policy. If you do not define any workflow, the moment an author submits an item to the digital repository, the item will straight away will be deposited in the repository. In which case, there is every possibility of allowing authors to deposit irrelevant items. To filter out irrelevant documents, it is essential to define workflows. If the administrator defines all the workflows, DSpace sends e-mail to the reviewers of the collections, once a reviewer is satisfied with the submitted item and okays it, e-mail will be sent to metadata editors, once the metadata editors goes though the Dublin core elements and modifies them if necessary and okays the item, e-mail will be sent to approvers. When the item is okayed by the approver, the item will be added to the digital repository. Following is the process an item goes through before it appears in the digital repository.
Submission Æ review (workflow 1) Æ metadata validation (workflow 2) Æ approval (workflow 3).
repository immediately after a reviewer okays it. The collection policy can be set using the screen presented in Fig. 8.
The following screens appear depending on the choices made in Fig. 8. The fig. 9a and 9b constitute one screen. If you scroll down the screen appearing 9a, you will see the screen in fig. 9b. The fields are very much similar to the fileds that appear while creating a community and fairly self-explanatory.
Fig. 9a Collection Description
Fig. 9b Collection Description
automatically to other collections in the digital repository. For example, if a user is authorized to submit to the thesis collection only, he may not be able to submit to ‘pre-prints’ collection, unless he is added to list of submitters of the ‘pre-‘pre-prints’ collection’. The DSpace administrator can prevent any user submitting to a collection by removing his name form the list of submitters by selecting a user name and clicking the button ‘remove selected’ in fig. 10.
The following screens appear one after other depending the choices you made in the screen of Fig. 8.
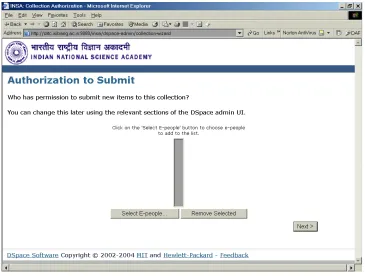
10.1 Submitters
Submitters are normally authors who are allowed to submit/ upload their publications to a digital repository. The submitters should already be members of the digital repository. Much of the DSpace organization is centered around the mail system. Hence, the membership is essentially providing the e-mail id of the members. It is the e-mail ids of the members that are added to various lists of submitters or reviewers or approvers. Each collection will have separate list of submitters, reviewers, approvers and metadata editors.
Fig. 10 Submission authorization
In the above screen (Fig. 10), if you click the button ‘Select E-people’, the screen in fig. 5 will appear, where you can select the e-people to be added to the list of submitters. If the administrator feels that a particular e-person has become problematic or does not wish to submit publications any more, the administrator can remove his name (e-mail id) from the list of submitters.
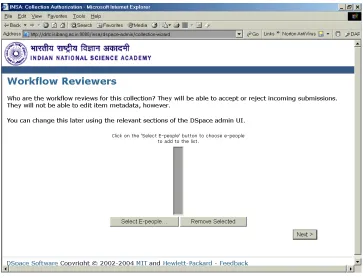
10.2 Reviewers
Reviewers are members you can review the submissions to a digital repository. When an item is submitted to a collection, the DSpace generates an e-mail alert to the reviewers to take up the task of reviewing the item. A reviewer examines the item and can accept or reject the item, depending on the policy of the digital repository.
Note
3) Also when a reviewer logs in DSpace, he will be presented the list of submissions to be reviewed by him.
4) However, it does not mean that all the reviewers should accept the task of reviewing. If does not, perhaps it will be done by another member.
5) If one of the reviewers either accepts or rejects a submission, the task of reviewing the particular item will be automatically removed from the task list of other reviewers, though the e-mail alerts already sent can not be recalled!!! 6) A reviewer can not modify the metadata of an item
7) However, if the DSpace administrator has defined only one workflow, all the tasks of reviewing, metadata validation and approval are bundled to the list of members in the workflow 1.
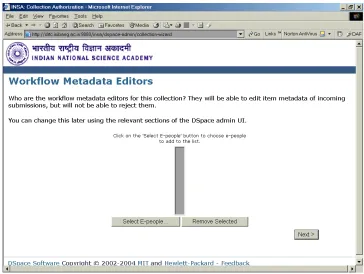
10.3 Metadata Editors
DSpace administrator can assign the task of validating the metadata of submitted items to a list of members. The metadata editors can examine the metadata and make any necessary modification in case some of the values are wrongly entered. However, metadata editors can accept or reject a submitted item. Once the metadata editors okays the item, e-mail alert will be sent to the members in the list of approvers.
It is expected that the metadata editors are thorough with the Qualified Dublin Core and the way it is implemented in DSpace. The best practice is to have Librarians as metadata editors, whereas the reviewers should be subject experts of the discipline of the collection.
10.4 Approvers
Approvers are the members who will finally commit a submission to the digital repository. A member of the approvers list can modify metadata or even reject a submitted item. An approver can take the final decision depending on the policy of the digital repository.
10.5 Collection Administrators
Fig. 11 Creating Reviewers
Fig. 13 Creating Metadata Editors
10.6 Default Metadata
Either the DSpace administrator or the Collection administrator can set default values to some the fields in the Dublin core metadata. This facility is hardly used, as in many cases it is hard to have a constant value for any field in the Dublin core element set. Some of the elements that may be considered for setting up default values are:
1) Publisher (if it is repository of your institutes/ university) publications, where the publisher field always will have your organization name as the default value.
2) Type of digital item (if the collection is intended only for a particular type of items). For example, collection of ‘ppts’.
3) Language (If the collection vastly consists of items in a particular language. 4) Sponsors (If majority of the items are sponsored by one sponsor)
Note: These default values are presented to the author/ submitter while submitting an item to a repository. However, the author can always override the default values at the time of submission. It is just save the time of the author while filling up certain fields.
Fig. 15 Setting default values of metadata
11. Modifying Collection Description
Fig. 16 Updating collection description
Creating communities and collections is an essential step in launching a digital repository. However, optionally the DSpace administrator can modify Dublin Core registry, bitstream format registry and can perform various other tasks as and when required.
12.
Item Mapping in DSpace
Item mapping facilities has been providing in 1.2 version of Dspace. Items can appear in more than one collection. The tool that 'maps' items to collections other than the one that owns it is the "Item Mapper".
It should be noted that the item mapped to a collection does not receive new access rights - it retains the authorizations that it inherited from the collection.
If you want access Item Mapper, first you should log on as administrator and go to the Collection homepage where you want to map an Item from another collection. (Fig. 18&19).
Fig. 18 Communities and Collections
Fig. 19 Item Mapper
In the collection homepage (Fig. 19) click on the “Item Mapper” button, which is on the right corner of the admin toolbox.
Note: Here Item mapping is done by author match, but there should be a option by the “Title” of the Item, because if one wanted to map an item to more than one collections, one would do it by the Title of the Item rather than the author(s).
Fig. 20 Authors Search
In Fig. 21, you can see the Items by the author ‘ard’ are listed. Check on the Title you want to be mapped, and click on the Add button
Fig. 21 Matching Item
If you want to check whether the Item has been mapped or not, you can go the Collection homepage, and browse by Title of the Item.