KeySecure
Appliance Administration
Guide
Document Information
Product Version 8.0
Document Part Number 007-012568-001
Release Date 1 July 2014
Revision History
Revision Date Reason
A 1 July 2014 Initial release
Trademarks
All intellectual property is protected by copyright. All trademarks and product names used or referred to are the copyright of their respective owners. No part of this document may be reproduced, stored in a retrieval system or transmitted in any form or by any means, electronic, mechanical, chemical, photocopy, recording or otherwise without the prior written permission of SafeNet, Inc.
Disclaimer
SafeNet makes no representations or warranties with respect to the contents of this document and specifically disclaims any implied warranties of merchantability or fitness for any particular purpose. Furthermore, SafeNet reserves the right to revise this publication and to make changes from time to time in the content hereof without the obligation upon SafeNet to notify any person or organization of any such revisions or changes.
We have attempted to make these documents complete, accurate, and useful, but we cannot guarantee them to be perfect. When we discover errors or omissions, or they are brought to our attention, we endeavor to correct them in succeeding releases of the product.
SafeNet invites constructive comments on the contents of this document. Send your comments, together with your personal and/or company details to the address below.
Contact Method Contact Information
Mail SafeNet, Inc.
4690 Millennium Drive Belcamp, Maryland 21017 USA
CONTENTS
PREFACE
About the Appliance Administration Guide
11
Customer Release Notes 11
Audience 11
Document Conventions 11
Notes 11
Cautions 12
Warnings 12
Command syntax and typeface conventions 12
Support Contacts 13
CHAPTER 1
Overview
14
The HSM Card 15
PED 15
iKeys 16
Device Configuration Overview 18
CHAPTER 1
The KeySecure Management Interfaces
21
Using the Management Console 21
Security Lockouts 23
CHAPTER 2
Cryptographic Key Servers
24
NAE-XML Protocol 24
KMIP 24
Authentication Overview 25
Authentication Options 25
Key Access and Ownership 25
Configure the User Directory Settings 26
Configure the User Account Lockout Settings 26
Manage the NAE-XML Server 27
Add a KMIP Server 30
Creating a Certificate Request for an Asymmetric Key Pair 36
CHAPTER 3
Health Check
38
Enable Health Check 38
CHAPTER 4
KeySecure Clustering
40
Creating a Cluster 42
Configuring the Replication Settings 42
Joining a Cluster 43
Synchronizing With a Cluster Member 45
Removing an Invalid Device from a Cluster 46
Upgrading a Cluster 47
Deleting a Cluster 47
Retry Key Replication across a Cluster 47
CHAPTER 5
Date, Time and NTP
49
Setting the Date and Time on the KeySecure 49
Configuring an NTP Server Connection 50
Manually Synchronizing with an NTP Server 50
CHAPTER 6
Network Configuration
51
Configure Network Interfaces 51
Changing an Existing IP Address 52
Changing the IP Address on an Existing SSKM VM 52
Configure VLAN Tagged Interfaces 52
Configure the Default Gateway 54
Configure a Static Route 55
Set the Hostname 56
Configure DNS Server 56
Configure Network Interface Port Speed/Duplex 57
Configure the IP Authorization Feature 58
Network Diagnostics 59
Ping a Hostname or IP 59
Run Traceroute 60
Check DNS for a Hostname or IP 60
Run Netstat 60
CHAPTER 7
High Availability
62
Configure High Availability 62
CHAPTER 8
SNMP
65
Configuring SNMPv1/v2 on the KeySecure 66
Configuring SNMPv3 on the KeySecure 68
Enterprise MIB Overview 71
CHAPTER 9
Administrator Configuration
73
Using Multiple Administrator Accounts 73
High Access Administrators 73
The Default Administrator 74
Local and LDAP Administrators 74
Local Administrators 74
Creating a Local Administrator 74
Deleting a Local Administrator 77
CHAPTER 10
LDAP Administrator
78
Setting up the LDAP Administrator Server 78
Creating an LDAP Administrator 81
LDAP Server 83
Setting up the LDAP User Server 83
LDAP Users & Groups 85
View LDAP Users 86
View LDAP Groups 86
View LDAP Group Members 86
CHAPTER 11
Password Management
88
Password Expiration 88
Password History 88
Changing Your Password 89
Configuring Password Settings for Local Administrators 89
CHAPTER 12
Multiple Credentials
91
Operations Requiring Multiple Authentication 91
Multiple Credentials in Clusters 91
Granting Credentials 92
Configuring the Multiple Credentials Feature 93
View and Revoke Granted Credentials 94
CHAPTER 13
Remote Administrator
96
Managing the Remote Administration Settings 96
Enabling the Web Admin User Authentication Feature 97
Generating a Client Certificate Request with req.exe 98
Signing a Certificate Request and Downloading the Certificate 98
Converting a Certificate from PEM to PKCS12 Format 99
Importing a Certificate to a Web Browser 99
Enabling Web Admin User Authentication on the KeySecure 100
Recreating the Web Cert 100
Recreating the SSH Key 100
CHAPTER 14
Logging
101
Log Rotation 101
Log Archives 102
Log Transfer 102
Log File Naming Convention 102
Syslog 103
Syslog Message Format 103
Secure Logs 104
Configure Log Rotation 104
Enable Syslog 105
Enable Signed Logs 106
Verify a Secure Log Using Microsoft Outlook 107
Verify a Secure Log Using OpenSSL 108
Log Viewer 109
System Logs 109
Audit Logs 109
Client Event Logs 110
SQL Logs 111
Database Encryption Logs 111
ProtectFile Client Logs 111
ProtectFile Manager Logs 112
View Logs 112
Rotate Logs 113
Clear Logs 114
Download Logs 114
CHAPTER 15
Statistics
115
View System Statistics 115
View Connection Statistics 116
View Throughput Statistics 117
View License Usage 118
View NAE-XML Statistics 118
View KMIP Statistics 120
CHAPTER 16
Backup and Restore
122
Permission Requirements 122
Creating a Backup 122
Schedule an Automated Remote Backup 126
Restoring a Backup 127
View the List of Internal Backups 130
Backup/Restore Compatibility 130
Backup and Restore in a Clustered Environment 131
CHAPTER 17
Service Management
132
Start, Stop, or Restart Services 132
Launch a Service at System Startup 132
Restart the KeySecure 133
Halt the KeySecure 133
CHAPTER 18
Upgrade
135
View Device Information 135
View License Information 135
View the Feature Activation List 136
Install Software Licenses 136
Upgrade Software 137
Roll Back Software 138
CHAPTER 18
The Crypto License Pack
140
Installing the Crypto License Pack 140
CHAPTER 19
System Health
141
Set Refresh Page Time 141
View Power Supply Status 141
View RAID Status 142
Recovery 143
SNMP Traps Associated with RAID 143
Adding a Disk 144
Removing a Disk 144
CHAPTER 20
Key Management
146
Key Ownership 146
Accessing Keys During Authenticated and Global Sessions 146
Versioned Keys 147
Create a Key 147
Set the Maximum Number of Key Versions 151
Create and Manage Key Versions 152
Create a Key Template 153
Manage Key and Certificate Life Cycle States 156
Edit the State and Associated Dates for a Key or Certificate 157
Importing a Key 158
Downloading an RSA Key 159
Deleting a Key 160
Delete Multiple Keys 160
Create a Key Query 161
Clone a Key 163
Application Specific Information 164
To view or edit Application Specific Information 164
CHAPTER 21
HSM Configuration
165
View HSM Status 165
Configure the Remote PED 166
Activating the HSM Card 169
Secure Key Caching 170
Secure Key Caching CLI Commands 171
Duplicating iKeys 171
HSM Partition Configuration 173
Registering HSM Partitions 173
CHAPTER 22
AWS CloudHSM
175
Setting Up CloudHSM 175
Setting Up CloudHSM 176
Registering CloudHSM with Virtual KeySecure 176
Checking Whether CloudHSM is Registered 177
Registering CloudHSM 177
Registering Virtual KeySecure with CloudHSM 178
Viewing Registered Clients 178
Viewing Registered Client Details 178
Viewing Partitions 179
Registering Virtual KeySecure 179
Verifying Virtual KeySecure Registration with CloudHSM 179
Logging Out from CloudHSM Partition as Crypto User from Virtual KeySecure 181
Unregistering CloudHSM from Virtual KeySecure 182
CHAPTER 23
Authorization Policies
183
Creating an Authorization Policy 184
Deleting an Authorization Policy 185
CHAPTER 24
Local Users and Groups
186
Create a Local User 186
Creating a Local Group 188
Removing a User from a Group 188
Deleting a User 189
Deleting a Group 189
CHAPTER 25
Certificates
190
Creating a Server Certificate for the KeySecure 190
Creating a Client Certificate 194
Installing a Certificate Chain 197
Create a Certificate Query 197
Downloading a Certificate 199
Import a Certificate 199
Import a Certificate as a Managed Object 200
Create a Certificate Request for an Asymmetric Key Pair 201
CHAPTER 26
Certificate Authorities
202
Manage the Trusted CA List 202
View and Download a Local CA 203
Create a Local Certificate Authority 205
Create an Intermediate CA Request 206
Install a CA Certificate 207
CHAPTER 27
Certificate Revocation Lists
209
Local CAs 209
Auto-Update 209
Force Periodic Update 210
CHAPTER 28
Certificate Management over KMIP
211
Certificate Ownership 212
Import a Certificate 212
Setting or Modifying Certificate Attributes 213
Set Permissions for a Certificate 214
Download a Certificate 214
Delete a Certificate 215
Delete Multiple Certificates 215
Create a Certificate Query 216
CHAPTER 29
High Security Features
218
FIPS Compliance 218
KeySecure Settings Required for FIPS Compliance 218
Configuring the KeySecure for FIPS Compliance 220
Configuring the High Security Settings on a KeySecure 221
CHAPTER 30
FIPS Status Server
224
Enabling the FIPS Status Server 225
Viewing the FIPS Status Report 225
CHAPTER 31
SSL
228
Enabling SSL Protocols and Session Key Timeout 229
Managing the SSL Cipher Order 231
APPENDIX A
Default Ports for KeySecure Features
233
Inbound and Inbound/Outbound Ports 233
Outbound Ports 233
Management Console Navigation 234
APPENDIX B
Supported Key Algorithms
236
Encryption and Decryption with Symmetric Keys 236
Encryption and Decryption with Asymmetric Keys 238
Message Authentication Codes (MACs) 239
Digital Signatures 240 Supported Algorithms 241 AES 241 ARIA 242 DES 242 DESede 243 HMAC-SHA1 244 HMAC-SHA256 244 HMAC-SHA384 245 HMAC-SHA512 245 RC4 245 RSA 245 SEED 246 246
APPENDIX C
Hardware Specifications
247
KeySecure 460 Attributes 247
APPENDIX D
Regulatory and Certification Statements
251
VCCI Class A Statement 251
APPENDIX E
Notices, Warnings, and Certifications
253
Notices and Warnings 253
Hinweise, Warnungen und Zertifizierungen 254
通 知 、警 告 、認 定 259
알 림,경 고 및 인 증 260
APPENDIX F
OASIS KMIP Support
262
KMIP Managed Object Support 262
KMIP Attribute Support 262
PREFACE About the Appliance Administration Guide
PREFACE
About the Appliance Administration Guide
This document describes the operational and administrative tasks you can perform to maintain the functionality and efficiency of your KeySecure appliance.
This preface includes the following information about this document:
- "Customer Release Notes" on page 11
- "Audience" on page 11
- "Document Conventions" on page 11
- "Support Contacts" on page 13
For information regarding the document status and revision history, see"Document Information" on page 2.
Customer Release Notes
The customer release notes (CRN) provide important information about this release that is not included in the customer documentation. Read the CRN to fully understand the capabilities, limitations, and known issues for this release. You can view or download the latest version of the CRN for this release at the following location:
- 8.0.0 CRN Service Portal
Audience
This document is intended for personnel responsible for maintaining your organization's security infrastructure. This includes users, security officers, key manager administrators, and network administrators.
All products manufactured and distributed by SafeNet, Inc. are designed to be installed, operated, and maintained by personnel who have the knowledge, training, and qualifications required to safely perform the tasks assigned to them. The information, processes, and procedures contained in this document are intended for use by trained and qualified personnel only.
It is assumed that the users of this document are proficient with security concepts.
Document Conventions
This document uses standard conventions for describing the user interface and for alerting you to important information.
Notes
PREFACE About the Appliance Administration Guide
Note: Take note. Contains important or helpful information.
Cautions
Cautions are used to alert you to important information that may help prevent unexpected results or data loss. They use the following format:
CAUTION: Exercise caution. Contains important information that may help prevent unexpected results or data loss.
Warnings
Warnings are used to alert you to the potential for catastrophic data loss or personal injury. They use the following format:
WARNING! Be extremely careful and obey all safety and security measures. In this situation you might do something that could result in catastrophic data loss or personal injury.
Command syntax and typeface conventions
Format Convention
bold The bold attribute is used to indicate the following: - Command-line commands and options (Type dir /p.) - Button names (Click Save As.)
- Check box and radio button names (Select the Print Duplex check box.) - Dialog box titles (On the Protect Document dialog box, click Yes.) - Field names (User Name: Enter the name of the user.)
- Menu names (On the File menu, click Save.) (Click Menu > Go To > Folders.) - User input (In the Date box, type April 1.)
italics In type, the italic attribute is used for emphasis or to indicate a related document. (See the Installation Guidefor more information.)
<variable> In command descriptions, angle brackets represent variables. You must substitute a value for command line arguments that are enclosed in angle brackets.
[optional] [<optional>]
Represent optionalkeywordsor <variables> in a command line description. Optionally enter the keyword or <variable> that is enclosed in square brackets, if it is necessary or desirable to complete the task.
{a|b|c}
{<a>|<b>|<c>}
Represent required alternatekeywordsor <variables> in a command line description. You must choose one command line argument enclosed within the braces. Choices are separated by vertical (OR) bars.
PREFACE About the Appliance Administration Guide
Format Convention [a|b|c]
[<a>|<b>|<c>]
Represent optional alternate keywords or variables in a command line description. Choose one command line argument enclosed within the braces, if desired. Choices are separated by vertical (OR) bars.
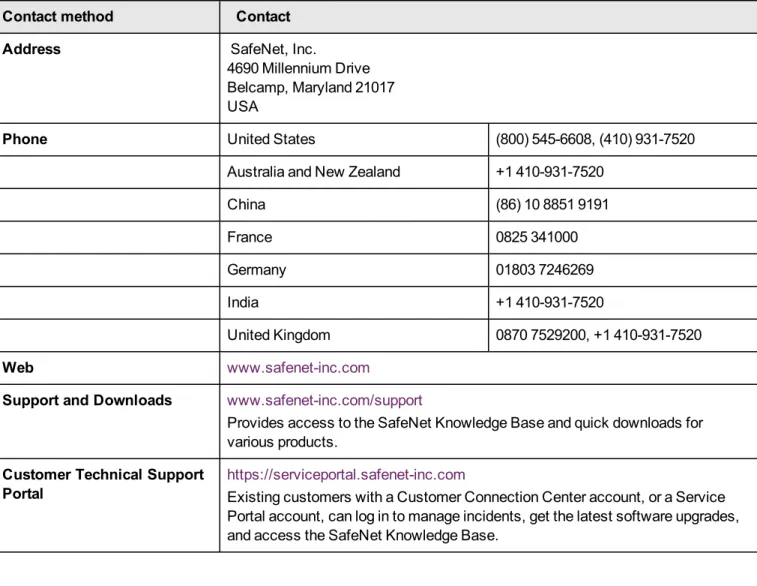
Support Contacts
If you encounter a problem while installing, registering or operating this product, please ensure that you have read the documentation. If you cannot resolve the issue, please contact your supplier or SafeNet support. SafeNet support operates 24 hours a day, 7 days a week. Your level of access to this service is governed by the support plan arrangements made between SafeNet and your organization. Please consult this support plan for further information about your entitlements, including the hours when telephone support is available to you.
Contact method Contact
Address SafeNet, Inc.
4690 Millennium Drive Belcamp, Maryland 21017 USA
Phone United States (800) 545-6608, (410) 931-7520
Australia and New Zealand +1 410-931-7520
China (86) 10 8851 9191 France 0825 341000 Germany 01803 7246269 India +1 410-931-7520 United Kingdom 0870 7529200, +1 410-931-7520 Web www.safenet-inc.com
Support and Downloads www.safenet-inc.com/support
Provides access to the SafeNet Knowledge Base and quick downloads for various products.
Customer Technical Support Portal
https://serviceportal.safenet-inc.com
Existing customers with a Customer Connection Center account, or a Service Portal account, can log in to manage incidents, get the latest software upgrades, and access the SafeNet Knowledge Base.
CHAPTER 1
Overview
By providing centralized management of keys, policies, and essential functions, KeySecure simplifies administration, helps ensure compliance, and maximizes security.
Key Management
KeySecure offers robust capabilities for managing cryptographic keys across their entire lifecycle, including key generation, key import and export, key rotation and much more. With KeySecure, all cryptographic keys are stored in a centralized, hardened appliance to simplify administration while ensuring tight security for the broadest array of data types.
High Performance
Even for large distributed enterprises that use multiple encryption solutions, keys can be centrally managed - without making any perceptible impact on system performance.
In addition, customers can deploy multiple KeySecure appliances in a clustered configuration with real-time replication of keys, policies, and configuration information across multiple appliances - enabling complete disaster recovery and business continuity.
Broad Flexibility
KeySecure offers key management capabilities that can be integrated with virtually any commercial encryption product. Supported technologies include:
- Luna SA HSM partitions and Luna PCI HSMs.
- Application encryption, either software or hardware based. - Database encryption, including native database encryption. - Laptop and device encryption.
- File and storage level encryption solutions.
SafeNet supports a wide range of open cryptographic standard interfaces, including PKCS #11, JCE, MSCAPI, and .NET. KeySecure also supports the Key Management Interoperability Protocol (KMIP). Further, customers and partners can take advantage of SafeNet's XML interface to develop their own custom software utilizing the enterprise key management functionality of KeySecure.
Robust Security
KeySecure offers a range of robust security features:
CHAPTER 1 Overview
- Granular authorization capabilities that enable constraints to be placed on user operations based on specific key permissions.
- Active alerting capabilities that inform administrators if attempts to breach protected data occur. - Secure key distribution through support of SSL.
- Secure storage of key encryption keys on a Luna HSM card.
The Crypto License Pack
With the additional Crypto License Pack, you can further enhance security with the ability to encrypt data. Enabling hardware-based encryption, the Crypto License Pack protects the broadest array of data types. The Crypto License Pack provides a unified platform with data encryption and administrative capabilities that can be applied to databases, applications, and individual files.
Along with data encryption, the Crypto License Pack expands logging, auditing, and reporting functionality by providing information on data encryption and decryption operations. A centralized mechanism increases security and helps you ensure compliance with industry mandates and government regulation.
To learn more about the Crypto License Pack and how to enable it, see"The Crypto License Pack" on page 140.
Supported Platforms
Version 8.0 of the KeySecure server is supported on the 460 platform, as well as virtual deployments available through VMWare and AWS CloudHSM. For the latest information about this release, please see the Customer Release Notes for version 8.0.
The HSM Card
The KeySecure now provides enhanced security by placing an Hardware Security Module (HSM) card at root of trust for the device.
With the K6 HSM card (and required configuration and administrative diligence), the KeySecure 460 key vaulting functionality complies with the FIPS 140-2 Level 3 standard.
The PED and iKeys are the only means of authenticating and permitting access to the administrative interface of the HSM. Accessing the keys on the HSM, required for the KeySecure to have any key management functionality, can only occur when an administrator has physical access to the black Crypto User iKey, knows the iKey PED PIN, and has access to a PED connected (either remotely or locally) to the HSM in the KeySecure.
As delivered, the HSM card has no partitions. The HSM is initialized as part of the KeySecure initialization. During this process, the Security Officer and Crypto User roles are defined and their corresponding iKeys are created. These roles and iKeys are explained below. At the conclusion of the initialization, the HSM card is activated and ready to create and manage keys at the end of that process.
In the event of a power outage, the HSM card is deactivated. To reactivate the HSM, a KeySecure administrator must run thehsm login crypto usercommand. If the power outage lasted longer than two hours, running that command will require that the Crypto User login. This means that the black Crypto User iKey must be inserted into the PED.
PED
CHAPTER 1 Overview
PEDs can be set to operate either inlocal mode, where they are connected directly to the HSM, or inremote mode, where they are connected to a properly configured client.
When running in local mode, the PED is powered by its connection to the HSM card. This is why no power cord is needed in this mode. The connection to the HSM card is direct; it bypasses other administrative controls, providing a very secure connection to the HSM. This connection cannot be monitored by any software on the KeySecure or any KeySecure client.
When running in remote mode, the PED must be plugged into a power source. Rather than connecting directly to the HSM, remote mode enables this PED to connect to a client, which in turn connects to the HSM. This allows for remote administration of the HSM, which may be desirable for large deployments.
Because PEDs do not contain any authentication information, they are interchangeable. Using the PED
As soon as the PED receives power from a connection to a powered appliance or to a power supply, the PED performs its start-up and self-test routines and then goes to local mode. The PED display shows "Awaiting command..." and the device is ready for use.
There are two things that you can do with the PED at this point:
- Wait for a prompt. This occurs during initialization, and when a program has caused the HSM to request authentication. Prompts typically direct you to enter an iKey, enter a PED PIN, or press the Yes, No, or Enter buttons on the keypad.
- Perform stand-alone PED operations. These operations include entering local or remote mode, and duplicating keys, updating PED software (very rare), and performing the PED self test. The PED self test checks the PED's keypad, USB port, and display screen.
The PED does not hold the HSM authentication secrets. The PED facilitates the communication of those secrets. The secrets are generated by the HSM during the initialization process. The secrets themselves reside, encrypted, on the portable iKeys. This means that an imprinted iKey can be used only with HSMs that share the particular secret, but PEDs are interchangeable.
There is no need for the PED to be constantly attached to the KeySecure. It must be attached only when the HSM requires authentication, such as HSM initialization and to log in after a prolonged power outage.
For large or geographically disperse deployments, we recommend using the PED in remote mode. To operate in remote mode, you must configure the orange Remote PED iKey, and have purchased the remote PED package, which
includes the necessary cabling and software. The PED can be used in remote mode for all actions except HSM initialization.
iKeys
An iKey is a small authentication device with a USB interface, electronically imprinted with identifying information generated by the HSM during initialization. This data is encrypted and stored on the iKey and recalled via the PED when the KeySecure administrator performs some action that requires HSM authentication; for example, when logging in as the crypto user to access keys.
The HSM initialization process creates three types of iKeys, each with distinct roles: the blue Security Officer iKey, the red Domain iKey, and the black Crypto User iKey. Each role is described below:
- TheSecurity Officeris responsible for administration of the HSM: initializing the HSM, creating partitions. The blue Security Officer iKey (sometimes referred to as the HSM Admin iKey) is needed to log in the Security Officer during the initialization process and will be required in the event of a firmware upgrade. An HSM can have only one Security Officer.
CHAPTER 1 Overview
- TheDomainis the shared identifier for a group of HSMs. An HSM can be a member of only one domain. There can be one or more HSMs in a domain. The red Domain iKey is needed to initialize the HSM and to create a partition, which both occur during the HSM initialization.
- TheCrypto Userowns the HSM partition that stores the keys used by the KeySecure. The Crypto User needs the black Crypto User iKey to log in. Log in is required to create and manage keys and certificates. If the Crypto User is not logged in, access to this information is denied and the KeySecure cannot perform its crucial functions.
Typically, you will log in the Crypto User once, at the end of the initialization process. The Crypto User will remain logged in until explicitly logged out, or may be logged out in the event of a power outage.
Note: When the Crypto User is logged out, all cluster operations will become disabled. The Device>Cluster>Cluster Configuration page will not indicate that cluster settings exist; it will appear empty. After the Crypto User is logged in again, it can take up to a minute to resume cluster activity. The following warning text should remain on the page until the Crypto User logs back in, and you have refreshed the page: "Crypto User is currently not logged in. All cluster operations are disabled. DO NOT attempt to recreate cluster. Please use CLI to log in the Crypto User." After the Crypto User logs back in, reloading the page will make this warning message go away.
The Crypto User has a password, in the form ofMxCT-c7F9-HHX5-YtH3, which is generated by the HSM and entered into the KeySecure CLI during initialization. Normally, you will not need to enter the password again unless you re-initialize the HSM or you reset the password using thehsm set passwordcommand.
All three of the iKeys are created and used during the HSM initialization. Afterward, the black Crypto User key will be the most used.
The orangeRemote PED iKeyis required to use the PED in remote mode, which is available to customers who have purchased the remote PED package. The iKey is needed to initialize the remote PED (at the KeySecure) and then to use the PED remotely (at the client machine). The orange iKey is configured after completing the initialization. Using the iKeys
The set of iKeys included with the KeySecure contains ten USB-token PED keys along with colored peel-and-stick labels used for identification. The iKeys are completely interchangeable before you print and label them.
At a minimum you have one each of: - blue HSM Admin iKey
- red Domain iKey - black User iKey
How you choose to use the iKeys can be straightforward (one of each listed above, plus one set of backups) or complex (for example, one red Domain iKey shared by multiple HSMs, employing M of N for the black User iKey). Plan ahead, keeping in mind your organization's own security policies.
For purposes of backup redundancy, you would normally have at least one other full set of imprinted iKeys for keeping in safe storage. You can create duplicates during the initialization process, or at anytime afterwards using the PED. We recommend creating duplicates as a separate process, done after initializing the HSM. This reduces the number of keys that you handle during the initialization and lessens the chance that you accidentally overwrite an iKey.
Each iKey has its own PIN that is needed to access the secret encrypted on the iKey. A PED PIN is a sequence of 4 to 48 digits that you enter at the PED keypad. The PIN is combined with the secret on the iKey and the combined blob is sent to the HSM.
CHAPTER 1 Overview
If, for example, you are initializing an HSM and not re-using any existing secret on the iKey that you present or if the iKey is blank, then during the process, the PED prompts:
Enter new PED PIN
To impose a PED PIN, enter the PIN when prompted during the iKey configuration process. Thereafter, whenever you present that iKey, you will be prompted to enter the PED PIN. The PED uses the PIN to "unlock" the actual
authentication secret, which is then sent to the HSM. Entering the wrong PIN is equivalent to presenting the wrong iKey - it is counted as a "bad password" attempt on the HSM.
Summary of iKey Use
Function Blue HSM Admin iKey Black User iKey Red Domain iKey Orange Remote iKey Initialize the HSM hsm initializecommand Required
Create the HSM partition
hsm create partitioncommand
Required Required
Log in the Security Officer
hsm login security officercommand
Required
Log in the Crypto User
hsm login crypto usercommand
Required
Initialize the remote PED (at the KeySecure) hsm remote ped initcommand
Required
Connect to the remote PED (at the client)
hsm remote ped connectcommand
Required
The first four functions, initialize HSM, create partition, log in Security Officer and log in Crypto User are all performed as part of the KeySecure initialization. Once the device is initialized, you may occasionally need to log in the Crypto User, and you have the option of initializing and connecting the remote PED.
Device Configuration Overview
After you have unpacked, installed, and initialized the KeySecure as described in theKeySecure Quick Start Guide, you can configure the device.
The following chapters describe how to configure the features of the KeySecure:
- "Cryptographic Key Servers" on page 24- create cryptographic key servers that accept client requests from clients using the NAE-XML protocol. You can set the IP, port, and authentication process (e.g., use of SSL) for each server you configure.
- "Health Check" on page 38- enables client applications to check the availability of the key server by sending the key server an HTTP request.
- "HSM Configuration" on page 165- enables a SafeNet hardware security module (HSM) to store the encryption keys used to create keys and certificates on the KeySecure. You must initialize the HSM card as part of the KeySecure installation process.
- "AWS CloudHSM" on page 175- enables a cloud HSM to store the encryption keys used to create keys and certificates on the Virtual KeySecure.
- "KeySecure Clustering" on page 40- enables multiple KeySecures to share configuration settings. Any changes made to these values on one cluster member are replicated to all members within the same cluster. This enables
CHAPTER 1 Overview
you to immediately share configuration changes with other Key Servers, and improves the failover capabilities of a high availability configuration.
- "Date, Time and NTP" on page 49- set the system date and time, and configure NTP servers.
- "Network Configuration" on page 51- enables you to configure the KeySecure network interface list and create VLAN tagged interfaces.
- "Configure the Default Gateway" on page 54- enables you to configure the default gateway list, select the interface to use for outgoing connections, and configure a static route list.
- "Set the Hostname" on page 56- set the KeySecure hostname and connect to any DNS servers in your network. - "Configure Network Interface Port Speed/Duplex" on page 57- enables you to configure the port speed and
duplex for the KeySecure network interfaces.
- "High Availability" on page 62- enable and configure the high availability feature.
- specify which IP addresses are permitted to connect to the KeySecure and which services those IP addresses may access.
- "SNMP" on page 65- enable monitoring of the KeySecure via SNMP.
- "Administrator Configuration" on page 73- create and manage local administrator accounts. - "LDAP Administrator " on page 78- enable and configure LDAP administrator accounts.
- "Password Management" on page 88- create password policies for all passwords used by the KeySecure: local administrators, local users, KeySecure clusters, and backups.
- "Multiple Credentials" on page 91- stipulate that some administrative and key management operations require authorization from more than one administrator.
- "Remote Administrator" on page 96- determine the IP addresses, ports, and certificates used for remote KeySecure administration via the Management Console and Command Line Interface.
The KeySecure provides logs and statistics that enable you to monitor system health and performance. The following chapters describe how to configure system logs and view system and server statistics.
- "Logging" on page 101- schedule log rotations, configure archiving details, transfer logs to an external device, and configure syslog.
- " Log Viewer" on page 109- view log files stored on the KeySecure. - "Statistics" on page 115- view system and server statistics.
Regular maintenance of the KeySecure involves creating backups of the device configuration. You can also stop and restart services, upgrade software, install licenses, monitor system health, and diagnose network connectivity issues. The following chapters describe how to perform regular device maintenance.
- "Backup and Restore" on page 122- create and restore backups of system configuration.
- "Service Management" on page 132- start and stop the key servers, web administration service, SSH
administration service, and SNMP agent, restart those services, enable those services to launch at system startup, restart the KeySecure, and halt the KeySecure.
- "Upgrade" on page 135- upgrade software, upload licenses, and examine information about the KeySecure device, including Box ID and current software version.
- "System Health" on page 141- view the status of the KeySecure power supply, cooling fan and disks, and prepare for the removal of disk from the RAID.
CHAPTER 1 Overview
- "Network Diagnostics" on page 59- test the KeySecure network connectivity by running ping, traceroute, host, or netstat commands
The following chapters explain how to manage keys, users, certificates, and the KeySecure advanced security features:
- "Key Management" on page 146- create keys, create and manage versioned keys, import keys, download the public portion of RSA keys, delete keys, create key queries, and clone keys.
- "Authorization Policies" on page 183- create and delete authorization policies.
- "Local Users and Groups" on page 186- create a local user, create a local group, remove a user from a group, delete a user, and delete a group.
- "LDAP Administrator " on page 78- set up the LDAP user server. - "LDAP Users & Groups" on page 85- view LDAP users and groups.
- "Certificates" on page 190- create a server certificate for the KeySecure, create a client certificate, download a certificate, and import a certificate.
- "Certificate Authorities" on page 202- manage the trusted CA list, view and download a local CA, create a local certificate authority, create an intermediate CA request, and install a CA certificate.
- "Certificate Revocation Lists" on page 209- download and update certificate revocation lists. - "Certificate Management over KMIP" on page 211- manage certificates for KMIP operations.
- "High Security Features" on page 218- configure the device for FIPS compliance, configure high security settings for the device, including disabling the use of FTP (for non-FIPS compliant hardware), and configure the device for Common Criteria compliance.
- "FIPS Status Server" on page 224- enable the FIPS status server and view the FIPS status report.
CHAPTER 1
The KeySecure Management Interfaces
Once you have completed the initial configuration of the KeySecure, described in theKeySecure Quick Start Guide, log in to either of the following management interfaces using a valid administrator account.
- Management Console- The management console is a graphic user interface that enables you to perform remote administration using a web browser.
The web browser used to connect to the Management Console must be capable of high-grade 128-bit encryption. To access all functionality of the Management Console, enable javascript on the browser.
- Command Line Interface- The command line interface (CLI) enables you to perform administrative functions either at the KeySecure serial console or remotely using SSH.
The serial console must use a terminal emulation program, such as HyperTerminal. Remote CLI administration requires a terminal emulation program that supports SSH (PuTTY, for example). The SSH client should connect to the IP address defined in the initialization process.
For more information about the command line interface, see theKeySecure CLI Reference Guide.
If you attempt unsuccessfully to log in to a user account five consecutive times, that account is locked out immediately for a period of one minute. If SNMP traps are enabled and the SNMP service is running, a trap is sent to the appropriate SNMP Management Station.
Using the Management Console
To log in to the management console
1. Type the following URL, using the IP address and port you set during the initialization process: https://IP-address:9443 (assuming that 9443 is the port you set up).
When connecting to the Management Console for the first time, your browser might display a certificate error notice. To avoid this message in the future, instruct the browser to accept the certificate for all sessions.
2. Enter aUsername. When logging in for the first time, use the default usernameadmin. You can create other administrator accounts using the Administrator Configuration page. This is described in"Administrator
Configuration" on page 73.
3. Enter thePassword. When logging in for the first time, this is the password you created during initialization. Do not lose this password.
CHAPTER 1 The KeySecure Management Interfaces
- Security Summary- This section displays security-related information about your KeySecure.
Click the High Security page link to access the High Security page. You can enable FIPS compliance from there. You can select theDo not show this message againcheckbox and clickSubmitto remove the Security
Summary section from the Home page. Once you remove the Security Summary section from the Home page, you cannot restore that section.
- System Summary- This section displays system information about the KeySecure.
This section contains the following fields:
Product- the product's model name (for example, SafeNet 460).
Box ID- the device's identification code. You will need this ID if you ever contact our customer support department.
Software Version- version of the software currently running on the device. Date- current system date.
Time- current system time.
Time Zone- current system time zone.
System Uptime- length of time that the system has been running since the last boot. Application Server Licenses- number of application server licenses currently in use. Database Server Licenses- number of database server licenses currently in use. Transform Utility Licenses- number of transform utility licenses currently in use. Licenses in Use- total number of licenses in use.
CHAPTER 1 The KeySecure Management Interfaces
contains a record of all configuration changes and user input errors made to the KeySecure, whether through the Management Console or the CLI. ClickView Complete Audit Logto view the entire log file.
Security Lockouts
If you enter the password incorrectly five consecutive times when logging in to a user account over an Ethernet connection, web and SSH access for that account are locked out immediately.
CAUTION: Once access has been locked, the lock remains in place for 30 minutes from the last attempt during the lockout period.
This means that even if you attempt to log in with the correct account name and password during the lockout period, the lock is extended. Any log in attempt during the lockout period resets the lockout period and extends it for another 30 minutes.
The other features of security lockouts are listed below.
- A lockout originating on a Web Admin session also applies to SSH access to the CLI. - A lockout originating over SSH access to the CLI also applies to web access.
- A lockout originating on the Web Admin interface (https) or SSH interface does not apply to direct serial console access. A user who is locked out on the web or SSH could still log in to the console with the correct password. - A lockout originating on the serial console has an independent start from Ethernet log ins, but follows a scheme
similar to the web log ins allowing four consecutive bad entries and locking the session on the fifth. A lockout originating on the serial console affects neither the ability to log in through the web admin interface nor the SSH, but remains in place for 30 minutes on the admin console only.
- If SNMP traps are enabled and the SNMP service is running, a trap is sent to the appropriate SNMP Management Station.
CHAPTER 2 Cryptographic Key Servers
CHAPTER 2
Cryptographic Key Servers
On the KeySecure, you can create Cryptographic Key Servers that accept key management requests from KMIP or NAE-XML clients.You can set the IP, port, and authentication process (for example, use of SSL) for each server you configure. One such server is included by default, you can edit this configuration or make additional servers as needed.
NAE-XML Protocol
The Network-Attached Encryption - XML (NAE-XML) protocol allows you to remotely generate and manage keys. In Crypto License Pack enabled devices, the NAE-XML protocol is used to off-load cryptographic operations from clients to the KeySecure. KeySecure clients, such as application servers running App and databases running Protect-DB, send cryptographic requests via the NAE-XML protocol. KeySecures with Crypto License Pack are capable of performing asymmetric and symmetric encryption and decryption, MAC and MAC verification, keyed hashes, digital signatures and verifications, and random number generation.
For more information about connecting to the KeySecure using this interface, see theXML Development Guide.For information about specific client software, see the appropriate ProtectDB or ProtectApp user guide for your product.
KMIP
The Key Management Interoperability Protocol (KMIP) is used to transmit key management requests from clients to the KeySecure. Clients are able to submit the following requests.
- Activate - AddAttribute - Create - CreateKeyPair - DeleteAttribute - Destroy - Get - GetAttributes - GetAttributeList - Locate - ModifyAttribute - Query - Register - Revoke
CHAPTER 2 Cryptographic Key Servers
The KeySecure currently supports the following managed objects: certificates, private keys, public keys, templates, secret data, and symmetric keys. For more information about the KeySecure implementation of KMIP, seeAppendix F, "OASIS KMIP Support."
Authentication Overview
The communication between the key server and the client varies slightly, depending on whether your protocol configuration requires users to authenticate. If you decide not to authenticate, then users have access only to global keys. Global keys are keys that are available to everyone, with no authentication required.
If you want to require authentication, then you must create keys for each user or group of users. An authenticated user has access to all global keys, all the keys owned by the user, and all keys accessible to groups to which that user belongs. In addition, a group of users can have an authorization policy assigned to it, which restricts the use of the keys accessible by that group to certain time periods or a certain number of operations per hour.
Authentication Options
The key server provides many options with respect to security and authentication, for each protocol. You can:
- Mandate SSLby selectingUse SSL- You can choose between SSL connections and standard TCP connections; SSL connections are more secure since all data exchanged between client and server is encrypted.
- Allow global sessionsby disablingPassword AuthenticationandClient Certificate Authentication for SSL session and username- You can allow clients to access and create global keys without providing a valid username and password to the key server. This does not offer a high level of security.
- Disable global sessionsby enablingPassword Authenticationand/or enablingClient Certificate
Authentication- You can disable global sessions altogether, which requires all users to provide either a valid username and password combination, or a client certificate signed by a CA trusted by the key server.
- Require client certificatesby enablingClient Certificate Authentication- You can require that clients present a client certificate in order to establish SSL connections. This client certificate can be the sole means of
authenticating to the key server, or it can be used in tandem with a username and password combination. - Enforce strong, two-factor authenticationby enablingClient Certificate Authenticationand configuring the
Username Field in Client Certificatefield - You can enhanceClient Certificate Authenticationby having the key server derive the username from the certificate; that username is then compared against the username provided in the authentication request. If the usernames match and the password provided is correct, then the user is authenticated. This may be combined with the IP address requirement.
- Require the client IP address in the certificateby enablingRequire Client Certificate to Contain Source IP -You can require that the client certificate contain the client's IP address in the certificate's subjectAltName field. The key server compares that value with the source IP address of the authentication request. If the IPs match, then the user is authenticated. This may be combined with the two-factor authentication option described above.
We recommend that you enforce the most stringent security policy supported by the key server. Such a security policy mandates SSL, disallows global sessions, enforces strong, two-factor authentication and requires that the client certificate contain the client IP address.
Key Access and Ownership
Keys can be created as global or owned by a particular user (keys are not owned by administrators). When you give group access permission for a key, all the users in that group can use that particular key (after authenticating to the
CHAPTER 2 Cryptographic Key Servers
When the client requests that the server generate a new key, the client can specify that the key should be exportable and/or deletable. An exportable key is a key that a client can export from the server. Once a key is generated as exportable, it can be exported only by the owner and any members of a group with the "Export" permission for that key. A deletable key is a key that the client can delete from the server. Once a key is generated as deletable, only the owner of the key can delete the key.
CAUTION: Administrators with Keys and Authorization Policies access control can delete any key regardless of whether it is marked as deletable.
Clients that do not authenticate can only see global keys, which are accessible to all users. Likewise, any keys that the client generates during an unauthenticated connection are global keys. If a global key is marked as exportable or deletable during generation, then all users have permission to export or delete that key.
Configure the User Directory Settings
The User Directory Settings section determines if the KeySecure will employ a local or LDAP user directory when authenticating client requests. To use an LDAP directory, you must select LDAP here, and also configure the LDAP settings on the LDAP Server Configuration page (Security>>LDAP>>LDAP Server)
To configure the user directory settings
1. Log in to the Management Console as an administrator with Key Server access control.
2. Navigate to the User Directory Settings section of the Cryptographic Key Server Configuration page (Device>>Key Server>>Key Server).
3. ClickEdit.
4. SelectLocalorLDAPin theUser Directoryfield. You can only choose one user directory at a time.
CAUTION: Selecting LDAP on a FIPS compliant device will take the device out of FIPS compliance - possibly in a manner that does not comply with FIPS standards. For information on disabling FIPS compliance, see "High Security Features" on page 218.
5. ClickSave. This change applies to all key servers.
Configure the User Account Lockout Settings
To configure the user account lockout settings
1. Log in to the Management Console as an administrator with Key Server access control.
2. Navigate to the User Account Lockout Settings section of the Cryptographic Key Server Configuration page (Device>>Key Server>>Key Server).
CHAPTER 2 Cryptographic Key Servers
3. ClickEdit.
4. SelectEnable Account Lockoutto prevent a user from logging in to the server for a given duration after a specified number of failed login attempts. When not enabled, users can make unlimited attempts to log in to an account.
5. Enter a value in theNumber of Failed Authentication Attempts Before Account Lockoutfield. After this number of failed attempts, the system temporarily forbids access to the account. After the last failed authentication attempt, the system ignores any subsequent login requests until the end of the account lockout duration, at which time the counter is reset.
6. Enter a value in theAccount Lockout Durationfield. This is the period of time during which the account is not available during lockout.
7. ClickSave.
Manage the NAE-XML Server
By default, the key server is pre-configured for the NAE-XML protocol, though you will need to change some settings to enable SSL, enable clients to create, delete, and import keys, manage users, and export keys.
To manage the NAE-XML server
1. Log in to the Management Console.2. Navigate to the Cryptographic Key Server page (Security>>Key Server).
CHAPTER 2 Cryptographic Key Servers
4. View the Cryptographic Key Server Properties. ClickEditto alter any values.
WARNING! Editing a Key Server setting in a production environment can compromise services from clustered servers, depending on cluster replication settings, and is not recommended. If you are considering such a change, contact SafeNet technical support for advice.
The available fields are:
- IP- IP address(es) on which the key server is enabled on the KeySecure. We strongly recommend that you select aspecificIP address rather than using[All]. If you have multiple IP addresses available, using a single address here enables the key server to listen for traffic on only one IP address. This can greatly reduce system vulnerability to outside attacks.
- Port- port on which the server is listening for client requests. The default port assignment is 9000 for NAE-XML.
- Use SSL- specify whether you want to require that clients connect to the key server using an SSL connection. If SSL is not enabled, the key server will not accept SSL connections.
- Server Certificate- required only when using SSL. The server certificate must be signed by a local CA. This certificate will be used to authenticate the key server to clients.
- Connection Timeout (sec)- specifies how long a client connect can remain idle before the key server begins closing them. The default value is 3600, which is also the maximum.
- Allow Key and Policy Configuration Operations- when enabled, the key server allows the following actions:
- key creation and deletion - key import
- users with User Administration Permission can create, delete, and modify users and groups (available only through the XML interface).
When this feature is disabled, only authentication and random number generation requests are available on standard KeySecure deployments. On KeySecures with Crypto License Pack, cryptographic, authentication, and random number generation requests are available.
Note: Allowing Key and Policy Configuration with the multiple credentials feature allows users (and unauthenticated sessions) to perform the actions listed without being subjected to the multiple credentials rules. This may pose a security loophole. You can allow this access for automated scripts, or you can disallow it to tighten security.
CAUTION: Enabling this feature on a FIPS compliant device will take the device out of FIPS compliance. For information on disabling FIPS compliance, see "High Security Features" on page 218.
CHAPTER 2 Cryptographic Key Servers
CAUTION: Enabling this feature on a FIPS compliant device will take the device out of FIPS compliance - possibly in a manner that does not comply with FIPS standards. For information on disabling FIPS compliance, see "High Security Features" on page 218.
5. View the Authentication Settings. ClickEditto alter any values.
The available fields are:
- Password Authentication- determines whether you require users to provide a username and password to access the key server. There are three options:
Not used- (default) password authentication is not allowed; all sessions are global unless Client Certificate Authentication is used for SSL session and username.
Optional- no password authentication is required; global sessions are allowed; all users can create and access global keys; only authenticated users can create and access non-global keys.
Required- password authentication is required; global sessions are not allowed;authenticated users can access both global and non-global keys, but can only create non-global keys.
- Client Certificate Authentication- there are three options:
Not used- (default) clients do not have to provide a client certificate to authenticate to the key server. All sessions are global unless password authentication is used.
Used for SSL session only- clients must provide a certificate signed by a CA trusted by the KeySecure in order to establish an SSL connection. When you select this option, you must also select a Trusted CA List Profile. Used for SSL session and username- clients must provide a certificate signed by a CA trusted by the KeySecure in order to establish an SSL connection, and a username is derived from the client certificate. The client certificate username is provided automatically whenever you provide the client certificate. The client certificate username is the sole means of authentication if password authentication is not used and the client does not provide a username and password. If the client does provide a username, the key server compares the client certificate username against the username in the authentication request. If the usernames match and the password is valid, the user is authenticated. If the usernames are not the same, the connection is closed immediately. When you select this option, you must also select a Trusted CA List Profile, and you must choose the field from which the username is derived.
- Trusted CA List Profile- select a profile to use to verify that client certificates are signed by a CA trusted by the KeySecure. This field is only used if you selectUsed for SSL session onlyorUsed for SSL session and usernameabove. As delivered, the default Trusted CA List profile contains no CAs. You must either add CAs to the default profile or create a new profile and populate is with at least one trusted CA before the key server can authenticate client certificates.
CHAPTER 2 Cryptographic Key Servers
ID),CN(Common Name),SN(Surname),E(Email address),E_ND(Email without domain), orOU (Organizational Unit) field.
If you selectE_ND, the key server matches against the data to the left of the @ symbol in the email address in the certificate request. For example, if the certificate request contains the email address [email protected], then the key server matches against User1.
- Require Client Certificate to Contain Source IP- determines if the key server expects that the client certificate presented by the client application has an IP address in the subjectAltName field. The key server obtains the IP address from the subjectAltName and compares that the source IP address of the client application; if the two IP addresses match, the key server authenticates the user. If the two IP addresses do not match, the key server closes the connection with the client.
Add a KMIP Server
Because the KMIP Interface operates over SSL, KMIP server configuration is done in three parts. First, you must configure a local Certificate Authority (CA) on the KeySecure. Second, you must create a server certificate signed by that local CA. Third, you must configure the KMIP server settings.
If there is already a local certificate authority on the KeySecure, you can skip to the second set of instructions. If there is already a server certificate, you can skip to the third set of instructions.
KMIP clients must provide certificates to connect to the KeySecure, which means the KeySecure must have access to signing CA to verify the certificate.
To create a local certificate authority:
1. Log in to the Management Console as an administrator with Certificate Authorities access control.
2. Navigate to the Create Local Certificate Authority section of the Certificate and CA Configuration page (Security>> Local CAs).
3. Enter theCertificate Authority Name,Common Name,Organization Name,Organizational Unit Name, Locality Name,State or Province Name,Country Name,Email Address, andKey Size.
CHAPTER 2 Cryptographic Key Servers
When you create a self-signed root CA, you must also specify a CA Certificate Duration and a Maximum User Certificate Duration, which become valid once you clickCreate. Once you create a self-signed root CA, you must add it to the trusted CA list for it to be recognized by the Key Server.
When you create an intermediate CA request, you must sign it with either an existing intermediate CA or your organization's root CA. Certificates signed by the intermediate CA can be verified by that same intermediate CA, by the root itself, or by any intermediate CAs that link the signing CA with the root. This enables you to de-centralize certificate signing and verification.
When creating an intermediate CA request, you must also specify a Maximum User Certificate Durationwhen installing the certificate response. This duration cannot be longer than the signing CA's duration.
5. ClickCreateto create the KeySecure local CA.
To create a server certificate, you must create a certificate request and sign it with the local CA:
1. Navigate to the Create Certificate Request section of the Certificate and CA Configuration page (Security>>SSLCertificates).
2. Enter theCertificate Name,Common Name,Organization Name,Organizational Unit Name,Locality Name,State or Province Name,Country Name,Email Address, andKey Sizefor the certificate. The KeySecure supports 768-bit, 1024-bit, and 2048-bit key sizes.
3. ClickCreate Certificate Request. The list shows the new request with a status ofRequest Pending.
CHAPTER 2 Cryptographic Key Servers
5. Copy the certificate request text. The certificate text looks similar to, but is NOT identical to, the following text. ---BEGIN CERTIFICATE
REQUEST--- MIIBmzCCAQQCAQAwWzEPMA0GA1UEAxMGZmxldGNoMQkwBwYDVQQKEwAxCTAHBgNVBAsTADEJM AcGA1UEBxMAMQkw- BwYDVQQIEwAxCzAJBgNVBAYTAlVTMQ8wDQYJKoZIhvcNAQkBFgAwgZ8wDQ YJKoZIhvcAYBABTUxxgY0AMIGJAoGBAMU- qA1t4m&Nm0sCcUqnt5Yug+qTSbgEFnvnYWUApHKD lx5keC1lguQDU1ol2Xcc3YGrUviGCe4y0JIMK2giQ5b+ABQDemR- iD11vInQqkhV6ngWBRD0lp KCjU6QXDEE9KGCKBRh5uqL70rr2LErqxUuYwOu50Tfn4T3tKb1HGgfdzAgMBAAGgADANB- gkqh kiG9w0BAQQFAAOBgQCuYnv8vBzXEZpgLD71FfeDK2Zqh0FnfTHXAkHrj4JP3MCMF5nKHgOSRV mImNHHy0c- YKTDP+hor68R76XhLVapKMqNuUHUYf7CTB5JNHHy0cYKTNHHy0cYKTuV1Ce8nvvU G+yp2Eh8aJ7thaua41xDFXPmIEX-TqzXi1++DCWAdWaysojPCZugY7jNWXmg==
---END CERTIFICATE
REQUEST---CAUTION: Be sure to include the first and last lines (---BEGIN CERTIFICATE REQUEST--- and REQUEST---REQUEST---END CERTIFICATE REQUESTREQUEST---REQUEST---), and enter only the text in the certificate. Do not copy any extra white space.
6. Navigate to the Local Certificate Authority List section (Security>>Local CAs). 7. Select a CA and clickSign Request.
CHAPTER 2 Cryptographic Key Servers
8. Paste the certificate request into theCertificate Requestfield.
9. SelectServeras theCertificate Purpose, specify aCertificate Durationand clickSign Request. The newly-activated certificate displays on a new page.
10. Copy the certificate text.
11. Navigate back to the Certificate List section. (Security>>SSL Certificates)
12. Select the certificate request and clickPropertiesto access the Certificate Request Information section. 13. ClickInstall Certificate.
CHAPTER 2 Cryptographic Key Servers
14. Paste the text of the signed certificate into theCertificate Responsefield.
15. ClickSave. When you return to the main Certificate Configuration page, the certificate request is now an active certificate. It can be used in to establish SSL connections with client applications.
To configure the KMIP server settings
1. Navigate to the Cryptographic Key Server Configuration page (Device>>Key Server).
2. ClickAddin the Cryptographic Key Server Settings section. 3. SelectKMIPforProtocol.
4. Select either[All]or a specific IP address forIP. 5. Select thePort. We recommend9002.
6. SelectUse SSL. SSL is required for KMIP.
7. Select aServer Certificatefrom the drop-down list. The certificate you just created should be available for selection.
CHAPTER 2 Cryptographic Key Servers
9. Select the KMIP radio button and clickProperties.
10. View the Cryptographic Key Server Properties. ClickEditto alter any values.
The available fields are:
- IP- IP address(es) on which the key server is enabled on the KeySecure. We strongly recommend that you select aspecificIP address rather than using[All]. If you have multiple IP addresses available, using a single address here enables the key server to listen for traffic on only one IP address. This can greatly reduce system vulnerability to outside attacks.
- Port- port on which the key server is listening for client requests. We recommend 9002 for KMIP. - Use SSL- required for KMIP.
- Server Certificate- must point to a server certificate signed by a local CA.
- Connection Timeout (sec)- specifies how long a client connect can remain idle before the key server closes the connection. The default value is 3600, which is also the maximum.
- Allow Key and Policy Configuration Operations- when enabled, the key server allows the following actions:
key creation and deletion key import
- Allow Key Export- when enabled, the key server allows key export. 11. View the Authentication Settings. ClickEditto alter any values.
CHAPTER 2 Cryptographic Key Servers
The available fields are:
- Password Authentication- This option is not currently supported.
- Client Certificate Authentication- You must enable this feature to comply with the KMIP standard. There are three options:
Not used- (default) client certificate authentication is not allowed.
Used for SSL session only- clients must provide a certificate signed by a CA trusted by the KeySecure in order to establish an SSL connection. When you select this option, you must also select a Trusted CA List Profile. Used for SSL session and username- clients must provide a certificate signed by a CA trusted by the KeySecure in order to establish an SSL connection; additionally, a username is derived from the client certificate and included in certificate requests. That username is the sole means of authentication if password authentication is optional and the client does not provide a username and password. If the client does provide a username, the key server compares the username derived from the certificate against the username in the authentication request. If the usernames match and the password is valid, the user is authenticated. If the usernames are not the same, the connection is closed immediately. When you select this option, you must also select a Trusted CA List Profile, and you must choose the field from which the username is derived. - Trusted CA List Profile- select a profile to use to verify that client certificates are signed by a CA trusted by
the KeySecure. This field is only used if you selectUsed for SSL session onlyorUsed for SSL session and usernameabove. As delivered, the default Trusted CA List profile contains no CAs. You must either add CAs to the default profile or create a new profile and populate is with at least one trusted CA before the key server can authenticate client certificates.
- Username Field in Client Certificate- specify the field from which to derive the username. This field is only used if you selectUsed for SSL session and usernameabove. The username can come from theUID(user ID),CN(Common Name),SN(Surname),E(Email address),E_ND(Email without domain), orOU (Organizational Unit) field.
- If you selectE_ND, the key server matches against the data to the left of the @ symbol in the email address in the certificate request. For example, if the certificate request contains the email address
[email protected], then the key server matches against User1.
- Require Client Certificate to Contain Source IP- determines if the key server expects that the client certificate presented by the client application has an IP address in the subjectAltName field. The key server obtains the IP address from the subjectAltName and compares that the source IP address of the client application; if the two IP addresses match, the key server authenticates the user. If the two IP addresses do not match, the key server closes the connection with the client.
Creating a Certificate Request for an Asymmetric Key Pair
Creating a certificate request for an asymmetric key pair is very similar to creating a server certificate. Navigate directly to the certificate creation page by navigating to Security >> Certificate Request.
CHAPTER 2 Cryptographic Key Servers
- Fill in all the fields and clickGenerate Certificate Request.
To edit the certificate, click on the certificate name in the list that is displayed above the certificate creation form. Upon creation of a Certificate Request, an asymmetric key pair is generated and stored in KeySecure server. The private key is protected by the Certificate Request Password entered from the UI. When the correct Certificate Request Password is provided, the key pair and Certificate Request can be downloaded as .gz file with the private key encrypted by the Certificate Request Password in PKCS8 format. The certificate requests can be deleted from the Management Console UI.
CHAPTER 3
Health Check
The Health Check feature enables client applications to check the availability of the KeySecure by sending the server an HTTP request. The Health Check feature listens for requests on a port that you specify in the Health Check section of the Cryptographic Key Server Configuration page. When a request is made to the KeySecure on the port that