860 INFORMATION PROCESSING SYSTEM REFERENCE MANUAL
HISTORY PAGE
This package contains supplement pages to be inserted in your 860 Information Processing System Reference Manual. To update your manual, insert this page as the first page in the manual, then remove and add new pages as instructed below.
MANUAL REORDER 119R80149
Part /I Master Disc
Manual Issue Date: 4/01/80 610P70533 WP-A3.000
Supplement Dates: 4/28/80 610P70538 WP-A4.000
7/21/80 610P70538 WP-B4.400
9/01/80 156P20800 WP-C5.000
GP-C2.000
1/05/81 156P20801 WP-E6.000
GP-E4.000
3/11/81 156P20802 WP-E6.000
GP-E4.000
9/15/81 156P20803 WP-H6.200
GP-H6.200
This supplement updates the manual with the following page changes:
SECTION: REMOVE
Keyboard & Display 1-4
Messages & Symbols 2-3,2-27 thru 2-30 Making Your Job Easier 3-16,3-2 8 ,3-3 7 "How-To" Glossary 4-6,4-17,4-18,4-31,
4-36 thru 4-38,4-52
Problem Solving 5-5,5-7
Index ii
ADD 1-4
2-3,2-27 thru 2-30 3-16,3-28, 3-37 4-6,4-17,4-18,4-31, 4-36 thru 4-38,4-52 5-5,5-7
ii
(cont.)
GENERIC PROGRAMS Section:
Table of Contents
& Introduction Alternating Headers
& Trailers
Document Assembly Forms Documents Multi-Line Headers Multi-Line Trailers Phrase Recall
Reformatting/Paginating Options Footnotes
Screen Math Table Math Equa tion Math
REMOVE iii,iv, viii
1-1 thru 1-4
3-8,3-9 6-4,6-5 8-1,8-2 9-1 thru 9-4 10-1 thru 10-4 11-1
n/a 1-13,1-14 2-1 3-19,3-20
ADD iii,i v, viii
1-1 thru 1-4
3-8,3-9 6-4,6-5 8-1,8-2 9-1 thru 9-4 10-1 thru 10-4 11-1
WHAT CHANGED
Keyboard &. Display - Information on the use of CODE + R VRSE +2 corrected.
Message &: Symbols - Corrected Action: for CHARACTER NOT ON PRINTWHEEL message and added System Error 03 lA WPP.
Making Your Job Easier - Information on trailer printing and the screen display of indexes corrected and typos (p.37) corrected.
"How-To" Glossary - Section has been updated with information on: adding pages in the middle of a document and message changes on creating a system disc. Corrections have been made in the "printing selected pages" and "deleting print list" sections and the description of the DISC DUPLICATE utility (p.52) has been revised. A reference to non-existent illustration (p.31) has been deleted.
Problem Solving - Added problem regarding lack of format block when adding a new page. Deleted problem regarding printing a code print document.
Index - Corrected page number for Index, reorder.
Generic Programs - You cannot use your old generic programs with the Word Processing E6.200 software.
Table of Contents/Introduction - Added entries for new Footnotes section.
Alternating Headers & Trailers - Corrections made in Limitations of the Program and Document Set-up sections and order of message sequence corrected.
Document Assembly - Edits made to Steps 4 and 7 (pp.8&9).
Forms Documents - Corrected documentation to reflect all prompts removed from screen before being prompted "one-at-a-time" in the Command Line.
Multi-Line Headers - Artwork corrected (pp.l&2).
Multi-Line Trailers - Artwork corrected (pp.l&2). Result for Steps 3 & 4 (pp.3&4) corrected and missing "TOUCH the RETURN key" added to Step 6 (p.4).
Phrase Recall - Corrected to reflect addition of new message regarding format blocks in your stored phrases.
Reformatting/Paginating Options - Corrected /ISS and /lSSN descriptions.
Footnotes - This new text section replaces documentation that had to be printed from your disc on the last release.
Screen Math - Replaced plus signs with equal signs in three TOTAL
=
messages and removed three unnecessary "TOUCH the ACCPT key" instructions.Table Math - Corrected documentation to reflect use of null code on mUlti-page statistical documents.
Equation Math - Corrected references to title of document being used in exercise.
iii 156P20803
XEROX
REFERENCE MANUAL
860 INFORMATION PROCESSING SYSTEM
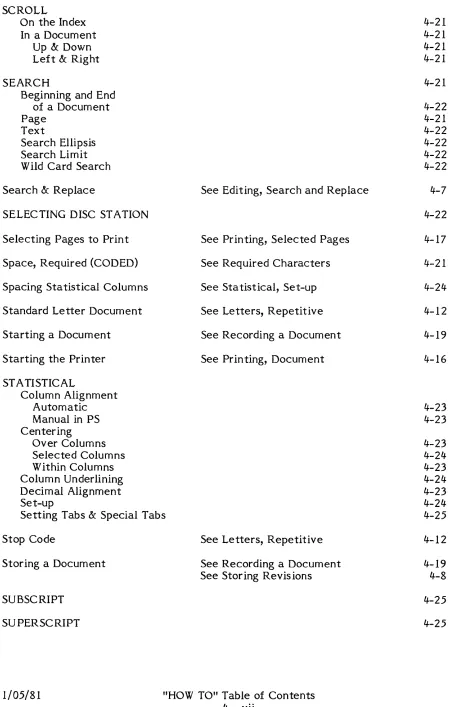
KEYBOARD and DISPLAY
Keyboard
The keyboard section describes how the special keys on your 860 work, under what circumstances they can be used, and what they're used for.
KEYBOARD WITH CAT KEYBOARD WITHOUT CAT
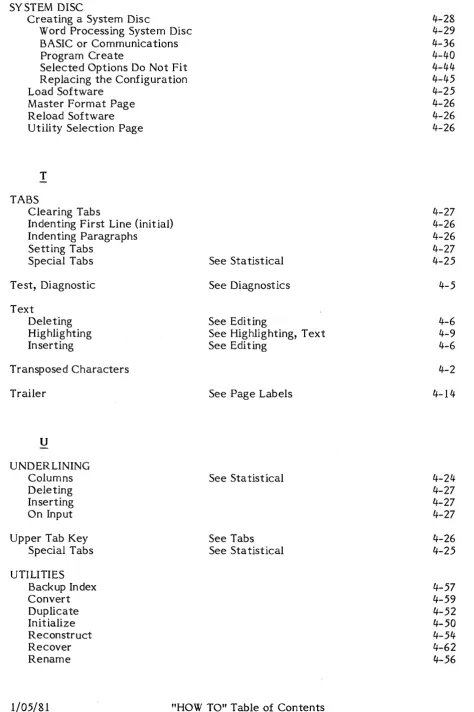
Display
The display section explains the different display pages you see on the 860 screen and how to use them.
Specific instructions on using the Partial Page display begin on page 20 of this section.
~~ ____ i _______ _
D-o - -
--l
1
FULL PAGE SCREEN
9/01/80
o
PARTIAL PAGE SCREENIn a document, the Index key moves text down from the line of typing Y4 line space. The Index key is also used to set the left margin on the Format Scale.
In a document, CODE + the Index key moves text up Y4 line space. CODE +
the Index key is also used to set the right margin on the Format Scale.
In a document, the upper tab key indents the first line of a paragraph (initial indent). The upper tab key is also used to set a special tab on the Format Scale.
In a statistical document, the upper tab key is used to tab to a column to cancel column alignment.
On the Format Page, the upper tab key is used to set special tabs for automatic alignment of statistical typing.
In a document, the lower tab key indents the entire paragraph (block indent). The lower tab key is also used to set a regular tab on the Format Scale.
In a document, on the Format Scale, the lower tab key is used to set special tabs for automatic alignment of statistical typing.
In a statistical document, the lower tab key is used to tab to columns for automatic alignment.
On the Format Page, the lower tab key is used to set regular tabs.
In a document, CODE + the hyphen key produces a dash which prevents the 860 from splitting the word between lines during reformat.
+
In a document, CODE + BACKSPACE backs up the printer one full space without erasing.
In a document, CODE + the return key always produces a required return.
In a document, CODE + the period key produces an abbreviation period that is not affected by reformatting.
In a document, CODE + the period key is used after the SEARCH key is touched to enter a search ellipsis ( •. ).
In a document, CODE + the comma key is used after the SEARCH key
is touched for a Wild Card search to find upper and/or lower case characters.
In a document, CODE + the space bar produces a required space.
In a document, when STD (standard) is selected as the KB/PW in the format, bracket and shift + bracket will display brackets on the screen but brackets will not print. The bracket key is used to access special characters on custom print wheels. The special characters are located on the upper-case period and the upper-upper-case comma spokes. Shift + bracket accesses upper-case period; bracket accesses upper-case comma.
When LEGAL is selected as the KB/PW in the format, and a Legal print wheel is used to print the document, bracket and shift + bracket will display brackets on the screen and brackets will print. You cannot access special characters on a custom print wheel when LEGAL is selected.
The numeric keys perform different functions when they are used with the CODE key. Within a document, they perform the functions described on the panel above the keys. On the Activity Page, they perform the functions described in the Instruction Blocks.
In a document, CODE + the 1 key right flushes text at the point the CODE + 1 is entered.
In a document, CODE + 2 enters a permanent page end code. CODE +
R VRSE + 2 is used to enter a temporary page end code in a search string.
On the Format Page, CODE + 2 entered in the HEADER or TRAILER line automatically numbers pages.
On the Activity Page, CODE + 2 returns the INDEX to the screen from the Print List.
In a document, a CODE + 3 causes the printer to stop.
In a variable document, CODE + 3 is used to separate the variable sets.
On the Activity Page, CODE + 3 brings the Print List to the screen.
In a statistical document, CODE + 5 centers headings over columns and centers numbers within a column.
In a document, CODE + 6 is used when typing documents that will use a program. It produces a non-printing code that has no weight in reformat.
In a document, CODE + 7 directs the 860 to switch between the standard
and variable documents.
On the Activity Page, CODE + 7 is used to bring the Print Options to
the screen.
In a document, CODE + 8 causes words to be overstruck with another
character. CODE + R VRSE + 8 deletes overstrikes.
On the Activity Page, CODE + 8 prints a list of all the titles on the disc.
In a document, CODE + 9 causes words to be bold printed (each character
prints twice). CODE + R VRSE + 9 deletes bold.
In a document, CODE + 0 is used to enter a non-required hyphen.
On the Activity Page, CODE + 0 brings up the System Disc Page.
In a Utility, CODE + 0 brings up the System Disc Page.
In a document, the FORMAT key is used to call up the Recordable and Non-Recordable Format Pages to select options and control placement of a document on a page.
In a document, CODE + FORMAT is used to recall formats from other documents. CODE + FORMAT, FORMAT is used to bring up the Format Scale.
On the Activity Page, highlighting a document in the Print List and touching the FORMAT key brings up the print options selected for that document. On the System Disc Page, FORMAT is touched to call up the Master Format Page.
In a document and on the Activity Page, the PROGRAM key is used to recall and run a program.
In a document, the SEARCH key is used to locate text or a specific page. On the Activity Page, the SEARCH key is used to locate a document
title by its entry number.
In a document, the STORE key is used to remove documents from the screen and store them on the disc.
In a document, touching the DEL key deletes highlighted text.
On the Activity Page, touching the DEL key deletes and/or clears documents from the Active List, the Print List, the INDEX, and the Backup Index.
In a document, the COpy key is used to copy text within documents or from document to document.
On the Activity Page, the COpy key is used to copy documents from
In a document, the MOVE key is used to move text within a document
or from document to document.
On the Activity Page, the MOVE key is used to reorder the titles in the
INDEX and the Print List.
In a document, the RPLCE key is used to replace highlighted text with
new text or to automatically change the highlighted text to upper or lower case. Also used with SEARCH to automatically search for and replace text. CODE + RPLCE is used with SEARCH to selectively search and replace text.
On the Activity Page, the RPLCE key is used to rename documents.
In a document, the MARK key is used to highlight more than one character,
word, line, or paragraph at a time for editing.
On the Activity Page, the MARK key is used to highlight more than one
title at a time.
In a document, the UND key is used to underline one word at a time.
UND, type text, UND is used to underline a series of words.
In a statistical document, CODE + UND is used to underline column headings
and columns of numbers. CODE + UND + UNO is used to place a double underline under columns or column headings.
In a document, the SCROLL key is used to view text that is not on the
screen. A long document can be viewed using SCROLL. The beginning of the document can be brought back into view by using R VRSE + SCROLL. The right side of a wide document can be viewed using CODE + SCROLL. CODE + R VRSE + SCROLL is used to view the left side of the wide docu-ment again.
On the Activity Page, the SCROLL key is used to look at the titles on
the IND EX if there are more than twenty titles on the disc. R VRSE +
SCROLL brings back the previous group of titles.
In a document and on the Activity Page, the R VRSE key reverses the action
of keys.
In a document, R VRSE + MOVE reverses the order of two characters.
R VRSE + STORE will store revisions over the original, but leave the document on the screen.
The text keys highlight corresponding amounts of text.
In a document, the PARA key highlights one paragraph and the returns following it.
Also used on the Format Pages to move through the options.
On the Activity Page and in a Utility, the PARA key is used to move the action from disc station to disc station.
In a document and on the Activity Page, CODE + the PARA key starts and stops the printer.
In a document, the LINE key highlights one line of text and any returns following it.
Also used on the Format Pages to move through the options.
On the Activity Page, the LINE key is used to highlight a title on the INDEX, Active List, or the Print List.
In a document, the WORD key highlights one word and the space following
it.
In a statistical document, CODE + WORD is used to move the highlighting down a column of numbers. CODE + R VRSE + WORD is used to move the highlighting up a column of numbers.
In a document, the CHAR key highlights one character -at a time.
In a statistical document, CODE + CHAR is used to move the highlighting down a column of numbers. CODE + R VRSE + CHAR is used to move the highlighting up a column of numbers.
In a document, the PAG E key is used to view the next page of the document.
Also used to move back and forth between the non-recordable format page and the recordable format page.
PAGE is also used with SEARCH and CODE + ACCPT to limit a search to a specific page.
CODE + PAG E is used to highlight an entire page.
On the Activity Page, the PAGE key is used to move the highlighting
between the Active List and the INDEX.
In a document, the ACCPT key is used to record a format.
CODE + ACCPT is used to bring back the Next Character Mark to resume typing.
CODE + ACCPT is also used with SEARCH to limit a search up to specific text.
In a document and on the Activity Page, the ACCPT key is used to begin
any action and to answer "yes" to questions displayed in the Command Line.
In a document, the STOP key is used to remove the format page without
recording a new format block and to cancel MOVE and COpy operations. Also used to remove the Next Character Mark from a document.
Also used to move the cursor to the home (upper left) position on the screen.
In a document and on the Activity Page, the S TO P key is used to stop
any action and to answer "no" to questions displayed in the Command Line.
Also used to remove highlighting.
1/05/81
KEYBOARD & DISPLAYXEROX
The XEROX Page
When you turn on the 860 in the morning, the XEROX page comes up on the screen. At this point, you can insert either your System Disc or your Master Disc.
OPTION SELECTION
LEFT: NOT READY RIGHT: System Disc
DATE: MM/DD!YY
OPTIONS:
WORD PROCESSING C 5.000
MACHINE SERIAL NUMBER: XI23-456789
CREATION DATE: REVISION LEVEL: COI'FIGURA TlON:
DISPLAY DISC TYPE PRINTER
PRINTER ACCESSORY
09/01/80 C 5.000
- FULL PAGE - SINGLE SIDED - STANDARD - NONE SHARED PRINTER INTERFACE - NONE COMMUNICA TIONS MODE - NONE
Copyright 1980, XEROX Corporation
SYSTEM DISC PAGE
As soon as the 860 reads your System Disc, the System Disc Page comes up on the screen and the words ENTER DATE appear in the Command Line. After you type in the current date, you can use the LINE key to select the software option you want. You can then touch the ACCPT key to load software. OR, you can touch the PAGE key to bring up the Utility Selection Page. OR, you can touch the FORMAT key to bring up the Master Format Page.
If you have a Partial Page display, the System Disc Page is divided into two sections.
9/01/80 KEYBOARD & DISPLAY
WORD PROCESSING MASTER FORMAT
MARGINS 12 84
TABS / SPEC TABS
LINE SPACING I III:! 2 3
JUSTIFY 0
PITCH PS 10 12 KB/PW SID LEGAL PRINT WHEEL 10
PAGE LAYOUT
TOP MARGIN 6
BOTTOM MARGIN 6
PAPER SIZE 66
PRINT OPTIONS
CONTINUOUS FORM 0 PAPER SIZE 0
EDIT OPTIONS
EDIT REFORMAT
•
UNATTENDED•
AUTO CARRIER RETURN•
AUTO PAGING•
MARGIN ZONE 5SPACE SIZE 3 7 OVERSTRIKE SYMBOL .;.
DISPLAY OPTIONS
ZOOM LINE
•
ZOOM SCREEN 0 SPLIT LINE 0 DARK SCREEN 0 CODE DISPLAY 0 HORIZONTAL SCROLL 40MASTER FORMAT PAGE
On this page, you have the opportunity to Change the standard settings for margins, tabs, line spacing, etc. Use the PARA and LINE keys to highlight the setting you want to change, then type in new numbers or use the CHAR key to turn on or off the option. For example, if you type most of your documents in 10 pitch, you'd want to change the PITCH to 10 and change the margins to 10 and 70.
LEFT: Disc Nome
UTILITY SELECTION
INITIALIZE DUPLICATE RECONSTRUCT RENAME BACKUP INDEX CONVERT RECOVER
Copyright 1980, XEROX Corporation
RIGHT: Disc Nome
C 5.000 C 5.000 C 5.000 C 5.000 C 5.000 C 5.000 C 5.000
UTILITY SELECTION PAGE
When the Utility Selection Page comes up on the screen, the words SELECT UTILITY appear in the Command Line. Use the LINE key to select the utility you want to use and touch ACCPT to load the software.
Note: The number of utili ties and the order in which they appear may vary depending
on how you create your System Disc.
9/01/80
KEYBOARD & DISPLAYLEFT: NOT READY
ACTIVE LIST
PRINTER: READY COMM: NOT READY
WORD PROCESSING
I GOTO COMM I SYSTEM
DISC
RIGHT: NOT READY
TITLE TYPE DISC ACTIVE PAGE USAGE SECTORS
INDEX: NOT READY STORAGE LEFT: MARKED DOCUMENTS: 0
ENTRY TITLE TYPE CREATED REVISED PAGES SECTORS
END OF INDEX
ACTIVITY PAGE
The Activity Page is a home base to start from and return to when you're using the 860. Documents are started, printed, deleted, copied, and even renamed from this home base. The Activity Page lists every document stored on the disc under the heading INDEX.
RECOROABLEFORMATPAGE
mnmm
TABS I SPEC TABS LINE SPACING JUSTIFY PITCH KB/PW PRINT Wt-EEL 10 PAGE LAYOUT
TOP MARGIN BOnOM MARGIN PAPER SIZE
PAGE LABELS - SPACES REMAINING 18' PAGE LABEL I'IJMBER
!-EADER
TRAILER COMMENTS
B 84
a
If, 2 3~ 10 12
Ita
LEGAL,
,
"
RECORDABLE FORMAT PAGE
You use the Recordable Format Page to control the layout (margins, tabs, line spacing) of the document you're working on. Use the PARA and LINE keys to select the options you want to change, and type in the change or use the CHAR key to turn on or off the option. Then touch the ACCPT key to record the format block in the document. You can record as many format blocks in a document as you need.
If you have a Partial Page display, the Recordable Format Page is divided into two sections.
9/01/80 KEYBOARD & DISPLAY
NON-RECORDABLE FORMAT PAGE
REFORMAT OPTIONS
I;fl..,"'·" D
UNATTENDED [) REPLACE MARGINS [) REPLACE TASS [) REPLACE LINE SPACING [) REPLACE JUSTIFY [) REPLACE PITCH [) REPLACE KB/PW [) REPLACE PRINT WHEEL ID [) DELETE REVISION MARKS [)
PAGINATION OPTIONS
PAGINATE [) UNA TTENDED [) REPLACE PAGE LAYOUT [) REPLACE PAGE LABELS [)
PAGE LIMIT
EDIT OPTIONS
EDIT REFORMAT UNATTENDED MARK REVISIONS AUTO CARRIER RETURN AUTO PAGING MARGIN ZONE
•
•
[)•
•
5SPACE SIZE 3 7
DISPLAY OPTIONS
ZOOM LINE ZOOM SCREEN SPLIT LINE DARK SCREEN CODE DISPLAY HOR I ZONT AL SCROLL
•
[) [) [) [)40
NON-RECORDABLE FORMAT PAGE
The Non-recordable Format Page is used to select the screen and edit options and to change the placement of your document on the page. The features at the top
of this page are used to rearrange the line and page endings after you've made revisions. The options listed at the bottom of the page control the appearance of your screen while you're working on a document. Use the PARA and LINE keys to select the feature you want and use the CHAR key to turn on or off the option. Then touch ACCPT.
The following are the Edit and Display Options.
• EDIT REFORMAT - When this feature is turned on, the 860 rearranges line
endings while you edit a document. If the Unattended option is not selected, the system will ask for hyphenation decisions as you edit.
• UNATTENDED - This features works with Edit Reformat. When Unattended
is selected, words are rearranged as you edit the document, but no hyphenation decisions are displayed. Unattended cannot be used if Edit Reformat is turned off.
• AUTO CARRIER RETURN - When this feature is turned on, the 860
auto-matically returns when the margin zone is reached.
• AUTO PAGING - When this feature is turned on, a temporary page end code
is automatically inserted after the last text line of each page.
• MARGIN ZONE - The margin zone is the area near the right margin where
conversions are made to control line endings. The standard setting is 5. The minimum value can be 0, and the maximum value can be a number up to the left margin setting subtracted from the right margin setting. It is recommended that the maximum setting be no more than 10.
• SPACE SIZE - The SPACE SIZE setting determines the amount of space to
be added or deleted between words to justify text. The standard settings are 3 and 7. The minimum can be 2, 3, or 4 and the maximum can be any
number from 5 to 99. To put more white space between words, the recommended settings are 4 and 8.
• ZOOM LINE - When this feature is turned on, the line on which you are typing
will appear double the normal height.
• ZOOM SCREEN - When this feature is turned on, all displayed text will appear
double the normal height.
• SPLIT LINE - When this feature is turned on, all lines that exceed the current
screen width will be displayed by breaking the text line and displaying the remainder on successive lines (in 70 character segments).
• DARK SCREEN - When this feature is turned on, the screen will show white
characters on a black background.
• CODE DISPLAY - When this feature is turned on, all codes are displayed.
• HORIZONTAL SCROLL - This feature determines the number of characters
that will be scrolled horizontally on the screen when a line of text exceeds
102 characters. The minimum is 10 characters, and the maximum is 80 characters. Any multiple of 10 between 10 and 80 may be entered. The standard is 40
characters.
1/05/81 KEYBOARD & DISPLAY
DISC CREATION AND MODIF ICA TION LEFT: Disc Name
DA TE FORMAT: MM/DD/YY MM/DD!YY DATE:
SYSTEM DISC NAME:
MACHINE SERIAL NUMBER: X CONFIGURA TION:
DISPLAY - FULL PAGE DISC TYPE - SINGLE SIDED PRINTER - ST ANDARD PRINTER ACCESSORY - NONE SHARED PRINTER INTERFACE - NONE COMMUNICA TlONS MODE - NONE PROCEDURE:
copy ENTIRE MASTER DISC TO SYSTEM DISC SELECT OPTIONS OR UTILITIES TO BE COPIED ADD OPTIONS/UTILITIES FROM ANOTHER DISC REPLACE CONFIGURATION
Copyright @ 1980, XEROX Corporation
RIGHT: Master Disc
DISC CREATION AND MODIFICATION PACE
You use this page to create or modify a system disc. Use the LINE key to move to the information lines and type in the information for your system. Under CON-FIGURATION, use the LINE key to move to each component and use the CHAR key to select your system's configuration. After you've selected the configuration, use the LINE key to select the procedure you want to use to create or modify your system disc.
See the "HOW TO" section for details.
1/05/81 KEYBOARD & DISPLAY
MASTER DISC: Disc Name
REVISION I
OPTION AND UTILITY NAMES I LEVEL I SECTORS
---1---OPERATING SYSTEM
I
E 6.000 140 OPERA TING SYSTEM WORD PROCESSING I E 6.000 228INITIALIZE
I
E 6.000 23 DUPLICATE I E 6.000 23 RECONSTRUCTI
E 6.000 24 RENAME I E 6.000 20 BACKUP INDEXI
E 6.000 27 CONVERT I E 6.000 66 RECOVERI
E 6.000 22I I
---~----~---LINE + MARK OPTIONS/UTILITIES TO BE COPIED
SYSTEM DISC SECTORS AVAILABLE: 460
OPTION AND UTILITY SELECTION PAGE
THE FULL PAGE SCREEN
The 860 Information Processing System screen features two controls that are designed for different opera tor preferences in screen position and br ightness. They are (1)
an Intensity (brightness) Control knob, and (2) a Tilt Adjustment lever.
BRIGHTNESS~7i
CONTROL
~---• The Intensity Control knob can be used to adjust the brightness of the screen from dark to light.
• The Tilt Adjustment lever can be used to move the screen to help eliminate overhead glare. Press the lever up, tilt the screen to the desired angle, and release the lever.
9/01/80 KEYBOARD & DISPLAY
The Partial Page
If you know how to use the 860 Full Page IPS, this training will show you how to use the 860 Partial Page. Basically, the only difference between the two systems is the size of the screen. The Partial Page will show you 24 lines at a time instead of 66 like the Full Page.
f&
I I
I I
-Creating a System Disc
The first thing you must do is create a system disc for your Partial Page. See page 4 - 28 in the "HOW TO" Glossary for instructions on creating a system disc for your Partial Page.
1/05/81
This page replaces pages 1 - 21 through 1 - 27
KEYBOARD & DISPLAY
The Activity Page
On the Partial Page, the Activity Page is divided into two sections. When you load software, the INDEX section of the Activity Page will come to the screen. The INDEX on the Partial Page displays fifteen document titles at one time. Like the Full Page, you use the SCROLL key or the LINE key to view the other titles in the INDEX.
When the INDEX is on the screen, you also see the Command Line and the Instruction Blocks. Under the Instruction Blocks, you see three headings: INDEX, STORAGE LEFT, and MARKED DOCUMENTS. The words after INDEX tell you the name of the active disc. To move to the other disc station, you touch the PARA key.
Step 1 TOUCH
Result
INSERT
CHECK
PARA.
The other disc station is selected. If there is no name after the word INDEX, you know that the disc station is empty.
an initialized disc in the empty station. You will use this disc to type your exercises.
that the name of your exercise disc appears after the word INDEX. (You can use PARA to switch from one disc to another.)
When working on the INDEX section of the Activity Page, look at the disc name after IND EX to see which disc is selected.
To look at the Active List, you touch the PAGE key.
Step 2 TOUCH
Result
TOUCH
PAGE to move the higlighting to ACTIVE LIST and bring the Active List section of the Activity Page to the screen. The Active List section of the Activity Page comes up on the screen.
PAG E several times to practice moving between the Active List and the Index.
COMMAND LINE --~.
INSTRUCTION BLOCKS
INDEX INFORMATION --~
INDEX-~'
!
COMMAND LINE •
INSTRUCTION BLOCKS - {
STATUS LINE - {
ACTIVE LIST ~
9/01/80
INDEX
ENTRY TITLE
END OF INDEX
LEFT NOT READY
ACTIVE LIST
STORAGE LEFT 0
TYPE CREATED
PRINTER READY CDMM NOT READY
WORD PROCESSING
I GO TO COMM I SYSTEM
DISC
MARKED DOCUMENTS 0
REVISED PAGES SECTORS
PRINT I GO TO
COMM I SYSTEM DISC
RIGHT NOT READY
TITLE TYPE DISC ACTIVE PAGE USAGE SECTORS
KEYBOARD & DISPLAY
Typing Documents
To begin a document on the Partial Page, you start from the Activity Page. Either the Index or the Active List can be on the screen when you type the title of your new document. You type documents on the Partial Page just like you type documents on the Full Page. As you type you will see 24 lines at a time. You'll also notice that the character size is larger on the Partial Page.
Step 1 TITLE a document
ROMAN LETTERS
and touch ACCPT threetimes.
Like the Activity Page, the Recordable Format Page is divided into two sections. You'll use the PARA or LINE key to bring up the second section. To go back to the first section, you use RVRSE + PARA or RVRSE + LINE.
Step 2
TOUCH
SET
TOUCH
Result
USE
TOUCH
FORMA T to bring the first section of the Recordable Format Page to the screen.
the following format: • Margins at 17 and 76
• Tab at 22
• Line Spacing at 2
PARA twice to bring the second section of the Format Page to the screen.
The second section of the Recordable Format Page comes to the screen and PAGE LABEL NUMBER is highlighted.
LINE to highlight HEADER and type in Rough Draft.
9/01/80
RECORDABLE FORMAT PAGE
EmIIIB
TABS I SPEC TABS LINE SPACING JUSTIFY PITCH KB/PW PRINT WHEEL ID
PAGE LAYOUT
TOP MARGIN BOITOM MARGIN PAPER SIZE
PAGE LABELS - SPACES REMAINING 189
PAGE LABEL NUMBER
HEADER
TRAILER
COMMENTS
IB 84 D I'" 2 3
P..
10 12• LEGAL
6 6 66
KEYBOARD & DISPLAY
As your typing nears the bottom of the screen, the text will scroll up one line. The text will continue to scroll one line at a time as you type. If you prefer, you can touch the SCROLL key and move the text further up on the screen.
Step 3 TYPE
STORE
the document on the opposite page. Be sure to use the upper tab key to indent the first line of each paragraph.
the document.
After you store a document on the Full Page, the highlighting stays on the Active List. When you store a document on the Partial Page, the Active List stays on the screen. As you remember, you use the PAGE key to move to the Index.
Printing a Document
On the Partial Page, documents are sent to the printer the same way as on the Full Page. That is, from the INDEX section of the Activity Page, you will highlight the title and use CODE + 7 to bring up to the Print Options list. You can use LINE and CHAR to select your print options, and then touch ACCPT to put the document in the Print List.
Step 4 TOUCH PAGE to highlight INDEX and display the index of the disc.
PRINT ROMAN LETTERS.
9/01/80
Rough Draft
Roman Letter Development
Many styles in writing developed as learning was carried from
Rome throughout the rest of the known world. The influence of the
roman characters might have been lost, however, had not Emperor
Charlemagne taken an interest in the revival and spread of ancient
learning.
Charlemagne encouraged the establishment of a school at
Tours by an English scholar named Alcuin. The calligraphy of this
school became the model for the rest of Europe.
Adding Text to a Document
In the next exercise, you'll recall ROMAN LETTERS to add more text.
Step 1 RECALL
USE
Result
ROMAN LETTERS to the screen.
CODE + ACCPT to restore the Next Character Mark to the screen.
The text scrolls up on the screen and the Next Character Mark appears at the end of the document.
The text you're going to add will make ROMAN LETTERS more than one page. When you get near the last line, the Command Line will flash LAST LINE. At the end of the line, the system will insert a temporary page end code and bring a new page to the screen.
Step 2 TYPE
Step 3 STORE
the text shown on the opposite page.
9/01/80
The manuscript hand of the Venetian scribes, which Nicholas
Jenson followed as his model, developed apart from gothic lettering.
It had evolved from roman capital letters. In formal writing and inscriptions the early Romans used square capitals, with slight modifications, in the form of our upper-case alphabet. For
correspondence and documents not requiring formal writing, large cursive or running capitals were used.
By the tenth century the use of letter forms from which we derive our lower case was quite universal. However, these letters did not assume the fixed form with which we are familiar until they were cast in types by Jenson.
The humanistic manuscripts, that is, manuscripts of classical literature produced by Venetian scribes, were Jenson's models. He did not copy the handwriting of the scribes letter for letter, but created a font of related letters legible and pleasing in effect. He clearly recognized that mechanical perfection is not as desirable as the composite appearance of the page.
In crediting Jenson with our style of roman type, it would be unfair to overlook other early printers who experimented with roman letter forms, or who modified the early gothic letters. The first German types were angular and pointed; later types became more rounded. A semi-gothic face, tending distinctly toward roman, was used in 1640 by John Mentelin, the Strassburg Printer.
KEYBOARD &. DISPLAY
Editing a Document
In the next exercise, you'll make some revisions to ROMAN LETTERS. Revisions are made on the Partial Page just like they are on the Full Page. Again, the only difference is that you don't see the entire page of text on the screen at one time. As you know from the Full Page, there are several ways to get to text that needs changing. You can use the text keys to move the highlighting down the screen. Or, you can use SEARCH to move directly to the text you want to change.
Step 1 RECALL ROMAN LETTERS to the screen.
If you just want to look at the bottom of a page of text, you use the SCROLL key to move the text up on the screen. Touching SCROLL once moves the text up one line. If you hold down the SCROLL key, the text moves quickly up the screen.
USE
TOUCH
USE
Step 2 HIGHLIGHT
TOUCH
USE
TOUCH
USE
HIGHLIGHT
TOUCH
SCROLL and RVRSE + SCROLL to move the text up and down on the screen.
PAGE to look at the second page of the document.
RVRSE + PAGE to go back to the first page.
the word styles in the first paragraph and add the word
national in front of it.
SEARCH, type model and touch ACCPT.
RVRSE + UND to remove the underline.
SEARCH and ACCPT to search to the next occurrence of the word "model".
RVRSE + UND to remove the underline.
the two spaces between letters. and In.
Rough Draft \
~ Roman Letter Development ~~D~
t'o.
Man~stYles in writing developed as learning was carried from Rome throughout the rest of the known world. The influence of the
roman characters might have been lost, however, had not Emperor Charlemagne taken an interest in the revival and spread of ancient
learning.
Charlemagne encouraged the establishment of a school at
Tours by an English scholar named Neuin. The calligraphy of this
school became the model for the rest of Europe.
~
The manuscript hand of the Venetian scribes, which Nicholas Jenson followed as his model, developed apart from gothic lettering.
It had evolved from
ro~alletters~n
formal writing andinscriptions the early Romans used square capitals, with slight
modifications, in the form of our upper-case alphabet. For
( correspondence and documents not requiring formal writing,~
\~~I!li t 81 running capitals were used.
9/01/80
By the tenth century the use of letter forms.ue Ii vvlricli \II'e-eel io e el'!ll' Ie .. era @!8:6@ was quite universal. However, these letters
did not assume the fixed form with which we are familiar until they
were cast in types by Jenson.
The humanistic manuscripts, that is, manuscripts of classical
literature produced by Venetian scribes, were Jenson's models. He
did not copy the handwriting of the scribes letter for letter, but
created a font of related letters legible and pleasing in effect. He
clearly recognized that mechanical perfection is not as desirable as
the composite appearance of the page.
Rough Draft f().C e,
In crediting Jenson with our style of roman tYPjt it would be
unfair to overlook other early printers who experimented with
roman letter forms, or who modified the early gothic letters. The
first German types were angular and pointed; later types became
more rounded. A semi-gothic face, tending distinctly toward roman,
,.fi'f'':I'
was used in 1640 by John Mentelin, the Strassburg Printer.
KEYBOARD & DISPLAY
Partial Page 1 - 37
Step 3 HIGHLIGHT
DELETE
SEARCH
SEARCH
USE
HIGHLIGHT
SEARCH
USE
and delete the words large cursive or
the words from which we derive our lower case.
to roman type and add the word face after it.
to Strassburg and add the word first in front of it.
RVRSE + PAGE and go back to the first page to reorder the paragraphs.
the first line of the first paragraph and touch MOVE.
to
-+
The manuMARK and PARA to highlight both paragraphs and touch ACCPT.
(
Rough Draft \
~~O(\~
1'0-Roman Letter Development
Man~styles in writing developed as learning was carried from Rome throughout the rest of the known world. The influence of the
roman characters might have been lost, however, had not Emperor
Charlemagne taken an interest in the revival and spread of ancient
learning.
Charlemagne encouraged the establishment of a school at
Tours by an English scholar named Meuin. The calligraphy of this
school became the model for the rest of Europe.
~
The manuscript hand of the Venetian scribes, which Nicholas
Jenson followed as his model, developed apart from gothic lettering.
It had evolved from
ro~alletters~n
formal writing and inscriptions the early Romans used square capitals, with slightmodifications, in the form of our upper-case alphabet. For
correspondence and documents not requiring formal writing,~ ~l!I'!li @ SF running capitals were used.
9/01/80
By the tenth century the use of letter forms .£Fsr ii VY !rielr W'~
eel if e el'!ll Ie leI e!86@ was quite universal. However, these letters
did not assume the fixed form with which we are familiar until they
were cast in types by Jenson.
The humanistic manuscripts, that is, manuscripts of classical
literature produced by Venetian scribes, were Jenson's models. He
did not copy the handwriting of the scribes letter for letter, but
created a font of related letters legible and pleasing in effect. He
clearly recognized that mechanical perfection is not as desirable as
the composite appearance of the page.
e,
Rough Draft f().C
In crediting Jenson with our style of roman tyPit it would be
unfair to overlook other early printers who experimented with
roman letter forms, or who modified the early gothic letters. The
first German types were angular and pointed; later types became
more rounded. A semi-gothic face, tending distinctly toward roman,
f;'('~t
was used in 1640 by John Mentelin, the Strassburg Printer.
KEYBOARD & DISPLAY Partial Page 1 - 39
The Format Pages
Now that you're finished editing the rough draft of ROMAN LETTERS, it should be printed as a final draft with new margins, tabs, line spacing, and justified. To do this, you'll make all the changes on the Recordable Format Page, then go to the Non-recordable Format Page to have the system reformat and paginate the document.
The Non-recordable Format Page is also divided into two sections (as illustrated on the opposite page). To get to the second section, you'll use the LINE or PARA key. Hyphenation and page ending decisions are made just like they are on the Full Page.
Step 4 TOUCH
Step 5 TOUCH
TOUCH
TOUCH
MAKE
Step 6 STORE
Step 7 PRINT
SEARCH three times and ACCPT to get to the beginning of the first page.
FORMAT and make the following changes: • Margins at 18 and 72
• Delete the tab at 22 and set a new tab at 24
• Turn on Justify
• Delete the Header and center a new Header: FINAL
DRAFT
FORMA T again and turn on the following options: • REFORMAT
• REPLACE MARGINS • REPLACE TABS • REPLACE JUSTIFY • PAGINATE
• REPLACE PAGE LABELS
ACCPT to begin reformatting and paginating ROMAN
LETTERS.
any necessary hyphenation or page end decisions.
the revised document under the title ROMAN REV.
RECORDABLE FORMAT PAGE
~
TABS I SPEC TABS LINE SPACING JUSTIFY PITCH KB/PW PRINT WHEEL ID
PAGE LAYOUT TOP MARGIN BOTTOM MARGIN PAPER SIZE NO~ECORDABLEFORMATPAGE REFORMAT OPTIONS IIJIMMtil UNATTENDED REPLACE MARGINS REPLACE TABS REPLACE LINE SPACING REPLACE JUSTIFY REPLACE PITCH REPLACE KB/PW REPLACE PRINT WHEEL ID DELETE REVISION MARKS
PAGINATION OPTIONS
PAGINATE UNATTENDED REPLACE PAGE LAYOUT REPLACE PAGE LABELS
PAGE LIMIT
9/01/80
16 84
D I" 2 3
1.10 12 • LEGAL
6 6 66 C C C C C C C C C C C C C C I
PAGE LABELS - SPACES REMAINING 189
PAGE LABEL NUMBER
HEADER TRAILER COMMENTS EDIT OPTIONS EDIT REFORMAT UNATTENDED MARK REVISIONS AUTO CARRIER RETURN AUTO PAGING MARGIN ZONE SPACE SIZE
DISPLAY OPTIONS
ZOOM LINE ZOOM SCREEN SPLIT LINE DARK SCREEN CODE DISPLAY HORIZONTAL SCROLL
KEYBOARD & DISPLAY
Partial Page 1 - 41
I
•
•
C•
•
53 7
•
C C C CThe Master Format Page
The Master Format Page lists all available format options and the standard settings. If your documents require settings that are different from the ones shown in the illustration on the opposite page, use the Master Format Page to make the changes. The Master Format Page is divided into the two sections as shown on the opposite page. You get to the Master Format Page the same way as on the Full Page--use CODE + 0 to go to the System Disc Page and touch FORMAT.
Step 1
CHECK
USE
Step 2
TOUCH
TOUCH
USE
the Active List to be sure there are no documents in it.
CODE + 0 to go to the System Disc Page.
FORMAT to bring the first section of the Master Format P age to the screen.
PARA three times to bring the second section of the Master Format Page to the screen.
RVRSE + PARA to bring the first section back to the screen.
If you need to make any changes to the standard settings, use LINE or PARA to highlight the setting you want to change and type in the new setting or use CHAR to turn on the option. When you touch ACCPT, the changes will be recorded on the System Disc as the standard settings. Each time you begin a new document, the format page will display these new standard settings.
Step 3
TOUCH
Result
TOUCH
ACCPT.
The first section of the System Disc Page is brought to the screen.
9/01/80
WORD PROCESSING MASTER FORMAT
~ECTABS
Bilij\
LINE SPACING JJSTIFY PITCH KB/PW
PRINT WHEEL 10
PAGE LAYOUT
TOP MARGIN BOTTOM MARGIN PAPER SIZE
PRINT OPTIONS
CONTII'UOUS FORM PAPER SIZE
EDIT OPTIONS
EDIT REFORMAT UNATTENDED
AUTO CARRIER RETURN AUTO PAGING
MARGIN ZONE SPACE SIZE
DISPLAY OPTIONS
ZOOM LINE ZOOM SCREEN SPLIT LINE DARK SCREEN CODE DISPLAY HORIZONT AL SCROLL
1&84
11!t 2 3
~
10 12Iii
LEGAL6 6
66
o
o
•
•
•
•
5 3 7•
o
o
o
o
40
KEYBOARD & DISPLAY
You have now completed the training for 860 Partial Page. Important points to remember are listed below.
1. The Partial Page operates very much like the Full Page, except that it will display only 24 lines of single-spaced text at a time.
2. You can use the SCROLL key to view the lines at the bottom of the page and RVRSE +
SCROLL to scroll back to the top of the page.
3. As you type, the screen will automatically scroll up when you type more than 23 lines on a page.
4. The Activity Page is divided into two sections. You use the PAGE key to move back and forth between the Active List and the Index sections.
5. The System Disc Page and the Format Pages are also divided into two sections. On these pages, you use PARA or LINE to move to the second section, and you use RVRSE + PARA or RVRSE + LINE to move back to the first section.
COMMAND LINE MESSAGES
Note: Underlining indicates the words flash.
ACTIVE LIST FULL
ACTIVE SPACE FULL
APPEND DOCUMENT(S) -- SELECT TITLE(S)
APPENDING
"Document Title"
ARE YOU SURE?
1/05/81
Reason: This message displays to let you know that:
(1) 10 documents are in the Active List, or (2) 20 documents are in the Print List, or
(3) A total of 20 documents are in the Active List and Print List, or
(4) A document has reached the maximum number of pages (9,999).
Action: For reason 1 & 2 check the documents in the Active List to be sure you want all of them. Store or clear any documents you don't need.
If you want to put 20 documents in the Print List, you'll have to clear documents from the Active List to make room for additional document titles in the Print List.
Or, confine your work to the documents currently in the
Active and Print Lists.
For reason 4, record the rest of the document under a new title.
Reason: (1) (2)
The internal document information area is full. The maximum number of pages per document (9,999) is reached.
Action: Touch STOP to clear the message. For reason 1, delete or copy enough documents to another disc to provide a work area on the disc. For reason 2, record the rest of the document under a new title.
Reason: COpy key has been touched when a document title is highlighted in the ACTIVE LIST.
Action: Select the document(s) to be appended, then touch ACCPT.
Or, touch STO P to cancel the instruction.
Reason: This message displays when the system is appending documents.
Action: No action is necessary. The message will clear when the appending is finished.
Reason: ACCPT has been touched in response to the DELETE ENTIRE INDEX? or CLEAR ENTIRE PRINT LIST? message or during the CONVERT utility.
Action: Touch ACCPT to begin the action.
Or, touch STOP to clear the message with no action taken.
BOLD
CENTER BETWEEN
CHANGE INDEX ORDER?
CHANGE PRINT LIST ORDER?
Reason: This is part of the UNO BOLD OVER message. When BOLD is highlighted, the text will print bolded. The message displays when:
(1) CODE + 9 is touched during input, or
(2) One character within bolded text is highlighted dur ing edi t.
Action: This is an informative message, no action is required. If
you wish to remove the bolding, use CODE + R VRSE + 9.
Reason: This message indicates that the optional centering fea-ture is being used. Text will be centered between the numbers indica ted in the message. The message displays when:
(1) CODE + 4- is entered after any character other than a carrier return or a format block, or
(2) CODE + 4- is entered in a header or trailer.
Action: For reason 1, type in desired setting for left margin, touch CHAR to move to the right margin. Type in desired setting for right margin. Touch ACCPT to record the centering points.
For reason 2, touch ACCPT to center the header or trailer between the margins.
Or, touch STOP to cancel the instruction and clear the message.
Reason: MOVE key has been touched when the INDEX is highlighted.
Action: Highlight one or more document titles, touch ACCPT and the title(s) will be moved to the top of the INDEX. Or, touch STO P to cancel the instruction with no action
taken.
Reason: MOVE key has been touched when the PRINT LIST is highlighted.
Action: Highlight one or more document titles, touch ACCPT and the title(s) will be moved to the top of the Print List.
CHANGE KEYBOARD? LEGAL TO STD
OR
CHANGE KEYBOARD? STD TO LEGAL
CHARACTER NOT ON PRINT WHEEL
CHECKING
OPTIONS/UTILITIES --PLEASE WAIT
CLEAR DOCUMENT?
CLEAR ENTIRE ACTIVE LIST?
Reason: When typing new information into an existing document, the system compares the current KEYBOARD/PRINT WHEEL (STD or LEGAL) setting to the setting at the point of insertion. If the settings do not match, this message is displayed in the Command Line.
Action: Touch ACCPT to clear the message and change the recorded KB/PW to the current selection.
NOTE:
Or, touch the STOP key to clear the message, return to
editing and use the original KB/PW setting in the document.
It may be easiest to keep documents which use LEGAL on a separate disc from the STD documents.
Reason: A character found in the print document is not on the print wheel and the printer has stopped.
Action: Touch ACCPT, the printer will substitute a blank character and continue printing. Or, touch STOP to clear the message and clear the document from the Active List. To print the document without stopping select the Non Stop Option on the Print Options List.
Reason: This message displays during the System Disc creation process.
Action: No action is necessary. The message will clear when the system locates the information it needs.
Reason: The DEL key is touched when a document that has been previously stored but not revised is highlighted in the ACTIVE LIST.
Action: Touch ACCPT to clear the document from the Active List.
Or, touch STOP to remove the message and leave the
document in the Active List.
Reason: DEL key has been touched when the ACTIVE LIST is highlighted but no document titles are highlighted.
Action: Touch ACCPT to clear all documents from the Active List.
Or, touch STOP to cancel the instruction and clear the
message.
MESSAGES
CLEAR ENTIRE PRINT LIST?
CLEAR NEW DOCUMENT?
CLEAR PRINT DOCUMENT(S)?
CLEAR REVISED DOCUMENT?
Reason DEL key has been touched when the PRINT LIST is highlighted but no document titles are highlighted.
Action: Touch ACCPT twice to clear the entire Print List.
Or, touch STOP to cancel the instruction and clear the message.
Reason: DEL key has been touched when the ACTIVE LIST is highlighted and a new (never stored) document title is highlighted.
Action: Touch ACCPT to delete the document without storing it. Or, touch STOP to cancel the instruction and clear the message.
Reason: DEL key has been touched when the PRINT LIST is highlighted and one or more document titles are highlighted.
Action: Touch ACCPT to clear the document(s) from the Print List.
Or, touch STOP to cancel the instruction and clear the message.
Reason: DEL key has been touched when the ACTIVE LIST is selected and an edited document title is highlighted. Action: Touch ACCPT to clear the revision without storing it
and remove the title from the ACTIVE LIST.
Or, touch STOP to cancel the instruction and clear the message.
CODE+O TO EXIT Reason: This message displays when you touch the STOP key while using one of the utilities.
-- ACCPT TO CONTINUE
Action: If you're finished using the utility, hold down the CODE key while you touch the 0 key and the System Disc Load Page will come to the screen.
-CONFLICTING Reason: (1) When creating a System Disc, this message displays if the configuration does not agree. For example, if you selected NONE under PRINTER but selected AUTOMATIC PAPER FEEDER under
SELECTION
--~HECK CONFIGURATION
CONVERSION
(2)
PRINTER ACCESSORY.
This message also displays if the selected software option is not supported by the config-uration. For example, if you selected NONE under COMMUNICATION MODE, and then tried to add one of the communication modes to your System Disc.
Action: For reason 1, touch STOP to clear the message. The selection in question will be highlighted. Use CHAR to change the selection or use LINE and CHAR to highlight and correct a selection.
For reason 2, touch the STOP key three times to bring the Disc Creation and Modification page to the screen. Use LINE and CHAR to highlight and correct the conflicting selection.
See page 4 - 59
COMPLETE -- CONTINUE?
CONVERTING "Document Title"
COpy
t
-COPY "Disc Name" TO "Disc Name"
1/05/81
See page 4 - 59
Reason: This message displays in the Command Line after the COpy key has been touched in a document, indicating that text is to be copied within the document or from one document to another.
Action: Highlight the text to be copied and touch ACCPT to complete the operation.
Or, touch STO P to cancel the instruction.
Reason: COpy key has been touched when the INDEX is selected and no document titles are highlighted. The message indicates that the entire contents of one disc will be copied to the other disc.
Action: Touch ACCPT to begin the disc copy.
Or, touch STOP to cancel the instruction and clear the message.
MESSAGES
COpy DOCUMENT TO "Disc Name"
COPYING
"Document Title"
COVER OPEN
CREATING SYSTEM
DISC -- PLEASE WAIT
DELETE DOCUMENT?
Reason: COpy key has been touched when the INDEX is selected and one or more document titles are highlighted. The message indicates that the documents will be copied to the other disc.
Action: Touch ACCPT to begin the document copy.
Or, touch STOP to cancel the instruction and clear the message.
Reason: This message displays in the Command Line while a document is being copied from one disc to another. Action: No action is required. Message will be cleared when
copy is completed.
Reason: This message displays in the Command Line and the Status Line to let you know the 860 cannot print because the printer cover has been raised.
Action: If there is no document printing, touch STO P to clear the Command Line, then CODE + PARA to clear the Status Line.
If a document is printing, close cover and touch CODE +
PARA or the START/STOP button to resume printing.
Reason: This message displays in the Command Line while a System Disc is being created. This procedure takes about six (6) minutes.
Action: No action is necessary. The message will clear when the System Disc has been created.
Reason: DEL key has been touched when the INDEX is selected and a document title highlighted.
Action: Touch ACCPT to delete the document.
Or, touch STOP to cancel the instruction and clear the message.
DELETE ENTIRE INDEX? Reason: DEL key has been touched when the INDEX is selected but no document titles are highlighted.
Action: Touch ACCPT twice to delete the entire index.
DELETE OBSOLETE OPTIONS/UTILITIES?
Reason: This message displays if an option or utility has been R VRSE MARKed or if you're adding new software to an old System Disc.
Action: Touch ACCPT to delete the obsolete software.
DESTINATION DISC See page 4 - 52, 4 - 54, and 4 - 62 IS FLAWED OR USED
DESTINATION DISC See page 4 - 52, 4 - 54, and 4 - 62 IS NOT INITIALIZED
DIAGNOSTIC PANEL CODES See E CODES
DISC ALMOST FULL
"Disc Namen BUSY
1/05/81
Reason: This message displays in the Command Line when there are less than 32 sectors left on the disc.
Action: Touch STOP twice to clear the message and any high-lighting. Then touch STORE and store the document. You should not continue working on a disc that is almost full. You may:
(I) A ttempt to recover disc space by highlighting the INDEX, then touching STOP (to be sure no titles are highlighted) and then touching ACCPT twice. Or,
(2) Recover disc space by deleting documents from the Backup Index. Or,
(3) Copy the document onto another disc and finish the work there.
Reason: This message displays if you attempt to perform an operation that will change the INDEX while the INDEX is being printed. The INDEX cannot be changed while it is printing.
Action: Touch STOP to clear the message. Wait until the INDEX has finished printing before stor ing a document or start-ing a new document.
MESSAGES
DISC ERROR --PRINTER
DISC ERROR --WORD PROCESSING
Reason: The system is unable to read a sector of information in the document that is currently printing.
Action: Touch ACCPT and take one of the following actions:
(1) Continue to print the document. The message
I I
IIDISC ERRORxx-x-xl I I I
will appear in place of the unreadable text. (The message is preceded and followed by two returns. The "xx-x-x" stands for the location of the error.) OR,(2) Stop the printer and clear the print document. Then recall the document, and check the page that was printing when the message occurred. If the text is okay, send the document to the printer again. If the words
I I I IDISC
ERRORxx-x-xl I I I
appear in the document, delete the words, retype any lost information, and STORE the document.Reason: This message displays during edit or copy when the system is unable to read a sector of information.
Action: Touch ACCPT and take one of the following actions:
(1) During edit, the page containing the faulty infor-mation will be brought to the screen with the words
I I I IDISC
ERRORxx-x-xl I I I.
(The message is preceded and followed by two returns. The "xx-x-x" stands for the location of the error.) Delete the wordsI I I IDISC
ERRORxx-x-xl I I land
retype any lost information.(2) During copy, the remainder of the document (or disc) will be copied after you touch ACCPT. When the copy operation is finished, recall the document on the source (or iginaI) disc. Search to and delete the words
I I IIDISC
ERRORxx-x-xl I I I,
and retype any lost information.DISC FULL
DISC FULL--JNSER T NEXT DISC
DISC SPACE RECOVERED
DOCUMENT IN PRINT LIST
DUPLICATE ANOTHER DISC?
1/05/81
Reason: This message indicates that the disc has been filled up and you should not attempt to record or revise the documents on it. The message will display under the following conditions:
(I) A new document title is typed when STO RAG E LEFT shows zero, or
(2) Editing changes to a document fill up the disc, or (3) A document is being copied to the disc, but the
document is larger than the STORAGE LEFT, or (4) A new document is being stored, but it is larger
than the STORAGE LEFT.
Action: Touch the STOP key to clear the message. If editing or reformatting a document, the remaining pages of the document may be viewed, but no more editing or refor-ma tting refor-may occur. STORE thIS document and take one of the following actions:
(l) A ttempt to recover disc space by highlighting the INDEX, touching STOP (to be sure no titles are highlighted) and then touching ACCPT twice. Or, (2) Recover disc space by deleting documents from
the Backup Index. Or,
(3) Copy the document onto another disc and finish the work there.
Reason: This message occurs when you're trying to copy, convert, or recover from a double sided disc to a single sided disc. Action: Remove the full disc, insert a newly initialized disc, and
touch ACCPT to complete the process.
Reason: This message displays to let you know the 860 has recovered as much disc space as possible.
Action: No action is necessary, but if you need more disc space to work with, use the Backup Index to permanently delete documents and free up more disc space.
Reason: This message is displayed after each document selected for Multi Pass has been queued to the printer.
Action: Select additional documents for printing. Or, touch STOP to return to the Activity Page.
See page 4 - 52
ECODES
Elxx
E2xx
E3xx
E4xx
E5xx
The E Codes may display on the diagnostic panel when you are loading software or running diagnostics. They indicate the system has encountered a problem reading the disc.
Reason: This code indicates the system is unable to understand some of the information on the disc.
Action: Touch the III REST ART button on the diagnostic panel.
If you get an E Code again, put the disc in the other disc station and touch the III RESTART button again. If the system then loads software from the second station, run diagnostics for the first station and call for service. If
you still get an E Code (in the second station), remove the disc, put in a different disc and touch the III REST AR T bu tton on the diagnostic panel. If you still get an E Code, this indicates a hardware problem. Run diagnostics and call for service.
Reason: This code indicates a possible hardware problem.
Action: Touch the III RESTART button on the diagnostic panel to try again. If you still get the same E Code, run diagnostics and call for service.
Reason: This code indicates the system is unable to read any information on the disc.
Action: (I) If this message comes up after MASTER DISC ERROR -- REST AR T, remove both discs, insert a good System Disc, touch the III RESTART button and reload the system. If you get the same E code, this indicates a hardware problem. Run diagnostics and call for service. (2) If this message comes up when you insert a data (working) disc, touch the III RESTART button on the diagnostic panel. If you get the same E Code again, try another disc. If you still get the same E Code, this indicates a hardware problem. Run diagnostics and call for service.
Reason: This code indicates the system did not store the informa-tion on the disc properly.