USING
is more than just a book: it’s the fastest, easiest way to
gain the technology skills you’re looking for!
Don’t just read about it: see it, hear it, with step-by-step video tutorials and valuable audio sidebars delivered through theFree Web Editionthat comes with everyUSINGbook. For the price of the book you get online access anywhere with a web connection—no books to carry, updated content, and the benefi t of video and audio learning.
How Do You Get Access to the Free Web Edition?
Simply visitquepublishing.com/using for information about how to register your USING book or eBook.
About the
USING
Web Edition
The Web Edition of every USING book is powered by Safari allowing you to access the video tutorials and valuable audio sidebars. Plus, you can search the contents of the book, highlight text and attach a note to that text, print your notes and highlights in a custom summary, and cut and paste directly from Safari Books Online.
800 East 96th Street, Indianapolis, Indiana 46240 USA
Acquisitions Editor Michelle Newcomb
Development Editor Deadline Driven Publishing
Managing Editor Kristy Hart
Project Editor Lori Lyons
Copy Editor Apostrophe Editing Services
Indexer Lisa Stumpf
Proofreader Water Crest Publishing, Inc.
Technical Editor Geetesh Bajaj Publishing Coordinator Cindy Teeters Book Designer Anne Jones Compositors Jake McFarland Nonie Ratcliff
Copyright © 2011 by Pearson Education, Inc.
All rights reserved. No part of this book shall be reproduced, stored in a retrieval system, or transmitted by any means, electronic, mechanical, photocopying, recording, or otherwise, without written permission from the publisher. No patent liability is assumed with respect to the use of the information contained herein. Although every precaution has been taken in the preparation of this book, the publisher and author assume no responsibility for errors or omissions. Nor is any liability assumed for damages resulting from the use of the information contained herein.
ISBN-13: 978-0-7897-4294-0 ISBN-10: 0-7897-4294-2
Library of Congress Cataloging-in-Publication Data Rutledge, Patrice-Anne.
Using Microsoft PowerPoint 2010 / Patrice-Anne Rutledge. p. cm.
Includes index. ISBN 978-0-7897-4294-0
1. Presentation graphics software. 2. Microsoft PowerPoint (Computer file) I. Title. T385.R8953 2011
005.5’8—dc22
2010020536
Printed in the United States of America First Printing: August 2010
Trademarks
All terms mentioned in this book that are known to be trademarks or service marks have been appropriately capitalized. Que Publishing cannot attest to the accuracy of this informa-tion. Use of a term in this book should not be regarded as affecting the validity of any trade-mark or service trade-mark.
Warning and Disclaimer
Every effort has been made to make this book as complete and as accurate as possible, but no warranty or fitness is implied. The information provided is on an “as is” basis. The author(s) and the publisher shall have neither liability nor responsibility to any person or entity with respect to any loss or damages arising from the information contained in this book or from the use of programs accompanying it.
Bulk Sales
Que Publishing offers excellent discounts on this book when ordered in quantity for bulk purchases or special sales. For more information, please contact
U.S. Corporate and Government Sales 1-800-382-3419
corpsales@pearsontechgroup.com For sales outside of the U.S., please contact
Contents at a Glance
Introduction xxi
Part I PowerPoint 2010 Basics
1 Introducing PowerPoint 2010 3 2 Creating a Basic Presentation 18
Part II Editing and Formatting Presentations
3 Customizing Themes and Backgrounds 40 4 Working with Text 53
5 Formatting and Organizing Objects, Slides, and Presentations 73 6 Working with Tables 89
7 Outlining Presentations 103 8 Reviewing Presentations 112
Part III Working with Images, Illustrations, and Media
9 Working with Images 122 10 Working with Shapes 137 11 Working with SmartArt 151 12 Working with Charts 163
13 Working with Audio and Video 177
14 Working with Animation and Transitions 196
Part IV Making Presentations
15 Presenting a Slide Show 211
16 Creating and Printing Presentation Materials 233 17 Sharing and Collaborating on Presentations 244
Part V Maximizing the Power of PowerPoint
18 Working with Hyperlinks and Action Buttons 262 19 Customizing PowerPoint 275
20 Accessing PowerPoint on the Web and Mobile Devices 303 21 Extending PowerPoint with Third-Party Tools 313
Media Files Table of Contents
To register this product and gain access to the Free Web Edition and the audio and video files, go to quepublishing.com/using.
Chapter 1: Introducing PowerPoint 2010 3
Tell Me More Media 1.1—Understanding What PowerPoint Can Do 4
Show Me Media 1.2—Using the Ribbon Tabs 6
Show Me Media 1.3—Using Backstage View 8
Show Me Media 1.4—Understanding PowerPoint Views 11
Chapter 2: Creating a Basic Presentation 18
Tell Me More Media 2.1—Understanding PowerPoint Presentations 18
Show Me Media 2.2—Creating a Presentation from a Template 22
Show Me Media 2.3—Adding Sections to Your Presentation 27
Show Me Media 2.4—Saving a Presentation 30
Chapter 3: Customizing Themes and Backgrounds 40
Show Me Media 3.1—Applying a New Theme 40
Tell Me More Media 3.2—Customizing Themes 42
Show Me Media 3.3—Customizing Theme Color Schemes 42
Show Me Media 3.4—Applying and Customizing Backgrounds 50
Chapter 4: Working with Text 53
Show Me Media 4.1—Inserting a Text Box 54
Tell Me More Media 4.2—Formatting Text 57
Point-Counterpoint Media 4.3—Using Text and Bullets: Is Less Really
More? 63
Show Me Media 4.4—Using WordArt 67
Show Me Media 4.5—Running a Spelling Check 71
Chapter 5: Formatting and Organizing Objects, Slides, and Presentations 73
Show Me Media 5.1—Pasting an Object 75
Show Me Media 5.2—Using the Slide Sorter View 86
Chapter 6: Working with Tables 89
Tell Me More Media 6.1—Understanding Tables 89
v
M e d i a Fi l e s Ta b l e o f C o n t e n t s
Show Me Media 6.3—Inserting an Excel Spreadsheet 93
Show Me Media 6.4—Formatting a Table 94
Chapter 7: Outlining Presentations 103
Tell Me More Media 7.1—Creating an Effective Presentation Outline 103
Show Me Media 7.2—Modifying Your Outline 105
Show Me Media 7.3—Inserting an Outline from Another Application 109
Chapter 8: Reviewing Presentations 112
Tell Me More Media 8.1—Understanding PowerPoint Reviewing Tools 112
Show Me Media 8.2—Working with Comments 113
Show Me Media 8.3—Comparing Presentations 116
Chapter 9: Working with Images 122
Tell Me More Media 9.1—Understanding PowerPoint Images 122
Show Me Media 9.2—Inserting Clip Art 124
Show Me Media 9.3—Creating a Presentation from a Photo Album 127
Show Me Media 9.4—Modifying Images 129
Chapter 10: Working with Shapes 137
Show Me Media 10.1—Inserting Shapes 137
Show Me Media 10.2—Applying a Shape Quick Style 143
Show Me Media 10.3—Applying Shape Effects 148
Chapter 11: Working with SmartArt 151
Tell Me More Media 11.1—Understanding SmartArt 151
Show Me Media 11.2—Inserting a SmartArt Graphic 153
Show Me Media 11.3—Using SmartArt Design Tools 156
Show Me Media 11.4—Formatting SmartArt Graphics 161
Chapter 12: Working with Charts 163
Tell Me More Media 12.1—Understanding Charts 163
Show Me Media 12.2—Inserting a Chart 166
Show Me Media 12.3—Inserting a Chart from Excel 169
Show Me Media 14.2—Setting Slide Transitions 197
Show Me Media 14.3—Applying Animation to Objects 199
Chapter 15: Presenting a Slide Show 211
Tell Me More Media 15.1—Preparing for a Polished Delivery 212
Show Me Media 15.2—Setting Up a Show 212
Show Me Media 15.3—Viewing Your Show 220
Tell Me More Media 15.4—Overcoming the Fear of Public Speaking 221
Tell Me More Media 15.5—Managing the Backchannel During Your
Presentation 222
Show Me Media 15.6—Broadcasting a Slide Show 230
Chapter 16: Creating and Printing Presentation Materials 233
Tell Me More Media 16.1—Ensuring a Smooth Printing Process 234
Show Me Media 16.2—Preparing to Print 236
Chapter 17: Sharing and Collaborating on Presentations 244
Tell Me More Media 17.1—Exploring Ways to Share and Collaborate in
PowerPoint 2010 244
Show Me Media 17.2—Protecting Your Presentation 245
Show Me Media 17.3—Inspecting Your Presentation 247
Tell Me More Media 17.4—Setting Ground Rules for Successful
PowerPoint Collaboration 251
Show Me Media 17.5—Saving to the Web 253
Chapter 13: Working with Audio and Video 177
Tell Me More Media 13.1—Working with Audio and Video 177
Show Me Media 13.2—Inserting a Video Clip from Your Computer 183
Show Me Media 13.3—Formatting Audio and Video Clips 186
Show Me Media 13.4—Creating a Video from a PowerPointPresentation 193
Chapter 14: Working with Animation and Transitions 196
vii
M e d i a Fi l e s Ta b l e o f C o n t e n t s
Chapter 18: Working with Hyperlinks and Action Buttons 262
Show Me Media 18.1—Inserting a Hyperlink to an External Website 263
Show Me Media 18.2—Inserting a Hyperlink to Another Slide in Your
Presentation 265
Show Me Media 18.3—Using Action Settings 271
Chapter 19: Customizing PowerPoint 275
Show Me Media 19.1—Working with the Quick Access Toolbar 275
Show Me Media 19.2—Customizing the Ribbon 288
Show Me Media 19.3—Creating a Custom Layout 295
Chapter 20: Accessing PowerPoint on the Web and Mobile Devices 303
Show Me Media 20.1—Adding Files to SkyDrive 305
Show Me Media 20.2—Creating a New Presentation in SkyDrive 306
Show Me Media 20.3—Editing a Presentation in the PowerPoint Web
App 308
Chapter 21: Extending PowerPoint with Third-Party Tools 313
Table of Contents
Introduction . . . .xxi
Part I PowerPoint 2010 Basics 1 Introducing PowerPoint 2010 . . . .3
Understanding What PowerPoint Can Do . . . .3
Exploring New PowerPoint 2010 Features . . . .4
Using the Ribbon Tabs . . . .5
Using Backstage View . . . .8
Using Toolbars . . . .9
Using the Quick Access Toolbar . . . .9
Using Mini Toolbars . . . .9
Using Task Panes . . . .9
Understanding PowerPoint Views . . . .10
Getting Help . . . .15
Searching for Help . . . .15
2 Creating a Basic Presentation . . . .18
Understanding PowerPoint Presentations . . . .18
Understanding Themes . . . .18
Understanding Templates . . . .19
Understanding Slide Layouts . . . .20
Creating a Presentation . . . .21
Creating a Presentation from a Template . . . .22
Creating a New Presentation with a Theme . . . .23
Creating a New Presentation from an Existing Presentation . . . .24
Creating a Presentation from Scratch . . . .25
Adding Slides to Your Presentation . . . .26
Adding Sections to Your Presentation . . . .27
Collapsing and Expanding Sections . . . .28
Removing Sections . . . .29
Saving a Presentation . . . .29
Saving as a PDF or XPS Document . . . .31
Changing to Another File Type . . . .34
Opening a Presentation . . . .35
Renaming a Presentation . . . .37
Closing a Presentation . . . .38
Deleting a Presentation . . . .38
Part II Editing and Formatting Presentations 3 Customizing Themes and Backgrounds . . . .40
Applying Themes . . . .40
Applying a New Theme . . . .40
Applying Multiple Themes to a Single Presentation . . . .41
Customizing Themes . . . .42
Customizing Theme Color Schemes . . . .42
Customizing Theme Fonts . . . .45
Customizing Theme Effects . . . .48
Working with Custom Themes . . . .48
Applying and Customizing Backgrounds . . . .50
Applying a Background Style . . . .50
Customizing a Background . . . .51
Omitting Background Graphics . . . .52
Resetting a Background . . . .52
4 Working with Text . . . .53
Adding Text to a Text or Title Placeholder . . . .53
Using Text Boxes . . . .54
Inserting a Text Box . . . .54
Moving and Resizing a Text Box . . . .54
Formatting a Text Box . . . .55
Formatting Text . . . .56
Enhancing Presentation Text . . . .57
Using the Formatting Tools on the Home Tab . . . .58
Formatting Text with Options in the Font Dialog Box . . . .59
Formatting Text with Options in the Paragraph Dialog Box . . . .61
Formatting Text with the Mini Toolbar . . . .62
Using Bullets . . . .62
Changing the Bullet Style of Selected Text . . . .63
Applying Picture Bullets . . . .64
Applying Character Bullets . . . .65
Using Numbered Lists . . . .66
Changing the Numbering Style of Selected Text . . . .66
ix
Using WordArt . . . .67
Inserting WordArt . . . .68
Formatting WordArt . . . .68
Proofing Your Text . . . .69
Setting Spelling Check Options . . . .70
Checking Your Spelling . . . .71
Looking Up a Synonym in the Thesaurus . . . .72
Looking Up a Synonym . . . .72
5 Formatting and Organizing Objects, Slides, and Presentations . . . .73
Formatting Objects . . . .73
Manipulating Objects . . . .73
Arranging Objects . . . .76
Using the Format Dialog Box . . . .81
Using AutoFit . . . .84
Organizing Slides . . . .85
Using the Slide Sorter View . . . .85
Copying and Moving Slides from One Presentation to Another . . . .86
Deleting Slides . . . .88
6 Working with Tables . . . .89
Understanding Tables . . . .89
Inserting a Table . . . .90
Inserting a New Slide with a Table . . . .90
Drawing Custom Tables . . . .91
Drawing a Table . . . .92
Inserting Excel Spreadsheets . . . .93
Inserting an Excel Spreadsheet . . . .93
Formatting a Table . . . .94
Setting Table Style Options . . . .95
Applying a Table Style . . . .96
Creating a Border . . . .97
Setting Table Fill Color . . . .98
Applying Table Effects . . . .99
Working with Columns and Rows . . . .99
Merging and Splitting Cells . . . .100
Specifying Other Layout Options . . . .100
Adding Bulleted and Numbered Lists Within Tables . . . .101
7 Outlining Presentations . . . .103
Creating an Effective Presentation Outline . . . .103
Using the Outline Tab . . . .104
Modifying Your Outline . . . .105
Promoting and Demoting Outline Points . . . .106
Moving Outline Points Up and Down . . . .107
Collapsing and Expanding Outline Points . . . .108
Showing Slide Formatting . . . .108
Inserting an Outline from Another Application . . . .109
8 Reviewing Presentations . . . .112
Understanding PowerPoint Reviewing Tools . . . .112
Working with Comments . . . .113
Adding Comments to Slides . . . .113
Editing Comments . . . .115
Reviewing Comments . . . .115
Deleting Comments . . . .115
Hiding Comments . . . .116
Comparing Presentations . . . .116
Comparing Two Presentations . . . .116
Working with the Reviewing Pane . . . .117
Viewing Revisions . . . .118
Accepting Changes . . . .119
Rejecting Changes . . . .120
Ending the Review . . . .120
Part III Working with Images, Illustrations, and Media 9 Working with Images . . . .122
Understanding PowerPoint Images . . . .122
Inserting Pictures . . . .123
Inserting Clip Art . . . .124
Inserting Screenshots . . . .126
Working with Photo Albums . . . .127
Creating a Presentation from a Photo Album . . . .127
Modifying Images . . . .129
Adjusting Images . . . .129
Applying Artistic Effects . . . .131
xi
Working with Picture Styles . . . .133
Arranging Images . . . .135
Cropping Images . . . .136
Modifying an Image’s Height and Width . . . .136
10 Working with Shapes . . . .137
Inserting Shapes . . . .137
Inserting a Shape . . . .137
Inserting Lines and Arrows . . . .139
Inserting Rectangles and Ovals . . . .140
Modifying and Enhancing Shapes . . . .141
Working with Shape Quick Styles . . . .142
Specifying Shape Fill Color . . . .143
Specifying Shape Outlines . . . .146
Applying Shape Effects . . . .148
Editing Shapes . . . .149
11 Working with SmartArt . . . .151
Understanding SmartArt Graphics . . . .151
Inserting Smart Art Graphics . . . .153
Modifying and Formatting SmartArt Graphics . . . .155
Using SmartArt Design Tools . . . .156
Formatting SmartArt Graphics . . . .160
12 Working with Charts . . . .163
Understanding Charts . . . .163
Understanding Chart Terminology . . . .164
Understanding Chart Types . . . .165
Inserting Charts . . . .166
Inserting a Chart from Excel . . . .169
Inserting an Excel Chart . . . .169
Modifying and Formatting Charts . . . .170
Modifying Chart Design . . . .170
Modifying Your Chart’s Layout . . . .172
Formatting Charts . . . .175
13 Working with Audio and Video . . . .177
Inserting Audio Clips . . . .178
Inserting Audio Clips from Your Computer . . . .178
Recording Audio Clips . . . .180
Inserting Video Clips . . . .181
Inserting a Video Clip from Your Computer . . . .181
Inserting Audio and Video Clips from the Clip Art Task Pane . . . .184
Formatting Audio and Video Clips . . . .185
Adjusting Audio and Video Clips . . . .186
Specifying a Video Poster Frame . . . .186
Working with Audio and Video Styles . . . .187
Arranging Audio and Video Clips . . . .187
Resizing Audio and Video Clips . . . .188
Specifying Audio and Video Playback Options . . . .188
Playing a Clip . . . .189
Adding a Bookmark . . . .189
Editing Audio and Video Clips . . . .189
Specifying Audio and Video Options . . . .191
Compressing Media Files for Improved Performance . . . .192
Compressing Media Files . . . .192
Creating Videos from PowerPoint Presentations . . . .193
Creating a Video from a PowerPoint Presentation . . . .194
14 Working with Animation and Transitions . . . .196
Understanding Animation and Transitions . . . .196
Setting Slide Transitions . . . .197
Setting Up Presentation Slide Transitions . . . .197
Applying Animation to Objects . . . .199
Animating Objects . . . .199
Customizing Animations on the Animation Pane . . . .201
Setting Additional Effects . . . .202
Setting Timings . . . .204
Animating Charts . . . .205
Animating Text . . . .206
Animating SmartArt Graphics . . . .207
Animating Audio and Video Files . . . .207
Viewing the Advanced Timeline . . . .208
Managing Animations . . . .208
Reordering Animations . . . .208
Modifying Animations . . . .208
Removing Animations . . . .209
Reusing Animations with the Animation Painter . . . .209
xiii
Part IV Making Presentations
15 Presenting a Slide Show . . . .211
Understanding Slide Shows . . . .211
Setting Up a Show . . . .212
Rehearsing Timings . . . .214
Using Timings . . . .215
Deleting Timings . . . .216
Recording Voice Narrations . . . .216
Recording a Voice Narration . . . .217
Rerecording Narrations . . . .218
Playing Narrations . . . .218
Deleting Narrations . . . .218
Creating Custom Shows . . . .218
Viewing Your Show . . . .220
Navigating a Show Full Screen . . . .221
Setting Pointer Options . . . .225
Using the Onscreen Pen to Mark Your Presentation . . . .225
Packaging a Presentation onto a CD . . . .227
Broadcasting a Slide Show . . . .230
16 Creating and Printing Presentation Materials . . . .233
Understanding PowerPoint Printing Options . . . .233
Printing PowerPoint Presentations . . . .235
Preparing to Print . . . .235
Customizing Headers and Footers . . . .239
Previewing a PowerPoint Presentation . . . .240
Printing Your Presentation . . . .240
Creating Handouts in Microsoft Word . . . .242
Creating Handouts in Microsoft Word . . . .242
17 Sharing and Collaborating on Presentations . . . .244
Exploring Ways to Share and Collaborate in PowerPoint . . . .244
Protecting Your Presentation . . . .245
Preparing Your Presentation for Sharing . . . .247
Inspecting Your Presentation . . . .247
Checking Your Presentation for Accessibility . . . .249
Sharing Your Presentation with Others . . . .251
Sending via E-Mail . . . .252
Saving Presentations to the Web . . . .253
Saving Presentations to SharePoint . . . .255
Publishing Slides to a Slide Library . . . .257
Other Ways to Collaborate in Microsoft PowerPoint 2010 . . . .258
Co-Authoring in Microsoft PowerPoint . . . .259
Collaborating with Microsoft Office Communications Server 2007 R2 . . . .259
Collaborating with Microsoft Office Live Workspace . . . .259
Part V Maximizing the Power of PowerPoint 18 Working with Hyperlinks and Action Buttons . . . .262
Working with Hyperlinks . . . .262
Inserting Hyperlinks . . . .262
Customizing Hyperlink ScreenTips . . . .269
Modifying Hyperlinks . . . .270
Removing Hyperlinks . . . .271
Using Action Settings . . . .271
Adding an Action Setting . . . .272
Using Action Buttons . . . .273
Testing Hyperlinks and Action Settings . . . .274
19 Customizing PowerPoint . . . .275
Working with the Quick Access Toolbar . . . .275
Moving the Quick Access Toolbar . . . .275
Adding and Removing Quick Access Toolbar Commands . . . .276
Setting PowerPoint Options . . . .277
Personalizing PowerPoint . . . .277
Setting Proofing Options . . . .278
Setting Save Options . . . .283
Setting Language Options . . . .285
Setting Advanced Options . . . .285
Customizing the Ribbon . . . .286
Customizing the Quick Access Toolbar . . . .289
Setting Add-In Options . . . .291
Setting Trust Center Options . . . .291
Setting Presentation Properties . . . .291
xv
Working with Slide Masters . . . .292
Modifying the Slide Master . . . .293
Adding a Slide Master . . . .294
Creating a Custom Layout . . . .295
Renaming a Slide Master or Layout . . . .297
Duplicating a Slide Master or Layout . . . .298
Deleting a Slide Master or Layout . . . .298
Preserving a Slide Master . . . .299
Applying a Theme to a Slide Master . . . .299
Modifying the Handout and Notes Masters . . . .300
20 Accessing PowerPoint on the Web and Mobile Devices . . . .303
Using the Microsoft PowerPoint Web App . . . .303
Setting Up SkyDrive . . . .303
Adding Files to SkyDrive . . . .305
Creating New Presentations in SkyDrive . . . .306
Setting SkyDrive Permissions . . . .307
Viewing Presentations in the PowerPoint Web App . . . .311
Accessing PowerPoint from Mobile Devices . . . .312
21 Extending PowerPoint with Third-Party Tools . . . .313
Extending PowerPoint with Third-Party Software . . . .313
Camtasia Studio . . . .313
Articulate Rapid E-Learning Studio . . . .314
Adobe Presenter . . . .315
Getting Creative with Third-Party Templates, Backgrounds, and Clip Art . . . .315
Enhancing Your PowerPoint Experience with External Hardware . . .316
Impatica ShowMate . . . .316
Papershow . . . .316
TurningPoint . . . .316
Laser Mouse . . . .317
Integrating PowerPoint with Twitter . . . .317
Poll Everywhere . . . .317
SAP PowerPoint Twitter Tools . . . .317
About the Author
Patrice-Anne Rutledgeis a business technology author and consultant who special-izes in teaching others to maximize the power of new technologies. Patrice has used—and has trained others to use—PowerPoint for many years, designing presen-tations for meetings, seminars, trade shows, and worldwide audiences. She is also the author of four previous books about PowerPoint for Pearson Education. She can be reached through her website at www.patricerutledge.com.
xvii
Dedication
To my family, with thanks for their ongoing support and encouragement.
Acknowledgments
We Want to Hear from You!
As the reader of this book, youare our most important critic and commentator. We value your opinion and want to know what we’re doing right, what we could do better, what areas you’d like to see us publish in, and any other words of wisdom you’re willing to pass our way.
As an associate publisher for Que Publishing, I welcome your comments. You can email or write me directly to let me know what you did or didn’t like about this book—as well as what we can do to make our books better.
Please note that I cannot help you with technical problems related to the topic of this book. We do have a User Services group, however, where I will forward specific techni-cal questions related to the book.
When you write, please be sure to include this book’s title and author as well as your name, email address, and phone number. I will carefully review your com-ments and share them with the author and editors who worked on the book.
xix
We Wa n t t o H e a r f r o m Yo u !
Email: feedback@quepublishing.com
Mail: Greg Wiegand
Associate Publisher Que Publishing 800 East 96th Street Indianapolis, IN 46240 USA
Reader Services
Introduction
Microsoft PowerPoint 2010 is part of Microsoft’s latest suite of business software applications, Microsoft Office 2010. Using PowerPoint, you can quickly create a basic slideshow or you can delve into sophisticated features to create a customized presentation. Because it’s part of the Microsoft Office suite of products, you’ll find PowerPoint to be intuitive and very familiar if you already use any other Office applications, such as Word or Excel.
Using Microsoft PowerPoint 2010is designed to get you up and running on
Pow-erPoint as quickly as possible. This book starts with presentation basics and then introduces you to PowerPoint 2010’s many new features that can give your presen-tation the wow factor, enable you to collaborate with colleagues around the world, and extend the power of PowerPoint with third-party applications. Because know-ing how to use the software is just part of creatknow-ing a successful presentation, Using
Microsoft PowerPoint 2010also provides numerous tips on presentation design,
content, rehearsal, and delivery. For now, turn to Chapter 1, “Introducing Pow-erPoint 2010,” to get started with this powerful presentation tool.
Who This Book Is For
This book is for you if...• You want to become productive with PowerPoint as quickly as possible and are short on time.
• You want to move beyond a basic bulleted list presentation and make the most of PowerPoint’s many design features.
• You’re a visual learner and want to seehow to use PowerPoint in addition to reading about it.
Using This Book
This book enables you to customize your own learning experience. The step-by-step instructions in the book give you a solid foundation in using PowerPoint, while rich and varied online content, including video tutorials and audio sidebars, pro-vide the following:
• Demonstrations of step-by-step tasks covered in the book
• Additional tips or information on a topic
• Practical advice and suggestions
• Direction for more advanced tasks not covered in the book
Here’s a quick look at a few structural features designed to help you get the most out of this book.
• Chapter roadmaps:At the beginning of each chapter is a list of the top-level topics addressed in that chapter. This list enables you to quickly see the infor-mation the chapter contains.
• Notes: Notes provide additional commentary or explanation that doesn’t fit neatly into the surrounding text. Notes give detailed explanations of how something works, alternative ways of performing a task, and other tidbits to get you on your way.
• Tips:This element gives you shortcuts, workarounds, and ways to avoid pitfalls.
• Cautions: Every once in a while, there is something that can have serious repercussions if done incorrectly (or rarely, if done at all). Cautions give you a heads-up.
• Cross-references:Many topics are connected to other topics in various ways. Cross-references help you link related information together, no matter where that information appears in the book. When another section is related to one you are reading, a cross-reference directs you to a specific chapter in the book in which you can find the related information.
LET ME TRY IT
tasks are presented in a step-by-step sequence so you can easily follow along.SHOW ME
videos walk through tasks you’ve just got to see—including bonus advanced techniques.POINT-COUNTERPOINT
audio debates compare alternative solutions—so you can pick one that’s best for you.Special Features
More than just a book, your USING product integrates step-by-step video tutorials and valuable audio sidebars delivered through the Free Web Editionthat comes with every USING book. For the price of the book, you get online access anywhere with a web connection—no books to carry, content is updated as the technology changes, and the benefit of video and audio learning.
About the USING Web Edition
The Web Edition of every USING book is powered by Safari Books Online, allowing you to access the video tutorials and valuable audio sidebars. Plus, you can search the contents of the book, highlight text and attach a note to that text, print your notes and highlights in a custom summary, and cut and paste directly from Safari Books Online.
To register this product and gain access to the Free Web Editionand the audio and video files, go to quepublishing.com/using.
The author also has a website online at www.patricerutledge.com/books/power-point2010, where you can access book updates, news about PowerPoint features and tools, and other books and courses that might be of interest.
xxiii
I
PowerPoint 2010 Basics
1 Introducing PowerPoint 2010 . . . .3
PowerPoint is powerful, easy-to-use presentation software that is part of the Microsoft Office suite of products. You can use PowerPoint to create presentations for a wide variety of audiences and for a wide variety of purposes. A presentation communicates information, and a good presentation can truly convince, motivate, inspire, and educate its audience. PowerPoint offers the tools both to create a basic presentation and to enhance and customize your presentation slides to meet your goals.
In this chapter, you explore the many features and benefits of using PowerPoint, including the new features introduced in PowerPoint 2010. You can also listen to tips on making the most of PowerPoint as a communication and design tool and watch videos that show you how to use the Ribbon tabs, use Backstage View, and work with PowerPoint presentation views.
Understanding What PowerPoint Can Do
One of PowerPoint’s strengths is its flexibility. Using themes, templates, and other presentation building blocks, you can quickly create a basic presentation even if you have little or no design skills. If you are a designer, PowerPoint’s advanced fea-tures and customization options give you complete creative control. With Pow-erPoint, you can
• Create a presentation using a template, using a theme, or from scratch. Another option is importing a presentation outline from another application such as Microsoft Word.
• Add text and tables to your presentation to convey basic information.
• Add visual content with charts, pictures, clip art, SmartArt graphics, and other shapes or objects.
• Bring multimedia into the picture using sound, video, and animation.
• Add interactivity with hyperlinks and action buttons.
1
Introducing PowerPoint 2010
• Create and print notes and handouts for you and your audience.
• Share and collaborate on presentations with others in your organization.
• Access PowerPoint using the PowerPoint web app or a mobile device.
• Deliver a presentation onscreen using a computer, broadcast it online, or cre-ate a presentation video that you can post on the web.
TELL ME MORE
Media 1.1—Understanding What PowerPoint Can Do Access this audio recording through your registered Web Edition atmy.safaribooksonline.com/9780132182553/media.
Exploring New PowerPoint 2010 Features
PowerPoint 2010 includes many new features that users of previous versions will enjoy. This new version of PowerPoint emphasizes visual creativity, usability, and collaboration. Some new features that might interest you include the following:
• Animation Painter—Apply the formatting of one animation to another ani-mation. This button works in much the same way as the Format Painter but-ton. See Chapter 14, “Working with Animation and Transitions,” for more information.
• Presentation Sections—Divide your presentation into logical sections to simplify navigation and organization. See Chapter 5, “Formatting and Orga-nizing Objects, Slides, and Presentations,” for more information.
• Video Editing—Use professional video editing and formatting tools directly in PowerPoint without the need for an external application. See Chapter 13, “Working with Audio and Video,” for more information.
• Paste Preview—Preview what pasted content will look like before you actu-ally paste it. See Chapter 5 for more information.
• Screenshot Captures—Incorporate screenshots directly from PowerPoint. See Chapter 9, “Working with Images,” for more information.
• Backstage View—Perform common file-related tasks such as creating, open-ing, savopen-ing, sharopen-ing, and printing presentations in fewer steps. See “Using Backstage View,” later in this chapter for more information.
5
U s i n g t h e R i b b o n Ta b s
• Co-Authoring—Collaborate with others on the same presentation in real-time. See Chapter 17, “Sharing and Collaborating on Presentations,” for more information.
• Broadcast Slide Show—Broadcast your presentation to anyone on the web using either SharePoint Server 2010 or a free Windows Live account. See Chapter 15, “Presenting a Slide Show,” for more information.
• Create a Video—Share your presentation with others as a high-definition, web-based, or mobile device video. See Chapter 13 for more information.
• Document Sharing—Share your document with colleagues real-time and communicate with them via instant messaging using Office Communicator 2007 R2. See Chapter 17 for more information.
• PowerPoint Web App—View and edit PowerPoint presentations on the web using the external PowerPoint web application. See Chapter 20, “Accessing PowerPoint on the Web and Mobile Devices,” for more information.
In addition to these new features, PowerPoint 2010 also offers many enhance-ments, including
• An enhanced Ribbon that is available across all Office applications
• More Office themes
• More SmartArt graphics
• Easier access to animation tools
• Enhanced slide transitions, including 3-D effects
• Numerous new image editing features
• Powerful editing tools for mathematical equations
• Improved notes printing
• Improved slide show recording functions
• Enhanced language and translation tools
Using the Ribbon Tabs
Although the Ribbonisn’t a new PowerPoint feature (it was introduced in
SHOW ME
Media 1.2—Using the Ribbon Tabs Access this video file through your registered Web Edition atmy.safaribooksonline.com/9780132182553/media.
The Ribbon, which replaces the menu structure found in previous versions of PowerPoint, provides an easy way to access common commands and buttons using the least space possible. The Ribbon is divided into tabs: Home, Insert, Design, Transitions, Animations, Slide Show, Review, View, and Add-Ins. Each Rib-bon tab includes groups and buttons of related features.
Figure 1.1 shows the Home tab.
To quickly determine the function of tab buttons and commands, pause your mouse over each option to display a basic description in a ScreenTip. If a hotkey is available (such as pressing Ctrl+C to copy), it also displays in the ScreenTip.
Common Ribbon features include
• Galleries—Galleries offer a menu of visual choices that pertain to a selected ribbon button or command. For example, when you click the down arrow next to the Themes group on the Design tab, a visual gallery of theme images displays (see Figure 1.2).
• Live Preview—Most, but not all, PowerPoint galleries provide a live preview of each option before you actually apply it to your slide. As an example, the Themes gallery enables you to see how each theme appears on your presen-tation when you pause your mouse over it. That way, you can quickly try out several options before making any changes to your actual presentation.
ScreenTip Tab group Dialog box launcher
7
[image:31.540.40.398.47.271.2]U s i n g t h e R i b b o n Ta b s
Figure 1.2 Galleries offer a quick overview of potential visual effects.
• Dialog box launcher—Clicking one of these small diagonal arrows in the lower-right corner of a group opens a dialog box of related options. For example, the Home tab includes dialog box launchers in the Clipboard, Font, Paragraph, and Drawing groups. The Clipboard dialog box launcher, interest-ingly enough, doesn’t launch a dialog box, but rather a task pane. All the other launchers launch a traditional dialog box. See “Using Task Panes” later in this chapter, for more information about task panes.
• Contextual tabs—Although the main tabs always display on the Ribbon, PowerPoint also includes several contextual Ribbon tabs that appear only when performing specific tasks. For example, when you select a chart on a PowerPoint slide, the Chart Tools tab displays, which includes three subtabs: Design, Layout, and Format (see Figure 1.3). They remain as long as you work on your chart. When you click elsewhere on your slide, they disappear.
See Chapter 19, “Customizing PowerPoint,” for more information about customizing the Ribbon tabs.
A few buttons include two sections: The upper portion performs a default action, and the lower portion (with a down arrow) opens a drop-down menu or gallery of options. For example, clicking the upper portion of the New Slide but-ton on the Home tab automatically inserts a new slide using the default Title Slide layout. Clicking the lower portion opens a gallery of options.
Using Backstage View
PowerPoint 2010 introduces Backstage View, which enables you to perform PowerPoint’s most common file-related tasks in one place. For example, Backstage View is now the place where you create, open, save, share, and print presentations.
SHOW ME
Media 1.3—Using Backstage View Access this video file through your registered Web Edition at my.safaribooksonline.com/9780132182553/media.To access Backstage View, click the File tab. Figure 1.4 shows Backstage View.
On the left side of the screen, you view a list of buttons and tabs. Clicking one of the buttons (Save, Save As, Open, Close, Options, and Exit) performs a command. Clicking one of the tabs (Info, Recent, New, Print, Save & Send, and Help) displays related content on the right side of the screen. Future chapters cover all the features available in Backstage View, including Chapter 2, “Creating a Basic Presentation.”
9
U s i n g Ta s k Pa n e s
Using Toolbars
Although PowerPoint 2010 uses far fewer toolbars than earlier versions of Pow-erPoint, you need to know about two types of toolbars: the Quick Access Toolbar and mini toolbar.
Using the Quick Access Toolbar
The Quick Access Toolbaris a small toolbar that displays in the upper-left corner of your screen (see Figure 1.5) and is available no matter which ribbon tab you select.
By default, this toolbar contains three buttons: Save, Undo, and Repeat, but you can customize it to include almost any PowerPoint command. See Chapter 19, “Cus-tomizing PowerPoint,” for more information about cus“Cus-tomizing the buttons on this toolbar and moving it to another location.
Using Mini Toolbars
Mini toolbarsare small contextual toolbars that appear when you perform specific
tasks. For example, when you select text, a mini toolbar appears with options related to text formatting (see Figure 1.6).
Although you can perform the same tasks using the commands on the main rib-bon tab, using the mini toolbar moves these commands to a more convenient location.
Using Task Panes
A task paneis a window inside PowerPoint that lets you perform common
PowerPoint tasks without covering your slide area. You can keep more than one Figure 1.5 Common commands are at your fingertips no matter what you’re doing in PowerPoint.
pane open at time, but keep in mind that too many open task panes can clutter your screen. A sampling of PowerPoint’s task panes include
• Clip Art—Search for image, audio, and video clips. Click the Clip Art button on the Insert tab to open this task pane, as shown in Figure 1.7.
• Clipboard—Collect and paste up to 24 different items. Click the dialog box launcher in the Clipboard group on the Home tab to open this task pane.
• Animation—Apply sophisticated animations to your slides or objects on your slides. Click the Animation Pane button on the Animations tab to open this task pane.
You can make the task pane wider or narrower if you prefer. To do so, pause the mouse pointer over the left edge of the pane until the pointer becomes a two-headed arrow. Click the mouse and drag the left edge to either the left or right until the task pane is the width you want.
To close a task pane, click the Close (x) button in the upper-right corner.
Understanding PowerPoint Views
[image:34.540.39.396.129.364.2]11
U n d e r s t a n d i n g Po w e r Po i n t Vi e w s
view you use depends on what you’re doing. The View tab, shown in Figure 1.8, includes numerous view buttons in the Presentation Views group and the Master Views group.
SHOW ME
Media 1.4—Understanding PowerPoint Views Access this video file through your registered Web Edition atmy.safaribooksonline.com/9780132182553/media.
You can also click one of the view buttons in the lower-right portion of the PowerPoint window to display the Normal, Slide Sorter, Reading, and Slide Show views.
PowerPoint’s views include
[image:35.540.65.373.360.565.2]• Normal view—This is the default view, as shown in Figure 1.9. Figure 1.8 Select a view option on the View tab.
Slides and Outline tab
Notes pane View buttons
Normal view includes
• Slide pane—Located in the center of the screen. You can add text, graphics, tables, charts, and other objects to your presentation on the slide pane.
Use the scrollbar on the right side of the Slide pane to navigate between pres-entation slides. You can also use the Page Up and Page Down keys to move among slides.
• Slides tab and Outline tab—On the left side of the screen. The Slides tab displays thumbnails of your slides. The Outline tab displays an outline of your presentation, including the initial text of each slide. You can use the tabs to rearrange and organize slides or to display a particular slide in the slide pane. See Chapter 7, “Outlining Presentations,” for more information.
• Notes pane—Includes space for you to write speaker’s notes or notes to yourself about your presentation.
You can resize the panes in Normal view. To do so, drag the border between panes to a new location. If you want to hide the Slides tab and Outline tab, click the Close (x) button. You can always reopen them later by clicking the Normal view button.
• Slide Sorter view—This view, as shown in Figure 1.10, displays miniature previews of all the slides in your presentation, making it easier for you to organize them. See Chapter 7 for more information.
13
[image:37.540.36.398.78.382.2]U n d e r s t a n d i n g Po w e r Po i n t Vi e w s
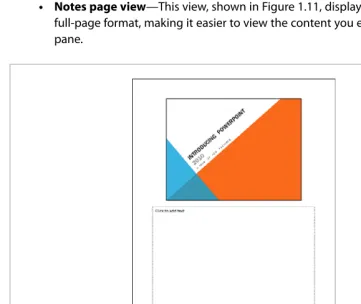
Figure 1.11 View your notes full screen.
• Reading view—Reading view (see Figure 1.12) displays your slides as they would appear in a slide show, full-screen, but with navigation buttons and menus in the lower-right corner.
Menu and Navigation Options
• Slide Show view—Slide Show view displays your slides as they would appear in an actual slide show, full-screen, without any menus, toolbars, or other features. Figure 1.13 shows this view. See Chapter 15, “Presenting a Slide Show,” for more information.
• Master views—PowerPoint’s three master views include the Slide Master, Handout Master, and Notes Master views. You use these views only when you customize your slide masters, including the placeholders, backgrounds, and colors that appear your slide layouts. See Chapter 19, “Customizing Pow-erPoint,” for more information.
Figure 1.13 Slide Show view demonstrates how your presentation will look when you present it.
Menu and navigation options
15
G e t t i n g H e l p
PowerPoint’s default view is Normal view with the Slides tab selected. If you want to change this, click the File tab, select Options, and go to the Advanced tab in the Options dialog box, where you can specify your default view in the Display section.
Getting Help
Although PowerPoint is an intuitive program, there are times when you might need additional help in completing an in-progress task or figuring out how to do some-thing. Fortunately, help is just a click away. Microsoft continuously updates its help system, so if you’re connected to the web while you search for PowerPoint help, you’ll always get the latest help content.
LET ME TRY IT
Searching for Help
To search for help on a specific topic, follow these steps:
[image:39.540.45.396.348.589.2]1. Click the Help button in the upper-right corner of the screen (a small ques-tion mark in a blue circle) or in the upper-right corner of a dialog box. Pressing F1 is another way to access help. Figure 1.14 shows the PowerPoint Help window, which opens.
2. To search for help on a specific topic, enter keywords in the text box, For example, if you want to search for help on creating sections, you could enter “sections.”
3. Click the Search button to initiate the search. The Help window displays a list of search result articles.
4. Click the article title that best matches your search to view the help content.
The top of the Help window includes the following buttons:
• Back—Return to previous help screen.
• Forward—Continue to next help screen.
• Stop—Halt the current search.
• Refresh—Refresh the help content.
• Home—Return to the main PowerPoint Help screen.
• Print—Print the open help article.
• Change Font Size—Make the help text larger or smaller.
• Show Table of Contents—Display a hyperlinked list of all PowerPoint help articles.
• Keep on Top—Maintain the help window on top of other applications, for easy access.
You can also receive help in Backstage View. To do so, click the File button and select Help. Figure 1.15 shows the Support page, which enables you to access the Help window, view a getting started guide on the web, contact the Microsoft sup-port center, check for software updates, and more.
17
[image:41.540.37.399.62.281.2]G e t t i n g H e l p
After you learn—or refresh your memory about—how to navigate PowerPoint, you can create a basic presentation. This chapter gets you up and running on presenta-tion basics so that you can quickly move forward to more advanced and sophisti-cated PowerPoint techniques.
In this chapter, you explore the many ways to create a PowerPoint presentation that suits your needs. You can also listen to presentation tips and watch videos that show you how to create a presentation using a template, create presentation sec-tions, and save your presentation.
Understanding PowerPoint Presentations
Before you start creating your first PowerPoint 2010 presentation, you need to understand themes, templates, and slide layouts, which are presentation building blocks.
TELL ME MORE
Media 2.1—Understanding PowerPoint PresentationsAccess this audio recording through your registered Web Edition at my.safaribooksonline.com/9780132182553/media.
Understanding Themes
A themeis a standalone file with colors, fonts, and effects to use in a single presen-tation. Other Microsoft Office 2010 applications, such as Word and Excel, also sup-port themes, enabling you to create a consistent look and feel between Office documents.
Each theme contains
• Fonts—A theme contains two fonts: one for headings and one for body text.
2
Creating a Basic Presentation
19
U n d e r s t a n d i n g Po w e r Po i n t Pr e s e n t a t i o n s
• Colors—PowerPoint color schemes include a set of 12 coordinated colors for text, backgrounds, accents, and hyperlinks.
• Effects—Office themes apply graphic effects to tables, text, charts, diagrams, shapes, and pictures.
Every presentation has a theme—even a blank presentation, which uses the Office theme. You can apply a theme when you first create your presentation or apply one at any time to an existing presentation.
See Chapter 3, “Customizing Themes and Backgrounds,” for more information about themes.
Understanding Templates
A templateis a starter document that you apply when you create a new
presenta-tion. Templates can include slide layouts; theme colors, fonts, and effects; back-ground styles; and content for a specific type of presentation, such as for a project status meeting or training seminar. Your new presentation contains the template’s content, layout, formatting, and theme. It’s usually a good idea to apply a single template to a presentation for consistency, but you can apply multiple templates to a single presentation if you want. Figure 2.1 illustrates a sample presentation cre-ated with a template.
Understanding Slide Layouts
In addition to themes and templates, the other important design feature you need to consider is a slide layout. A slide layout helps you add specific types of content to your slides, such as text, tables, charts, and pictures.
By default, PowerPoint offers nine choices of layout (see Figure 2.2), but you can create your own layouts as well. If you enabled support for Far East Asian lan-guages, additional layout options are available.
The layouts are
• Title Slide—Include placeholders for a title and subtitle.
• Title and Content—Include placeholders for a title and one content item, such as a table, chart, SmartArt graphic, picture, clip art, or media file.
• Section Header—Introduce a new presentation section.
• Two Content—Include placeholders for a title and two content items.
• Comparison—Include placeholders for a title and two content items, each with a text heading.
• Title Only—Include a placeholder for a title only.
[image:44.540.45.398.179.424.2]• Content with Caption—Include placeholders for a brief title, text, and content item.
• Picture with Caption—Include placeholders for a large picture, title, and text.
If the predefined layouts don’t suit your needs, you can modify a blank slide or modify one of the existing layouts by adding, moving, or deleting objects.
See Chapter 4, “Working with Text,” for more information about inserting text in placeholders.
The Title and Content, Two Content, Comparison, and Content with Caption layouts include a content palette as a placeholder. This content palette includes six but-tons:
• Insert Table
• Insert Chart
• Insert SmartArt Graphic
• Insert Picture from File
• Clip Art
• Insert Media Clip
On any slide that contains the content palette, you can also enter a bullet list using the starter bullet that displays in the upper-left corner of the slide area. If you click one of the buttons on the palette, this bullet disappears.
Future chapters cover each of these options in more detail.
Creating a Presentation
You can create a presentation in several different ways, depending on the amount of content and design assistance you need. You can create the following:
• Presentation using a template—Use one of PowerPoint’s existing tem-plates, a template you create yourself, or a template from Office.com’s collec-tion of templates.
• Presentation using a theme—If you don’t need the content help of a tem-plate, creating a new presentation using a PowerPoint theme provides an ini-tial design with coordinated colors, fonts, and effects.
21
• New presentation using an existing presentation—Using this option, you create a presentation by copying an existing presentation and then editing and modifying it. Doing this doesn’t change the original presentation.
• Blank presentation—A blank presentation contains black text on a white background with no content suggestions. Create a blank presentation only when you are experienced with PowerPoint and want to create a custom design. Even if you want to create a custom presentation, it often saves you time to start with a similar existing design and then customize it.
If you’re going to create a complex presentation, it’s often beneficial to create a storyboard before actually working in PowerPoint. A storyboard is a visual roadmap for your presentation. Begin by mapping out your complete presenta-tion flow. By determining up front the order of your content and the best way to communicate your message (text, tables, charts, audio, video, or pictures), you can design your presentation faster and more effectively.
Creating a Presentation from a Template
Using a template is one of the easiest way’s to create a new presentation. Be sure to customize your template to ensure that it meets the needs of your audience.
SHOW ME
Media 2.2—Creating a Presentation from a Template Access this video file through your registered Web Edition atmy.safaribooksonline.com/9780132182553/media.
LET ME TRY IT
Creating a Presentation from a Template
To create a new presentation from a template, follow these steps:
1. Click the File tab, and then click New to open Backstage view (see Figure 2.3).
2. Select the template you want to use. You can do the following:
• Click the Recent Templates button to select a template you recently applied.
• Click the Sample Templates button to preview PowerPoint’s default templates.
• Click one of the buttons in the Office.com Templates section. PowerPoint searches Office.com and displays matching templates.
3. Click the Create button to open your new presentation with the selected template. If you choose a template on Office.com, click the Download but-ton instead. PowerPoint opens a new presentation based on your selected template.
4. From here, you can add content to your presentation, format it, and insert additional slides.
Creating a New Presentation with a Theme
Using a coordinated PowerPoint theme as a starting point is another good way to create a presentation.
LET ME TRY IT
Creating a New Presentation with a Theme
To create a new presentation with a theme, follow these steps:
1. Click the File tab, and then click New to open Backstage view (refer to Figure 2.3).
2. Click the Themes button. PowerPoint displays a list of available themes, as shown in Figure 2.4.
3. Select the theme you want to apply to your presentation.
23
C r e a t i n g a Pr e s e n t a t i o n
Figure 2.4 Create a coordinated design using a theme.
4. Click the Create button. PowerPoint opens a new presentation with a Title Slide layout.
Creating a New Presentation from an Existing
Presentation
Another way to create a new presentation is simply to copy an existing presenta-tion whose content and format are similar to what you want.
LET ME TRY IT
Creating a New Presentation from an Existing Presentation
To create a new presentation from an existing presentation, follow these steps:
1. Click the File tab, and then click New to open Backstage view (refer to Figure 2.3).
2. Click the New from Existing button. The New from Existing Presentation dialog box opens, as shown in Figure 2.5.
3. Select the existing presentation on which you want to base the new one.
Creating a Presentation from Scratch
If you have your own vision for your presentation and want to start with a blank slate, you can create a presentation from scratch.
LET ME TRY IT
Creating a Presentation from Scratch
To create a blank presentation, follow these steps:
1. Click the File tab, and then click New to open Backstage view.
2. Double-click the Blank Presentation button to open a blank slide in Title Slide layout.
Figure 2.6 illustrates a sample blank presentation.
3. From here, you can add more slides and adjust formatting to suit your needs.
25
C r e a t i n g a Pr e s e n t a t i o n
Adding Slides to Your Presentation
To add a new slide to an open presentation, on the Home tab, click the lower por-tion of the New Slide button. From here, you can
• Select a layout from the gallery that appears (refer to Figure 2.2). See “Understanding Slide Layouts” earlier in this chapter for more information about layout options.
• Select Duplicate Selected Slides to insert duplicates of the slides selected on the Slides tab.
• Select Slides from Outline to create slides from an outline you created in another application, such as Microsoft Word. See Chapter 7, “Outlining Presentations,” for more information.
• Select Reuse Slides to open the Reuse Slides task pane, as shown in
Figure 2.7. You can reuse slides from another PowerPoint presentation or from a slide library. See Chapter 17, “Sharing and Collaborating on Presentations,” for more information about slide libraries.
[image:50.540.37.399.63.294.2]Alternatively, click the top portion of the New Slide button to add a slide in Title and Content layout automatically without opening the gallery. Pressing Ctrl+M also performs this same task.
27
A d d i n g S e c t i o n s t o Yo u r Pr e s e n t a t i o n
Adding Sections to Your Presentation
PowerPoint 2010 introduces the ability to add sections to your presentations. Sec-tions are particularly useful for large presentaSec-tions where it’s easy to get lost in a sea of slides. You can use sections to define presentation topics or distinguish between speakers, for example.
You can also use the Section Header slide layout to further define presentation sec-tions. See the “Understanding Slide Layouts” section earlier in this chapter for more information.
SHOW ME
Media 2.3—Adding Sections to Your Presentation Access this video file through your registered Web Edition atmy.safaribooksonline.com/9780132182553/media.
LET ME TRY IT
Adding Sections to Your Presentation
To add a section to your presentation, follow these steps:1. In either Normal view or Slide Sorter view, select the slide that starts the section you want to insert.
2. On the Home tab, click the Section button, and select Add Section from the menu. PowerPoint inserts an untitled section, as shown in Figure 2.8.
Alternatively, right-click between two slides on the Slides tab where you want to insert a section, and from the menu that displays, click Add Section.
Figure 2.9 Give each section a meaningful name.
3. Select the untitled section, click the Section button again, and select Rename Section. Figure 2.9 shows the Rename Section dialog box, which opens.
Figure 2.8 Add sections to better manage large presentations.
4. Enter a Section Name, and click the Rename button.
You can follow this procedure to enter as many sections as you need in your pres-entation.
Collapsing and Expanding Sections
29
S a v i n g a Pr e s e n t a t i o n
Table 2.1 PowerPoint File Types
File Type Extension Result
PowerPoint Presentation PPTX Save as a PowerPoint 2010 or 2007 presentation (an XML-enabled format).
PowerPoint Macro-Enabled Presentation
PPTM Save as a presentation with macros enabled.
PowerPoint 97–2003 Presentation PPT Save as a presentation you can open in PowerPoint 97 to 2003. PDF PDF Save as a PDF (Portable Document Format) file.
XPS Document XPS Save as an XPS (XML Paper Specification) file. PowerPoint Template POTX Save as a template that you can use as a starter for future
presentations.
PowerPoint Macro-Enabled Template POTM Save as a template with macros enabled.
PowerPoint 97–2003 Template POT Save as a template you can open in PowerPoint 97 to 2003. Office Theme THMX Save as a theme that includes colors, fonts, and effects. PowerPoint Show PPS, PPSX Save as a slide show.
PowerPoint Macro-Enabled Show PPSM Save as a slide show with macros enabled.
PowerPoint 97–2003 Show PPT Save as a slide show you can view in PowerPoint 97 to 2003. PowerPoint Add-In PPAM Save as an add-in that includes custom commands or VBA code. PowerPoint 97–2003 Add-In PPA Save as an add-in that you can open in PowerPoint 97 to 2003.
Removing Sections
To remove a section, select it, click the Section button on the Home tab, and select Remove Section from the menu. To remove all sections, select Remove All Sections. You can also remove a section by right-clicking it and selecting Remove Section from the menu that appears.
When you remove a section, PowerPoint deletes the section marker but not the slides in that section. If you want to remove a section and its slides, right-click the section and select Remove Sections & Slides from the menu.
Saving a Presentation
SHOW ME
Media 2.4—Saving a Presentation Access this video file through your registered Web Edition at my.safaribooksonline.com/9780132182553/media.LET ME TRY IT
Saving a Presentation
To save an open PowerPoint presentation, follow these steps:
1. On the Quick Access Toolbar, click the Save button. Alternatively, press Ctrl+S. If this is the first time you’ve saved the presentation, the Save As dialog box displays, as shown in Figure 2.10.
2. Select the folder in which to save your presentation. PowerPoint automati-cally selects your default folder, but you can change this if you want. You can customize the default folder on the Save tab in the PowerPoint Options dialog box (choose Tools, Save Options from the Save As dialog box).
Table 2.1 PowerPoint File Types
File Type Extension Result
PowerPoint XML Presentation XML Save in XML format for use in an XML information storage system. Windows Media Video WMV Save as a video that you can play on the web or on a media player. GIF Graphics Interchange Format GIF Save as a graphic for use on the web.
JPEG File Interchange Format JPG Save as a graphic for use on the web. PNG Portable Network Graphics Format PNG Save as a graphic for use on the web. TIFF Tag Image File Format TIF Save as a TIFF graphic image. Device Independent Bitmap BMP Save as a bitmap graphic image. Windows Metafile WMF Save as a 16-bit vector graphic image. Enhanced Windows Metafile EMF Save as a 32-bit vector graphic image.
Outline/RTF RTF Save as an outline in Rich Text Format, which you can open in Microsoft Word.
PowerPoint Picture Presentation PPTX Save as a PowerPoint 2010 or 2007 presentation in which each slide is converted to a picture.
31
S a v i n g a Pr e s e n t a t i o n
Figure 2.10 Specify save parameters in this dialog box.
3. In the File Name field, type a name for the presentation. The drop-down list in the File Name field includes previously saved presentations. Even if you choose one of these filenames, PowerPoint warns you so that you don’t accidentally overwrite an existing presentation.
4. Choose the file format from the Save as Type drop-down list. Refer to Table 2.1 for a list of available file types. If you want to save as a PDF or XPS doc-ument, see “Saving as a PDF or XPS Document” later in this section.
5. Click the Save button to save the file.
After you save a presentation, press Ctrl+S or click the Save button to save new changes without opening the Save As dialog box. To open the Save As dialog box to make additional changes, click the File tab and select Save As.
To set and modify save options such as default formats, file locations, embedded fonts, and AutoRecovery, choose Tools, Save Options from the Save As dialog box.
Saving as a PDF or XPS Document
Figure 2.11 New fields appear when you choose to save in a PDF or XPS format.
LET ME TRY IT
Saving as a PDF or XPS Document
To save as a PDF or XPS, follow these steps:
1. Click the File tab, and then click Save As from the menu to open the Save As dialog box (refer to Figure 2.10).
2. Select the folder in which to save your presentation.
3. In the File Name field, type a name for the presentation.
4. In the Save as Type drop-down list, select either PDF or XPS Document. New fields appear in the lower portion of the Save As dialog box, as shown in Figure 2.11.
5. Select the Open File After Publishing check box (the default) if you want to open your presentation in PDF or XPS format after saving.
6. If you want to create a document that’s suitable for both online viewing and printing, select the Standard option button. If you just want people to view it online, select the Minimum Size option button.
8. Select any of the advanced options you want to use in this dialog box. Options include
• Range—Choose whether to include all slides, the current slide only, the slides you’ve selected (on the Slides tab, for example), a specific range of slides, or the slides in a custom show.
• Publish What—Publish slides, handouts, notes pages, or the outline view. If you select handouts, you can specify how many slides to include on each page (up to nine) and the orientation (horizontal or vertical). See Chapter 16, “Creating and Printing Presentation Ma