Table of Contents
Lecture 6
Table of Contents
• table of contents is to organize your document’s headings in a table as shown below
How to Create a Table of Contents?
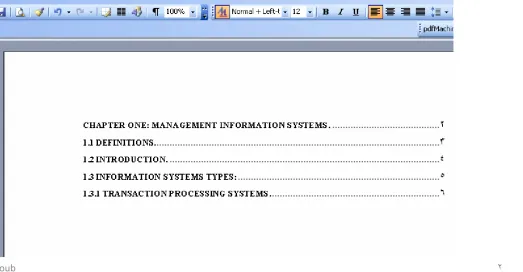
1. Create a table of contents manually: You can type
table of contents entries and use tabs to get the dotted lines, or dot leaders, between each entry and its page number
2. Create a table of contents from outline levels: use the outline toolbar to format and build a table of
contents
3. Create a Table of Contents Using Applied Styles : use the heading styles to format and build a table of contents
4. Create a table of contents from entries you mark yourself: Use the Mark Table of Contents box to insert TOC fields into your document.
How to Create a Table of Contents?
• The easiest way to create a table of contents is
to use the built-in outline-level formats
or
heading styles
• outline level: Paragraph formatting you can use
to assign a hierarchical level (Level 1 through
Level 9) to paragraphs in your document.
• heading style: Formatting applied to a heading.
Microsoft Word has nine different built-in styles:
Heading 1 through Heading 9.
Generate a Table of Contents Using Applied
Styles
1. Open your document where you want to
insert a table of contents.
2. Select the first heading that you want to
appear in the table of contents .
Generate a Table of Contents Using Applied
Styles
3. Click the Style drop-down arrow and apply
Heading 1. or go to Format
→
styles and
formatting
→
apply Heading 1.
When you click styles and formatting this window appears to select the heading
style From this menu
you can select the heading style
Generate a Table of Contents Using Applied
Styles
4. Repeat steps 2 and 3 for each heading that you want
to include in the table of contents .
5. On the Insert menu, point to Reference ،and click
Index and Tables .
6. Click the Table of Contents tab. As shown below.
Generate a Table of Contents Using Applied
Styles
7. To use one of the available designs, click a design in
the Formats box .
8. Select any other table of contents options you want .
9. Click OK and your table of contents is generated.
Create a Table of Contents from Outline Levels
1. On the View menu, point to Toolbars ،and click Outlining. The outlining toolbar appears.
2. Select the first heading that you want to appear in the table of contents .
3. On the Outlining toolbar, select the outline level that you want to associate with the selected paragraph .
When you clicking outlining the outline
toolbar appears. Where you can select
the level for each selected header.
Create a Table of Contents from Outline Levels
4. Repeat steps 2 and 3 for each heading that you want
to include in the table of contents .
5. Click where you want to insert the table of contents .
6. On the Insert menu, point to Reference ،and click
Index and Tables .
7. Click the Table of Contents tab .
8. To use one of the available designs, click a design in
the Formats box .
9. Select any other table of contents options you want .
10. Click OK and your table of contents is generated.
Create a Table of Contents from Entries you
Mark yourself
• This method gives you the ability to create
a TOC from
any
keyword or phrase in
your document .
• This means that your document does not
need to have formatted Headings in order
for Microsoft Word's Table of Contents
feature to work.
• Word can build a TOC from any phrase or
keyword in your document.
Create a Table of Contents from Entries you
Mark yourself
1. Select the first phrase .
2. Press [ALT] + [Shift] + [o]. This combination opens the Mark Table of Contents Entry dialog box. (Notice that your
selected text is in the Entry field.) As shown below. 3. Click the "Mark" button.
The Table Identifier default is C if you do not
have any other tables . This is for multiple tables
and allows for hierarchy among the tables.
Level identifier for your selected text. You change this field to correspond to whatever heading levels you have
selected.
Create a Table of Contents from Entries you
Mark yourself
4. Set aside the "Mark Table of Contents Entry" window out of your way temporarily, or double click the
document. (The Mark Table of Contents Entry dialog box will stay open ).
5. Scroll to and highlight the second phrase.
6. Grab the "Mark Table of Contents Entry" window again, or double click the mark window, and singe left click on the "Entry" field. Your word or phrase should now
appear in the "Entry" field and the "Mark" button should be clickable.
7. Click the Mark button.
8. Repeat these steps until all phrases are marked. 9. Click the "Close" button.
Create a Table of Contents from Entries you
Mark yourself
10. Click where you want to insert the Table of
Contents in your document.
11. Go to Insert
→
Reference
→
Index And
Tables.
12. Select the Table Of Contents tab.
13. click the Options button
14. Under the option for Build table of contents
from, uncheck the Styles and outline levels
checkboxes and check the option for Table
entry fields.
Create a Table of Contents from Entries you Mark yourself
15. Click the OK button twice. Word inserts the new Table of Contents based on your own marked phrases at the insertion point .
Steps to Insert a Table of
Contents with Arabic Explanation