User-Based Firewall Support
Last Updated: January 20, 2012
Firewalls traditionally apply rules based on source and destination IP addresses. In the new, highly dynamic mobile world, IP addresses of end systems constantly change. Therefore it becomes increasingly difficult to have a particular user group function assigned to a particular block of IP addresses. It is also difficult to apply firewall policies for a user group that is the source of the traffic. This feature allows source IP addresses to be associated with user groups. Network administrators can apply firewall policies based on user-groups, and the infrastructure can seamlessly apply these security policies.
Your software release may not support all the features documented in this module. For the latest feature information and caveats, see the release notes for your platform and software release. To find information about the features documented in this module, and to see a list of the releases in which each feature is supported, see the Feature Information for User-Based Firewall Support section.
Use Cisco Feature Navigator to find information about platform support and Cisco IOS and Catalyst OS software image support. To access Cisco Feature Navigator, go to http://www.cisco.com/go/cfn . An account on Cisco.com is not required.
• Finding Feature Information, page 1
• Prerequisites for User-Based Firewall Support, page 2
• Restrictions for User-Based Firewall Support, page 2
• Information About User-Based Firewall Support, page 2
• How to Configure User-Based Firewall Support, page 5
• Configuration Examples for User-Based Firewall Support, page 30
• Additional References, page 32
• Feature Information for User-Based Firewall Support, page 33
Finding Feature Information
Your software release may not support all the features documented in this module. For the latest feature information and caveats, see the release notes for your platform and software release. To find information about the features documented in this module, and to see a list of the releases in which each feature is
Prerequisites for User-Based Firewall Support
• Hardware Requirements, page 2• Software Requirements, page 2
Hardware Requirements
• Access Control Server
• Cisco Network Access Device, which can be any of the following:
◦ Cisco 7200 router
◦ Cisco 1800 router
◦ Cisco 2800 router
◦ Cisco 3800 router
Software Requirements
• Cisco IOS Release 12.4(20)T or a later release
• An Ingress Security feature that uses the Identity Policy infrastructure for policy application
Restrictions for User-Based Firewall Support
User-group mapping is based on the IPv4 address of the end-host’s source. The “user-group” match criterion is supported for inspect class-maps.
Authentication Proxy and IP Admission
Authentication Proxy and IP Admission is an input-only feature that should be configured on all the interfaces of the source zone. The Authentication Proxy and IP Admission feature is not virtual routing and forwarding (VRF)-aware; therefore, the user-group Zone Policy Firewall policies cannot be applied on a per VRF basis.
Information About User-Based Firewall Support
• Feature Design of User-Based Firewall Support, page 3• Firewall Support, page 3
• Authentication Proxy, page 4
• Zone-Based Policy Firewall, page 4
• Tag and Template, page 4
• Access Control List Overview, page 5
Hardware Requirements Prerequisites for User-Based Firewall Support
Feature Design of User-Based Firewall Support
The User-Based Firewall Support feature was designed to provide identity or user-group based security that provides differentiated access for different classes of users. Classification can be provided on the basis of user identity, device type (for example, IP phones), location (for example, building) and role (for example, engineer). Because of the dynamic nature of end-host access, where every user is different and the resource he or she accesses is different, it is important to associate end-user’s identity, role, or location with security policies. This association prevents the need for administrators to constantly update policy filters, a
cumbersome task. The end-user identity can be derived through a variety of different mechanisms. Once a user’s identity is established, security policies will be aware of the user’s identity, not just the source address. Individual policies can be enforced allowing for greater control.
Cisco IOS supports several features that offer dynamic, per-user authentication and authorization of network access connections. These features include 802.1X, IKE, Authentication Proxy, Network Admission Control (NAC), and so on. These features allow network administrators to enforce security policies on per-user basis. By integrating authentication features with Cisco Policy Language-based features such as Zone Based Firewall, quality of service (QoS), and so on, the combination can provide a transparent, reliable, ease to manage and deploy security solution to dynamically authenticate and enforce polices on a per user basis.
Cisco IOS User-Based Firewall Support leverages existing authentication and validation methods to associate each source IP address to a user-group. User-group association can be achieved using two methods. The first method (Tag and Template) uses locally defined policies to achieve the association, while the second method obtains the user-group information from the access control server (ACS) and requires no further configuration on the network access device (NAD).
The User-Based Firewall Support feature leverages the Tag and Template concept where the authenticating server returns a tag-name on validating the user credentials. This tag received on the authentication device is mapped to a template. The template is a control plane policy map that refers to an identity policy configured on the device. The identity policy contains the access policies that are to be applied for the corresponding tag-name. The identity policy defines one or more user-groups to which the source IP would be associated. This mapping provides administrators with flexibility to associate the end-host with multiple user-group memberships. The scope of the user-group defined in the identity policy is local to the device. Once the end-host’s user-group membership has been established, other Cisco IOS policy language based features can enforce security policies on a per user-group basis.
Match Criterion
The match user-group criterion in the inspect type class map configuration can be used to enforce security policies on a per user-group basis. The match criterion filters the traffic stream based on the client’s source IP address in the specified user-group, making it independent of the authentication method that established the group membership. The match criterion in the inspect type class map enables inspection for any ingress traffic and for any protocol, thereby enabling inspection for all traffic.
Firewall Support
Cisco IOS Firewall includes multiple security features. Cisco IOS Firewall stateful packet inspection provides true firewall capabilities to protect networks against unauthorized traffic and control legitimate business-critical data. Authentication proxy controls access to hosts or networks based on user credentials stored in an authentication, authorization, and accounting (AAA) server. Multi-VRF firewall offers firewall
Feature Design of User-Based Firewall Support
application activity to provide granular policy enforcement of application usage, protecting legitimate application protocols from rogue applications and malicious activity. For more information on firewall support see the Cisco IOS Firewall Design Guide.
Authentication Proxy
The Cisco IOS Firewall Authentication Proxy feature provides dynamic, per-user authentication and authorization, authenticating users against industry standard TACACS+ and RADIUS authentication protocols. Authenticating and authorizing connections by users provides more robust protection against network attacks. See the Authentication Proxy document for more information about this feature.
Zone-Based Policy Firewall
Cisco IOS Zone-Based Policy Firewall can be used to deploy security policies by assigning interfaces to different zones and configuring a policy to inspect the traffic moving between these zones. The policy specifies a set of actions to be applied on the defined traffic class. For more information see the document Zone-Based Firewall.
Tag and Template
The Tag and Template feature allows network administrators to define enforcement policies on a local device and have a RADIUS server specify the policy selector to be enforced. This feature can be applied to a NAC architecture. See the Tag and Template feature guide for more information about this feature.
Network Admission Control
In a typical Network Admission Control deployment, an ACS or a RADIUS server is used for validating the user posture information and for applying the policies on the NAD. A centralized ACS can be used to support multiple NADs. This solution has inherent problems associated with it, namely:
• Version control of policies. Typically, a specific NAD that is running a Cisco IOS image may support some access control lists (ACLs), and another NAD may support a different version. Managing different versions can be a problem.
• Users connect on different interfaces to the NAD, and on the basis of the interface type, the policies that can be applied to the user can change, and the NAD can determine the policies to be applied. In the current architecture, the ACS sends the same set of policies to all the NADs when a profile is matched, which does not give enough control to the administrator to configure the polices on the basis of the NAD configuration.
Configuring the Tag and Template feature allows the ACS to map users to specific groups and associate a tag with them. For example, the Usergroup1 user group may have a tag with the name usergroup1. When the NAD queries the ACS for the policies, the ACS can return the tag that is associated with the user group. When this tag is received at the NAD, the NAD can map the tag to a specific template that can have a set of policies that are associated with the user group. This mapping provides administrators with the flexibility to configure the template on a NAD basis, and the policies can change from NAD to NAD even though the tag is the same.
In summary, a template must be configured on the NAD, and the template must be associated with a tag. When the ACS sends the policies back to the NAD, the template that matches the tag that was received from the ACS is used.
Authentication Proxy Information About User-Based Firewall Support
Access Control List Overview
Cisco provides basic traffic filtering capabilities with access control lists (also referred to as access lists). Access lists can be configured for all routed network protocols (IP, AppleTalk, and so on) to filter the packets of those protocols as the packets pass through a router. You can configure access lists at your router to control access to a network. Access lists can prevent certain traffic from entering or exiting a network.
How to Configure User-Based Firewall Support
• Configuring Access Control Lists, page 5• Configuring the Identity Policy for Tag and Template, page 6
• Configuring Control Type Tag Class-Maps or Policy-Maps for Tag and Template, page 7
• Configuring Supplicant-Group Attribute on the ACS, page 9
• Configuring Firewall Class-Maps and Policy-Maps, page 10
• Configuring Firewall Zone Security and Zone-Pair, page 12
• Configuring ACLs for Authentication Proxy, page 13
• Configuring Authentication Proxy, page 16
• Configuring AAA and RADIUS, page 19
• Configuring AAA and LDAP, page 23
Configuring Access Control Lists
To configure ACLs, perform the steps in this section. Policy specific ACLs are defined under the identity policy.
SUMMARY STEPS 1. enable
2. configure terminal
3. ip access-list extended access-list-name
4. permit protocol any host ip-address
5. end
DETAILED STEPS
Command or Action Purpose Step 1 enable
Example: Router> enable
Enables privileged EXEC mode. • Enter your password if prompted.
Access Control List Overview
Command or Action Purpose Step 2 configure terminal
Example:
Router# configure terminal
Enters global configuration mode.
Step 3 ip access-list extended access-list-name
Example:
Router(config)# ip access-list extended auth_proxy_acl
Defines an IP access list and enters extended named access list configuration mode.
Step 4 permit protocol any host ip-address
Example:
Router(config-ext-nacl)# permit tcp any host 192.168.104.136
Sets the permission for an access list using TCP.
Step 5 end
Example:
Router(config-ext-nacl)# end
Exits extended named access list configuration mode.
Configuring the Identity Policy for Tag and Template
To configure the identity policy for Tag and Template, perform the steps in this section. Usergroup support is achieved by configuring the usergroup that is to be associated with the IP address on the NAD itself using a locally defined identity policy. A tag is received from the ACS that matches a template (identity policy) on the NAD. The user-group associated with the IP address is obtained from the NAD.
SUMMARY STEPS 1. enable
2. configure terminal
3. identity policy policy-name
4. user-group group-name
5. access-group group-name
6. end
Configuring the Identity Policy for Tag and Template How to Configure User-Based Firewall Support
DETAILED STEPS
Command or Action Purpose Step 1 enable
Example: Router> enable
Enables privileged EXEC mode. • Enter your password if prompted.
Step 2 configure terminal
Example:
Router# configure terminal
Enters global configuration mode.
Step 3 identity policy policy-name
Example:
Router(config)# identity policy auth_proxy_ip
Creates an identity policy and enters identity policy configuration mode.
Step 4 user-group group-name
Example:
Router(config-identity-policy)# user-group auth_proxy_ug
Establishes a user-group.
Step 5 access-group group-name
Example:
Router(config-identity-policy)# access-group auth_proxy_acl
Specifies the access-group to be applied to the identity policy.
Step 6 end
Example:
Router(config-identity-policy)# end
Exits identity policy configuration mode.
Configuring Control Type Tag Class-Maps or Policy-Maps for Tag and
Template
To configure control type tag class-maps or policy-maps for Tag and Template, perform the steps in this
Configuring Control Type Tag Class-Maps or Policy-Maps for Tag and Template
SUMMARY STEPS 1. enable
2. configure terminal
3. policy-map type control tag policy-map-name
4. class type control tag control-class-name
5. identity policy policy-name
6. exit
7. configure terminal
8. class-map type control tag match-all class-map-name
9. match tag tag-name
10.end
DETAILED STEPS
Command or Action Purpose Step 1 enable
Example: Router> enable
Enables privileged EXEC mode. • Enter your password if prompted.
Step 2 configure terminal
Example:
Router# configure terminal
Enters global configuration mode.
Step 3 policy-map type control tag policy-map-name
Example:
Router(config)# policy-map type control tag all_tag_cm_pm
Creates a control policy map and enters policy-map configuration mode.
Step 4 class type control tag control-class-name
Example:
Router(config-pmap)# class type control tag auth_proxy_tag_cm
Creates a control class and enters policy-map-class configuration mode.
Step 5 identity policy policy-name
Example:
Router(config-pmap-c)# identity policy auth_proxy_ip
Creates an identity policy.
Configuring Control Type Tag Class-Maps or Policy-Maps for Tag and Template How to Configure User-Based Firewall Support
Command or Action Purpose Step 6 exit
Example:
Router(config-pmap-c)# exit
Exits policy-map-class configuration mode.
Step 7 configure terminal
Example:
Router# configure terminal
Enters global configuration mode.
Step 8 class-map type control tag match-all class-map-name
Example:
Router(config)# class-map type control tag match-all auth_proxy_tag_cm
Creates a control class map and enters class-map configuration mode.
Step 9 match tag tag-name
Example:
Router(config-cmap)# match tag auth_proxy_tag
Specifies the tag to be matched for a tag type of class map.
Step 10 end
Example:
Router(config-cmap)# end
Exits class-map configuration mode.
Configuring Supplicant-Group Attribute on the ACS
The supplicant group attribute needs to be configured as a Cisco attribute value (AV) Pair on the ACS for user-based firewall support. To configure the supplicant-group attribute on the ACS, perform the steps in this section. The supplicant-group attribute is defined in the RADIUS and Lightweight Directory Access Protocol (LDAP) authorization group attributes from where all authorization data pertaining to the client resides. The user-group information is obtained from the ACS and no further user-group specific configuration is required on the NAD.
Cisco:Avpair=supplicant-group=eng Defines the supplicant-group attribute.
Configuring Supplicant-Group Attribute on the ACS
Configuring Firewall Class-Maps and Policy-Maps
Perform the following task to configure firewall class-maps and policy-maps. User-groups are configured and attached to policy-maps by using the inspect command with each class-map.
SUMMARY STEPS 1. enable
2. configure terminal
3. class-map type inspect match-all class-map-name
4. match protocol protocol-name
5. match user-group group-name
6. exit
7. configure terminal
8. policy-map type inspect policy-map-name
9. class type inspect class-map-name
10.inspect
11.end
DETAILED STEPS
Command or Action Purpose Step 1 enable
Example: Router> enable
Enables privileged EXEC mode. • Enter your password if prompted.
Step 2 configure terminal
Example:
Router# configure terminal
Enters global configuration mode.
Step 3 class-map type inspect match-all class-map-name
Example:
Router(config)# class-map type inspect match-all auth_proxy_ins_cm
Creates an inspect type class map and enters class-map configuration mode.
Step 4 match protocol protocol-name
Example:
Router(config-cmap)# match protocol telnet
Configures the match criterion for the class map on the basis of the specified protocol.
Configuring Firewall Class-Maps and Policy-Maps How to Configure User-Based Firewall Support
Command or Action Purpose Step 5 match user-group group-name
Example:
Router(config-cmap)# match user-group auth_proxy_ug
Configures the match criterion for the class map on the basis of the specified user-group.
Step 6 exit
Example:
Router(config-cmap)# exit
Exits class-map configuration mode.
Step 7 configure terminal
Example:
Router# configure terminal
Enters global configuration mode.
Step 8 policy-map type inspect policy-map-name
Example:
Router(config)# policy-map type inspect all_ins_cm_pm
Creates an inspect type policy map and enters policy-map configuration mode.
Step 9 class type inspect class-map-name
Example:
Router(config-pmap)# class type inspect auth_proxy_ins_cm
Specifies the traffic (class) on which an action is to be performed.
Step 10 inspect
Example:
Router(config-pmap)# inspect
Enables Cisco IOS stateful packet inspection.
Step 11 end
Example:
Router(config-pmap)# end
Exits policy-map configuration mode.
Configuring Firewall Class-Maps and Policy-Maps
Configuring Firewall Zone Security and Zone-Pair
To configure firewall zone security and zone -pair, perform the steps in this section. Security zones are configured for untrustworthy (outside) and trustworthy (inside) networks or interfaces. Zone-pairs are configured where the source zone is untrustworthy and the destination zone is trustworthy.
SUMMARY STEPS 1. enable
2. configure terminal
3. zone security zone-name
4. end
5. configure terminal
6. zone-pair security zone-pair-name source source-zone-name destination destination-zone-name
7. service-policy type inspect policy-map-name
8. end
DETAILED STEPS
Command or Action Purpose Step 1 enable
Example: Router> enable
Enables privileged EXEC mode. • Enter your password if prompted.
Step 2 configure terminal
Example:
Router# configure terminal
Enters global configuration mode.
Step 3 zone security zone-name
Example:
Router(config)# zone security out_sec_zone
Creates a security zone, and enters security zone configuration mode.
Step 4 end
Example:
Router(config-sec-zone)# end
Exits security zone configuration mode.
Configuring Firewall Zone Security and Zone-Pair How to Configure User-Based Firewall Support
Command or Action Purpose Step 5 configure terminal
Example:
Router# configure terminal
Enters global configuration mode.
Step 6 zone-pair security zone-pair-name source source-zone-name destination destination-zone-name
Example:
Router(config)# zone-pair security out_in source out_sec_zone destination in_sec_zone
Creates a pair and enters security zone-pair configuration mode.
Step 7 service-policy type inspect policy-map-name
Example:
Router(config-sec-zone-pair)# service-policy type inspect all_ins_cm_pm
Attaches a firewall policy map to the zone-pair.
Step 8 end
Example:
Router(config-sec-zone-pair)# end
Exits security zone-pair configuration mode.
Configuring ACLs for Authentication Proxy
To configure ACLs for authentication proxy, perform the steps in this section.
Configuring ACLs for Authentication Proxy
SUMMARY STEPS 1. enable
2. configure terminal
3. ip access-list extended access-list-name
4. permit protocol any source-ip-address destination-ip-address
5. permit protocol any host destination-ip-address
6. permit protocol any any eq bootps
7. permit protocol any any eq domain
8. end
9. configure terminal
10.ip access-list extended access-list-name
11.permit protocol any host destination-ip-address
12.permit protocol any host destination-ip-address eq domain
13.permit protocol any host destination-ip-address eq www
14.permit protocol any host destination-ip-address eq port
15.end
DETAILED STEPS
Command or Action Purpose Step 1 enable
Example: Router> enable
Enables privileged EXEC mode. • Enter your password if prompted.
Step 2 configure terminal
Example:
Router# configure terminal
Enters global configuration mode.
Step 3 ip access-list extended access-list-name
Example:
Router(config)# ip access-list extended 102
Defines an IP access list and enters extended named access list configuration mode.
Step 4 permit protocol any source-ip-address destination-ip-address
Example:
Router(config-ext-nacl)# permit ip any 192.168.100.0 10.0.0.255
Sets the permission for an access list using IP.
Configuring ACLs for Authentication Proxy How to Configure User-Based Firewall Support
Command or Action Purpose Step 5 permit protocol any host destination-ip-address
Example:
Router(config-ext-nacl)# permit ip any host 192.168.104.136
Sets the permission for an access list using IP.
Step 6 permit protocol any any eq bootps
Example:
Router(config-ext-nacl)# permit ip any any eq bootps
Sets the permission for an access list using IP.
Step 7 permit protocol any any eq domain
Example:
Router(config-ext-nacl)# permit ip any any eq domain
Sets the permission for an access list using IP.
Step 8 end
Example:
Router(config-ext-nacl)# end
Exits extended named access list configuration mode.
Step 9 configure terminal
Example:
Router# configure terminal
Enters global configuration mode.
Step 10 ip access-list extended access-list-name
Example:
Router(config)# ip access-list extended 103
Defines an IP access list and enters extended named access list configuration mode.
Step 11 permit protocol any host destination-ip-address
Example:
Router(config-ext-nacl)# permit ip any host 192.168.104.136
Sets the permission for an access list using IP.
Configuring ACLs for Authentication Proxy
Command or Action Purpose Step 12 permit protocol any host destination-ip-address eq domain
Example:
Router(config-ext-nacl)# permit udp any host 192.168.104.136 eq domain
Sets the permission for an access list using user datagram protocol (UDP).
Step 13 permit protocol any host destination-ip-address eq www
Example:
Router(config-ext-nacl)# permit tcp any host 192.168.104.136 eq www
Sets the permission for an access list using TCP.
Step 14 permit protocol any host destination-ip-address eq port
Example:
Router(config-ext-nacl)# permit udp any host 192.168.104.136 eq 443
Sets the permission for an access list using UDP.
Step 15 end
Example:
Router(config-ext-nacl)# end
Exits extended named access list configuration mode.
Configuring Authentication Proxy
To configure authentication proxy default IP admissions, perform the steps in this task.
Configuring Authentication Proxy How to Configure User-Based Firewall Support
SUMMARY STEPS 1. enable
2. configure terminal
3. ip admission auth-proxy-banner http c Auth-Proxy-Banner-Text c
4. ip admission watch-list expiry-time expiry-minutes
5. ip admission max-login-attempts attempt-number
6. ip admission inactivity-timer timeout-minutes
7. ip admission absolute-timer timeout-minutes
8. ip admission init-state-timer timeout-minutes
9. ip admission auth-proxy-audit
10.ip admission watch-list enable
11.ip admission ratelimit limit
12.ip admission name admission-name proxy http list acl
13.ip admission name admission-name proxy telnet list acl
14.ip admission name admission-name proxy http list acl service-policy type tag service-policy-name
15.exit
DETAILED STEPS
Command or Action Purpose Step 1 enable
Example: Router> enable
Enables privileged EXEC mode. • Enter your password if prompted.
Step 2 configure terminal
Example:
Router# configure terminal
Enters global configuration mode.
Step 3 ip admission auth-proxy-banner http c Auth-Proxy-Banner-Text c
Example:
Router(config)# ip admission auth-proxy-banner http c Auth-Proxy-Banner-Text c
Creates a network admission control rule with an
authentication proxy banner to be applied to the interface.
Configuring Authentication Proxy
Command or Action Purpose Step 4 ip admission watch-list expiry-time expiry-minutes
Example:
Router(config)# ip admission watch-list expiry-time 50
Creates a network admission control rule with a watch-list to be applied to the interface.
Step 5 ip admission max-login-attempts attempt-number
Example:
Router(config)# ip admission max-login-attempts 10
Creates a network admission control rule with a specified maximum login attempts per user number to be applied to the interface.
Step 6 ip admission inactivity-timer timeout-minutes
Example:
Router(config)# ip admission inactivity-timer 205
Creates a network admission control rule with a specified inactivity timeout to be applied to the interface.
Step 7 ip admission absolute-timer timeout-minutes
Example:
Router(config)# ip admission absolute-timer 305
Creates a network admission control rule with a specified absolute timeout to be applied to the interface.
Step 8 ip admission init-state-timer timeout-minutes
Example:
Router(config)# ip admission init-state-timer 15
Creates a network admission control rule with a specified init-state timeout to be applied to the interface.
Step 9 ip admission auth-proxy-audit
Example:
Router(config)# ip admission auth-proxy-audit
Creates a network admission control rule with authentication proxy auditing to be applied to the interface.
Step 10 ip admission watch-list enable
Example:
Router(config)# ip admission watch-list enable
Creates a network admission control rule with a watch-list to be applied to the interface.
Configuring Authentication Proxy How to Configure User-Based Firewall Support
Command or Action Purpose Step 11 ip admission ratelimit limit
Example:
Router(config)# ip admission ratelimit 100
Creates a network admission control rule with a specified session rate limit to be applied to the interface.
Step 12 ip admission name admission-name proxy http list acl
Example:
Router(config)# ip admission name auth_rule proxy http list 103
Creates an IP network admission control rule. • Telnet, HTTP, or both can be configured.
Step 13 ip admission name admission-name proxy telnet list acl
Example:
Router(config)# ip admission name auth_rule proxy telnet list 103
Creates an IP network admission control rule. • Telnet, HTTP, or both can be configured.
Step 14 ip admission name admission-name proxy http list acl service-policy type tag service-policy-name
Example:
Router(config)# ip admission name auth_rule proxy http list 103 service-policy type tag all_tag_cm_pm
(Optional) Creates an IP network admission control rule. • Configures a control plane service policy when the
Tag & Template method of user-group association is used.
• Control plane tag service policy that is configured using the policy-map type control tag policy name command, keyword, and argument. This policy map is used to apply the actions on the host when a tag is received.
Step 15 exit
Example:
Router(config)# exit
Exits global configuration mode.
Configuring AAA and RADIUS
To configure AAA and RADIUS servers, perform the steps in this task.
Configuring AAA and RADIUS
SUMMARY STEPS 1. enable
2. configure terminal
3. aaa new-model
4. aaa authentication login default group radius
5. aaa authentication login list-name none
6. aaa authentication eou default enable group radius
7. aaa authorization network default group radius local
8. aaa authorization list-name default group radius
9. aaa accounting auth-proxy default start-stop group group-name
10.aaa accounting system default start-stop group group-name
11.aaa session-id common
12.radius-server attribute 6 on-for-login-auth
13.radius-server attribute 8 include-in-access-req
14.radius-server attribute 25 access-request include
15.radius-server configure-nas
16.radius-server host ip-address auth-port port-number acct-port port-number key string
17.radius-server host ip-address auth-port port-number acct-port port-number key string
18.radius-server source-ports extended
19.radius-server vsa send authentication
20.exit
DETAILED STEPS
Command or Action Purpose Step 1 enable
Example: Router> enable
Enables privileged EXEC mode. • Enter your password if prompted.
Step 2 configure terminal
Example:
Router# configure terminal
Enters global configuration mode.
Step 3 aaa new-model
Example:
Router(config)# aaa new-model
Enables the AAA access control model.
Configuring AAA and RADIUS How to Configure User-Based Firewall Support
Command or Action Purpose Step 4 aaa authentication login default group radius
Example:
Router(config)# aaa authentication login default group radius
Sets AAA authentication at login using the group radius method.
Step 5 aaa authentication login list-name none
Example:
Router(config)# aaa authentication login noAAA none
Sets AAA authentication at login and ensures that the authentication succeeds even if all methods of authentication return an error.
Step 6 aaa authentication eou default enable group radius
Example:
Router(config)# aaa authentication eou default enable group radius
Sets authentication lists for Extensible Authentication Protocol over User Datagram Protocol (EAPoUDP).
Step 7 aaa authorization network default group radius local
Example:
Router(config)# aaa authorization network default group radius local
Sets parameters that restrict user access to a network using the group radius and local methods.
• The group radius method uses the list of all RADIUS servers for authentication.
• The local method uses the local database for authorization.
Step 8 aaa authorization list-name default group radius
Example:
Router(config)# aaa authorization auth-proxy default group radius
Sets parameters that restrict user access to a network using the group radius method.
Step 9 aaa accounting auth-proxy default start-stop group group-name
Example:
Router(config)# aaa accounting auth-proxy default start-stop group radius
Creates a method list to provide information about all authenticated-proxy user events.
• Sends a “start” accounting notice at the beginning of a process and a “stop” accounting notice at the end of a process.
Configuring AAA and RADIUS
Command or Action Purpose Step 10 aaa accounting system default start-stop group
group-name
Example:
Router(config)# aaa accounting system default start-stop group radius
Creates a method list to provide accounting for all system-level events not associated with users.
• Sends a “start” accounting notice at the beginning of a process and a “stop” accounting notice at the end of a process.
Step 11 aaa session-id common
Example:
Router(config)# aaa session-id common
Specifies that the same ID will be assigned for each AAA accounting service type within a call.
Step 12 radius-server attribute 6 on-for-login-auth
Example:
Router(config)# radius-server attribute 6 on-for-login-auth
Sends the Service-Type attribute in the authentication packets.
Step 13 radius-server attribute 8 include-in-access-req
Example:
Router(config)# radius-server attribute 8 include-in-access-req
Sends the IP address of a user to the RADIUS server in the access request.
Step 14 radius-server attribute 25 access-request include
Example:
Router(config)# radius-server attribute 25 access-request include
Sends an arbitrary value that the network access server includes in all accounting packets for the user if supplied by the RADIUS server.
Step 15 radius-server configure-nas
Example:
Router(config)# radius-server configure-nas
Configures the Cisco router or access server to query the vendor-proprietary RADIUS server for the static routes and IP pool definitions used throughout its domain when the device starts up.
Configuring AAA and RADIUS How to Configure User-Based Firewall Support
Command or Action Purpose Step 16 radius-server host ip-address auth-port port-number
acct-port port-number key string
Example:
Router(config)# radius-server host
192.168.104.131 auth-port 1645 acct-port 1646 key string1
Specifies a RADIUS server host.
• Specifies the UDP destination port for authentication requests.
• Specifies the UDP destination port for accounting requests.
Step 17 radius-server host ip-address auth-port port-number acct-port port-number key string
Example:
Router(config)# radius-server host
192.168.104.132 auth-port 1645 acct-port 1646 key string2
Specifies a RADIUS server host.
• Specifies the UDP destination port for authentication requests.
• Specifies the UDP destination port for accounting requests.
Step 18 radius-server source-ports extended
Example:
Router(config)# radius-server source-ports extended
Enables 200 ports in the range from 21645 to 21844 to be used as the source ports for sending out RADIUS requests.
• Ports 1645 and 1646 are used as the source ports for RADIUS requests.
Step 19 radius-server vsa send authentication
Example:
Router(config)# radius-server vsa send authentication
Configures the network access server (NAS) to recognize and use vendor-specific attributes (VSAs).
Step 20 exit
Example:
Router(config)# exit
Exits global configuration mode.
Configuring AAA and LDAP
Perform this task to configure AAA and LDAP servers:
Configuring AAA and LDAP
SUMMARY STEPS 1. enable
2. configure terminal
3. aaa new-model
4. aaa authentication login default group ldap
5. aaa authentication login list-name none
6. aaa authorization network default group ldap local
7. aaa authorization list-name default group ldap
8. ldap attribute map map-name
9. map type ldap-attr-type aaa-attr-type
10.exit
11.ldap server name
12.ipv4 ipv4-address
13.bind authenticate root-dn username password [0 string | 7 string] string
14.base-dn string
15.attribute map map-name
16.exit
DETAILED STEPS
Command or Action Purpose Step 1 enable
Example: Router> enable
Enables privileged EXEC mode. • Enter your password if prompted.
Step 2 configure terminal
Example:
Router# configure terminal
Enters global configuration mode.
Step 3 aaa new-model
Example:
Router(config)# aaa new-model
Enables the AAA access control model.
Configuring AAA and LDAP How to Configure User-Based Firewall Support
Command or Action Purpose Step 4 aaa authentication login default group ldap
Example:
Router(config)# aaa authentication login default group ldap
Sets AAA authentication at login using the group LDAP method.
Step 5 aaa authentication login list-name none
Example:
Router(config)# aaa authentication login AAA none
Sets AAA authentication at login and ensures that the authentication succeeds even if all methods of authentication return an error.
Step 6 aaa authorization network default group ldap local
Example:
Router(config)# aaa authorization network default group ldap local
Sets parameters that restrict user access to a network using the group LDAP and local methods.
• The group LDAP method uses the list of all LDAP servers for authentication.
• The local method uses the local database for authorization.
Step 7 aaa authorization list-name default group ldap
Example:
Router(config)# aaa authorization auth-proxy default group ldap
Sets parameters that restrict user access to a network using the group LDAP method.
Step 8 ldap attribute map map-name
Example:
Router(config)# ldap attribute map map1
Configures dynamic LDAP attribute map and enters attribute-map configuration mode.
Step 9 map type ldap-attr-type aaa-attr-type
Example:
Router(config-attr-map)# map type supp-grp supplicant-group
Defines an attribute map.
Step 10 exit
Example:
Exits the attribute-map configuration mode.
Configuring AAA and LDAP
Command or Action Purpose Step 11 ldap server name
Example:
Router(config)# ldap server ldap_dir_1
Specifies the LDAP server name and enters LDAP server configuration mode.
Step 12 ipv4 ipv4-address
Example:
Router(config-ldap-server)# ipv4 10.0.0.1
Specifies the IP address of the LDAP server.
Step 13 bind authenticate root-dn username password [0 string | 7 string] string
Example:
Router(config-ldap-server)# bind authenticate root-dn “cn=administrator,cn=users, dc=cisco,dc=com password”
Authenticates a client to a LDAP server.
Step 14 base-dn string
Example:
Router(config-ldap-server)# base-dn dc=example,dc=sns,dc=com
(Optional) Configures the base DN that you want to use to perform search operations in the LDAP directory tree.
Step 15 attribute map map-name
Example:
Router(config-ldap-server)# attribute map map1
Attaches the attribute map to a particular LDAP server.
Step 16 exit
Example:
Router(config-ldap-server)# exit
Exits LDAP server group configuration mode.
• Troubleshooting Tips, page 26
• Examples, page 27
Troubleshooting Tips
The following commands can be used to troubleshoot User-Based Firewall Support: • clear ip admission cache
Configuring AAA and LDAP Troubleshooting Tips
• debug user-group • show debugging • show epm session ip • show ip access-lists • show ip admission • show logging
• show policy-map type inspect zone-pair • show user-group
Examples
show epm session ip
The following example shows sample output of the show epm sessioncommand when the summary keyword is used.
Router# show epm session ip summary EPM Session Information
---Total sessions seen so far: 8 Total Active sessions: 1 Session IP Address:
---192.168.101.131
The following example shows sample output of the show epm sessioncommand when the ip-address argument is specified. The output below is displayed if a locally defined user-group association (Tag and Template method) is used.
Router# show epm session ip 192.168.101.131 Admission feature: Authproxy
Tag Received: eng_group_tag Policy map used: all_tag_cm_pm Class map matched: eng_tag_cm
The following example shows sample output of the show epm sessioncommand when the ip-address argument is specified. The output below is displayed if ACS defined (supplicant-group attribute configured on the ACS) user-group association is used.
Router# show epm session ip 192.168.101.131 Admission feature: Authproxy
AAA policies:
ACS ACL: xACSACLx-IP-TEST_ACL-47dfc392 Supplicant-Group: eng
Supplicant-Group: mgr
Proxy ACl: permit udp any any Router#
show ip access-lists
The following example shows sample output of the show ip access-listscommand.
Router# show ip access-lists Extended IP access list 102
Configuring AAA and LDAP
from AAA
10 permit ip any 192.168.100.0 10.0.0.255 (956 matches) 20 permit ip any 192.168.101.0 10.0.0.255 (9 matches) 30 permit ip any host 192.168.104.136 (20 matches) 40 permit udp any any eq bootps
50 permit udp any any eq domain
Extended IP access list 103
10 permit ip any host 192.168.104.136 (3 matches) 20 permit udp any host 192.168.104.136 eq domain 30 permit tcp any host 192.168.104.136 eq www 40 permit udp any host 192.168.104.136 eq 443 50 permit tcp any host 192.168.104.136 eq 443 Extended IP access list vendor_group_acl
10 permit ip any host 192.168.104.136 Extended IP access list auth_proxy_acl 10 permit tcp any host 192.168.104.136 20 permit udp any host 192.168.104.136 30 permit icmp any host 192.168.104.136 Extended IP access list sales_group_acl 10 permit ip any host 192.168.104.131 Extended IP access list eng_group_acl 10 permit ip any host 192.168.100.132 Extended IP access list manager_group_acl 10 permit ip any host 192.168.104.128 Router#
show ip admission
The following is sample output of the show ip admissioncommand when the configuration keyword is used.
Router# show ip admission configuration Authentication Proxy Banner
HTTP Protocol Banner: Auth-Proxy-Banner-Text Authentication global cache time is 205 minutes Authentication global absolute time is 305 minutes Authentication global init state time is 15 minutes Authentication Proxy Session ratelimit is 100 Authentication Proxy Session Watch-list is enabled Watch-list expiry timeout is 50 minutes
Authentication Proxy Auditing is enabled Max Login attempts per user is 10 Authentication Proxy Rule Configuration Auth-proxy name auth_rule
http list 103 inactivity-timer 205 minutes Router#
The following is sample output of the show ip admissioncommand when the cache keyword is used. After a successful Telnet/HTTP-proxy session, from a Cisco Trust Agent (CTA) client to an Audit Server, is established, logs are displayed.
Router# show ip admission cache Authentication Proxy Cache
Client Name aaatestuser, Client IP 192.168.101.131, Port 1870, timeout 205, Time Remaining 205, state ESTAB
show logging
The following is sample output of the show loggingcommand.
Router# show logging Log Buffer (65000 bytes):
*Jul 3 05:33:13:935: %SYS-5-CONFIG_I: Configured from console by console
*Jul 3 05:33:18.471: USRGRP-API: [Type=IPv4 Val=192.168.101.131 Group-h_ug]: Usergroup opcode entry deletion.
*Jul 3 05:33:18.471: %UG-6-MEMBERSHIP: IP=192.168.101.131| INTERFACE=Vlan|
Configuring AAA and LDAP Examples
USERGROUP=eng_group_ug| STATUS-REMOVED
*Jul 3 05:33:18.471: USRGRP-ENTRY: [Type=IPv4 Val=192.168.101.131 :: Group=eng_group_ug Count=0]:Usergroup entry deleted
*Jul 3 05:33:18.471: USRGRP-ENTRY: [Type=IPv4 Val=192.168.101.131 :: Group=eng_group_ug Count=0]:Usergroup entry clean up and free
*Jul 3 05:33:18.471: USRGRP-DB: Group=h_ug Count=0: Usergroup is empty. Destroy Group. *Jul 3 05:33:18.471: USRGRP-DB: Group=h_ug Count=0: Clean up and free usergroup db. *Jul 3 05:33:22.383: USRGRP-API: [Type=IPv4 Val=192.168.101.131 Group=eng_group_ug]: Usergroup opcode entry addition.
*Jul 3 05:33:22.383: USRGRP-DB: Group=h_ug Count=0 New usergroup db created. *Jul 3 05:33:22.383: %UG-6-MEMBERSHIP: IP=192.168.101.131| INTERFACE=Vlan333| USERGROUP=eng_group_ug| STATUS=ESTABLISHED
*Jul 3 05:33:22.383: USRGRP-ENTRY: [Type=IPv4 Val=192.168.101.131 :: Group=eng_group_ug Count=1]: Usergroup entry added
*Jul 3 05:33:41.239: USRGRP-API: [Type=IPv4 Val=192.168.101.131 Group=eng_group_ug]: Usergroup opcode entry deletion.
*Jul 3 05:33:41.239: %UG-6-MEMBERSHIP: IP=192.168.101.131| INTERFACE=Vlan333| USERGROUP=eng_group_ug| STATUS=REMOVED
*Jul 3 05:33:41.239: USRGRP-ENTRY: [Type=IPv4 Val=192.168.101.131 :: Group=eng_group_ug Count=0]: Usergroup entry deleted
*Jul 3 05:33:41.239: USRGRP-ENTRY: [Type=IPv4 Val=192.168.101.131 :: Group=eng_group_ug Count=0]: Usergroup entry clean up and free
*Jul 3 05:33:41.239: USRGRP-DB: Group=eng_group_ug Count=0: Usergroup is empty. Destroy group.
*Jul 3 05:33:41.239: USRGRP-DB: Group=eng_group_ug Count=0: Clean up and free usergroup db.
*Jul 3 05:33:50.687: USRGRP-API: {Type=IPv4 Val=192.168.101.131 Group=eng_group_ug]: Usergroup opcode entry addition.
*Jul 3 05:33:50.687: USRGRP-DB: Group=eng_group_ug Count=0: New usergroup db created. *Jul 3 05:33:50.687: %UG-6-MEMBERSHIP: IP=192.168.101.131| INTERFACE=Vlan333| USERGROUP=eng_group_ug| STATUS=ESTABLISHED
*Jul 3 05:33:50.687: USRGRP-ENTRY: [Type=IPv4 Val=192.168.101.131 :: Group=eng_group_ug Count=1]: Usergroup entry added
show policy-map type inspect zone-pair
The following is sample output of the show policy-map type inspect zone-paircommand when the sessions keyword is used.
Router# show policy-map type inspect zone-pair sessions policy exists on zp out_in
Zone-pair: out_in
Service-policy inspect: all_ins_cm_pm Class-map: vendor_group_ins_cm (match-all) Match: user-group vendor_group_ug
Class-map: manager_group_ins_cm (match-all) Match: protocol telnet
Match: user-group manager_group_ug Class-map: auth_proxy_ins_cm (match-all) Match: user-group auth_proxy_ug
Match: protocol telnet
Number of Established Sessions = 1 Established Sessions
Session 49D12BE0 (192.168.101.131:1872)=>(192.168.104.136:23) telnet:tcp SIS_OPEN Created 00:00:15, Last heard 00:00:09
Bytes sent (initiator:responder) [171:249] Class-map: eng_group_ins_cm (match-all) Match: user-group eng_group_ug
Match: protocol ftp
Number of Established Sessions = 1 Established Sessions
Session 49D12E20 (192.168.101.131:1874)=>(192.168.104.136:21) ftp:tcp SIS_OPEN Created 00:00:12, Last heard 00:00:06
Bytes sent (initiator:responder) [45:137] Class-map: sales_group_ins_cm (match-all) Match: protocol ftp
Match: user-group sales_group_ug
Configuring AAA and LDAP
show user-group
The following is sample output of the show user-groupcommand when the configuration keyword is used.
Router# show user-group Usergroup: auth_proxy_ug
---User Name Type Interface Learn Age (min)
---192.168.101.131 IPv4 Vlan333 Dynamic 0 Usergroup: eng_group_ug
---User Name Type Interface Learn Age (min)
---192.168.101.131 IPv4 Vlan333 Dynamic 0
The following is sample output of the show user-groupcommand when the group-name argument is used.
Router# show user-group auth_proxy_ug Usergroup: auth_proxy_ug
---User Name Type Interface Learn Age (min)
---192.168.101.131 IPv4 Vlan333 Dynamic 0
The following is sample output of the show user-groupcommand when the countkeyword is used.
Router# show user-group count Total Usergroup: 2
---User Group Members
---auth_proxy_ug 1
eng_proxy_ug 1
Configuration Examples for User-Based Firewall Support
• Cisco IOS Authentication Proxy Example, page 30Cisco IOS Authentication Proxy Example
The following example shows how to configure User-Based Firewall Support. The Cisco IOS
Authentication Proxy maps two users to different user-groups. Zone Policy Firewall policies are configured on a per user-group basis.
!IP Admission configuration
Configure the rule for HTTP based proxy authentication and associate the control plane tag service policy.
!
configure terminal
ip admission name auth-http proxy http service-policy type tag global-policy ip http server ip http secure-server !AAA configuration ! aaa new-model !
aaa authentication login default group radius aaa authentication login noAAA none
aaa authentication eou default group radius
aaa authorization network default group radius local aaa authorization auth-proxy default group radius
Cisco IOS Authentication Proxy Example Configuration Examples for User-Based Firewall Support
aaa accounting auth-proxy default start-stop group radius aaa accounting system default start-stop group radius aaa session-id common
!
radius-server attribute 6 on-for-login-auth radius-server attribute 8 include-in-access-req radius-server attribute 25 access-request include radius-server configure-nas
radius-server host 192.168.104.131 auth-port 1645 acct-port 1646 key cisco radius-server host 192.168.104.132 auth-port 1645 acct-port 1646 key cisco radius-server source-ports extended
radius-server vsa send authentication !
!Tag and Template configuration.
Configuration policy attributes for the engineer. !
identity policy engineer-policy access-group engineer-acl user-group group-engineer identity policy manager-policy access-group manager-acl user-group group-manager
!Define type control tag class-maps !
class-map type control tag match-all auth_proxy_tag_cm match tag auth_proxy_tag
class-map type control tag match-all eng_tag_cm match tag eng_group_tag
class-map type control tag match-all manager_tag_cm match tag manager_group_tag
!
!Define the control plane tag policy map. !
policy-map type tag control tag global-policy class engineer-class
identity policy engineer-policy class manager-class
identity policy manager-policy
!Define per-user group traffic classification based on membership of the source IP address in the specified user-group.
!
class-map type inspect match-all engineer-insp-cmap match user-group group-engineer
match protocol tcp match protocol udp
class-map type inspect match-all manager-insp-cmap match user-group group-manager
match protocol http
!Zone Policy Firewall configuration. Configure zones z1 and z2.
!
zone security z1 zone security z2
!Configure the policy map to inspect traffic between z1 and z2. !
policy-map type inspect z1-z2-policy class type inspect engineer-insp-cmap inspect
class type inspect manager-insp-cmap inspect
!Configure interfaces to their respective zones and apply the ip admission rule on the source zone member(s).
! interface e0 ip admission auth-http zone-member security z1 interface e1 zone-member security z2
!Configure the zone-pair and apply the appropriate policy-map.
Cisco IOS Authentication Proxy Example
Additional References
The following sections provide references related to the User-Based Firewall Support feature.
Related Documents
Related Topic Document Title
Cisco IOS Firewall Design The Cisco IOS Firewall Design Guide Cisco IOS firewall commands Cisco IOS Security Command Reference
Cisco IOS Tag and Template “Tag and Template” module
Cisco IOS Zone-Based Policy Firewall Zone-Based Policy Firewall” module Cisco IOS Authentication Proxy “Authentication Proxy” module
Standards
Standard Title
No new or modified standards are supported by this feature, and support for existing standards has not been modified by this feature.
--MIBs
MIB MIBs Link
None To locate and download MIBs for selected
platforms, Cisco IOS releases, and feature sets, use Cisco MIB Locator found at the following URL:
http://www.cisco.com/go/mibs
RFCs
RFC Title
None
--Cisco IOS Authentication Proxy Example Additional References
Technical Assistance
Description Link
The Cisco Support website provides extensive online resources, including documentation and tools for troubleshooting and resolving technical issues with Cisco products and technologies.
To receive security and technical information about your products, you can subscribe to various services, such as the Product Alert Tool (accessed from Field Notices), the Cisco Technical Services Newsletter, and Really Simple Syndication (RSS) Feeds.
Access to most tools on the Cisco Support website requires a Cisco.com user ID and password.
http://www.cisco.com/cisco/web/support/ index.html
Feature Information for User-Based Firewall Support
The following table provides release information about the feature or features described in this module. This table lists only the software release that introduced support for a given feature in a given software release train. Unless noted otherwise, subsequent releases of that software release train also support that feature.
Use Cisco Feature Navigator to find information about platform support and Cisco software image support. To access Cisco Feature Navigator, go to www.cisco.com/go/cfn. An account on Cisco.com is not required.
Table 1 Feature Information for User-Based Firewall Support
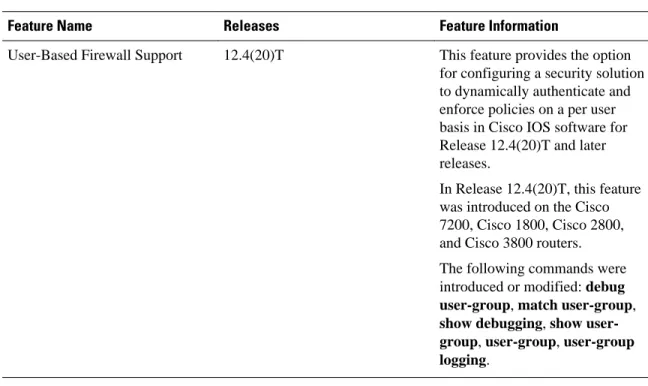
Feature Name Releases Feature Information
User-Based Firewall Support 12.4(20)T This feature provides the option for configuring a security solution to dynamically authenticate and enforce policies on a per user basis in Cisco IOS software for Release 12.4(20)T and later releases.
In Release 12.4(20)T, this feature was introduced on the Cisco 7200, Cisco 1800, Cisco 2800, and Cisco 3800 routers. The following commands were introduced or modified: debug user-group, match user-group, show debugging, show user-Cisco IOS Authentication Proxy Example
Feature Name Releases Feature Information
LDAP Active Directory support for authproxy
15.1(1)T This feature enables the
authentication proxy to authenticate and authorize the users with the Active Directory server using LDAP.
The following commands were introduced or modified: aaa authentication , aaa
authorization, attribute map, bind authenticate, base-dn, ipv4, ldap attribute map, map type, ldap server.
Cisco and the Cisco logo are trademarks or registered trademarks of Cisco and/or its affiliates in the U.S. and other countries. To view a list of Cisco trademarks, go to this URL: www.cisco.com/go/trademarks. Third-party trademarks mentioned are the property of their respective owners. The use of the word partner does not imply a partnership relationship between Cisco and any other company. (1110R)
Any Internet Protocol (IP) addresses and phone numbers used in this document are not intended to be actual addresses and phone numbers. Any examples, command display output, network topology diagrams, and other figures included in the document are shown for illustrative purposes only. Any use of actual IP addresses or phone numbers in illustrative content is unintentional and coincidental.
© 2012 Cisco Systems, Inc. All rights reserved.