PROFESSIONAL NODE.JS®
INTRODUCTION . . . .xxvii
PART I
INTRODUCTION AND SETUP
CHAPTER 1 Installing Node . . . 3CHAPTER 2 Introducing Node . . . .15
PART II
NODE CORE API BASICS
CHAPTER 3 Loading Modules . . . 23CHAPTER 4 Using Buff ers to Manipulate, Encode, and Decode Binary Data . . . 29
CHAPTER 5 Using the Event Emitter Pattern to Simplify Event Binding . . . 35
CHAPTER 6 Scheduling the Execution of Functions Using Timers . . . 45
PART III FILES, PROCESSES, STREAMS, AND NETWORKING
CHAPTER 7 Querying, Reading from, and Writing to Files . . . 53CHAPTER 8 Creating and Controlling External Processes . . . 63
CHAPTER 9 Reading and Writing Streams of Data . . . 75
CHAPTER 10 Building TCP Servers . . . 83
CHAPTER 11 Building HTTP Servers . . . 95
CHAPTER 12 Building a TCP Client . . . 103
CHAPTER 13 Making HTTP Requests . . . 113
CHAPTER 14 Using Datagrams (UDP) . . . 129
CHAPTER 15 Securing Your TCP Server with TLS/SSL . . . 139
CHAPTER 16 Securing Your HTTP Server with HTTPS . . . 149
PART IV BUILDING AND DEBUGGING MODULES AND APPLICATIONS
CHAPTER 17 Testing Modules and Applications . . . 157CHAPTER 18 Debugging Modules and Applications . . . 167
CHAPTER 19 Controlling the Callback Flow . . . .177
Continues
ffirs.indd i
PART V
BUILDING WEB APPLICATIONS
CHAPTER 20 Building and Using HTTP Middleware . . . 197
CHAPTER 21 Making a Web Application Using Express.js . . . 217
CHAPTER 22 Making Universal Real-Time Web Applications Using Socket.IO . . . . 241
PART VI CONNECTING TO DATABASES
CHAPTER 23 Connecting to MySQL Using node-mysql . . . 267CHAPTER 24 Connecting to CouchDB Using Nano . . . 277
CHAPTER 25 Connecting to MongoDB Using Mongoose . . . 311
PROFESSIONAL
Node.js
®ffirs.indd iii
PROFESSIONAL
Node.js
®BUILDING JAVASCRIPT-BASED SCALABLE SOFTWARE
Pedro Teixeira
ffirs.indd v
Professional Node.js®: Building JavaScript-Based Scalable Software Published by
John Wiley & Sons, Inc. 10475 Crosspoint Boulevard Indianapolis, IN 46256 www.wiley.com
Copyright © 2013 by John Wiley & Sons, Inc., Indianapolis, Indiana
Published simultaneously in Canada
ISBN: 978-1-118-18546-9 ISBN: 978-1-118-22754-1 (ebk) ISBN: 978-1-118-24056-4 (ebk) ISBN: 978-1-118-26518-5 (ebk)
Manufactured in the United States of America
10 9 8 7 6 5 4 3 2 1
No part of this publication may be reproduced, stored in a retrieval system or transmitted in any form or by any means, electronic, mechanical, photocopying, recording, scanning or otherwise, except as permitted under Sections 107 or 108 of the 1976 United States Copyright Act, without either the prior written permission of the Publisher, or authorization through payment of the appropriate per-copy fee to the Copyright Clearance Center, 222 Rosewood Drive, Danvers, MA 01923, (978) 750-8400, fax (978) 646-8600. Requests to the Publisher for permission should be addressed to the Permissions Department, John Wiley & Sons, Inc., 111 River Street, Hoboken, NJ 07030, (201) 748-6011,
fax (201) 748-6008, or online at http://www.wiley.com/go/permissions.
Limit of Liability/Disclaimer of Warranty: The publisher and the author make no representations or warranties with respect to the accuracy or completeness of the contents of this work and specifi cally disclaim all warranties, including without limitation warranties of fi tness for a particular purpose. No warranty may be created or extended by sales or promotional materials. The advice and strategies contained herein may not be suitable for every situation. This work is sold with the understanding that the publisher is not engaged in rendering legal, accounting, or other professional services. If professional assistance is required, the services of a competent professional person should be sought. Neither the publisher nor the author shall be liable for damages arising herefrom. The fact that an organization or Web site is referred to in this work as a citation and/or a potential source of further information does not mean that the author or the publisher endorses the information the organization or Web site may provide or recommendations it may make. Further, readers should be aware that Internet Web sites listed in this work may have changed or disappeared between when this work was written and when it is read.
For general information on our other products and services please contact our Customer Care Department within the United States at (877) 762-2974, outside the United States at (317) 572-3993 or fax (317) 572-4002.
Wiley publishes in a variety of print and electronic formats and by print-on-demand. Some material included with standard print versions of this book may not be included in e-books or in print-on-demand. If this book refers to media such as a CD or DVD that is not included in the version you purchased, you may download this material at http://booksupport.wiley.com. For more information about Wiley products, visit www.wiley.com.
Library of Congress Control Number: 2012940020
This book is dedicated to my wife, Susana.
Throughout all these years she has always been an
example of strength and persistence.
ffirs.indd vii
ABOUT THE AUTHOR
PEDRO TEIXEIRA is a prolifi c open-source programmer and author of many Node.js modules. After
graduating with a degree in Software Engineering more than 14 years ago, he has been a consultant, a programmer, and an active and internationally known Node.js community member.
He is a founding partner of The Node Firm and a Senior Programmer at Nodejitsu Inc., the leading Node.js platform-as-a-service provider. He is also the author of the popular Node Tuts screencasts. When Pedro was 10 years old, his father taught him how to program a ZX Spectrum, and since then he has never wanted to stop. He taught himself how to program his father’s Apple IIc and then entered the PC era. In college he was introduced to the universe of UNIX and open-source, becom-ing seriously addicted to it. In his professional life he has developed systems and products built with Visual Basic, C, C++, Java, PHP, Ruby, and JavaScript for big telecommunications companies, banks, hotel chains, and others.
He has been a Node.js enthusiast since its initial development, having authored many applications and many well-known modules like Fugue, Alfred.js, Carrier, Nock, and more.
ffirs.indd ix
ABOUT THE TECHNICAL EDITOR
MANUEL KIESSLING is a software development and systems administration team lead, using and
teaching agile practices in both domains. He runs several open-source projects, is an active blogger, and wrote the freely available Node Beginner Book. He currently lives near Cologne, Germany, with his wife and two children.
He is the co-author of Chapter 22, “Making Universal Real-Time Web Applications Using Socket.IO,” and Chapter 23, “Connecting to MySQL Using node-mysql.”
ffirs.indd xi
CREDITS
ACQUISITIONS EDITOR
Mary James
PROJECT EDITOR
Tora Estep
TECHNICAL EDITOR
Manuel Kiessling
PRODUCTION EDITOR
Daniel Scribner
COPY EDITOR
Kezia Endsley
EDITORIAL MANAGER
Mary Beth Wakefi eld
FREELANCER EDITORIAL MANAGER
Rosemarie Graham
ASSOCIATE DIRECTOR OF MARKETING
David Mayhew
MARKETING MANAGER
Ashley Zurcher
BUSINESS MANAGER
Amy Knies
PRODUCTION MANAGER
Tim Tate
VICE PRESIDENT AND EXECUTIVE
GROUP PUBLISHER
Richard Swadley
VICE PRESIDENT AND EXECUTIVE
PUBLISHER
Neil Edde
ASSOCIATE PUBLISHER
Jim Minatel
PROJECT COORDINATOR, COVER
Katie Crocker
PROOFREADER
Nicole Hirschman
INDEXER
Ron Strauss
COVER DESIGNER
Ryan Sneed
COVER IMAGE
© Gregory Olsen/iStockPhoto
ffirs.indd xiii
ACKNOWLEDGMENTS
FIRST, I WANT TO THANK my wife, Susana, and my kids, Henrique and Beatriz. You have given me
courage and persistence by reminding me what is really important in life.
I’d also like to thank my Acquisitions Editor at Wiley, Mary E. James, for having faith in me and signing me up to write this book.
I want to thank my good friend and former colleague, programmer and photographer Pedro Mendes, who persuaded me to start writing a book about Node.js over a few beers in Lisbon. I also want to thank my good friend Nuno Job, who has been my companion in this open-source and Node.js crusade for these last few years.
A big word of appreciation also goes out to the Node.js community in general. You are the best, most welcoming, appreciative, and fun programming community I have been a part of.
Lastly, I want to thank you, the reader, for buying this book. I hope it helps you in learning about the ins and outs of the wonderful world of programming in Node.js.
ffirs.indd xv
CONTENTS
INTRODUCTION xxvii
PART I: INTRODUCTION AND SETUP
CHAPTER 1: INSTALLING NODE 3
Installing Node on Windows
4
Installing on Mac OS X
5
Installing Node Using the Source Code
6
Choosing the Node Version 6
Downloading the Node Source Code 6
Building Node 7
Installing Node 7
Running Node 8
Setting Up and Using Node Package Manager
8
Using NPM to Install, Update, and Uninstall Packages 9Summary 13
CHAPTER 2: INTRODUCING NODE 15
Introducing the Event-Driven Programming Style
16
How Node and JavaScript Make Writing Asynchronous
Applications Easier
17
What Are Closures? 18
How Closures Help When Programming Asynchronously 19
Summary 19
PART II: NODE CORE API BASICS
CHAPTER 3: LOADING MODULES 23
Understanding How Node Loads Modules
24
Exporting a Module
24
Loading a Module 25
Summary 28
ftoc.indd xvii
CONTENTS
CHAPTER 4: USING BUFFERS TO MANIPULATE, ENCODE,
AND DECODE BINARY DATA 29
Creating a Buff er
30
Getting and Setting Bytes in a Buff er
30
Slicing a Buff er
32
Copying a Buff er
32
Decoding a Buff er
32
Summary 33
CHAPTER 5: USING THE EVENT EMITTER PATTERN
TO SIMPLIFY EVENT BINDING 35
Understanding the Standard Callback Pattern
36
Understanding the Event Emitter Pattern
36
Understanding Event Types
37
Using the Event Emitter API
38
Binding Callbacks Using .addListener() or .on() 38
Binding Multiple Event Listeners 39
Removing an Event Listener from an Event Emitter
Using .removeListener() 40
Getting a Callback Executed at Most Once Using .once() 40 Removing All Event Listeners from an Event Emitter
Using .removeAllListeners() 41
Creating an Event Emitter
41
Inheriting from Node Event Emitter 42
Emitting Events 42
Summary 43
CHAPTER 6: SCHEDULING THE EXECUTION
OF FUNCTIONS USING TIMERS 45
Using setTimeout to Defer the Execution of a Function
46
Using clearTimeout to Cancel the Execution of a Function
46
Scheduling and Canceling the Repetitive Execution of a Function
47
Using process.nextTick to Defer the Execution
of a Function Until the Next Event Loop Iteration
47
Blocking the Event Loop
48
Escaping the Event Loop
49
Using setTimeout Instead of setInterval
to Force Serialization
49
xix
CONTENTS
PART III: FILES, PROCESSES, STREAMS, AND NETWORKING
CHAPTER 7: QUERYING, READING FROM, AND WRITING TO FILES 53
Manipulating File Paths
54
Normalizing Paths 54
Joining Paths 54
Resolving Paths 55
Finding the Relative Path Between Two Absolute Paths 55
Extracting Components of a Path 55
Determining the Existence of a Path 56
Introducing the fs Module
57
Querying File Statistics 57
Opening a File
58
Reading from a File
59
Writing to a File 60
Closing a File 60
Summary 62
CHAPTER 8: CREATING AND CONTROLLING
EXTERNAL PROCESSES 63
Executing External Commands
64
Spawning Child Processes
69
Creating the Child Process 69
Listening for Data from the Child Process 69
Sending Data to the Child Process 70
Receiving Notifi cation When the Child Process Exits 72
Signaling and Killing Processes
73
Summary 74
CHAPTER 9: READING AND WRITING STREAMS OF DATA 75
Using a Readable Stream
76
Waiting for Data 76
Pausing and Resuming a Stream 77
Knowing When the Stream Ends 77
Using Writable Streams
77
Writing Data into a Stream 78
Waiting for a Stream to Drain 78
Considering Some Stream Examples
78
Creating File-System Streams 79
Understanding Networking Streams 80
ftoc.indd xix
CONTENTS
Avoiding the Slow Client Problem and Saving Your Server
80
Understanding the Slow Client Problem 80
Avoiding the Slow Client Problem 81
Using stream.pipe() to Prevent the Slow Client Problem and Assembling
Readable and Writable Streams Using pipe() 82
Summary 82
CHAPTER 10: BUILDING TCP SERVERS 83
Creating a TCP Server
83
Using the Socket Object 85
Understanding Idle Sockets 86
Setting Up Keep-Alive 87
Using Delay or No Delay 87
Listening for Client Connections 88
Closing the Server 88
Handling Errors 88
Building a Simple TCP Chat Server
89
Accepting Connections 89
Reading Data from a Connection 90
Collecting All the Clients 90
Broadcasting Data 91
Removing Closed Connections 92
Using Your TCP Chat Server 93
Summary 93
CHAPTER 11: BUILDING HTTP SERVERS 95
Understanding the http.ServerRequest Object
97
Understanding the http.ServerResponse Object
98
Writing a Header 98
Changing or Setting a Header 99
Removing a Header 99
Writing a Piece of the Response Body 99
Streaming HTTP Chunked Responses
99
Piping a File 100
Piping the Output of Another Process 100
Shutting Down the Server
101
Example 1: Building a Server that Serves Static Files
101
Example 2: Making Use of HTTP Chunked
Responses and Timers
102
xxi
CONTENTS
CHAPTER 12: BUILDING A TCP CLIENT 103
Connecting to a Server
104
Sending and Receiving Data
105
Ending the Connection
105
Handling Errors
106
Building an Example Command-Line TCP Client
106
Connecting to the Server 107
Sending the Command Line to the Server 107
Printing Server Messages 107
Reconnecting if the Connection Dies 108
Closing the Connection 109
Putting the Client Together 111
Summary 112
CHAPTER 13: MAKING HTTP REQUESTS 113
Making GET Requests
113
Using Other HTTP Verbs
114
Inspecting the Response Object 115
Obtaining the Response Body 116
Streaming the Response Body 116
Pooling Sockets Using http.Agent
116
Using a Third-Party Request Module to Simplify
HTTP Requests
118
Installing and Using Request 118
Creating a Testing Server 120
Following Redirects 121
Setting Some Request Options 123
Encoding the Request Body 125
Streaming 127
Using a Cookie Jar 127
Summary 128
CHAPTER 14: USING DATAGRAMS (UDP) 129
Understanding UDP
129
Understanding the Uses of UDP
130
Building a Datagram Server
130
Listening for Messages 130
Testing the Server 131
Inspecting Additional Message Information 132
Creating a Simple Datagram Echo Server
132
ftoc.indd xxi
CONTENTS
Waiting for Messages 132
Sending Messages Back to Senders 132
Putting the Echo Server Together 133
Building a Datagram Client
134
Creating the Client 134
Sending Messages 134
Closing the Socket 134
Creating a Simple Datagram Command-Line Client
135
Reading from the Command Line 135
Sending Data to the Server 135
Receiving Data from the Server 136
Putting the Command-Line UDP Client Together 136
Understanding and Using Datagram Multicast
136
Receiving Multicast Messages 137
Sending Multicast Messages 138
Understanding Maximum Datagram Size 138
Summary 138
CHAPTER 15: SECURING YOUR TCP SERVER WITH TLS/SSL 139
Understanding Private and Public Keys
139
Generating a Private Key 140
Generating a Public Key 140
Building a TLS Server
141
Initializing the Server 141
Listening for Connections 141
Reading Data from the Client 142
Sending Data to the Client 142
Ending the Connection 142
Building a TLS Client
143
Initializing the Client 143
Connecting to the Server 143
Verifying the Server Certifi cate 143
Sending Data to the Server 144
Reading Data from the Server 144
Ending the Connection 144
Building Some Examples
145
Creating a TLS Chat Server 145
Creating a TLS Command-Line Chat Client 146
Verifying the Client Certifi cate 147
xxiii
CONTENTS
CHAPTER 16: SECURING YOUR HTTP SERVER WITH HTTPS 149
Building a Secure HTTP Server
149
Setting Up the Server Options 150
Listening for Connections 150
Validating the HTTPS Client Certifi cate 151
Creating an HTTPS Client
152
Initializing the Client 152
Making the Request 152
Validating the HTTPS Server Certifi cate 153
Summary 154
PART IV: BUILDING AND DEBUGGING MODULES AND APPLICATIONS
CHAPTER 17: TESTING MODULES AND APPLICATIONS 157
Using a Test Runner
157
Writing Tests 158
Running Tests 159
Using an Assertion Testing Module
159
Using the assert Module 159
Using the Built-in Assertion Functions in Node-Tap 161
Testing Your Asynchronous Module
163
Summary 166
CHAPTER 18: DEBUGGING MODULES AND APPLICATIONS 167
Using console.log
167
Using Node’s Built-in Debugger
169
Using Node Inspector
173
Summary 175
CHAPTER 19: CONTROLLING THE CALLBACK FLOW 177
Understanding the Boomerang Eff ect
177
Avoiding the Boomerang Eff ect
by Declaring Functions
179
Using the async Flow Control Library
183
Executing in Series 184
Executing in Parallel 185
Cascading 186 Queuing 187 Iterating 189 Mapping 190
ftoc.indd xxiii
CONTENTS
Reducing 191 Filtering 192 Detecting 193
Summary 194
PART V: BUILDING WEB APPLICATIONS
CHAPTER 20: BUILDING AND USING HTTP MIDDLEWARE 197
Understanding the Connect HTTP Middleware Framework
198
Building Your Own HTTP Middleware
198
Creating Asynchronous Middleware 200
Registering Callbacks Inside Middleware 201
Handling Errors Inside Middleware 203
Using the HTTP Middleware Bundled in Connect
206
Logging Requests 206
Handling Errors 208
Serving Static Files 209
Parsing the Query String 210
Parsing the Request Body 211
Parsing Cookies 212
Using a Session 213
Other Available Middleware 216
Summary 216
CHAPTER 21: MAKING A WEB APPLICATION USING EXPRESS.JS 217
Initializing Your Express.js Application
218
Setting Up Middleware in Your Application
220
Routing Requests
222
Handling Routes 222
Using Sessions 229
Using Route Middleware 234
Summary 238
CHAPTER 22: MAKING UNIVERSAL REAL-TIME
WEB APPLICATIONS USING SOCKET.IO 241
Understanding How WebSockets Work
242
Using Socket.IO to Build WebSocket Applications
243
Installing and Running Socket.IO on the Server 243
Building a Real-Time Web Chat with Socket.IO 245
Extending the Chat Application 250
xxv
CONTENTS
Separating Users into Rooms 255
Using Namespaces 259
Distributing the Server-Side Application Using Redis 259
Summary 263
PART VI: CONNECTING TO DATABASES
CHAPTER 23: CONNECTING TO MYSQL USING NODE-MYSQL 267
Using a Library to Connect to and Communicate
with a MySQL Database
268
Adding Data to the Database with
Security Concerns in Mind
270
Reading Data Effi
ciently
272
Summary 276
CHAPTER 24: CONNECTING TO COUCHDB USING NANO 277
Installing Nano
278
Connecting and Creating a Database
281
Storing Documents
285
Creating and Using CouchDB Views
286
Attaching Files to a CouchDB Document
298
Summary 310
CHAPTER 25: CONNECTING TO MONGODB USING MONGOOSE 311
Installing Mongoose
313
Understanding How Mongoose Uses Models
to Encapsulate Database Access
313
Connecting to MongoDB
314
Defi ning a Schema
314
Defi ning a Model
315
Using Validators 324
Using Modifi ers 330
Using Getters 331
Using Virtual Attributes 332
Using Default Values 338
Defi ning Indexes 340
Referencing Other Documents Using DB Refs 341
Defi ning Instance Methods 347
Defi ning Static Methods 348
Summary 349
INDEX 351
ftoc.indd xxv
INTRODUCTION
IN 1995, WHEN I WAS IN MY SECOND YEAR IN COLLEGE, I was introduced to UNIX network
program-ming. In C, you could create sockets to open TCP connections to servers and code the servers that accepted these connections. I remember the excitement I felt the fi rst time I created a TCP server: I could accept connections and receive and send messages on them.
If I wanted my server to accept many concurrent connections, the common solution was to use threads, and soon I had created my fi rst multi-threaded TCP server. This server accessed a shared data structure, which needed to synchronize the access to all the client threads that had been spawned. Getting the synchronization fi ne-grained (to maximize resources and time) and right (to avoid deadlocks) proved to be more diffi cult than anticipated.
A couple of years later, I entered the working world to become a consultant, programming and leading teams of programmers to implement various client projects. At fi rst I continued to work within the UNIX world, but soon I was diverted to Java and all its enterprise fl avors and fi nally landed on the fertile plains of web development, using scripting languages like PHP and Ruby. Doing web development, I slowly became familiar with JavaScript and the event-driven program-ming model, never realizing it would later connect me back to the world of UNIX.
Fast-forwarding to early 2010, a good friend of mine talked to me about Node.js. It was fast, he said, and you can program it in JavaScript. It transported the event-driven browser programming into the UNIX network programming world.
Curious, I went to take a look at the API documents and was immediately hooked. The ease with which you could create highly scalable servers without using threads and mix-and-match client and server code made me take a deep dive into Node’s source code and surrounding modules. Node.js connected the ease of a scripting language with all the power of UNIX network programming, and I felt like I was fi nally home.
WHO THIS BOOK IS FOR
This book was written for the developer who is familiar with JavaScript, either browser or server-side programming. The reader should be familiar with some introductory concepts of how TCP and HTTP works. For the later chapters on web application development, it also helps if the reader is familiar with classic development for the web (HTML, CSS, and JavaScript).
If you already have Node.js installed, you may skip to Chapter 2, “Introducing Node.”
If you already know the basics of how Node.js works internally and know about server-side event programming in JavaScript, you may skip to Chapter 3, “Loading Modules.”
flast.indd xxvii
INTRODUCTION
After introducing core Node.js concepts and API subsets, I go into application building starting in Chapter 17 (“Testing Modules and Applications”) and cover debugging (Chapter 18, “Debugging Modules and Applications”), and I present some tips on controlling asynchronous fl ow
(Chapter 19, “Controlling the Callback Flow”).
Next, I address the necessary parts of building web applications, starting in Chapter 20, “Building and Using HTTP Middleware,” passing through Express.js (Chapter 21), and creating real-time web allocations using Socket.IO (Chapter 22).
Finally, I also address how to access and use databases from Node.js, including MySQL (Chapter 23), CouchDB (Chapter 24), and MongoDB (Chapter 25).
WHAT THIS BOOK COVERS
This book covers Node.js v0.8, Express.js v2.5, Socket.io 0.9, Node-mysql v0.9, Nano v3.1, and Mongoose v2.7.
HOW THIS BOOK IS STRUCTURED
The book starts with setting up and introducing Node.js.
It then explains the Node core fundamentals, which include modules, buffers, the Event Emitter pattern, and timers, after which the fundamental Node core specifi c fi le and networking APIs are introduced and explained, all complemented with practical examples.
After covering core Node concepts, the book continues with some best practices for developing applications with Node.js, such as testing modules, debugging applications, and maintaining control of the asynchronous callback fl ow.
Building real-time web applications is one of the main use cases of Node, and this book shows you how to do it using Connect, Express.js, and Socket.IO.
Because most applications need to connect to a database, the book explains how to connect to and use MySQL, CouchDB, and MongoDB from your Node.js application.
WHAT YOU NEED TO USE THIS BOOK
To install and run Node.js applications, you need a PC or Macintosh computer running a recent version of either Windows, Linux, or MacOS.
xxix
INTRODUCTION
CONVENTIONS
To help you get the most from the text and keep track of what’s happening, we’ve used a number of conventions throughout the book.
WARNING Warnings hold important, not-to-be-forgotten information that is
directly relevant to the surrounding text.
NOTE Notes indicates notes, tips, hints, tricks, and asides to the current
discussion.
➤ We italicize new terms and important words when we introduce them. ➤ We show keyboard strokes like this: Ctrl+A.
➤ We show fi le names, URLs, and code within the text like so: persistence.properties.
We present code in two different ways:
We use a monofont type with no highlighting for most code examples.
We use bold to emphasize code that is particularly important in the present context or to show changes from a previous code snippet.
SOURCE CODE
As you work through the examples in this book, you may choose either to type in the code manu-ally, or to use the source code fi les that accompany the book. All the source code used in this book is available for download at www.wrox.com. Specifi cally for this book, the code download is on
the Download Code tab at: http://www.wrox.com/WileyCDA/WroxTitle/Professional-Node-js-Building-Javascript-Based-Scalable-Software.productCd-1118185463.html.
You can also search for the book at www.wrox.com by ISBN to fi nd the code. And a complete list
of code downloads for all current Wrox books is available at www.wrox.com/dynamic/books/ download.aspx.
Throughout each chapter, you’ll fi nd references to the names of code fi les as needed in listing titles and text.
Most of the code on www.wrox.com is compressed in a .ZIP, .RAR archive, or similar archive
for-mat appropriate to the platform. Once you download the code, just decompress it with an appropri-ate compression tool.
flast.indd xxix
INTRODUCTION
NOTE Because many books have similar titles, you may fi nd it easiest to search
by ISBN; this book’s ISBN is 978-1-118-18546-9.
Once you download the code, just decompress it with your favorite compression tool. Alternately, you can go to the main Wrox code download page at www.wrox.com/dynamic/books/download .aspx to see the code available for this book and all other Wrox books.
ERRATA
We make every effort to ensure that there are no errors in the text or in the code. However, no one is perfect, and mistakes do occur. If you fi nd an error in one of our books, like a spelling mistake or faulty piece of code, we would be very grateful for your feedback. By sending in errata, you may save another reader hours of frustration, and at the same time, you will be helping us provide even higher quality information.
To fi nd the errata page for this book, go to http://www.wrox.com/WileyCDA/WroxTitle/ Professional-Node-js-Building-Javascript-Based-Scalable-Software
.productCd-1118185463.html and click the Errata link. On this page you can view all errata that
has been submitted for this book and posted by Wrox editors.
If you don’t spot “your” error on the Book Errata page, go to www.wrox.com/contact/techsupport .shtml and complete the form there to send us the error you have found. We’ll check the information
and, if appropriate, post a message to the book’s errata page and fi x the problem in subsequent editions of the book.
P2P.WROX.COM
For author and peer discussion, join the P2P forums at http://p2p.wrox.com. The forums are a
web-based system for you to post messages relating to Wrox books and related technologies and interact with other readers and technology users. The forums offer a subscription feature to e-mail you topics of interest of your choosing when new posts are made to the forums. Wrox authors, edi-tors, other industry experts, and your fellow readers are present on these forums.
At http://p2p.wrox.com, you will fi nd a number of different forums that will help you, not only
as you read this book but also as you develop your own applications. To join the forums, just follow these steps:
1.
Go to http://p2p.wrox.com and click the Register link.2.
Read the terms of use and click Agree.xxxi
INTRODUCTION
4.
You will receive an e-mail with information describing how to verify your account and com-plete the joining process.NOTE You can read messages in the forums without joining P2P, but to post
your own messages, you must join.
Once you join, you can post new messages and respond to messages other users post. You can read messages at any time on the web. If you would like to have new messages from a particular forum e-mailed to you, click the Subscribe to This Forum icon by the forum name in the forum listing. For more information about how to use the Wrox P2P, be sure to read the P2P FAQs for answers to questions about how the forum software works, as well as many common questions specifi c to P2P and Wrox books. To read the FAQs, click the FAQ link on any P2P page.
flast.indd xxxi
PART I
Introduction and Setup
CHAPTER 1:
Installing Node
CHAPTER 2:
Introducing Node
c01.indd 1
1
Installing Node
WHAT’S IN THIS CHAPTER?
➤ Getting Node up and running
➤ Installing Node Package Manager (NPM)
➤ Using NPM to install, uninstall, and update packages
At the European JSConf in 2009, Ryan Dahl, a young programmer, presented a project he had been working on. This project was a platform that combined Google’s V8 JavaScript engine, an event loop, and a low-level I/O API. This project was not like other server-side JavaScript platforms where all the I/O primitives were event-driven and there was no way around it. By leveraging the power and simplicity of JavaScript, this project turned the diffi cult task of writing event-driven server-side applications into an easy one. The project received a standing ovation and has since then been met with unprecedented growth, popularity, and adoption. The project was named Node.js and is now known to developers simply as Node. Node provides a purely event-driven, non-blocking infrastructure for building highly concurrent software.
NOTE Node allows you to easily construct fast and scalable network services.
Ever since its introduction, Node has received attention from some of the biggest players in the industry. They have used Node to deploy networked services that are fast and scalable. Node is so attractive for several reasons.
c01.indd 3
4
❘
CHAPTER 1 INSTALLING NODEWhen you click Run, the Installation Wizard starts (see Figure 1-3).
Click on the Next button and Node will start installing. A few moments later you will get the confi rmation that Node was installed (see Figure 1-4).
One reason is JavaScript. JavaScript is the most widely used programming language on the planet. Most web programmers are used to writing JavaScript in the browser, and the server is a natural extension of that.
The other reason is Node’s simplicity. Node’s core functionalities are kept to a minimum and all the existing APIs are quite elegant, exposing the minimum amount of complexity to the programmers. When you want to build something more complex, you can easily pick, install, and use several of the available third-party modules.
Another reason Node is attractive is because of how easy it is to get started using it. You can download and install it very easily and then get it up and running in a matter of minutes. The typical way to install Node on your development machine is by following the steps on the http://nodejs.org website. Node installs out of the box on Windows, Linux, Macintosh, and Solaris.
INSTALLING NODE ON WINDOWS
Node supports the Windows operating system since version 0.6.0. To install Node on Windows, point your browser to http://nodejs.org/#download and download the node-v*.msi
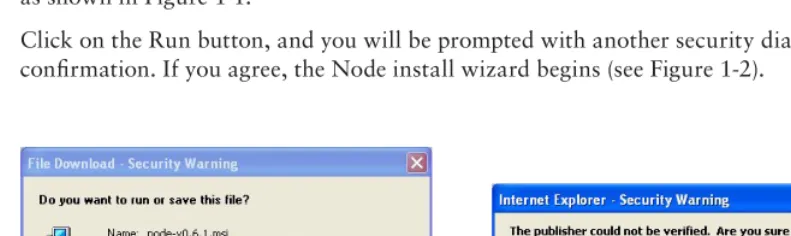
Windows installer by clicking on the link. You should then be prompted with a security dialog box, as shown in Figure 1-1.
[image:38.639.51.447.387.505.2]Click on the Run button, and you will be prompted with another security dialog box asking for confi rmation. If you agree, the Node install wizard begins (see Figure 1-2).
Installing on Mac OS X
❘
5FIGURE 1-3 FIGURE 1-4
INSTALLING ON MAC OS X
If you use Mac OS X you can install Node using an Install Wizard. To start, head to
http://nodejs.org/#download and download the node-v*.pkg Macintosh installer by clicking on
the link. Once the download is fi nished, click on the downloaded fi le to run it. You will then get the fi rst wizard dialog box, as seen in Figure 1-5.
[image:39.639.78.497.412.566.2]Choose to continue and install. The wizard will then ask you for the system user password, after which the installation will start. A few seconds later you’ll get the confi rmation window stating that Node is installed on your system (see Figure 1-6).
FIGURE 1-5 FIGURE 1-6
c01.indd 5
6
❘
CHAPTER 1 INSTALLING NODEINSTALLING NODE USING THE SOURCE CODE
If you have a UNIX system, you can install Node by compiling the source code. First you need to select which version of Node you will be installing, then you will download the source code and build, install, and run Node.
NOTE Node depends on several third-party code libraries, but fortunately most
of them are already distributed along with the program. If you are building from source code, you should need only two things:
➤ python (version 2.4 or higher) — The build tools distributed with Node run on python.
➤ libssl-dev — If you plan to use SSL/TLS encryption in your networking, you’ll need this. libssl is the library used in the openssl tool. On Linux and UNIX systems it can usually be installed with your favorite package manager. The libssl library comes pre-installed on Mac OS X.
Choosing the Node Version
Two different versions of Node are usually available for download on the nodejs.org website: the
latest stable and the latest unstable.
In Node, the minor version numbering denotes the stability of the version. Stable versions have an even minor version (0.2, 0.4, 0.6), and unstable versions have an odd minor version (0.1, 0.3, 0.5, 0.7). Not only might an unstable version be functionally unstable, but the API might also be mutating. The stable versions should not change the public API. For each stable branch, a new patch should include only bug fi xes, whereas APIs sometimes change in the unstable branch.
Unless you want to test a new feature that is only available in the latest unstable release, you should always choose the latest stable version. The unstable versions are a battleground for the Node Core Team to test new developments in the platform.
More and more projects and companies successfully use Node in production (some of the most relevant are on the nodejs.org home page), but you might have to put some effort into keeping up
with the API changes on each new minor stable release. That’s the price of using a new technology.
Downloading the Node Source Code
After you choose a version to download, copy the source code tarball URL from the
http://nodejs.org website and download it. If you’re running in a UNIX system, you probably
have wget installed, which means that you can download it by using a shell prompt and typing the following:
Installing Node Using the Source Code
❘
7If you don’t have wget installed, you may also use the curl utility:
$ curl -O http://nodejs.org/dist/v0.6.1/node-v0.6.12.tar.gz
If you don’t have either of these tools installed, you have to fi nd another way to download the
tarball fi le into your local directory — such as by using a browser or transferring it via the local network.
(The examples in this book use the latest stable version at the time of writing, which is 0.6.12.)
Building Node
Now that you have the source code in your computer, you can build the Node executable. First you need to unpack the source fi les like this:
$ tar xfz node-v0.6.12.tar.gz
Then step into the source directory:
$ cd node-v0.6.12
Confi gure it:
$ ./configure
You should get a successful output like this:
'configure' finished successfully (9.278s)
Then you are ready to compile it:
$ make
You should get a successful output like this:
'build' finished successfully (0.734s)
Installing Node
When you have built Node, you can install it by running the following command:
$ make install
This will copy the Node executable into /usr/local/bin/node.
If you have a permissions problem when issuing this command, run it as the root user or using sudo:
$ sudo make install
c01.indd 7
8
❘
CHAPTER 1 INSTALLING NODERunning Node
Now you are ready to start using Node. First you can simply experiment running Node as a
command-line interface (CLI). For that you need only to call the Node executable with no argu-ments like this:
$ node
This will start the CLI, which will then wait for you to input an expression. Just to test the installa-tion and see Node actually doing something, you can type:
> console.log('Hello World!'); Hello World!
> undefined
You can also run a JavaScript script from a fi le. For instance, if you create a fi le with this content:
console.log('Hello World!');
Name the fi le hello_world.js. Then run the fi le by passing the fi le path as fi rst argument to the
Node executable while inside a shell prompt. For example:
$ node hello_world.js Hello World!
You can quit the CLI by typing Ctrl+D or Ctrl+C.
SETTING UP AND USING NODE PACKAGE MANAGER
You can only get so far using the language features and the core functions. That’s why most programming platforms have a system in place that allows you to download, install, and manage third-party modules. In Node, you have Node Package Manager (NPM).
NPM is three things — a third-party package repository, a way to manage packages installed in your computer, and a standard to defi ne dependencies on other packages. NPM provides a public registry service that contains all the packages that programmers publish in NPM. NPM also provides a command-line tool to download, install, and manage these packages. You can also use the standard package descriptor format to specify which third-party modules your module or application depends on.
You don’t need to know about NPM to start using Node, but it will become necessary once you want to use third-party modules. Because Node provides only low-level APIs, including third-party modules is almost always necessary to fulfi ll any complex application without having to do it all yourself. As you will see, NPM allows you to download and play with modules without installing packages globally, which makes it ideal for playing around and trying things.
Setting Up and Using Node Package Manager
❘
9Using NPM to Install, Update, and Uninstall Packages
NPM is a powerful package manager and can be used in many ways. NPM maintains a centralized repository of public modules, which you can browse at http://search.npmjs.org. A Node
opensource module author may choose, as most do, to publish the module to NPM, and in the installation instructions should be the NPM module name you can use to remotely download and install it.
This section covers the most typical uses of NPM, which are installing and removing packages. This should be just enough for you to start managing your application dependencies on third-party modules published on NPM. However, fi rst you need to understand the differences between global and local modes of operation and how these affect module lookups.
Using the Global versus the Local Mode
NPM has two main modes of operation: global and local. These two modes change target directories for storing packages and have deep implications for how Node loads modules. The local mode is the default mode of operation in NPM. In this mode, NPM works on the local directory level, never making system-wide changes. This mode is ideal for installing the modules your application depends on without affecting other applications you might also have installed locally.
The global mode is more suited for installing modules that should always be available globally, like the ones that provide command-line utilities and that are not directly used by applications. Always use the default local mode if you are in doubt. If module authors intend for one specifi c module to be installed globally, generally they will tell you so in the installation instructions.
The Global Mode
If you installed Node using the default directory, while in the global mode, NPM installs packages into /usr/local/lib/node_modules. If you type the following in the shell, NPM will search for,
download, and install the latest version of the package named sax inside the directory /usr/local/ lib/node_modules/sax:
$ npm install -g sax
NOTE If your current shell user doesn’t have enough permissions, you will need
to login as the root user or run this command within sudo:
$ sudo npm install -g sax
If you then have the requirement for this package in any Node script:
var sax = require('sax');
c01.indd 9
10
❘
CHAPTER 1 INSTALLING NODENode will pick up this module in this directory (unless you have it installed locally, in which case Node prefers the local version).
The local mode is the default mode, and you have to explicitly activate the global mode in NPM by using the –g fl ag.
The Local Mode
The local mode is the default mode of operation in NPM and the recommended dependency resolution mechanism. In this mode NPM installs everything inside the current directory — which can be your application root directory — and never touches any global settings. This way you can choose, application by application, which modules and which versions to include without polluting global module space. This means that you can have two applications that depend on different ver-sions of the same module without them confl icting.
In this mode, NPM works with the node_modules directory under the current working directory. If
you are inside /home/user/apps/my_app, NPM will use /home/user/apps/my_app/node_modules
as fi le storage for the modules.
If you run a Node application installed in the directory /home/user/apps/my_app, Node will
search this /home/user/apps/my_app/node_modules directory fi rst (before trying the parent
directories and fi nally searching for it inside the global one). This means that, when Node is
resolving a module dependency, a module installed using the local mode will always take precedence over a module installed globally.
Installing a Module
Using the following command, you can download and install the latest version of a package:
$ npm install <package name>
For example, to download and install the latest version of the sax package, you should fi rst change
your current directory to your application root directory and then type:
$ npm install sax
This will create the node_modules directory if it doesn’t already exist and install the sax module
under it.
You can also choose which version of a specifi c module to install by specifying it like this:
$ npm install <package name>@<version spec>
You can use a specifi c version number in the <version spec> placeholder. For instance, if you want
to install version 0.2.5 of the sax module, you need to type: $ npm install [email protected]
Under <version spec> you can also specify a version range. For instance, if you want to install the
Setting Up and Using Node Package Manager
❘
11$ npm install [email protected]
If you want to install the latest version before 0.3 you should type:
$ npm install sax@"<0.3"
You can get more sophisticated and combine version specifi cations like this:
$ npm install sax@">=0.1.0 <0.3.1"
Uninstalling a Module
When you use the following command, NPM will try to fi nd and uninstall the package with the specifi ed name.
$ npm uninstall <package name>
If you want to remove a globally installed package, you should use:
$ npm uninstall -g <package name>
Updating a Module
You can also update an installed module by using the following command:
$ npm update <package name>
This command will fetch the latest version of the package and update it. If the package does not exist, it will install it.
You can also use the global switch (-g) to update a globally installed module like this: $ npm update –g <package name>
Using the Executable Files
It’s possible that a module includes one or more executable fi les. If you choose to install a module globally and you used the default installation directory settings, NPM installs the executables inside
/usr/local/bin. This path is usually included in the default executable PATH environment variable.
If you installed a package locally, NPM installs any executables inside the ./node_modules/.bin
directory.
Resolving Dependencies
NPM not only installs the packages you request but also installs the packages that those packages depend on. For instance, if you request to install package A and this package depends on package B and C, Node will fetch packages B and C and install them inside ./node_modules/A/ node_modules.
c01.indd 11
12
❘
CHAPTER 1 INSTALLING NODEFor instance, if you locally installed the nano package like this:
$ npm install nano
NPM outputs something like:
[email protected] ./node_modules/nano ├── [email protected]
This shows that the nano package depends on the underscore and request packages and indicates which versions of these packages were installed. If you peek inside the ./node_modules/nano/ node_modules directory, you’ll see these packages installed there:
$ ls node_modules/nano/node_modules request underscore
Using
package.json
to Defi ne Dependencies
When coding a Node application, you can also include a package.json fi le at the root. The package.json fi le is where you can defi ne some of your application metadata, such as the
name, authors, repository, contacts, and so on. This is also where you should specify extraneous dependencies.
You don’t need to use it to publish the application to NPM — you may want to keep that application private — but you can still use package.json to specify the application dependencies.
The package.json is a JSON-formatted fi le that can contain a series of attributes, but for the
pur-poses of declaring the dependencies you only need one: dependencies. An application that depends
on the sax, nano, and request packages could have a package.json fi le like this: {
"name" : "MyApp", "version" : "1.0.0", "dependencies" : { "sax" : "0.3.x", "nano" : "*",
"request" : ">0.2.0" }
}
Here you are specifying that your application or module depends on sax version 0.3, on any version of nano, and on any version of request greater than 0.2.0.
NOTE You may also fi nd that if you omit the name and version fi elds, NPM will
Summary
❘
13Then, on the application root, type:
$ npm install
NPM will then analyze the dependencies and your node_modules directory and automatically
download and install any missing packages.
You can also update all the locally installed packages to the latest version that meets your depen-dency specifi cations, like this:
$ npm update
In fact you can always use this last command, because it will also make NPM fetch any missing packages.
SUMMARY
You’ve learned how to install Node and the Node Package Manager. You can now use NPM to install, uninstall, and remove third-party packages. You can also use the package.json fi le together
with NPM to manage the third-party packages you depend on.
Now that you have Node and NPM installed, you are ready to experiment with them. But fi rst you need some background on Node and the event-driven programming style.
c01.indd 13
Introducing Node
WHAT’S IN THIS CHAPTER?
➤ What is the event-driven programming style and what are the advantages of using it
➤ How Node.js and JavaScript make event-driven programming easy
Traditional programming does I/O the same way as it does local function calls: Processing cannot continue until an operation fi nishes. This programming model of blocking when doing I/O operations derives from the early days of time-sharing systems in which each process corresponded to one human user. The purpose was to isolate users from one another. In those systems, a user would typically need to fi nish one operation before deciding what the next operation would be. But with widespread use of computer networks and the Internet, this model of “one user, one process” did not scale well. Managing many processes places a big burden on the operating system — in memory and context switching costs — and the performance of these tasks starts to decay after a certain number is reached.
Multi-threading is one alternative to this programming model. A thread is a kind of light-weight process that shares memory with every other thread within the same process. Threads were created as an ad hoc extension of the previous model to accommodate several concurrent threads of execution. When one thread is waiting for an I/O operation, another thread can take over the CPU. When the I/O operation fi nishes, that thread can wake up, which means the thread that was running can be interrupted and eventually be resumed later. Furthermore, some systems allow threads to execute in parallel in different CPU cores. This means that programmers do not know what set of threads is executing at any given time, so they must be careful with concurrent access to the shared memory state. They have to use synchronization primitives like locks and semaphores to synchronize access to some data
2
c02.indd 15
16
❘
CHAPTER 2 INTRODUCING NODEstructures, forcing them to foresee every possible way threads can be scheduled to execute to try to prevent problems. If the application relies heavily on a shared state between threads, this type of programming can easily lead to strange bugs that happen at random and are usually diffi cult to fi nd. An alternative to having the operating system scheduling the thread execution for you is to use cooperative multi-threading. In this scheme you are responsible for explicitly relinquishing the CPU to give time for another thread to execute. Because you are now responsible for thread scheduling, this can relax the synchronization requirements. However, this approach can become complex and error-prone for the same reasons as regular multi-threading.
INTRODUCING THE EVENT-DRIVEN PROGRAMMING STYLE
Event-driven programming is a programming style whereby the fl ow of execution is determined by events. Events are handled by event handlers or event callbacks. An event callback is a function that is invoked when something signifi cant happens — such as when the result of a database query is available or when the user clicks on a button.
Consider how a query to a database is completed in typical blocking I/O programming:
result = query('SELECT * FROM posts WHERE id = 1'); do_something_with(result);
This query requires that the current thread or process wait until the database layer fi nishes process-ing it.
In event-driven systems, this query would be performed in this way:
query_finished = function(result) { do_something_with(result); }
query('SELECT * FROM posts WHERE id = 1', query_finished);
Here you are fi rst defi ning what will happen when the query is fi nished and storing that in a function named query_finished. Then you are passing that function as an argument to the query.
When it’s fi nished, the query will invoke the query_finished function, instead of simply returning
the result.
This style of programming — whereby instead of using a return value you defi ne functions that are called by the system when interesting events occur — is called event-driven or asynchronous
How Node and JavaScript Make Writing Asynchronous Applications Easier
❘
17This event loop is just one thread running inside one process, which means that, when an event hap-pens, the event handler can run without interruption. This means the following:
➤ There is at most one event handler running at any given time. ➤ Any event handler will run to completion without being interrupted.
This allows the programmer to relax the synchronization requirements and not have to worry about concurrent threads of execution changing the shared memory state.
A WELL-KNOWN SECRET
For quite some time, the systems-programming community has known that event-driven programming is the best way to create a service that can handle many concurrent connections. It has been known to be more effi cient regarding memory because there is less context to store, and more effi cient regarding time because there is less context switching.
This knowledge has infi ltrated other platforms and communities; some of the most well-known event loop implementations are Ruby’s Event Machine, Perl’s
AnyEvent, and Python’s Twisted. There are also others for these and other languages.
Implementing an application using one of these frameworks requires framework-specifi c knowledge and framework-framework-specifi c libraries. For example, when using Event Machine, you should avoid using synchronous libraries. To gain the benefi t of not blocking, you are limited to using asynchronous libraries built specifi cally for Event Machine. If you use any blocking library (like most of the ones in the Ruby standard library), your server will not be able to scale optimally because the event loop will be constantly blocking, which prevents timely processing of I/O events.
Node was devised as a non-blocking I/O server platform from day one, so generally you should expect everything built on top of it to be non-blocking. Because JavaScript itself is very minimal and does not impose any way of doing I/O (it does not have a standard I/O library), Node has a clean slate to build upon.
HOW NODE AND JAVASCRIPT MAKE WRITING ASYNCHRONOUS
APPLICATIONS EASIER
Ryan Dahl, the author of Node, began his project building a C platform, but maintaining the con-text between function calls was too complicated and led to complex code. He then turned to Lua, but Lua already had several blocking I/O libraries. This mix of blocking and non-blocking could confuse developers and prevent many of them from building scalable applications, thus Lua was not ideal either.
c02.indd 17
18
❘
CHAPTER 2 INTRODUCING NODEDahl then turned to JavaScript. JavaScript has closures and fi rst-class functions, which makes it a powerful match for event-driven programming. The power of JavaScript is one of the main reasons Node has become so popular.
What Are Closures?
Closures are functions that inherit variables from their enclosing environment. When you pass a function callback as an argument to another function that will do I/O, this callback function will be invoked later, and this function will — almost magically — remember the context in which it was declared, along with all the variables available in that context and any parent contexts. This powerful feature is at the heart of Node’s success.
The following example shows how a closure works when programming JavaScript in the web browser. For instance, if you want to listen for an event — a button click, for instance — you can do something like:
var clickCount = 0;
document.getElementById('myButton').onclick = function() { clickCount += 1;
alert("clicked " + clickCount + " times."); };
Or, using jQuery:
var clickCount = 0;
$('button#mybutton').click(function() { clickedCount ++;
alert('Clicked ' + clickCount + ' times.'); });
In JavaScript, functions are fi rst-class objects, which means you can pass functions as arguments to other functions. In both examples you assigned or passed a function as an argument to be executed later. The click handling function — your callback function — has every variable in scope at the point where the function was declared, which means that, in this case, it has access to the
clickCount variable declared in the parent closure.
The variable clickCount stores the number of times that the user has clicked on the button.
This variable is stored in the global scope (the outermost scope you can get to in JavaScript). Storing variables in the global scope is generally bad practice because they can easily collide with other code; you should keep variables in a scope that is local to the functions that need to use them. Most of the time you can easily avoid global scope pollution by wrapping all of your code inside another function to create an additional closure, as in the next example:
(function() { var clickCount = 0;
$('button#mybutton').click(function() { clickCount ++;
alert('Clicked ' + clickCount + ' times.'); });
Summary
❘
19How Closures Help When Programming Asynchronously
In event-driven programming you start by defi ning the code that will be executed when an event occurs, then put that code inside a function, and fi nally pass that function as an argument to be called later.
In JavaScript, a function operates not by working in isolation but by remembering the context where it was declared, which enables manipulation of any variable present in that or any parent context. When you pass a callback function as an argument, that function will be invoked some time later, but it can manipulate any variable present in that or in the parent scope, even if these scopes have already returned. In the last example, the callback function was able to access and manipulate the
clickCount variable, even though it was invoked from within the jQuery click() function.
This shows that by using the closure pattern, you can have the best of both worlds: You can do event-driven programming without having to maintain the state by passing it around to functions. A JavaScript closure keeps the state for you.
SUMMARY
Event-driven programming is a programming style whereby the fl ow is determined by the occurrence of events. Programmers register callbacks to be used as event handlers for events they are interested in, and the system invokes these handlers when those events occur. This model of programming has some advantages over the traditional blocking paradigm where, to scale, you have to use multiple processes or threads.
JavaScript is a powerful language, which is well suited for this style of programming, mainly because it has fi rst-class functions and closures.
NOTE Line 7 invokes a function immediately after defi ning it. This is a
common JavaScript pattern where you create a function just to create a new scope.
c02.indd 19
PART II
Node Core API Basics
CHAPTER 3:
Loading Modules
CHAPTER 4:
Using Buff ers to Manipulate, Encode, and
Decode Binary Data
CHAPTER 5:
Using the Event Emitter Pattern to Simplify
Event Binding
CHAPTER 6:
Scheduling the Execution of Functions Using Timers
c03.indd 21
Loading Modules
WHAT’S IN THIS CHAPTER?
➤ Loading modules
➤ Creating modules
➤ Using the node_modules folder
JavaScript is one of the most frequently deployed programming languages in the world; it’s the web’s lingua franca, used by all the browsers. The core of the language was created quickly back in the Netscape days, in a rush to beat Microsoft during the heat of the browser wars. The language was released prematurely, which inevitably meant it came out with some bad features.
Despite its short development time, JavaScript also shipped with some really powerful features. The sharing of a global namespace among scripts is not one of them, though.
Once you load JavaScript code into a web page, it is injected into the global namespace, which is a common addressing space shared by all other scripts that have been loaded. This can lead to security issues, confl icts, and general bugs that are hard to trace and solve.
Thankfully, Node brings some order in this regard to server-side JavaScript and implements the CommonJS modules standard. In this standard each module has its own context, separated from the other modules. This means that modules cannot pollute a global scope — because there is none — and cannot interfere with other modules.
In this chapter, you will learn about different types of modules and how to load them into your application.
Dividing your code into a series of well-defi ned modules can help you keep your code under control. You will also see how you can create and use your own modules.
3
c03.indd 23