MICROSOFT
WINDOWS VISTA
Start Menu • printing • installing programs • security • Internet Explorer • Mail • search • Sidebar and Gadgets • Media Player • Photo Gallery • Movie Maker •
Windows Live Messenger • organizing files • networks • Start Menu • printing • installing programs • security • Internet Explorer • Mail • search • Sidebar and
Gadgets • Media Player • Photo Gallery • Movie Maker • Windows Live
Messen-ger • organizing files • networks • Start Menu • printing • installing programs • security • Internet Explorer • Mail • search • Sidebar and Gadgets • Media
Player • Photo Gallery • Movie Maker • Windows Live Messenger •
organiz-ing files • networks • Start Menu • printing • installing programs • security •
Internet Explorer • Mail • search • Sidebar and Gadgets • Media Player • Photo
Gallery • Movie Maker • Windows Live Messenger • organizing files • networks • Start Menu • printing • installing programs • security • Internet Explorer • Mail • search • Sidebar and Gadgets • Media Player • Photo Gallery • Movie Maker •
Windows Live Messenger • organizing files • networks • Start Menu • printing
CHRIS FEHILY
Learn Windows Vista the
Quick and Easy Way!
Visual quickstart guide
MICROSOFT
WINDOWS VISTA
Visual quickstart guide
✓
intermediateadvancedVisual QuickStart Guide—the quick and easy way to learn!
n
Easy visual approach
uses pictures to guide you through Microsoft Windows
Vista and show you what to do.
n
Concise steps and explanations
let you get up and running in no time.
n
Page for page, the best content and value around
.
n
Chris Fehily
is a writer and consultant living in San Francisco. He admits to
having used Windows even before version 1.0, when it was called Interface
Manager. His other books for Peachpit Press include Visual QuickStart Guides to
Windows XP and to the Python and SQL programming languages.
Peachpit Press
1249 Eighth Street, Berkeley, CA 94710 800 283-9444 510 524-2178 fax 510 524-2221 Find us on the Web at: www.peachpit.com
For CoMPutErS uSInG: Microsoft Windows Vista Home/Business/Enterprise/ultimate Editions
CoMPutEr Book SHELF CAtEGory: Windows / Windows Vista
US $21.99 Canada $26.99 uk £15.99
VISUAL QUICKSTART GUIDE
Microsoft
W
INDOWS
V
ISTA
Chris Fehily
Microsoft Windows Vista
Chris Fehily
Peachpit Press
1249 Eighth Street Berkeley, CA 94710 510/524-2178 800/283-9444 510/524-2221 (fax)
Find us on the Web at: www.peachpit.com
To report errors, please send a note to [email protected] Peachpit Press is a division of Pearson Education
Copyright © 2007 by Chris Fehily
Managing editor: Clifford Colby Editor: Kathy Simpson
Production editor: Andrei Pasternak Compositor: Owen Wolfson Indexer: Rebecca Plunkett Cover design: The Visual Group
Notice of Rights
All rights reserved. No part of this book may be reproduced or transmitted in any form by any means, electronic, mechanical, photocopying, recording, or otherwise, without the prior written permission of the publisher. For information on getting permission for reprints and excerpts, contact [email protected].
Notice of Liability
The information in this book is distributed on an "As Is" basis without warranty. While every precaution has been taken in the preparation of the book, neither the author nor Peachpit shall have any liability to any person or entity with respect to any loss or damage caused or alleged to be caused directly or indirectly by the instructions contained in this book or by the computer software and hardware products described in it.
Trademarks
Visual QuickStart Guide is a registered trademark of Peachpit Press, a division of Pearson Education.
Throughout this book, trademarks are used. Rather than put a trademark symbol in every occurrence of a trademarked name, we state that we are using the names in an editorial fashion only and to the benefit of the trademark owner with no intention of infringement of the trademark.
ISBN 0-321-43452-8
9 8 7 6 5 4 3 2 1
Special Thanks to…
Kathy Simpson for staying ahead of meCliff Colby for working backstage
Andrei Pasternak for coordinating
Owen Wolfson for squashing
Introduction
xiii
Chapter 1:
Getting Started
1
Chapter 2:
The Desktop
55
Chapter 3:
Getting Help
103
Chapter 4:
Personalizing Your Work Environment
117
Chapter 5:
Organizing Files and Folders
181
Chapter 6:
Installing and Running Programs
251
Chapter 7:
Printing, Scanning, and Faxing
285
Chapter 8:
Setting up Hardware
313
Chapter 9:
Digital Photos
331
Chapter 10:
Windows Media Player
357
Chapter 11:
Windows Movie Maker
391
Chapter 12:
Connecting to the Internet
411
Chapter 13:
Security and Privacy
421
Chapter 14:
Internet Explorer
445
Chapter 15:
Email, Contacts, and Calendars
471
Chapter 16:
Windows Live Messenger
497
Chapter 17:
Managing User Accounts
509
Chapter 18:
Setting up a Small Network
519
Chapter 19:
Working Remotely
539
Chapter 20:
Maintenance & Troubleshooting
551
Appendix:
Installing Windows Vista
571
Index
581
C
ontent
s
a
t
a
G
l
ance
T
able
of
C
ontent
s
Introduction
xiii
What Windows Does . . . xiv
The Editions of Windows Vista. . . xv
What’s New in Windows Vista . . . xvi
Upgrading to Windows Vista . . . xviii
About This Book . . . xix
Chapter 1:
Getting Started
1
Logging On and Logging Off . . . 2Using Welcome Center . . . 15
Exploring the Windows Interface . . . 17
The Mouse . . . 20
The Keyboard. . . 22
Menus . . . 25
Toolbars. . . 32
Icons. . . 33
Windows . . . 36
Dialog Boxes. . . 44
Properties . . . 46
Transferring Data . . . 48
Chapter 2:
The Desktop
55
Exploring the Start Menu . . . 56Using the Start Menu. . . 60
Customizing the Start Menu . . . 69
Exploring the Taskbar . . . 73
Managing Windows by Using the Taskbar . . . 74
Customizing the Taskbar . . . 76
Using the Notification Area . . . 80
Adding Toolbars to the Taskbar . . . 83
Using the Quick Launch Toolbar . . . 87
Using the Sidebar . . . 89
Managing Shortcuts. . . 94
Tidying Your Desktop . . . 101
Chapter 3:
Getting Help
103
Starting Help and Support . . . 104
Browsing Help and Support . . . 105
Searching Help and Support . . . 107
Getting Help on the Web . . . 108
Capturing Screen Images . . . 109
Allowing Others to Connect to Your Computer Remotely. . . 110
Chapter 4:
Personalizing Your
Work Environment
117
Using Control Panel . . . 118Setting the Window Color and Color Scheme . . 121
Setting the Desktop Background . . . 123
Setting the Screen Saver . . . 125
Setting the Desktop Theme . . . 127
Configuring the Monitor. . . 129
Configuring the Mouse . . . 135
Configuring the Keyboard . . . 138
Configuring Sound and Audio Devices . . . 140
Setting the Date and Time . . . 145
Localizing Your System . . . 148
Accommodating Disabled Users. . . 153
Using Speech Recognition . . . 157
Using Alternative Mouse Behavior . . . 162
Conserving Power . . . 163
Managing Fonts . . . 171
Managing Visual Effects and Performance . . . . 175
Restoring the Old Windows Look . . . 176
Getting General System Information. . . 179
Chapter 5:
Organizing Files and Folders
181
Exploring Your Computer. . . 182Storing Stuff in Your Personal Folder. . . 185
Using Windows Explorer . . . 188
Navigating in Windows Explorer . . . 194
Tagging Files . . . 198
Filtering, Sorting, Stacking, and Grouping Files . . . 201
Customizing a Folder. . . 206
Setting Folder Options . . . 207
Creating Folders . . . 210
Naming Files and Folders . . . 211
T
able
of
C
ontent
Moving and Copying Files and Folders . . . 212
Sending Files and Folders . . . 215
Deleting Files and Folders . . . 217
Compressing Files and Folders . . . 222
Searching for Files and Folders . . . 228
Saving Searches . . . 241
Burning CDs and DVDs . . . 242
Using Keyboard Shortcuts . . . 248
Chapter 6:
Installing and Running Programs
251
Installing Programs . . . 252Removing Programs . . . 257
Turning Windows Features On or Off . . . 259
Launching Programs . . . 260
Launching Programs Automatically . . . 262
Running Older Programs . . . 263
Switching Programs . . . 264
Exiting Programs . . . 266
Killing Unresponsive Programs . . . 267
Using the Free Utility Programs . . . 269
Saving Documents . . . 277
Opening Documents . . . 279
Associating Documents with Programs . . . 281
Chapter 7:
Printing, Scanning, and Faxing
285
Installing a Printer . . . 286Sharing a Network Printer . . . 293
Setting Printer Properties . . . 295
Printing Documents. . . 297
Controlling Printouts. . . 300
Scanning and Faxing . . . 302
Chapter 8:
Setting up Hardware
313
Connecting Devices to Your Computer. . . 314Installing a New Device. . . 320
Setting up Bluetooth Devices . . . 324
Managing Device Drivers . . . 326
Chapter 9:
Digital Photos
331
Importing Photos to Your Computer. . . 332Getting Started with Windows Photo Gallery . . 338
Viewing Photos . . . 344
Finding Photos . . . 347
Touching up Photos . . . 351
Printing Photos . . . 352
T
able
of
C
ontent
Ordering Prints Online . . . 353
Emailing Photos . . . 354
Using Keyboard Shortcuts . . . 355
Chapter 10:
Windows Media Player
357
Getting Started with Media Player . . . 358Playing Music CDs . . . 361
Customizing the Now Playing Tab . . . 364
Viewing Visualizations . . . 366
Changing Player Appearance with Skins . . . 367
Shopping Online . . . 368
Listening to Radio Stations . . . 369
Ripping CDs to Your Hard Drive. . . 370
Organizing Your Library . . . 374
Working with Playlists. . . 382
Burning Music CDs . . . 386
Playing DVDs. . . 388
Using Keyboard Shortcuts . . . 390
Chapter 11:
Windows Movie Maker
391
Getting Started with Movie Maker. . . 392Importing Content . . . 394
Organizing Your Clips . . . 398
Creating a Project . . . 399
Editing a Project . . . 400
Editing Clips . . . 403
Adding Visual Content . . . 405
Adding Audio Tracks . . . 407
Publishing a Movie . . . 409
Chapter 12:
Connecting to the Internet
411
Understanding Connection Types . . . 412Connecting to the Internet . . . 415
Chapter 13:
Security and Privacy
421
Checking Your Security Status . . . 422Using a Firewall. . . 426
Updating Windows . . . 431
Defending Against Viruses and Spyware . . . 434
Setting Parental Controls . . . 440
Encrypting Data . . . 442
T
able
of
C
ontent
Chapter 14:
Internet Explorer
445
Getting Started with Internet Explorer . . . 446
Navigating the Web . . . 447
Using Tabs . . . 454
Bookmarking Pages . . . 457
Blocking Pop-Up Windows . . . 460
Browsing Tips . . . 462
Chapter 15:
Email, Contacts, and Calendars
471
Getting Started with Windows Mail . . . 472Setting up an Email Account. . . 473
Sending Email . . . 475
Reading Email . . . 480
Receiving Attachments . . . 487
Applying Message Rules . . . 490
Using Newsgroups . . . 492
Managing Your Contacts . . . 494
Creating a Personal Calendar. . . 495
Chapter 16:
Windows Live Messenger
497
Setting up Messenger . . . 498Signing in to Messenger . . . 500
Creating a Contacts List . . . 503
Using Messenger . . . 504
Chapter 17:
Managing User Accounts
509
Setting up User Accounts . . . 510Using User Account Control . . . 517
Managing User Profiles . . . 518
Chapter 18:
Setting up a Small Network
519
Understanding Network Types . . . 520Sharing an Internet Connection . . . 524
Setting up a Network . . . 525
Managing a Network . . . 530
Sharing Files. . . 534
Chapter 19:
Working Remotely
539
Dialing Direct . . . 540Connecting to a Virtual Private Network Server . . . 541
Controlling a Computer with Remote Desktop . . . 542
Making Network Files and Folders Available Offline . . . 548
Using Laptop Utilities . . . 550
T
able
of
C
ontent
Chapter 20:
Maintenance & Troubleshooting
551
Getting System Information . . . 552
Managing Tasks . . . 553
Cleaning up a Disk . . . 554
Defragmenting a Disk . . . 555
Checking for Disk Errors. . . 556
Managing Disks . . . 557
Scheduling Tasks. . . 558
Editing the Registry . . . 560
Reporting and Solving Problems. . . 561
Boosting Memory . . . 562
Restoring Your System. . . 563
Backing up Your Files . . . 566
Recovering After a Crash . . . 570
Appendix:
Installing Windows Vista
571
Getting Ready to Install Windows Vista. . . 572Choosing an Installation Type. . . 575
Installing Windows Vista . . . 576
Activating Windows Vista . . . 579
Transferring Existing Files and Settings . . . 580
Index
581
T
able
of
C
ontent
Windows Vista, the successor to Windows XP, is the latest Microsoft operating system for PC users at home, work, and school. Feature for feature, Vista is better than XP, but to make people wantto upgrade to Vista, Microsoft put special effort into:
The user interface.The new UI, called Aero, is slick and lets you find and launch your stuff instantly no matter how your files and folders are organized (or disorganized). The Start menu, the taskbar, Windows Explorer, and other redesigned controls retain enough of their old personalities to let you jump in.
Security.Vista protects you against malicious websites, viruses, spyware, and other online threats. You also can control what your children or guests view and play. Vista’s reduced-privilege mode (turned on by default) defends even administrators against attacks.
Connectivity.It’s easy to connect quickly (and wirelessly) to people, data, and devices that you need to interact with.
Performance.Vista scales to your machine’s hardware and, provided that you feed it enough memory, is faster than XP. Vista’s broad driver support means that your exist-ing hardware and software will work right (in most cases).
Introduction
i
What Windows Does
Windows—like every operating system, Microsoft or otherwise—is software that controls:The user interface.Windows manages the appearance, behavior, and interaction of the windows, buttons, icons, folders, mouse pointers, cursors, menus, ribbons, and other visual elements on your computer screen, either directly or indirectly through another program.
Storage.Windows’ file system allocates space for and gives access to files—programs and documents—stored on disk or in memory.
Other software.Windows is a launching platform for programs. When you run Microsoft Word, Adobe Photoshop, The Sims, or any other Windows program, it relies on the services and building blocks that Windows provides for basic operations such as drawing a user interface, saving files, and sharing hardware.
Peripheral devices.Windows controls or syncs with peripheral hardware such as your mouse, keyboard, monitor, printer, scanner, USB flash drives, digital camera, PDA, and iPod.
Networks and security.Windows controls the interaction of a group of computers and peripheral devices connected by a commu-nications link such as Ethernet or wireless. Windows also protects your system and data from harm or loss.
System resources.Windows handles the allocation and use of your computer’s low-level hardware resources such as memory (RAM) and central processing unit (CPU) time.
Task scheduling.Windows acts like a traffic cop, setting priorities and allocating time slices to the processes running on your PC.
W
h
a
t
W
indo
ws
Does
Freeware and Shareware
Many of the third-party (meaning non-Microsoft) programs that I recommend in this book are freeware or shareware.
Freewareis software that you can use for an unlimited time at no cost, whereas sharewareis software that you can use for a tryout period—usually 30 days— before you’re expected to pay for it. I say “expected to” because much shareware keeps working beyond the trial period, so you can escape payment. Paying the fee, however, often gets you a keycode that unlocks features or turns off nag messages. If you pass along copies of shareware to others, they’re expected to pay too.
Freeware and shareware are copyrighted and have licenses that may impose restric-tions (“free for personal, noncommercial use,” for example). Unlike commercial software, freeware and shareware isn’t shrink-wrapped or sold in stores but is downloaded from the internet (or pro-vided on magazine cover disks). I give the publisher’s website for each recommended program, but you also can browse down-load sites like www.download.com,
www.tucows.com, and www.fileforum.com
or an index like http://dmoz.org/Computers/
Software. http://sourceforge.nethas
lots of free high-quality software. Also, to keep up with the latest releases, try
www.betanews.com, http://freshmeat.net,
and www.microsoft-watch.com.
The Editions of
Windows Vista
The editions of Windows Vista are:
◆ Windows Vista Home Basic
◆ Windows Vista Home Premium
◆ Windows Vista Business
◆ Windows Vista Enterprise
◆ Windows Vista Ultimate
The home editions have entertainment features that aren’t in the business editions, which themselves have management features that aren’t in the Home editions. Ultimate edition combines the Home and Business features, for a complete package, and lets you get additional programs and services by using the Windows Ultimate Extras utility in Windows Update.
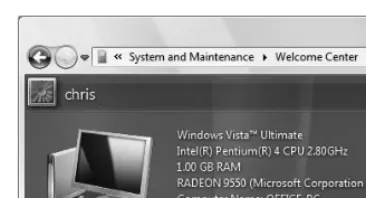
The core features in the different Vista editions look and work alike, so most discussions apply to all editions equally. This book points out the differences among the editions where necessary. To find out which edition you’re running, choose Start > Control Panel > System and Maintenance > Welcome Center (Figure i.1).
✔
Tips
■ Windows Anytime Upgrade, new in Vista, lets you upgrade your copy of Vista to another edition. You can upgrade from Home Basic to either Home Premium or Ultimate, for example. Choose Start > Control Panel > System and Maintenance > Windows Anytime Upgrade.
■ There’s also an inexpensive—and severely hamstrung—Starter edition, sold only in developing countries and not covered in this book.
T
he
Editions
of W
indo
ws V
i
s
t
[image:16.564.62.245.53.152.2]a
Figure i.1The edition of Windows Vista that you’re
What’s New in
Windows Vista
If you’re familiar with earlier versions of Windows, here are Vista’s significant new and updated features and programs.
New programs and features
◆ Welcome Center. See “Using Welcome Center” in Chapter 1.
◆ Taskbar thumbnail previews. See “Customizing the Taskbar” in Chapter 2.
◆ Sidebar and gadgets. See “Using the Sidebar” in Chapter 2.
◆ Aero color scheme. See “Setting the Window Color and Color Scheme” in Chapter 4.
◆ Live icons. See “Using Windows Explorer” in Chapter 5.
◆ File tagging. See “Tagging Files” in Chapter 5.
◆ Filtering and stacking files. See “Filtering, Sorting, Stacking, and Grouping Files” in Chapter 5.
◆ Instant search. See “Searching for Files and Folders” in Chapter 5.
◆ Saved searches. See “Saving Searches” in Chapter 5.
◆ Flip 3D. See “Switching Programs” in Chapter 6.
◆ Windows Ultimate Extras. See “Using the Free Utility Programs” in Chapter 6.
◆ XPS document support. See “Installing a Printer” in Chapter 7.
◆ Windows DVD Maker. See “Publishing a Movie” in Chapter 11.
◆ Windows Defender. See “Defending Against Viruses and Spyware” in Chapter 13.
◆ Parental Controls. See “Using Parental Controls” in Chapter 13.
◆ Windows Contacts (replaces Address Book). See “Managing Your Contacts” in Chapter 15.
◆ Windows Calendar. See “Creating a Personal Calendar” in Chapter 15.
◆ User Account Control. See “Using User Account Control” in Chapter 17.
◆ Sync Center and Windows Mobility Center. See “Using Laptop Utilities” in Chapter 19.
◆ ReadyBoost. See “Boosting Memory” in Chapter 20.
Major updates
◆ Speech recognition. See “Using Speech Recognition” in Chapter 4.
◆ Power Options utility. See “Conserving Power” in Chapter 4.
◆ Windows Explorer. See Chapter 5.
◆ Windows Photo Gallery (replaces Windows Picture and Fax Viewer). See Chapter 9.
◆ Internet Explorer. See Chapter 14.
◆ Network setup. See Chapter 18.
◆ Task Scheduler. See “Scheduling Tasks” in Chapter 20.
◆ Backup and Restore Center (formerly Windows Backup). See “Backing up Your Files” in Chapter 20.
Moderate updates
◆ Start menu. See “Exploring the Start Menu” in Chapter 2.
◆ Windows Help and Support. See Chapter 3.
◆ Control Panel. See “Using Control Panel” in Chapter 4.
◆ Taskbar clock. See “Setting the Date and Time” in Chapter 4.
◆ Ease of Access (formerly Accessibility). See “Accommodating Disabled Users” in Chapter 4.
◆ Personal folder (reorganizes My Documents, My Music, and so on). See “Storing Stuff in Your Personal Folder” in Chapter 5.
◆ Disc burning. See “Burning CDs and DVDs” in Chapter 5.
◆ Programs and Features (formerly Add or Remove Programs). See “Removing Programs” in Chapter 6.
◆ Meeting Space (formerly NetMeeting). See “Using the Free Utility Programs” in Chapter 6.
◆ Windows Fax and Scan (formerly Windows Fax). See “Scanning and Faxing” in Chapter 6.
◆ Windows Media Player. See Chapter 10.
◆ Windows Movie Maker. See Chapter 11.
◆ Internet connections. See “Connecting to the Internet” in Chapter 12.
◆ Windows Mail (formerly Outlook Express). See Chapter 15.
◆ Windows Live Messenger (formerly Windows Messenger). See Chapter 16.
◆ System Restore. See “Restoring Your System” in Chapter 20.
◆ Windows Easy Transfer (formerly Files and Settings Transfer Wizard). See “Transferring Existing Files and Settings” in the appendix.
W
h
a
t’s
Ne
w
in W
indo
ws V
i
s
t
Upgrading to
Windows Vista
If you’re moving to Vista from an earlier version of Windows, Microsoft gives you upgrade options that depend on the version that you’re currently running. A Windows Vista version upgrade is much cheaper than a full copy. You can upgrade from only Windows XP or Windows 2000; if you have an earlier version, you must install a full copy of Vista. You have two ways to upgrade:
◆ An upgradelets you install Vista and keep your programs, files, and settings as they were in your previous edition of Windows.
◆ Aclean installoverwrites your current copy of Windows with Vista, erasing everything. You can use Windows Easy Transfer (see the appendix) to reload your files and settings on your upgraded PC.
Table i.1tells you which Windows versions qualify for an upgrade to Vista Home, Business, or Ultimate editions.
Upgr
ading
t
o
W
indo
ws V
i
s
t
a
Not Eligible to Upgrade?
If you’re not eligible to upgrade because you’re a first-time Windows customer or your current Windows version doesn’t qualify, then it’s cheaper to buy the Vista
upgradeversion andget Windows 2000 —from a friend, coworker, computer swap meet, www.craigslist.org. . . there are plenty of copies around. (You can get a copy of Windows XP instead, but you might have trouble with its activation key if it’s already been used.)
Install Windows 2000 on your PC and then apply the Vista upgrade, first making sure that your hardware meets Vista system requirements (see the appendix). Don’t throw out Windows 2000; you may need it to reinstall Vista someday.
Table i.1
Upgrading from Earlier Windows Versions
C u r r e n t V e r s i o n H o m e B a s i c H o m e P r e m i u m B u s i n e s s U l t i m a t e
Windows XP Professional
•
•
•
•
Windows XP Home•
•
•
•
Windows XP Media Center•
•
•
•
Windows XP Tablet PC•
•
•
•
Windows XP Professional x64•
•
•
•
Windows 2000•
•
•
•
•
Clean install only.About This Book
This book is for you if you’re new to Windows, moving or upgrading to Vista from a previous Windows version, or need a quick reference at hand. My audience is beginning and intermediate Windows Vista users, including people who are buying Vista along with their first computers. Windows veterans can look up specific tasks quickly or scan the tips and sidebars for tricks, shortcuts, and subtleties. Wherever possible, I give step-by-step instructions for using features and programs.Conventions used in this book
Commands.I use shorthand instructions rather than list steps separately. Here’s a command that opens a nested folder:
◆ Choose Start > Computer > Local Disk (C:) > Users > Public.
This sequence means: Click the Start button (on the taskbar, in the bottom-left corner of the desktop) to reveal the Start menu; then click Computer. Inside the Computer window, double-click the drive icon labeled Local Disk (C:) to open it. Inside that window, double-click the icon Users to open it. Inside thatwindow, double-click the icon Public to open it.
Each shorthand element (between the > symbols) refers to an icon, window, dialog box, menu, button, check box, link, tab, or some other user-interface component; just look for the component whose label matches the element name. Whenever a particular step is unclear or ambiguous, I spell it out rather than use shorthand.
Here’s a command that launches the Notepad program:
◆ Choose Start > All Programs > Accessories > Notepad.
This one shows file extensions:
◆ Choose Start > Control Panel > Appearance and Personalization > Folder Options > View tab > uncheck Hide Extensions for Known File Types > OK.
Keyboard shortcuts.Use keyboard short-cuts so that you don’t waste time moving your hand from keyboard to mouse repeat-edly. These shortcuts involve the modifier keys that sit at the bottom corners of the keyboard’s main section. Press these keys—Shift, Ctrl (Control), and Alt (Alternate)—together with other keys to change the action. The C key pressed by itself types a lowercase c; pressed along with the Shift key, it types an uppercase C; and pressed along with the Ctrl key, it issues the Copy command.
About T
his
Modifier keys are joined to other keys with a plus sign. Ctrl+C, for example, means “Press the Ctrl key, hold it down while you press the C key, and then release both keys.” A three-key combination such as Ctrl+Alt+Delete means “Hold down the first two keys while you press the third one; then release all three.” The modifiers always are listed first. An Alt-key shortcut joined by commas rather than plus signs (Alt, F, O, for example) means press and release each key in succes-sion rather than pressing them all at once.
The Windows logo key,next to the Alt key on most PC keyboards, pulls up the Start menu when pressed by itself, but it also can be used as a modifier. Windows logo key+D, for example, minimizes all win-dows. When I give a Windows-logo-key shortcut, mentally add “if my keyboard has one,” because not all keyboards do.
✔
Tip
■ Use Windows Help and Support to view or print a list of keyboard shortcuts: Choose Start > Help and Support, and search for keyboard shortcuts.
Default settings
Throughout this book, I refer to Vista’s defaults,
or predefined settings, that Microsoft set when it shipped Windows from the factory. In some cases a middleman—such as your PC’s manufacturer, a network administrator, or whoever unpacked your computer—will have changed some default options, so your initial Windows setup might look or behave a little differently than I describe.
Companion website
For corrections and updates, go to
www.fehily.com. Click the Contact link
to send me questions, suggestions, correc-tions, and gripes related to this book.
About T
his
Windows Vista is complex software, but its user interface—the aspects of it that you see and hear and use to control Vista—is designed to let you wield a lot of power with a modest amount of learning. The secret is understand-ing the underlyunderstand-ing consistency of the ways that Windows works. As you use Windows, techniques like switching programs, searching for files, resizing windows, drag-and-drop, and copy-and-paste will become familiar.
This chapter and the next one get you up and running and introduce you to Windows fundamentals. Chapter 3 tells you how to get help with learning and configuring Windows, on or off the internet. After that you’re on your way to becoming a power user.
Getting Started
1
Getting
S
t
ar
ted
“Windows needs your
permission to continue”
Windows Vista has a new security feature, named User Account Control (UAC), that interrupts program installations and attempts to make significant changes to your computer’s setup. UAC alerts you to system changes and gets your approval via the User Account Control prompt:
If you’re logged on as an administrator, UAC asks you to click Continue or Allow. If you’re a standard user, the UAC prompt provides a space for you to type an administrator password. When the UAC prompt appears, the rest of the screen darkens until you consent to (or deny) the action. Windows marks administra-tor actions with a shield icon:
Logging On and
Logging Off
Logging onis the process of starting a session in Windows Vista—the first thing you do after turning on your computer. After your computer powers up—or boots—you’ll see the Welcome screen, in which you enter your user name and (optional) password. Windows user accountsidentify who has permission to use a particular computer (or network). User accounts are covered in Chapter 17, but for now you need to know only your user name and password, which depend on your installation:
◆ If your PC came with Windows Vista installed, either the Welcome screen will appear with a factory-installed account name or the computer will start in Windows Setup (see the appendix) the first time you turn it on. Follow the man-ufacturer’s instructions.
◆ If you upgraded to Windows Vista from Windows XP by doing an in-place instal-lation, your existing accounts migrated to the new installation and appear on the Welcome screen.
◆ If you did a clean install of Windows Vista, you set up an account during installation. Use that user name and password.
◆ If you’re on a large network at work or school, ask your network administrator how to log on.
◆ If your computer has only one user account with no password, Windows bypasses the Welcome screen and boots to that account’s desktop directly. (Vista comes with hidden Guest and Administrator accounts, but they don’t apply here.)
L
ogging
On
and
L
ogging
L
ogging
On
and
L
ogging
Off
Logging on Automatically
You can set up your computer to log on automatically at startup even if it has more than one account or if your account is password-protected. You may like automatic logon if you’re the main user but sometimes others log on, or if you keep your own separate accounts for differ-ent tasks.
To log on automatically at startup:
1. Choose Start, type control userpasswords2in the Search box, and then press Enter.
or
If you’re connected to a network domain, choose Start > Control Panel > User Accounts > Advanced Options.
If a security prompt appears, type an administrator password or confirm the action.
2. In the User Accounts dialog box, on the Users tab, uncheck Users Must Enter a User
Name and Password to Use This Computer.
This check box won’t appear if your computer doesn’t support automatic logon or if your network administrator has disabled it.
3. Click OK.
4. In the Automatically Log On dialog box, type the user name and password (twice) of the
account that you want to log on to automatically; then click OK.
Now the system invisibly enters your user name and password at power-up. Anyone who turns on your computer can access the same files and resources that you do.
Logging on
Logging on to a computer identifies you uniquely so that Windows can load your personal settings and grant you certain per-missions. You use the Welcome screen to log on to Windows; it lists all the accounts on your computer.
To log on to Windows:
1. On the Welcome screen, click your user
name or picture.
2. If your account is password-protected,
type your password in the Password box and then press Enter or click the arrow. Your personalized Windows desktop appears.
✔
Tips
■ If you’ve set a password hint (see “Setting up User Accounts” in Chapter 17), it appears below the password box if you mistype your password.
■ The bottom portion of the Welcome screen shows the edition of Vista that you’re running and offers the options listed in Table 1.1.
■ To cancel logon after you’ve started typing your password, press Esc.
■ Windows XP lets you turn off the Welcome screen and use the classic logon prompt; Vista doesn’t.
L
ogging
On
and
L
ogging
Off
Secure Logon
For added security, force users to press Ctrl+Alt+Delete to log on. Secure logon halts any other programs running on your PC, preventing user-name and pass-word theft by Trojan-horse programs that mimic the logon screen.
To enable secure logon:
1. Choose Start, type control userpasswords2
in the Search box, and then press Enter.
or
If you’re on a network domain, choose Start > Control Panel > User Accounts > Advanced Options.
If a security prompt appears, type an administrator password or confirm the action.
2. In the User Accounts dialog box,
choose Advanced tab > check Require Users to Press Ctrl+Alt+Delete > OK.
From now on, users are greeted with “Press CTRL + ALT + DELETE to log on.”
Table 1.1
Welcome Screen Options
B u t t o n C l i c k T o
Adjust your computer for vision, hearing, and mobility, and use speech recognition. See “Accommodating Disabled Users” in Chapter 4.
Choose a turn-off option: Restart, Sleep, Hibernate, or Shut Down. See “Turning off your computer” later in this section. Cancel Return to the CTRL + ALT+ DELETE screen if
L
ogging
On
and
L
ogging
Off
Domain Logons
If you’re a home or small-business user, you’re probably using a stand-alone computer or one that’s part of a small workgroup network (Chapter 18), so you log on by using the Welcome screen. If you’re on a large network at work or school, your machine is part of a centrally administered domain. You can log on to any computer in the domain without needing an account on that machine. Your network administrator or IT department will give you logon instructions, but here are a few basics:
◆ Windows Vista Business, Enterprise, and Ultimate editions can join domains (Home edi-tions can’t).
◆ Secure logon usually is enabled on domains; press Ctrl+Alt+Delete to display the logon screen.
◆ The domain logon screen, unlike the standard Welcome screen, doesn’t list everyone’s account (doing so would be insecure and impractical). Instead, you have a single place to enter your user name and password.
◆ By default, the logon screen shows the last account to log on and gives you the option to log on as a different user. Include the domain name with your user name: Log on as
user_name@domain_nameor domain_name\user_name. To log on to the local machine, type
.\user_name,where user_nameis a local (not domain) account.
◆ After logon, you can connect to the domain’s shared network resources (printers, servers, and so on). Your computer might run an automated logon script to handle permissions, security, maintenance, updates, system scans, or whatever else your network administra-tor wants.
◆ To find the domain that you’re on, choose Start > Control Panel > System and
Maintenance > System (or press Windows logo key+Break). If your computer is connected to a domain, under Computer Name, Domain, and Workgroup Settings, you’ll see the domain name; otherwise, you’ll see a workgroup name.
◆ To connect to a domain, choose Start > Control Panel > System and Maintenance > System (or press Windows logo key+Break). Under Computer Name, Domain, and Workgroup Settings, click Change Settings. (If a security prompt appears, type an admin-istrator password or confirm the action.) On the Computer Name tab, click Network ID to start the Join a Domain or Workgroup wizard and then follow the onscreen instructions. (Alternatively, click Change instead of Network ID to set the domain quickly without using the wizard.)
Switching users
Fast User Switchinglets more than one per-son log on at the same time. If you step away from your computer for a short time, you can leave your programs running andlet someone else log on to, say, check email. When you log back on, Windows resumes your session where you left off.
Only one person at a time—the active user— actually can usethe computer (type at the keyboard). People who are logged on but not active—disconnected users—can keep their programs running and files open in the background, invisible to the active user.
To switch users without logging off:
1. Choose Start, click the arrow next to the
Lock button, and then click Switch User (Figure 1.1).
or
Press Windows logo key+L.
or
Press Ctrl+Alt+Delete; then click Switch User.
2. If secure logon is enabled, press
Ctrl+Alt+Delete.
3. In the Welcome screen, click another
account name or picture; then log on normally.
L
ogging
On
and
L
ogging
Off
Figure 1.1Choose Switch User to keep all your work
✔
Tips
■ Save all your work before switching. If the other user shuts down the computer or logs you off, Windows won’t save your open files automatically.
■ In Vista (unlike Windows XP), Fast User Switching works if you’re on a network domain.
■ To turn off Fast User Switching, choose Start, type gpedit.mscin the Search box, and then press Enter. (If a security prompt appears, type an administrator password or confirm the action.) In the Group Policy Object Editor, choose Local Computer Policy > Computer Configuration > Administrative Templates > System > Logon > enable Hide Entry Points for Fast User Switching > OK.
To find out who else is logged on to
your computer:
1. Right-click an empty area of the taskbar
and choose Task Manager.
or
Press Ctrl+Shift+Esc.
2. Click the Users tab to view users and
their status (Figure 1.2).
L
ogging
On
and
L
ogging
Off
Figure 1.2The Users tab tells you who else is logged
If your computer is running slowly, use Task Manager to see the programs that other logged-on users are running and how much memory they’re chewing up. Task Manager lists filenames (winword.exe, for example) in the Image Name column and program names (Microsoft Word) in the Description column.
To find out which programs other
users are running:
1. Right-click an empty area of the taskbar
and choose Task Manager.
or
Press Ctrl+Shift+Esc.
2. Click the Processes tab.
3. Click Show Processes from All Users
(Figure 1.3).
If a security prompt appears, type an administrator password or confirm the action.
✔
Tips
■ If Task Manager is missing its menus and tabs, double-click the window border to bring them back.
■ To identify the active user quickly, click Start and read the user name in the top-right section of the Start menu.
■ To log off another user, see “Logging off ” later in this section.
■ Fast way to switch users: Right-click a user name in Task Manager’s Users tab and choose Connect or Disconnect from the shortcut menu (see Figure 1.6 later in this chapter).
L
ogging
On
and
L
ogging
Off
Figure 1.3This list is sorted by user name. Click any
Locking your computer
Without logging off, you can lock your com-puter—that is, set it so that the keyboard and mouse won’t change anything—to protect your programs and personal information while you’re away from your PC. Locking lets others know that you’re using the computer and prevents everyone except you (or an administrator) from viewing your files or programs, though other users still can log on via Fast User Switching.
To lock your computer:
◆ Choose Start > Lock button (Figure 1.4).
or
Press Windows logo key+L.
or
Press Ctrl+Alt+Delete; then click Lock This Computer.
Windows displays a Locked screen with your user name until you return.
To unlock your computer:
◆ On the Locked screen, type your pass-word in the Passpass-word box; then press Enter or click the arrow. (If secure logon is enabled, press Ctrl+Alt+Delete to dis-play the Locked screen.)
✔
Tips
■ You can set your screen saver to lock your computer automatically after a set period of idle time; see “Setting the Screen Saver” in Chapter 4.
■ A locked computer still is subject to power-management settings; see “Conserving Power” in Chapter 4.
■ A locked computer doesn’t interfere with shared printers or other network resources.
L
ogging
On
and
L
ogging
Off
Figure 1.4Your programs continue to run while your
Logging off
Logging offends your session in Windows Vista. When you log off your user account:
◆ Windows closes all your open programs and files. (Each program prompts you to save any unsaved work.)
◆ Windows disconnects your dial-up and other external connections.
◆ You prevent curious or malicious passersby from using your user account to access your files or network.
◆ Your computer remains turned on.
To log off:
1. Choose Start, click the arrow next to the
Lock button, and then click Log Off (Figure 1.5).
or
Press Ctrl+Alt+Delete; then click Log Off.
2. If there’s a problem logging off (usually
because you haven’t saved your work in some program), Windows displays a dialog box listing the currently running programs and explaining the problem. Do one of the following:
▲ Click Cancel to cancel the logoff. Resolve the issue with the problem program (by saving your work and exiting the program, for example).
▲ or
▲ Click Log Off Now to continue log-ging off. Windows forces the problem program to close. You might lose your work as a result.
L
ogging
On
and
L
ogging
Off
Figure 1.5After you log off, Windows displays the
If other users are logged on to your machine (via Fast User Switching), you can use Task Manager to log them off.
To log off someone else:
1. Right-click an empty area of the taskbar
and choose Task Manager.
or
Press Ctrl+Shift+Esc.
2. Click the Users tab to view logged-on
users.
3. Select a user; then click Logoff.
or
Right-click a user and choose Log Off (Figure 1.6).
4. Confirm the logoff in the message box
that appears.
L
ogging
On
and
L
ogging
Off
Figure 1.6Logging other users off without warning is
Turning off your computer
Windows prepares itself for shutdown by saving session and system information and by disconnecting network, dial-up, and other external connections. Windows still can recover if you lose power suddenly or yank your PC’s plug from the wall, but you may get an “improper shutdown” message when you return (and your unsaved work will be lost). For peace of mind, always use one of the official Windows turn-off options.
By default, turning off your computer puts it in a power-saving state called Sleep. Sleep, new in Vista, differs from the Shut Down (power-off) state used by default in earlier Windows versions.
To turn off your computer:
◆ To put your computer to sleep, choose Start; then click the Power button ( ). On laptop PCs, closing the lid puts the computer to sleep by default.
or
To use a different turn-off option, choose Start, click the arrow next to the Lock button (Figure 1.7), and then choose one of the options listed in Table 1.2.
L
ogging
On
and
L
ogging
Off
Table 1.2
Turn-Off Options
O p t i o n W h a t I t D o e s
Sleep Turns off the display, stops the hard disks and fan, and enters low-power-consumption mode. Windows saves your work automatically, so you don’t have to save your files and exit programs before putting your computer to sleep. A light on your computer case may blink slowly or turn yellow while the computer sleeps. A sleeping computer springs to life quickly—with your desktop exactly as you left it—when you start working again. Use Sleep to stop using your computer for a short time and save power (especially useful for laptops).
Shut Down Ends your session and shuts down Windows so that you can turn off the power safely. Most computers turn off the power automatically; if yours doesn’t, push the power button on the computer after the “It’s safe” message appears. This option quits your programs, prompting you to save any unsaved work. After shutdown, it may take several minutes to turn on your computer, log on, and then start the programs that you were using. Use Shut Down when you’re done for the day or when you need to muck around inside your computer. Restart Ends your session, shuts down Windows, and starts Windows again automatically. This option quits your
pro-grams, prompting you to save any unsaved work. Use Restart if you’ve installed hardware or software that requires a restart, or if Windows is acting erratically or sluggishly.
Hibernate Hibernate saves your session to a file on your hard disk before turning off the power. When you restart the computer, your desktop is restored quickly and exactly as you left it. Older computers may not support this option.
Figure 1.7Choose Restart, Sleep, Hibernate, or
To wake a computer from sleep state:
◆ Press the power button on the com-puter’s case, press a key on the keyboard, click the mouse, or (for a laptop PC) open the lid. The computer usually will wake within seconds.
✔
Tips
■ A sleeping computer uses a tiny amount of power to maintain your work in mem-ory. Sleeping laptops lose about 1 or 2 percent of battery power per hour. If a laptop has been sleeping for a few hours or its battery is low, Windows saves your work to hard disk and turns off your computer, drawing no power. To learn about power options for laptops, see “Conserving Power” in Chapter 4.
■ If the Power button looks like this, your computer will shut down instead of sleep because either your hardware doesn’t support the sleep option (possi-bly because you have an old video card or outdated video driver) or an administra-tor has set the Power button to always shut down (see “Conserving Power” in Chapter 4).
■ A shield on the Power button means that automatic updates are ready to be installed on your computer (see “Updating Windows” in Chapter 13). Clicking this button ends your session, installs the updates, and then shuts down your computer.
■ The turn-off options also are available on the Welcome screen; see “Logging on” earlier in this section.
L
ogging
On
and
L
ogging
■ If the desktop is active, you can press Alt+F4 to chose a turn-off option (Figure 1.8).
■ For reasons of convenience, parts wearout, power consumption, power interruption, and heat stress, it’s unclear whether you should leave your PC on or shut it down overnight. (I know people who rarely turn off their PCs.) Either way, you should always turn off your monitor when you’re done.
L
ogging
On
and
L
ogging
Off
Figure 1.8The old-style Shut Down Windows dialog
box still is available.
When Installing Hardware
You should follow the manufacturer’s instructions when installing hardware on your PC, but here are a few general rules (see Chapter 8 for details):
◆ Before you install hardware inside your computer (memory, disk drive, sound card, video card, and so on), shut down your computer andunplug it.
◆ Before you attach a peripheral device (printer, monitor, external drive) that does not con-nect to a USB or IEEE 1394 (FireWire) port, shut down your computer (no need to unplug it).
Using Welcome Center
At startup, Windows displays Welcome Center (Figure 1.9) to help you set up your computer for the first time. Common tasks include connecting to the internet (Chapter 12), adding user accounts for other people (Chapter 17), transferring files and settings from another computer (appendix), and personalizing Windows (Chapter 4).Welcome Center appears automatically when you log on for the first time. If you don’t want to see it on future starts, uncheck Run at Startup in the bottom-left corner. You can always bring it back.
Using W
elcome
Center
Figure 1.9Welcome Center puts tasks that help you get started using Windows Vista in one easy-to-find place. Click
To open Welcome Center:
◆ Choose Start > Control Panel > System and Maintenance > Welcome Center.
✔
Tips
■ By default, only some tasks are shown. To see them all, click the Show All Items link in the Get Started with Windows section.
■ Below Get Started with Windows is at least one Offers section with more tasks and (free or pay) offers from Microsoft or your computer’s manufacturer.
■ Some Welcome Center tasks depend on your Windows setup. Add New Users won’t appears if you’re on a network domain, for example, and Windows Ultimate Extras appears only in Vista Ultimate edition.
Using W
elcome
Exploring the Windows
Interface
Figure 1.10shows the basic elements that you’ll find on the Windows Vista desktop.
E
x
p
l
oring
the W
indo
ws
Interf
a
c
e
Figure 1.10Basic elements of the Windows Vista desktop. The desktop lets you move items and manage your tasks
vaguely the same way that you would on a physical desktop.
Icons Mouse pointer Windows Menu Start-menu button
Toolbar Desktop Dialog box
Microsoft modeled Windows on a real-world office environment: You have a desktop, on which you work and use tools, and folders, in which you organize files.
Desktop.After you log on to Windows, the
desktop—a work area that uses menus, icons, and windows to simulate the top of a desk—appears automatically.
Start menu.The Start menuis the central menu that lets you access the most useful folders, programs, and commands on your computer. Chapter 2 covers the Start menu.
Taskbar.The taskbarlets you switch among open programs and documents. It also lets you launch programs and alerts you to cer-tain events, such as appointment reminders or incoming email. Chapter 2 covers the taskbar.
Sidebar.The sidebar,new in Vista, is a long vertical bar on the edge of the desktop. It holds mini-programs, called gadgets,that show live information (time, weather, head-lines, and so on) and provide access to fre-quently used tools (calendar, contacts, notes). Chapter 2 covers the sidebar.
Mouse pointer.Use your mouse, stylus, trackball, touchpad, or similar input device to move the mouse pointerto select items, drag icons, or choose commands onscreen.
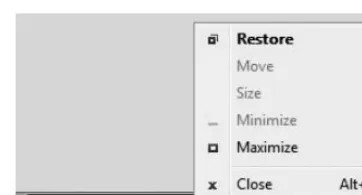
Menus.Amenuis a list of related com-mands. Most programs use menus to provide an easy-to-learn, easy-to-use alternative to memorizing instructions.
E
x
p
l
oring
the W
indo
ws
Interf
a
c
Toolbars.Atoolbaris a row, column, or block of buttons or icons. When you click one of these buttons or icons, the program carries out a command or task.
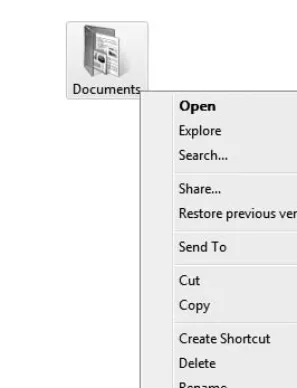
Icons.An iconis a small image that repre-sents an item to be opened, such as a file, folder, disk, program, or the Recycle Bin. An icon’s picture is a visual cue designed to help you recall what the icon represents.
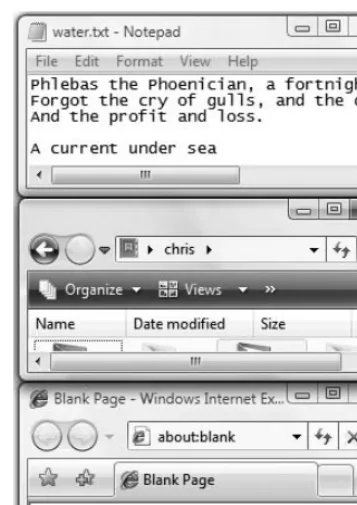
Windows.Awindowis a rectangular por-tion of your screen where a program runs. You can open many windows at the same time. Each window can be independently resized, moved, or closed; maximized to occupy the entire screen; or minimized to a button on the taskbar.
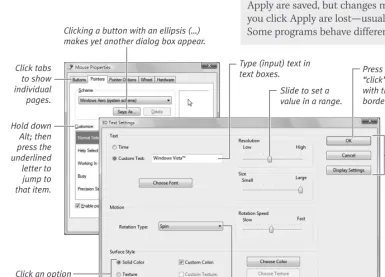
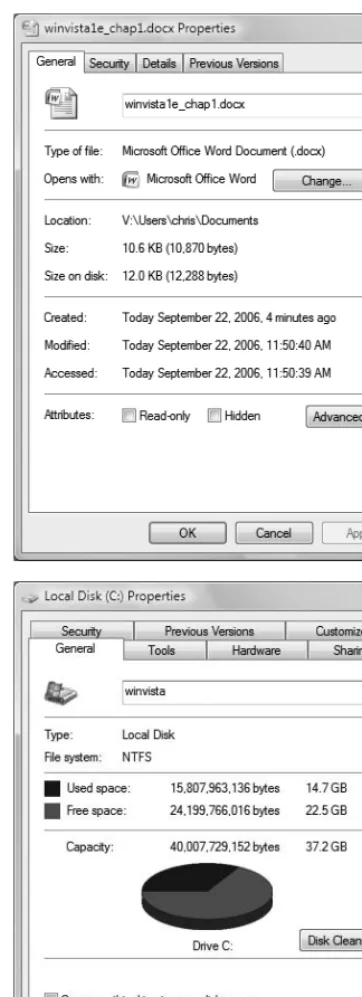
Dialog boxes.A special type of window called a dialog box contains text boxes, but-tons, tabs, scrolling lists, or drop-down lists that let you set preferences or run commands. Some dialog boxes—such as Open, Save As, and Print—are similar in every Windows program. Others, such as the Properties dia-log box shown in Figure 1.10, depend on the program or context.
E
x
p
l
oring
the W
indo
ws
Interf
a
c
e
The User Interface
You work with Windows through its
graphical user interface(GUI, pronounced
The Mouse
The mouse is one of two primary input devices in Windows (the other is the key-board). Moving the mouse on your physical desk controls the motion of the mouse pointer on your screen. By moving the mouse pointer over an icon or control and then clicking, you can select an item, open or move a file, run a program, or throw some-thing away, for example.
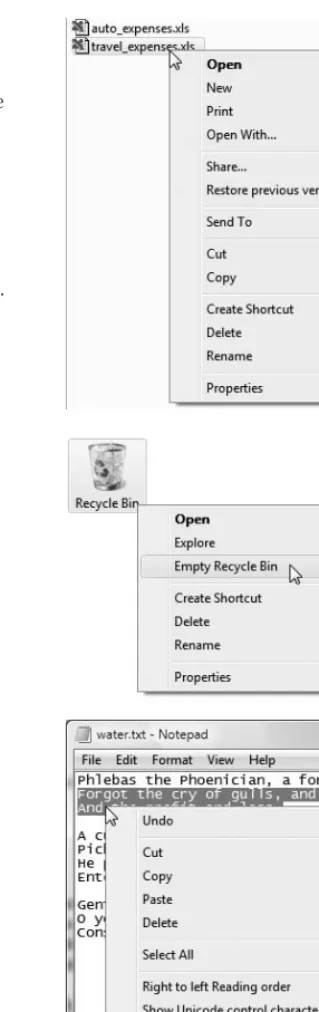
A mouse has a left and a right button. You’ll use the left button for most actions, but skillful use of the right button, which dis-plays a shortcut menu, is a key to working quickly. Advanced mice have extra buttons for other functions.
✔
Tips
■ Most mice have a scroll wheel(a small wheel between the two main buttons) that helps you scroll through documents and webpages. On some mice, you can press the scroll wheel as a third button.
■ Instead of a mouse, you may have a touchpad (used on laptops), trackball, or stylus (used on Tablet PCs).
■ Lefties can swap the functions of the left and right mouse buttons. See “Configuring the Mouse” in Chapter 4.
■ The pointer’s shape changes depending on what it’s pointing to. Table 1.3shows the default pointers. To change the shapes, see “Configuring the Mouse” in Chapter 4.
■ In text documents, don’t confuse the cursor, which blinks steadily, with the mouse pointer, which never blinks. The
cursor(also called the insertion point) indicates where text will be inserted when you type (Figure 1.11).
T
he
Mouse
Figure 1.11The cursor—the vertical bar at the end of
the text—marks the insertion point for newly typed text. To move the insertion point, click the mouse pointer—the I-beam on the right—at a new insertion point or use the arrow keys.
Table 1.3
Mouse Pointers
S h a p e W h e n I t A p p e a r s
The normal pointer. Click the area or item that you want to work with.
Appears when you click the question mark (?) in the top-right corner of a dialog box. Click any dialog-box item to get “What’s This?” help.
Windows is doing something in the back-ground—opening or saving a temporary file, for example. You can keep doing your own work, but response time may be longer than usual.
Windows is busy with a task and will ignore you until it finishes. Typically, this pointer will appear in only one program window at a time; if it appears everywhere, your com-puter is indeed busy.
Appears when you point to a window’s bor-der (side or corner). Drag the borbor-der to resize the window. See “Windows” later in this chapter.
Appears when you point to a word or image linked to a help page, command, or web-site. Click the link to jump to a related desti-nation or display pop-up information. The action that you’re trying to perform is forbidden, or the item that you’re pointing to is unavailable.
To point:
◆ Move the tip of the pointer over the item to which you want to point (Figure 1.12).
To click:
◆ Point to an item; then press and release the left mouse button without moving the mouse (Figure 1.13and Figure 1.14).
To double-click:
◆ Point to an item and click the left mouse button twice in rapid succession without moving the mouse.
✔
Tip
■ Double-click too slowly, and Windows interprets it as two single clicks, which isn’t the same thing. To change the speed of what Windows recognizes as a double-click, see “Configuring the Mouse” in Chapter 4.
To right-click:
◆ Point to an item; then click the right
mouse button without moving the mouse (Figure 1.15).
To drag:
◆ Point to an item; press and holdthe left mouse button while you move the pointer to a new location; then release the button (Figure 1.16).
✔
Tips
■ Drag an object with the right mouse but-ton to display a shortcut menu when you reach the new location.
■ Press Esc during a drag to cancel it.
■ Drag in a folder window or on the desk-top to draw a rectangular marquee
around icons. Releasing the mouse but-ton selects the enclosed icons.
T
he
Mouse
Figure 1.12One tiny pixel is the
pointer’s hot spot, which you use to point precisely. For an arrow pointer, it’s the tip of the arrow. In Microsoft’s wilder alternative pointer schemes, finding the hot spot takes a little practice.
Figure 1.13Click to select an icon...
Figure 1.14...or activate a dialog-box item.
Figure 1.15Right-click an item to display
its shortcut menu.
Figure 1.16Drag to move items such as icons and
The Keyboard
The keyboard isn’t just for typing text. Experienced Windows users use keystrokes instead of the mouse to issue commands. Windows provides hundreds of keyboard shortcutsthat replicate almost every common mouse maneuver. You can use keyboard short-cuts to open, close, and navigate the Start menu, desktop, menus, windows, dialog boxes, programs, documents, and webpages. Using a keyboard shortcut usually is faster than using the mouse to do the same thing
In addition to keys for letters, numbers, and symbols, your keyboard has other types of keys:
◆ Modifier keysalter the meaning of the other key(s) being pressed (Table 1.4).
◆ Function keysare the keys along the keyboard’s top or left side labeled F1, F2, and so on. Their functions depend on the program that you’re using.
◆ Navigation keysscroll windows and move things around (Table 1.5).
T
he
Ke
y
b
o
ard
Table 1.4
Modifier Keys
K e y P r e s s T o
Shift Type symbols or uppercase letters, or extend the selection when used with the mouse.
Ctrl Modify the function of other keys. (Ctrl stands for Control.)
Alt Access menus or modify the function of other keys. (Alt stands for Alternate.)
Table 1.5
Navigation Keys
K e y P r e s s T o
Home Scroll to the beginning or move to the start of a line or row
End Scroll to the end or move to the end of a line or row
Page Up Scroll up one page or windowful Page Down Scroll down one page or windowful Arrow keys Scroll in that direction, move the
inser-tion point or selected item(s), or select the adjacent item.