Shackelford
US $54.99 Shelve in Linux/General User level: Beginning–Advanced
SOURCE CODE ONLINE
Beginning Amazon Web
Services with Node.js
Beginning Amazon Web Services with Node.js teaches anyone new to Node.js development how to configure, deploy, and maintain scalable Node.js applications, from small to large, in Amazon Web Services. Hosting a Node.js application in a production environment usually means turning to PaaS hosting solutions, but this approach is often fraught with problems. Deploying Node.js directly to AWS solves the problems you encounter in those situations and enables you to cut out the middle man.
Noted expert Adam Shackelford gets you started with a basic RESTful web service in Node.js, using the popular Express.js framework, which is pre-built and ready to run in your local environment. The book then introduces you to the most powerful tools in AWS, and you learn how to configure your project to take advantage of them. The book also guides you through the steps of getting the various key components to work together on AWS. Through code samples using the AWS JavaScript SDK and tutorials in the AWS Console, you gain the knowledge to incorporate secure user authentication, server auto-scaling, a load balancer, CDN, customized caching behavior, and outage monitoring. Get started with Node.js and AWS using this book today.
In this book, you learn how to:
• Build Node.js apps on AWS that automatically power up to handle a massive volume of traffic and then scale back down to a lighter configuration when demand drops
• Use AWS OpsWorks to architect and configure a secure web application built for hosting in the cloud
• Integrate AWS Cloudwatch, SES, and other AWS services into your code • Use AWS Route 53 to configure your domain to use a load balancer, CDN,
and other performance-enhancing services with your application
RELATED
For your convenience Apress has placed some of the front
matter material after the index. Please use the Bookmarks
Contents at a Glance
About the Author ���������������������������������������������������������������������������������������������������
xiii
About the Technical Reviewer ���������������������������������������������������������������������������������xv
Acknowledgments �������������������������������������������������������������������������������������������������xvii
Preface �������������������������������������������������������������������������������������������������������������������xix
Chapter 1: Getting Started with Amazon Web Services
■
�����������������������������������������
1
Chapter 2: Working with AWS OpsWorks
■
������������������������������������������������������������
31
Chapter 3: OpsWorks Part II: Databases and Scaling
■
������������������������������������������
61
Chapter 4: CloudFront and DNS Management
■
�����������������������������������������������������
93
Chapter 5: Simple Storage Service and Content Delivery
■
����������������������������������
121
Chapter 6: Simple Email Service
■
����������������������������������������������������������������������
147
Chapter 7: Monitoring the Application
■
��������������������������������������������������������������
171
Chapter 8: Securing the Application
■
������������������������������������������������������������������
209
1
Getting Started with Amazon
Web Services
Welcome to Beginning Amazon Web Services with Node.js! Over the course of this book, you will learn how to optimize your Node.js applications for deployment on Amazon Web Services (AWS). By using AWS to host your application, you take advantage of a series of features that are commonly known as “the cloud.” You will learn about some of the core features of AWS, understand how to design your application stack, and integrate your application into the AWS environment. Though you could easily upload your code to a server and call it a day, learning how to incorporate the various features of AWS into your project will allow you to make full use of the benefits of the cloud. But what are these benefits?
Understanding the Cloud
First and foremost is scalability, or the ability to rapidly deploy additional resources to support your
application. Prior to the proliferation of cloud-hosting providers such as AWS, if demand for your application outstripped your hardware resources, deploying additional servers was an expensive and laborious task and often out of the capabilities of startups and small or medium-sized businesses. With your application hosted on AWS, you can allocate resources on demand, launching new servers and keeping your application online. According to the AWS white paper “Architecting for the Cloud: Best Practices,”1
Traditionally, applications have been built for fixed, rigid and pre-provisioned
infrastructure. Companies never had the need to provision and install servers on [a] daily
basis. As a result, most software architectures do not address the rapid deployment or
reduction of hardware. Since the provisioning time and upfront investment for acquiring
new resources was too high, software architects never invested time and resources in
optimizing for hardware utilization. It was acceptable if the hardware on which the
application is running was under-utilized. The notion of “elasticity” within an architecture
was overlooked because the idea of having new resources in minutes was not possible.
The ability to respond to demand for your application is known as elasticity. Being able to replace one server with 100 is useless if it’s not a strategic action. When additional servers had to be manually booted and configured for deployment in response to demand, the cost of doing so led many
businesses/institutions to instead over-allocate resources. Instead of spinning up additional servers for a spike in traffic, the extra servers would just be left running at all times and required concomitant maintenance. With the elasticity of AWS, spikes in traffic can be detected, and additional resources can be automatically deployed. When the demand returns to normal, the application can be scaled down automatically to a normal state. Use what you need, and pay for what you use—a simple concept that revolutionizes web application development. This saves time, money, energy, and reduces the barrier to entry for enterprise-level software.
As you can see, scalability and elasticity are great attributes to have in your application. These benefits also mean thinking differently about your role as software developer and architect. Shifting from developing in a fixed-hardware environment to a cloud-computing environment means that we are now cloud
architects, in addition to software developers. This constitutes a major change in the way developers must think about web applications. For many of us, there will no longer be a system administrator or database administrator maintaining the infrastructure. (They work at Amazon, IBM, Google, Rackspace, etc., now.) Instead, virtual hardware management/cloud architecture is now in our domain. Not only do we think about our application in terms of best coding practices and organization, we have to think about how to leverage the vast resources available to us as developers. This means we have to become familiar with the features of AWS and understand how to design, configure, and maintain a virtual-hosting environment.
As you learn how to be a cloud architect, you will learn about a lot of great features specific to AWS, as well as the general philosophies of elasticity and scalability. The many features of AWS are organized into a series of overlapping services. Many of them have redundant features, allowing for some creativity in the decisions we make as we architect our system. All of these services run in virtualized-hardware environments located in Amazon’s many data centers around the globe. We will explore some of these services in the chapters that follow.
You will be familiarizing yourself with the fundamentals of Amazon Web Services. I have discussed some of the general principles and advantages of using AWS. Later on, I will discuss some of the core services in greater detail and the different ways we can interact with them. Before we dive in, it is important to start on the same page.
The Approach in This Book
This book assumes that you are already at least a beginner Node.js developer, looking to expand your skill set to include architecting and developing a Node.js application with scalability and elasticity in mind. You should have a basic understanding of the main concepts in web-application development. You should know what a RESTful web service is, know your way around Git or SVN, and have a code editor handy.
Designing and developing the application is a creative process. This means that a number of highly subjective decisions have to be made. First and foremost, we will be using Amazon RDS (Relational Database Service) to host a MySQL database on AWS. Many Node.js developers prefer MongoDB to MySQL. That is perfectly fine! However, the sample application and subsequent instructions focus on MySQL, which suits the needs of our application. If you want to use this book to deploy an app using MongoDB, you will have to be capable of rewriting the database connections and queries accordingly. In either case, you will need elementary knowledge of the database language in question. This is just one of many creative decisions to be made along the way. You may disagree with some or require a different approach in your next project, but you will end up being better equipped to make these decisions in your next project, and you will be prepared to work with AWS services as a developer and architect.
3
Virtually every task you can carry out in the AWS Management Console (AWS Console) could also be carried out programmatically, and vice versa. The AWS Console adds a lot of clarity to the process by providing access to hints and documentation and by providing visual reference for the otherwise abstract concepts. It can help a lot to use the console while you wrap your head around everything AWS can do. You might ask, “How do I know when to use the console and when to use the SDK?” Learning curve aside, this is a highly subjective topic. You may, in time, decide what rules are best for your workflow, but we can follow a few ground rules.
Note
■
there is also a third approach for interacting with awS services: the awS command-line interface
(CLi). we will not use the CLi until the final chapter.
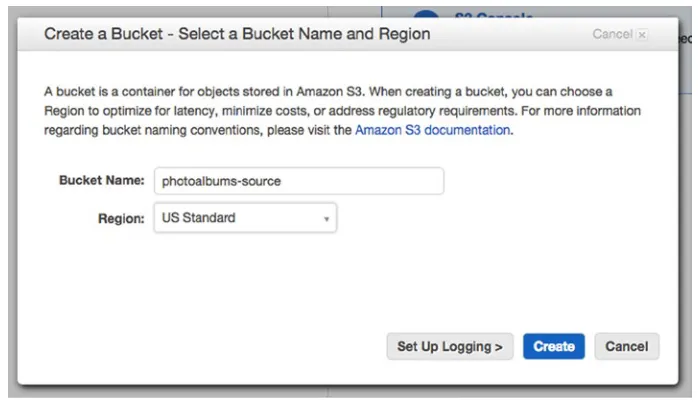
First, routine tasks should definitely be carried out in the SDK. If your app needs to store a daily log or report in an S3 bucket for storage, you probably want to accomplish that programmatically. Routine tasks involving file transfers are especially good candidates for the SDK. In the case of our application, images uploaded by the user will be stored in an S3 bucket for use in the application. When you learn how to do this, I will illustrate clearly why using the AWS Console would be a bad idea. For now, know that the SDK is a tremendous time-saving tool in this use case. The same goes for event-driven tasks, except where CloudWatch can detect them (such as a server going offline). For example, if your app has to generate e-mails when a user registers for your application, you want your code to trigger it instantly when it happens. We will explore these types of events in greater detail in Chapters 6 and 7.
There are many one-time tasks, however, that we will carry out on the AWS Console, for clarity’s sake. It will be a lot easier to diagnose errors or avoid them altogether with the AWS Console’s GUI than it would be to debug code that you only need to run once. For instance, while we could programmatically create an alarm to notify us when our app is slow to respond to requests, for clarity’s sake, we will do so in the AWS Console instead. When you’re learning, you can find yourself causing comically absurd bugs with the AWS SDK. Oops, I didn’t mean to create server instances on an infinite loop. If you were feeling ambitious after finishing the lessons, you could probably script many of the AWS Console tasks in the book. I’ll call that extra credit.
Before you are introduced to the AWS products we will be using, it is important to reiterate that there is more than one way to achieve the same goal with AWS. The scope of this book is limited to a set of products that work well together for achieving our goal of application scalability and elasticity with the feature set we need and a reasonable budget. However, many AWS services have some redundancy. For example, we will be using OpsWorks to manage our application stack, but it is not the only service for doing so. Many AWS developers prefer to use Elastic Beanstalk over OpsWorks, for the simplicity it offers, among other reasons. As time passes, AWS services have become more and more cohesive, so I hope learning how to use a handful of products will put you on the path to learn more, and with greater ease.
When you create and run an EC2 instance, you are renting computing resources in one or more AWS data centers, which are organized by geographic region. The price of these resources is based on the power and number of hours of use. EC2 uses a tiered pricing structure, whereby EC2 hardware specs (clock speed, RAM, etc.) are named according to their relative size. When you create an instance, the resources are allocated to your instance, and your billing begins. It doesn’t matter how much you actually use the resources you’ve rented. You are charged for your price tier. You could spend a lot of money reserving the largest instances available, but that would be a waste, just like the traditional deployment method described earlier. Instead, we will use other AWS services to scale our EC2 instances up and down, according to our needs, getting the most bang for the buck. Since we’re now also cloud architects as well as developers, we’re going to do our best to be stingy. Pay for what you use; use what you pay for.
While you could manually create and configure EC2 instances by hand, using a management tool such as OpsWorks streamlines the process significantly and can drastically reduce the risk of human error when setting up a complex system. We will be using OpsWorks to manage our application layers, deployment, and many other vital facets of the application. OpsWorks will be your main interface for configuring our project, and the first thing you will need to master. In Chapter 2, you will be introduced to the core features of OpsWorks and configure your application for deployment to EC2 instances. By the end of the chapter, your application will be deployed via OpsWorks to an EC2 instance.
In Chapter 3, you will be adding a scalable MySQL database to your application with Amazon RDS. You will also learn how to add additional server instances to your app and set up a load balancer to manage traffic. In Chapters 4 and 5, you will learn how to set up a CDN in CloudFront, as well as how to work with file transfers and caching. You will also learn about DNS configuration with Route 53. You will learn how to send e-mail with SES (Simple Email Service) from your application, in Chapter 6, and in Chapter 7, you will learn how to use CloudWatch to monitor your application. Finally, in Chapter 8, you will secure your application for your users by restricting critical API endpoints to HTTPS connections.
Though the application we’re building is relatively simple, using cloud computing is not. In addition to knowledge of Node.js, there are a number of tools and services you will require to complete this book.
Requirements
You will, of course, need all the tools for Node.js and MySQL development: an IDE, local MySQL database, and Git or SVNclient (unless you prefer the command line). Additionally, you will need accounts with a domain registrar, SSL certificate provider, and, of course, AWS.
AWS Account
The first thing you will need is your own AWS account. You can create one by going to
http://aws.amazon.com/ and clicking the Sign Up button. You will need to provide billing information to complete the registration process. You should complete this process now; there is no charge for an account with no services activated. As you proceed through the lessons and activate more services, you will start to accrue some expenditure. Once you have registered, you can review your expenditure at any time here:
5
In the preceding figure, you can see the main Billing and Cost Management dashboard (note that the entire screen is visible in this figure, which will not always be the case). Your current monthly bill is highlighted in a big, bold font, below which is a progress bar with a range of zero to your previous month’s bill. This is to give you an informed projection of your monthly costs, though they will likely fluctuate, based on changes in usage. Don’t let my bill scare you, though, there’s a lot more than the sample app running on my account.
There is also a callout to enable Alerts & Notifications. You can configure AWS to alert you when certain cost metrics have been reached. The utility of this is self-explanatory. If only the electric company offered this feature!
To the right is a circle chart and breakdown of your bill by service. As you can see, EC2 is likely to be your biggest expense, followed by RDS or whatever database service you use. You can expect your database service bill to scale up with the volume of queries your application makes and, hence, with the size of your user base.
You only pay for what you use, but if you go overboard with power, you will feel it in your bank account. To complete the lessons in this book, you will undoubtedly incur a small cost. The exact cost will depend on how quickly you complete the book and whether you leave your application running 24/7 or not. There are a number of other reports and billing-related tools and options in here that are outside the scope of these lessons. We will return to the AWS Console later in the chapter, to begin configuring the account for use as a production environment.
Tip
■
to save money, you can shut down many of your resources when you aren’t working on the lessons.
Domain Registration
You will require your own domain to complete all of the lessons. It doesn’t really matter what it is, as long as you have the ability to change the nameservers. If you don’t have a domain yet, you can register one at any registrar, such as GoDaddy (www.godaddy.com). That’s not an endorsement of GoDaddy; registrars are mostly all the same. Expect this to cost about $13 per year. You can also register your domain directly in the AWS Route 53 dashboard now, which is handy if you want to keep all your moving parts in one place.
SSL Certificate
This topic will be covered in detail in Chapter 8, so you don’t need this now. However, expect that you will have to provision a valid SSL certificate with a Certificate Authority. This will cost about $9 per year, at a minimum.
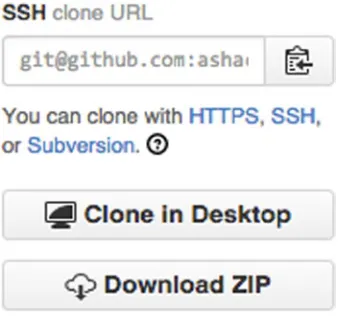
Code Repository
Down the road, when you are setting up your app in AWS OpsWorks, you will discover that you need to choose a means of deploying your application. You will be presented with a number of choices. The easiest and arguably most secure means of doing this deployment is from a GitHub (https://github.com) account, or another Git account-hosting service with comparable features. We specifically want one that supports auto-deployment or can otherwise be accessed by AWS via SSH connection. After downloading the sample project, you will want to add the project to your own repository, in which you can alter it as you see fit and configure your own deployment process.
Download the Sample Project
You will not begin the coding lessons by duplicating lengthy, step-by-step code samples. Instead, you can begin by downloading the sample project here: (www.apress.com/9781484206546). We will then review the prepackaged code and make iterative changes throughout the lessons that follow. Before you do this, make sure you have the latest version of Node.js installed (or at least version 0.10.26). Download a zip of the sample project, or pull the branch to your machine, and open the directory in a code editor.
Local Environment
You should already have Node.js installed locally on your machine and be capable of running it in the command-line interface. In the beginning, you will also need a local MySQL database. The easiest way to set one up is with MAMP (www.mamp.info/en/) or XAMPP (www.apachefriends.org/index.html). I will just assume that you can get this installed on your own without step-by-step instructions (hint: go to the web site and click Download). Unlike PHP, you won’t need MAMP/XAMPP to run your app, but it’s the easiest way to get a local MySQL database set up and accessible. You will also want to have MySQL Workbench
7
ExpressJS
You will want to be familiar with ExpressJS, a popular (perhaps the most popular) web application
framework for Node.js. Using ExpressJS will do a lot of the heavy lifting of routing and parsing HTTP requests and simplify the process of sending a response via templating engine, raw text/HTML, or JSON. Additionally, ExpressJS accepts a few handy global configurations and allows you to create or install middleware. This allows you to pass all HTTP requests made to your server through common functions, which makes it easy to integrate such features as authentication, field validation, and error handling.
The sample project is optimized for Express 4, the latest major release. If you are more familiar with Express 2 or Express 3, there are significant changes in this version. You should review
http://expressjs.com/guide/migrating-4.html to get up to speed.
Now let’s get you familiarized with the sample project. Some basic functionality for a simple RESTful web service has already been created for you. Keep in mind that the goal of this book is not to teach you how to code, nor is the functionality intended to be groundbreaking. By learning with a simple app, you will, I hope, develop a vision of how to integrate AWS into your own work.
Sample Project
Though this is not technically a Node.js guide, we will use a sample project to contextualize the lessons in this book. The sample project will provide a real-world app to develop, while we work with AWS. In the beginning, we will be starting with a bare-bones application—it needs a lot of work before it’s ready for use in the field. We’ll be doing some of that work throughout the book.
Overview
The sample project is the code base for a very simple photo-based social media app. The functionality is minimal: users can register for an account and log in. They can create album objects, which consist of a title and a collection of photo objects. Users can upload photos with captions to the albums, one at a time (but we aren’t storing and serving the files yet). Users can see a list of all other users and get all albums for specific users. Users interact with the app through a JSON-formatted RESTful API, and records are stored in a MySQL database.
As we progress through the lessons, we will be adding more functionality to the app. It will use a proper secure user-authentication scheme. Users will receive welcome e-mails when they register their account. We will store image files in a CDN, for easy and fast storage. Application logs will be generated and stored in AWS, and it will make use of a range of AWS services.
The use cases for an application such as this are many. Countless platforms, from social networks to newsreader apps, possess similar functionality at their core. With a little work, you could add the notion of friending or following, by creating a relationship among users, and the means for the user to create and delete them. You could add tagging, geolocation data, and comments to the photos.
Our application output is in JSON, but web templates could easily be generated by the application as well. Keep in mind that, although the app is simple at this point, it will become more complicated very quickly. The purpose of the sample project is not to dazzle you with Node.js coding skills but to provide a simple, clear code base that’s easy to follow and could be expanded into a more sophisticated application.
Note
Source Code Organization
Let’s start by opening the project in a code editor and taking a look at the contents. You should see the following in the project directory:
/lib /public /routes /setup /views server.js package.json
Open package.json in your code editor. You will see some information and config options for the project, in JSON format. You will see the dependencies property, which looks something like this:
"dependencies": { "express": "~4.8.6", "body-parser": "~1.6.6", "cookie-parser": "~1.3.2", "morgan": "~1.2.3", "serve-favicon": "~2.0.1", "debug": "~1.0.4", "jade": "~1.5.0",
... // additional dependencies truncated }
These are the other npm modules required to run the app. Many of them are automatically added to the list of dependencies when you use the ExpressJS app generator command. You will have to install these locally to run the app locally. Open your command-line interface (e.g., Terminal in OS X), and navigate to this directory. Type the following on the command line:
npm install
This command will look for a package.json file in the same directory and attempt to install all the modules in the dependencies attribute. You should see all the packages download and install over the course of a few minutes.
Let’s run through a few of the other files and directories in the project. Overall, this project is structured to follow the Model View Controller (MVC) design pattern. If you don’t know what this is, it’s simply a way of organizing your code base into a logical separation between three types of classes. In MVC, the three types are the model, or object definition and manipulation; the view, or output of the app; and the controller, which contains all the logic determining what information is sent to/retrieved from the model, based on input to the application. This is, of course, a simplification of the concept, but it should give you an idea of how it all works as we walk through it.
9
objects is so short that using a flexible data model often makes sense. If you wanted, you could create your own classes, instantiate them, and populate them, instead of following the approach in the sample project. You would not be wrong to do so, if it helps you to maintain your code base more efficiently.
The controllers for the MVC pattern are in the /routes directory. Each file corresponds to a directory path in a user’s request (e.g., /photos/1 or /users/adam) and processes all requests to URLs within that path. It will retrieve whatever data it needs from the corresponding model and send a response.
So where is the view? In cases where the response is JSON, the view is the JSON data itself. However, as an ExpressJS4 app, the jade templating engine (http://jade-lang.com/) is natively supported. If you were to develop web templates, those files would be located in the /views directory. When thinking about MVC, in this case, the view is not always going to be accessible in a template file. The view is always going to be an HTTP response, whether the content type is text/html or application/json.
Moving on, the public directory stores all the static assets, such as style sheets, images, and JavaScript files used by the front-end templates. This directory was auto-generated by ExpressJS. In Chapter 4, you will learn how to more efficiently serve these files to the users, with AWS CloudFront.
You have already learned about server.js. If you look in this file, you will see how the request routes are mapped to files in the /routes directory. You will also see a bunch of middleware and ExpressJS configuration in here. For now, these aren’t too important.
You should also be aware of /lib/globals.js. This file is simply a convenient place to store global configurations and commonly used values for easy reference, without polluting the global namespace. Developers have a variety of different ideas about how to approach this type of feature in their code, so this is merely one approach of many.
The sample project also includes a file called /setup/photoalbums.sql. This is the database schema that you can import to your local MySQL database. You will want to import it into a local database called photoalbums, if you intend to test the sample app in your local environment. You will also need to import this file into your Amazon RDS database at a later point.
Configuration and Startup
You can start the app in one of two ways: Typing
• node app.js on the command line
Typing
• npm start on the command line
If the app compiled successfully, you should be able to view the welcome page at
http://localhost:8081 (assuming you used port 8081). If not, you should see an error on the command-line interface. If so, most likely, one of your dependencies didn’t install correctly. If that’s the case, try running npm install again.
Another possible error is that port 8081 is not available on your machine. When we deploy our app to the cloud, we will be using port 80. If you have to change this, open /lib/globals and change the
applicationPort property to a different value, such as 8081. If your app is trying to open a port that is not available, the error will look something like this:
events.js:72
throw er; // Unhandled 'error' event ^
Error: listen EACCES
at errnoException (net.js:904:11) at Server._listen2 (net.js:1023:19) at listen (net.js:1064:10)
If none of these suggestions resolves your issue, you will have to read the error in your command-line interface and attempt to resolve it on your own. Just a reminder: Anytime you make changes in your code, you will have to recompile your app. If you’re used to working in PHP or front-end JavaScript and refreshing your browser to test a fix, it can take some time to get into the habit of recompiling your app routinely.
Working with the Sample App
Congratulations on getting the sample app to run properly. You shouldn’t need to do any further configuration on your machine, aside from installing a few more npm packages. From here on out, the sample project source code is yours! You should check it into a repository now, so you have a good snapshot to return to if you get lost.
Throughout the rest of the lessons, we will be jumping back and forth between the source code, the command-line interface, and the AWS Console in your browser. Let’s dive further into the sample code, to get a better idea of how it works. First, let’s look at server.js. At the beginning of the file, you’ll see all the included npm modules. Beginning at line 8, you will see all the source files we’ve added to the project:
var routes = require('./routes/index'); var users = require('./routes/users'); var photos = require('./routes/photos'); var albums = require('./routes/albums'); var globals = require('./lib/globals');
Farther down, around line 27, you’ll see where these are used:
app.use('/', routes); app.use('/users', users); app.use('/photos', photos); app.use('/album', albums);
We will now explore the functionality in each of the different routes we have registered in the application.
Home Route
The first line directs HTTP requests to the root path of our application to the file at /routes/index.js. We can make a quick stop here, as this route is only used to show a welcome page, so you know the app is running properly. At the top of the file you will see
var express = require('express'); var router = express.Router();
11
There is only one route registered in index.js:
/* GET home page. */
router.get('/', function(req, res) {
res.render('index', { title: 'Photoalbums' }); });
As you can see, we aren’t doing anything with the request but sending a response. There is no reading of parameters, no interaction with the model, etc. We simply respond with the index template from the
views folder, and the title ‘Photoalbums’. The rest of our app is responding with JSON, but for this landing page, we’re using an HTML response generated with a jade template. I won’t cover this in much detail. The important thing to know is that you can send all sorts of different response types with an ExpressJS response object. More information is available here: http://expressjs.com/4x/api.html#response.
Requests to /users/ are routed to /routes/users.js, and so forth. All routes, or controller files, have to be registered in server.js in order to be implemented in our application. All of the controllers are designed the same way, so we’ll start with users as a good example of how everything works together. In server.js, we look at the line
app.use('/users', users);
and know to follow the request to /routes/users.js to see what happens.
Users Route
For now, we only have skeleton functionality. The app has just enough features for basic interaction. As we progress through the lessons, users will become more robust than they are currently. The out-of-the-box functionality for users includes
Register account (
• POST /users/register) params:
• username, email, password
Login to account (
• POST /users/login) params:
• username, password
Logout of account (
• POST /users/logout) View all users (
• GET /users/) View all photo albums by user (
• GET /users/user/:user) params:
• user
Once again, this sample code is only intended to get you started. With a little effort, you could add as much functionality to user accounts as you want. You could add additional fields to the user database table, such as a profile image, bio, or user web site. Then, you could add an update method, allowing the user to first register an account and then submit an update to complete his/her profile. You could require users to confirm their names after they register. You could allow them to reset their usernames or passwords. With that in mind, let’s take a look at the code. At the top of the file, you’ll see a different set of included files, as follows:
var express = require('express'); var router = express.Router();
Because we’re in the users controller, we know we will want to access the users model frequently. We will go ahead and include the users model file here. In fact, you can expect every controller to include its model at the top. However, some routes will require more than one model class to be included, especially as the functionality becomes more robust. For the sake of consistency, we can name the default model variable
model, and any additional models modelPhoto or modelAlbum, etc. What if we only have to access another model once? We will determine the variable scope for any additional models on a case-by-case basis.
Let’s take a look at a typical router method in the users controller.
/* GET users listing. */
router.get('/', function(req, res) { model.getAllUsers(function(err, obj){ if(err){
res.status(500).send({error: 'An unknown server error has occurred!'}); } else {
res.send(obj); }
}); });
The preceding code is the typical way we will route and process HTTP requests in an ExpressJS controller class. You can see from the first line that GET requests to the /users/ path will be processed here. If there were any parameters to validate, we would do so at the beginning of the method. However, this is simply a means of retrieving a list of all users; there is no user input. As the app user base grows, we might want to allow users to pass parameters with this request, to support a paginated list of all users. For now, we can keep it simple and ignore any user input.
We immediately retrieve the data from the model with model.getAllUsers(). There are no parameters being passed to the model in this case. When we receive a message back from the model object, we check whether it is an error object or data that we want to use.
In some cases, we will want to send the model object’s error back to the user. This would look something like the following:
model.getAllUsers(function(err, obj){ if(err){
res.send(err); }
});
However, we are going to refrain from doing that most of the time. Some of the errors returned from the model are probably going to be MySQL database query errors. It would not be a good security practice to expose information about the database tables to the user, nor is MySQL error information likely to be very useful to any of our end users. It would be more appropriate for the controller to check the error received from the model and send a suitable message to the client making the request to our API. Next, let’s take a look at the model to see what getAllUsers does.
As with the routes file, let’s start at the top.
var mysql = require('mysql');
var globals = require('./../globals');
13
Note
■
Full documentation for the
mysqlmodule is available at
https://github.com/felixge/node-mysql.
As mentioned previously, globals is an object that stores common variables without polluting the
global namespace and is used here for convenience. The MySQL database connection is initialized as
connection, using the database configuration stored in globals. Let’s look at the first method, which we already know about, getAllUsers().
function getAllUsers(callback){
connection.query('SELECT username, userID FROM users', function(err, rows, fields){ if(err){
callback(err); } else {
callback(null, rows); }
}); }
This method is about as simple as a model-getter function can get. There are no parameters to validate, no user input to escape, nor any other intermediary functions. We simply retrieve all users from the database and return them to the callback function in routes/user. For a moment, let’s scroll to the very bottom of the file and note exports assignments.
exports.getAllUsers = getAllUsers; exports.getUser = getUser;
exports.createUser = createUser; exports.loginUser = loginUser; exports.logoutUser = logoutUser;
These lines are very important, as they are the means by which you make a method in this file public; otherwise, all methods are private or inaccessible to other objects. If you build additional functionality with this sample application, it’s easy to forget this step.
Review—The Order of Things
Returning to /routes/user for a moment, you should see now how a request is handled. Here’s a quick recap of how a client would retrieve a list of users from our app:
1. server.js is listening for all HTTP requests at the designated port.
2. The client makes an HTTP GET request to /users/.
3. Server.js forwards the request to the controller at /routes/users.
4. The controller at /routes/users notes that the request is for “/” relative to “/ users” and passes the request to the corresponding listener method.
6. The model method getAllUsers() queries the database, processes the results, and returns the data set to the controller.
7. The controller populates the response object with data.
8. server.js sends an HTTP response with the data requested by the user.
Does that all make sense? If you’re already familiar with ExpressJS, it probably didn’t tell you anything new. If you’re learning about this for the first time, don’t worry; we will be spending a lot of time with these concepts in further lessons. And the best way to learn is to try writing your own routes and seeing what it takes to make them function. Never underestimate the power of trial and error!
Example—Working with Parameters
Let’s return to /routes/users to look at another concept. So far, we’ve looked at handling a basic request without any parameters or client input. When you have no variables involved, there is a very small likelihood of failure. Once we start accepting specific requests from the client, the points of failure start to add up quickly. We can look at the /users/login route as an example.
/* POST user login. */
router.post('/login', function(req, res) {
if(req.param('username') && req.param('password') ){ var params = {
username: req.param('username').toLowerCase(), password: req.param('password')
};
model.loginUser(params, function(err, obj){ if(err){
res.status(400).send({error: 'Invalid login'}); } else {
res.send(obj); }
}); } else {
res.status(400).send({error: 'Invalid login'}); }
});
This route accepts HTTP POST requests and expects that the client has sent both a username and password. However, we cannot assume that both parameters were included. As such, we have to check that the parameters exist before we try to use them. If the parameters have been included, we proceed. If not, an invalid login error is sent in response to the request.
15
function loginUser(params, callback){
connection.query('SELECT username, password, userID FROM users WHERE username=' + connection.escape(params.username), function(err, rows, fields) {
if(err){
callback(err);
} else if(rows.length > 0){ var response = {
username: rows[0].username, userID: rows[0].userID }
callback(null, response); } else {
var error = new Error("Invalid login"); callback(error);
} }); }
For now, we’re selecting the user from the database, if the username is valid. In the future, we will be decrypting the user’s password to authenticate the user. Currently, we are automatically returning a success response, which includes the username and user ID of the authenticated user. The important lesson here is that the controller is used to sanitize and validate client input before sending it to the model. It is a good idea to separate concerns and encapsulate functionality in this way. The model will expect an object with the necessary properties to be sent to its methods, and the controller is responsible for constructing that object or rejecting malformed requests. If you follow this pattern, you will be able to safely reuse the public methods in your model classes in different scenarios, and your app will be much easier to maintain and debug in the long run.
Try It Out
It’s time to fire up the app and see it in action. If the app isn’t running, open your command-line interface, navigate to the app directory, and type node server.js. Open your REST client, and enter the following URL:
http://localhost:8081/users/register
If you’re running the app on a different port, remember to replace 8081. Set your HTTP method to POST. Add POST parameters named username, password, and email. You can enter whatever values you want into those parameters. Send the request!
You should receive the following success message:
{
"message": "Registration successful!" }
Next, you should be able to log in with the username you just registered. Remove the email parameter and change the URL to
You should receive the following username and user ID in response:
{
"username": "adam", "userID": 1
}
You can now make a GET request in the browser to http://localhost:8081/users/. You should see the user you created in the response. You can create additional users, and they will appear in this response as well. From here, you can use the user ID from the login response to create albums and photos for your user. I will discuss these in more detail soon. For now, let’s make a quick GET request to the user detail API endpoint at /users/user/:user, replacing :user with the username you just registered. You should see something similar to the following response:
{
"username":"adam", "userID":1, "albums":[] }
For now, there’s not much new information here. But once you start creating albums for this user, you will get information about them here. Let’s take a look at albums next.
Albums
Each user can have an unlimited number of albums. The album object is very simple, consisting of a title and user ID. Any number of photos can also be associated with the album.
Albums have the following functionality: Create a new album (
• POST /albums/upload) params:
• userID, title
Gets an album by ID, including all photos included in it (
• GET /albums/id/:albumID)
params:
• albumID
Delete an album (
• POST /albums/delete) params:
• albumID
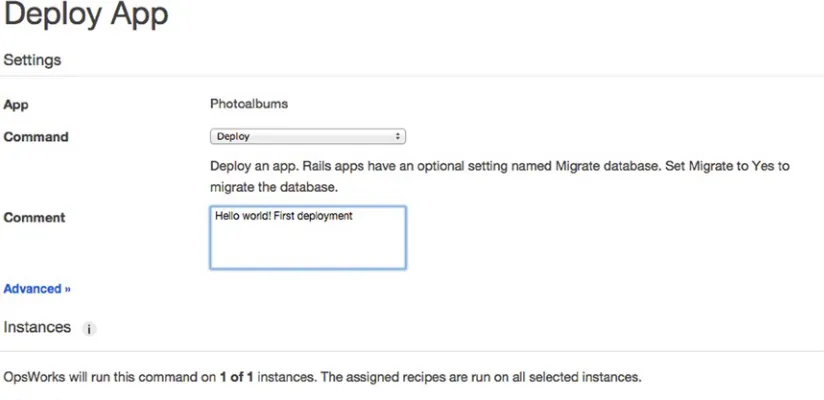
Let’s open /routes/albums.js and take a closer look. The variables declared at the top should already be familiar. In this case, you can see that the model variable is set to /lib/model/model-albums.js. The first route will allow us to create an album. Using the user ID you received when you registered, point your RESTful client to http://localhost:8081/albums/upload, set the method to POST, and add fields for the user ID and title. You can put whatever name you want in the title. We’ll go with “Hello World” for now. You should receive the following response:
17
In /routes/albums.js, find the route:
/* POST create album. */
router.post('/upload', function(req, res) { if(req.param('title') && req.param('userID')){ var params = {
userID : req.param('userID'), title : req.param('title') }
model.createAlbum(params, function(err, obj){ if(err){
res.status(400).send({error: 'Invalid album data'}); } else {
res.send(obj); }
}); } else {
res.status(400).send({error: 'Invalid album data'}); }
});
First, the required parameters are validated, and an object named params is constructed with the parameters we passed to it. While you could pass the request parameters directly to the model, using an intermediary variable is a good habit, largely for readability. Let’s go to the model file at /lib/model/model-albums.js to see what happens in createAlbum().
function createAlbum(params, callback){ var query = 'INSERT INTO albums SET ? ';
connection.query(query, params, function(err, rows, fields){ if(err){
callback(err); } else {
var response = { id : rows.insertId, title : params.title };
callback(null, response); }
}); }
All the parameters we passed here are inserted into a new row in the albums table. We then create a response object with the auto-incremented ID and the title. Note that the ID is accessible as rows.insertId. When creating a row in the MySQL database, the rows parameter is a single object. You’ll find slightly different behavior for SELECT queries.
The next route allows you to get an album by ID.
/* GET album by ID */
router.get('/id/:albumID', function(req, res) { if(req.param('albumID')){
var params = {
model.getAlbumByID(params, function(err, obj){ if(err){
res.status(400).send({error: 'Invalid album ID'}); } else {
res.send(obj); }
}); } else {
res.status(400).send({error: 'Invalid album ID'}); }
});
This is pretty straightforward. If the album ID is included in the request, the controller will retrieve the album from the model and send the album data as a response. You can use the album ID from the album you just created. Now, head over to /lib/model/model-albums.js and find the getAlbumByID() method.
function getAlbumByID(params, callback){
var query = 'SELECT * FROM albums WHERE albumID=' + connection.escape(params.albumID); connection.query(query, function(err, rows, fields){
if(rows.length > 0){
getPhotosForAlbum(rows[0], function(err, obj){ if(err){
callback(err); } else {
callback(null, obj); }
}); } else {
callback(null, []); }
}); }
First, the album and all its fields are retrieved from the database. In all database queries, rows is an object populated from the database query. In the case of a SELECT query, rows is always an array. If you found what you were looking for, rows will have a length of 1 or more. In this case, we’re selecting a single row by its unique identifier, albumID. But this time, we don’t stop here and return the data we found. Instead, we call getPhotosForAlbum() and pass our results to it, then finally send the data back to the controller. Scroll down to getPhotosForAlbum() to see what happens there.
function getPhotosForAlbum(album, callback){ var modelPhotos = require('./model-photos');
modelPhotos.getPhotosByAlbumID(album, function(err, obj){ if(err){
callback(err); } else {
19
If we’re sending a single album by ID, it seems reasonable for the end user to expect that we would provide all of the data associated with that album. In this case, we need to get all the photos associated with the album.
Note
■
we know the client has the user’s information, because that’s how he/she retrieved the album id.
in a more full-featured application, you might want to include some user information in this response as well.
First, we instantiate a reference to the photos model at /lib/model/model-photos.js. We give the album a photos property, set to the array of photos (even if it’s empty) we retrieved from the photos model. Navigate to /lib/model/model-photos.js and find getPhotosByAlbumID() to finish the route.
function getPhotosByAlbumID(params, callback){
var query = 'SELECT * FROM photos WHERE published=1 AND albumID=' + connection. escape(params.albumID);
connection.query(query, function(err, rows, fields){ if(err){
callback(err); } else {
if(rows.length > 0){ callback(null, rows); } else {
callback(null, []); }
} }); }
This method simply retrieves all photos with the album ID we passed to it. Note that the photos must have the value published set to 1. For both albums and photos, we will use published=1 to mean the object is available for public consumption and published=0 to mean the object is hidden. This allows us to provide delete functionality without actually destroying the data in our database. We can look at deletion next, starting in /routes/album.js.
/* POST delete album. */
router.post('/delete', function(req, res) { if(req.param('albumID')){
var params = {
albumID : req.param('albumID') }
model.deleteAlbum(params, function(err, obj){ if(err){
res.status(400).send({error: 'Album not found'}); } else {
res.send(obj); }
}); } else {
res.status(400).send({error: 'Invalid album ID'}); }
By now, you’ve seen this pattern many times. So, we will advance to model.deleteAlbum()
immediately.
function deleteAlbum(params, callback){
var query = 'UPDATE albums SET published=0 WHERE albumID=' + connection.escape(params.albumID);
connection.query(query, function(err, rows, fields){ if(err){
callback(err); } else {
callback(null, {message: 'Album deleted successfully'}); }
}); }
As you can see, we are not actually deleting the album. We are unpublishing it, which means it’s invisible to all users. This is a good way to prevent permanent accidental deletion by users, and it reduces the risk of malicious use of our application. If someone’s password was stolen or cracked and all his content deleted, we could restore it without too much trouble. Note also that our callback does not return any data, simply a message confirming that the deletion was successful. Our app is very simple, and there’s currently no expectation as to what the user sees after he’s deleted something. This is OK for now, but in your own app, you might consider what sort of response your users will expect. Lastly, we will review photos.
Photos
Photos are the objects for individual photo/image uploads. Currently, the photo objects used in the app do not include actual files. A photo object is little more than an ID and a caption at this point. File uploads and URL generation are features we will be tailoring specifically to AWS. We will be building this functionality in later lessons.
Photos have the following functionality: Create a new photo (
• POST /photos/upload) params:
• albumID, caption, userID
Get a photo by ID (
• GET /photos/id/:id) params:
• id
Delete a photo (
• POST /photos/delete) params:
• id
You’ll notice that these methods are virtually identical to those of albums. Let’s review a few points about photos, starting by uploading a “photo.” You should have an album ID and user ID from the previous API queries you’ve made. (We’ll assume both are equal to 1.) Let’s go ahead and create a new photo object, using those IDs as parameters. In your REST client, make a POST request to http://localhost:8081/ photos/upload with the following params:
21
The response simply contains the ID of the photo you just created.
{
"id": 5 }
Take a look at the method you just queried, in /routes/photos.
/* POST create photo. */
router.post('/upload', function(req, res) {
if(req.param('albumID') && req.param('userID')){ var params = {
userID : req.param('userID'), albumID : req.param('albumID') }
if(req.param('caption')){
params.caption = req.param('caption'); }
model.createPhoto(params, function(err, obj){ if(err){
res.status(400).send({error: 'Invalid photo data'}); } else {
res.send(obj); }
}); } else {
res.status(400).send({error: 'Invalid photo data'}); }
});
One difference worth noting is that the caption parameter is optional. If the caption is present, we’re including it in the parameter object that gets passed to model.createPhoto(). This shows the value of constructing an intermediary object and not just passing request parameters directly to the model. If an optional field is omitted from the request, we simply let the database apply the default value. Go ahead and make another request to /photos/upload and remove the caption parameter. You should receive the same response from the API.
Now let’s take a moment to check our album, to make sure our photos are there. Make a GET request to http://localhost:8081/albums/id/1. Note that the photo without a caption has an empty string for a caption. The response should look something like this:
{ "albumID":1, "userID":1, "title":"Hello World", "photos":[ { "photoID":4, "userID":1, "albumID":1,
"photoID":5, "userID":1, "albumID":1, "caption":"" } ] }
Take another moment to browse through the rest of the code for the photos route and model. There shouldn’t be any surprises.
Developing with the Sample App
You’ve seen by now that the sample app has only basic functionality. If you’re an experienced MySQL developer, you will have noticed by now that there are no association tables, which constrains our ability to make many-to-many relationships between objects. For the sake of providing simple examples, this functionality has been omitted. Other more essential features—uploading files, authentication, etc.—are incomplete. You will be fleshing out these features as you learn more about working with AWS. As you work through the lessons with the sample app, keep in mind that our goal is to develop an app that utilizes AWS services. There are plenty of other books that teach the finer points of RESTful web services, Node.js, and MySQL. With that in mind, let’s begin!
The next step is going to be our first task in AWS. You should have already registered for an AWS account while following the previous steps. The first thing we will do in the AWS Console is learn how to use IAM (Identity and Access Management) to manage permissions and security within the application infrastructure. IAM is Amazon’s solution to the problem of needing to manage a variety of permissions. When managing permissions, we aren’t just talking about giving other users access to our AWS
infrastructure, but access among AWS services as well. For example, you may have an EC2 instance that you want to be able to connect to your RDS database, but you don’t want it to have permission to access send commands to OpsWorks.
It would be bad practice to be too generous with security credentials. Imagine for a moment that you were administrating a news web site. You would want to provide different rights for different types of users. Readers would only be allowed to read articles and post comments. Editors would be allowed to post and edit articles and delete user comments. Administrators would be able to ban users, create new editors, and perform site-level administrative tasks. You would not want to give all of your users admin privileges and trust that they behave accordingly. Even just making your editors administrators, you could wake up one day and find that your own admin powers have been taken away.
We will manage our AWS infrastructure with the same caution. Users in the AWS Console should only have the rights that they require to do their job. Similarly, every server instance has a role to play and should be limited to that role only. When you have a good grasp on IAM, you can deploy your application without having to store passwords in configuration files waiting to be hacked.
Identity and Access Management
There are a lot of challenges to managing rights and credentials in an application of this type.
23
Then there is the issue of managing security for each individual server. Organizing and restricting access to the security keys for a series of servers is an art in itself. Typically, we would also have to include database access credentials in the source code for our application. Not only would we have to worry about restricting access to the source code where credentials are stored, we would also have to make certain that development environment credentials didn’t accidentally get deployed to production, and vice versa.
On top of all of these concerns, we have the problem of staff turnover. Engineers and administrators quit their jobs or are fired, and we have to review all of our security, to make sure they don’t have access to anything sensitive. If someone with lots of security access quits unexpectedly, we are left scrambling to lock down all of our credentials. Security breaches, though they may be brief, are guaranteed. Every time we have to reset credentials, all the risks of misconfiguring something are reintroduced into the system. It should be clear by now that even with an application as simple as ours, there are many points of failure and great risks of human error in controlling internal security.
AWS solves these problems by unifying all user security, database and server security, and API access into a single system called Identity and Access Management (IAM). For now, we’re going to assume that there are no other AWS users whom we need to be concerned about. However, we do want to be certain that the EC2 instances we create in OpsWorks will be able to interact with other AWS services properly.
The IAM Dashboard
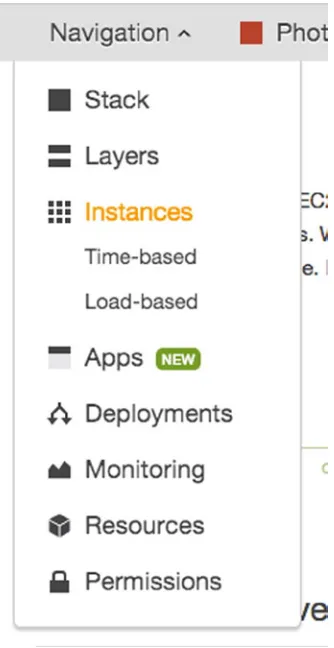
Let’s log in to the AWS Console and navigate to IAM. When you log in successfully to AWS, you are presented with a three-column list of AWS products. You’ll find IAM listed under the Deployment and Management header in the second column. Click it, and you should see something like Figure 1-2 (some user interface elements have been cropped out for clarity).
On the left-hand side of the IAM dashboard, you will find the navigation for IAM (this is a standard interface paradigm for the AWS Console). On the right side, you will see a list of all IAM resources you have already created. There are a number of other tutorial and advisory UI elements on the page. Feel free to explore these at your leisure, to familiarize yourself with the dashboard. As your first official task in AWS, you’ll have to create a user in IAM.
IAM Users
User is an administrative account, which has a login (username/password) as well as other security credentials, if needed. For now, let’s create a single user account to administrate our application. Select the Users link in the navigation, and you should see an empty table view. Click the Create New Users button at the top of the page. This will take you to the screen shown in Figure 1-3.
On this screen, you can create up to five new usernames, but we only need one. In the first input field, type the username photoadmin. There is a check box that is automatically checked, indicating that an access key will be generated for each user. If we were using this user to make AWS API queries in our app, we would want an access key. However, our intention is that this user will have access to the necessary parts of the AWS Console and nothing to do with the functionality of the app itself. We will, therefore, uncheck the box before clicking Create.
The username should now appear in the users table. You will notice that our user is not a part of any group, nor does the user have an access key. Clicking the user’s row will bring us to the detail view for the user. You should see something similar to Figure 1-4.
25
There’s a lot of information on this page. First, is the User ARN, or Amazon Resource Name. An ARN is essentially a global identifier for all AWS resources of any kind. Anytime any resource, such as a user, an EC2 instance, a database instance, etc., is created, an ARN is automatically generated. You may find them useful at a later point, but we don’t need to do anything with this ARN right now. You’ll notice bold text under both the Groups and Permissions headers. Our user has no groups and no policies!
Policies are perhaps the most important concept in IAM. A policy is essentially a declaration of one or more permissions for a user, group, role, or other resource. In short, they are the universal system for configuring permissions for all entities in AWS. A policy can contain remarkably granular permissions, or a sweeping “Allow” for all attributes within an AWS product. In contrast, you also can explicitly deny access to services or resources. For our purposes, we want the user to have full permissions to manage all the AWS products our application uses. This user is our superadmin.
IAM Groups
The temptation here will be to start adding new policies to this user. Wait! Are we certain that this is such a good idea? Do we know for a fact that this is the only user who will ever possess all this power? In the long run, there will probably be more than one superadmin on the project. Perhaps it would make more sense to create a Group and manage our policies there instead.
Select Groups in the navigation, and you will be brought to a screen similar to the users table we saw earlier. Click Create New Group. What should we call this group? We know that we want these administrators to have access to all products used by our app. We’re giving enormous power to this group, because right now, we are only creating a user for ourselves. Let’s call the group PhotoAdmins. Click Next Step, and you will be brought to the Attach Policy view.
IAM Managed Policies
If you’ve used AWS before, you may notice that the IAM policy generation tools have changed. There are now two types of IAM policies: managed policies and inline policies. A managed policy is one or more permissions grouped in a policy curated by AWS. For instance, the AmazonEC2FullAccess policy includes full access to EC2 services, as well as related services like Elastic Load Balancing and CloudWatch. Inline policies are custom permissions that you can create when you have specific policy needs, which we will discuss shortly.
When you create a group, you’re prompted to attach a managed policy. The Attach Policy view, shown in Figure 1-5, will soon become a dear friend. The sole purpose of this tool is to make it easy to navigate the complexity of selecting correct permissions for your users, groups, and roles (more on these later).
Figure 1-6. Review Group
Figure 1-5. Selecting a managed IAM policy in the Attach Policy view
While we could just choose one of the managed policies and call it a day, that wouldn’t be any fun would it? Instead, let’s create the group and then manually add inline policies to it. Click Next Step to proceed to the Review view, shown in Figure 1-6, where you will see your group name and policies again. Click Create Group to finish.
You will be returned to the Group list view. Select the PhotoAdmins group and expand the Inline Policies panel. Click the link to create a new inline policy. In the next view, you can choose from the following options:
• Policy Generator: This option will launch a wizard, which allows you to add a series of individual policy statements to the group. This is a handy way to configure a group that requires access to some, but not all, services.
27
Let’s go ahead and make sure our PhotoAdmins group has all the power it needs (and no more!) and choose the Policy Generator option. Click Select.
IAM Permissions Editor
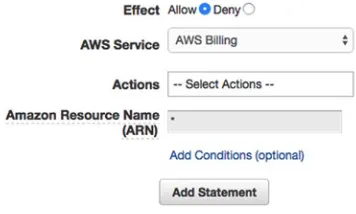
[image:30.504.84.262.234.341.2]The next screen is the Permissions editor. Here, we will add each individual permission that our users will need. We’re going to give them the power to complete the rest of the lessons, with the exception of returning to IAM to create additional policies. See Figure 1-7.
Figure 1-7. Generating individual IAM policy statements
Our first option in configuring permissions is Effect. While we could choose Deny to forbid access to specific services, because our group currently has no permissions, this would be working backward. We will leave Allow selected, as we will be allowing access to a specific service.
Figure 1-8. Permissions statement listing
Let’s add the rest of the permissions we need. For each of the services below, create a statement that allows all actions for the service.
Amazon CloudFront
•
Amazon CloudWatch
•
Amazon CloudWatch Logs
•
Amazon EC2
•
Amazon RDS
•
Amazon Route53
•
Amazon Route53 Domains
•
Amazon S3
•
Amazon SES
•
29
Figure 1-9. IAM Group Inline Policies view
Next, we want to add our user to the group. Navigate to the Users tab and select photoadmin from the table. Under the Groups heading, click Add User to Groups. Check the box next to our PhotoAdmins group and click Add to Groups. You will see that the group now appears on the Users detail view. Soon the user will be able to sign in and start working.
Scroll down a bit, and you’ll see that the user doesn’t have a password yet. Let’s give him a default password. Click Manage Password at the bottom right. On the Manage Password page, let’s assign him a custom password for now. Select the radio button next to Assign a custom password and, in the boxes, type the word photo. Just below these fields is a check box to require the user to change his password when he signs in. Obviously, photo is not a secure password. Let’s check the box and click Apply.
If you don’t trust your users to choose secure passwords on their own, you can navigate to the Password Policy tab and select a number of rules to enforce when users set a password, such as minimum length or requires one number.
Head back to the IAM dashboard. At the top of the page, you should see the text “IAM users sign-in link.” This is the URL your users will employ to sign in to their account. Let’s test our progress.
Copy the URL to your clipboard and sign out of the AWS Console by clicking your name in the top-right corner of the browser window and choosing Sign Out. Paste the URL back in your address bar, and you’ll see a typical login screen. Enter the username photoalbum and the password photo. If you forced the user to reset her password on login, you will be asked to do this now. Then proceed to the AWS Console. You should still see all AWS services on the dashboard, but you will not be able to perform any actions that you’re now restricted from taking.