Copyright © 2006–2007 by Freescale Semiconductor, Inc. All rights reserved.
Information in this document is provided solely to enable system and software implementers to use Freescale Semicon-ductor products. There are no express or implied copyright licenses granted hereunder to design or fabricate any inte-grated circuits or inteinte-grated circuits based on the information in this document.
Freescale Semiconductor reserves the right to make changes without further notice to any products herein. Freescale Semiconductor makes no warranty, representation or guarantee regarding the suitability of its products for any partic-ular purpose, nor does Freescale Semiconductor assume any liability arising out of the application or use of any product or circuit, and specifically disclaims any and all liability, including without limitation consequential or incidental dam-ages. “Typical” parameters that may be provided in Freescale Semiconductor data sheets and/or specifications can and do vary in different applications and actual performance may vary over time. All operating parameters, including “Typ-icals”, must be validated for each customer application by customer's technical experts. Freescale Semiconductor does not convey any license under its patent rights nor the rights of others. Freescale Semiconductor products are not de-signed, intended, or authorized for use as components in systems intended for surgical implant into the body, or other applications intended to support or sustain life, or for any other application in which the failure of the Freescale Semi-conductor product could create a situation where personal injury or death may occur. Should Buyer purchase or use Freescale Semiconductor products for any such unintended or unauthorized application, Buyer shall indemnify and hold Freescale Semiconductor and its officers, employees, subsidiaries, affiliates, and distributors harmless against all claims, costs, damages, and expenses, and reasonable attorney fees arising out of, directly or indirectly, any claim of personal injury or death associated with such unintended or unauthorized use, even if such claim alleges that Freescale Semiconductor was negligent regarding the design or manufacture of the part.
How to Contact Us
Corporate Headquarters Freescale Semiconductor, Inc. 7700 West Parmer Lane Austin, TX 78729 U.S.A.
I Overview
II Using the Compiler
1
Introduction
27
Compiler environment . . . 27
Project directory . . . 28
Editor. . . 28
Using CodeWarrior to manage a project. . . 28
New Project Wizard . . . 28
Analysis of the project files and folders . . . 40
Compilation with the Compiler . . . 50
Linking with the Linker . . . 63
Application Programs (Build Tools). . . 70
Startup Command-Line Options . . . 71
Highlights . . . 72
CodeWarrior Integration . . . 72
Combined or Separated Installations. . . 72
Target Settings preference panel . . . 73
Build Extras preference panel . . . 73
Assembler for HC12 preference panel . . . 75
Burner preference panel . . . 76
Compiler for HC12 preference panel . . . 78
Importer for HC12 preference panel . . . 79
Linker for HC12 preference panel . . . 80
Simulink preference panel. . . 81
CodeWarrior Tips and Tricks . . . 82
Integration into Microsoft Visual Studio (Visual C++ V5.0 or later) . . . 83
HIWARE Object-File Format . . . .86
ELF/DWARF Object-File Format . . . .86
Tools . . . .86
Mixing Object-File Formats . . . .87
2
Graphical User Interface
89
Launching the Compiler . . . .89Interactive Mode . . . .90
Batch Mode . . . .90
Tip of the Day . . . .91
Main Window . . . .92
Window Title. . . .92
Content Area . . . .92
Toolbar . . . .93
Status Bar . . . .94
Menu Bar. . . .94
File Menu. . . .95
Editor Settings dialog box . . . .97
Save Configuration dialog box . . . .104
Environment Configuration Dialog Box . . . .105
Compiler Menu . . . .107
View Menu. . . .107
Help Menu . . . .108
Standard Types dialog box . . . .109
Option Settings dialog box . . . 110
Compiler Smart Control dialog box . . . 112
Message Settings dialog box . . . 113
Changing the Class associated with a Message. . . 115
Retrieving Information about an Error Message . . . 116
About ... dialog box . . . 116
Specifying the Input File . . . 117
Use the Command Line in the Toolbar to Compile . . . 117
Message/Error Feedback . . . 118
Use Information from the Compiler Window . . . 118
3
Environment
119
Current Directory . . . 120
Environment Macros. . . 121
Global Initialization File (mcutools.ini) . . . 122
Local Configuration File (usually project.ini) . . . 122
Paths . . . 123
Line Continuation . . . 124
Environment Variable Details . . . 125
COMPOPTIONS: Default Compiler Options . . . 126
COPYRIGHT: Copyright entry in object file . . . 127
DEFAULTDIR: Default Current Directory. . . 128
ENVIRONMENT: Environment File Specification . . . 129
ERRORFILE: Error filename Specification . . . 130
GENPATH: #include “File” Path . . . 132
INCLUDETIME: Creation Time in Object File . . . 133
LIBRARYPATH: ‘include <File>’ Path . . . 134
OBJPATH: Object File Path . . . 135
TEXTPATH: Text File Path. . . 136
TMP: Temporary Directory. . . 137
USELIBPATH: Using LIBPATH Environment Variable . . . 138
USERNAME: User Name in Object File . . . 139
4
Files
141
Input Files . . . 141Source Files . . . 141
Include Files . . . 141
Output Files. . . 142
Object Files . . . 142
Error Listing . . . 142
Interactive Mode (Compiler Window Open) . . . 142
File Processing . . . 143
Compiler Option Details . . . .148
Option Groups . . . .148
Option Scopes . . . .149
Option Detail Description . . . .150
-!: filenames to DOS length. . . .153
-AddIncl: Additional Include File . . . .154
-Ansi: Strict ANSI . . . .156
-Asr: It is assumed that HLI code saves written registers . . . .157
-BfaB: Bitfield Byte Allocation. . . .159
-BfaGapLimitBits: Bitfield Gap Limit . . . .161
-BfaTSR: Bitfield Type-Size Reduction . . . .163
-C++ (-C++f, -C++e, -C++c): C++ Support . . . .165
-Cc: Allocate Constant Objects into ROM . . . .167
-Ccx: Cosmic Compatibility Mode for Space Modifiers and Interrupt Handlers . . . .169
-Cf: Float IEEE32, doubles IEEE64 . . . .172
-Ci: Tri- and Bigraph Support . . . .173
-Cn: Disable compactC++ features . . . .177
-Cni: No Integral Promotion . . . .179
-Cppc: C++ Comments in ANSI-C . . . .182
-CpDIRECT: DIRECT Register Value . . . .184
-CpDPAGE: Specify DPAGE Register . . . .186
-CpEPAGE: Specify EPAGE Register. . . .188
-CpGPAGE: Specify GPAGE Register . . . .190
-CpPPAGE: Specify PPAGE Register . . . .192
-CpRPAGE: Specify RPAGE Register . . . .194
-Cpu: Generate code for specific HC(S)12 families . . . .196
-Cq: Propagate const and volatile qualifiers for structs. . . .198
-CswMaxLF: Maximum Load Factor for Switch Tables . . . .200
-CswMinLB: Minimum Number of Labels for Switch Tables . . . .202
-CswMinLF: Minimum Load Factor for Switch Tables . . . .204
-CswMinSLB: Minimum Number of Labels for Search Switch Tables . . .206
-Cu: Loop Unrolling . . . .208
-CVolWordAcc: Do not reduce volatile word accesses . . . 211
-D: Macro Definition. . . 214
-Ec: Conversion from 'const T*' to 'T*'. . . 216
-Eencrypt: Encrypt Files . . . 218
-Ekey: Encryption Key . . . 220
-Env: Set Environment Variable . . . 221
-F (-Fh, -F1, -F1o, -F2, -F2o,-F6, or -F7): Object-File Format. . . 223
-H: Short Help . . . 225
-I: Include File Path. . . 227
-Ica: Implicit Comments in HLI-ASM Instructions . . . 229
-La: Generate Assembler Include File . . . 230
-Lasm: Generate Listing File. . . 232
-Lasmc: Configure Listing File . . . 234
-Ldf: Log Predefined Defines to File . . . 236
-Li: List of Included Files . . . 238
-Lic: License Information . . . 240
-LicA: License Information about every Feature in Directory . . . 241
-LicBorrow: Borrow License Feature . . . 242
-LicWait: Wait until Floating License is Available from Floating License Server . . . 244
-Ll: Statistics about Each Function . . . 245
-Lm: List of Included Files in Make Format. . . 247
-LmCfg: Configuration of List of Included Files in Make Format . . . 249
-Lo: Object File List . . . 252
-Lp: Preprocessor Output . . . 253
-LpCfg: Preprocessor Output configuration . . . 254
-LpX: Stop after Preprocessor. . . 256
-M (-Ms, -Mb, -Ml): Memory Model . . . 257
-Map: Define mapping for memory space 0x4000-0x7FFF . . . 258
-N: Display Notify Box . . . 259
-NoBeep: No Beep in Case of an Error. . . 261
-NoDebugInfo: Do not Generate Debug Information . . . 262
-NoEnv: Do not Use Environment . . . 264
-NoPath: Strip Path Info . . . 265
-O (-Os, -Ot): Main Optimization Target . . . 266
-ObjN: Object filename Specification . . . .270
-Oc: Common Subexpression Elimination (CSE) . . . .272
-OdocF: Dynamic Option Configuration for Functions . . . .274
-Of or -Onf: Create Sub-Functions with Common Code. . . .276
-Oi: Inlining . . . .279
-Oilib: Optimize Library Functions . . . .281
-Ol: Try to Keep Loop Induction Variables in Registers . . . .284
-Ona: Disable Alias Checking . . . .286
-OnB: Disable Branch Optimizer . . . .288
-Onbf: Disable Optimize Bitfields. . . .289
-Onbt: Disable ICG Level Branch Tail Merging . . . .291
-Onca: Disable any Constant Folding . . . .293
-Oncn: Disable Constant Folding in case of a New Constant . . . .295
-OnCopyDown: Do Generate Copy Down Information for Zero Values . . . .297
-OnCstVar: Disable CONST Variable by Constant Replacement . . . .299
-One: Disable any low-level Common Subexpression Elimination . . . .300
-OnP: Disable Peephole Optimization. . . .302
-OnPMNC: Disable Code Generation for NULL Pointer to Member Check . . . .304
-Ont: Disable Tree Optimizer . . . .305
-Or: Allocate Local Variables into Registers . . . 311
-Ou and -Onu: Optimize Dead Assignments . . . .313
-Pe: Preprocessing Escape Sequences in Strings. . . .315
-PEDIV: Use EDIV instruction . . . .317
-Pic: Generate Position-Independent Code (PIC) . . . .320
-PicRTS: Call Runtime Support Position Independent . . . .322
-Pio: Include Files Only Once . . . .324
-Prod: Specify Project File at Startup . . . .326
-PSeg: Assume Objects are on Same Page . . . .327
-Px4: Do Not Use ?BNE or ?BEQ. . . .330
-Qvtp: Qualifier for Virtual Table Pointers . . . .332
-Rp (-Rpe, -Rpt): Large Return Value Type . . . .333
-T: Flexible Type Management . . . .335
-View: Application Standard Occurrence . . . 343
-WErrFile: Create "err.log" Error File. . . 345
-Wmsg8x3: Cut filenames in Microsoft Format to 8.3 . . . 347
-WmsgCE: RGB Color for Error Messages . . . 349
-WmsgCF: RGB Color for Fatal Messages. . . 350
-WmsgCI: RGB Color for Information Messages . . . 351
-WmsgCU: RGB Color for User Messages . . . 352
-WmsgCW: RGB Color for Warning Messages . . . 353
-WmsgFb (-WmsgFbi, -WmsgFbm): Set Message File Format for Batch Mode . . . 354
-WmsgFi (-WmsgFiv, -WmsgFim): Set Message Format for Interactive Mode . . . 356
-WmsgFob: Message Format for Batch Mode . . . 358
-WmsgFoi: Message Format for Interactive Mode . . . 360
-WmsgFonf: Message Format for no File Information. . . 362
-WmsgFonp: Message Format for no Position Information . . . 364
-WmsgNe: Number of Error Messages. . . 366
-WmsgNi: Number of Information Messages . . . 367
-WmsgNu: Disable User Messages. . . 368
-WmsgNw: Number of Warning Messages. . . 370
-WmsgSd: Setting a Message to Disable . . . 371
-WmsgSe: Setting a Message to Error . . . 372
-WmsgSi: Setting a Message to Information . . . 373
-WmsgSw: Setting a Message to Warning . . . 374
-WOutFile: Create Error Listing File . . . 375
-Wpd: Error for Implicit Parameter Declaration . . . 377
-WStdout: Write to Standard Output . . . 379
-W1: No Information Messages . . . 380
-W2: No Information and Warning Messages. . . 381
6
Compiler Predefined Macros
383
Compiler Vendor Defines . . . 383Product Defines. . . 384
Data Allocation Defines . . . 384
Option Checking in C Code . . . .386
ANSI-C Standard Types 'size_t', 'wchar_t' and 'ptrdiff_t' Defines . . . .386
Macros for HC12 . . . .388
Division and Modulus . . . .389
Macros for HC12 . . . .390
Object-File Format Defines. . . .390
Bitfield Defines . . . .390
Bitfield Allocation . . . .390
Bitfield Type Reduction. . . .392
Sign of Plain Bitfields . . . .393
Type Information Defines . . . .394
7
Compiler Pragmas
397
Pragma Details . . . .397#pragma align (on|off): Turn alignment on or off . . . .399
#pragma CODE_SEG: Code Segment Definition. . . .401
#pragma CONST_SEG: Constant Data Segment Definition . . . .404
#pragma CREATE_ASM_LISTING: Create an Assembler Include File Listing . . . .407
#pragma DATA_SEG: Data Segment Definition . . . .408
#pragma INLINE: Inline Next Function Definition . . . 411
#pragma INTO_ROM: Put Next Variable Definition into ROM . . . .412
#pragma LINK_INFO: Pass Information to the Linker . . . .414
#pragma LOOP_UNROLL: Force Loop Unrolling . . . .416
#pragma mark: Entry in CodeWarrior IDE Function List . . . .417
#pragma MESSAGE: Message Setting . . . .419
#pragma NO_ENTRY: No Entry Code . . . .421
#pragma NO_EXIT: No Exit Code . . . .423
#pragma NO_FRAME: No Frame Code . . . .425
#pragma NO_INLINE: Do not Inline next function definition . . . .427
#pragma NO_LOOP_UNROLL: Disable Loop Unrolling . . . .428
#pragma NO_RETURN: No Return Instruction . . . .429
#pragma NO_STRING_CONSTR: No String Concatenation during preprocessing . . . .431
#pragma OPTION: Additional Options. . . 433
#pragma REALLOC_OBJ: Object Reallocation . . . 436
#pragma STRING_SEG: String Segment Definition . . . 438
#pragma TEST_CODE: Check Generated Code . . . 440
#pragma TRAP_PROC: Mark function as interrupt function. . . 442
8
ANSI-C Frontend
443
Implementation Features. . . 443Keywords . . . 443
Preprocessor Directives. . . 444
Language Extensions. . . 444
Implementation-Defined Behavior . . . 460
Translation Limitations . . . 461
ANSI-C Standard . . . 464
Integral Promotions . . . 465
Signed and Unsigned Integers. . . 465
Arithmetic Conversions. . . 465
Order of Operand Evaluation . . . 466
Rules for Standard-Type Sizes . . . 466
Floating-Type Formats . . . 467
Floating-Point Representation of 500.0 for IEEE . . . 468
Representation of 500.0 in IEEE32 Format . . . 468
Representation of 500.0 in IEEE64 Format . . . 469
Representation of 500.0 in DSP Format . . . 470
Volatile Objects and Absolute Variables. . . 472
Bitfields. . . 472
Signed Bitfields . . . 473
Segmentation . . . 474
Example of Segmentation without the -Cc Compiler Option . . . 476
Example of Segmentation with the -Cc Compiler Option . . . 477
Optimizations . . . 477
Peephole Optimizer . . . 477
Strength Reduction . . . 478
Shift Optimizations . . . 478
Dead-Code Elimination . . . .478
Constant-Variable Optimization . . . .479
Tree Rewriting . . . .479
Using Qualifiers for Pointers. . . .481
Defining C Macros Containing HLI Assembler Code . . . .483
Defining a Macro. . . .483
Using Macro Parameters . . . .485
Using the Immediate-Addressing Mode in HLI Assembler Macros . . . .486
Generating Unique Labels in HLI Assembler Macros . . . .486
Generating Assembler Include Files (-La Compiler Option) . . . .487
9
Generating Compact Code
499
Compiler Options . . . .499-Or: Register Optimization . . . .499
-Oi: Inlining: Inline Functions . . . .499
__SHORT_SEG Segments . . . .500
Defining I/O Registers . . . .501
Programming Guidelines. . . .502
Constant Function at a Specific Address . . . .502
HLI Assembly . . . .503
Post and Pre Operators in Complex Expressions . . . .504
Boolean Types . . . .504
printf() and scanf(). . . .505
Bitfields . . . .505
Struct Returns . . . .505
Local Variables . . . .506
Parameter Passing . . . .507
Unsigned Data Types . . . .507
Inlining and Macros. . . .507
Data Types . . . .509
Short Segments . . . .509
10 HC(S)12 Backend
511
Memory Models . . . 511
SMALL memory model . . . 511
BANKED memory model. . . 512
LARGE memory model . . . 519
Non-ANSI Keywords . . . 520
Data Types . . . 521
Scalar Types . . . 521
Floating-Point Types . . . 522
Bitfields . . . 524
Paged Variables. . . 525
Position-Independent Code (PIC) . . . 529
Register Usage . . . 533
Call Protocol and Calling Conventions . . . 533
Argument Passing . . . 533
Return Values . . . 534
Returning Large Results . . . 534
Stack Frames . . . 534
Calling a __far Function . . . 536
__far and __near . . . 536
Pragmas. . . 537
TRAP_PROC . . . 537
NO_ENTRY . . . 537
NO_EXIT . . . 537
NO_FRAME . . . 537
Interrupt Functions . . . 538
#pragma TRAP_PROC . . . 538
Interrupt Vector Table Allocation . . . 538
Debug Information . . . 539
Segmentation . . . 540
Optimizations . . . 541
Lazy Instruction Selection. . . 541
Peephole Optimizations. . . 541
Branch Optimizations . . . .549
Constant Folding . . . .551
Volatile Objects . . . .551
Programming Hints . . . .551
11 High-Level Inline Assembler for the Freescale HC(S)12
553
Syntax . . . .553Mixing HLI Assembly and HLL . . . .554
Special Features . . . .556
III ANSI-C Library Reference
12 Library Files
561
Directory Structure . . . .561How to Generate a Library . . . .561
Common Source Files . . . .561
Target Dependent Files for HC12 . . . .562
Startup Files. . . .563
Startup Files for the Freescale HC12. . . .564
Library Files . . . .565
13 Special Features
567
Memory Management -- malloc(), free(), calloc(), realloc(); alloc.c, and heap.c. . 567 Signals - signal.c . . . .567Multi-byte Characters - mblen(), mbtowc(), wctomb(), mbstowcs(), wcstombs(); stdlib.c . . . .568
Program Termination - abort(), exit(), atexit(); stdlib.c . . . .568
I/O - printf.c. . . .568
Locales - locale.*. . . .570
ctype . . . .570
14 Library Structure
571
Error Handling . . . 571
String Handling Functions . . . 571
Memory Block Functions . . . 572
Mathematical Functions . . . 572
Memory Management. . . 574
Searching and Sorting . . . 574
System Functions . . . 576
Time Functions . . . 576
Locale Functions. . . 577
Conversion Functions . . . 577
printf() and scanf() . . . 577
File I/O . . . 578
15 Types and Macros in the Standard Library
581
errno.h . . . 581float.h . . . 581
limits.h . . . 582
locale.h . . . 583
math.h . . . 585
setjmp.h. . . 585
signal.h . . . 586
stddef.h . . . 586
stdio.h . . . 587
stdlib.h. . . 588
time.h . . . 589
string.h . . . 589
assert.h . . . 590
stdarg.h . . . 590
ctype.h. . . 591
16 The Standard Functions
593
abort() . . . 594acos() and acosf(). . . .596
asctime() . . . .597
asin() and asinf() . . . .598
assert() . . . .599
atan() and atanf() . . . .600
atan2() and atan2f() . . . .601
atexit() . . . .602
atof() . . . .603
atoi(). . . .604
atol(). . . .605
bsearch() . . . .606
calloc() . . . .608
ceil() and ceilf() . . . .609
clearerr() . . . .610
clock() . . . 611
cos() and cosf() . . . .612
cosh() and coshf() . . . .613
ctime() . . . .614
difftime() . . . .615
div() . . . .616
exit(). . . .617
exp() and expf() . . . .618
fabs() and fabsf() . . . .619
fclose() . . . .620
feof() . . . .621
ferror() . . . .622
fflush() . . . .623
fgetc(). . . .624
fgetpos(). . . .625
fgets(). . . .626
floor() and floorf() . . . .627
fmod() and fmodf() . . . .628
fopen() . . . .629
fprintf() . . . .631
fputs() . . . 633
fread() . . . 634
free() . . . 635
freopen() . . . 636
frexp() and frexpf() . . . 637
fscanf() . . . 638
fseek() . . . 639
fsetpos(). . . 640
ftell() . . . 641
fwrite(). . . 642
getc() . . . 643
getchar() . . . 644
getenv() . . . 645
gets() . . . 646
gmtime() . . . 647
isalnum(), isalpha(), iscntrl(), isdigit(), isgraph(), islower(), isprint(), ispunct(), isspace(), isupper(), and isxdigit() . . . 648
labs() . . . 650
ldexp() and ldexpf(). . . 651
ldiv() . . . 652
localeconv(). . . 653
localtime() . . . 654
log() and logf() . . . 655
log10() and log10f() . . . 656
longjmp(). . . 657
malloc() . . . 658
mblen() . . . 659
mbstowcs() . . . 660
mbtowc() . . . 661
memchr() . . . 662
memcmp() . . . 663
memcpy() and memmove() . . . 664
memset() . . . 665
mktime() . . . 666
perror(). . . .668
pow() and powf() . . . .669
printf() . . . .670
putc() . . . .671
putchar(). . . .672
puts() . . . .673
qsort(). . . .674
raise() . . . .676
rand() . . . .677
realloc() . . . .678
remove(). . . .679
rename(). . . .680
rewind() . . . .681
scanf() . . . .682
setbuf(). . . .683
setjmp() . . . .684
setlocale(). . . .685
setvbuf(). . . .686
signal() . . . .687
sin() and sinf() . . . .688
sinh() and sinhf() . . . .689
sprintf() . . . .690
sqrt() and sqrtf(). . . .694
srand() . . . .695
sscanf(). . . .696
strcat() . . . .700
strchr() . . . .701
strcmp() . . . .702
strcoll(). . . .703
strcpy(). . . .704
strcspn() . . . .705
strerror(). . . .706
strftime() . . . .707
strlen() . . . .709
strncmp() . . . 711
strncpy() . . . 712
strpbrk(). . . 713
strrchr() . . . 714
strspn(). . . 715
strstr() . . . 716
strtod() . . . 717
strtok() . . . 718
strtol() . . . 719
strtoul() . . . 721
strxfrm() . . . 722
system() . . . 723
tan() and tanf(). . . 724
tanh() and tanhf(). . . 725
time() . . . 726
tmpfile(). . . 727
tmpnam() . . . 728
tolower() . . . 729
toupper() . . . 730
ungetc() . . . 731
va_arg(), va_end(), and va_start() . . . 732
vfprintf(), vprintf(), and vsprintf(). . . 733
wctomb() . . . 734
wcstombs() . . . 735
IV Appendices
A
Porting Tips and FAQs
739
Migration Hints. . . 739Porting from Cosmic . . . 739
Allocation of Bitfields. . . 745
Type Sizes and Sign of char . . . 745
@tiny and @far Qualifier for Variables . . . .746
Arrays with Unknown Size . . . .746
Missing Prototype . . . .747
_asm(“sequence”) . . . .747
Recursive Comments . . . .747
Interrupt Function, @interrupt. . . .747
Defining Interrupt Functions . . . .748
How to Use Variables in EEPROM. . . .751
Linker Parameter File . . . .751
The Application . . . .752
General Optimization Hints . . . .754
Executing an Application from RAM . . . .755
ROM Library Startup File . . . .755
Generate an S-Record File. . . .756
Modify the Startup Code . . . .756
Application PRM File . . . .757
Copying Code from ROM to RAM . . . .757
Invoking the Application’s Entry Point in the Startup Function . . . .758
Frequently Asked Questions (FAQs), Troubleshooting . . . .759
Making Applications . . . .759
EBNF Notation . . . .765
Terminal Symbols . . . .766
Non-Terminal Symbols . . . .766
Vertical Bar . . . .766
Brackets . . . .766
Parentheses . . . .766
Production End . . . .766
EBNF Syntax . . . .767
Extensions . . . .767
Abbreviations, Lexical Conventions . . . .768
Number Formats. . . .768
Precedence and Associativity of Operators for ANSI-C. . . .769
B
Global Configuration-File Entries
773
[Options] Section . . . 773
DefaultDir . . . 773
[XXX_Compiler] Section . . . 774
SaveOnExit . . . 774
SaveAppearance . . . 774
SaveEditor . . . 774
SaveOptions . . . 775
RecentProject0, RecentProject1, ... . . 775
TipFilePos . . . 776
ShowTipOfDay . . . 776
TipTimeStamp . . . 776
[Editor] Section. . . 777
Editor_Name . . . 777
Editor_Exe. . . 777
Editor_Opts . . . 778
Example . . . 778
C
Local Configuration-File Entries
781
[Editor] Section. . . 781Editor_Name . . . 781
Editor_Exe. . . 782
Editor_Opts . . . 782
Example [Editor] Section . . . 782
[XXX_Compiler] Section . . . 783
RecentCommandLineX. . . 783
CurrentCommandLine. . . 783
StatusbarEnabled . . . 784
ToolbarEnabled . . . 784
WindowPos . . . 785
WindowFont . . . 785
Options . . . 786
EditorType . . . 786
EditorDDEClientName . . . .787 EditorDDETopicName . . . .787 EditorDDEServiceName . . . .788 Example. . . .788
D
Using the Linux Command Line Compiler
791
Command Line Arguments . . . .791 Command Examples . . . .791 Using a Makefile . . . .791 Using the .hidefaults File . . . .794
I
Overview
The HC(S)12 Compiler manual describes the Compiler used for the Freescale 8-bit MCU (Microcontroller Unit) chip series. This document contains these major sections:
• Overview (this section): Description of the structure of this document and a bibliography of C language programming references
• Using the Compiler: Description of how to run the Compiler
• ANSI-C Library Reference: Description on how the Compiler uses the ANSI-C library
• Appendices: FAQs, Troubleshooting, and Technical Notes
Refer to the documentation listed below for details about programming languages. • “American National Standard for Programming Languages – C”, ANSI/ISO 9899–
1990 (see ANSI X3.159-1989, X3J11)
• “The C Programming Language”, second edition, Prentice-Hall 1988
• “C: A Reference Manual”, second edition, Prentice-Hall 1987, Harbison and Steele • “C Traps and Pitfalls”, Andrew Koenig, AT&T Bell Laboratories, Addison-Wesley
Publishing Company, Nov. 1988, ISBN 0-201-17928-8
• “Data Structures and C Programs”, Van Wyk, Addison-Wesley 1988 • “How to Write Portable Programs in C”, Horton, Prentice-Hall 1989
• “The UNIX Programming Environment”, Kernighan and Pike, Prentice-Hall 1984 • “The C Puzzle Book”, Feuer, Prentice-Hall 1982
• “C Programming Guidelines”, Thomas Plum, Plum Hall Inc., Second Edition for Standard C, 1989, ISBN 0-911537-07-4
Corporate Center, 20 Waterview Boulevard, Parsippany, NJ 07054
• “System V Application Binary Interface”, UNIX System V, 1992, 1991 UNIX Systems Laboratories, ISBN 0-13-880410-9
• 'Programming Microcontroller in C', Ted Van Sickle, ISBN 1878707140 • 'C Programming for Embedded Systems', Kirk Zurell, ISBN 1929629044
II
Using the Compiler
This section contains eleven chapters in the use and operation of the Compiler:
• “Introduction” on page 27: Description of the CodeWarrior Development Studio and the Compiler
• “Graphical User Interface” on page 89: Description of the Compiler’s GUI • “Environment” on page 119: Description of all the environment variables • “Files” on page 141: Description of how the Compiler processes input and output
files
• “Compiler Options” on page 145: Detailed description of the full set of Compiler options
• “Compiler Predefined Macros” on page 383: List of all macros predefined by the Compiler
• “Compiler Pragmas” on page 397: List of available pragmas
• “ANSI-C Frontend” on page 443: Description of the ANSI-C implementation • “Generating Compact Code” on page 499: Programming advice for the developer to
produce compact and efficient code.
• “HC(S)12 Backend” on page 511: Description of code generator and basic type implementation, also hints about hardware-oriented programming (optimizations, interrupt functions, etc.) specific for the Freescale HC(S)12.
1
Introduction
This chapter describes the Compiler used for the Freescale HC(S)12. The Compiler consists of a Frontend, which is language-dependent and a Backend that depends on the target processor, the HC(S)12.
The major sections of this chapter are: • “Compiler environment” on page 27
• “Using CodeWarrior to manage a project” on page 28 • “Compilation with the Compiler” on page 50 • “Application Programs (Build Tools)” on page 70 • “Startup Command-Line Options” on page 71 • “Highlights” on page 72
• “CodeWarrior Integration” on page 72
• “Integration into Microsoft Visual Studio (Visual C++ V5.0 or later)” on page 83 • “Object-File Formats” on page 85
Compiler environment
The Compiler can be used as a transparent, integral part of the CodeWarrior Development Studio. Using the CodeWarrior IDE is the recommended way to get your project up and running in minimal time. Alternatively, the Compiler can still be configured and used as a standalone application as a member of a suite of other Build Tool Utilities such as a Linker, Assembler, EPROM Burner, Simulator or Debugger, etc.
A linux version of the HC(S)12 compiler (chc12) runs on Red Hat Linux 9.0. Refer to Appendix D “Using the Linux Command Line Compiler” for more information.
In general, a Compiler translates source code such as from C source code files (*.c) and header (*.h) files into object-code (*.o) files for further processing by a Linker. The
*.c files contain the programming code for the project’s application, and the *.h files have data that is specifically targeted to a particular CPU chip or are interface files for functions. The Compiler can also directly generate an absolute (*.abs) file that the Burner uses to produce an S-Record (*.s19 or *.sx) File for programming ROM memories.
Project directory
A project directory contains all of the environment files that you need to configure your development environment.
In the process of designing a project, you can either start from scratch by making your own project configuration (*.ini) file and various layout files for your project for use with standalone project-building tools. On the other hand, you can let CodeWarrior coordinate and manage the entire project. Or, you can begin the construction of your project with CodeWarrior and also use the standalone build tools (Assembler, Compiler, Linker, Simulator/Debugger, etc.) that are included with the CodeWarrior suite.
NOTE The Build Tools are located in the prog folder in the CodeWarrior installation. The default location is:
C:\Program Files\Freescale\CW for HC12\prog.
Editor
You can associate an editor, including the editor that is integrated into CodeWarrior, with the Compiler to enable both error or positive feedback. You can use the Configuration
dialog box to configure the Compiler to select your choice of editors when using the Build Tools. Please refer to the Editor Settings dialog box section of this manual.
Using CodeWarrior to manage a project
CodeWarrior has a New Project Wizard to easily configure and manage a project. You can get your project up and running by following a short series of steps to configure the project and to generate the basic files which are located in the project directory.
The following New Project Wizard section will construct and configure a basic CodeWarrior project that uses C source code.
New Project Wizard
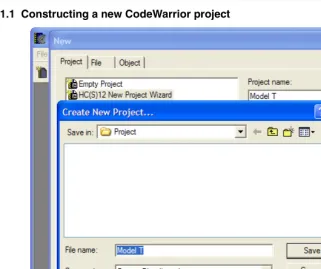
Start the HC(S)12 CodeWarrior IDE (usual path: Freescale\CodeWarrior for HC12\bin\IDE.exe) and select New... from the File menu (File > New...). The New
Figure 1.1 Constructing a new CodeWarrior project
Select the HC(S)12New Project Wizard. Enter the name for your project in the Project Name text box. CodeWarrior uses the default *.mcp extension automatically, so you do not have to explicitly append the extension to the filename.
In the event that the default location in the Location textbox is not where you want to place the project directory, press the Set button to the right of the Location textbox and browse to the location of your choice in the Create New Project dialog box. Check the Create Folder checkbox, unless you already prepared another folder. Press the Save and the OK
buttons to close the dialog boxes.
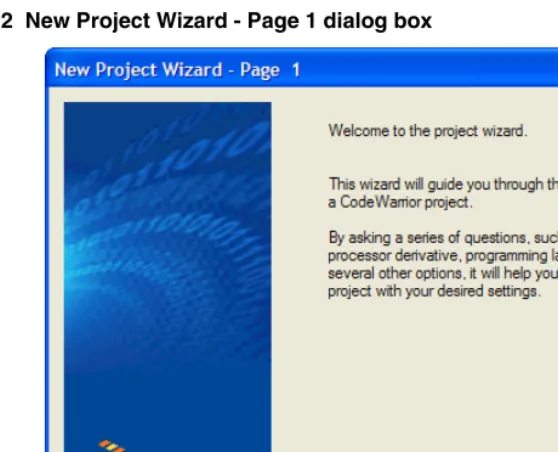
Figure 1.2 New Project Wizard - Page 1 dialog box
The New Project Wizard welcomes you aboard. Moving right along... Press Next >. The
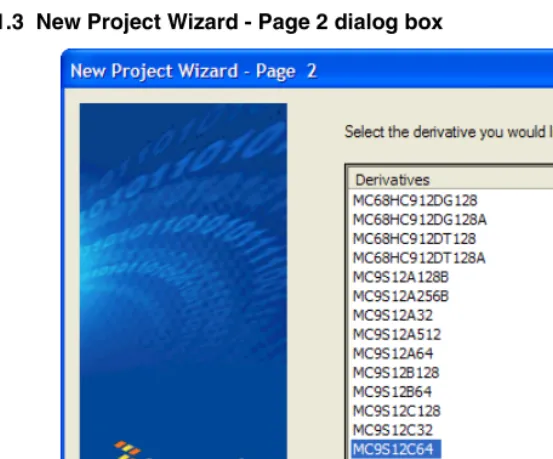
Figure 1.3 New Project Wizard - Page 2 dialog box
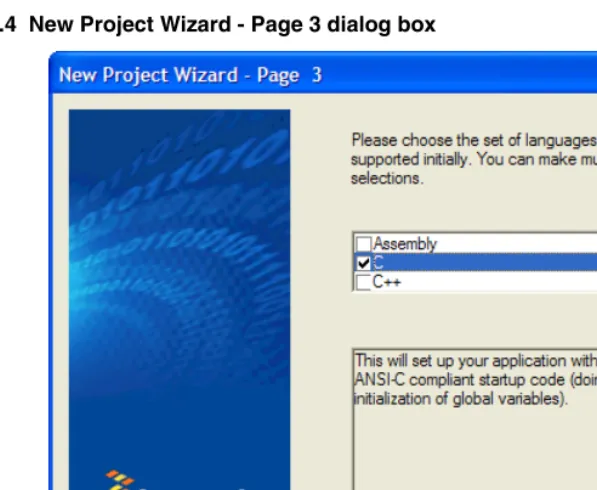
Figure 1.4 New Project Wizard - Page 3 dialog box
The default - C is already checked. Uncheck Assembly and C++. You can have more than one selection for the language, but the C option is the only option we will use. Press
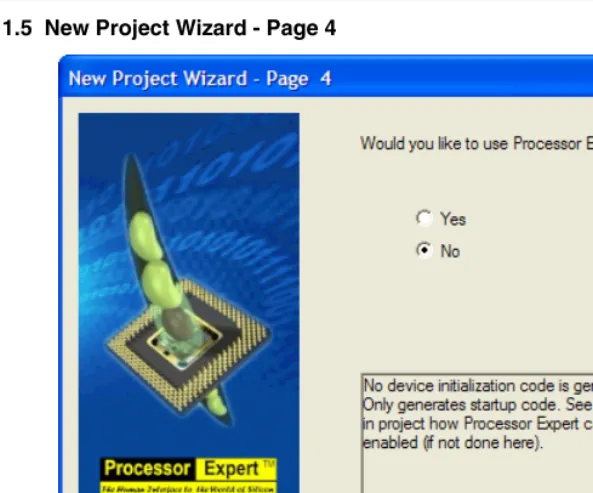
Figure 1.5 New Project Wizard - Page 4
Select No. We are interested in creating a simple, basic ANSI-C project. Processor Expert
Figure 1.6 New Project Wizard - Page 5 dialog box
Figure 1.7 New Project Wizard - Page 6 dialog box
Figure 1.8 New Project Wizard - Page 7 dialog box
Figure 1.9 New Project Wizard - Page 8 dialog box
Figure 1.10 New Project Wizard - Page 9
Figure 1.11 Project creation
Figure 1.12 CodeWarrior project window
A number of files and folders are automatically generated. The root folder is the project directory that you selected in the first step.
Analysis of the project files and folders
Figure 1.13 Project directory in the Windows Explorer
For this project, the name of the project directory and its path is:
E:\Freescale\Project\Model T
Figure 1.14 Project window showing most of the files that CodeWarrior created
Figure 1.15 main.c opened in the project window
You could adapt the main.c file created by the Wizard as a base for your C source program. Otherwise, you can import other C source-code files into the project and remove the default main.c file from the project. Whichever way you go concerning the C source code, you need one and only one main() function for your project.
For now we will use the simple main.c file. At this point, CodeWarrior has created the project, but the source files have not yet been compiled and no object code has been linked into an executable output file. Return to the CodeWarrior project window.
You could process any of the check-marked files individually or a combination of them simultaneously by selecting their icons in the project window. In this case, we will build the entire project all at once. To do this, you could press the Make button on the Toolbar in the project window or you can build your project from the Project menu in CodeWarrior (Project > Make (or Debug).
Figure 1.16 Successful build of your project
Continually compiling and linking your project files incrementally during the construction phase of the project is a wise programming technique in case an error occurs. The source of the error is much easier to locate if the project is frequently rebuilt. You can make use of the positive or error feedback for each compilation.
This project has four C-source files that successfully compiled. The Code and Data
Figure 1.17 Windows Explorer after a project build
Figure 1.18 bin folder in the project directory
As you can see, all the files currently in the bin folder have the Simulator filename plus an extension. The extension for the executable is *.abs (for absolute). The *.s19
file extension is the S-Record File used for programming ROM memory. The *.map file extension is for the Linker Map file. The Map file provides (among other things) useful information concerning how the Linker allocates RAM and ROM memory areas for the various modules used in the project.
You have not entered these filenames - Simulator.* - while creating the project with the New Project Wizard. So where did these filenames come from? These so happen to be the default filenames for the project using the New Project Wizard. You can change these defaults to become more meaningful, say Alpha.*, by using one of the preference panels available in CodeWarrior - Target Settings.
Figure 1.19 Target Settings preference panel
The Target Name: text box contains the default Target Name for the project. Enter Alpha
Figure 1.20 Alpha is the new name for the build target...
This causes the name of the Simulator folder which contains the object files to be changed to Alpha. However, the names in the bin folder still are unchanged. You can change the name of the executable file to Alpha.abs by using another preference panel. From the Edit menu, select Alpha Settings.... The Alpha Settings dialog box appears. Select Target > Linker for HC12 in the Target Settings Panels. The Linker for HC12
Figure 1.21 Linker for HC12 preference panel
In the Application Filename: text box, delete Simulator.abs and enter Alpha.abs and press OK. Now a dialog box appears stating that “Target ‘Alpha’ must be relinked”. Press
OK. Press the Make icon on the Toolbar to rebuild the project. The contents of the bin
Figure 1.22 bin folder revisited...
Now, files with the Alpha.* filenames are generated. The previous Simulator.*
files are not modified at all. However, they no longer are included in the project, so that they may be safely deleted.
The Linker PRM file
The PRM file determines how the Linker allocates the RAM and ROM memory areas. The usual procedure is to use the default PRM file in the project window for any particular CPU derivative. However, it is possible to modify the PRM file if you want an alternative allocation.
Compilation with the Compiler
A Build Tool such as the Compiler makes use of a project directory file for configuring and locating its generated files. The folder that is properly configured for this purpose is referred to by a Build Tool as the “current directory.”
Start the Compiler. You can do this by opening the chc12.exe file in the prog folder in the HC12 CodeWarrior installation. The Compiler opens (Figure 1.23).
Figure 1.23 HC12 Compiler opens...
p
Read any of the Tips if you choose to and then press Close to close the Tip of the Day
dialog box.
Configuring the Compiler
A Build Tool, such as the Compiler, requires information from configuration files. There are two types of configuration data:
• Global
This data is common to all Build Tools and projects. There may be common data for each Build Tool (Assembler, Compiler, Linker, ...) such as listing the most recent projects, etc. All tools may store some global data into the mcutools.ini file. The tool first searches for this file in the directory of the tool itself (path of the executable). If there is no mcutools.ini file in this directory, the tool looks for an mcutools.ini file located in the MS WINDOWS installation directory (e.g.
Listing 1.1 Typical locations for a global configuration file
\CW installation directory\prog\mcutools.ini - #1 priority C:\mcutools.ini - used if there is no mcutools.ini file above
If a tool is started in the C:\Program Files\Freescale\CW for HC12 V4.5\prog directory, the initialization file in the same directory as the tool is used.
C:\Program Files\Freescale\CW for HC12 V4.5\prog\mcutools.ini).
But if the tool is started outside the CodeWarrior installation directory, the initialization file in the Windows directory is used. For example,
(C:\WINDOWS\mcutools.ini).
For information about entries for the global configuration file, see Global Configuration-File Entries in the Appendices.
• Local
This file could be used by any Build Tool for a particular project. For information about entries for the local configuration file, see Local Configuration-File Entries in the Appendices.
After opening the compiler, you would load the configuration file for your project if it already had one. However, you will create a new configuration file and save it so that when the project is reopened, its previously saved configuration state will be used. From the File menu, select New / Default Configuration. The HC12 Compiler Default Configuration dialog box appears (Figure 1.24)
Figure 1.24 HC12 Compiler Default Configuration dialog box
Now save this configuration in a newly created folder that will become the project directory. From the File menu, select Save Configuration (or Save Configuration As...). A
Figure 1.25 Loading configuration dialog box
Press Open and Save. The current directory of the HC12 Compiler changes to your new project directory (Figure 1.26).
Figure 1.26 Compiler’s current directory switches to your project directory...
If you were to examine the project directory with the Windows Explorer at this point, it would only contain the project.ini configuration file that you just created. If you further examined the contents of the project’s configuration file, you would notice that it now contains the [CHC12_Compiler] portion of the project.ini file in the prog
folder where the Build Tools are located. Any options added to or deleted from your project by any Build Tool would be placed into or deleted from this configuration file in the appropriate section for each Build Tool.
If you want some additional options to be applied to all projects, you can take care of that later by changing the project.ini file in the prog folder.
You now set the object file format that you intend to use (HIWARE or
[image:53.612.136.390.333.436.2]displays the HC12 CompilerOption Settings dialog box. Select the Output tab (Figure 1.27).
Figure 1.27 HC12 Compiler Option Settings dialog box
In the Output panel, select the check boxes labeled Generate Listing File and Object File Format. For the Object File Format, select the ELF/DWARF 2.0 in the pull-down menu. Press OK to close the HC12 Compiler Option Settings dialog box. Save the changes to the configuration by:
• selecting File > Save Configuration (Ctrl + S) or • pressing the Save button on the toolbar.
Input Files
simplicity’s sake, you can copy and paste the Sources folder from the previous Model T CodeWarrior project into the ModelA project directory (Figure 1.28).
Figure 1.28 Project files
Now there are four files in the project:
• the project.ini configuration file in the project directory and • in the Sources folder:
– datapage.c,
A collection of paged data-access runtime routines – main.c, and
The user’s program plus derivative-specific and memory-model includes – Start12.c.
The startup and initialization routines
Compiling the C source-code files
Figure 1.29 Select File to Compile dialog box
Figure 1.30 Results of compiling the Start12.c file
Figure 1.31 Context menu
Figure 1.32 C5200 error message help
The Tips portion in the Help for the C5200 error states that you should specify the correct paths and names for the source files. All four of the files that the Compiler could not find are contained in the same following folder:
NOTE If you read the Start.c file, you could have anticipated this on account of two #include preprocessor directives on lines 24 and 25 for two header files. The remaining two missing files were included by those two header files. The Compiler needs a configurational modification so that it can find these missing files. Select File > Configuration. The Configuration dialog box appears (Figure 1.33).
Figure 1.33 Browsing for the include subfolder in the CodeWarrior lib folder
Select the Environment tab in the Configuration dialog box and then select Header File Path. Press the “...” button and navigate in the Browse for Folder dialog box for the folder that contains the missing file - the include subfolder in the CodeWarrior installation’s
Figure 1.34 Adding a Header File Path
Press the Add button. The path to the header files “C:\Program Files\Freescale\CW for HC12 V5.0\lib\hc12c\include” now appears in the lower panel. Press OK. An asterisk now appears in the Configuration Title bar, so save the modification to the configuration by pressing the Save button or by File > Save Configuration. If you do not save the configuration, the Compiler will revert to last-saved configuration the next time the project is reopened. The asterisk disappears.
TIP You can clear the messages in the Compiler window at any time by selecting
View > Log > Clear Log.
Now that you have supplied the path to the erstwhile missing files, you can try again to compile the Start12.c file. Instead of compiling each file separately, you can compile any or all of them simultaneously.
Figure 1.35 Successful compilation - three object files created...
The Compiler indicates successful compilation of all three C-source files and displays the Code Size for each. Also, the header files included by each C-source file are shown. The message “*** 0 error(s),” indicates that the file compiled without errors. Do not forget to save the configuration one additional time.
The Compiler also generated object files in the Sources folder (for further processing by the Linker), and a output listing file in the project directory. The binary object file has the same name as the input module, but with the ‘*.o’ extension instead. The assembly output file for each C-source file is similarly named (Figure 1.36).
Figure 1.36 Project directory after successful compilation
The haphazard running of this project was intentionally designed to fail in order to illustrate what would occur if the path of any header file is not properly configured. Be aware that header files may be included by C-source or other header files. The lib folder in the CodeWarrior installation contains several derivative-specific header and other files available for inclusion into your projects.
Now that the project’s object code files are available, the Linker Build Tool
(linker.exe) together with an appropriate *.prm file for the CPU-derivative used in the project could link these object-code files together with any necessary library files to create a *.abs executable output file. See the Linker section in the Build Tool Utilities manual for details. However, using the CodeWarrior Development Studio is much faster and easier to set up or configure for this purpose.
Linking with the Linker
If you are using the standalone Linker (also known as the Smart Linker), you will use a PRM file for the Linker to allocate RAM and ROM memory areas.
• Start your editor and create the project’s linker parameter file. You can modify a
*.prm file from another project and rename it as <target_name>.prm. • Store the PRM file in a convenient location. A good spot would be directly into the
project directory.
• In the <target_name>.prm file, add the name of the executable (*.abs) file, say <target_name>.abs. (The actual names chosen for the filenames do not matter, as long as they are unique.) In addition, you can also modify the start and end addresses for the ROM and RAM memory areas. The module’s Model_A.prm file
— a PRM file for an MC9S12C64 from another CodeWarrior project was adapted —
Listing 1.2 Layout of a PRM file for the Linker - Model_A.prm
/* This is an adapted linker parameter file for the MC9S12C64 */ LINK Model_A.abs /* This is the name of the executable output file */ NAMES Start12.o datapage.o main.o /* list of all object-code files */ END
SEGMENTS /* Here all RAM/ROM areas of the device are listed. Used in PLACEMENT below. */
RAM = READ_WRITE 0x0400 TO 0x0FFF; /* unbanked FLASH ROM */
ROM_4000 = READ_ONLY 0x4000 TO 0x7FFF; ROM_C000 = READ_ONLY 0xC000 TO 0xFEFF; /* banked FLASH ROM */
PAGE_3C = READ_ONLY 0x3C8000 TO 0x3CBFFF; PAGE_3D = READ_ONLY 0x3D8000 TO 0x3DBFFF; END
PLACEMENT /* Here all predefined and user segments are placed into the SEGMENTS defined above. */
STARTUP, /* startup data structures */ ROM_VAR, /* constant variables */ STRINGS, /* string literals */ DEFAULT_ROM, NON_BANKED, /* runtime routines which
must not be banked */
COPY /* copy down information: how to initialize variables */ /* in case you want to use
ROM_4000 here as well, make sure that all files (incl. library files) are compiled with the option: -OnB=b */
INTO ROM_C000/*, ROM_4000*/; OTHER_ROM INTO PAGE_3D, PAGE_3C;
.stack, /* allocate stack first to avoid overwriting variables on overflow */ DEFAULT_RAM INTO RAM;
END
STACKSIZE 0x100
NOTE If you are adapting a PRM file from a CodeWarrior project, most of what you need do is adding the LINK portion and adding in the NAMES portion whatever object filenames that are to be linked.
NOTE The default size for the stack using the CodeWarrior New Project Wizard for the MC9S12C64 is 256 bytes: (STACKSIZE 0x100).
NOTE Most of the entries in the PLACEMENT section are not used in this simple project. Furthermore, a number of extra entries were deleted from the actual PRM file used in another CodeWarrior project. It does not matter if all of these entries are used or not. They were left in order to show what entries are available for your future projects.
The commands in the linker parameter file are described in detail in the Linker section of the Build Tool Utilities manual.
• Start the Linker.
The Smart Linker tool is located in the prog folder in the CodeWarrior installation:
proj\linker.exe
• Press Close to close the Tip of the Day dialog box.
• Load the project’s configuration file. Use the same <project>.ini that the Compiler used for its configuration - the project.ini file in the project directory:
Figure 1.37 HC(S)12 Linker
Figure 1.38 Select File to Link dialog box
Figure 1.39 Linker main window after linking
The messages in the linker’s project window indicate:
• The current directory for the Linker is the project directory,
E:\Projects\Model A
• The Model_A.prm file was used to name the executable file, which object files were linked, and how the RAM and ROM memory areas are to be allocated for the relocatable sections.
• There were three object-code files, Start12.o, main.o, and datapage.o. • The output format was DWARF 2.0.
• The Code Size was 67 bytes.
• A Linker Map file was generated - Model_A.map.
• No errors or warnings occurred and no information messages were issued. The Simulator/Debugger Build Tool, hiwave.exe, located in the prog folder in the CodeWarrior installation could be used to simulate the sample program in the main.c
• Start the Simulator.
• Load the absolute executable file:
– File > Load Application... and browse to the appropriate *.abs file or – Select the given path to the executable file, if it is appropriate as in this case
(Figure 1.40):
E:\Projects\Model A\Model_A.abs
Figure 1.40 HC(S)12 Simulator: Select the executable file
Figure 1.41 HC(S)12 Simulator Startup
This particular C program could be simulated through its program. You could gain an insight as to what the Start12.c routines are before it turns the program over to the routines in main.c.
Application Programs (Build Tools)
You will find the standalone application programs (Build Tools) in the \prog directory where you installed the CodeWarrior software. For example, if you installed the CodeWarrior software in the C:\Program Files\Freescale\ directory, all the Build Tools are located in the C:\Program Files\Freescale\prog directory with the exception of IDE.exe which is found in the bin subfolder of the CodeWarrior installation folder.
The following list is an overview of the tools used for C programming: • IDE.exe - CodeWarrior IDE
• chc12.exe - HC(S)12 Compiler • ahc12.exe - HC(S)12 Assembler
• libmaker.exe - Librarian Tool to build libraries
• linker.exe - Link Tool to build applications (absolute files). The Linker is also referred to as the Smart Linker.
• maker.exe - Make Tool to rebuild automatically
• burner.exe - Batch and interactive Burner (S-Record Files, ...) • hiwave.exe - Multi-Purpose Simulation or Debugging Environment • piper.exe - Utility to redirect messages to stdout
NOTE Depending on your license configuration, not all programs listed above may be installed or there might be additional programs.
Startup Command-Line Options
There are some special tool options. These tools are specified at tool startup (while launching the tool). They cannot be specified interactively:
• -Prod: Specify Project File at Startup specifies the current project directory or file (Listing 1.3).
Listing 1.3 An example of a startup command-line option
linker.exe -Prod=C:\Freescale\demo\myproject.pjt
There are other options that launch a build tool and open its special dialog boxes. Those dialog boxes are available in the compiler, assembler, burner, maker, linker, decoder, or libmaker:
• ShowOptionDialog
This startup option (see Listing 1.4) opens the tool’s option dialog box. • ShowMessageDialog
This startup option opens the tool message dialog box. • ShowConfigurationDialog
This opens the File > Configuration dialog box. • ShowBurnerDialog
This option is for the Burner only and opens the Burner dialog box. • ShowSmartSliderDialog
This option is for the compiler only and opens the smart slider dialog box. • ShowAboutDialog
This option opens the tool about box.
Listing 1.4 An example of storing options in the current project settings file
C:\Freescale\prog\linker.exe -ShowOptionDialog
-Prod=C:\demos\myproject.pjt
Highlights
• Powerful User Interface • Online Help
• Flexible Type Management • Flexible Message Management • 32-bit Application
• Support for Encrypted Files • High-Performance Optimizations • Conforms to ANSI/ISO 9899-1990
CodeWarrior Integration
All required plug-ins are installed together with the CodeWarrior IDE. The CodeWarrior IDE is installed in the ‘bin’ directory (usually C:\CodeWarrior\bin). The plug-ins are installed in the ‘bin\plugins’ directory.
Combined or Separated Installations
The installation script enables you to install several CPUs in one single installation path. This saves disk space and enables switching from one processor family to another without leaving the IDE.
NOTE In addition, it is possible to have separate installations on one machine. There is only one point to consider: The IDE uses COM files, and for COM the IDE installation path is written into the Windows Registry. This registration is done in the installation setup. However, if there is a problem with the COM registration using several installations on one machine, the COM registration is done by starting a small batch file located in the ‘bin’ (usually the
C:\CodeWarrior\bin) directory. To do this, start the
Target Settings preference panel
The linker builds an absolute (*.abs) file. Before working with a project, set up the linker for the selected CPU in the Target Settings Preference Panel (Figure 1.42).
Figure 1.42 Target Settings preference panel
Depending on the CPU targets installed, you can choose from various linkers available in the linker drop box.
You can also select a libmaker. When a libmaker is set up, the build target is a library (*.lib) file. Furthermore, you may decide to rename the project’s target by entering its name in the Target Name: text box.
Build Extras preference panel
Figure 1.43 Build Extras preference panel
Enable the ‘Use External Debugger’ check box to use the external simulator or debugger. Define the path to the debugger, which is either absolute (for example,
‘C:\Freescale\prog\hiwave.exe’), or installation-relative (for example, ‘{Compiler}prog\hiwave.exe’).
Additional command-line arguments passed to the debugger are specified in the Arguments box. In addition to the normal arguments (refer to your simulator or debugger documentation), the following ‘% macros’ can also be specified:
• %sourceFilePath
• %sourceFileDir
• %sourceFileName
• %sourceLineNumber
• %sourceSelection
• %sourceSelUpdate
• %projectFilePath
• %projectFileDir
• %projectFileName
• %targetFilePath
• %targetFileDir
• %targetFileName
• %currentTargetName
• %symFilePath
• %symFileDi
• %symFileName
Assembler for HC12 preference panel
The Assembler for HC12 preference panel (Figure 1.44) contains the following: • Command Line Arguments: Command-line options are displayed. You can add,
delete, or modify the options by hand, or by using the Messages and Options buttons below.
– Messages: Button to open the Messages dialog box – Options: Button to open the Options dialog box
• Display generated commandlines in message window: The plug-in filters the messages produced, so that only Warning, Information, or Error messages are displayed in the ‘Errors & Warnings’ window. With this check box set, the complete command line is passed to the tool.
• Use Decoder to generate Disassembly Listing: The built-in listing file generator is used to produce the disassembly listing. If this check box is set, the external decoder is enabled.
Figure 1.44 Assembler for HC12 preference panel
Burner preference panel
Figure 1.45 Burner for HC12 preference panel
The Burner for HC12 preference panel contains the following:
• Command Line Arguments: The actual command line options are displayed. You can add, delete, or modify the options manually, or use the Messages, Options, and Burner buttons listed below.
– Messages: Opens the Messages dialog box – Options: Opens the Options dialog box – Burner: Opens the Burner dialog box
• Display generated commandlines in message window: The plug-in filters the messages produced, so that only Warning, Information, or Error messages are displayed in the ‘Errors & Warnings’ window. With this check box set, the complete command line is passed to the tool.
Compiler for HC12 preference panel
The plug-in Compiler Preference Panel (Figure 1.46) contains the following: • Command Line Arguments: Command line options are displayed. You can add,
delete, or modify the options manually, or use the Messages, Options, Type Sizes, and Smart Sliders buttons listed below.
– Messages: Opens the Messages dialog box – Options: Opens the Options dialog box
– Type Sizes: Opens the Standard Type Size dialog box – Smart Sliders: Opens the Smart Slider dialog box
• Display generated commandlines in message window: The plug-in filters the messages produced, so that only Warning, Information, or Error messages are displayed in the ‘Errors & Warnings’ window. With this check box set, the complete command line is passed to the tool.
• Use Decoder to generate Disassembly Listing: Checking this check box enables the external decoder to generate a disassembly listing.
• About: Provides status and version information. • Help: Opens the help file.
Importer for HC12 preference panel
The plug-in Importer Preference Panel (Figure 1.47) contains the following controls: • Command-line Arguments: Command-line options are displayed. You can add,
delete, or modify the options manually, or use the Messages or Options buttons listed below.
– Messages: Opens the Messages dialog box – Options: Opens the Options dialog box
• Display generated commandlines in message window: The plug-in filters the messages produced so that only Warning, Information, or Error messages are displayed in the ‘Errors & Warnings’ window. With this check box set, the complete command line is passed to the tool.
• About: Provides status and version information. • Help: Opens the help file.
Linker for HC12 preference panel
This preference panel (Figure 1.48) displays in the Target Settings Panel if the Linker is selected. The plug-in preference panel contains the following controls:
• Command-line Arguments: Command-line options are displayed. You can add, delete, or modify the options manually, or use the Messages or Options buttons listed below.
– Messages: Opens the Messages dialog box – Options: Opens the Options dialog box
• Preprocess PRM file: When checked, the preprocessor of the ANSI-C compiler is used to preprocess the PRM file prior to the linking step. In the PRM file, all ANSI-C preprocessor conditions like conditional inclusion (#if) are available. The same preprocessor macros as in ANSI-C code can be used (e.g., #ifdef __SMALL__). • Display generated commandlines in message window: The plug-in filters the
messages produced, so that only Warning, Information, or Error messages are displayed in the ‘Errors & Warnings’ window. With this check box set, the complete command line is passed to the tool.
• Use Custom PRM file: Specifies a custom linker parameter file in the edit box. Use the browse button (...) to browse for a file.
• Use Template PRM file: With this radio control set, you can select one of the pre-made PRM files located in the templates directory (usually
C:\Freescale\templates\<target>\prm). By employing the ‘Copy Template’ button, the user can copy a template PRM file into the project to maintain a local copy.
Figure 1.48 Linker preference panel
Simulink preference panel
The plug-in Importer Preference Panel (Figure 1.47) contains the following controls:
• Group Name
• File Name: Filename of the listing file.
• Filter: List of file extensions. Use “|” for separators.
Figure 1.49 Simulink preference panel
CodeWarrior Tips and Tricks
If the Simulator or Debugger cannot be launched, check the settings in the Build Extras Preference Panel.
If the data folder of the project is deleted, then some project-related settings may also have been deleted.
If a file cannot be added to the project, its file extension may be absent from the File Mappings Preference Panel. Adding this file’s extension to the listing in the File Mappings Preference Panel should correct this.
If it is suspected that project data is corrupted, export and re-import the project using
Figure 1.50 Compiler Log Display
Integration into Microsoft Visual Studio
(Visual C++ V5.0 or later)
Use the procedure in Listing 1.5 to integrate the Tools into the Microsoft Visual Studio (Visual C++).
Listing 1.5 Integration as Additional Tools
(1) Start Visual Studio.
(2) Select the menu Tools->Customize. (3) Select the Tools Tab.
(4) Add a new tool using the New button, or by double-clicking on the last empty entry in the Menu contents list.
(5) Type in the name of the tool to display in the menu (for example, Linker). (6) In the Command field, type in the name and path of the piper tool (for example, ‘C:\Freescale\prog\piper.exe’.
(7) In the Arguments field, type in the name of the tool to be started with any command line options (for example, -N) and the $(FilePath) Visual variable
(for example, ‘C:\Freescale\prog\linker.exe -N $(FilePath)’). (8) Check Use Output Window.
(9) Uncheck Prompt for arguments.
Figure 1.51 Customize dialog box
This allows the active file to be compiled