Technical Report
Installing SQL Server 2012 on SMB Shares
on NetApp Storage
Pat Sinthusan, NetApp November 2012 | TR-4108
TABLE OF CONTENTS
1 Introduction ... 3
2 Intended Audience... 3
3 Terminology ... 3
4 System Requirements ... 3
5 Installer Account Setup ... 4
5.1 Active Directory ...4
5.2 Controller Setup and Security ...6
5.3 Server Security ...7
5.4 SQL Server Service Account Setup ...9
6 Installation ... 9
7 Data Protection ... 12
8 Summary ... 12
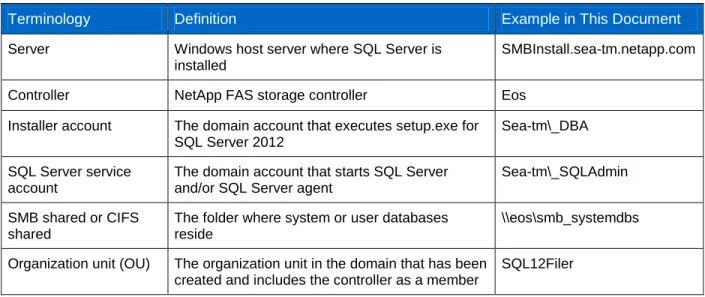
LIST OF TABLES Table 1) Terminology. ...3
LIST OF FIGURES Figure 1) Both installer and SQL Server service accounts must have full control on shared folder. ...7
Figure 2) Installer must be a member of local administrator group on server. ...8
Figure 3) Security settings for installer and SQL Server accounts. ...9
Figure 4) Security setting for both installer and SQL Server accounts. ... 10
Figure 5) SQL Server 2012 setup. ... 11
1 Introduction
With Microsoft®
SQL Server
®2012, Microsoft introduces full support for the Server Message Block (SMB) protocol. This means you can install SQL Server 2012 with both system and user databases on SMB file shares. This allows you to build end-to-end network-attached storage (NAS) solutions where SQL Server can leverage the data management capabilities of NAS, such as volume autogrow and the ability to shrink NAS volumes.
This document describes how to install SQL Server 2012 on an SMB/Common Internet File System (CIFS) share. It also details the requirements for both the Microsoft Windows Server® host and the NetApp® Data ONTAP® controller.
2 Intended Audience
This document is intended for system administrators, storage architects, and SQL Server database administrators who are responsible for deploying such a solution in a customer environment. It is assumed that the reader is familiar with the various components of this solution.
3 Terminology
Table 1 lists the terminology definitions and examples that have been used in this document. Table 1) Terminology.
Terminology Definition Example in This Document
Server Windows host server where SQL Server is
installed
SMBInstall.sea-tm.netapp.com
Controller NetApp FAS storage controller Eos
Installer account The domain account that executes setup.exe for SQL Server 2012
Sea-tm\_DBA
SQL Server service account
The domain account that starts SQL Server and/or SQL Server agent
Sea-tm\_SQLAdmin
SMB shared or CIFS shared
The folder where system or user databases reside
\\eos\smb_systemdbs
Organization unit (OU) The organization unit in the domain that has been created and includes the controller as a member
SQL12Filer
4 System Requirements
For setup of both the SQL Server system and user databases on NetApp storage, the following software was used:
Windows® 2008 R2 Enterprise Edition x64 with SP1 SQL Server 2012 Enterprise Edition x64
Data ONTAP PowerShell Tool kit 1.6 (optional) Data ONTAP Release 8.1.2 operating in 7-Mode
5 Installer Account Setup
5.1 Active Directory
With Data ONTAP operating in 7-Mode, the installer account must be added to manage audit and security log group policy. Since changing the default domain policy is not recommended, a new organization unit should be created.
The following steps accomplish this task: 1. Select Start menu.
2. Administrative tools.
3. Active Directory Users and Computers. 4. Select your domain.
5. Right-click New.
6. Select organization unit (OU).
7. Type your new OU name, and then select OK.
8. Move the controller to the new OU by dragging the controller name from computers to the new OU.
After the new OU has been created, the new group policy management (GPO) must be created and tied to the new OU.
This task can be performed using the following steps: 1. Select Start menu.
3. Select Group Policy Management. 4. Select new OU that was recently created.
5. Right-Click and select create a GPO in this domain and link it here. 6. Type the new GPO name.
Select OK.
7. Right-click the GPO that was recently created. 8. Select Edit.
9. Right-click Edit. The Group Policy Management edit window appears.
10. Select Policies.
11. Select Windows Settings. 12. Select Security Setting. 13. Select Local Policies.
14. Select User Rights Assignment. 15. Select Manage audit and security log. 16. Select Properties.
17. Add the installer account by clicking Add User and Group. 18. Add <domain>\Domain Admins.
19. Execute gpupdate from command prompt (cmd).
5.2 Controller Setup and Security
The CIFS group policy object must be enabled on the controller by executing the following command on the controller:
options cifs.gpo.enable on
This task can also be accomplished using Microsoft PowerShell™, as the following sample script is displayed:
if ((Get-Module| select -exp name) -notcontains “DataOntap”) { Import-Module DataOntap} $napassword = “net@pp11”
$nauser = “root” $nacontroller = “eos”
$password = ConvertTo-SecureString $napassword -AsPlainText –Force
$cred = New-Object -TypeName System.Management.Automation.PSCredential -ArgumentList $nauser,$password
Connect-NaController $nacontroller -Credential $cred Set-NaOption -OptionName cifs.gpo.enable on
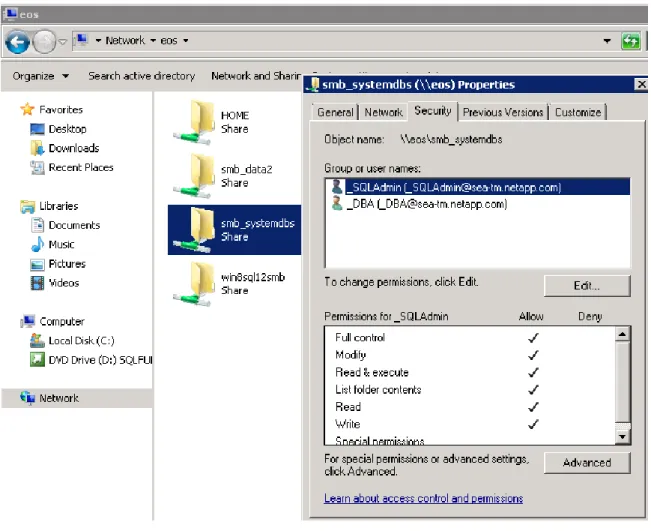
Figure 1) Both installer and SQL Server service accounts must have full control on shared folder.
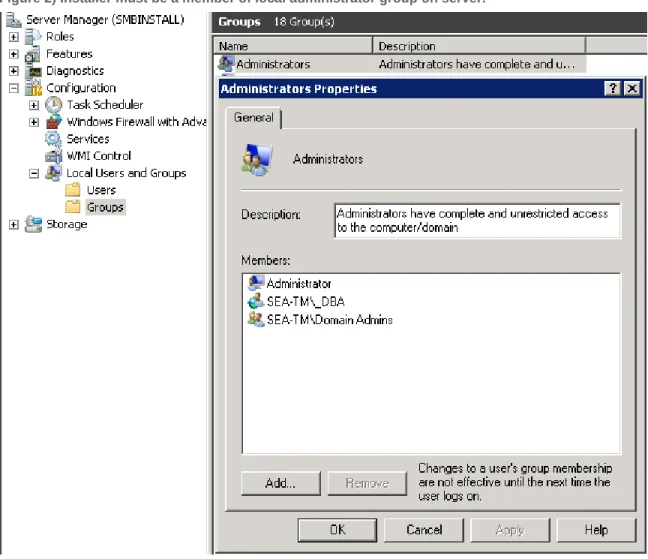
5.3 Server Security
The installer account must be added to the local administrator group on the server on which SQL Server will be installed.
Figure 2) Installer must be a member of local administrator group on server.
Figure 3) Security settings for installer and SQL Server accounts.
5.4 SQL Server Service Account Setup
The SQL Server service account must have full access for the SMB/CIFS share where the system database will reside.
6 Installation
When installing SQL Server, it is important to pay attention to the following:
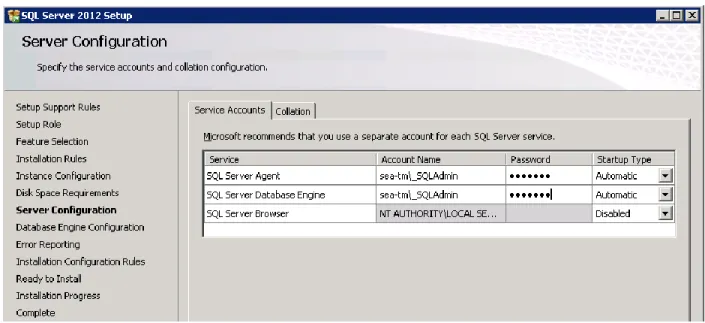
1. Specify the service accounts. At this step, you should specify the service account. This is a regular domain account for both SQL Server agent and SQL Server database engine. Typically, these service accounts are the same.
Figure 4) Security setting for both installer and SQL Server accounts.
2. Enter the Universal Naming Convention (UNC) path for the previously created SMB/CIFS share as the data root directory.
Figure 5 illustrates that after the SMB/CIFS share has been specified for the database root directory, SQL Server installer will warn that it will verify that the SQL Server service account has the necessary
Figure 5) SQL Server 2012 setup.
If the SMB/CIFS share has been set up properly, you can accept this warning, and the SQL Server installer will validate the SQL Server service account’s permissions for the data root directory.
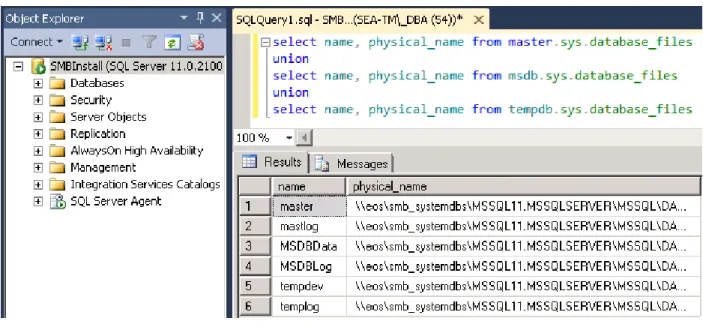
After the installation has completed, you can validate the installation with transact SQL Server commands on SQL Server Management Studio as follows:
select name, physical_name from master.sys.database_files union
select name, physical_name from msdb.sys.database_files union
select name, physical_name from tempdb.sys.database_files
Figure 6) Query and query result of database files and physical name of database files.
7 Data Protection
Currently, SnapManager® for SQL Server does not support protecting databases that reside on SMB shares. This, however, does not prevent NetApp Snapshot™ technology from being used to protect databases on SMB shares. Unlike the scenario where the databases reside on a block-level storage (SAN), SQL Server does not need to be quiesced when the databases reside on SMB shares on NetApp storage. In that case, Data ONTAP facilitates consistency of the database files. Note that since Snapshot copies are created at the volume level, the data and log files must reside in the same volume. Note that this does not take into account any transaction log management.
The following Windows PowerShell script shows how to create a Snapshot copy of a volume. $sourcevol = "sql12smb1_userdbs"
$cred = New-Object -TypeName System.Management.Automation.PSCredential -ArgumentList $ncuser,$password
If ((Get-Module| select -exp name) -notcontains 'DataONTAP'){Import-Module DataONTAP} connect-nccontroller $filer -cred $cred
new-ncSnapshot $sourcevol $snapshot
8 Summary
SQL Server 2012 introduces many new features, including allowing SQL Server to be installed on Server Message Block (SMB) shares.
The following configuration steps accomplish this: 1. Create group policy.
2. Enable the installer account to manage audit and security logs. 3. Enable group policy object in the controller.
4. Grant SQL Server service account full access of the SMB/CIFS share.
Currently, SnapManager for SQL Server does not support backup and restore of databases over SMB. However, databases can be backed up by creating volume-level Snapshot copies.
NetApp provides no representations or warranties regarding the accuracy, reliability, or serviceability of any information or recommendations provided in this publication, or with respect to any results that may be obtained by the use of the information or observance of any recommendations provided herein. The information in this document is distributed AS IS, and the use of this information or the implementation of any recommendations or techniques herein is a customer’s responsibility and depends on the customer’s ability to evaluate and integrate them into the customer’s operational environment. This document and the information contained herein may be used solely in connection with the NetApp products discussed in this document.
Refer to the Interoperability Matrix Tool (IMT) on the NetApp Support site to validate that the exact product and feature versions described in this document are supported for your specific environment. The NetApp IMT defines the product components and versions that can be used to construct configurations that are supported by NetApp. Specific results depend on each customer's installation in accordance with published specifications.
© 2012 NetApp, Inc. All rights reserved. No portions of this document may be reproduced without prior written consent of NetApp, Inc. Specifications are subject to change without notice. NetApp, the NetApp logo, Go further, faster, Data ONTAP, SnapManager ,