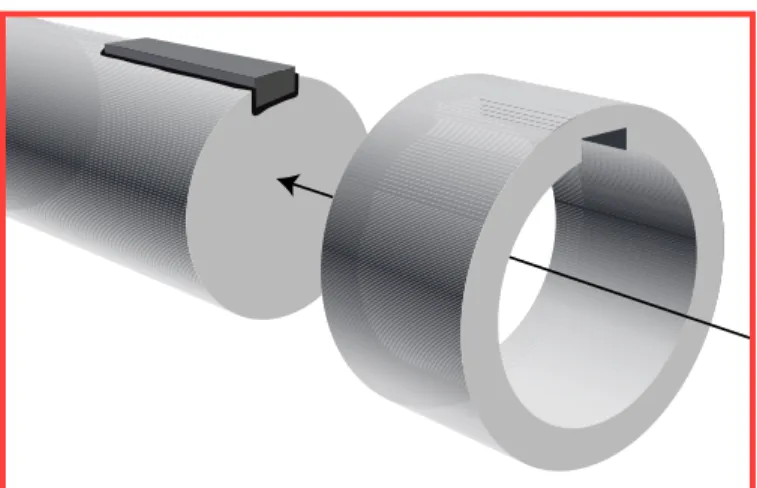
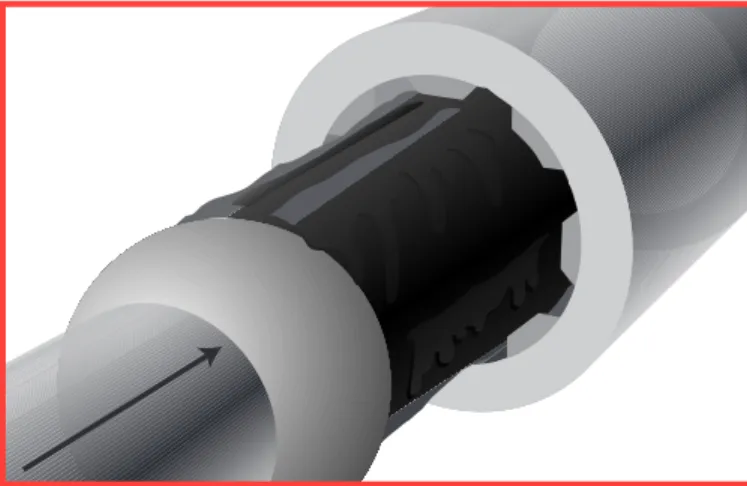
Epoxy Application
Guide
Steel Putty
Superior Metal
Aluminum Putty
Wearing Compound
Pneu-Wear
Table of Contents
FIXMASTER
®& NORDBAK
®Epoxy Application Guide
Loctite
®Epoxy Compounds have been developed to
provide cost-effective solutions for numerous repair
and maintenance applications.
Loctite
®Epoxy Compounds offer proven
maintenance solutions to the problems caused by
wear, abrasion, chemical attack, erosion, vibration,
corrosion, fatigue, and mechanical damage.
This manual is designed to assist maintenance
personnel through many common everyday repairs.
Not all repair procedures are listed. However, with
the techniques shown here, combined with the
versatility of Loctite
®products and the ingenuity of
the user, many hundreds more are possible. For
application assistance or technical information in
the United States, call 1-800-LOCTITE
(1-800-562-8483). In Canada, call 1-800-263-5043.
Or visit us on the web at www.loctite.com
GENERAL INFO
Mixing . . . .2
Surface Preparation . . . .2-3
Application Tips . . . .3-4
Fixmaster
®Epoxies . . . .4
Nordbak
®Epoxies . . . .5
REPAIR APPLICATIONS
Pipe and Ducting Repairs . . . .6-7
Metal Surface Repairs . . . .8-9
Shaft Repairs . . . .9-10
Keyways . . . .11
Splines . . . .12
Heat Exchangers & Condenser Repairs . . .13-14
Pump Repairs . . . .15-16
APPLICATION EXAMPLES
Fixmaster
®Epoxies . . . .17
Nordbak
®Epoxies . . . .17
PRODUCT SELECTION
Ordering Information . . . .18-19
Properties/Application Charts . . . .20-21
General Info
MIXING
The following tips are designed to facilitate the process of working with Loctite®repair compounds under a variety
of conditions.
Mixing. Thorough mixing of epoxies, in
proper ratio, is critical to the performance of the material. Whenever possible, the complete container should be mixed at one time. If the material is to be mixed in separate batches, the user must be careful to adhere to the mix ratios which appear on the product label.
The material is mixed by adding hardener to resin. The mixing process is complete when the product is free from streaks or
other variances. Failure to thoroughly mix the material will cause soft spots or overall failure of the product. Mixing should take 3 to 5 minutes.
Large masses of epoxy (over one pound) can be mixed more easily by turning out the resin and hardener onto a clean, disposable surface. Mix and knead material with a putty knife or other flat tool until the product is thoroughly mixed. Do not fold material into the mix as this process can cause air entrapment that will weaken the cured product.
Cure. Epoxy compounds begin to cure, or harden, when the
hardener is added to the resin. Epoxy cures by a chemical reaction that causes exotherming, or the process of giving off heat. There are some basic principles of working with epoxy compounds that every user should understand:
Cure times are mass dependent. The larger the mass that is
mixed, the faster it will cure. If the mixed material cannot be applied during the working time specified on the product label, mix it in smaller batches.
Cure times are temperature dependent. The higher the
temperature, the faster the product will cure. Ideal mixing temperature of epoxies is between 55°F and 80°F.
If the application is to occur at higher temperatures, the product should be stored at room temperature or slightly below to slow down the chemical reaction between resin and hardener. At lower temperatures, the epoxy will cure very slowly or may fail to cure at all. To speed up the cure at low temperatures, store product at room temperature and heat parts to be repaired prior to application. The repaired area can also be heated with a heat gun upon completion of the application.
Most epoxies are skin and eye irritants, and many epoxy hardeners are corrosive. Always wear appropriate gloves and
SURFACE PREPARATION
The successful application of any Loctite®FIXMASTER®orNORDBAK®epoxy is largely dependent on correct surface
preparation. For this reason, it is critical that all
applications begin with a thorough preparation of the repair surface in keeping with the instructions in this section. Surface conditions vary from application to application. This section is designed to prepare any substrate for use with all repair products in the Loctite®epoxy range.
GENERAL SURFACE PREPARATION
Ensure that the surface is dry and stop all liquid leakage. Remove all dirt, paint, rust, and other contaminates by abrasive blasting or other suitable mechanical techniques. Degrease thoroughly using Loctite®ODC-Free Cleaner
& Degreaser.
Provide a profile by abrasive blasting or other mechanical means.
To bond an epoxy to a badly degraded surface or to fill large voids, first tack weld wire mesh over the damaged area, then fill the prepared area with the epoxy.
To prevent epoxy from adhering to a surface, as when casting parts or in tooling applications, coat the surface with Loctite®Silicone Lubricant (Product
No. 51360) or other release agent.
CLEANING THE SURFACE
Clean the surface with Loctite®ODC-Free Cleaner & Degreaser.
Areas immersed in oil must be cleaned repeatedly to draw the oil out of the surface. Use a heat gun to force oil out of the pores. Allow the surface to cool, then degrease again. After cleaning, roughen the surface to produce a good profile. The following methods may be used, but in all cases the objective is to obtain an anchor profile of 0.003 to 0.005 inches (75 to 125 microns).
Abrasive blast using an angular grit such as aluminum oxide, silicon carbide, or Black Beauty 1240 medium grade. Round abrasive grit should not be used. High velocity water blasting with an abrasive medium is also recommended. (See figure 1)
The wire mesh reinforces the repair area and forms a mechanical backing for the epoxy.
Epoxy is turned out onto a disposable surface to ensure proper mixing
General Info
Figure 1. For best results, abrasive blast the application surface. If grit blasting is not possible, roughen the surface using a coarse grinding wheel (60 grit or coarser) or a needle gun to achieve the desired profile. (See figure 2)
Figure 2. Coarse grinding of the surface is also recommended for surface preparation.
Using coarse sandpaper or a file is acceptable only if the first two methods cannot be utilized.
After roughening, the surface must again be thoroughly cleaned with Loctite®ODC-Free Cleaner & Degreaser.
Repairs should be made as soon as possible to avoid rusting.
WET SURFACES
Surface must be dry. Exceptions are when using Wet Surface Repair Epoxy, Underwater Repair Epoxy or Metal Magic Steel™. These products will cure in the presence of water.
Figure 3. Stop leaks with a wooden plug or screw inserted in area of seepage.
If the leak is caused by corrosion, the side wall may be weak. Open the hole to a point where the wall is close to its original thickness. Then plug the opening using a suitable material. All surface condensation, wetness, or dampness must be wiped clean and dried off using a hot air gun or similar device. Continue surface preparation in accordance with the preceding section on Surface Cleaning.
APPLICATION TIPS
¥ For Maximum Bond
Pre-coat the application surface by rubbing the mixed epoxy into the substrate. This technique, called "wetting out the surface," helps the epoxy repair material fill all the crevices in the application surface, creating a superior bond between the epoxy and substrate. The rest of the mixed epoxy can then be applied over the pre-coat to finish the application.
¥ Pouring Liquid Epoxies
Avoid air entrapment in cured epoxies by pouring close to the mold in a steady, even stream. Stop all leakage or seepage by:
¥ Turning off the water flow.
¥ Fitting a wooden peg or sheet metal screw.
¥ Stuffing with cork, wax, rags, or any other suitable material. (See figure 3)
General Info
¥ Wear Resistant Putty
Ceramic fibers give this trowelable putty excellent wear and abrasion resistance. Provides a smooth, low-friction finish. Particularly suitable for repairing shafts and other low-friction surfaces.
¥ Aluminum Putty
Aluminum-filled epoxy rebuilds and repairs aluminum equipment, forming a non-rusting finish.
¥ Stainless Steel Putty
Stainless steel-filled epoxy forms a very hard, durable finish on damaged stainless steel surfaces.
¥ Wet Surface Repair Putty
This unique, trowelable epoxy can repair and rebuild wet, even underwater, surfaces. Bonds to wood, concrete, steel, iron, aluminum, brass, and some plastics.
LIQUIDS
¥ Steel Liquid
¥ Aluminum Liquid
These epoxies are similar in chemistry to putty types, however, liquid versions are self-leveling and can be poured or cast to form molds, tools or
replacement parts. Also used to repair and rebuild difficult to reach areas.
STICK
¥ Metal Magic Steel™
No toolbox is complete without this convenient, fast-curing epoxy in stick form. Just cut off a section, knead and apply to leaking pipes or damaged equipment. Cures in 10 minutes. It’s the ultimate in repair convenience. NSF approved to Standard 61.
¥ Underwater Repair Epoxy
This putty-like material works on both wet and dry surfaces and sets up and cures underwater. It is ideal for plumbing, irrigation and marine applications because it is unaffected by chlorinated or salt water. It is hand kneadable and fully cures in one hour.
APPLICATION TIPS (cont.)
¥ Eliminating Air Entrapment
Use a heat gun (do not use an open flame) to pull air bubbles out of cast epoxy. Heat will cause bubbles to rise to the top of the epoxy and dissipate.
¥ Creating a Smooth Finish
Smooth out the uncured epoxy finish with a warm trowel for a smooth, glossy finish. A heat gun can also be used to create a smooth finish.
FIXMASTER
®EPOXIES
Filled epoxies repair, rebuild and restore damaged parts to get equipment back into service quickly.
Different fillers provide a range of performance
characteristics, making FIXMASTER®epoxies suitable for
specific applications. Putty, liquid and stick forms give you the flexibility to fix equipment throughout the plant.
PUTTIES
¥ Steel Putty
The workhorse of the FIXMASTER®
line, this steel-filled product is used for making cost-saving repairs on metal parts all over the plant. Our most recommended, general-purpose epoxy.
¥ Fast Set Steel Putty
A fast-curing version of Steel Putty, this material reaches a functional cure in about 10 minutes. Use it wherever a fast, general-purpose epoxy is called for.
¥ Superior Metal
Ideal for surfaces subject to corrosion, abrasion and harsh environments. Ferro-silicon-filled epoxy has outstanding compressive strength and chemical resistance.
General Info
NORDBAK
®EPOXIES
Tackle the toughest industrial repair jobs with the #1 name in wearing compounds.
NORDBAK®epoxies utilize the superior wear properties of
ceramic and the convenience of two-part epoxies. Available in trowelable and brushable formulations with special fillers for the toughest conditions, NORDBAK®products are
designed to keep equipment like pumps, chutes and augers in tip-top operating condition. NORDBAK®epoxies are ideal
for all those large-scale repairs that have to last.
PUTTIES WITH BEADS
¥ Wearing Compound
Large ceramic beads and fine silicon carbide in a high performance epoxy system protect against hard sliding abrasion.
¥ Pneu-Wear
This epoxy contains small ceramic beads and silicon carbide for
maximum protection against pneumatic abrasion.
¥ High Impact Wearing Compound
A rubber-modified epoxy with better impact resistance than ceramic tile. For applications where both sliding abrasion and impact are present.
¥ Combo Bead Wearing Compound
Combines large and small ceramic beads and silicon carbide. Protects against hard sliding abrasion. Extends the life of material handling equipment.
HIGH TEMPERATURE FORMULAS
¥ High Temperature Wearing Compound
¥ High Temperature Pneu-Wear
Same great performance as standard curing versions, only these high temperature formulas can be used up to 450°F/232°C. Both must be
post-cured for maximum temperature resistance and performance.
Both epoxies are also available, as a special order, in an Ultra High Temperature formula, good to 550°F/288°C with post-cure.
FAST SET FORMULAS
¥ Fast Cure Wearing Compound
¥ Fast Cure Pneu-Wear
These faster curing versions perform like standard wearing products while reducing equipment downtime. Now you can renew worn surfaces and put equipment back in service in as little as three hours.
BRUSH-ON FORMULAS
¥ Brushable Ceramic
Ultra-smooth and ceramic filled for a high gloss, low-friction coating. Protects against turbulence, abrasion and cavitation. Also works as a topcoat over Wearing
Compound for surface rebuilding and lasting protection.
¥ High Temperature Brushable Ceramic
Performs like standard Brushable Ceramic while providing protection up to 550°F/288°C. Must be post-cured for maximum temperature resistance and performance.
SPECIAL FORMULAS
¥ Chemical Resistant Coating
This advanced formulation epoxy protects against extreme chemical attack and corrosion. Low viscosity means it can be applied by brush. Smooth, glossy, low-friction finish.
¥ Castable Wearing Compound
Pourable ceramic epoxy can be cast into any shape. Use it for making replacement parts, lining cyclone apexes and filling flat back elbows.
¥ Ceramic Tile Adhesive
Secure ceramic tiles to vertical, horizontal and overhead surfaces with this high-strength epoxy. Excellent shock and impact resistance make it an ideal grout.
Repair Applications
PIPE AND DUCTING
REPAIRS
Pipes are used for transporting all compositions of fluids, slurries, gases, and solids. Wear, corrosion, abrasion and chemical attack can lead to progressive damage to pipe walls, leading to eventual piping failure.
Industries such as coal-fired power plants, sewage
treatment plants, pulp and paper processors, and aggregate sites are particularly vulnerable to pipe abrasion due to caustic and abrasive media carried in the piping system. The areas of piping most subject to wear and damage are elbows, t-junctions, reduction fittings and weld spots in both seams and joints. Flange faces can also suffer erosion, preventing effective gasket sealing.
The problem of pipe damage can be as simple as a leaky pipe or as severe as a total plant shutdown, service contamination, or fire damage; but good plant maintenance depends on keeping equipment, such as piping systems, running smoothly and efficiently. The following information is intended to identify possible problem areas that can be successfully protected or repaired with Loctite®epoxies in
order to reduce downtime and equipment failure.
Note: Before starting any pipe repair, the line pressure must
be removed.
EXTERIOR REPAIR – FRACTURES AND PINHOLES
1. To prepare the application, plug the hole or fracture withFIXMASTER®Metal Magic Steel™, an epoxy in stick form
that hardens in just 10 minutes. Or use a wooden dowel, putty or plasticine. If the wall thickness is insufficient to support a mechanical plug, use a rubber patch and an adhesive such as FIXMASTER®4-Minute Epoxy.
Abrasive blast, grind, or file off all deposits, paint, rust, and millscale. The area must be prepared with an extension border of 3" (7, 6 cm) around the damaged area. Degrease the application area completely with Loctite®ODC-Free
Cleaner & Degreaser.
2. For repairs to large diameter pipes, weeping pipework, and high-pressure pipes, use a half section of pipe with a
slightly larger diameter than the pipe to be repaired. A curved aluminum or steel backing plate that extends 2" (5 cm) radially and axially beyond the damaged area will also work to reinforce the repair.
Abrade the inside and outside of the backing plate and degrease thoroughly with ODC-Free Cleaner & Degreaser.
3. For large, low pressure pipes (diameter > 3" or 7.6 cm
and pressure less than 100 psi or 0.70 mpa), prepare the pipe as above. Inspect the damaged area to see if the fracture or crack is under stress. If so, relieve by drilling the ends and "V"-ing out the crack.
Apply the epoxy to the prepared area forcing the product into the crack. Also apply epoxy to the inside radius of the backing plate. Press the backing plate firmly over the repair area. (See figures 4 & 5) Force out any air, and remove excess epoxy. Use ties, clamps, or wire to hold the repair firmly in place. After the epoxy has cured, the clamps may be removed and the patch coated with more product for reinforcement of the repair. (See figure 6)
Figure 4. Force epoxy into the damaged area.
Repair Applications
Figure 6. Reinforce repair area by tying or clamping the repair until the epoxy is cured.
4. For high-pressure pipes (> 100 psi or 0.70 mpa) prepare
the pipe as above. For small diameter pipes, wrap the repair firmly with reinforcing mesh impregnated with epoxy. Before the epoxy hardens, over-coat and shape the repair with a final application of epoxy. (See figure 7)
5. For low pressure, small diameter pipes (< 100 psi or
0.70 mpa and < 3" or 7.6 cm diameter). Prepare as in
Step 1 above. Apply 1/8" or 3 mm layer of epoxy, working
it well into the anchor pattern and into the hole. Wrap reinforcement mesh treated with repair compound at least twice around the pipe. Remove excess product. As epoxy starts to cure, over-coat the repair with a final application of epoxy.
INTERNAL REPAIR
Internal repair of pipes, elbows, and fittings is sometimes possible and necessary. This procedure should include exterior patching according to Step 3 above.
1. To prepare the surface, flush the interior of the pipe
liberally with high-pressure water, if available. Abrasive blast to achieve .003 - .005" (75 - 125 microns) profile. Blast inside and outside, as well as the backing plate, for the exterior patching.
Degrease thoroughly.
2. Exterior patching must be done prior to internal lining. If
backing plate is not suitable, tack weld a heavy metal mesh and apply 1/8 to 1/4” (3 - 6 mm) of epoxy.
3. Coat the interior by applying a series of thin coats of
epoxy pressed into the abraded profile. Continue to build up the original profile. As the epoxy begins to cure, apply a 1/4" (6 mm) over-coat of epoxy to the repair area. Do not coat the ends of sectioned pipe.
CAUTION: PRESSURIZED LINES SHOULD BE REPLACED WHEN TIME AND MANPOWER PERMITS.
Figure 7. Wrap the repair area with reinforcing mesh when repairing small pipes.
Figure 8. Use steel clamps to reinforce repairs to large diameter pipes.
For large diameter pipes, once patched, clamp into
position using steel clamps 2" (5 cm) apart. Do not remove the clamps. (See figure 8)
Repair Applications
METAL SURFACE REPAIRS
The following procedures are developed for surface repairs that call for filling or rebuilding a damaged metal surface. Damage caused by metal fatigue or stress cracks should be replaced.Loctite®Repair Epoxies are recommended for making surface
repairs to restore the integrity of cracked or damaged metal. In general, epoxies are not recommended for heavy load bearing applications or for making structural repairs; however, experience has shown that successful temporary or emergency repairs can be made to seriously damaged equipment using skillful and imaginative techniques. Non-stress cracking problems are common to pump casings, bearing housings, valve bodies, tanks and gearboxes.
Note: When the equipment to be repaired may have contained
flammable or explosive material, proper safeguards must be taken to clean the area thoroughly to remove all flammable material. If in doubt, contact a Loctite representative.
1. To prepare the surface of the damaged metal, refer to
Surface Preparation in this manual.
2. Drill holes 1/8" (3 mm) larger than the crack at either end
of the crack. Use detecting dye if necessary to determine the actual area of the crack. If the crack is over 5" (12.5 cm) long, drill multiple holes along the length of the crack. (See figure 9)
Figure 9. Drill holes at either end of the crack.
3. To create a better bond, drill or edge grind the cracked
area with an abrasive wheel to "V" out the cracked area. After the area has been opened up, clean the area of any residue using Loctite®ODC-Free Cleaner & Degreaser.
(See figure 10)
Figure 10. Grind out the repair area for maximum adhesion.
4. Apply the epoxy with a putty knife, forcing the epoxy
material into the crack. Fill the "V" thoroughly, and overlap approximately 1" on each side of the application area. (See figure 11)
Repair Applications
5. Using reinforcing mesh, such as fiberglass or wire
screening, lay a strip of the reinforcement material over the application and imbed the tape into the epoxy. (See figure 12)
Figure 13. Over-coat the epoxy/tape application with another coating of epoxy.
7. To speed the cure, heat the repair area with a heat gun or
heat lamp. Never expose epoxy to an open flame. Figure 12. Reinforce the repair by applying tape over the epoxy.
6. Apply another 1/16" to 1/4" (1.5 – 6 mm) of epoxy over the
reinforced mesh and smooth out the epoxy. To prevent lifting of the repair, be sure to feather the edges in keeping with the contour of the repaired equipment.
(See figure 13)
SHAFT REPAIRS
Loctite®epoxies can often be used to repair damaged or
scored shafts. In some cases, however, the repair may not provide long-term service and should not be made. Repairs are not recommended to the following shafts:
¥ Any repair on an area subject to frictional heat such as on a shaft worn by mechanical packing.
¥ The worn area under a bearing, bushing or mechanical seal that exceeds its width.
¥ Shafts under 1/2" (13 mm).
THE SHAFT
Since the area to be repaired needs to be machined, the standard preparation procedures are not used. (See figure 14)
Figure 14.
Undercut the worn area according to the following guidelines: Shaft Diameter Desired Undercut
1/2 to 1" (13 – 25 mm) 1/16" (1.5 mm) 1 to 3" (25 – 75 mm) 1/8" (3 mm)
1. Using a lathe, undercut to the desired depth. If the shaft
is already worn to the recommended depth, go to the next step.
Dovetail the ends of the worn area to lock the application into place and to serve as a guide when repairing. (See figure 15)
Repair Applications
Figure 16. Roughen shaft for better adhesion.
SHAFT REPAIRS (cont.)
2. Finish undercutting by machining a rough cut surface orgramophone pattern, the larger the shaft diameter, the deeper the threads. Degrease thoroughly. (See figure 16)
3. Apply a very thin layer of the recommended repair epoxy
and force into the bottom of the threads. Turn the shaft at a very low speed and continue to apply more material by using a tool, such as a putty knife, that can be bent. (See figure 17)
Figure 17. Fill the repair area with epoxy.
4. Machine the repair to the required dimensions using the
guidelines below. (See figure 18)
Figure 18. Machine the epoxy to the original dimensions of the shaft.
Lathe Speed: 150 ft./min. 46 m/min.
Feed Rate: Roughing .025 in./rev 0.64 mm/rev Finishing .010 in./rev 0.25 mm/rev
Top Rake: 3°
Side Clearance: 3° Front Clearance: 3°
Comments: Cut dry; use carbide or high speed steel bits. If polishing is required, use only wet 400 to 600 grit emery paper. (See figure 19)
Figure 19. If necessary, polish repair with emery paper. Allow the product to cure for the required period at 70°F
(20°C) or higher. Apply dry heat to the area, if necessary, to speed up the cure.
Repair Applications
KEYWAYS
A keyway becomes worn through constant pressure from starting and stopping.
1. To prepare the surface, follow the Surface Preparation section.
Roughen the surface with a file or rotary cutting/grinding tool and degrease again. (See figure 20)
Figure 20. Roughen the damaged surface.
Figure 21. Coat with release agent.
2. Apply a thin layer of Loctite®Silicone Lubricant release
agent to the key and to any area where you do not want the product to stick. (See figure 21)
Figure 22. Fill keyway with epoxy and install coated key.
3. Apply the recommended epoxy using a spatula or putty
knife. Use a thin coat on the bottom and a thicker layer on the side walls to ensure the key will not be raised and also to ensure a close tolerance fit. (See figure 22)
Figure 23. Immediately scrape excess epoxy away from repair area.
4. Scrape away excess epoxy from the side of the keyway.
(See figure 23)
Figure 24. Immediately align key, shaft and hub.
5. Immediately reposition the shaft on the hub to properly
align the key, shaft and hub. Leave assembled. (See figure 24)
For technical information
and/or product availability,
Call 1-800-LOCTITE
(1-800-562-8483)
or visit us on the web at
Repair Applications
SPLINES
1. Remove the spline shaft from the socket and chamfer the
edges of the sockets to a 45° angle using a file. (See figure 25)
Figure 25. File the socket to a 45° angle.
2. To prepare the application surface, degrease the surface
thoroughly.
Check the spline shaft for evenness and remove any high spots or rough areas by filing or sanding.
Degrease again.
3. Apply a thin layer of Loctite®Silicone Lubricant release
agent to the spline shaft, ensuring that the entire surface is coated.
4. Mix and apply the recommended repair compound to the
spline shaft. Do not apply product into the socket. Immediately push the spline shaft into the socket and remove excess material. (See figure 26)
Figure 26. Install coated spline into shaft and remove
Allow the epoxy to cure according to the application
instructions before putting the equipment back into service.
If it will be necessary to dismantle the assembly in the
future, mark the position of the spline and socket in order to be able to reposition the assembly in exactly the same position. (See figure 27)
Figure 27. Mark the position of the spline in the socket for future assembly.
Repair Applications
HEAT EXCHANGER AND
CONDENSER REPAIRS
Tubes in a heat exchanger are subject to severe galvanic corrosion since the tubes and the tube sheet are not of the same metal. The corrosion process is accelerated by the presence of hot, wet conditions and, if left unattended, the tube plate will corrode and eventually fail. The following is an easy and effective way to rebuild and extend the life of a tube plate in a heat exchanger using Loctite®Epoxies thatare designed to fight bi-metallic corrosion.
1. Install stoppers. Remove the end plates and baffles, and
insert rubber stoppers into the end of the tubes. The stoppers should protrude no more than 1/8" (3 mm). This clearance will allow for a 1/8" coating of epoxy, as illustrated. (See figure 31)
Figure 31. Install stoppers flush with the ends of the tubes. The best way to install stoppers is to push each one snug. If the tube is not flush with the tube plate due to wear or design, install the stopper to be flush with the end of the tube. (See figure 32)
Figure 32. Install stoppers flush with the end of the tube when the tube extends beyond the sheet.
Figure 33. Sandblast the tube sheet once stoppers are installed.
2. Surface preparation. Once the stoppers are installed,
abrasive blast the entire faceplate. After blasting, blow out the debris from the sheet using clean air. Degrease thoroughly with Loctite®ODC-Free Cleaner & Degreaser.
For best results, steam clean the application surface after blasting and degreasing. Prepare the baffle plates and end covers as the tube sheet itself. (See figure 33)
Figure 34. Apply two coats of epoxy to the tube sheet.
3. Apply Loctite®Brushable Ceramic in two coats. After the
first coat, wait 1-3 hours and recoat again. The two-coat system helps fill any voids missed after the first coat. (See figure 34)
Repair Applications
Figure 35. Brush apply epoxy to "wet out" surface.
HEAT EXCHANGER AND
CONDENSER REPAIRS
(cont.)
4. To build up depressions where there is a greater than 1/8"
(3 mm) distance from the tube sheet, first coat the sheet with Brushable Ceramic to help "wet out" the surface and act as an excellent prime coat for the next step.
(See figure 35)
Next, trowel on Loctite®Wear Resistant Putty to the tube
plate surface at the desired thickness. Build up the thickness of the face plate to be flush with the tubes themselves. Then apply a topcoat of Brushable Ceramic. (See figure 36)
Figure 36. Build up damaged surface with epoxy putty.
5. Coat the inlet areas, baffle plate inserts, and the end
covers. Be sure not to apply any epoxy material to the baffle plate holder tracks, otherwise, it may be difficult to reassemble the plates after all the coatings have been
Figure 37. Coat inlet areas, baffle plate inserts and end covers for complete protection of equipment.
6. Wait at least 18 hours after the coating has been applied
before taking out the stoppers. Then take a packing puller or large pliers and pull out all the rubber stoppers. (See figure 38)
Figure 38. Remove stoppers with a packing puller.
7. To provide a clean finish in the tubes, allowing an easy
flow of liquid, smooth the opening of the tubes to remove excess epoxy. Use a conical grinding bit for best results. (See figure 39)
Repair Applications
PUMP REPAIRS
Pump castings, impellers and volutes wear due to corrosion, erosion, cavitation, and mechanical damage. All these forms of damage can be effectively and economically repaired with Loctite®epoxies. The two main areas subject to wear
are the volute and the impeller.
REPAIRING VOLUTES
1. To prepare the surface, remove all rust, old paint, and
other debris from the area to be repaired. For best results, abrasive blast large areas or, use a needle gun or grinder. Prepare the area at least 1/2" (12 mm) greater than the repair area on all sides.
Where the equipment has been pumping salt solutions, abrasive blast all areas to be treated and leave for 24 hours, after which time the entire area should be given a brush blast to remove all salts which may have sweated to the surface.
Sandblast to sound metal and clean with Loctite®ODC-Free
Cleaner & Degreaser.
2. Build up the gouges and worn areas on the inside of the
body by applying a smooth coating of epoxy. To avoid air entrapment, use a suitably shaped thin plastic or metal applicator to apply a thin coat of product to all faces of the cavities. (See figure 40)
Figure 40. Epoxy putty is used to rebuild worn areas of volute.
3. To fill the cavities, press epoxy into the repair area. Use
the applicator to smooth and shape the repair area to the original contour. Alternatively, the epoxy can be used to build up the repair area slightly larger than the required contour. After the epoxy has cured, it can be ground down to the original contour using a combination of grinding wheel and sanding disc attachments.
4. Top coat the entire volute area with Brushable Ceramic
Epoxy to increase pump efficiency. (See figure 41)
Figure 41. Brushable Ceramic applied over the epoxy putty repair provides a low friction finish that extends the operating life and efficiency of the pump.
For Material Safety Data
Sheets (MSDS) or for
Technical Data Sheets
(TDS), Call 1-800-LOCTITE
(1-800-562-8483)
Repair Applications
PUMP REPAIRS (cont.)
REBUILDING IMPELLERS
1. Prepare the surface as in step 1 on previous page. To aid
in penetration of the epoxy into cavities, warm the impeller to 120-140°F (50-60°C) before applying product.
2. For severely eroded blades, tack weld expanded metal
from the edge to be rebuilt to the existing metal surface. (See figure 42)
Figure 42. Expanded metal, used over damaged blades, rebuilds and reinforces the repair area.
3. Apply epoxy over the expanded metal, forcing the epoxy
through the mesh, being careful to avoid air entrapment. Smooth the finish with a thin plastic or metal applicator. (See figure 43)
Figure 43. Coat expanded metal with epoxy and smooth out finish.
4. To finish the repair, brush apply a 15-20 mil coating of
Brushable Ceramic to entire impeller area, filling in porous spots in the casting. Once the first coat has cured, apply a second coat of Brushable Ceramic. (See figure 44)
Figure 44. Two coats of Brushable Ceramic seal the metal and provide a low friction surface.
Note: After full cure, balance impeller before returning
to service.
For technical information
and/or product availability,
Call 1-800-LOCTITE
(1-800-562-8483)
Application Examples
FIXMASTER
®EPOXIES
Problem: Gap between ceramic tile and flange lips
Equipment: Discharge flange face
of cyclone
Solution: FIXMASTER®Wear
Resistant Putty
FIXMASTER®Wear Resistant Putty fills the gap between liner
and flange, created when new ceramic tiles were installed. Wear Resistant Putty is troweled into the gap and either "wet finished" (see Application Tips on page 4) or machined to exact tolerances.
Problem: Leaking flange
Equipment: Flange face on a
chemical pump
Solution: FIXMASTER®
Aluminum Putty
Flange faces, eroded by chemical exposure, were previously repaired by welding and machining. FIXMASTER®Aluminum
Putty repairs aluminum faces at a lower cost and with far less downtime than conventional methods.
Problem: Severely damaged pipe
Equipment: Slurry transport pipe Solution: FIXMASTER®
Metal Magic Steel™
Damage to this pipe was so severe that expanded mesh is welded over the opening to provide reinforcement for the epoxy application. FIXMASTER®Metal Magic Steel™ is pressed
over the mesh to fill and seal the application area. The pipe is ready for service in just minutes.
NORDBAK
®EPOXIES
Problem: Uneven tiled lining
Equipment: Inlet section of heavy
media cyclone
Solution: NORDBAK®
Brushable Ceramic
In this two-step process, NORDBAK®Wearing Compound is
used to rebuild the flat disk area of the cyclone intake. NORDBAK®Brushable Ceramic is then applied to provide a
low-friction finish to prevent turbulence created by irregularities in the tile profile.
Problem: Eroded processing equipment
Equipment: Cyclone apex Solution: NORDBAK®
Wearing Compound
A form on the end of the apex is used to rebuild the interior to its original dimensions. NORDBAK®Wearing Compound is
applied here with a gloved hand to fill the eroded area and smooth the finish.
Problem: Damage from abrasive coal handling
Equipment: Heavy media cyclone Solution: NORDBAK®
Wearing Compound
Both the inlet section and vortex finder of this heavy media cyclone are rebuilt and protected with NORDBAK®
Wearing Compound.
Problem: Erosion of internal structure
Equipment: Side suction
media pump
Solution: NORDBAK®
Wearing Compound
A pump divider designed to reduce the turbulence inside the pump was almost completely worn away due to abrasion. It was rebuilt using a form over which NORDBAK®Wearing
Compound was applied until the repaired section replicated the original divider.
Problem: Worn bronze parts
Equipment: Propeller casting Solution: NORDBAK®Pneu-Wear
and Brushable Ceramic
Severe abrasion had worn out a critical part of a marine propeller. To rebuild the surface and provide maximum protection from salt water exposure, NORDBAK®Pneu-Wear
was applied. The area was then coated with NORDBAK®
Product Selection
A wide range of high performance repair epoxies are available to you from Loctite. Since each application has specific requirements relative to equipment type, operating conditions, application and operating temperatures and other critical factors, it is important to know how to choose the best product for your application.
The following is a brief description of each type of Loctite®repair
epoxy with typical recommended applications. Use this information along with the Physical Properties Charts on pages 20 and 21 to determine the Loctite®repair material that is suitable for your
particular application.
LOCTITE
®REPAIR EPOXIES
FIXMASTER®EPOXIES
Steel Putty and Liquid: Steel-filled epoxies in putty and liquid forms
cure to a metal-like finish that can be drilled, tapped and machined. A versatile repair compound, this epoxy is used for routine surface rebuilding applications that do not require outstanding wear resistant properties or a low friction, non-rusting finish. Recommended for pipe and tank repair.
Product # Size Steel Putty 99913 1 lb. 99914 4 lbs. 99912 25 lbs. Steel Liquid 97483 1 lb. 97484 4 lbs. 97482 16 lbs.
Fast Set Steel Putty: Steel Putty in a special formula that cures in just
10 minutes. Recommended for emergency and temporary repairs that require a fast-setting material. This material can be used to make initial repairs, followed by an application of a second, higher performance epoxy for long-term durability of the application.
Product # Size
39917 1 lb.
Metal Magic Steel™: Fast curing epoxy in a convenient stick form for
plugging holes in pipes and tanks and other emergency repairs.
Product # Size
98853 4 oz./ 114 g
CHOOSING THE BEST LOCTITE
®EPOXY FOR YOUR APPLICATION
Wet Surface Repair Putty: Non-rusting repair material adheres to
damp and wet surfaces, even cures underwater. Recommended for repairing pipes, tanks, and other equipment when the application surface cannot be fully dried.
Product # Size
96583 1 lb.
Aluminum Putty and Liquid: Similar in properties to Steel Epoxy,
Aluminum Epoxy is recommended for rebuilding and repairing aluminum or other non-rusting equipment.
Aluminum Product # Size Putty 97463 1 lb.
Aluminum 97453 1 lb.
Liquid
Stainless Steel Putty: Recommended for rebuilding and repairing
stainless steel and other non-rusting equipment.
Product # Size
97443 1 lb.
Wear Resistant Putty: Trowelable putty with excellent wear and
abrasion resistance provides a smooth, low friction surface for equipment exposed to wear and erosion. Recommended for rebuilding and repairing pumps, keyways, tube sheets and valves. Non-rusting.
Product # Size
98742 1 lb. 98743 3 lbs.
Superior Metal: Similar in properties to Wear Resistant Putty, this
ferro-silicon filled material is a non-rusting putty with outstanding compressive strength and chemical resistance. Recommended for rebuilding and protecting pumps, shafts, keyways, splines, bearings, tube sheets, impellers, and valves.
Product # Size
Product Selection
NORDBAK®EPOXIES
Wearing Compound: Large ceramic bead filled repair compound
provides extra protection against extreme abrasion as may be required to protect pumps that process heavy, abrasive slurries. Available in 6 formulas. Product # Size Wearing 99813 5 lbs. 99812 25 lbs. Castable 98992 25 lbs. Fast Cure 96373 6 lbs. High Impact 39918 25 lbs. High Temp. 99112 25 lbs. Ultra High 96392 25 lbs. Temperature
Pneu-Wear: Small ceramic bead formulation is a patented design that
provides maximum protection against fine particle abrasion. Available in 4 formulas. Product # Size Pneu-Wear 98383 3 lbs. 98382 25 lbs. Fast Cure 98363 6 lbs. High 98372 25 lbs. Temperature 98382 25 lbs. Ultra High 96332 25 lbs. Temperature
Combo Bead Wearing Compound: Large and small ceramic bead
formulation protects against hard sliding abrasion by multiple particles.
Product # Size
96303 6 lbs.
CHOOSING THE BEST LOCTITE
®EPOXY FOR YOUR APPLICATION
Brushable Ceramic: Ceramic-filled, brushable epoxy. When used on its
own, can fill cavitated areas and protect equipment from corrosion and abrasion. Used as a top coat over an epoxy putty, Brushable Ceramic provides a low friction coating that protects pump casings, impellers, fans and other processing equipment against turbulence, abrasion and wear. Available in 2 formulas.
Product # Size/Color Brushable 98733 2 lbs./Grey
Ceramic 98732 6 lbs./Grey 96443 2 lbs./White
High Temp. 96433 2 lbs./Red
Brushable Ceramic
The following Loctite®products are also referenced in this guide and
are available from industrial distributors:
Product # Size Nordbak® 96092 12 lbs. Chemical Resistant Coating Nordbak® 97762 20 lbs. Ceramic Tile Adhesive
ODC-Free 22355 15 oz. Aerosol
Cleaner & 20162 16 fl. oz. Pump Spray
Degreaser 20260 1 gallon can
Silicone 51360 5.3 oz. Tube
Lubricant 81246 13 oz. Aerosol
Fixmaster® 97434 50 ml Cartridge 4-Minute Epoxy
Fixmaster® 82093 4 oz. Stick Underwater
Product Selection
Steel Putty FIXMASTER® EPOXIES PROPERTIES CHART P R O D U C T Steel Liquid Fast Set Steel Putty Metal Magic Steel™Superior Metal
Wear Resistant Putty Aluminum Putty Aluminum Liquid
Stainless Steel Putty
Color Coverage, ft. 2 @ 1/4 ″ thickness
Maximum operating temperature,
°
F
Compressive strength, psi
†
Tensile strength, psi
†
Hardness (Shore D) Working time, minutes Functional cure, hours Mix Ratio by volume,
r : h 97453 97463 39917 98853 97443 97483 97484 97482 99913 99914 99912 97473 98742 98743 96583 1 lb. kit 1 lb. kit 1 lb. kit 4 oz. 1 lb. kit 1 lb. kit 4 lb. kit 16 lb. kit 1 lb. kit 4 lb. kit 25 lb. kit 1 lb. kit 1 lb. kit 3 lb. kit 1 lb. kit Alumin. Alumin. Grey Grey Grey Grey Grey Dark Grey Grey Grey 17 in.3 0.5 0.4 7 in.2 0.25 13 in.3 52 in.3 208 in.3 0.3 1.2 7.5 0.25 0.36 1.1 0.5 200 225 200 250 225 225 225 250 225 150 17,000 11,300 10,800 12,000 14,000 13,500 13,000 18,000 11,600 12,500 6,000 4,000 4,600 2,500 4,600 6,000 4,900 5,500 4,900 3,500 85 87 80 80 85 89 90 90 86 85 20 20 3 3 20 25 30 20 30 30 6 6 10 min. 10 min. 6 6 6 6 6 18 5:1 4:1 1:1 N/A 4:1 4:1 2.5:1 4:1 4:1 1:1 9:1 6.3:1 6.3:1 N/A 9:1 9.5:1 6.25:1 7.25:1 8:1 10:9
Mix Ratio by weight,
r : h
Properties are based on mixing one lb. mass at 77°F, 7 days cure. †Ultimate cure.
Product
Number Container
APPLICATION SELECTION GUIDE
P R O D U C T Emergency metal repairs Corrosion protection Repairing pipes, tanks Rebuilding shafts, keyways, bearings Repairing threaded parts Restoring tube sheets Pump repair Repairing engine blocks Fixtures and prototypes Rebuilding impellers, valves Repairing aluminum parts Repairing stainless steel parts Forming molds, fixtures
Metal Magic Steel™ Fast Set Steel Putty
Steel Putty Steel Liquid Aluminum Liquid
Aluminum Putty
Superior Metal Wear Resistant Putty Wet Surface Repair Putty
Wet surface repairs
Preferred Choice Good Choice
Wet Surface Repair Putty
Product Selection
Coverage, ft.
2
@ 1/4" thickness Maximum operating temperature,
°
F
Compressive strength, psi Hardness (Shore D) Working time, minutes, 77
˚F
Functional cure, hours
, 77
˚F
Mix ratio by volume,
r : h
Fine particle abrasion
Mix ratio by weight,
r : h
Properties based on mixing one lb. mass at 77°F, ultimate cure. *20 mil thickness. ▲ Requires heat cure. See Technical Data Sheet.
Impact resistance Chemical corrosion protection High temperature resistance Fast cure
Multiple particle abrasion Pump repair
Container Product
Number
P R O D U C T
Corrosion protection Tile installation Elbows Fan housings Cyclones
Color 5 lb. kit 25 lb. kit 6 lb. kit 25 lb. kit 25 lb. kit 25 lb. kit 25 lb. kit 3 lb. kit 25 lb. kit 6 lb. kit 25 lb. kit 25 lb. kit 6 lb. kit 2 lb. kit 6 lb. kit 2 lb. kit 2 lb. kit 12 lb. kit 20 lb. kit 250 225 450 550 250 225 250 225 450 550 250 200 200 200 600 150 200 16,000 10,000 15,000 – 15,000 18,500 15,000 12,000 15,000 – 13,000 12,500 12,500 12,500 16,000 10,000 14,000 90 90 85 90 85 90 90 90 90 90 90 85 85 85 90 83 88 30 10 30 30 30 30 30 10 30 30 25 30 30 15 120 20 60 7 3 ▲ ▲ 6 6 6 3 ▲ ▲ 8 6 6 5 ▲ 16 12 2:1 2:1 4:1 2.44:1 2:1 2:1 4:1 2:1 4:1 2:1 2:1 2.75:1 2.75:1 2.9:1 2.6:1 2.2:1 1:1 2:1 2:1 3.9:1 2.85:1 2:1 6.8:1 4:1 2:1 4:1 2.27:1 2:1 4.8:1 4.8:1 4.8:1 4.25:1 3.7:1 3.7:1 1.75 8.75 2.1 9 9 8.75 277 in.3 1.1 9 2.1 8.8 8.8 2.3 12* 36* 12* 21.5* 74* 12 Grey Blue Grey Grey Grey Grey Grey Blue Grey Grey Grey Grey Grey White Red Grey Beige APPLICATION SELECTION GUIDE P R O D U C T Chutes Wearing Compound Fast Cure Wearing Compound High Temperature Wearing Compound Ultra High Temperature Wearing Compound High Impact Wearing Compound
Castable Wearing Compound Pneu-Wear
Fast Cure Pneu-Wear
High Temperature Pneu-Wear Ultra High Temp. Pneu-Wear Combo Bead Wearing Brushable Ceramic
High Temperature Brushable Ceramic
Chemical Resistant Coating Ceramic Tile Adhesive
Wearing Compound Fast Cure
Wearing Compound High Temperature Wearing Compound Ultra High Temperature Wearing Compound High Impact Wearing Compound
Castable Wearing Compound Pneu-Wear
Fast Cure Pneu-Wear High Temp. Pneu-Wear Ultra High Temp. Pneu-Wear Combo Bead Wearing Brushable Ceramic High Temperature Brushable Ceramic
Chemical Resistant Coating Ceramic Tile Adhesive
99813 99812 96373 99112 96392 39918 98992 98383 98382 96363 98372 96332 96303 98733 98732 96443 96433 96092 97762 NORDBAK® EPOXIES PROPERTIES CHART
Loctite Americas
USALocal Loctite Adhesives & Sealants Specialist 1-800-323-5106
Nearest Authorized Loctite Distributor Arrange an in-plant seminar Technical Product Assistance 1-800-LOCTITE (1-800-562-8483) To place an order
1-800-243-4874 Loctite Corporation 1001 Trout Brook Crossing Rocky Hill, Connecticut 06067 860-571-5100
fax: 860-571-5465 Loctite Corporation
One Northfield Plaza, 5600 Crooks Road Suite 105
Troy, Michigan 48098 248-828-8000 fax: 248-828-8009
Mexico
Local Loctite Adhesives & Sealants Specialist Nearest Authorized Loctite Distributor Arrange an in-plant seminar Technical Product Assistance 01-800-901-8100 (within Mexico) To place an order
01-800-849-9412 (within Mexico) Loctite Company de México, S.A. de C.V. Calzada de la Viga s/n, Fracc. Los Laureles Loc. Tulpetlac, C.P. 55090
Ecatepac de Morelos, Edo. de México, México 011-525-836-1305
fax: 011-525-787-9404 Canada
Local Loctite Adhesives & Sealants Specialist Nearest Authorized Loctite Distributor Arrange an in-plant seminar Technical Product Assistance To place an order
1-800-263-5043 (within Canada) Loctite Canada Inc.
2225 Meadowpine Blvd. Mississauga, Ontario L5N 7P2 800-263-5043 (within Canada) 905-814-6511 fax: 905-814-5391 Brazil
Local Loctite Adhesives & Sealants Specialist Nearest Authorized Loctite Distributor Arrange an in-plant seminar Technical Product Assistance To place an order
(55.11) 426-4011/5011 Loctite Brazil
Av. Prof. Vernon Krieble, 91 06690-11- Itapevi São Paulo - Brazil (55.11) 426-4011/5011 fax: (55.11) 426-4820/4493
For Material Safety Data Sheets or Technical Information call the Loctite 24-hour fax and information network. In the U.S.A., call
1-800-LOCTITE (562-8483). In Canada, call 1-800-263-5043. For information on the ProActive Maintenance Process call:
1-800-LOCTITE (562-8483) (U.S.A.), 1-800-263-5043 (Canada).