Corporate Headquarters Cisco Systems, Inc.
170 West Tasman Drive San Jose, CA 95134-1706 USA
http://www.cisco.com Tel: 408 526-4000
800 553-NETS (6387)
Network Analysis Module
Command Reference
THE SPECIFICATIONS AND INFORMATION REGARDING THE PRODUCTS IN THIS MANUAL ARE SUBJECT TO CHANGE WITHOUT NOTICE. ALL STATEMENTS, INFORMATION, AND RECOMMENDATIONS IN THIS MANUAL ARE BELIEVED TO BE ACCURATE BUT ARE PRESENTED WITHOUT WARRANTY OF ANY KIND, EXPRESS OR IMPLIED. USERS MUST TAKE FULL RESPONSIBILITY FOR THEIR APPLICATION OF ANY PRODUCTS.
THE SOFTWARE LICENSE AND LIMITED WARRANTY FOR THE ACCOMPANYING PRODUCT ARE SET FORTH IN THE INFORMATION PACKET THAT SHIPPED WITH THE PRODUCT AND ARE INCORPORATED HEREIN BY THIS REFERENCE. IF YOU ARE UNABLE TO LOCATE THE SOFTWARE LICENSE OR LIMITED WARRANTY, CONTACT YOUR CISCO REPRESENTATIVE FOR A COPY.
The Cisco implementation of TCP header compression is an adaptation of a program developed by the University of California, Berkeley (UCB) as part of UCB’s public domain version of the UNIX operating system. All rights reserved. Copyright © 1981, Regents of the University of California.
NOTWITHSTANDING ANY OTHER WARRANTY HEREIN, ALL DOCUMENT FILES AND SOFTWARE OF THESE SUPPLIERS ARE PROVIDED “AS IS” WITH ALL FAULTS. CISCO AND THE ABOVE-NAMED SUPPLIERS DISCLAIM ALL WARRANTIES, EXPRESSED OR IMPLIED, INCLUDING, WITHOUT
LIMITATION, THOSE OF MERCHANTABILITY, FITNESS FOR A PARTICULAR PURPOSE AND NONINFRINGEMENT OR ARISING FROM A COURSE OF DEALING, USAGE, OR TRADE PRACTICE.
IN NO EVENT SHALL CISCO OR ITS SUPPLIERS BE LIABLE FOR ANY INDIRECT, SPECIAL, CONSEQUENTIAL, OR INCIDENTAL DAMAGES, INCLUDING, WITHOUT LIMITATION, LOST PROFITS OR LOSS OR DAMAGE TO DATA ARISING OUT OF THE USE OR INABILITY TO USE THIS MANUAL, EVEN IF CISCO OR ITS SUPPLIERS HAVE BEEN ADVISED OF THE POSSIBILITY OF SUCH DAMAGES.
Network Analysis Module Command Reference
Copyright © 2004—2005 Cisco Systems, Inc. All rights reserved.
CCSP, CCVP, the Cisco Square Bridge logo, Follow Me Browsing, and StackWise are trademarks of Cisco Systems, Inc.; Changing the Way We Work, Live, Play, and Learn, and iQuick Study are service marks of Cisco Systems, Inc.; and Access Registrar, Aironet, ASIST, BPX, Catalyst, CCDA, CCDP, CCIE, CCIP, CCNA, CCNP, Cisco, the Cisco Certified Internetwork Expert logo, Cisco IOS, Cisco Press, Cisco Systems, Cisco Systems Capital, the Cisco Systems logo, Cisco Unity, Empowering the Internet Generation, Enterprise/Solver, EtherChannel, EtherFast, EtherSwitch, Fast Step, FormShare, GigaDrive, GigaStack, HomeLink, Internet Quotient, IOS, IP/TV, iQ Expertise, the iQ logo, iQ Net Readiness Scorecard, LightStream, Linksys, MeetingPlace, MGX, the Networkers logo, Networking Academy, Network Registrar, Packet, PIX, Post-Routing, Pre-Routing, ProConnect, RateMUX, ScriptShare, SlideCast, SMARTnet, StrataView Plus, TeleRouter, The Fastest Way to Increase Your Internet Quotient, and TransPath are registered trademarks of Cisco Systems, Inc. and/or its affiliates in the United States and certain other countries.
C O N T E N T S
Preface
ixAudience
ixOrganization
ixRelated Documentation
ixConventions
xObtaining Documentation
xiCisco.com
xiDocumentation DVD
xiiOrdering Documentation
xiiDocumentation Feedback
xiiCisco Product Security Overview
xiiiReporting Security Problems in Cisco Products
xiiiObtaining Technical Assistance
xiiiCisco Technical Support Website
xivSubmitting a Service Request
xivDefinitions of Service Request Severity
xivObtaining Additional Publications and Information
xvC H A P T E R 1
Command-Line Interface
1-1Logging in to the NAM
1-1Getting Help
1-2Command Mode
1-3Subcommand Mode
1-3Creation and Edit Modes
1-4C H A P T E R 2
Network Analysis Module Commands
2-1alarm event
2-2alarm mib
2-4alarm voice
2-6Contents
cdp hold-time
2-12cdp interval
2-13clear access log
2-14clear system-alerts
2-15config clear
2-16config network
2-17config upload
2-18coredump
2-19custom-filter capture
2-20custom-filter decode
2-22diffserv aggregate
2-24diffserv profile
2-25entity alias
2-27entity assetid
2-28exit
2-29exsession
2-30help
2-31ip address
2-32ip broadcast
2-33ip gateway
2-34ip host
2-35ip hosts add
2-36ip hosts delete
2-37ip http port
2-38ip http secure generate
2-39ip http secure install certificate
2-40ip http secure server
2-41ip http secure port
2-42ip http server
2-43ip http tacacs+
2-44ip interface
2-46ip nameserver
2-47logout
2-48monitor addrmap
2-49Contents
monitor diffserv host
2-53monitor diffserv matrix
2-55monitor diffserv pdist
2-57monitor diffserv stats
2-59monitor etherstats
2-61monitor etherstats on-switch
2-63monitor history
2-64monitor hlhost
2-66monitor hlmatrix
2-68monitor host
2-70monitor ifstats
2-72monitor matrix
2-73monitor mpls
2-75monitor nbar
2-76monitor pdist
2-77monitor priostats
2-79monitor protocol
2-80monitor protocol auto-learned
2-82monitor protocol auto-learned max-entry
2-83monitor protocol auto-learned tcp exclude
2-84monitor protocol auto-learned tcp max-port
2-85monitor protocol auto-learned udp exclude
2-86monitor protocol auto-learned udp max-port
2-87monitor urlcollection
2-88monitor urlfilter
2-90monitor vlanstats
2-92monitor vlanstats on-switch
2-94monitor voice h.323
2-95monitor voice sccp
2-97monitor voice mgcp
2-99netflow data-source
2-101netflow device
2-103Contents
ping
2-107preferences
2-108reboot
2-110rmon buffer
2-111rmon channel
2-113rmon filter
2-115rmwebusers
2-117show access-log
2-118show alarm event
2-119show alarm mib
2-120show alarm voice
2-121show application group
2-122show autostart
2-125show bios
2-126show cdp settings
2-127show certificate
2-128show certificate-request
2-129show configuration
2-130show custom-filter capture
2-132show custom-filter decode
2-133show date
2-134show diffserv aggregate
2-135show diffserv profile
2-136show entity
2-137show hosts
2-138show ip
2-139show log config
2-140show log patch
2-141show log upgrade
2-142show memory
2-143show monitor addrmap
2-144show monitor art
2-145show monitor diffserv host
2-146show monitor diffserv matrix
2-147Contents
show monitor diffserv stats
2-149show monitor etherstats
2-150show monitor etherstats on-switch
2-151show monitor history
2-152show monitor hlhost
2-153show monitor hlmatrix
2-154show monitor host
2-155show monitor ifstats
2-156show monitor matrix
2-157show monitor mpls
2-158show monitor nbar
2-159show monitor pdist
2-160show monitor priostats
2-161show monitor protocol
2-162show monitor protocol all
2-163show monitor protocol auto-learned settings
2-164show monitor urlcollection
2-165show monitor urlfilter
2-166show monitor vlanstats
2-167show monitor vlanstats on-switch
2-168show monitor voice
2-169show nam data-source
2-170show patches
2-171show preferences
2-172show rmon buffer
2-173show rmon channels
2-174show rmon filters
2-175show rxcounters
2-176show snmp
2-177show syslog-settings
2-178show system-alerts
2-179show tech-support
2-180Contents
show web-users
2-184shutdown
2-185snmp
2-186syslog
2-187syslog mib
2-188syslog remote-server
2-189syslog system
2-190syslog voice
2-191terminal
2-192time
2-193traceroute
2-195trap-dest
2-196upgrade
2-198web-user
2-199A P P E N D I X A
NAM Maintenance Partition CLI
B-1Preface
This preface describes the audience, organization, and conventions of this publication, and provides information on how to obtain related documentation.
Audience
This publication is for experienced network administrators who are responsible for configuring and maintaining Catalyst 6500 series switches, the Catalyst 6500 series and Cisco 7600 series Network Analysis Module (NAM), and the Cisco Branch Routers Series Network Analysis Module (NM-NAM).
Organization
This publication is organized as follows:
Chapter Title Description
Chapter 1 Command-Line Interface Describes how to log in to the NAM from the switch supervisor engine, information about the two CLI command modes (the command mode and subcommand mode) and information about NAM CLI edit and create modes.
Chapter 2 Network Analysis Module Commands
Lists alphabetically and provides detailed information for commands that are specific to the Catalyst 6500 series and Cisco 7600 series Network Analysis Module.
Appendix A NAM Maintenance Partition CLI Lists the NAM maintenance partition commands.
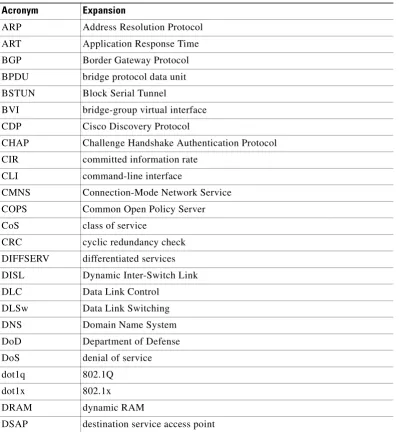
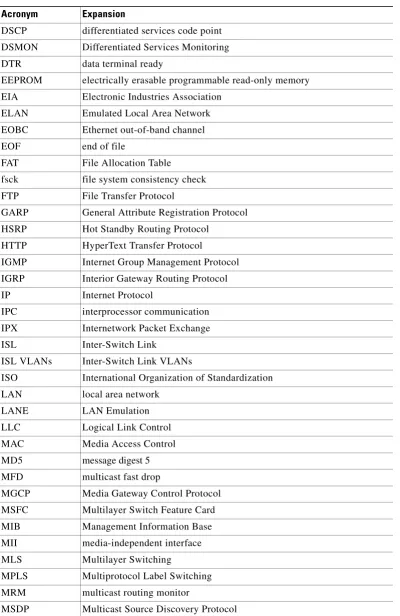
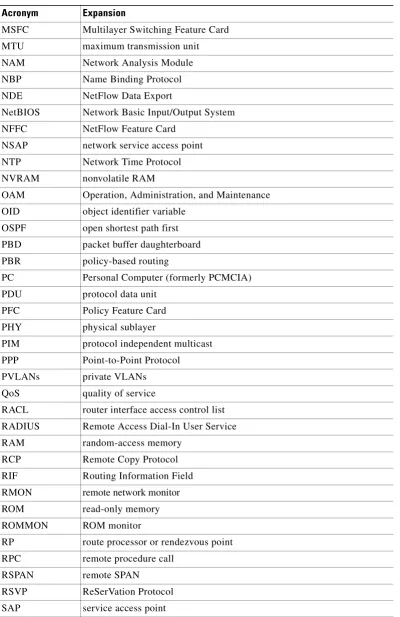
Appendix B Acronyms Defines the acronyms used in this
Preface Conventions
• Release Notes for Catalyst 6500 Series Switch and Cisco 7600 Series Router Network Analysis Module
• Catalyst 6500 Series Switch and Cisco 7600 Series Router Network Analysis Module Installation and Configuration Note
• User Guide for the Network Analysis Module Traffic Analyzer, Release 3.1
• Catalyst 6500 Series Switch Module Installation Guide
• Catalyst 6500 Series Switch Cisco IOS Software Configuration Guide
• Catalyst 6500 Series Switch Cisco IOS System Message Guide
• Release Notes for Catalyst 6500 Series Switch Cisco IOS Software, Release X.X
For information about the NAM, refer to this URL:
http://www.cisco.com/en/US/products/sw/cscowork/ps5401/index.html
The Cisco IOS documentation set includes these documents:
• Configuration Fundamentals Configuration Guide
• Command Reference
For information about the NM-NAM network module, refer to this URL:
http://lbj.cisco.com/targets/ucdit/cc/td/doc/product/software/ios123/123newft/123limit/123x/123xd/nm _nam.htm
For information about MIBs, refer to this URL:
http://www.cisco.com/public/sw-center/netmgmt/cmtk/mibs.shtml
For information about the Support Information for Platforms and Cisco IOS Software Images, use the Cisco Feature Navigator. The Cisco Feature Navigator allows you to find information about platform support and Cisco IOS software image support. Access the Cisco Feature Navigator at
http://www.cisco.com/go/fn. You must have an account on Cisco.com. If you do not have an account or have forgotten your username or password, click Cancel at the login dialog box and follow the
instructions that appear.
Conventions
This document uses the following conventions:
Convention Description
boldface font Commands, command options, and keywords are in
boldface.
italic font Arguments for which you supply values are in italics. [ ] Elements in square brackets are optional.
{ x | y | z } Alternative keywords are grouped in braces and separated by vertical bars. Braces can also be used to group keywords and/or arguments; for example, {interfaceinterfacetype}. [ x | y | z ] Optional alternative keywords are grouped in brackets and
Preface
Obtaining Documentation
Notes use the following conventions:
Note Means reader take note. Notes contain helpful suggestions or references to material not covered in the publication.
Cautions use the following conventions:
Caution Means reader be careful. In this situation, you might do something that could result in equipment damage or loss of data.
Obtaining Documentation
Cisco documentation and additional literature are available on Cisco.com. Cisco also provides several ways to obtain technical assistance and other technical resources. These sections explain how to obtain technical information from Cisco Systems.
Cisco.com
You can access the most current Cisco documentation at this URL:
http://www.cisco.com/univercd/home/home.htm
You can access the Cisco website at this URL:
string A nonquoted set of characters. Do not use quotation marks around the string or the string will include the quotation marks.
screen font Terminal sessions and information the system displays are in screen font.
boldface screen font
Information you must enter is in boldface screen font.
italic screen font Arguments for which you supply values are in italic screen
font.
^ The symbol ^ represents the key labeled Control—for example, the key combination ^D in a screen display means hold down the Control key while you press the D key.
< > Nonprinting characters, such as passwords are in angle brackets.
[ ] Default responses to system prompts are in square brackets.
!, # An exclamation point (!) or a pound sign (#) at the beginning of a line of code indicates a comment line.
Preface Documentation Feedback
You can access international Cisco websites at this URL:
http://www.cisco.com/public/countries_languages.shtml
Documentation DVD
Cisco documentation and additional literature are available in a Documentation DVD package, which may have shipped with your product. The Documentation DVD is updated regularly and may be more current than printed documentation. The Documentation DVD package is available as a single unit.
Registered Cisco.com users (Cisco direct customers) can order a Cisco Documentation DVD (product number DOC-DOCDVD=) from the Ordering tool or Cisco Marketplace.
Cisco Ordering tool:
http://www.cisco.com/en/US/partner/ordering/
Cisco Marketplace:
http://www.cisco.com/go/marketplace/
Ordering Documentation
You can find instructions for ordering documentation at this URL:
http://www.cisco.com/univercd/cc/td/doc/es_inpck/pdi.htm
You can order Cisco documentation in these ways:
• Registered Cisco.com users (Cisco direct customers) can order Cisco product documentation from the Ordering tool:
http://www.cisco.com/en/US/partner/ordering/
• Nonregistered Cisco.com users can order documentation through a local account representative by calling Cisco Systems Corporate Headquarters (California, USA) at 408 526-7208 or, elsewhere in North America, by calling 1 800 553-NETS (6387).
Documentation Feedback
You can send comments about technical documentation to [email protected].
You can submit comments by using the response card (if present) behind the front cover of your document or by writing to the following address:
Cisco Systems
Attn: Customer Document Ordering 170 West Tasman Drive
San Jose, CA 95134-9883
Preface
Cisco Product Security Overview
Cisco Product Security Overview
Cisco provides a free online Security Vulnerability Policy portal at this URL:
http://www.cisco.com/en/US/products/products_security_vulnerability_policy.html
From this site, you can perform these tasks:
• Report security vulnerabilities in Cisco products.
• Obtain assistance with security incidents that involve Cisco products.
• Register to receive security information from Cisco.
A current list of security advisories and notices for Cisco products is available at this URL:
http://www.cisco.com/go/psirt
If you prefer to see advisories and notices as they are updated in real time, you can access a Product Security Incident Response Team Really Simple Syndication (PSIRT RSS) feed from this URL:
http://www.cisco.com/en/US/products/products_psirt_rss_feed.html
Reporting Security Problems in Cisco Products
Cisco is committed to delivering secure products. We test our products internally before we release them, and we strive to correct all vulnerabilities quickly. If you think that you might have identified a vulnerability in a Cisco product, contact PSIRT:
• Emergencies —[email protected]
• Nonemergencies —[email protected]
Tip We encourage you to use Pretty Good Privacy (PGP) or a compatible product to encrypt any sensitive information that you send to Cisco. PSIRT can work from encrypted information that is compatible with PGP versions 2.x through 8.x.
Never use a revoked or an expired encryption key. The correct public key to use in your correspondence with PSIRT is the one that has the most recent creation date in this public key server list:
http://pgp.mit.edu:11371/pks/lookup?search=psirt%40cisco.com&op=index&exact=on
In an emergency, you can also reach PSIRT by telephone:
• 1 877 228-7302
• 1 408 525-6532
Obtaining Technical Assistance
Preface Obtaining Technical Assistance
Cisco Technical Support Website
The Cisco Technical Support Website provides online documents and tools for troubleshooting and resolving technical issues with Cisco products and technologies. The website is available 24 hours a day, 365 days a year, at this URL:
http://www.cisco.com/techsupport
Access to all tools on the Cisco Technical Support Website requires a Cisco.com user ID and password. If you have a valid service contract but do not have a user ID or password, you can register at this URL:
http://tools.cisco.com/RPF/register/register.do
Note Use the Cisco Product Identification (CPI) tool to locate your product serial number before submitting a web or phone request for service. You can access the CPI tool from the Cisco Technical Support Website by clicking the Tools & Resources link under Documentation & Tools.Choose Cisco Product Identification Tool from the Alphabetical Index drop-down list, or click the Cisco Product
Identification Tool link under Alerts & RMAs. The CPI tool offers three search options: by product ID or model name; by tree view; or for certain products, by copying and pasting show command output. Search results show an illustration of your product with the serial number label location highlighted. Locate the serial number label on your product and record the information before placing a service call.
Submitting a Service Request
Using the online TAC Service Request Tool is the fastest way to open S3 and S4 service requests. (S3 and S4 service requests are those in which your network is minimally impaired or for which you require product information.) After you describe your situation, the TAC Service Request Tool provides recommended solutions. If your issue is not resolved using the recommended resources, your service request is assigned to a Cisco TAC engineer. The TAC Service Request Tool is located at this URL:
http://www.cisco.com/techsupport/servicerequest
For S1 or S2 service requests or if you do not have Internet access, contact the Cisco TAC by telephone. (S1 or S2 service requests are those in which your production network is down or severely degraded.) Cisco TAC engineers are assigned immediately to S1 and S2 service requests to help keep your business operations running smoothly.
To open a service request by telephone, use one of the following numbers:
Asia-Pacific: +61 2 8446 7411 (Australia: 1 800 805 227) EMEA: +32 2 704 55 55
USA: 1 800 553-2447
For a complete list of Cisco TAC contacts, go to this URL:
http://www.cisco.com/techsupport/contacts
Definitions of Service Request Severity
To ensure that all service requests are reported in a standard format, Cisco has established severity definitions.
Preface
Obtaining Additional Publications and Information
Severity 2 (S2)—Operation of an existing network is severely degraded, or significant aspects of your business operation are negatively affected by inadequate performance of Cisco products. You and Cisco will commit full-time resources during normal business hours to resolve the situation.
Severity 3 (S3)—Operational performance of your network is impaired, but most business operations remain functional. You and Cisco will commit resources during normal business hours to restore service to satisfactory levels.
Severity 4 (S4)—You require information or assistance with Cisco product capabilities, installation, or configuration. There is little or no effect on your business operations.
Obtaining Additional Publications and Information
Information about Cisco products, technologies, and network solutions is available from various online and printed sources.
• Cisco Marketplace provides a variety of Cisco books, reference guides, and logo merchandise. Visit Cisco Marketplace, the company store, at this URL:
http://www.cisco.com/go/marketplace/
• Cisco Press publishes a wide range of general networking, training and certification titles. Both new and experienced users will benefit from these publications. For current Cisco Press titles and other information, go to Cisco Press at this URL:
http://www.ciscopress.com
• Packet magazine is the Cisco Systems technical user magazine for maximizing Internet and networking investments. Each quarter, Packet delivers coverage of the latest industry trends, technology breakthroughs, and Cisco products and solutions, as well as network deployment and troubleshooting tips, configuration examples, customer case studies, certification and training information, and links to scores of in-depth online resources. You can access Packet magazine at this URL:
http://www.cisco.com/packet
• iQ Magazine is the quarterly publication from Cisco Systems designed to help growing companies learn how they can use technology to increase revenue, streamline their business, and expand services. The publication identifies the challenges facing these companies and the technologies to help solve them, using real-world case studies and business strategies to help readers make sound technology investment decisions. You can access iQ Magazine at this URL:
http://www.cisco.com/go/iqmagazine
• Internet Protocol Journal is a quarterly journal published by Cisco Systems for engineering professionals involved in designing, developing, and operating public and private internets and intranets. You can access the Internet Protocol Journal at this URL:
http://www.cisco.com/ipj
• World-class networking training is available from Cisco. You can view current offerings at this URL:
C H A P T E R
1
Command-Line Interface
This chapter provides information for understanding and using the Network Analysis Module (NAM) software by using the command-line interface (CLI). This chapter includes the following sections:
• Logging in to the NAM, page 1-1
• Getting Help, page 1-2
• Command Mode, page 1-3
• Subcommand Mode, page 1-3
• Creation and Edit Modes, page 1-4
For an overview of the Catalyst 6500 series Cisco IOS configuration, refer to the Catalyst 6500 Series Switch Cisco IOS Software Configuration Guide. For Catalyst 6500 series switch Cisco IOS commands, refer to the Catalyst 6500 Series Switch Cisco IOS Command Reference.
For an overview of the Catalyst 6500 series operating system software configuration, refer to the
Catalyst 6500 Series Switch Configuration Guide. For Catalyst 6500 series switch operating system software commands, refer to the Catalyst 6500 Series Switch Command Reference.
For information about supported platforms, Cisco IOS releases, and Catalyst operating system releases, refer to this URL:
http://www.cisco.com/en/US/products/sw/cscowork/ps5401/index.html
Logging in to the NAM
There are two levels of access on the Network Analysis Module, each with different privileges:
• Guest—Read-only access (default password is guest)
• Root—Full read-write access (default password is root)
Note The root account uses the # prompt; the guest account uses the > prompt.
To log into the NAM, perform these steps:
Chapter 1 Command-Line Interface Getting Help
Cisco IOS Software:
switch> session slot 4 processor 1
The default escape character is Ctrl-^, then x.
You can also type 'exit' at the remote prompt to end the session Trying 127.0.0.41 ... Open
Cisco Network Analysis Module (WS-SVC-NAM-2)
login:
Catalyst Operating System Software:
switch> session 3 Trying NAM-3... Connected to NAM-3. Escape character is '^]'.
Cisco Network Analysis Module (WS-SVC-NAM-1)
login:
Step 3 Log into the NAM by typing root to log in as the root user or guest to log in as a guest user at the login prompt.
login: root
Step 4 At the password prompt, enter the password for the account. The default password for the root account is “root,” and the default password for the guest account is “guest.”
Password:
After a successful login, the command-line prompt appears as follows:
Cisco Network Analysis Module (WS-SVC-NAM-1) Console, 3.4(0.15) Copyright (c) 1999-2005 by cisco Systems, Inc.
Getting Help
When you have successfully logged in, type a ? and press Return or enter the help command for a list of commands used to configure the NAM. For example:
Cisco Network Analysis Module (WS-SVC-NAM-1) Console, 3.1(0.22) Copyright (c) 1999-2003 by cisco Systems, Inc.
? - display help
alarm - configure NAM MIB/voice alarms autostart - enable/disable autostart collections clear - clear access log / system alerts config - configure NAM
coredump - retrieve the coredump file
custom-filter - configure capture/decode custom filters diffserv - differentiated service related configurations exit - log out of system
exsession - enable/disable outside logins help - display help
Chapter 1 Command-Line Interface
Command Mode
mfgtest - Manufacturing only tests monitor - enable collections
no - delete various configurations nslookup - query nameservers
password - set new password
patch - download and install new patch ping - ping a network device
preferences - configure web interface preferences for all users reboot - reboot the system
rmon - configure RMON collections
rmwebusers - remove all web users from local web user database show - show system parameters
shutdown - shut down the system snmp - set snmp parameters syslog - configure NAM syslog terminal - set terminal parameters
time - configure NAM system time settings traceroute - traceroute to a network device trap-dest - create/edit NAM trap destination
upgrade - download and install new maintenance image voice - enable/disable voice collections
web-user - create/edit local web user
Command Mode
The Network Analysis Module provides a configurable command mode accessible when you log into the NAM as “root.” Certain commands enter into a subcommand mode. In all command and subcommand modes, the asterisk (*) specifies that the subcommand is mandatory.
Subcommand Mode
Some commands enter into a subcommand mode, which provides additional configuration commands that you can use in that mode. For example:
[email protected]# monitor host
Entering into subcommand mode for this command. Type 'exit' to come out of this mode.
Type 'cancel' to discard changes and to come out of this mode. [email protected](sub-monitor-host)#
When you have entered the subcommand mode, type a ? or enter the help command for a list of commands available in that subcommand mode. For example:
[email protected](sub-monitor-host)# ? ? - display help
cancel - discard changes and exit from sub-command mode control-index - specify the collection control index data-source - specify the collection data source (*) exit - exit from the sub-command mode
help - display help
Chapter 1 Command-Line Interface Creation and Edit Modes
Creation and Edit Modes
C H A P T E R
2
Network Analysis Module Commands
This chapter contains an alphabetical listing of the commands unique to the Catalyst 6500 series and Cisco 7600 series Network Analysis Module (NAM) and the NM-NAM network module.
For information about Cisco IOS commands that are used to configure the switch, refer to the current Cisco IOS documentation including:
• Catalyst 6500 Series Switch Cisco IOS Software Configuration Guide
• Catalyst 6500 Series Switch Cisco IOS Software Command Reference
For information about Catalyst operating system commands that are used to configure the switch, refer to the current Catalyst operating system documentation including:
• Catalyst 6500 Series Switch Configuration Guide
• Catalyst 6500 Series Switch Command Reference
For information about the NM-NAM network module, refer to this URL:
Chapter 2 Network Analysis Module Commands alarm event
alarm event
To enter the alarm event configuration subcommand mode, and then configure alarm NAM events, use the alarmevent command. To remove an alarm event, use the no form of this command.
alarm event
no alarm event 1-65535
Syntax Description
Defaults This command has no default settings.
Command Modes Command mode
Usage Guidelines When you enter the alarm event submode, the following commands are available:
• cancel—Discards changes and exits from the subcommand mode.
• community community_string—(Optional) Sets the community string.
• description description-string—Sets the alarm description.
• exit—Saves changes and exits from the subcommand mode; see the “exit” command section.
• index index—(Optional) Sets the alarm index. Range is from 1 to 65535.
• owner owner-string—(Optional) Specifies the collection owner. Default is monitor.
Note The collections that are configured in the CLI will not be visible in the GUI. For collections that use a GUI screen, you can make them visible in the GUI by using the owner string “LocalMgr.”
• type [both | log | none | trap]—(Optional) Sets the event to both log and trap, log, none, or trap.
Examples This example shows how to configure an alarm event:
[email protected]# alarm event
Entering into subcommand mode for this command. Type 'exit' to come out of this mode.
Type 'cancel' to discard changes and to come out of this mode. [email protected](sub-alarm-event)# ?
? - display help
cancel - discard changes and exit from subcommand mode community - set community string
description - set description
exit - exit from subcommand mode help - display help
index - set index
owner - set owner string
Chapter 2 Network Analysis Module Commands
alarm event
type - set type
[email protected](sub-alarm-event)# community public [email protected](sub-alarm-event)# description test-event [email protected](sub-alarm-event)# index 100
[email protected](sub-alarm-event)# owner monitor [email protected](sub-alarm-event)# type both [email protected](sub-alarm-event)# exit Successfully created the event.
[email protected]# show alarm event Index: 100
Description:test-event Type: Log and trap Community: public Owner: monitor [email protected]#
Related Commands alarm mib
Chapter 2 Network Analysis Module Commands alarm mib
alarm mib
To enter the alarm MIB configuration subcommand mode, and then configure NAM MIB alarms, use the
alarm mib command. To remove an alarm MIB entry, use the no form of this command.
alarm mib
no alarm mib 1-65535
Syntax Description
Defaults This command has no default settings.
Command Modes Command mode
Usage Guidelines When you enter the alarm MIB submode, the following commands are available:
• cancel—Discards changes and exits from the subcommand mode.
• exit—Saves changes and exits from the subcommand mode; see the “exit” command section.
• falling-event 1-65535—Sets the falling event index. Range is from 1 to 65535.
• falling-thresholdnumber— (Optional) Sets the number of packets for the falling event threshold. Default is 0 packets.
• index 1-65535—(Optional) Sets the alarm index. Range is from 1 to 65535.
• interval seconds—(Optional) Sets the polling interval in seconds. Default is 60 seconds.
• ownerstring—(Optional) Sets the owner string. Default is monitor.
Note The collections that are configured in the CLI will not be visible in the GUI. For collections that use a GUI screen, you can make them visible in the GUI by using the owner string “LocalMgr.”
• rising-event1-65535—Sets the rising event index. Range is from 1 to 65535.
• rising-threshold number—(Optional) Sets the number of packets for the rising event threshold. Default is 0 packets.
• sample-typeabsolute | delta—Sets the sample type to absolute or delta.
• startup-alarmboth | falling | rising—Sets the startup alarm to both rising and falling, falling, or rising.
• variableOID—Sets the object identifier (OID) variable.
Chapter 2 Network Analysis Module Commands
alarm mib
Examples This example shows how to set a MIB alarm:
Entering into subcommand mode for this command. Type 'exit' to come out of this mode.
Type 'cancel' to discard changes and to come out of this mode. [email protected](sub-alarm-mib)# ?
? - display help
cancel - discard changes and exit from subcommand mode exit - exit from subcommand mode
falling-event - set falling event index (*)
falling-threshold - set number of pkts for falling threshold help - display help
index - set alarm index interval - set polling interval owner - set owner string
rising-event - set rising event index (*)
rising-threshold - set number of pkts for rising threshold sample-type - set sample type (*)
startup-alarm - set startup alarm (*) variable - set variable (*)
(*) - denotes a mandatory field for this configuration. [email protected](sub-alarm-mib)# falling-event 100 [email protected](sub-alarm-mib)# rising-event 100 [email protected](sub-alarm-mib)# sample-type delta [email protected](sub-alarm-mib)# startup-alarm both
[email protected](sub-alarm-mib)# variable nlHostInPkts.29673.0.1.4.10.77.201.68 [email protected](sub-alarm-mib)# exit
Successfully created the NAM MIB alarm. [email protected]# show alarm mib Index: 19967
Polling interval: 60 secs
Variable: nlHostInPkts.29673.0.1.4.10.77.201.68 Sample type: Delta
Startup: Rising & falling Rising threshold: 0 Pkts
Falling threshold: 0 Pkts Rising event index: 100 Falling event index: 100 Owner: monitor
Related Commands alarm mib
Chapter 2 Network Analysis Module Commands alarm voice
alarm voice
To enter the alarm voice configuration subcommand mode, and then configure NAM voice alarms, use the alarm voice command. To disable voice alarm, use the jitter-alarm disable or the pkt-loss-alarm disable subcommands.
alarm voice
Syntax Description This command has no arguments or keywords.
Defaults This command has no default settings.
Command Modes Command mode
Usage Guidelines When you enter the alarm voice submode, the following commands are available:
• cancel—Discards changes and exits from the subcommand mode.
• exit—Saves changes and exits from the subcommand mode; see the “exit” command section.
• jitter-alarmenable | disable—(Optional) Enables or disables the jitter alarm.
• jitter-thresholdint—(Optional) Sets the jitter threshold in milliseconds. Default for SCCP is 30 milliseconds, H.323 is 150 milliseconds, and MGCP is 30 milliseconds.
• pkt-loss-alarm enable | disable—(Optional) Enables or disables the packet loss alarm.
• pkt-loss-threshold int—(Optional) Sets the packet loss threshold in percentage(%). Default is 5 percent for all three protocols, SCCP, H.323, and MGCP.
• protocol H.323 | SCCP | MGCP—Sets the voice protocol to H323, SCCP, or MGCP.
The MGCP protocol option is specific to the Network Analysis Module (NAM) software release running on network modules in the Cisco 2600, 3600, 3700 routers.
Examples This example shows how to set a voice alarm:
root@localhost# alarm voice
Entering into subcommand mode for this command. Type 'exit' to come out of this mode.
Type 'cancel' to discard changes and to come out of this mode. [email protected](sub-alarm-voice)# ?
? - display help
cancel - discard changes and exit from subcommand mode exit - exit from subcommand mode
help - display help
jitter-alarm - enable/disable jitter alarm jitter-threshold - set jitter threshold
pkt-loss-alarm - enable/disable packet loss alarm pkt-loss-threshold - set packet loss threshold
protocol - set protocol (*)
Chapter 2 Network Analysis Module Commands
alarm voice
[email protected](sub-alarm-voice)# protocol SCCP [email protected](sub-alarm-voice)# jitter-alarm enable [email protected](sub-alarm-voice)# jitter-threshold 50 [email protected](sub-alarm-voice)# exit
Successfully updated the SCCP configuration. [email protected]# show alarm voice SCCP:
Jitter alarm: Disabled Packet lost alarm: Disabled Jitter threshold: 30 msecs Packet lost threshold:5% H.323:
Jitter alarm: Disabled Packet lost alarm: Disabled Jitter threshold: 150 msecs Packet lost threshold:5%
MGCP:
Jitter alarm: Enabled Packet lost alarm: Enabled Jitter threshold: 31 msecs Packet lost threshold:6%
Related Commands alarm mib
Chapter 2 Network Analysis Module Commands application group
application group
To enter the application group submode and define an application group, use the application group
command.
application group
no application group group-name
Syntax Description
Defaults This command has no default settings.
Command Modes Command mode
Usage Guidelines When you enter the application group submode, the following commands are available:
• add protocol-specifier—Adds a protocol to the group. You only can add one protocol to a group at a time (for example, HTTPS). This command allows you to group statistics for more than one specified protocol into one counter.
To add two or more protocols to an application group, repeat the add command for each protocol. The protocols are added only when you exit application group subcommand mode.
• cancel—Discards changes and exits from the subcommand mode; see the “cdp enable” command section.
• delete protocol-specifier—Removes a protocol from the group. You only can remove one protocol from a group at a time.
To remove two or more existing protocols from an existing application group, repeat the delete
command for each protocol. The protocol is removed only when you exit the application group subcommand mode.
• exit—Saves changes and exits from the subcommand mode; see the “exit” command section.
• help—Displays help and keeps you in the application group subcommand mode; see the “help” command section.
• name string—Sets the the application group name.
You must provide protocol specifiers in the add or delete parameters, or both the add and delete
parameters.
Examples This example shows how to create an application group named appBrpSample with two protocols in the
group:
root@NAM# application group
Entering into subcommand mode for this command. Type 'exit' to come out of this mode.
Type 'cancel' to discard changes and to come out of this mode.
Chapter 2 Network Analysis Module Commands
application group
? - display help
add - add a protocol to the group (*)
cancel - discard changes and exit from subcommand mode delete - remove a protocol from the group (*)
exit - exit from subcommand mode help - display help
name - set application group name (*)
(*) - denotes a mandatory field for this configuration.
root@NAM(sub-application-group)# add 16.1.0.0.1.0.0.8.0.0.0.0.6.0.0.3.68.4.0.1.0.0 root@NAM(sub-application-group)# add 16.1.0.0.1.0.0.8.0.0.0.0.17.0.0.4.60.4.0.1.0.0 root@NAM(sub-application-group)# name appGrpSample
root@NAM(sub-application-group)# exit
Sucessfully create application group appGrpSample. root@NAM#
root@NAM#
root@NAM# show application group appGrpSample Application Group: appGrpSample
Number of Protocols: 2 - w-ether2.ip.tcp.tcp-836
16.1.0.0.1.0.0.8.0.0.0.0.6.0.0.3.68.4.0.1.0.0 - w-ether2.ip.udp.udp-1084
16.1.0.0.1.0.0.8.0.0.0.0.17.0.0.4.60.4.0.1.0.0
root@NAM#
Chapter 2 Network Analysis Module Commands autostart
autostart
To enable or disable autostart collections, use the autostart command.
autostart collection{enable | disable}
Syntax Description
Defaults This command has no default settings.
Command Modes Command mode
Examples This example shows how to enable autostart collections on the NAM:
[email protected]# autostart ?
addressmap - enable/disable autostart address map art - enable/disable autostart art
etherstats - enable/disable autostart ether stats priostats - enable/disable autostart prio stats vlanstats - enable/disable autostart vlan stats [email protected]# autostart etherstats enable
[email protected]# show autostart etherstats enable
addressmap disable priostats disable vlanstats disable art disable
Related Commands show autostart
collection Specifies a collection. Valid collections are etherstats,
addressmap, priostats, vlanstats, and art.
enable Enables autostart.
Chapter 2 Network Analysis Module Commands
cdp enable
cdp enable
To enable the Cisco Discovery Protocol (CDP) on the NM-NAM, use the cdp enable command. To disable CDP on the NM-NAM, use the no form of this command.
cdp enable
no cdp enable
Syntax Description This command has no arguments or keywords.
Defaults This command has no default settings.
Command Modes Command mode
Usage Guidelines This command is supported only on the NM-NAM. This command is disabled on the NAM-1 and
NAM-2.
Examples This example shows how to enable CDP:
[email protected]# cdp enable [email protected]#
Related Commands cdp hold-time
Chapter 2 Network Analysis Module Commands cdp hold-time
cdp hold-time
To set the Cisco Discovery Protocol (CDP) messages hold time, use the cdp hold-time command. To return the CDP messages hold time to the default value, use the no form of this command.
cdp hold-time time
no cdp hold-time
Syntax Description
Defaults 180 seconds.
Command Modes Command mode
Examples This example shows how to set the CDP messages hold time:
[email protected]# cdp hold-time 30 [email protected]#
Related Commands cdp enable
cdp interval show cdp settings
Chapter 2 Network Analysis Module Commands
cdp interval
cdp interval
To set the Cisco Discovery Protocol (CDP) messages interval on the NM-NAM, use the cdp interval
command. To return the CDP messages interval on the NM-NAM to the default value, use the no form of this command.
cdp interval time
no cdp interval
Syntax Description
Defaults 60 seconds
Command Modes Command mode
Examples This example shows how to set the CDP messages interval:
[email protected]# cdp interval 200 [email protected]#
Related Commands cdp enable
cdp hold-time show cdp settings
Chapter 2 Network Analysis Module Commands clear access log
clear access log
To clear the access log, use the clear access log command.
clear access-log
Syntax Description This command has no arguments or keywords.
Defaults This command has no default settings.
Command Modes Command mode
Examples This example shows how to clear the access log:
root@localhost# clear access-log
Related Commands clear system-alerts
Chapter 2 Network Analysis Module Commands
clear system-alerts
clear system-alerts
To clear the system alerts, use the clear system-alerts command.
clear system-alerts
Syntax Description This command has no arguments or keywords.
Defaults This command has no default settings.
Command Modes Command mode
Examples This example shows how to clear the system alerts:
root@localhost# clear system-alerts
Related Commands clear access log
Chapter 2 Network Analysis Module Commands config clear
config clear
To reset the NAM and return it to the factory-default state, use the config clear command.
config clear [all | ip]
Syntax Description
Defaults This command has no default settings.
Command Modes Command mode
Examples This example shows how to clear the configuration:
root@localhost# config clear
This operation will reset the NAM configuration with the exception of NAM IP parameters.
This operation will also reboot the NAM to allow the changes to take effect.
Do you wish to continue? (y/n) [n]:y
Successfully updated the SCCP configuration. Successfully updated the H.323 configuration. NAM syslog settings updated successfully.
NAM web interface preferences updated successfully.
Successfully modified the configuration.
NAM will be rebooted now, for the changes to take effect ...
all (Optional) Resets the NAM to the factory-default state including the NAM IP parameters configuration. The NAM reboots automatically for the changes to take effect.
Chapter 2 Network Analysis Module Commands
config network
config network
To import a NAM configuration into the NAM from a specified location, use the config network
command.
config network url
Syntax Description
Defaults This command has no default settings.
Command Modes Command mode
Examples This example shows how to download a configuration file to a NAM named kluu-test.config, which is
located at the FTP server namlab-pc1 in the user home directory named /home/kluu directory.
root@NAM #
root@NAM # config network ftp://kluu@namlab-pc1//home/kluu/kluu-test.config Downloading ftp://kluu@namlab-pc1//home/kluu/kluu-test.config, please wait ...
Password for kluu@namlab-pc1:
ftp://kluu@namlab-pc1//home/kluu/kluu-test.config (9K)
/tmp/lrcfile.txt.1007 [########################] 9K | 4916.90K/s 9748 bytes transferred in 0.00 sec (4274.44k/sec)
Download completed.
Configuring the NAM. This may take few minutes, please wait ...
NAM configuration completed.
To view the results, use the command 'show log config'. root@NAM #
Chapter 2 Network Analysis Module Commands config upload
config upload
To upload the running NAM configuration to a specified location, use the config upload command.
config uploadurl [filename]
Syntax Description
Defaults This command has no default settings.
Command Modes Command mode
Examples This example shows how to upload the NAM running configuration to the FTP server named namlab-pc1
with a filename of example.config:
root@NAM# config upload ftp://[email protected] example.config Building configuration, please wait... Done.
Uploading the configuration to 'example.config'
on 'ftp://[email protected]', This may take few minutes ...
Password:
Successfully uploaded the NAM configuration. root@NAM#
url Specifies the configuration location.
Chapter 2 Network Analysis Module Commands
coredump
coredump
To retrieve the core dump file, use the coredump command.
coredump ftp://user:passwd@host/full-path/
Syntax Description
Defaults This command has no default settings.
Command Modes Command mode
Examples This example shows how to retrieve a core dump:
root@localhost# coredump ftp://user:passwd@host/full-path/
Chapter 2 Network Analysis Module Commands custom-filter capture
custom-filter capture
To enter the custom filter capture subcommand mode, and then configure custom filter capture settings, use the custom-filter capture command. To remove custom filter capture, use the no capture-filter
filtername command.
custom-filter capture
no capture-filter filtername
Syntax Description
Defaults This command has no default settings.
Command Modes Command mode
Usage Guidelines When you enter the custom filter capture submode, the following commands are available:
• baseOID—(Optional) Sets the base object identifier (OID) variable.
• cancel—Discards changes and exits from the subcommand mode.
• datahex-string—(Optional) Sets the data.
• data-mask hex-string—(Optional) Sets the data mask.
• data-not-mask hex-string—(Optional) Sets the data-not mask.
• description string—(Optional) Sets the filter description.
• exit—Saves changes and exits from the subcommand mode; see the “exit” command section.
• filter-name string—Sets the filter name.
• offset0-65535—(Optional) Sets the offset. Range is 0 to 65535.
• protocol OID— Sets the protocol object identifier (OID) variable.
• status 0-65535 (Optional)—Sets the status. Range is 0 to 65535.
• status-mask 0-65535—(Optional) Sets the status mask. Range is 0 to 65535.
• status-not-mask 0-65535—(Optional) Sets the status-not mask. Range is 0 to 65535.
Examples This example shows how to configure custom filter settings:
root@localhost# custom-filter capture
Entering into sub-command mode for this command. Type 'exit' to come out of this mode.
Type 'cancel' to discard changes and to come out of this mode. [email protected](sub-custom-filter-capture)#
Chapter 2 Network Analysis Module Commands
custom-filter capture
Related Commands custom-filter capture
Chapter 2 Network Analysis Module Commands custom-filter decode
custom-filter decode
To enter the custom-filter decode subcommand mode, and then configure custom filter decode settings, use the custom-filter decode command. To remove custom filter decode, use the no decode-filter
filtername command.
custom-filter decode
no decode-filter filtername
Syntax Description
Defaults This command has no default settings.
Command Modes Command mode
Usage Guidelines When you enter the custom-filter decode submode, the following commands are available:
• address-type ip | mac—(Optional) Sets the address type to IP or MAC.
• baseOID—(Optional) Sets the base object identifier (OID) variable.
• cancel—Discards changes and exits from the subcommand mode.
• datahex-string—(Optional) Sets the data.
• description string—(Optional) Sets the filter description.
• directionboth | single—(Optional) Applies the filter to both directions or a single direction.
• dst-addressaddress—(Optional) Sets the traffic destination address.
• exit—Saves changes and exits from the subcommand mode; see the “exit” command section.
• filter-expression expression-string—(Optional) Sets the filter expression.
• filter-name string—Sets the filter name.
• offset 0-1518—(Optional) Sets the offset. Range is 0 to 1518.
• protocol string— Sets the protocol.
• src-address address (Optional)—Sets the data stream source address.
Examples This example shows how to custom filter decode settings:
root@localhost<sub># custom-filter decode Entering into sub-command mode for this command. Type 'exit' to come out of this mode.
Type 'cancel' to discard changes and to come out of this mode.
[email protected](sub-custom-filter-decode)# filter-name 12345
Chapter 2 Network Analysis Module Commands
custom-filter decode
Related Commands custom-filter capture
Chapter 2 Network Analysis Module Commands diffserv aggregate
diffserv aggregate
To enter the differentiated services aggregate configuration subcommand mode, and then configure differentiated services aggregation, use the diffserv aggregate command. To remove differentiated services aggregation, use the no form of this command.
diffserv aggregate
no diffserv aggregate control-index
Syntax Description
Defaults The control index is random.
Command Modes Command mode
Usage Guidelines When you enter the differentiated services aggregation submode, the following commands are available:
• cancel—Discards changes and exits from the subcommand mode.
• control-index control-index—(Optional) Specifies the collection control index. Range is from 1 to 65535. Default is random.
• description description—Specifies the aggregate description.
• exit—Saves changes and exits from the subcommand mode; see the “exit” command section.
• owner owner-string—(Optional) Specifies the collection owner. Default is monitor.
Note The collections that are configured in the CLI will not be visible in the GUI. For collections that use a GUI screen, you can make them visible in the GUI by using the owner string “LocalMgr.”
Examples This example shows how to configure differentiated services aggregation:
root@localhost# diffserv aggregate
Entering into sub-command mode for this command.
Type 'cancel' to discard changes and to come out of this mode. root@localhost(sub-diffserv-aggregate)# descr test1
root@localhost(sub-diffserv-aggregate)# exit Successfully created a diffserv aggregate. root@localhost# show diffserv aggregate Control index: 25013 Description: test1 Owner: monitor Status: 1
root@localhost# no diffserv aggregate 25013 Successfully removed the diffserv aggregate.
Related Commands diffserv profile
show diffserv aggregate
Chapter 2 Network Analysis Module Commands
diffserv profile
diffserv profile
To enter the differentiated services profile configuration subcommand mode, and then configure differentiated services profile, use the diffserv profile command. To remove differentiated services aggregation, use the no form of this command.
diffserv profile
no diffserv profileprofile-index
Syntax Description
Defaults The profile index is random.
Command Modes Command mode
Usage Guidelines When you enter the differentiated services profile submode, the following commands are available:
• cancel—Discards changes and exits from the subcommand mode.
• descripton DSCP-value | description—(Optional) Specifies the aggregate description.
• exit—Saves changes and exits from the subcommand mode; see the “exit” command section.
• profile-index profile-index— Specifies the entry control index for an existing differentiated services aggregate. Range is from 1 to 65535. Default is random.
Note To create a new differentiated services profile entry, you must obtain a new differentiated services aggregate control index by using the diffserv aggregate command to create a new differentiated services aggregate entry before using the diffserv profile command.
Examples This example shows how to configure a differentiated services profile:
root@localhost# show diffserv aggregate Control index: 25013 Description: test1 Owner: monitor Status: 1
[email protected]# diffserv profile
profile-index Specifies a differentiated services aggregate control index. Range is from 1 to 65535.
Note Use the diffserv aggregate command to first create the differentiated services control index, and then use the show
diffserv aggregate command to obtain a differentiated services
Chapter 2 Network Analysis Module Commands diffserv profile
[email protected](sub-diffserv-profile)# descr 0 dscpA [email protected](sub-diffserv-profile)# descr 1 dscpB [email protected](sub-diffserv-profile)# exit
Successfully updated the differentiated service profile. [email protected]# show diffserv profile 25013 Aggregate Profile Index:25013
DSCP Value Description 0 dscpA
1 dscpB
[email protected]# no diffserv profile 25013 Successfully removed the diffserv profile.
Related Commands show diffserv aggregate
Chapter 2 Network Analysis Module Commands
entity alias
entity alias
To configure an entity alias for the entity MIB, use the entity alias command.
entity alias string
Syntax Description
Defaults This command has no default settings.
Command Modes Command mode
Usage Guidelines The entity MIB makes the entPhysicalTable and entLastChangeTime available through SNMP.
The clearconfiguration command deletes the entity alias and asset ID by setting them to an empty string.
Examples This example shows how to log out of the NAM:
root@localhost# entity alias 123456
Related Commands show entity
Chapter 2 Network Analysis Module Commands entity assetid
entity assetid
To configure an entity MIB asset ID, use the entity assetid command.
entity assetid string
Syntax Description
Defaults This command has no default settings.
Command Modes Command mode
Usage Guidelines The entity MIB makes the entPhysicalTable and entLastChangeTime available through SNMP.
The clearconfiguration command deletes the entity alias and asset ID by setting them to an empty string.
Examples This example shows how to log out of the NAM:
root@localhost# entity assetid 1234566
Related Commands show entity
Chapter 2 Network Analysis Module Commands
exit
exit
To log out of the system or to leave a subcommand mode, use the exit command.
exit
Syntax Description This command has no arguments or keywords.
Defaults This command has no default settings.
Command Modes Command mode
Usage Guidelines To leave a subcommand mode, use the exit command. The exit command saves any changes before leaving the submode.
Examples This example shows how to log out of the NAM:
Chapter 2 Network Analysis Module Commands exsession
exsession
To enable or disable outside logins, use the exsession command.
exsession on [ssh]
exsession off
Syntax Description
Defaults This command has no default settings.
Command Modes Command mode
Usage Guidelines A strong crypto patch is required if you use the ssh option.
Examples This example shows how to allow outside logins to the NAM:
root@localhost# exsession on
on Enables outside logins.
off Disables outside logins.
Chapter 2 Network Analysis Module Commands
help
help
To display help, use the help command or ?. You must press the Enter key after entering the ?.
help | ?
Syntax Description This command has no arguments or keywords.
Defaults This command has no default settings.
Command Modes Command mode or subcommand mode
Examples This example shows how to display help:
root@localhost# help
? - display help
alarm - configure NAM MIB/voice alarms autostart - enable/disable autostart collections clear - clear access log / system alerts config - configure NAM
coredump - retrieve the coredump file
custom-filter - configure capture/decode custom filters diffserv - differentiated service related configurations exit - log out of system
exsession - enable/disable outside logins help - display help
ip - set ip parameters logout - log out of system mfgtest - Manufacturing only tests monitor - enable collections
no - delete various configurations nslookup - query nameservers
password - set new password
patch - download and install new patch ping - ping a network device
preferences - configure web interface preferences for all users reboot - reboot the system
rmon - configure RMON collections
rmwebusers - remove all web users from local web user database show - show system parameters
shutdown - shut down the system snmp - set snmp parameters syslog - configure NAM syslog
time - configure NAM timezone/time sync settings traceroute - traceroute to a network device
trap-dest - create/edit NAM trap destination
upgrade - download and install new maintenance image voice - enable/disable voice collections
Chapter 2 Network Analysis Module Commands ip address
ip address
To set the system IP address, use the ip address command.
ipaddressip-addresssubnet-mask
Syntax Description
Defaults This command has no default settings.
Command Modes Command mode
Usage Guidelines After setting the IP address, the gateway address may be set to 0.0.0.0. When this situation occurs, use the ip gateway command to set the gateway address.
The broadcast address is automatically set with an address that is created using the new IP address and network mask. To select a different broadcast address, use the ip broadcast command
Examples This example shows how to set the system IP address:
root@localhost# ip address 172.20.104.74 255.255.255.192 IP address and netmask configured successfully.
NOTE: Default gateway address has been reset to 0.0.0.0 Please use 'ip gateway' command to configure it.
root@localhost# ip gateway 172.20.104.66 root@localhost# show ip
IP address: 172.20.104.74 Subnet mask: 255.255.255.192 IP Broadcast: 172.20.255.255
DNS Name: namlab-kom8.cisco.com Default Gateway: 172.20.104.66
Nameserver(s): 171.69.2.133 HTTP server: Enabled
HTTP secure server: Disabled HTTP port: 80 HTTP secure port: 443 TACACS+ configured: No Telnet: Enabled SSH: Disabled root@localhost#
Related Commands ip broadcast
ip gateway ip host show ip
ip-address Sets the system IP address.
Chapter 2 Network Analys