Cloud Tools Reference Guide
Version: 3.2.1.GA
1. Tasks ... 1
1.1. Connecting to a Deltacloud server ... 1
1.2. Add and manage server keys ... 3
1.3. Using the Deltacloud perspective ... 4
1.3.1. The Cloud Viewer ... 5
1.3.2. The Images view ... 5
1.3.3. The Instances view ... 8
1.4. Using the Remote System Explorer ... 9
Chapter 1.
Tasks
1.1. Connecting to a Deltacloud server
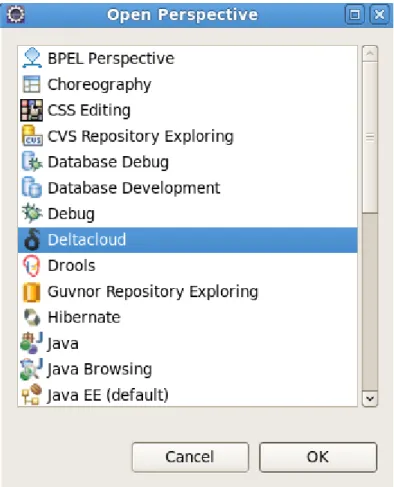
Ensure the Deltacloud perspective is open in your workspace. To open the perspective navigate to Window → Open Perspective → Other and then select Deltacloud from the perspective
options and click the OK button.
Figure 1.1. Selecting the Deltacloud perspective
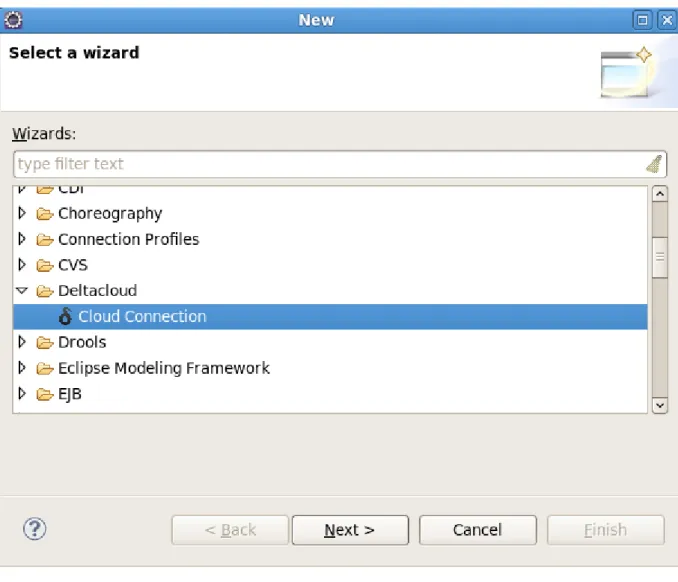
To setup a connection to a Deltacloud server select File → New → Other. From the New dialog
Chapter 1. Tasks
Figure 1.2. Opening the cloud connection wizard
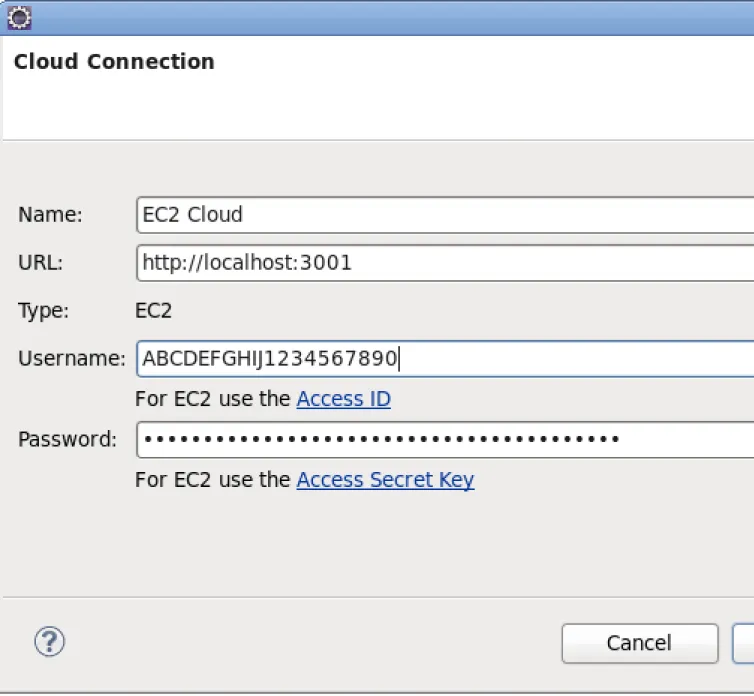
The Cloud Connection dialog requires a cloud name, URL, username and password to create a connection. Once you specify the URL of a cloud server the Type field will automatically inform you of the cloud type. If you are connecting to an EC2 cloud type, use your Access ID for the
Username field and your Access Secret Key for the Password field.
Once all fields are filled in correctly, click the Finish button.
Note
Add and manage server keys
Figure 1.3. Creating the connection
Your new cloud connection will appear in the Cloud Viewer using the name you specified in the connection wizard. For information on using your new cloud server connection see Section 1.3, “Using the Deltacloud perspective”.
1.2. Add and manage server keys
To access Deltacloud servers, key file authentication is used. Each key represents the person accessing the server and informs the server of their authorization level (a person may have several keys).
Chapter 1. Tasks
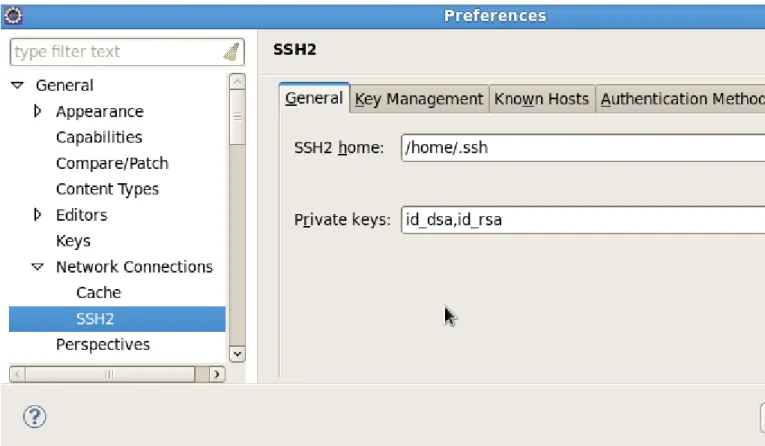
Each unique user requires an private key. These keys can be generated by Deltacloud Tools when launching an instance (see Section 1.3, “Using the Deltacloud perspective”), using a number of external tools, or provided by a service such as Amazon EC2. Each private key must then be specified in the SSH2 private keys list prior to performing the ssh connection.
Tip
New keys generated by Deltacloud Tools when launching an instance are automatically added to the SSH2 private keys list.
To access the SSH2 private keys list navigate to Window → Preferences → General → Network Connections → SSH2.
Figure 1.4. Preferences: SSH2
The Cloud Viewer
1.3.1. The Cloud Viewer
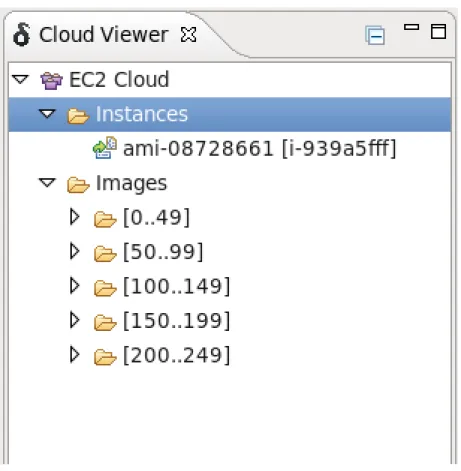
The Cloud Viewer view lists the servers you are connected to, the instances running on each server and the images available on each server. Right-clicking (or control-clicking on Mac OS) on a cloud connection presents you with options to delete a cloud using the Delete Cloud option or reload the the cloud view with the Refresh View option.
You can also right-click (or control-click on Mac OS) anywhere in the Cloud Viewer view and select the Launch Instance option to launch a new instance. See Section 1.3.2, “The Images view” for more information on launching an instance.
Clicking on a connection name causes details to be shown in the Properties view.
Figure 1.5. Deltacloud perspective: The Cloud Viewer
You can have multiple Deltacloud servers connected at any one time. If you have not yet setup a connection to a Deltacloud server see Section 1.1, “Connecting to a Deltacloud server”. You will also require a unique key file for each user who is to have access to the server. To add and manage your key files see Section 1.2, “Add and manage server keys”
Chapter 1. Tasks
Figure 1.6. Deltacloud perspective: The Images view
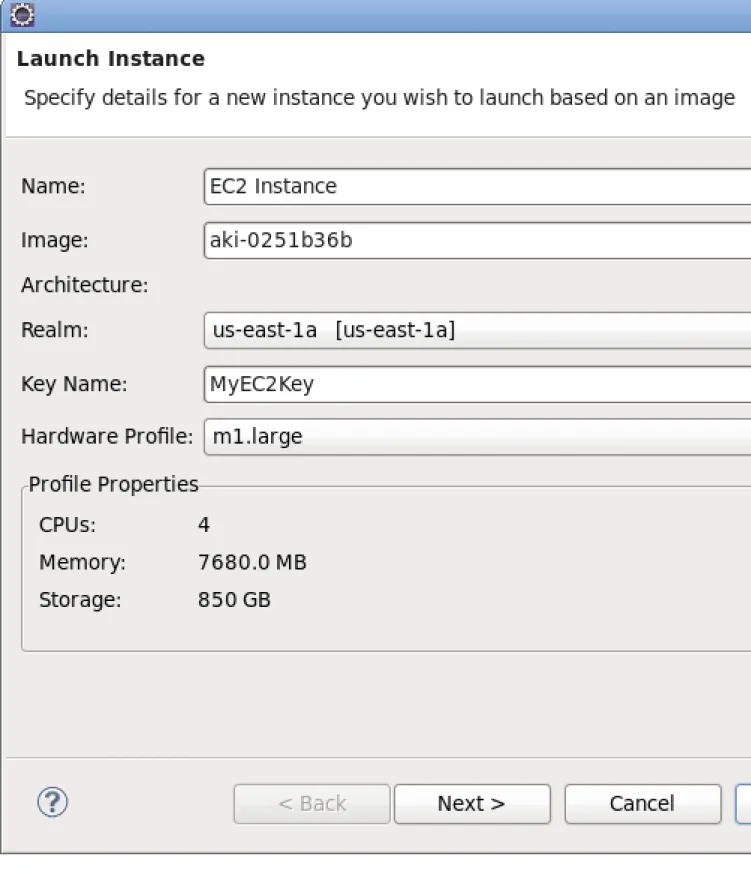
By right-clicking (or control-clicking on Mac OS) on an image in the table and selecting Launch
Instance, a dialog will appear. Define the Name of the instance, the Realm the instance
should appear in, select a predefined Hardware Profile and choose a Key Name for key file authentication. You can also change the default image by defining the value for the Image field, or by clicking the Find... button.
User authentication keys are managed for Deltacloud tooling by the Manage Keys dialog. When clicking on the Manage you will be presented with this dialog. Select one from the list or add a new one by clicking the New button. Newly created keys will also be added to the SSH2 key list if they are not already present.
The Images view
Figure 1.7. Deltacloud perspective: Launching an instance
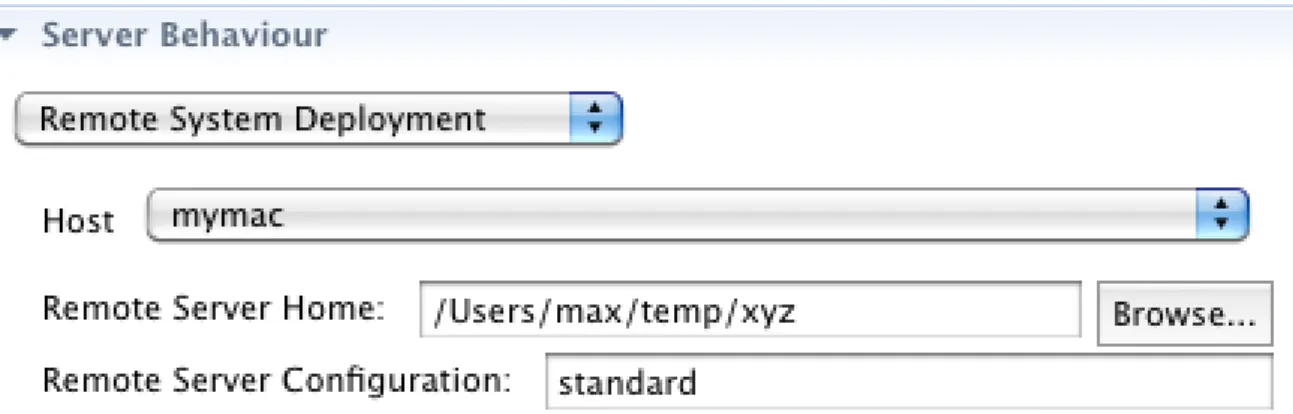
The next wizard page allows you to explicitly create an Eclipse Remote System Explorer (RSE), which is used to browse the remote filesystem and connect to the instance via an SSH terminal.
Chapter 1. Tasks
You can also create a Web Tools Platform (WTP) server adapter, which will allow you to deploy any WTP compliant web project to the remote instance.
Click the Finish button to launch the new instance and any RSE Connections or WTP Adapters that you have defined.
Figure 1.8. Deltacloud perspective: Defining an RSE Connection and a WTP
Adapter
1.3.3. The Instances view
Through the Instances view you can see all instances for a cloud server while having the functionality to start, stop and restart a selected instance.
Using the Remote System Explorer
Once connected, files on the external instance can be manipulated as if they were on your local machine.
1.4. Using the Remote System Explorer
With the Eclipse Remote System Explorer installed, you are able to publish to a remote location and setup additional hosts. You can also start and stop an external server through this perspective and these commands can be customized through the launch configuration.
To deploy to a remote system, toggle between Local and Remote System in the server editor. For information on the server editor see the JBoss Server Manager Reference Guide.
Appendix A. Revision History
Revision History
Revision 1-0 Mon Jan 10 2011 MatthewCasperson<[email protected]>
General updates
Revision 0-0 Fri Sep 24 2010 IsaacRooskov<[email protected]>