Part No. 118356-A Rev. A September 1997
Marketing Release 5.1
Remote Access
Concentrator Software
for Windows and
Windows NT
4401 Great America Parkway 8 Federal Street
Santa Clara, CA 95054 Billerica, MA 01821
Copyright © 1997 Bay Networks, Inc.
All rights reserved. Printed in the USA. September 1997.The information in this document is subject to change without notice. The statements, configurations, technical data, and recommendations in this document are believed to be accurate and reliable, but are presented without express or implied warranty. Users must take full responsibility for their applications of any products specified in this document. The information in this document is proprietary to Bay Networks, Inc.
The software described in this document is furnished under a license agreement and may only be used in accordance with the terms of that license. A summary of the Software License is included in this document.
Trademarks
Optivity and Bay Networks are registered trademarks and Remote Annex, Quick2Config, System 5000, Bay Networks Press, and the Bay Networks logo are trademarks of Bay Networks, Inc.
Microsoft, MS, MS-DOS, Win32, Windows, and Windows NT are registered trademarks of Microsoft Corporation.
All other trademarks and registered trademarks are the property of their respective owners.
Restricted Rights Legend
Use, duplication, or disclosure by the United States Government is subject to restrictions as set forth in subparagraph (c)(1)(ii) of the Rights in Technical Data and Computer Software clause at DFARS 252.227-7013.
Notwithstanding any other license agreement that may pertain to, or accompany the delivery of, this computer software, the rights of the United States Government regarding its use, reproduction, and disclosure are as set forth in the Commercial Computer Software-Restricted Rights clause at FAR 52.227-19.
Statement of Conditions
In the interest of improving internal design, operational function, and/or reliability, Bay Networks, Inc. reserves the right to make changes to the products described in this document without notice.
Bay Networks, Inc. does not assume any liability that may occur due to the use or application of the product(s) or circuit layout(s) described herein.
SUCH PORTIONS OF THE SOFTWARE ARE PROVIDED “AS IS” AND WITHOUT ANY EXPRESS OR IMPLIED WARRANTIES, INCLUDING, WITHOUT LIMITATION, THE IMPLIED WARRANTIES OF
Bay Networks, Inc. Software License Agreement
NOTICE: Please carefully read this license agreement before copying or using the accompanying software or installing the hardware unit with pre-enabled software (each of which is referred to as “Software” in this Agreement). BY COPYING OR USING THE SOFTWARE, YOU ACCEPT ALL OF THE TERMS AND CONDITIONS OF THIS LICENSE AGREEMENT. THE TERMS EXPRESSED IN THIS AGREEMENT ARE THE ONLY TERMS UNDER WHICH BAY NETWORKS WILL PERMIT YOU TO USE THE SOFTWARE. If you do not accept these terms and conditions, return the product, unused and in the original shipping container, within 30 days of purchase to obtain a credit for the full purchase price
1. License Grant. Bay Networks, Inc. (“Bay Networks”) grants the end user of the Software (“Licensee”) a personal, nonexclusive, nontransferable license: a) to use the Software either on a single computer or, if applicable, on a single authorized device identified by host ID, for which it was originally acquired; b) to copy the Software solely for backup purposes in support of authorized use of the Software; and c) to use and copy the associated user manual solely in support of authorized use of the Software by Licensee. This license applies to the Software only and does not extend to Bay Networks Agent software or other Bay Networks software products. Bay Networks Agent software or other Bay Networks software products are licensed for use under the terms of the applicable Bay Networks, Inc. Software License Agreement that accompanies such software and upon payment by the end user of the applicable license fees for such software.
2. Restrictions on use; reservation of rights. The Software and user manuals are protected under copyright laws. Bay Networks and/or its licensors retain all title and ownership in both the Software and user manuals, including any revisions made by Bay Networks or its licensors. The copyright notice must be reproduced and included with any copy of any portion of the Software or user manuals. Licensee may not modify, translate, decompile, disassemble, use for any competitive analysis, reverse engineer, distribute, or create derivative works from the Software or user manuals or any copy, in whole or in part. Except as expressly provided in this Agreement, Licensee may not copy or transfer the Software or user manuals, in whole or in part. The Software and user manuals embody Bay Networks’ and its licensors’ confidential and proprietary intellectual property. Licensee shall not sublicense, assign, or otherwise disclose to any third party the Software, or any information about the operation, design, performance, or implementation of the Software and user manuals that is confidential to Bay Networks and its licensors; however, Licensee may grant permission to its consultants, subcontractors, and agents to use the Software at Licensee’s facility, provided they have agreed to use the Software only in accordance with the terms of this license.
THE FOREGOING WARRANTIES AND LIMITATIONS ARE EXCLUSIVE REMEDIES AND ARE IN LIEU OF ALL OTHER WARRANTIES EXPRESS OR IMPLIED, INCLUDING WITHOUT LIMITATION ANY WARRANTY OF MERCHANTABILITY OR FITNESS FOR A PARTICULAR PURPOSE. Licensee is responsible for the security of its own data and information and for maintaining adequate procedures apart from the Software to reconstruct lost or altered files, data, or programs.
4. Limitation of liability. IN NO EVENT WILL BAY NETWORKS OR ITS LICENSORS BE LIABLE FOR ANY COST OF SUBSTITUTE
PROCUREMENT; SPECIAL, INDIRECT, INCIDENTAL, OR
CONSEQUENTIAL DAMAGES; OR ANY DAMAGES RESULTING FROM INACCURATE OR LOST DATA OR LOSS OF USE OR PROFITS ARISING OUT OF OR IN CONNECTION WITH THE PERFORMANCE OF THE SOFTWARE, EVEN IF BAY NETWORKS HAS BEEN ADVISED OF THE POSSIBILITY OF SUCH DAMAGES. IN NO EVENT SHALL THE LIABILITY OF BAY NETWORKS RELATING TO THE SOFTWARE OR THIS
AGREEMENT EXCEED THE PRICE PAID TO BAY NETWORKS FOR THE SOFTWARE LICENSE.
5. Government Licensees. This provision applies to all Software and
documentation acquired directly or indirectly by or on behalf of the United States Government. The Software and documentation are commercial products, licensed on the open market at market prices, and were developed entirely at private expense and without the use of any U.S. Government funds. The license to the U.S. Government is granted only with restricted rights, and use, duplication, or disclosure by the U.S. Government is subject to the restrictions set forth in subparagraph (c)(1) of the Commercial Computer Software––Restricted Rights clause of FAR 52.227-19 and the limitations set out in this license for civilian agencies, and subparagraph (c)(1)(ii) of the Rights in Technical Data and Computer Software clause of DFARS 252.227-7013, for agencies of the Department of Defense or their successors, whichever is applicable.
6. Use of Software in the European Community. This provision applies to all Software acquired for use within the European Community. If Licensee uses the Software within a country in the European Community, the Software Directive enacted by the Council of European Communities Directive dated 14 May, 1991, will apply to the examination of the Software to facilitate interoperability. Licensee agrees to notify Bay Networks of any such intended examination of the Software and may procure support and assistance from Bay Networks.
Remote Access Concentrator Software for Windows and Windows NT
foregoing, Licensee, on behalf of itself and its subsidiaries and affiliates, agrees that it will not, without first obtaining all export licenses and approvals required by the U.S. Government: (i) export, re-export, transfer, or divert any such Software or technical data, or any direct product thereof, to any country to which such exports or re-exports are restricted or embargoed under United States export control laws and regulations, or to any national or resident of such restricted or embargoed countries; or (ii) provide the Software or related technical data or information to any military end user or for any military end use, including the design,
development, or production of any chemical, nuclear, or biological weapons. 9. General. If any provision of this Agreement is held to be invalid or
unenforceable by a court of competent jurisdiction, the remainder of the provisions of this Agreement shall remain in full force and effect. This Agreement will be governed by the laws of the state of California.
Remote Access Concentrator Software for Windows and Windows NT
Contents
About This Guide
Before You Begin . . . xiii
Conventions . . . xiv
Ordering Bay Networks Publications . . . xv
Bay Networks Customer Service . . . xv
How to Get Help . . . xvi
Chapter 1
Overview, Requirements and Online Help
Supported Platforms . . . 1-2 Requirements for Server Tools . . . 1-2 Security Authentication . . . 1-3 Log On Privileges . . . 1-3 Requirements for NA and Quick2Config Annex . . . 1-4 RACs . . . 1-5 Using the RAC Software Online Help System . . . 1-5 Starting Online Help . . . 1-5 Moving Around Online Help . . . 1-6 Exiting Online Help . . . 1-6
Chapter 2
Installing Remote Access Concentrator Software
Figures
Tables
About This Guide
Read this guide if you are using Remote Access Network Software for
Windows to configure and manage Bay Networks
®Remote Access
Concentrators (RACs). This software includes:
•
Remote Annex Server Tools for Microsoft
®Windows NT
®version 3.1
•
NA utility 3.1
•
Quick2Config Annex version 3.1
You should be familiar with:
•
IBM compatible PC terminology and operation
•
Windows NT 3.51, Windows NT 4.0, or Windows 95
Before You Begin
Before using this guide, you must:
•
Provision your lines through your telco service provider
•
Install the Remote Access Concentrator
If you want Go to
Information about the products being installed, the system
resources, and the online help available
Chapter 1
About This Guide
Conventions
This manual uses the following printing conventions:
Convention: Represents:
special type In examples,special type indicates system output.
special type Boldspecial type indicates user input. In command examples, this notation indicates that pressing enters the default value.
bold Bold indicates commands, pathnames, or filenames that must be entered as displayed.
italics In the context of commands and command syntax, lowercase italics indicate variables for which the user supplies a value.
[ ] In command dialog, square brackets indicate default values. Pressing selects this value. Square brackets appearing in command syntax indicate optional
arguments.
{ } In command syntax, braces indicate that one, and only one, of the enclosed value must be entered.
| In command syntax, this character separates the different options available for a parameter.
Notes provide important information.
Warnings inform you about conditions that can have adverse effects on processing.
Cautions notify you about dangerous conditions. Return
Return
About This Guide
Ordering Bay Networks Publications
To purchase additional copies of this document or other Bay Networks
publications, order by part number from Bay Networks Press
™at the
following numbers:
•
Phone--U.S./Canada: 888-422-9773
•
Phone--International: 510-490-4752
•
FAX--U.S./Canada and International: 510-498-2609
The Bay Networks Press catalog is available on the World Wide Web at support.baynetworks.com/Library/GenMisc. Bay Networks publications are available on the World Wide Web at support.baynetworks.com/Library/tpubs.
Bay Networks Customer Service
You can purchase a support contract from your Bay Networks distributor
or authorized reseller, or directly from Bay Networks Services. For
information about, or to purchase a Bay Networks service contract, either
call your local Bay Networks field sales office or one of the following
numbers:
Information about customer service is also available on the World Wide Web at support.baynetworks.com.
Region Telephone number Fax number
United States and
Canada
800-2LANWAN; then enter
Express Routing Code (ERC) 290,
when prompted, to purchase or
renew a service contract
508-916-8880 (direct)
508-916-3514
Europe
33-4-92-96-69-66
33-4-92-96-69-96
Asia/Pacific
61-2-9927-8888
61-2-9927-8899
About This Guide
How to Get Help
If you purchased a service contract for your Bay Networks product from
a distributor or authorized reseller, contact the technical support staff for
that distributor or reseller for assistance.
If you purchased a Bay Networks service program, call one of the
following Bay Networks Technical Solutions Centers:
Technical Solutions Center Telephone number Fax number
Billerica, MA
800-2LANWAN
508-916-3514
Santa Clara, CA
800-2LANWAN
408-495-1188
Valbonne, France
33-4-92-96-69-68
33-4-92-96-69-98
Sydney, Australia
61-2-9927-8800
61-2-9927-8811
Chapter 1
Overview, Requirements and
Online Help
T
his chapter provides an overview of Remote Access Concentrator
(RAC) Software for Windows, and the requirements for installing the
software. The chapter also describes how to use online help.
Remote Access Concentrator Software for Windows includes three
modules:
Server Tools
Remote Annex Server Tools for Windows NT allows you to boot and
configure RACs in a Windows NT network. The software includes the
expedited remote procedure call daemon (erpcd), which runs on the host
server and on request from the RAC, downloads operational code and
other files. The Server Tools also enable you to use the Windows NT
domains to authenticate and authorize RAC users.
NA Command Line
Interface
The Network Administrator Utility (NA) enables you to display and
configure operating characteristics of a RAC and its ports. The utility also
enables you to remotely boot the RAC, upload the RAC operating image
before a boot, and broadcast administrative messages to ports on a RAC.
The utility can be installed with the Server Tools on the host server and
on other Windows platforms on the network.
Quick2Config Annex
The Quick2Config Annex application provides a Microsoft Windows
®based user interface that you can use to configure, manage and monitor
remote access servers in a networked environment. Quick2Config Annex
is compatible with the Optivity
®network management products from
Bay Networks. Using the Quick2Config Annex application you can:
•
Configure a RAC or group of RACs with an easy-to-use
graphical interface
•
Retrieve status and statistical information from a RAC or RACs
Chapter 1 Overview, Requirements and Online Help
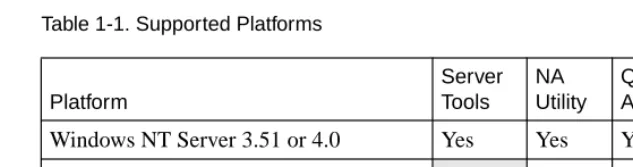
[image:20.612.161.478.200.283.2]Supported Platforms
Table 1-1
lists the platforms on which the various components of the RAC
software can operate. Note that there can be multiple instances of NA and
Quick2Config Annex on the same Windows NT network.
Table 1-1. Supported Platforms
Requirements for Server Tools
Before you install Remote Annex Server Tools for Windows NT, make
sure you have the following:
•
Windows NT Server version 3.51 or 4.0, configured to support
TCP/IP protocol
•
Administrative privileges on the server
•
At least 10 MB of free disk space on the NTFS drive
•
One Windows NT Server client license per RAC
•
PC with an Intel 486 (or higher) CPU with 32 MB RAM
•
CD ROM drive to install the product
Remote Annex Server Tools for Windows NT requires RAC Software
Release 11.1 or a subsequent release. The CD-ROM includes the
appropriate RAC software release.
Platform Server Tools NA Utility Quick2Config Annex
Windows NT Server 3.51 or 4.0
Yes
Yes
Yes
Windows NT Workstation 3.51 or 4.0
Yes
Yes
Chapter 1 Overview, Requirements and Online Help
Security Authentication
The RAC software has third-party security authentication tools available
from Security Dynamics (SecurID) and RADIUS. Refer to the following
sections if you plan to use security authentication software on the server.
SecurID
If SecurID authentication is being used, the sdconf.rec file must be copied
to the Windows NT %SystemRoot%system32 directory on the server.
This is done through the SD_Admin function provided in the SecurID
software. The SecurID administrator should copy this file over to the
server before continuing with the installation. The system can
authenticate users only if this file is copied to the server.
RADIUS
If RADIUS authentication is being used, all the necessary files are copied
to the server during installation.
Log On Privileges
If you install Remote Annex Server Tools for Windows NT on a primary
domain controller, all users must have the right to log on locally. The
system cannot authenticate users who do not have this privilege.
To allow users to log onto the primary domain controller:
1. Choose User Manager > User Rights to open the User Rights Window.
2. In the Right field, select Log on locally.
Chapter 1 Overview, Requirements and Online Help
3. Edit the list using Add and Remove.
To add groups or individual users, press Add and select individual or group names from the Add Users and Groups dialog box.
To delete users or groups, highlight a name and click on Remove.
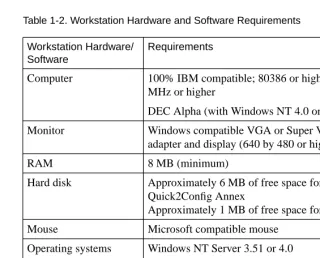
Requirements for NA and Quick2Config Annex
The NA utility and the Quick2Config Annex application can be installed
on client platforms as well as on the server.
Table 1-2
lists the minimum
[image:22.612.159.479.292.550.2]hardware and software requirements for installing and running this
software on a workstation.
Table 1-2. Workstation Hardware and Software Requirements
Workstation Hardware/ Software
Requirements
Computer
100% IBM compatible; 80386 or higher; 33
MHz or higher
DEC Alpha (with Windows NT 4.0 only)
Monitor
Windows compatible VGA or Super VGA
adapter and display (640 by 480 or higher)
RAM
8 MB (minimum)
Hard disk
Approximately 6 MB of free space for
Quick2Config Annex
Approximately 1 MB of free space for NA
Mouse
Microsoft compatible mouse
Operating systems
Windows NT Server 3.51 or 4.0
Windows NT Workstation 3.51 or 4.0
Windows 95
Chapter 1 Overview, Requirements and Online Help
RACs
Quick2Config Annex supports:
•
Remote Access Concentrator models running Release 14.1 or
later
•
Remote Annex models 2000, 4000, 5390, 5391 and 6100
running Release 11.2 or later
•
Annex 3 and Micro Annex XL Communications Servers
running Release 10.0 or later
Using the RAC Software Online Help System
Both the Quick2Config Annex installation and the application itself
include online help. Use the help system to view help topics that describe
windows, displays, menu items, toolbar buttons, fields and procedures.
In addition, you can find technical support and online services
information in your help system.
Starting Online Help
How you start online help depends on whether or not you are in
installation help or application help.
Installation Help
Chapter 1 Overview, Requirements and Online Help
Application Help
To start the Quick2Config Annex application help system:
•
Choose Help > Contents.
Displays the Quick2Config Annex help contents window,
which lists the main help topics.
•
Press the F1 key after selecting a tab or click on the Help button
on each tab.
Displays information about the contents of the tab. Click on the
underlined text to get additional information about a specific
field on the tab.
•
Click on the arrow/question mark button, drag it to a menu and
click on a command.
Displays help information for the selected command.
Moving Around Online Help
To move around the help system, use the toolbar at the top of the help
window. From the toolbar you can jump to the Contents page, search for
a help topic, go back to the previous help topic, view a history of the help
topics selected, or browse backward and forward.
Exiting Online Help
To exit the Quick2Config Annex application help system:
•
Choose Exit from the Help File menu or toolbar.
Chapter 2
Installing Remote Access
Concentrator Software
T
his chapter describes use of the Setup program to install Remote
Access Concentrator Software for Windows. The installation example in
this chapter loads NA, Server Tools and Quick2Config Annex on a host
running either Windows NT Server 3.51 or Windows NT Server 4.0. The
chapter also covers installing NA and Quick2Config Annex on Windows
NT Workstations and Windows 95 systems.
If you are installing RAC Software for Windows from a Remote
Annex Software for UNIX CD-ROM, the CD-ROM does not include
the Server Tools.
Before installing the RAC software, make sure the hardware and software
meet or exceed the minimum requirements described in
Chapter 1
.
Installing the Setup Program
The Remote Access Concentrator Software for Windows is provided on
a CD-ROM along with an integrated setup program.
Before you install the Remote Access Concentrator Software, you
should close all other Windows programs.
Remote Annex Server Tools
for
Windows requires Remote Access
Concentrator Software Release 14.1 or a subsequent release. The CD
ROM includes the appropriate RAC software release.
To install the RAC software:
1. Insert the CD in your CD-ROM drive.
2. Use either Program Manager or File Manager to run:
[CD-ROM Drive]:\Disk1\setup
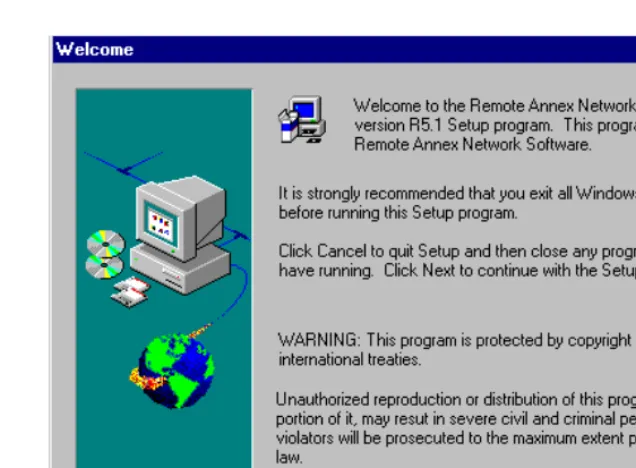
Chapter 2 Installing Remote Access Concentrator Software
Figure 2-1. Welcome Dialog Box
3. Read the instructions in this dialog box before continuing. 4. Click on Cancel if you need to close any Windows programs or
Next to continue the installation.
Chapter 2 Installing Remote Access Concentrator Software
Figure 2-2. Select Operation Dialog Box
Making Installation Diskettes
The Setup program allows you to make diskette copies of NA and
Quick2Config Annex. This option enables you to install the software on
client platforms that do not have CD-ROM drives.
To make diskette copies:
1. Choose Make Installation Floppies. 2. Click on Next.
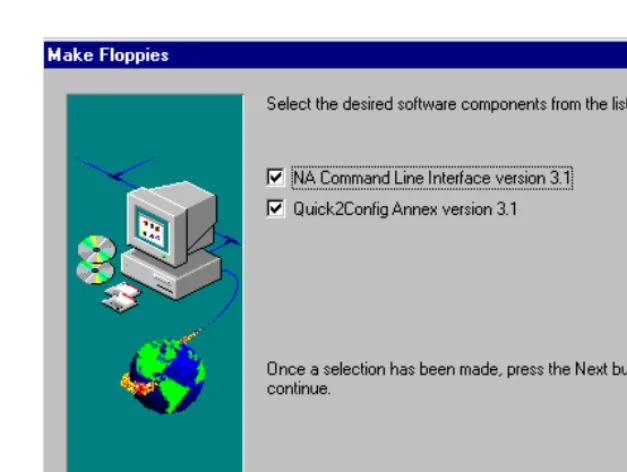
Chapter 2 Installing Remote Access Concentrator Software
Figure 2-3. Make Floppies Dialog Box
The dialog box opens with NA and Quick2Config Annex selected.
1. Click on the checkbox to the left of the selection to clear it if you do not want to copy one of the listed components.
2. Click on
Next
to continue.Chapter 2 Installing Remote Access Concentrator Software
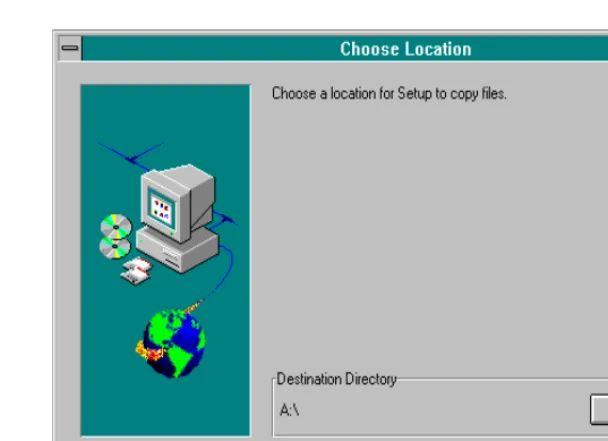
Figure 2-4. Choose Location Dialog Box
3. Click on
Next
to accept the default destination drive.4. If you want to change the path, click on Browse to select a new directory.
Chapter 2 Installing Remote Access Concentrator Software
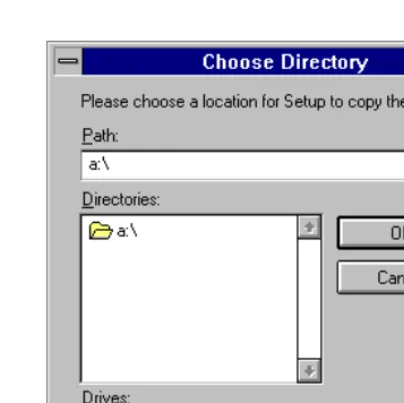
Figure 2-5. Choose Directory Dialog Box
5. Use the dialog box to make your selection and click on OK.
Setup closes the dialog box and substitutes the new path name in the Choose Location dialog box.
6. Click on Next to copy the Setup program to the selected location.
Starting the Setup Program
You start the software installation from the Select Operation dialog box
(
Figure 2-2
).
To continue the installation:
Chapter 2 Installing Remote Access Concentrator Software
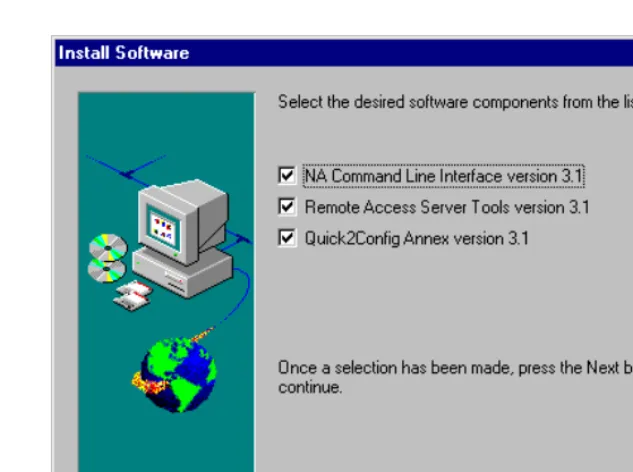
[image:31.612.177.494.127.363.2]Setup displays the dialog box with each of the components selected.
Figure 2-6. Install Software Dialog Box
2. Click on any item to deselect installation of the module. 3. Choose Next to continue the installation.
If you are not installing NA, skip to
Installing Server Tools on page 2-12
.
If you are installing only Quick2Config Annex, skip to
Installing
Chapter 2 Installing Remote Access Concentrator Software
Installing NA
Before installing each software component, Setup scans the Windows NT
Server platform for previously installed versions.
No Previous Version
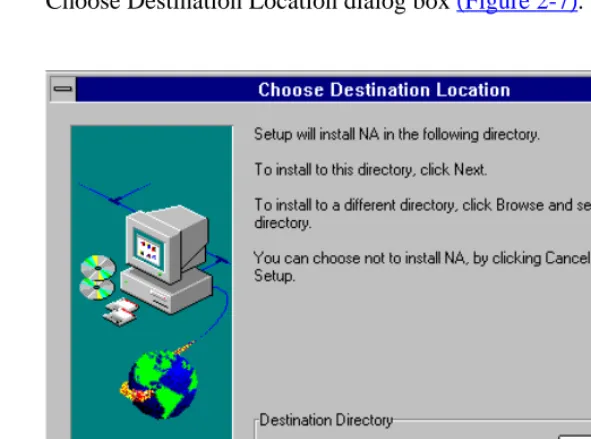
If Setup does not find a previous version of NA, the program displays the
[image:32.612.159.455.256.475.2]Choose Destination Location dialog box
(Figure 2-7)
.
Figure 2-7. Choose Destination Location Dialog Box
Chapter 2 Installing Remote Access Concentrator Software
1. To install in the default directory, click on
Next
.Setup begins copying the software to the selected directory. Skip to
Loading NA on page 2-11
.2. If you want to install in a different directory, click on Browse to select a new directory.
[image:33.612.179.380.211.407.2]Setup opens a standard Windows Choose Directory dialog box so you can select the new location (Figure 2-8).
Figure 2-8. Choose Directory Dialog Box
3. Use the dialog box to make your selection and click on OK.
Setup closes the dialog box and substitutes the new path name in the Choose Destination Location dialog box.
4. Click on Next to install in the new directory.
Chapter 2 Installing Remote Access Concentrator Software
Previous Version Found
If the program discovers a previous version of NA, it opens a dialog box
to give you a choice between overwriting the existing version or installing
[image:34.612.160.455.189.410.2]the software in a separate directory
(Figure 2-9)
.
Figure 2-9. Overwrite or Install Dialog Box
To replace the current version:
1. Choose Overwrite this version and click on Next.
Setup installs the software in the same directory as the previous version. Skip to
Loading NA on page 2-11
.Chapter 2 Installing Remote Access Concentrator Software
2. Use the dialog box to make your selection and click on OK.
Setup closes the dialog box and substitutes the new path name in the Choose Destination Location dialog box.
3. Click on Next to install in the new directory.
Loading NA
As Setup loads the software, it displays gauge icons and a dialog box to
[image:35.612.178.490.251.354.2]mark the progress of the installation
(Figure 2-10)
.
Figure 2-10. Setup Progress Icons
After copying the appropriate files and modifying program groups, Setup
displays the release notes dialog box shown in
Figure 2-11
.
[image:35.612.177.431.441.527.2]Chapter 2 Installing Remote Access Concentrator Software
4. Click OK to continue.
Setup begins installation of the next selected module. If you are not
installing Server Tools, skip to
Installing Quick2Config Annex on page
2-21
.
Installing Server Tools
If you opted to install Server Tools, the Setup program scans the Windows
NT Server for previous versions of the software.
No Previous Version
If Setup did not find a previous version of the Server Tools, the program
Chapter 2 Installing Remote Access Concentrator Software
Figure 2-12. Server Tools Choose Destination Location Dialog Box
The dialog box displays a default directory selection for the software
component:
C:\WIN32APP\BayNet\RAnnex
1. To install the Server Tools in the default directory, click on Next.
Setup begins installation of the Server Tools. Skip to
Choosing
Remote Access Concentrators on page 2-17
.2. If you want to install in a different directory, click on Browse.
Chapter 2 Installing Remote Access Concentrator Software
Figure 2-13. Choose Directory Dialog Box
3. Use the dialog box to make your selection and click on OK.
Setup closes the dialog box and substitutes the new path name.
4. Click on Next to accept the directory shown in the Choose Destination Location dialog box.
Chapter 2 Installing Remote Access Concentrator Software
Previous Version Found
If a previous version of the Server Tools is found, Setup provides three
choices:
•
Overwrite the existing version with the new software. This
action replaces the options set in the previous version of the
Server Tools with defaults settings in the new software.
•
Install the new software in a different directory. This action
gives you two versions of the Server Tools.
You may want to maintain prior versions of the Server
Tools and the RAC images for certain applications. Refer
to the Release Notes that accompanied the software to
identify potential effects of the current version on your
applications.
•
Upgrade the previous version with the new software. This
choice updates the software but preserves the settings
configured with the previous Server Tools.
Setup opens a dialog box to choose between overwriting the software or
upgrading it (
Figure 2-14
). Note that selecting the Overwrite option is
Chapter 2 Installing Remote Access Concentrator Software
Figure 2-14. Server Tools Installation Options Dialog Box
To install the Server Tools in the same directory, but save the existing
RAC settings:
1. Select Upgrade the existing version and click on Next.
Setup begins installation of the Server Tools. Skip to
Choosing
Remote Access Concentrators on page 2-17
.To install the Server Tools in the same directory with the default RAC
settings:
1. Select Overwrite the existing version and click on Next.
Chapter 2 Installing Remote Access Concentrator Software
2. Click on Next.
Setup begins installation of the Server Tools. Skip to
Choosing
Remote Access Concentrators
.To install the Server Tools in a different directory:
1. Choose Overwrite the existing version and click on Next.
Setup opens the Choose Destination Location dialog box (Figure 2-12) so you can select a new directory.
2. Click on Browse.
Setup opens a standard Windows Choose Directory dialog box so you can select the new location (Figure 2-13).
3. Use the dialog box to make your selection and click on OK.
Setup closes the dialog box and substitutes the new path name in the Choose Destination Location dialog box.
4. Click on Next to install in the new directory.
Setup begins installing the software to the selected directory.
Choosing Remote Access Concentrators
When Setup installs the Annex Server Tools, it opens the Select Remote
Chapter 2 Installing Remote Access Concentrator Software
Figure 2-15. Select Remote Annex Image Dialog Box
1. Use Select All or Clear All to select or deselect the entire list. 2. Double-click on an item to toggle its selection ON or OFF. 3. Click on Next when you have made your selections. 4. Select the geographic location(s) that applies to your site
Chapter 2 Installing Remote Access Concentrator Software
Figure 2-16. Geographic Locations
Setup will install the appropriate images for the product(s) and geographic location(s) checked in the dialog boxes. After installing the image files, Setup opens the Server Tools Options dialog box (Figure 2-17).
Chapter 2 Installing Remote Access Concentrator Software
Figure 2-17. Server Tools Options Dialog Box
5. After setting the options, choose OK.
The program displays the release notes dialog box shown in Figure 2-18.
[image:44.612.158.412.408.495.2]Chapter 2 Installing Remote Access Concentrator Software
Installing Quick2Config Annex
If you select Quick2Config Annex installation, the Setup program scans
the Windows NT Server for previous versions of the software.
No Previous Version
If the program does not find a previous version, Setup displays the Choose
[image:45.612.178.494.255.497.2]Destination Location dialog box
(Figure 2-19)
.
Chapter 2 Installing Remote Access Concentrator Software
The dialog box displays the default directory selection for the platform
you are using:
Windows NT
C:\WIN32APP\BayNet\Q2CAnnex
Windows 95
C:\Program Files\BayNet\Q2CAnnex
1. To install in the default directory, click on
Next
.Setup begins copying the software to the selected directory. Skip to
Loading the Programs on page 2-24
.2. If you want to install in a different directory, click on Browse to select a new directory.
[image:46.612.162.363.297.491.2]Setup opens a standard Windows Choose Directory dialog box so you can select the new location (Figure 2-20).
Chapter 2 Installing Remote Access Concentrator Software
4. Click on Next to install in the new directory.
Setup begins copying the software to the selected directory. Skip to
Loading the Programs on page 2-24
.Previous Version Found
If Setup discovers a previous version of Quick2Config Annex, the
program opens a dialog box to give you a choice between overwriting the
existing version or installing the software in a separate directory
[image:47.612.180.481.262.489.2](Figure 2-21)
.
Figure 2-21. Overwrite or Install Dialog Box
To replace the current version:
1. Choose Overwrite this version and click on Next.
Chapter 2 Installing Remote Access Concentrator Software
To install Quick2Config Annex in different directory:
1. Choose Install to another location and click on Next.
Setup displays the Choose Directory dialog box (Figure 2-20).
2. Use the dialog box to make your selection and click on OK.
Setup closes the dialog box and substitutes the new path name in the Choose Directory dialog box.
3. Click on Next to install in the new directory.
Loading the Programs
As Setup loads the software, it displays gauge icons to mark the progress
[image:48.612.159.473.305.406.2]of the installation
(Figure 2-22)
.
Figure 2-22. Setup Progress Icons
Setup copies the appropriate files and modifies program groups.
When you install Quick2Config Annex, Setup adds an
application-related section to your win.ini file with path information.
When the process is complete, the program displays the release notes
Chapter 2 Installing Remote Access Concentrator Software
Figure 2-23. Release Notes Dialog Box
1. Click OK to continue.
Setup displays the Setup Complete message box(Figure 2-24).
Figure 2-24. Setup Complete Message Box
[image:49.612.177.491.274.379.2]Chapter 2 Installing Remote Access Concentrator Software
Getting Started with RAC Software
To start any of the software modules, click on the appropriate icon in the
Bay Networks program group.
For information on how to select an authentication tool and for detailed
instructions on using the Server Tools Options windows, refer to Using
Remote Access Concentrator Server Tools for Windows NT
®.
For information on using the NA utility, refer to Managing Remote Access
Concentrators Using Command Line Interfaces.
Click on the Q2C Annex icon in the Bay Networks program group to start
Quick2Config Annex. Refer to the online help system included with the
Quick2Config Annex application for instructions on using Quick2Config
Annex. In addition, refer to online help system for basic configuration
examples.