Blend System
Quick Start Admin ManualClassroom
Blended
Learning
System
Welcome to VIEWpath and the Blend System by Audio Enhancement. VIEWpath & Blend combine to form a comprehensive all in one classroom audio and video system. This manual is intended to be a quick start admin manual to get your Blend Systems added and operating within the VIEWpath system. For a complete administration guide to the VIEWpath system, including LDAP/Active Director
registration information, please see the complete VIEWpath/EPIC Administration Manual.
Your VIEWpath Server is pre-configured according to the network information that you provided our pre-programming team. The Blend Systems are all configured to request a DHCP address from your network when connected. You will need to make sure that the network ports that your Blend Systems are connecting to is on the same VLAN as the server.
Table of Contents
Quick Start Guide – Please follow these initial steps ... 3
Step 1 – Install your Server ... 3
Step 2 – Log into your server ... 3
Step 3 – LDAP Configuration ... 3
Step 4 – Adding your Blend Systems to VIEWpath ... 4
Connect Blend Systems to the network ... 4
Step 5 - Add Teachers to the Virtual Rooms ... 7
Logging In ... 8
LDAP – Managing your Teacher Users ... 9
LDAP ... 9
LDAP Setup ... 10
Assigning LDAP Groups to VIEWpath Roles ... 13
User Roles/Privileges ... 14
Teacher Role ... 15
Login Screen after LDAP Configuration ... 15
Quick Start Guide
–
Please follow these initial steps
We want to help!! We have provided a basic framework in this section that will give you the best possible experience in getting your system up and running. Please allow us the opportunity to assist you in getting started with your VIEWpath & Blend Systems.
Step 1
–
Install your Server
If you have received a physical server as part of your system, the first step will be to install your server into a server rack and get it connected to power and your network. If you are using a virtual server, you should have previously worked with the Audio Enhancement implementations team to build your virtual server.
Step 2
–
Log into your server
Open up your Chrome browser on your computer, and use the default admin credentials to log into the server:
User Name: schooladmin Password: password
Once you have successfully logged into your server, and are seeing the main admin screen, please stop and call the Audio Enhancement Tech Support line at 800-932-3578. We are anxious to help you get up and running successfully in the least time possible.
Step 3
–
LDAP Configuration
Step 4
–
Adding your Blend Systems to VIEWpath
Your Blend EDUCAMPTZ camera is configured to receive an IP Address from your DHCP server. Each network port that you would like to use with your Blend Systems needs to be configured to be on the same VLAN as the server, for VIEWpath to automatically discover the Blend Systems. (If you are using a VLAN configuration that will require routing between the server VLAN and the VLAN the Blend is plugged into please call Audio Enhancement Support for assistance)
This process is one method for identifying and assigning your Blend Systems within the VIEWpath System. There are several ways of accomplishing this same outcome, this is just one option.
Connect Blend Systems to the network
Because the Blend Systems are designed to be portable, it is easiest to plug one system in at a time.
• Make sure you are logged in as an Admin in the VIEWpath system
• Plug your first Blend System into a Network Port that is assigned to the same VLAN as the Server
• Configure the Blend System
• Press Submit
Hint: You will find it useful to name the camera the same name as the virtual room you are going to assign this camera to in the next step. You will also want to physically label the units as you work through this process so that the Device Name, the Virtual Room Name, and the Physical Label on the device itself all match
• Once you have assigned a Blend System to a virtual room, you will want to physically label that system in some way so that you know which Blend System is assigned to each room.
• Repeat this process for the remainder of your Blend Systems
Step 5 - Add Teachers to the Virtual Rooms
The VIEWpath platform allows you to manage which teachers have access to the cameras. This is accomplished by associating a teacher with a virtual room. Only teachers that have been assigned to a particular room can access the Blend System in that room to use the camera.
Logging In
The VIEWpath server is web-based and can be logged in to via Google Chrome. Contact your school IT representative to get the log in IP address or server weblink for when a DNS (Domain Name System) entry is added.
Note: If there is a security warning, simply click “advanced>proceed to site.” If an SSL certificate is added,
this will no longer show up. Below is the login prompt users will see when accessing the system.
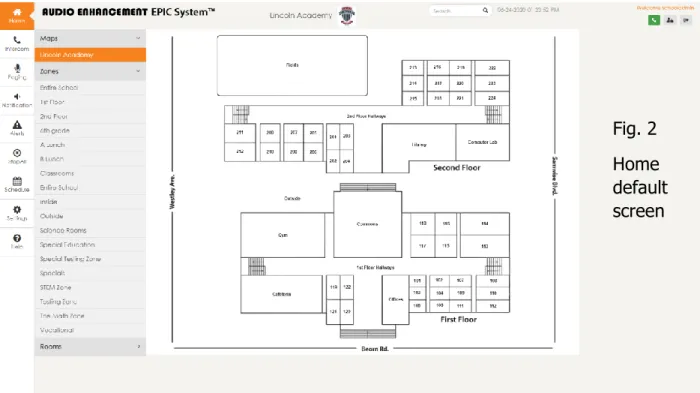
Log in using provided credentials (see Fig.1). The default admin user account is schooladmin:password. If LDAP has been enabled, this will be the normal login account used for email, computer, etc. User will be logged in and see the portions of the software to which rights have been granted. The first page is the “Home” screen, which is a visual representation of the school (see Fig. 2 on next page).
The menu along the left side allows users to click these icons to perform the appropriate tasks. For administration, click the “Settings” gear icon . The VIEWpath module primarily uses the “Settings” section of the larger EPIC platform.
LDAP
–
Managing your Teacher Users
Users can be added to the system in one of two ways. They can be added and managed manually as local users, or an integration with LDAP can be created. Because VIEWpath with the Blend Systems is by definition a system that is used by teachers, it is going to be much more efficient to create the
integration with LDAP, thereby allowing the teachers to use their same logins that they use for other computers and systems, and also allowing the administration and management of users to happen in one place, the LDAP database.
LDAP
The VIEWpath system will work best by creating an LDAP connection to log in the users and assign privileges. The LDAP settings are found under configuration. Enter the appropriate information for LDAP connection or update the username/password if credentials have changed and click “Save.” A test can be done by clicking “Test LDAP Connection,”.
Fig. 2
Home
default
screen
LDAP Setup
• Login as an administrator (Default Admin login is: User Name: schooladmin Password: password)
• Navigate to the LDAP Tab in the System Settings section
• Enter your LDAP Information & press ‘Save’
• After pressing ‘Save’ you will see the following message, and the browser will refresh, returning you to the home screen
• Navigate back to the LDAP tab in the System Settings Section
• You should get a dialog box that shows Connection Successful
• If you receive a Server not responding. Try again message – re-check your LDAP information and press ‘Save’ again
Assigning LDAP Groups to VIEWpath Roles
• Navigate to the Roles Tab in the System Settings Section
User Roles/Privileges
Now, assign permissions to each role according to the permissions they should have.
Click “Permissions” and the permissions matrix will come up for each role (see screen shot on next page). Note: the only role that will allow access to the teacher focused VIEWpath User Interface is the Teacher role.
Now, simply check the access for each user role to have. If a heading like “Home” is checked, it will check all the settings within that heading. Click “Save” once complete and permissions are updated.
Teacher Role
When a teacher logs in, they are presented with the teacher screen, rather than the admin screen. This is determined by the role that they are assigned to.
Login Screen after LDAP Configuration
not recommended as a best practice for managing your network. The Blend devices must be online and registered to the server to function properly.
Automated Device Management
Device management and configuration is automated by the VIEWpath System when using Audio Enhancement supported cameras. The VIEWpath System will discover and recognize the devices on the network automatically. When added to the system, the device settings are stored and managed from the VIEWpath System – no need to login to the endpoint device. Blend System devices can be added, programmed, and updated all from within the VIEWpath System.
Device Discovery
Login into the VIEWpath system with your admin credentials, using a Chrome Browser.
From the Devices tab within settings, the “Discover” module will run automatically (see Fig. 22 on next page). This is the home and primary page for existing device status and editing as well. When the page loads, the VIEWpath System will check the network (LAN discovery only) and if it finds any Audio Enhancement devices on the network that it has not registered, it will list them in the “Unknown Devices” list. The devices can then be easily added into the VIEWpath System. If there are no unknown devices, this section will be collapsed and only the known devices will be displayed. This section can be manually expanded or collapsed by pressing the + or – button.
Adding a Blend Device to your system
Devices can be added to EPIC System by clicking the “+” icon within the unknown devices list (see Fig. 24).
This will bring up a pop-up window “Identify Unknown Device”. This is the easiest and preferred method to adding a device. The user will need to specify desired device name (Audio Enhancement standard is SchoolAbbreviation-RoomNumber-DeviceType – e.g. JHS-141-EDUCAMPTZ). Please note that when using the Blend Systems exclusively in your VIEWpath system, while it is necessary to have a ‘room’ in the system for each Blend System, that room could be a virtual room or a physical room.
Click submit. EPIC System will register the device and push its settings and site standard configuration* to that device and it is ready to go.
*For more details regarding Site Configuration Templates please refer to that section in the complete admin manual.
Example: Add EduCamfrom Discovery (see Fig. 25)
Manually Add a Blend Device
If the device is not yet on the network or for some other reason the device is not automatically discovered by EPIC System, the device can be manually added by clicking the “Add Device” module within the Devices tab. The same information from above is required. The user must enter the device info and click Submit (see Fig. 27). The user must also manually enter the MAC address of the device being added (add any format, it will update to colon notation). This is required so the VIEWpath System recognizes it as a known device. The VIEWpath System will configure the device so it’s ready for use.
Managing Virtual or Physical Room Assignments for your Blend Systems
Rooms are what the VIEWpath system uses to associate Blend Systems with Teachers. In come cases, you may have loaded an actual map of the school building in order to associate the Blend Systems with an actual physical room. In other cases, the ‘rooms’ may just be virtual representations that are there to allow the association of the users with that specific Blend System. Either way, the process is the same. Rooms are defined as objects that contain the devices (Blend Systems) and are visually represented on the map.Fig. 26
Add Room
To add a room, first navigate to Settings then click “Map Setup.” (see Fig. 52 and 53)
Click “Maps” and then click on the school map to display the map (see Fig. 54). If you have chosen to not have an actual map of the building, and just represent the Blend Systems as Virtual rooms, you will only just see a white Background with squares representing each of the Blend Systems that you initially purchased.
Click “Add Room” on the right side of the screen, to add a new room (see Fig. 55).
Fig. 52
Fig. 53
The new room will come up along with the room information panel (see Fig. 56). Resize/shape the room by clicking and dragging the four (4) points on the corners and placing them in the appropriate shape. If the line is clicked, it will add a new point in the shape to be moved and manipulated. If any points need to be removed, click and hold the new point for three-seconds and it will be deleted. (you may also hold down the Shift key and click on a point to remove it)
Enter the information for the room. The Display Name is what will show up on the map. Enter the name and description. (You will not need to select any zones for the rooms when using the system only for the VIEWpath functionality), Select the teacher(s) assigned to this room and then Scroll down and click “Apply.” (See Fig. 56)
Note: Any teacher that is assigned to the room on the Map Setup page will have full access to the camera assigend to that room.
Click and hold for 3+ seconds to remove point
Available devices will show up here. Checkmark to add device for this new room
Change display name (this will show up on the map)
Move point to edit shape Click and drag any display name to position elsewhere on map
Fig. 56
Select associated teacher(s) for that room
Edit Room
To edit a room, change the name of a room, change the teacher(s) assigned to the room, or change the devices belonging to the room, go to “Map Setup” and click the room. The information panel will come up and any information can be edited. Click “Apply” to save the changes to that room. To edit the shape, click on the room to reveal corners. Drag the corners to reshape the room.
Locating the MAC Address of the Blend Camera
The MAC Address is included in the serial number label of your Blend Camera. The last 6 digits of the MAC Address are the last 6 digits of the Serial number