NCS Serv
User Guide
Software Version 4.0
WARNING!
Toll fraud is committed when individuals unlawfully gain access to customer telecommunication systems. This is a criminal offense. Currently, we do not know of any telecommunications system that is immune to this type of criminal activity. NEC America will not accept liability for any damages, including long distance charges, which result from unauthorized and/or unlawful use. Although NEC America has designed security features into its products, it is your sole responsibility to use the security features and to establish security practices within your company, including training, security awareness, and call auditing.
NOTICE
While every effort has been made to ensure accuracy, NEC America will not be liable for technical or editorial errors or omissions contained within the documentation. The information contained in this documentation is subject to change without notice.
This documentation may be used only in accordance with the terms of the NEC America License Agreement.
NEC America, Inc., Corporate Networks Group 4 Forest Parkway
Shelton, CT. 06484 Telephone: 203-926-5400 Fax: 203-929-0535 Web site: cng.nec.com
TRADEMARKS
NEC, NCS Serv, NCS Ware, Extended Caller ID, N-TeliTouch, NCS Link, NCS Console, NCS Admin and N-TeliCall are trademarks or registered trademarks of NEC.
All other brand names mentioned are trademarks or registered trademarks of their respective manufacturers.
Copyright © NEC America 2001. All rights reserved.
Table of Contents
Contents
CHAPTER 1
NCS Serv Telephone Functions . . . 1
Basic Functions . . . 1
Making Calls. . . 1
Answering Calls . . . 1
Putting a Call on Hold . . . 1
Transferring Calls . . . 2
Centrex Transfer . . . 2
Conference Calls. . . 3
Consultation . . . 4
Call Park . . . 4
System Call Park and Silent System Call Park. . . 5
Single Call Waiting. . . 5
Multiple Call Waiting . . . 6
System Callback (to Remote Location) . . . 7
Using NCS Serv VoIP . . . 7
Calling a Remote Extension Directly over IP. . . 7
Calling Remote Auto Attendant or Operator . . . 7
Calling a Remote Number (Hop Off Dialing) . . . 8
Voice Over IP Trunk Call Support . . . 9
Supported Features . . . 9
Remote Locations IP Dialing Chart . . . 11
Using Feature Codes . . . 12
Answering Calls . . . 12
NCS Mail Quick Features. . . 14
Making Calls. . . 14
Call Management . . . 15
Workgroup Features . . . 16
Workgroup Supervisor Features . . . 16
Other Features. . . 17
Operator Features . . . 18
Table of Contents
CHAPTER 2
Using NCS Mail Voice Messaging . . . 21
Logging In . . . 21
Transfer to NCS Mail Feature . . . 22
Returning to Auto Attendant from NCS Mail . . . 23
NCS Mail Main Menu Options . . . 23
Listening to Messages . . . 23
Sending Messages. . . 25
Making a Call from within NCS Mail . . . 25
Personal Options . . . 26
Recording Greetings . . . 26
Changing your Password . . . 27
Using Message Notification . . . 28
Using Reminder Calls. . . 29
Call Forwarding . . . 30
Feature Tips . . . 30
Using Distribution Lists . . . 31
Enable/Disable IP Extension . . . 32
Dynamic Messaging . . . 33
N-TeliCall . . . 33
Private Messaging. . . 34
NCS Mail Mixed-Media Messaging . . . 35
Accessing NCS Mail Mixed-Media Messages . . . 35
CHAPTER 3 Using N-TeliTouch . . . 39
Logging In . . . 39
The Main Menu . . . 40
Setting Call Management . . . 42
Speed Dial Setup . . . 44
CallView . . . 44
Workgroup View . . . 47
Message Notification Setup . . . 49
N-TeliFind, One Number Access . . . 50
Telephone Feature Codes . . . v
NCS Mail Quick Features:. . . v
Making Calls: . . . v
Answering Calls:. . . v
Call Management: . . . v
Workgroup Features:. . . vi
Workgroup Supervisor Features: . . . vi
Table of Contents
Telephone Feature Codes . . . vii
NCS Mail Quick Features:. . . vii
Making Calls: . . . vii
Answering Calls: . . . vii
Call Management: . . . vii
Workgroup Features: . . . viii
Workgroup Supervisor Features: . . . viii
Basic Functions
Telephone
Functions
C h a p t e r 1
NCS Serv Telephone Functions
NCS Serv provides a broad range of call-handling and dialing features. For the most effective use the system, you will want to browse through this section and keep it handy for future reference.
This guide refers to the FLASH button on the telephone device.The flash function is the off-hook flash used, for example, to take the other call in a simple call-waiting situation. Some telephones may provide a LINK or similarly labelled button that provides the same function.
Basic Functions
Making Calls
• To make an internal call to another extension, lift the handset off-hook, wait for dial tone and dial the extension number.
• To make an external call, lift the handset off-hook, wait for dial tone, dial the designated outside line access digit and dial the phone number. The outside line digit(s) are provided by your administrator.
Answering Calls
When the telephone rings, lift the handset off-hook and speak into the transmitter. There may be different rings depending on who is calling. When Distinctive Ringing is enabled on your system, three different ringing patterns may be heard:
• Internal Call = short double rings
NCS Serv Telephone Functions
1. System Hold - Press the FLASH button. If the system is set up to
play music on hold, the outside party will hear music.
DO NOT HANG UP (hanging up will disconnect the call)
Press the FLASH button again to re-connect to the call.
2. Extension Hold - Press the HOLD button (if your phone has one).
This connects a holding circuit across the line. Hang up the handset. This will not disconnect the call. Nothing is heard by the outside party when placed on hold this way.
To reconnect to the call, lift the handset off hook.
Transferring Calls
To transfer the currently connected call:
1. Press the FLASH button.
2. At the dial tone, dial the third party’s extension number, or if permitted, a trunk-line access prefix and an external phone number.
3. When the third party answers, announce the call or simply hang up. When hanging up, use the Release button if available or keep the hook-flash down for a couple of seconds to make sure the call is transferred.
To abort the transfer and reconnect to the original caller, press FLASH again before the transfer is complete.
Centrex Transfer
If you have a Centrex line, you can use this feature to transfer an external call to an outside number without having to tie up two trunk lines. Once the transfer is complete, the external caller’s line connects directly to the outside number. Since there are no longer any connections to internal users, internal trunk lines are then dropped, freeing up system trunk line resources for other calls.
To complete a Centrex transfer:
1. Press FLASH, then *.
2. Dial the second party’s phone number (no need to dial the prefix for trunk-line access such as 9) and either hang up or announce the call.
Basic Functions
Telephone
Functions
Transferring Calls into NCS Mail
To send an outside call into the NCS Mail Voice Messaging system, press
FLASH # 4 0.
Transferring Calls Directly to a User’s Voice Mailbox
To transfer a call directly into a user’s voice mail, press FLASH ## and the user’s extension number. When you transfer a call this way, you do not need to set the user’s station on Do-Not-Disturb or wait for the telephone to finish ringing.
Transferring Calls to an Auto Attendant
To transfer a call to the Auto Attendant, press FLASH # 15 and the two or three digit Auto Attendant number. For example, if 01 is the initial greeting to which you want to send the user, press FLASH # 1 5 0 1.
Conference Calls
You can place conference calls including up to 5 other parties, and you can speak privately with each party before adding them to the conference call. Any internal user is able to add parties to the conference call.
The quality of the conference call depends on the quality of service available with the local telephone company.
To initiate a conference call while connected to the first party:
1. Press FLASH.
2. At the dial tone, dial the next party’s phone number.
3. Wait for the third party to answer and announce the conference call.
4. Press # to put all three parties into the conference call.
5. During conferencing, any internal conference participant may press
FLASH, dial the next party’s number, and press # to bring the person
into the conferencing session.
NCS Serv Telephone Functions
Depending on the type of board, the each Quantum board could run up to 4, 8, or 12 extensions. There is no limit to conferencing extensions from the same board.
For all conferences on a single board, the system allows up to 4 extensions total from any of other boards, in any combination, at any one time.
For example, if Conference #1 includes 4 extensions from other boards, Conference #2 and #3 cannot have any. If Conference #1 includes only 2 extensions from other boards, 2 other extensions could be used by Conference #2 or #3.
If these limits are reached, the system rejects attempts to conference additional parties to the call.
Consultation
To place the caller on hold and speak with a person at another extension:
1. Press FLASH and dial the extension number of the person you wish to speak with.
2. When you are finished, press FLASH again to disconnect the consultation and return to the original caller.
Call Park
You can park calls and then pick them up at your current extension or another extension. After a time-out period—set in the NCS Ware Administrator—parked calls ring the extension at which they are parked.
To park a call:
1. Do one of the following:
• To park the call at the current extension, press FLASH # 31 and hang up.
• To park the call at another extension, press FLASH # 31 followed by the extension number. For example to park the call at ext. 487, press FLASH # 3 1 4 8 7.
Basic Functions
Telephone
Functions
System Call Park and Silent System Call Park
System Call Park allows user to park a call at a public “location” by
entering FLASH #41. The system announces where the call is parked—a location number. Calls parked by a user will ring that user’s extension after the time-out period expires.
You can enable the Silent System Call Park feature to by pressing #73 on your telephone keypad. This feature is used to disable the system from announcing the “location” of a call when using the System Call Park feature. This announcement can be confusing when using a graphic interface applications such as NCS Console or N-TeliView. This feature also eliminates having to wait for the location number to be announced before moving on to the next task.
To retrieve the parked call, press # 4 1 and then dial the announced location number where the call was parked.
Single Call Waiting
To use call waiting, it must have been enabled either for the system in the NCS Ware Administrator or by the user in N-TeliView or N-TeliTouch. The latter is described in “Setting Call Management” on page 42.
If a call comes in while you’re on the telephone, the system will beep up to three times over a 24 second period before the call is routed into voice mail. To answer the call:
1. Press FLASH to put the first call on hold and simultaneously connect to the waiting call.
2. Press FLASH again to return to the first call. (You may continue to press Flash to go back and forth between the calls.)
With Single Call Waiting enabled, you cannot transfer or park an existing call before answering a waiting call.
Distinctive Call Waiting Tone
NCS Serv Telephone Functions
Multiple Call Waiting
This feature enables a “personal” queue that allows you to handle multiple incoming calls by letting callers wait in queue until you answer the call. When this feature is enabled, you can transfer or park the current call before answering the next call in queue.
Multiple Call Waiting must be enabled for your extension by the system administrator before it can be used.
Before being placed in queue, the caller hears an Initial Greeting. Once in the queue, the caller hears a Subsequent Greeting every 30 seconds. You can change or customize these greetings in NCS Mail at the Personal
Options menu as described in “Recording Greetings” on page 26.
In queue, the callers can press pound (#) to exit the queue and leave a voice mail message or, if your organization has an operator, press 0 for the operator. You may want to remind users of these options in the greetings.
To answer calls in a Multiple Call Waiting situation:
• During a call, you will hear an alert tone (audio beep) for each new call that is added to the queue.
• If you hang up, the telephone will ring with the next caller in queue.
• If the first caller hangs up, you will hear a fast busy tone which indicates that there is a another call in queue. To pickup the call, press
the FLASH key.
1. To park or transfer a call before answering the next call, press the
FLASH key and do one of the following:
• To transfer the call, enter the extension or phone number and hang up.
• To park the call using Personal Call Park, press # 31, enter an extension number only if you want to park the call at an extension other than your own, and then hang up (see page 4).
• To park the call using System Call Park, press # 41, note the parked call “location” number, and then hang up.
Using NCS Serv VoIP
Telephone
Functions
System Callback (to Remote Location)
You can have NCS Serv call you back at a remote location. This is useful for mobile users who don’t want to accrue expensive toll charges while traveling, especially from international locations where there is no access to toll-free numbers.
In order to access this feature, System Callback must be configured in the Auto Attendant by the system administrator.
To use the System Callback feature:
1. Call the NCS Serv system you want to call you back.
2. Using the Auto Attendant, select the System Callback option.
3. When prompted, enter your extension number and password.
4. Enter the number for NCS Serv to call you back and press # at the end of the number. When you enter the number, it should be exactly as NCS Serv will dial it back; enter a 1 and the area code if it is a long distance number or 011 and the country code if it is an international number. You do not need to enter an outside line access digit (e.g. 9).
5. Hang up. NCS Serv will call you back at the number you specified.
6. When prompted, enter your password. At successful login, you are connected to the Auto Attendant.
Using N C S Serv VoIP
Calling a Remote Extension Directly over IP
To call a remote extension directly over IP:1. Dial the IP trunk access code (e.g. 8).
2. Dial the destination ID (e.g. 1 to select site 1), if applicable.
3. Dial the destination extension number (e.g. 101).
1. Dial the IP trunk access code (e.g. 8).
2. Dial the destination ID (e.g. 1 to select site 1), if applicable.
Calling a Remote Number (Hop Off Dialing)
If your NCS Ware systems are configured to allow Hop Off dialing—using a remote trunk to place an outgoing call—you can do that as follows:
1. Dial IP trunk access code (e.g. 8).
2. Dial the remote system ID digit (e.g. 3 for site 3).
3. Dial *, which selects the PSTN trunk with the lowest value in the access code.
4. Dial the phone number (e.g. 14085551212).
5. Optionally, press # to indicate the end of the phone number. This will speed up the call.
For example, to call 650 555-4444, using your local IP trunk access code of 8 and the remote system with an ID of 3, you would dial 8 0 *
16505554444#, this will call 14085551212 using a CO trunk on the remote system.
You can also replace the * with a 9 to select the remote access trunk access code 9. The specific trunk access code only works for ‘9.’ You cannot select ‘8’,’ 7,’ or ‘6,’ etc., as the trunk access code using this dialing method unless the remote extension for this system is set to ‘unknown.
Note: The remote Extension Length must be always be set to None for
the remote system entry, if using Hop Off Dialing.
Hop On Dialing to a Remote Extension
To hop onto a remote extension:
1. The incoming call must come in over T1 or the CO to an extension.
Voice Over IP Trunk Call Support
Telephone
Functions
Voice Over IP Trunk Call Support
If your system is set up with Voice Over IP, you can use the following trunk-related NCS Serv features during IP trunk call sessions.
Supported Features
The following features are supported while dialing through IP trunks:
• Incoming and Outgoing Trunk Calls - you must dial the IP trunk access code to make outgoing calls via an IP trunk.
• Call Transfer To and From IP Trunk (Blind and Supervised) - you must dial the IP trunk access code and all necessary prefixes to transfer calls via an IP trunk.
• N-TeliFind, One Number Access - when entering “outcall” numbers via N-TeliTouch or NCS Admin, you must add the IP Trunk Access number. For example, if you want NCS Serv to dial the extension 300 at a remote NCS Serv where the location ID (Dialed Digits) is 1 and the IP trunk access code is 8, you must enter 81300 as the outcall number.
• Message Notification
• Reminder Calls
• Multi-Location Conferencing
• Call Park
• Call Waiting
• Call Forwarding
• Automatic Call Distribution
• Auto Attendant
• System CallBack over IP Trunk
• Calling Out from Voice Mail
• Dial Last Caller - NCS Serv will use an IP trunk to dial the last caller if that call was received via an IP trunk.
• Call Restrictions
• Speed Dialing - be sure to enter all appropriate prefixes such as IP trunk access code, Dialed Digits, etc.
• Call Accounting
• Caller ID - displays location and extension number. If an incoming call is from an unspecified IP host, the IP address is used instead of location name.
• Voice Mail
• Microsoft Exchange Integration
• NCS Console Client Support - you can use NCS Console to handle calls to and from IP trunks.
• N-TeliTouch Support - all features accessible via N-TeliTouch (N-TeliFind, Message Notification, etc.) can be used with IP trunks. Call View and Workgroup View windows also show call activities over IP trunks.
Remote Locations IP Dialing Chart
Telephone
Functions
Remote Locations IP Dialing Chart
To use IP trunks to dial remote NCS Serv locations, generally you need to know the IP trunk access code, the remote location ID (the digit(s) you dial to reach the remote server), and the remote extension you want. You can use the following chart to list the IDs and extension lengths for each remote NCS Serv system.
IP Trunk Access Code: (e.g. 8)
Location/Destination Remote Loc. ID) (Dialed Digits)
Extension Length (at remote location)
(example) San Jose 1 3
Using Feature C o d e s
The following sections describe additional telephone features used for call handling and management. To use any of these features,
1. Lift the handset off-hook and wait for the dial tone.
2. Dial the keys indicated in the “DIAL” column.
Answering Calls
Feature Dial* Description
Individual Call Pickup
#29 <ext>
Connects to the local set with extension number <ext>.
System Call Pickup (any ringing phone)
#30 Connects the call of any ringing telephone to the
local set. Personal Call Park FLASH #31, then hang up; OR FLASH #31 <ext>, then hang up
Parks the call to later pick up from this or another station. Or park the call at another station by pressing FLASH #31 and the extension number of the other station. You can have up to 50 calls parked per station simultaneously. Parked calls ring the extension upon time-out. Time-out time is configurable, with a default of 2 minutes.
Personal Call Park Pickup
#31 <ext>
Picked up the call parked at extension number <ext>
System Call Park FLASH #41
Park a call at a public “location” station by entering FLASH #41. The system announces where the call is parked (a location number). Calls parked by a user will ring that user’s extension upon time-out after 2 minutes.
System Call Park Pickup
#41 <loc.>
Using Feature Codes
Telephone
Functions
Hands Free Intercom Mode
#81 Allows you to receive calls through the speaker
phone without having to pickup the handset to answer. The system will connect the call automatically within one ring.
Outside calls will ring the telephone and you must answer manually by pressing the Flash key. You can use the handset to answer if that is preferred.
Caution, Security Issue: If you are away from
your desk for a moment, or if the ringer is off, you may not be aware that a call has come in and the caller is connected and listening to whatever conversation you are having.
Pressing #81 activates, pressing #81 a second time deactivates this feature.
You must use a speaker phone, and the speaker must be turned on to use this feature. When a call comes in, you hear a ringing tone from the speaker, and the call is automatically connected.
Handsfree Man-ual Mode (for headset use)
#82 Allows you to receive internal and external calls
through a headset (or speaker phone). It is intended to be used with a PC desktop user interface such as NCS Console, N-TeliView or Center.
The call is not answered automatically. You must press FLASH (or Link) or use the Answer button in N-TeliView (or double-click the call) to take the call.
You must use a speaker phone, and the speaker must be turned on to use this feature. If the speaker phone is not on, the telephone still rings, but you must answer using the handset.
Pressing #82 activates, pressing #82 a second time deactivates this feature.
N C S Mail Quick Features
The following voice messaging features are accessible in the same way as telephone features, without having to login to NCS Mail.
Making Calls
1Feature Dial Description
Greeting Menu # 11 <pass-word>
Follow the system prompts to change your greeting.
Password Menu # 28 Follow the system prompts to change your password.
Feature Dial*
* <ext> = extension num.; <nn> = 2-digit num.; <loc.> location num.; <string> = character string
Description
Dial by Name #34
<string> #
After entering #34, enter the letters of the name beginning with last name, followed by the first name, followed by #. Use 1 for Q and Z. The system searches for a unique name and calls the extension associated with the name.
Station Privilege Over-ride
#35 <your ext> <pass-word>
To have your own calling privileges at that telephone set for the next call only. After the call, the telephone set returns to its original call restrictions.
Dial Last Caller #69 Dials the last incoming call number.
Station Speed Dial #77 <nn> Dials the 2-digit speed dial number <nn>. See “Station Speed Dial Setup” on page 17.
System Speed Dial #88 <nn> Dials the 2-digit system-wide speed dial number <nn>.
Last Number Redial #99 Saves and redials the last number dialed.
1 If you are unable to make calls within certain area codes, check with your
Using Feature Codes
Telephone
Functions
C a l l M a n a g e m e n t
Feature Dial* Description
Station Log Out #26 <pass-word>
Deactivates, shuts off, your extension, forwarding all calls to voice mail. This feature can be used to move your extension from your telephone set to another telephone set in the office.
Station Log In #27 <ext> <pass-word>
Reactivates your extension at your original telephone set or another one. If using a different telephone set, that set must be deactivated for any prior extension.
#27 can also be used to hear the currently active extension number for the telephone set.
Account Code (before calling)
#32 <acct. num>,
After entering the account number, a maximum of ten digits, make the call when you hear the dial tone. This feature can be used for client billing purposes. The System Administrator should assign all account codes in order to prevent duplication of codes by different users.
Account Code (during a call)
FLASH (wait for dial tone) #32 <acct. num> #
Press FLASH, wait for the dial tone, enter #32 and the account code followed by #. You will then be reconnected to the call.
Do Not Disturb / Deactivate Do Not Disturb
#33 Activates Do Not Disturb when it’s off,
deactivates it when it’s on. While activated, all calls are forwarded to voice mail.
Call Forward-ing #36 <pass-word> <destina-tion> #
Forwards all call to the destination, which can be an internal extension or external phone number including access code, long distance prefix and area code. To deactivate forwarding, press #36 again, or deactivate from within NCS Mail. There is a 1-Hop limit to call forwarding, as discussed on page 42.
Remote Call Forwarding
#37 <your ext>
W o r k g r o u p Features
Workgroup Supervisor Features
1Feature Dial*
* <wkgp ext> = workgroup pilot extension num.; Description Workgroup Call Pickup #29 <wkgp ext>
Pickup incoming calls for your workgroup and ignore other calls into the system.
Workgroup Log In #54 <wkgp ext>
For workgroup members only: Logs in to a workgroup.
Workgroup Log Out #56 <wkgp ext>
Logs out and block workgroup calls but receive other calls to your extension.
Status Ready†
† Features added in version 4.0
#90 Tells the system your extension is ready to
receive workgroup calls. This can be used to end a call Wrap Up Time delay.
Status Not Ready† #91 Tells the system not to route workgroup
calls to this workgroup extension.
Feature Dial*
* <wkgp ext> = workgroup pilot extension num.; Description Workgroup
Silent Monitor
#59 + <wkgp ext> +<wkgp pwd> + <agnt ext> + 1
Listen to calls coming into the specified workgroup. Not used on outgoing calls.
Workgroup Barge In
#59 + <wkgp ext> +<wkgp pwd> + <agnt ext> + 2
Intervene in a conversation between an agent and an incoming caller.
1These features were added in version 4.0. They also require a Triton Resource
Using Feature Codes
Telephone
Functions
Other Features
Feature Dial* Description
Feature Status Check
#22 Retrieves an announcement about currently
activated telephone features. In addition, the
dial tone changes also when the following
features are activated: Do Not Disturb, Call Forwarding, Remote Call Forwarding, Hands-Free Mode, Dial Tone Mute Mode, Outside Call Blocking (Operator only) and Operator Off-line (Operator only).
Station Speed Dial Setup
#25 <nn> <phone num> #
Program a station speed dial phone number assigned to a 2-digit dialing number between 00 and 19. The phone number can be up to 20 digits, and must include all necessary digits such as outside line access digit, 1 for out of area numbers and the area code. When you have finished, press #.
Hang up when done, or you can continue to set up other speed dial numbers by pressing # again.
Overhead Paging #44 If available on your system, connects to the overhead broadcast device. Speak into the handset and hang up when finished.
Overhead Paging by Trunk
#45 If available on your system, directs a call to a
particular trunk with a paging ID broadcast. Allows broadcasting through a trunk without checking call progress.
Feature Tips #55 Plays helpful tips and reminders for optimal use of NCS Serv. There are eleven tips total and a different one is played each time you access Feature Tips. See page 30 for more information.
Silent System Call Park
#73 Disable the system from announcing the
Operator Features
This section is provided specifically for the designated Operator.
Depending on your organization, this may be a single person or a number of people.
Call Handling and the Auto Attendant
If your system uses the Auto Attendant, it can handle and route incoming calls automatically with prompts and menus; most incoming calls do not reach the Operator.
The call will ring at the Operator’s desk if the caller dials 0 while listening to options given by the Auto Attendant. The sections at the beginning of this chapter offer instructions on basic answering, putting calls on hold, and transferring calls.
Checking the General Mailbox
The System Administrator may set up a General Mailbox where callers can leave messages if they do not know who to speak with or when the Operator is unavailable. This mailbox works like any other voice mailbox and has an extension number and password. Be sure to check this mailbox frequently and forward messages to the appropriate person as soon as possible.
Operator on Hold
To place a call on hold, do one of the following:
• Press the FLASH button to play music on hold, or
• Press the HOLD button to place the caller on hold without music.
Operator Features
Telephone
Functions
Operator Off-line
When the Operator Off-line feature is activated, all calls are directed to the Auto Attendant. When callers dial 0 in the Auto Attendant, the system transfers the call to the next extension in the workgroup if one is
configured. If there is no operator extension available, the system informs the caller that the Operator is not available and to leave a message in the Operator’s mailbox.
To activate this feature, press # 39. When it’s active, you can deactivate it also by pressing # 39.
Outside Call Blocking
Voice Mail
C h a p t e r 2
Using NCS Mail Voice Messaging
This chapter describes the use of the features and functions available in NCS Mail, the voice messaging subsystem of NCS Serv. NCS Mail include basic voice mail functions and more sophisticated features such as an interface with email.
NCS Mail voice prompts provide instructions and options for all functions. From any menu, press 0 to repeat your options or * to return to the previous menu.
The chart at the end of the NCS Serv User Guide will help you better understand the menu structure.
Feature Tips
Each time you login to NCS Mail, you hear a Feature Tip—helpful tips and reminders of the most useful features for optimal use of NCS Serv. See “Feature Tips” on page 30 for more information on this feature as well as instructions on how to enable/disable this feature.
Logging In
First time access
From your station, press # # and then enter your default password, which is normally your extension number. After login, you’ll hear the NCS Mail Main Menu, described on page 23.
Logging in from Another Station or as a Virtual Extension
Press #, followed by your extension number, followed by your password.
R e m o t e L o g i n
For remote login from outside the office, dial your company phone number and during the Auto Attendant greeting, press #, followed by your extension number, followed by your password.
For standard remote login, the Auto Attendant must be configured. If Auto Attendant is not used in your office, someone in the office (such as the operator) must transfer you into NCS Mail. Please see “Transfer to NCS Mail Feature” on page 22.
A b o u t P a s s w o r d s
• Valid passwords are from 2 – 8 digits in length and can contain numbers or letters A- Z. The letters map to numbers as follows:
Transfer to NCS Mail Feature
If the Auto Attendant is not active when you want to login in from a remote telephone, you must have the operator or any other internal user transfer you into NCS Mail. There are two ways to transfer users into NCS Mail:
• Normally, anyone in the office is able to send an outside user into NCS Mail by pressing FLASH #40 while connected to the user. The outside caller will then be prompted to enter their extension number and password.
• Anyone at the office can send your call to NCS Mail by pressing FLASH ## and dialing your extension number. Press * during the voice mail greeting for your extension. You then enter your password. If you are transferred to voice mail for someone else’s extension, press # to enter your extension and then your password.
Numbers Letters Numbers Letters
2 A, B, C, a, b, c 7 P, R, S, p, r, s
3 D, E, F, d, e, f 8 T, U, V, t, u, v
4 G, H, I, g, h, i 9 W, X, Y, w, x, y
5 J, K, L, j, k, l 1 Q, Z, q, z
Voice Mail
Returning to Auto Attendant from NCS Mail
After a remote login, you can dial 9 from the main menu to return to the Auto Attendant, provided the Auto Attendant is configured and activated. This allows you to access voice mail and also speak with or leave messages for others on the same phone call.
N C S Mail Main Menu Options
Once you’ve successfully logged into NCS Mail, you are presented with the following options at the Main Menu:
1. Listen to New Messages
2. Review Saved Messages
3. Send a Message
4. Access Personal Options
5. Access Private Messaging Options
6. Phrase Management (system manager extension only)
8. Review Mixed-Media Messages
9. Transfer Out of Voice Mail (for remote access NCS Mail only)
#. Make a Call
Listening to Messages
If there are new messages in your voice mail box, the dial tone changes from a constant tone to a broken tone. At the Main Menu, NCS Mail announces the presence of new and saved messages.
To check voice mail messages, press…
• 1 for new messages
• 2 for saved messages
To listen to Mixed-Media messages (see page 35), press 8 and then…
Disposing of the Messages
After or while listening to a new or saved message, you have the following options. Press…
• 1 to delete
• 2 to replay
• 3 to save
• 4 to forward a copy of the message with an introduction
• 5 to call the sender.
This is the N-TeliCall feature described on page 33. Press *** to disconnect from the call and return to NCS Mail.
The sender’s caller ID information is automatically captured by the NCS Serv if the caller is an internal user or an outside caller who has either a publicly listed number or has entered their callback number in the delivery options menu after leaving the message. But if the caller ID is not available, you can still use the N-TeliCall feature by manu-ally dialing the number.
When using N-TeliCall with Cellular or PCS telephones, see the dis-cussion in the next subsection.
• 6 to reply to the message
• 7 to rewind (during message playback)
• 9 to fast forward (during message playback)
• # to skip
• (To listen to a skipped message, press 1 again at the Main Menu.)
See your System Administrator to activate or deactivate the announcement of time and date for each message before playing the message content. The time stamp can be skipped by pressing 9 during playback.
About Outcalls to Cellular or PCS Phone Numbers
Voice Mail
S e n d i n g M e s s a g e s
To send a message:1. At the Main Menu, press 3
2. Record your message and press # when finished.
If you need to re-record the message, press * when prompted.
3. Select a destination by entering one of the following:
• Enter destination extension number
• # to enter destination extension by name. Enter last name followed by the first name and press # when finished. Use 1 for “Q” and “Z”.)
The following two options were added in NCS Ware version 4.0.
• 01 followed by a personal Distribution List number to send a message to a personal distribution list. See “Using Distribution Lists” on page 31 for information on setting up distribution lists in NCS Mail. You can also set them up in N-TeliView.
• 02 followed by a system Distribution List number to send a message to a system distribution list. System distributions are set up by the system administrator.
4. After selecting the destination, press one of the following:
• # to send immediately
• 1 for delivery options, then 1 for urgent delivery, or 2 for future delivery. Urgent messages are placed at the beginning in the queue of new messages to be heard, before other non-urgent messages.
• 2 to re-enter a destination as in step 3.
Making a Call from within NCS Mail
For external numbers, dial the outside line access code (e.g., 9 or 8) and any long distance prefix such as 1 and area code. Press *** to disconnect from the call and return to NCS Mail.
Personal Options
Personalize your NCS Mail by creating unique greetings and customizing the system to notify you of important calls or remind you about meetings and action items.
At the Main Menu, press 4 for the following Personal Options:
• Personal Greetings
• Password
• Message Notification
• Reminder Call
• Call Forwarding
• Feature Tips
• Distribution Lists (added in NCS Ware Version 4.0)
• Enable/Disable IP Extension
Recording Greetings
At the Personal Options menu, press 1 to record greetings, then press…
• 1 to record your Personal Greeting.
Record your greeting and press # when finished. Example: “Hi, this is Mary Smith. I am unable to answer your call at this time. Please leave a detailed message and I will return your call promptly.”
• 2 to record your Directory Name.
Record your full name and press # when finished.
• 3 to select which greeting to use (the system greeting or personal
greeting).
Personal Options
Voice Mail
The following options, 4 and 5, are available only when Multiple Call Waiting is enabled for your extension. See “Multiple Call Waiting” on page 6. These features both require activation as discussed in the preceding paragraph.
• 4 to record an Initial Greeting
Callers will hear the Initial Greeting when placed in your personal queue. Example: “Hi, this is Mary Smith. I’m on the other line at the moment. If you would like to hold, please stay on the line. To leave a message, press pound (#) at any time. Press 0 for the operator.”
The system default Initial Greeting is “<your directory name> is on the phone and will be with you as soon as possible. You may hold or press the # key to leave a message”.
• 5 to record a Subsequent Greeting
Callers in your personal queue will hear the Subsequent Greeting every 30 seconds. Example: “Hi, I’m still on the other line. Please continue to hold or press pound (#) to leave a message. Press 0 for the operator.”
The system default Subsequent Greeting is “<your directory name> is still on the phone. You may continue holding or press # to leave a message”.
C h a n g i n g y o u r P a s s w o r d
To protect your voice mail system, memorize your password without writing it down. Change your password frequently, and change it any time you suspect it has been compromised.
To change your password, after pressing 4 at the Main Menu to hear the Personal Options …
1. Press 2 for the Password options
2. Press 1 to change the password
Using Message Notification
When you’re away from your desk, you can use the Message Notification function to alert you about incoming messages. When a caller leaves a message in your voice mailbox, the system calls the extension, phone number or pager that you designate—the delivery phone number. NCS Mail then prompts you for your password and places you at the Main Menu.
About the Delivery Number
When setting this delivery phone number, NCS Mail asks you to enter the number (up to a maximum of 64 digits), using the long distance prefix 1 for out of area phone numbers. You must also identify the type of number: extension, phone number, or pager. You don’t need to enter the trunk or route access trunk or route access code as part of the number.
The destination number cannot be a virtual extension or workgroup pilot extension. Also, please see “About Outcalls to Cellular or PCS Phone Numbers” on page 24.
If the system is unable to reach you for Message Notification or Reminder Calls, it will play “Attempts to reach you earlier were unsuccessful” the next time you login to NCS Mail. Also, the system cannot reach you at an outside location if there are no trunk lines available when the system attempts to make the call.
To Set Message Notification
After pressing 4 at the Main Menu to hear the Personal Options menu…press 3 to hear the Message Notification options, then press…
• 1 to enable notification for urgent messages only
• 2 to enable notification for all messages
• 3 to disable message notification
• 4 to set or change notification phone number, pager number or
extension.
• 5 to set a notification schedule, and then select one of the following
options:
— 1 to activate notification at all times
— 2 to activate notification during off hours
— 3 to setup your own notification schedule.
Personal Options
Voice Mail
the hour digit is “1” in the case of one o’clock for example, press # after the entry. Always enter two digits for minutes. NCS Mail will only accept 10 minute intervals such as 10:10 or 10:20 and not 10:15.
Using Reminder Calls
You can nudge your memory about important meetings, calls, or other events by setting up a Reminder Call. NCS Mail will ring you and play back your pre-recorded message at a specified time and date, to a specified delivery phone number. For example, you can have NCS Mail call you at home tonight to remind you to bring a file to work the next morning!
The delivery number used by Reminder Call is the same as the one used by the Message Notification function. If you want to use a different number than the one set in Message
Notification, open the Message Notification options by pressing 3 on the Personal Options menu, then press 4 to set or change the delivery number. Also, please see “About the Delivery Number” on page 28.
To Set Up a Reminder Call
After pressing 4 at the Main Menu to hear the Personal Options menu, press 4 again to hear the Reminder Call options, then…
1. Press 2.
2. At the prompts, set the time and date for the call
If the hour digit is “1”, press # after the entry. Always enter two digits for minutes. NCS Mail will only accept 10 minute intervals such as 10:10 or 10:20 and not 10:15.
3. Record the reminder message, then press #.
4. Select one of the following:
— 1 to deliver the reminder to your extension
R e v i e w i n g S c h e d u l e d R e m i n d e r C a l l s
If a scheduled reminder call has not been delivered, there is an additional option on the Reminder Call menu: you can press 1 to review scheduled reminder calls.
Call Forwarding
You can configure Call Forwarding from your telephone or from a remote locations by dialing into NCS Mail and following the steps listed here:
Forwarding calls to a pager is possible but not recommended since callers will only hear what is heard when calling a pager and will not know to enter a return phone number unless instructed. Also, please see “About Outcalls to Cellular or PCS Phone Numbers” on page 24.
To Set Up Call Forwarding
After pressing 4 at the Main Menu to hear the Personal Options menu, press 5 to set up call forwarding, then…
1. Enter the destination number.
If it is an external number, begin with the outside trunk or route access digit and any long distance prefix digits such as 1 and area code.
2. After entering the destination number, press #.
3. This forwards all calls to the destination number until you login, select the call forwarding option again and disable it.
Feature Tips
Each time you login to NCS Mail, you hear a Feature Tip—helpful tips and reminders about the most useful NCS Serv features. There are a total of eleven tips and a different tip is played each time you access NCS Mail.
Another way to listen to Feature Tips is by pressing #55 on your telephone. You can listen to just one tip at a time or listen to all the tips at once.
Personal Options
Voice Mail
Using Distribution Lists
Distribution List features were added in NCS Ware and N-TeliView versions 4.0.
Distribution lists provide a way to use a single destination number to send messages to a group of people. You can send or forward a message to a list just as you would to an extension. When you send a message to a list, it is sent to everyone on the list.
You can create up to distribution100 lists, and each list can have up to 64 entries. An entry can be an extension of any kind, including virtual or workgroup pilots, or another distribution list, so in effect there is no practical limit to the number of people to which you can send a single message.
When you create lists at your station, they are your personal distribution lists—every extension can have its own lists. There may also be system distribution lists created by your system administrators.
Creating a Distribution List
After pressing 4 at the Main Menu to hear the Personal Options menu, press 7 to access the Distribution Lists menu, then…
1. Press 1 to Add a distribution list.
2. When prompted, enter a 2-digit number to identify the list.
3. When prompted, enter the list members, which can be one of the following forms:
• Extension numbers.
• 01, followed by a System Distribution List number.
• 02, followed by a Personal Distribution List number.
4. The system reads back the entry to you, and you press # to save or * to cancel the entry.
5. Repeat the previous two steps until you’ve added all the list members.
1. Press 3 to Modify a distribution list.
2. When prompted, enter a 2-digit number to identify the list.
3. When prompted, do one of the following:
• To add members, press 1, then follow steps 3 in the immediately preceding procedure, “Creating a Distribution List”.
• To delete members, press 2. When prompted, enter the member number you want to delete. For extensions, enter the extension number. Use 01 or 02, followed by the list number, to specify system or personal distribution lists, respectively.
4. The system reads back the entry to you, and you press # to save or * to cancel the action.
5. If you just added a member, you’re prompted to add another. If you just deleted a member, you’re asked if you want to delete another.
Deleting a Distribution List
After pressing 4 at the Main Menu to hear the Personal Options menu, press 7 to access the Distribution Lists menu, then…
1. Press 2 to Delete a distribution list.
2. When prompted, enter a 2-digit number to identify the list.
3. The system reads back the entry to you, and you press # to confirm the deletion or * to cancel.
Reviewing a Distribution List
To hear a report of list members. After pressing 4 at the Main Menu to hear the Personal Options menu, press 7 to access the Distribution Lists menu, then…
1. Press 4 to Review a distribution list.
2. When prompted, enter a 2-digit number to identify the list. 3. The system reports the list members one by one.
Enable/Disable IP Extension
Dynamic Messaging
Voice Mail
D y n a m i c M e s s a g i n g
NCS Serv provides special Dynamic Messaging features to provide support for business travelers who need these remotely enabled functions.
The N-TeliCall feature enables you to return a call with the push of one button while you are in NCS Mail. Private Messaging provides a way to leave a private message for callers who are difficult to reach.
N-TeliCall
N-TeliCall feature enables the user to listen to messages in NCS Mail, make calls to the parties who left the messages, and then return to NCS Mail (like a N-TeliCall). This feature can allow a traveler to return calls for all messages with one call into NCS Mail from a cellular telephone, for example.
How it Works, with and without Caller ID
When you make a N-TeliCall callback, the system automatically makes the call to the number captured by Caller ID. The Caller ID information is captured for all internal users and for external callers who have a publicly listed, unblocked number or who have entered their callback number in the delivery options menu after leaving the message (see “The Caller’s Options” on page 34).
If the caller ID was not captured, the user can enter the number manually. If it is an external number, be sure to dial the outside line access digit and any long distance prefix digits such as 1 and area code. Also, please see “About Outcalls to Cellular or PCS Phone Numbers” on page 24.
N-TeliCall is configured for each user; check your access with your NCS Serv system administrator.
To use N-TeliCall:
1. After or while listening to a new or saved message, press 5 to call the sender of the message.
The Caller’s Options
After leaving a message, the caller can simply hang up or press # for the following options.
• * to re-record the message
• 1 to specify delivery options
• 2 to attach a call back number
(If the callback number is outside of your outcall accessibility, the system cannot return the call. Please check with your System Admin-istrator for your toll restrictions.)
• # to send the message
After pressing 2, the caller is asked to leave a call back number beginning with the area code. To notify your callers of this option, you may want to mention the option to leave a call back number in your personal greeting. If the caller’s number is a publicly listed number, there is no need to enter their callback number since NCS Serv automatically captures their caller ID information.
Private Messaging
You have the ability to leave a private, detailed message in NCS Mail for a caller in case you are not at your desk or in the office to take the call. This feature is perfect for those who are difficult to reach and want to leave information for callers to pick up. When you leave a private message, the system asks callers to enter the letters of their names (last name followed by first name) to check if they have a private message.
You can have up to five private messages at one time, so you should delete messages that have been heard.
To Leave A Private Message
At the Main Menu, press 5 to access the Private Messaging menu and then proceed as follows:
1. 2 to record a new message
2. At the tone, record message and press #
3. Using the number pad, enter recipient’s last name followed by the first name. Use 1 for “Q” and “Z”.
NCS Mail Mixed-Media Messaging
Voice Mail
To Check Message Status or Delete Messages
To check the status of private messages that have been recorded, at the Main Menu, press 5 to access the Private Messaging menu, then press 1. NCS Serv reports the following:
• The time and date the message was recorded
• The recipient
• Whether the message has been heard
• A replay of the message
• A prompt for you to press 1 to keep the message or 2 to delete it.
N C S Mail Mixed-Media Messaging
NCS Mail can send and receive communications not only in voice mail but email. NCS Mail combines different forms of messages into a “package” called a Mixed-Media message. You can save time and money by sending Mixed-Media messages over the Internet to anyone throughout the world with an Internet address, toll free.
Since all messages (voice mail, e-mail or Mixed-Media messages) go into the same NCS Mail mailbox, you need only to check one location for all messages with your multimedia computer.
When away from the office, access Mixed-Media messaging from anywhere using an access line from an Internet provider to download all unretrieved Mixed-Media messages from the NCS Mail Post Office.
A c c e s s i n g N C S M a i l M i x e d - M e d i a M e s s a g e s
“@your.domain.name”. Please see your System Administrator for your organization’s domain name.
3. Click or select the Get Mail option. Some e-mail client applications may provide a field to cache your e-mail password for the current session so that you don’t have to enter your password every time you click Get Mail. Be sure to enter your e-mail password when prompted.
Retrieving Messages
To retrieve messages using your multi-media computer,
1. Configure your e-mail application (see “Accessing NCS Mail” above).
2. Click on the “Get Mail” icon.
3. All new messages, whether read or unread, are stored in the Inbox folder. Click on the Inbox folder.
4. Individual messages should appear on the right side of the window. Click on a message to read/listen to it.
5. To listen to an audio attachment in an e-mail, click on the attachment to hear the message through the computer speaker. If you do not want others around you to hear the message from your computer, you may listen to the audio portion of the message over the handset of your telephone by pressing 8 at the Main Menu of NCS Ware. Refer to page page 21 for more detailed instructions on listening to messages over the telephone.
Voice mail messages also appear as Mixed-Media messages in the “Inbox” folder. Open it and click on the audio attachment to listen to the message.
C o m p o s i n g a n d S e n d i n g M e s s a g e s
To compose a new message,
1. Click or select the “To: Mail” option and enter your recipient’s e-mail address.
2. Type the text portion of the message (optional).
3. Send an audio attachment with or without a text message by lifting the handset off-hook and dialing # 0.
4. As instructed by NCS Mail, press 2 to record a new audio attachment.
NCS Mail Mixed-Media Messaging
Voice Mail
6. Click the “Send” icon when finished. NCS Mail will attach the voice annotation to the e-mail when it is sent.
Logging In
Web Functions
C h a p t e r 3
Using N-TeliTouch
N-TeliTouch is a Web-based management tool that provides the ability to handle NCS Serv calls options such as call handling, speed dialing, N-TeliFind, CallView, and Message Notification using a standard Web browser. It provides an easy-to-use interface and is accessible from any location that has an Internet connection.
Logging In
Users can access N-TeliTouch Call Management by using any popular browser. To use the CallView function, the browser must be Java capable.
To access and log in to N-TeliTouch:
1. Obtain your organization’s N-TeliTouch URL address from the system administrator. It will be in the form http://[servername]/ N-TeliTouch
2. Open a web browser and go to the N-TeliTouch URL address, where you login by entering your first and last name, extension, and password.
Figure 1. N-TeliTouch Login page
T h e M a i n M e n u
After login, you come to the main menu, which provides access to the following functions.:
• Call management
• Station speed dialing
• CallView — a view of extension activity
• N-TeliFind, One Number Access
Logging In
Web Functions
Figure 2. N-TeliTouch Main Menu
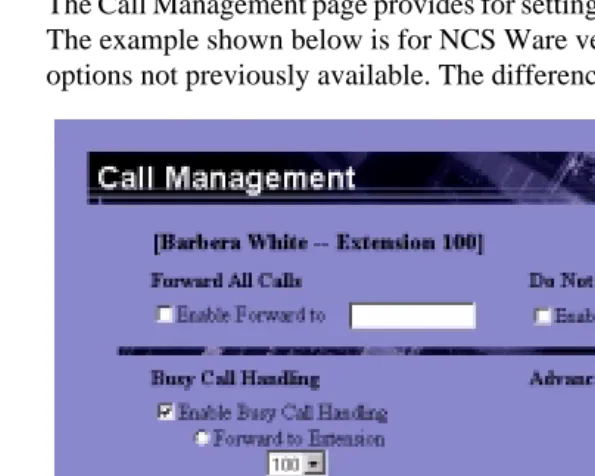
Setting Call Management
The Call Management page provides for setting up incoming call handling. The example shown below is for NCS Ware version 4.0 and includes options not previously available. The differences are explained below.
Figure 3. Call Management Setup page (Version 4.0)
Forwarding All Calls
If you want to forward calls to an external number, begin with the outside trunk or route access digit and any long distance prefix digits such as 1 and area code.
If you want to use N-TeliFind, One Number Access, see page 50.
Setting Call Management
Web Functions
F o r w a r d i n g t o a P a g e r N o t R e c o m m e n d e d
Forwarding calls to a pager is possible but not recommended since callers will only hear what is heard when calling a pager and will not know to enter a return phone number unless instructed.
Do Not Disturb
If you enable Do Not Disturb, all incoming calls are forwarded to voice mail.
Busy Call Handling and No Answer Handling.
You can use these options to specify how you want to handle incoming calls when you’re already on the phone or when you can’t answer the phone, for example, when you’ve enabled the Do Not Disturb status.
NCS Ware version 4.0 added the Busy Call Handling and No Answer Handling option to route calls to the Auto Attendant.
If want to use the Auto Attendant and you don’t know the number of the phrase or menu you want to use, check with your system administrator.
Number of Rings Before Forwarding
This setting is pertains to almost all the options on this page: the number of times the phone should ring before the system decides to forward the call to an extension, voice mail, or the Auto Attendant.
Forwarding Email
The ability to configure Email Forwarding was added in NCS Ware version 4.0.
You can forward email by first selecting the Enable Mail Forwarding check box, then selecting the Forward Email check box and typing in the email address to which to forward the mail.
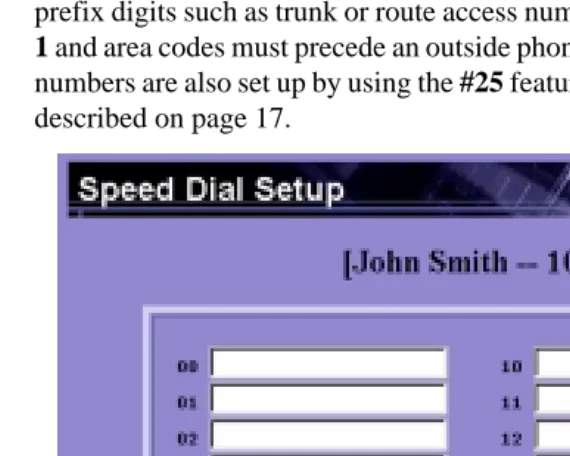
Speed Dial Setup
The Speed Dial Setup page, access by clicking Station Speed on the main menu, allows you to set up to 20 station speed dial numbers. All relevant prefix digits such as trunk or route access number, the long distance prefix 1 and area codes must precede an outside phone number. Station speed dial numbers are also set up by using the #25 feature code on your phone set, as described on page 17.
Figure 4. Speed Dial Setup page
CallView
CallView is a graphical user interface (GUI) that displays the status of all NCS Serv users’ extensions and provides the functionality of a “personal console” without having to install or use TAPI.
You must use a Java-capable Web browser to use CallView. Also, you must have the system administrator enable Multiple Call Waiting for your extension to be able to handle more than one call at a time.
CallView
Web Functions
Figure 5. N-TeliTouch CallView page
The call log box at the top shows the extension or phone number (Caller ID) of incoming calls, the name if available, and the time and date of each call. The green Message indicator turns red when there are messages in the user’s mailbox.
Up to 30 call entries are displayed. This “call log” information is cleared when N-TeliTouch is closed.
Using CallView to Make or Receive Calls
• Answer a call - simply pickup the handset or click the FLASH button
• Take a call off hold—Click the Retrieve button to be reconnected with the call. The Retrieve button changes to a Hold button.
• Transfer a Call - while connected to a call, click the extension to
which you want to transfer the call, then click Transfer.
• Transfer a Call to Voice Mail - while connected to a call, select the
extension to which you want to send the call, then click Voice Mail. The call is directed to voice mail box for the selected extension.
• Setting up Consultation Transfer:
1. While connected to a call, select the extension of the person with whom you want to consult.
2. Click Consultation to connect to the extension.
3. Click FLASH to re-connect to the caller.
• Call Pickup - with the handset off-hook, click an extension that has a
ringing call. Then click the Pickup button to pick up that ringing call at that extension. This is the same as dialing #29 <extension> on the handset to pick up a call.
• Using the Release button - click the Release button to disconnect an
CallView
Web Functions
W o r k g r o u p V i e w
If you login to N-TeliTouch using a workgroup pilot extension number, the CallView page displays WorkgroupView which can be used to monitor a workgroup in ways that are not possible without N-TeliTouch.
The WorkgroupView page is a monitoring interface only. It is used to view call activity, monitor workgroup member activities, and act as a message waiting indicator.
Figure 6. N-TeliTouch WorkgroupView page
The three rows below the title line are the message waiting indicators. They indicate the number and type of messages contained in the workgroup’s mailbox.
The other boxes show the number of calls in queue, the caller IDs if available, and the number of abandoned calls—calls that have left the queue.
At the bottom you see an Update Frequency slide. You can drag the indicator to set the frequency at which to refresh the page data.
The member information box shows a list of workgroup members, and for each member shows the following information:
• Member - shows the extension number of the workgroup member. If
a member has logged out of the workgroup, it indicates this by showing “(out)” next to the member extension number.
• Status - shows whether the member is on the phone (in-use) or not
(idle).
• Num of Calls - shows the number of calls the member has taken
• Ave Call Length - shows the average length of calls that come in
through the workgroup and are taken by a workgroup member.
Message Notification Setup
Web Functions
Message Notification Setup
The Message Notification page allows you to set up how you’d like to be alerted to new messages when you’re away from your desk. You can also set up Message Notification through the NCS Mail voice messaging system, discussed under “Using Message Notification” on page 28 for more information on this feature.
Figure 7. Message Notification setup page (version 4.0)
Use this page to set the following:
• The types of messages on which you want to be alerted.
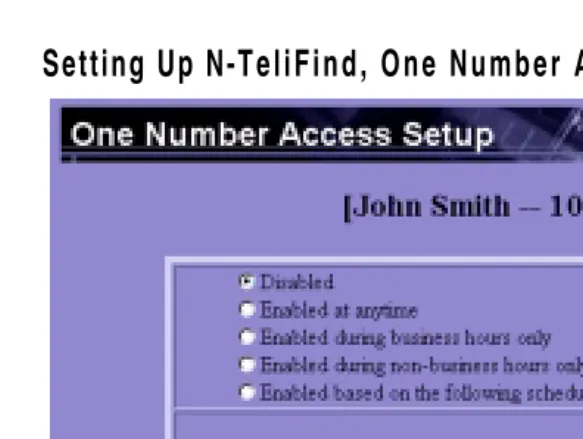
N-TeliFind, One Number Access
If you are expecting calls that you want to receive regardless of where you are, you can have the system send the call to you by dialing pre-determined numbers based on a pre-determined schedule.
When N-TeliFind, One Number Access is active and a call comes in to your extension, the system checks to see if the number represents a call you want to receive. If it finds a match, it calls you at the number you specified.
N-TeliFind depends on the ability to identify the incoming call by the Caller ID. If the system can’t identify the call, it can’t make a match.
If the system is unable to connect the call, the caller is sent into the user’s voice mail.
Before You Set Up N-TeliFind, One Number Access
Before you use N-TeliFind, you need to make sure your call handling settings are appropriate. Keep in mind that all system and extension call restrictions apply for N-TeliFind. For example, if Do Not Disturb is enabled, or if the line is busy, the call will be handled according to the extension’s Busy Call Handling configuration.
To use N-TeliFind, it must be enabled in the NCS Ware Administrator, and to use N-TeliFind to forward to outside lines, that must also be enabled as an Extension Configuration restriction in NCS Admin.Check with your system administrator if you have questions about these settings.
• Enable N-TeliFind on the Call Management page of N-TeliTouch by selecting the Enable One Number Access box.