Release 1.4.2
Zenoss, Inc.
www.zenoss.com
Copyright 2017 Zenoss, Inc. All rights reserved.
Zenoss, Own IT, and the Zenoss logo are trademarks or registered trademarks of Zenoss, Inc., in the United States and other countries. All other trademarks, logos, and service marks are the property of Zenoss or other third parties. Use of these marks is prohibited without the express written consent of Zenoss, Inc., or the third-party owner.
Linux is a registered trademark of Linus Torvalds.
All other companies and products mentioned are trademarks and property of their respective owners. Part Number: 1300.17.331
Zenoss, Inc.
Supported clients and browsers...7
Documentation feedback...7
Change history... 7
Chapter 1: Documented upgrade paths...10
Release dates...10
Upgrade paths included in this document...11
Chapter 2: Downloading and staging required files...13
Downloading Control Center files... 13
Installing the repository mirror...14
Staging Docker image files on the master host... 16
Staging a Docker image file on ZooKeeper ensemble nodes... 16
Part I: Upgrading 1.4.x to 1.4.2...17
Chapter 3: Before upgrading from 1.4.x to 1.4.2... 18
New features that affect upgrades...18
Upgrade best practices...18
Chapter 4: Stopping a Control Center deployment... 19
Stopping Control Center (single-host deployment)...19
Stopping Control Center (multi-host deployment)...20
Chapter 5: Upgrading a master host from 1.4.x to 1.4.2... 24
Updating Docker...24
Loading image files... 25
Updating Control Center on the master host... 26
Chapter 6: Upgrading delegates from 1.4.x to 1.4.2...28
Updating Docker...28
Configuring NFS 4.0... 29
Updating Control Center on delegate hosts... 30
Updating the ZooKeeper image on ensemble nodes...31
Chapter 7: Starting the ZooKeeper ensemble... 33
Chapter 9: Before upgrading from 1.3.x to 1.4.2... 37
New features that affect upgrades...37
Upgrade best practices...38
Chapter 10: Stopping a Control Center deployment... 39
Stopping Control Center (single-host deployment)...39
Stopping Control Center (multi-host deployment)...40
Chapter 11: Upgrading a master host from 1.3.x to 1.4.2...44
Identifying storage for audit logging...44
Updating Docker...44
Loading image files... 46
Updating Control Center on the master host... 47
Chapter 12: Upgrading delegates from 1.3.x to 1.4.2...49
Updating Docker...49
Configuring NFS 4.0... 51
Updating Control Center on delegate hosts... 51
Updating the ZooKeeper image on ensemble nodes...52
Chapter 13: Starting the ZooKeeper ensemble... 54
Chapter 14: After upgrading from 1.4.x to 1.4.2...56
Removing unused images...56
Part III: Upgrading 1.2.x to 1.4.2...57
Chapter 15: Before upgrading from 1.2.x to 1.4.2...58
New features that affect upgrades from release 1.2.x...58
Upgrade best practices...59
Chapter 16: Stopping a Control Center deployment... 60
Stopping Control Center (single-host deployment)...60
Stopping Control Center (multi-host deployment)...61
Chapter 17: Upgrading a master host from 1.2.x to 1.4.2...65
Chapter 18: Upgrading delegates from 1.2.x to 1.4.2...70
Updating to Docker CE...70
Configuring NFS 4.0... 72
Updating Control Center on delegate hosts... 72
Updating the ZooKeeper image on ensemble nodes...73
Chapter 19: Starting the ZooKeeper ensemble... 75
Chapter 20: After upgrading from 1.2.x to 1.4.2...77
Removing unused images...77
Part IV: Upgrading 1.1.x to 1.4.2...78
Chapter 21: Before upgrading from 1.1.x to 1.4.2...79
New features that affect upgrades from 1.1.x...79
Upgrade best practices...80
Chapter 22: Stopping a Control Center deployment... 82
Stopping Control Center (single-host deployment)...82
Stopping Control Center (multi-host deployment)...83
Chapter 23: Upgrading a master host from 1.1.x to 1.4.2...87
Identifying storage for audit logging...87
Updating to Docker CE...87
Configuring Docker... 89
Optional: Changing the local Docker registry endpoint... 91
Loading image files... 92
Updating Control Center on the master host... 92
Chapter 24: Upgrading delegates from 1.1.x to 1.4.2...94
Updating to Docker CE...94
Configuring Docker... 96
Changing the local Docker registry endpoint... 97
Configuring NFS 4.0... 98
Updating Control Center on delegate hosts... 99
Updating the ZooKeeper image on ensemble nodes...100
Chapter 25: Starting an upgraded deployment...101
Starting and registering the master host (single-host deployment)... 101
Starting and registering the master host (multi-host deployment)... 102
Removing unused images...109
Removing orphaned snapshot devices...110
Updating the OpenTSDB time-to-live value...111
Managing maintenance scripts... 112
Appendix A: Control Center application data storage requirements...114
Examining application data storage status... 114
Adding space to the metadata area of a Control Center thin pool...115
Adding space to the data area of a Control Center thin pool... 116
Adding space to a tenant volume...116
Appendix B: Storage management utility...118
serviced-storage...118
Appendix C: User access control...122
Adding users to the default browser interface access group...122
Configuring a regular group as the Control Center browser interface access group...123
Enabling use of the command-line interface...124
Appendix D: Configuring a private master NTP server... 125
Configuring an NTP master server... 125
Configuring NTP clients...126
Appendix E: Resolving package dependency conflicts... 128
Resolving device mapper dependency conflicts... 128
Resolving other dependency conflicts...129
Appendix F: Control Center releases and images... 131
Releases and image tags...131
Identifying installed Docker images...132
Removing unused images...132
Appendix G: Control Center configuration variables...133
Removed variables (at version 1.2.0)...133
New variables (at version 1.2.0)... 134
Master host configuration variables... 135
Delegate host configuration variables... 138
Universal configuration variables...140
Best practices for configuration files... 142
About this guide
The Control Center Upgrade Guide provides detailed instructions for performing the following upgrades:
■ Upgrade from version 1.4.x to version 1.4.2 ■ Upgrade from version 1.3.x to version 1.4.2 ■ Upgrade from version 1.2.x to version 1.4.2 ■ Upgrade from version 1.1.x to version 1.4.2
Zenoss customers: This guide does not include procedures for upgrading a high-availability deployment. For more information, refer to the Control Center Upgrade Guide for High-Availability Deployments.
Supported clients and browsers
The following table identifies the supported combinations of client operating systems and web browsers.
Client OS Tested browsers
Internet Explorer 11* Firefox 56 and later Windows 7, 10
Chrome 61 and later Firefox 56 and later macOS 10.12.3, 10.13
Chrome 61 and later Firefox 56 and later Ubuntu 14.04 LTS
Chrome 61 and later
Documentation feedback
To provide feedback about this document, or to report an error or omission, please send an email to
[email protected]. In the email, please include the document title (Control Center Upgrade Guide)
and part number (1300.17.331) and as much information as possible about the context of your feedback.
Change history
The following list associates document part numbers and the important changes to this guide since the previous release. Some of the changes involve features or content, but others do not. For information about new or changed features, refer to the Control Center Release Notes.
1300.17.331 (1.4.2)
Replace Leapfile.net with delivery.zenoss.com. 1300.17.313 (1.4.2)
Add chapters for updating 1.4.x deployments.
Add step for updating RHEL/CentOS to 7.4, if necessary.
Add steps for a delegate host workaround of an NFS issue on RHEL/CentOS 7.4. 1300.17.268
1300.17.229
Update release number (1.4.0).
Correct a previous modification for configuring Docker. The --insecure-registry flag must be set
when the value of SERVICED_DOCKER_REGISTRY is not localhost:5000.
1300.17.187
Modify the yum command used to install Docker CE 17.03.1.
1300.17.172
Update release number (1.3.3). Add support for Docker CE 17.03.1.
Add ZooKeeper variables for tuning TCP/IP communications with resource pools. Remove step for disabling SELinux.
1300.17.122
Update release number (1.3.2) 1300.17.100
Update release number (1.3.1).
Add a part for upgrading 1.3.x systems to the latest release. Move thin pool resize procedures to an appendix.
Modify the step for configuring Docker on master hosts. The --insecure-registry flag is only
needed on delegate hosts.
Move information about Docker images to an appendix. 1300.17.076
Update release number (1.3.0).
Change space requirements for the master. 1300.17.058
Update release number (1.2.3).
Remove TLS_RSA_WITH_RC4_128_SHA from list of ciphers associated with
SERVICED_TLS_CIPHERS.
Remove section for configuring dnsmasq.
1300.17.024
Update release number (1.2.2). 1300.16.351
Add sections for configuring dnsmasq and removing consistent network device naming.
Simplify Docker install and configuration steps.
Add sections about the maintenance scripts that are installed. 1300.16.350
Add a chapter of details about releases and upgrades. Create a part for the minor release upgrade chapters. Add a part and new chapters for micro release upgrades.
Add steps to download and use the serviced RPM file (Zenoss customers only).
Add a procedure for updating ZooKeeper images on offline nodes (Zenoss customers only). Clarify the procedures for stopping a cluster.
1300.16.327
Add a description of a new feature, setting the connection timeout value of a resource pool, to the pre-upgrade chapter.
Add a procedure for the new feature to the post-upgrade chapter. 1300.16.322
Documented upgrade paths
1
This chapter includes the dates of Control Center releases and the upgrade paths that are documented in this guide.
Release dates
Table 1: Release 1.4
Release Date
Control Center 1.4.2 09 Nov 2017
Control Center 1.4.1 25 Sep 2017
Control Center 1.4.0 17 Aug 2017
Table 2: Release 1.3
Release Date
Control Center 1.3.3 20 Jun 2017
Control Center 1.3.2 03 May 2017
Control Center 1.3.1 13 Apr 2017
Control Center 1.3.0 09 Mar 2017
Table 3: Release 1.2
Release Date
Control Center 1.2.3 27 Feb 2017
Control Center 1.2.2 25 Jan 2017
Control Center 1.2.1 16 Dec 2016
Table 4: Release 1.1
Release Date
Control Center 1.1.10 23 Nov 2016
Control Center 1.1.9 17 Oct 2016
Control Center 1.1.8 20 Sep 2016
Control Center 1.1.7 20 Jul 2016
Control Center 1.1.6 28 Jun 2016
Control Center 1.1.5 01 Jun 2016
Control Center 1.1.4 24 May 2016
Control Center 1.1.3 20 Apr 2016
Control Center 1.1.2 04 Mar 2016
Control Center 1.1.1 29 Feb 2016
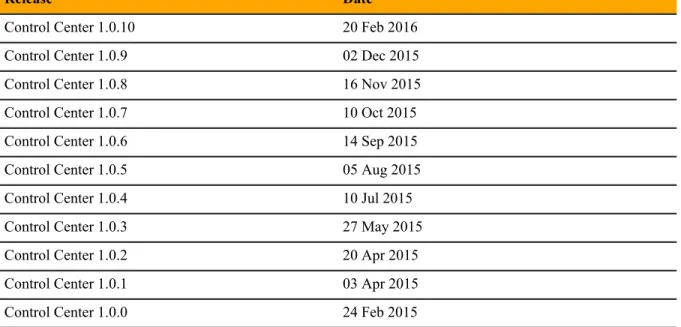
Table 5: Release 1.0
Release Date
Control Center 1.0.10 20 Feb 2016
Control Center 1.0.9 02 Dec 2015
Control Center 1.0.8 16 Nov 2015
Control Center 1.0.7 10 Oct 2015
Control Center 1.0.6 14 Sep 2015
Control Center 1.0.5 05 Aug 2015
Control Center 1.0.4 10 Jul 2015
Control Center 1.0.3 27 May 2015
Control Center 1.0.2 20 Apr 2015
Control Center 1.0.1 03 Apr 2015
Control Center 1.0.0 24 Feb 2015
Upgrade paths included in this document
Release 1.4.0 upgradesFrom To
Control Center 1.4.1 Control Center 1.4.2
Release 1.3.x upgrades
From To
Control Center 1.3.3 Control Center 1.4.2
Control Center 1.3.2 Control Center 1.4.2
Control Center 1.3.1 Control Center 1.4.2
Control Center 1.3.0 Control Center 1.4.2
Release 1.2.x upgrades
From To
Control Center 1.2.3 Control Center 1.4.2
Control Center 1.2.2 Control Center 1.4.2
Control Center 1.2.1 Control Center 1.4.2
Control Center 1.2.0 Control Center 1.4.2
Release 1.1.x upgrades
From To
Control Center 1.1.10 Control Center 1.4.2
Control Center 1.1.9 Control Center 1.4.2
Control Center 1.1.8 Control Center 1.4.2
Control Center 1.1.7 Control Center 1.4.2
Control Center 1.1.5 Control Center 1.4.2
Control Center 1.1.4 Control Center 1.4.2
Control Center 1.1.3 Control Center 1.4.2
Control Center 1.1.2 Control Center 1.4.2
Downloading and staging required files
2
This chapter describes how to download and install or stage Control Center software and its operating system dependencies. The procedures in this chapter are required to perform an upgrade.
The following table identifies where to perform each procedure in this chapter.
Procedure Where to perform
Downloading Control Center files on page 13 A workstation with internet access
Installing the repository mirror on page 14 All Control Center hosts
Staging Docker image files on the master host on page
16 The Control Center master host
Staging a Docker image file on ZooKeeper ensemble nodes
on page 16 Delegate hosts that are ZooKeeper ensemblenodes
Downloading Control Center files
To perform this procedure, you need:
■ A workstation with internet access.
■ Zenoss Resource Manager users: Permission to download files from the delivery.zenoss.com site.
Customers can request permission by filing a ticket at the Zenoss Support site.
■ Zenoss Core users: An account on the Zenoss Community site. ■ A secure network copy program.
Use this procedure to
■ download the required files to a workstation ■ copy the files to the hosts that need them
Perform these steps:
1 In a web browser, navigate to the download site, and then log in. Zenoss Resource Manager users: delivery.zenoss.com
Zenoss Core users: Zenoss Community
install-zenoss-serviced-isvcs-v60.run install-zenoss-isvcs-zookeeper-v10.run
3 Download the Control Center RPM file.
serviced-1.4.2-1.x86_64.rpm
4 Identify the operating system release on Control Center hosts.
Enter the following command on each Control Center host in your deployment, if necessary. All Control Center hosts should be running the same operating system release and kernel.
cat /etc/redhat-release
5 Download the RHEL/CentOS repository mirror file for your deployment.
The download site provides a repository mirror file for each tested release of RHEL/CentOS. Each mirror file contains the release-specific packages that Control Center requires.
yum-mirror-centos7.2-1511-serviced-1.4.2.x86_64.rpm yum-mirror-centos7.3-1611-serviced-1.4.2.x86_64.rpm yum-mirror-centos7.4-1708-serviced-1.4.2.x86_64.rpm
If the installed release is untested, download the mirror file for the release to which you will upgrade the hosts in your deployment.
6 Optional: Download the Zenoss GNU Privacy Guard (GPG) key, if desired.
You can use the Zenoss GPG key to verify the RPM file and the yum metadata of the repository mirror.
a Download the key.
curl -L -o /tmp/tmp.html \
'http://keys.gnupg.net/pks/lookup?op=get&search=0xED0A5FD2AA5A1AD7'
b Determine whether the download succeeded.
grep -Ec '^\-\-\-\-\-BEGIN PGP' /tmp/tmp.html
■ If the result is 0, return to the previous substep.
■ If the result is 1, proceed to the next substep.
c Extract the key.
awk '/^---BEGIN PGP.*$/,/^---END PGP.*$/' \ /tmp/tmp.html > ./RPM-GPG-KEY-Zenoss
7 Use a secure copy program to copy the files to Control Center hosts.
■ Copy all files to the master host.
■ Copy the RHEL/CentOS RPM file, the Control Center RPM file, and the Zenoss GPG key file to all
delegate hosts.
■ Copy the Docker image file for ZooKeeper to delegate hosts that are ZooKeeper ensemble nodes.
Installing the repository mirror
Use this procedure to install the Zenoss repository mirror on a Control Center host. Repeat this procedure on each host in your deployment.
2 Move the RPM files and the Zenoss GPG key file to /tmp.
3 Optional: Remove the existing repository mirror, if necessary. a Search for the mirror.
yum list --disablerepo=* | awk '/^yum-mirror/ { print $1}'
b Remove the mirror.
Replace Old-Mirror with the name of the Zenoss repository mirror returned in the previous substep:
yum remove Old-Mirror
4 Install the new repository mirror.
yum install /tmp/yum-mirror-*.rpm
The yum command copies the contents of the RPM file to /opt/zenoss-repo-mirror.
5 Optional: Install the Zenoss GPG key, and then test the package files, if desired. a Move the Zenoss GPG key to the mirror directory.
mv /tmp/RPM-GPG-KEY-Zenoss /opt/zenoss-repo-mirror
b Install the key.
rpm --import /opt/zenoss-repo-mirror/RPM-GPG-KEY-Zenoss
c Test the repository mirror package file.
rpm -K /tmp/yum-mirror-*.rpm
d Test the Control Center package file.
rpm -K /tmp/serviced-*.rpm
6 Optional: Update the configuration file of the Zenoss repository mirror to enable GPG key verification, if desired.
a Open the repository mirror configuration file (/etc/yum.repos.d/zenoss-mirror.repo) with
a text editor, and then add the following lines to the end of the file.
repo_gpgcheck=1
gpgkey=file:///opt/zenoss-repo-mirror/RPM-GPG-KEY-Zenoss
b Save the file, and then close the editor. c Update the yum metadata cache.
yum makecache fast
The cache update process includes the following prompt:
Retrieving key from file:///opt/zenoss-repo-mirror/RPM-GPG-KEY-Zenoss
Importing GPG key 0xAA5A1AD7:
Userid : "Zenoss, Inc. <[email protected]>"
Fingerprint: f31f fd84 6a23 b3d5 981d a728 ed0a 5fd2 aa5a 1ad7 From : /opt/zenoss-repo-mirror/RPM-GPG-KEY-Zenoss
Enter y.
7 Move the Control Center package file to the mirror directory.
Move /tmp/serviced-1.4.2-1.x86_64.rpm /opt/zenoss-repo-mirror
8 Optional: Delete the mirror package file, if desired.
rm /tmp/yum-mirror-*.rpm
Staging Docker image files on the master host
Before performing this procedure, verify that approximately 640MB of temporary space is available on the file system where /root is located.
Use this procedure to add Docker image files to the Control Center master host. The files are used when Docker is fully configured.
1 Log in to the master host as root, or as a user with superuser privileges.
2 Copy or move the archive files to /root.
3 Add execute permission to the files.
chmod +x /root/*.run
Staging a Docker image file on ZooKeeper ensemble nodes
Before performing this procedure, verify that approximately 170MB of temporary space is available on the file system where /root is located.
Use this procedure to add a Docker image file to the Control Center delegate hosts that are ZooKeeper ensemble nodes. Delegate hosts that are not ZooKeeper ensemble nodes do not need the file. The files are used when the ZooKeeper ensemble is configured.
1 Log in to a delegate host as root, or as a user with superuser privileges.
2 Copy or move the install-zenoss-isvcs-zookeeper-v10.run file to /root.
3 Add execute permission to the file.
Part I:
Upgrading 1.4.x to 1.4.2
The chapters in this part provide instructions for upgrading Control Center from version 1.4.x to 1.4.2. The following table identifies the upgrades of Control Center that are documented in this part.
From To
Control Center 1.4.1 Control Center 1.4.2
Before upgrading from 1.4.x to 1.4.2
3
This chapter provides information and procedures to prepare a Control Center deployment for an upgrade from 1.4.x to 1.4.2.
New features that affect upgrades
This release includes new features and new requirements that affect the upgrade process. The following list provides an overview of the changes that are addressed during this upgrade.
■ RHEL/CentOS 7.4 is added; RHEL/CentOS 7.1 is withdrawn. The upgrade process includes a step for
updating the operating system.
■ On RHEL/CentOS 7.4, there may be a file locking defect in NFS 4.1. To avoid the issue, delegate hosts are
configured to use NFS 4.0.
■ This release replaces Docker Community Edition (CE) 17.03.1 with Docker CE 17.09.0.
For more information about this release, refer to the Control Center Release Notes.
Upgrade best practices
The following list outlines recommended best practices for upgrading Control Center deployments:
1 Download a copy of the Control Center Release Notes for this release and review its contents. The latest information is included in that document.
2 Compare the Docker images that accompany this release with the images that accompany the installed release, and determine whether the image files need to be downloaded and installed. For more information, see Releases and image tags on page 131.
3 On delegate hosts, most of the upgrade steps are identical. Use screen, tmux or a similar program to
establish sessions on each delegate host and perform the steps at the same time.
4 Review and verify the settings in delegate host configuration files (/etc/default/serviced) before
starting the upgrade. Ideally, the settings on all delegate hosts are identical, except on ZooKeeper nodes and delegate hosts that do not mount the DFS.
5 Review the procedures in this guide before performing them. Every effort is made to avoid mistakes and anticipate needs; nevertheless, the instructions may be incorrect or inadequate for some requirements or environments.
6 Download and stage the required files for your upgrade. For more information, see Downloading and staging required files on page 13.
Stopping a Control Center deployment
4
This chapter includes procedures for stopping both single-host and multi-host Control Center deployments.
Note The procedures in this chapter assume that Control Center is the only source of Docker containers that
are run on Control Center hosts.
Stopping Control Center (single-host deployment)
Use this procedure to stop the Control Center service (serviced) in a single-host deployment.
1 Log in to the master host as root, or as a user with superuser privileges.
2 Stop the top-level service serviced is managing, if necessary.
a Show the status of running services.
serviced service status
The top-level service is the service listed immediately below the headings line.
■ If the status of the top-level service and all child services is stopped, proceed to the next step.
■ If the status of the top-level service and all child services is not stopped, perform the remaining
substeps.
b Stop the top-level service.
Replace Service with the name or identifier of the top-level service:
serviced service stop Service
c Monitor the stop.
serviced service status
When the status of the top-level service and all child services is stopped, proceed to the next step.
3 Stop the Control Center service.
systemctl stop serviced
a Display the identifiers of all containers, running and exited.
docker ps -qa
■ If the command returns no result, stop. This procedure is complete. ■ If the command returns a result, perform the following substeps.
b Remove all remaining containers.
docker ps -qa | xargs --no-run-if-empty docker rm -fv
c Display the identifiers of all containers, running and exited.
docker ps -qa
■ If the command returns no result, stop. This procedure is complete. ■ If the command returns a result, perform the remaining substeps.
d Disable the automatic startup of serviced. systemctl disable serviced
e Reboot the host.
reboot
f Log in to the master host as root, or as a user with superuser privileges.
g Enable the automatic startup of serviced. systemctl enable serviced
Stopping Control Center (multi-host deployment)
To stop Control Center in a multi-host deployment, perform the procedures in this section, in order.
Stopping a master host (multi-host deployment)
Use this procedure to stop the Control Center service (serviced) on the master host in a multi-host
deployment.
1 Log in to the master host as root, or as a user with superuser privileges.
2 Stop the top-level service serviced is managing, if necessary.
a Show the status of running services.
serviced service status
The top-level service is the service listed immediately below the headings line.
■ If the status of the top-level service and all child services is stopped, proceed to the next step.
■ If the status of the top-level service and all child services is not stopped, perform the remaining
substeps.
Replace Service with the name or identifier of the top-level service:
serviced service stop Service
c Monitor the stop.
serviced service status
When the status of the top-level service and all child services is stopped, proceed to the next step.
3 Stop the Control Center service.
systemctl stop serviced
4 Ensure that no containers remain in the local repository. a Display the identifiers of all containers, running and exited.
docker ps -qa
■ If the command returns no result, stop. This procedure is complete. ■ If the command returns a result, perform the following substeps.
b Remove all remaining containers.
docker ps -qa | xargs --no-run-if-empty docker rm -fv
c Display the identifiers of all containers, running and exited.
docker ps -qa
■ If the command returns no result, stop. This procedure is complete. ■ If the command returns a result, perform the remaining substeps.
d Disable the automatic startup of serviced. systemctl disable serviced
e Reboot the host.
reboot
f Log in to the master host as root, or as a user with superuser privileges.
g Enable the automatic startup of serviced. systemctl enable serviced
Stopping a delegate host
Use this procedure to stop the Control Center service (serviced) on a delegate host in a multi-host
deployment. Repeat this procedure on each delegate host in your deployment. 1 Log in to the delegate host as root, or as a user with superuser privileges.
2 Stop the Control Center service.
3 Ensure that no containers remain in the local repository. a Display the identifiers of all containers, running and exited.
docker ps -qa
■ If the command returns no result, proceed to the next step. ■ If the command returns a result, perform the following substeps.
b Remove all remaining containers.
docker ps -qa | xargs --no-run-if-empty docker rm -fv
■ If the remove command completes, proceed to the next step.
■ If the remove command does not complete, the most likely cause is an NFS conflict. Perform the
following substeps.
c Stop the NFS and Docker services.
systemctl stop nfs && systemctl stop docker
d Start the NFS and Docker services.
systemctl start nfs && systemctl start docker
e Repeat the attempt to remove all remaining containers.
docker ps -qa | xargs --no-run-if-empty docker rm -fv
■ If the remove command completes, proceed to the next step.
■ If the remove command does not complete, perform the remaining substeps.
f Disable the automatic startup of serviced. systemctl disable serviced
g Reboot the host.
reboot
h Log in to the delegate host as root, or as a user with superuser privileges.
i Enable the automatic startup of serviced. systemctl enable serviced
4 Dismount all filesystems mounted from the Control Center master host.
This step ensures no stale mounts remain when the storage on the master host is replaced. a Identify filesystems mounted from the master host.
awk '/serviced/ { print $1, $2 }' < /proc/mounts \ | grep -v '/opt/serviced/var/isvcs'
■ If the preceding command returns no result, stop. This procedure is complete. ■ If the preceding command returns a result, perform the following substeps.
b Force the filesystems to dismount.
for FS in $(awk '/serviced/ { print $2 }' < /proc/mounts \ | grep -v '/opt/serviced/var/isvcs')
do
umount -f $FS done
c Identify filesystems mounted from the master host.
awk '/serviced/ { print $1, $2 }' < /proc/mounts \ | grep -v '/opt/serviced/var/isvcs'
■ If the preceding command returns no result, stop. This procedure is complete. ■ If the preceding command returns a result, perform the following substeps.
d Perform a lazy dismount.
for FS in $(awk '/serviced/ { print $2 }' < /proc/mounts \ | grep -v '/opt/serviced/var/isvcs')
do
umount -f -l $FS done
e Restart the NFS service.
systemctl restart nfs
f Determine whether any filesystems remain mounted from the master host.
awk '/serviced/ { print $1, $2 }' < /proc/mounts \ | grep -v '/opt/serviced/var/isvcs'
■ If the preceding command returns no result, stop. This procedure is complete. ■ If the preceding command returns a result, perform the remaining substeps.
g Disable the automatic startup of serviced. systemctl disable serviced
h Reboot the host.
reboot
i Log in to the delegate host as root, or as a user with superuser privileges.
j Enable the automatic startup of serviced. systemctl enable serviced
Upgrading a master host from 1.4.x to 1.4.2
5
Use this chapter to upgrade a Control Center 1.4.x master host to 1.4.2. Before performing the procedures in this chapter, download required software. See Downloading and staging required files on page 13.
Updating Docker
Use this procedure to update Docker to version 17.09.0. 1 Log in as root, or as a user with superuser privileges.
2 Update the operating system, if necessary. a Determine which release is installed.
cat /etc/redhat-release
■ If the result is 7.2, 7.3, or 7.4, proceed to the next step.
■ If the result is 7.1, perform the remaining substeps.
b Disable automatic start of serviced. systemctl disable serviced
c Update the operating system, and then restart the host.
The following commands require internet access or a local mirror of operating system packages.
yum makecache fast && yum update && reboot
d Log in as root, or as a user with superuser privileges.
e Enable automatic start of serviced. systemctl enable serviced
3 Update the Linux kernel, if necessary.
a Determine which kernel version is installed.
uname -r
b Disable automatic start of serviced. systemctl disable serviced
c Update the kernel, and then restart the host.
The following commands require internet access or a local mirror of operating system packages.
yum makecache fast && yum update kernel && reboot
d Log in as root, or as a user with superuser privileges.
e Enable automatic start of serviced. systemctl enable serviced
4 Stop the Docker service.
systemctl stop docker
5 Remove Docker 17.03.1.
a Remove without checking dependencies.
rpm -e --nodeps docker-ce
b Clean the yum databases. yum clean all
6 Install Docker CE 17.09.0.
yum install --enablerepo=zenoss-mirror docker-ce
If yum returns an error due to dependency issues, see Resolving package dependency conflicts on page
128 for potential resolutions. 7 Start the Docker service.
systemctl start docker
8 Remove a previous workaround for an NFS rpcbind issue.
a Remove the NFS service drop-in file, if it exists.
test -f /etc/systemd/system/nfs-server.service.d/nfs-server.conf \ && rm -f /etc/systemd/system/nfs-server.service.d/nfs-server.conf
b Reload the systemd manager configuration. systemctl daemon-reload
Loading image files
Perform the steps in Downloading and staging required files on page 13 before performing this procedure. Use this procedure to load images into the local Docker registry.
2 Change directory to /root. cd /root
3 Extract the images.
for image in install-*.run do
echo -n "$image: " ./$image
done
Image extraction begins when you press the y key. If you press the y key and then Return key, the current image is extracted, but the next one is not.
4 List the images in the registry.
docker images
The result should show one image for each archive file. 5 Optional: Delete the archive files.
rm -i ./install-*.run
Updating Control Center on the master host
Use this procedure to update Control Center on the master host to version 1.4.2. 1 Log in to the master host as root, or as a user with superuser privileges.
2 Save the current serviced configuration file as a reference.
a Rename the file.
mv /etc/default/serviced /etc/default/serviced-pre-1.4.2
b Set permissions to read-only.
chmod 0440 /etc/default/serviced-pre-1.4.2
3 Remove the external Zenoss repository package. Upgrades no longer require external repositories.
yum remove zenoss-repo-1-1.x86_64
4 Install the new version of Control Center.
yum install --enablerepo=zenoss-mirror \
/opt/zenoss-repo-mirror/serviced-1.4.2-1.x86_64.rpm
If yum returns an error due to dependency issues, see Resolving package dependency conflicts on page
128 for potential resolutions.
5 Make a backup copy of the new configuration file. a Copy the file.
b Set permissions to read-only.
chmod 0440 /etc/default/serviced-1.4.2-orig
6 Compare the new configuration file with the configuration file of the previous release. a Identify the configuration files to compare.
ls -l /etc/default/serviced*
The original versions of the configuration files should end with orig, but you may have to compare the
dates of the files.
b Compare the new and previous configuration files.
Replace New-Version with the name of the new configuration file, and replace Previous-Version with the name of the previous configuration file:
diff New-Version Previous-Version
For example, to compare versions 1.2.0 and 1.4.2, enter the following command:
diff /etc/default/serviced-1.2.0-orig \ /etc/default/serviced-1.4.2-orig
■ If the command returns no result, restore the backup of the previous configuration file.
cp /etc/default/serviced-pre-1.4.2 \
/etc/default/serviced && chmod 0644 /etc/default/serviced
■ If the command returns a result, restore the backup of the previous configuration file, and then optionally,
use the results to edit the restored version.
cp /etc/default/serviced-pre-1.4.2 \
/etc/default/serviced && chmod 0644 /etc/default/serviced
For more information about configuring the master host, see Control Center configuration variables on page 133.
7 Update the log file management configuration file, if necessary.
The default configuration of the /opt/serviced/etc/logrotate.conf file now uses file size
rather than file age to determine when to rotate logs. If you customized /opt/serviced/etc/ logrotate.conf for your environment, your customizations are saved in /opt/serviced/etc/ logrotate.conf.bak. Compare the new and old versions, and update the new one as desired.
■ If you are upgrading a multi-host deployment, continue to the next procedure. ■ If you are upgrading a single-host deployment, start Control Center.
Upgrading delegates from 1.4.x to 1.4.2
6
Use this chapter to upgrade Control Center 1.4.x delegate hosts to 1.4.2. Before performing the procedures in this chapter, download required software. See Downloading and staging required files on page 13.
Updating Docker
Use this procedure to update Docker to version 17.09.0. 1 Log in as root, or as a user with superuser privileges.
2 Update the operating system, if necessary. a Determine which release is installed.
cat /etc/redhat-release
■ If the result is 7.2, 7.3, or 7.4, proceed to the next step.
■ If the result is 7.1, perform the remaining substeps.
b Disable automatic start of serviced. systemctl disable serviced
c Update the operating system, and then restart the host.
The following commands require internet access or a local mirror of operating system packages.
yum makecache fast && yum update && reboot
d Log in as root, or as a user with superuser privileges.
e Enable automatic start of serviced. systemctl enable serviced
3 Update the Linux kernel, if necessary.
a Determine which kernel version is installed.
uname -r
b Disable automatic start of serviced. systemctl disable serviced
c Update the kernel, and then restart the host.
The following commands require internet access or a local mirror of operating system packages.
yum makecache fast && yum update kernel && reboot
d Log in as root, or as a user with superuser privileges.
e Enable automatic start of serviced. systemctl enable serviced
4 Stop the Docker service.
systemctl stop docker
5 Remove Docker 17.03.1.
a Remove without checking dependencies.
rpm -e --nodeps docker-ce
b Clean the yum databases. yum clean all
6 Install Docker CE 17.09.0.
yum install --enablerepo=zenoss-mirror docker-ce
If yum returns an error due to dependency issues, see Resolving package dependency conflicts on page
128 for potential resolutions. 7 Start the Docker service.
systemctl start docker
8 Remove a previous workaround for an NFS rpcbind issue.
a Remove the NFS service drop-in file, if it exists.
test -f /etc/systemd/system/nfs-server.service.d/nfs-server.conf \ && rm -f /etc/systemd/system/nfs-server.service.d/nfs-server.conf
b Reload the systemd manager configuration. systemctl daemon-reload
Configuring NFS 4.0
Use this procedure to configure NFS 4.0 on delegate hosts if the operating system release is 7.4. There may be a file locking defect in NFS 4.1 with RHEL/CentOS 7.4.
2 Determine which release is installed.
cat /etc/redhat-release
■ If the result includes 7.4, perform the remaining steps of this procedure.
■ If the result includes 7.2 or 7.3, continue to the next procedure.
3 Change the NFS configuration file.
a Open /etc/nfsmount.conf with a text editor.
b Locate the Defaultvers directive.
c Remove the number sign character (#) from the beginning of the line.
d Change the value from 4 to 4.0.
The line should appear as follows:
Defaultvers=4.0
e Save the file, and then close the editor. 4 Restart the NFS server.
systemctl restart nfs-server
Updating Control Center on delegate hosts
This procedure updates Control Center on delegate hosts to version 1.4.2. Perform this procedure on each delegate host in your deployment.
1 Log in to a delegate host as root, or as a user with superuser privileges.
2 Save the current serviced configuration file as a reference.
a Rename the file.
mv /etc/default/serviced /etc/default/serviced-pre-1.4.2
b Set permissions to read-only.
chmod 0440 /etc/default/serviced-pre-1.4.2
3 Remove the external Zenoss repository package. Upgrades no longer require external repositories.
yum remove zenoss-repo-1-1.x86_64
4 Install the new version of Control Center.
yum install --enablerepo=zenoss-mirror \
/opt/zenoss-repo-mirror/serviced-1.4.2-1.x86_64.rpm
If yum returns an error due to dependency issues, see Resolving package dependency conflicts on page
128 for potential resolutions.
5 Make a backup copy of the new configuration file. a Copy the file.
b Set permissions to read-only.
chmod 0440 /etc/default/serviced-1.4.2-orig
6 Compare the new configuration file with the configuration file of the previous release. a Identify the configuration files to compare.
ls -l /etc/default/serviced*
The original versions of the configuration files should end with orig, but you may have to compare the
dates of the files.
b Compare the new and previous configuration files.
Replace New-Version with the name of the new configuration file, and replace Previous-Version with the name of the previous configuration file:
diff New-Version Previous-Version
For example, to compare versions 1.2.0 and 1.4.2, enter the following command:
diff /etc/default/serviced-1.2.0-orig \ /etc/default/serviced-1.4.2-orig
■ If the command returns no result, restore the backup of the previous configuration file.
cp /etc/default/serviced-pre-1.4.2 \
/etc/default/serviced && chmod 0644 /etc/default/serviced
■ If the command returns a result, restore the backup of the previous configuration file, and then optionally,
use the results to edit the restored version.
cp /etc/default/serviced-pre-1.4.2 \
/etc/default/serviced && chmod 0644 /etc/default/serviced
For more information about configuring a delegate host, see Control Center configuration variables on page 133.
Updating the ZooKeeper image on ensemble nodes
Perform the steps in Downloading and staging required files on page 13 before performing this procedure. Use this procedure to install a new Docker image for ZooKeeper on ZooKeeper ensemble nodes.
1 Log in to the master host as root, or as a user with superuser privileges.
2 Identify the hosts in the ZooKeeper ensemble.
grep -E '^\b*SERVICED_ZK=' /etc/default/serviced
The result is a list of 3 or 5 hosts, separated by the comma character (,). The master host is always a node in
the ZooKeeper ensemble.
3 Log in to a ZooKeeper ensemble node as root, or as a user with superuser privileges.
4 Change directory to /root. cd /root
5 Extract the ZooKeeper image.
./install-zenoss-isvcs-zookeeper-v*.run
Image extraction begins when you press the y key. 6 Optional: Delete the archive file.
rm -i ./install-zenoss-isvcs-zookeeper-v*.run
Starting the ZooKeeper ensemble
7
Use this procedure to start the ZooKeeper ensemble.
1 Log in to the master host as root, or as a user with superuser privileges.
2 Determine whether serviced is configured to start when the system starts. systemctl is-enabled serviced
■ If the result is enabled, proceed to the next step.
■ If the result is disabled, enter the following command: systemctl enable serviced
3 Identify the hosts in the ZooKeeper ensemble.
grep -E '^\b*SERVICED_ZK=' /etc/default/serviced
The result is a list of 3 or 5 hosts, separated by the comma character (,). The master host is always a node in
the ZooKeeper ensemble.
4 In separate windows, log in to each of the delegate hosts that are nodes in the ZooKeeper ensemble as root,
or as a user with superuser privileges. 5 On all ensemble hosts, start serviced.
The window of time for starting a ZooKeeper ensemble is relatively short. The goal of this step is to start Control Center on each ensemble node at about the same time, so that each node can participate in electing the leader.
systemctl daemon-reload && systemctl start serviced
6 On the master host, check the status of the ZooKeeper ensemble. a Attach to the container of the ZooKeeper service.
docker exec -it serviced-isvcs_zookeeper /bin/bash
b Query the master host and identify its role in the ensemble.
Replace Master with the hostname or IP address of the master host:
The result includes leader or follower.
c Query the other delegate hosts to identify their role in the ensemble. Replace Delegate with the hostname or IP address of a delegate host:
{ echo stats; sleep 1; } | nc Delegate 2181 | grep Mode
d Detach from the container of the ZooKeeper service.
exit
If none of the nodes reports that it is the ensemble leader within a few minutes of starting serviced,
After upgrading from 1.4.x to 1.4.2
8
Perform the procedures in this chapter after Control Center is upgraded.
Removing unused images
Use this procedure to identify and remove unused Control Center images. 1 Log in to the master host as root, or as a user with superuser privileges.
2 Identify the images associated with the installed version of serviced. serviced version | grep Images
Example result:
IsvcsImages: [zenoss/serviced-isvcs:v60 zenoss/isvcs-zookeeper:v10]
3 Start Docker, if necessary.
systemctl status docker || systemctl start docker
4 Display the serviced images in the local repository. docker images | awk '/REPO|isvcs/'
Example result (edited to fit):
REPOSITORY TAG IMAGE ID zenoss/serviced-isvcs v40 88cd6c24cc82 zenoss/serviced-isvcs v60 0aab5a2123f2 zenoss/isvcs-zookeeper v3 46fa0a2fc4bf zenoss/isvcs-zookeeper v10 0ff3b3117fb8
The example result shows the current versions and one set of previous versions. Your result may include additional previous versions and will show different images IDs.
5 Remove unused images.
Replace Image-ID with the image ID of an image for a previous version.
Part II:
Upgrading 1.3.x to 1.4.2
The chapters in this part provide instructions for upgrading Control Center from version 1.3.x to 1.4.2. The following table identifies the upgrades of Control Center that are documented in this part.
From To
Control Center 1.3.3 Control Center 1.4.2
Control Center 1.3.2 Control Center 1.4.2
Control Center 1.3.1 Control Center 1.4.2
Before upgrading from 1.3.x to 1.4.2
9
This chapter provides information and procedures to prepare a Control Center deployment for an upgrade from 1.3.x to 1.4.2.
New features that affect upgrades
This release includes new features and new requirements that affect the upgrade process. The following list provides an overview of the changes that are addressed during this upgrade.
■ RHEL/CentOS 7.4 is added; RHEL/CentOS 7.1 is withdrawn. The upgrade process includes a step for
updating the operating system.
■ On RHEL/CentOS 7.4, there may be a file locking defect in NFS 4.1. To avoid the issue, delegate hosts are
configured to use NFS 4.0.
■ The upgrade (and install) process now requires downloading packages from Zenoss manually. The required
software and images are no longer available from the online Zenoss repository or Docker Hub. For more information, see Downloading and staging required files on page 13.
The packages to download include a yum repository mirror that contains the required dependencies of
Docker CE and Control Center. An operating system or kernel upgrade can install newer versions of the dependencies included in the mirror, and when you attempt to upgrade Docker CE or Control Center, yum
will stop when it finds the newer versions. A new appendix in this document includes workarounds for the most common dependency conflicts.
■ This release includes a new feature, serviced and application audit logging. By default, audit logging
requires 10GB of storage on the master host. The upgrade process includes a procedure for adding space to the master host, if necessary. For more information about audit logging, refer to the Control Center Reference Guide.
■ A new configuration variable, SERVICED_LOG_PATH, sets the location for audit logs. The default location
is /var/log/serviced.
■ This release replaces Docker 1.12.1 with Docker Community Edition (CE) 17.09.0.
■ The following new configuration variables are available in /etc/default/serviced, for tuning TCP/
IP communications between ZooKeeper ensemble hosts and Control Center:
SERVICED_ZK_CONNECT_TIMEOUT
SERVICED_ZK_PER_HOST_CONNECT_DELAY SERVICED_ZK_RECONNECT_START_DELAY SERVICED_ZK_RECONNECT_MAX_DELAY
■ The Control Center RPM package includes a script that adds the serviced user group to a host, if
necessary. Users must be members of the serviced group to use the command-line interface. For more
information, see User access control on page 122.
For more information about this release, refer to the Control Center Release Notes.
Upgrade best practices
The following list outlines recommended best practices for upgrading Control Center deployments:
1 Download a copy of the Control Center Release Notes for this release and review its contents. The latest information is included in that document.
2 Compare the Docker images that accompany this release with the images that accompany the installed release, and determine whether the image files need to be downloaded and installed. For more information, see Releases and image tags on page 131.
3 On delegate hosts, most of the upgrade steps are identical. Use screen, tmux or a similar program to
establish sessions on each delegate host and perform the steps at the same time.
4 Review and verify the settings in delegate host configuration files (/etc/default/serviced) before
starting the upgrade. Ideally, the settings on all delegate hosts are identical, except on ZooKeeper nodes and delegate hosts that do not mount the DFS.
5 Review the procedures in this guide before performing them. Every effort is made to avoid mistakes and anticipate needs; nevertheless, the instructions may be incorrect or inadequate for some requirements or environments.
6 Download and stage the required files for your upgrade. For more information, see Downloading and staging required files on page 13.
Stopping a Control Center deployment
10
This chapter includes procedures for stopping both single-host and multi-host Control Center deployments.
Note The procedures in this chapter assume that Control Center is the only source of Docker containers that
are run on Control Center hosts.
Stopping Control Center (single-host deployment)
Use this procedure to stop the Control Center service (serviced) in a single-host deployment.
1 Log in to the master host as root, or as a user with superuser privileges.
2 Stop the top-level service serviced is managing, if necessary.
a Show the status of running services.
serviced service status
The top-level service is the service listed immediately below the headings line.
■ If the status of the top-level service and all child services is stopped, proceed to the next step.
■ If the status of the top-level service and all child services is not stopped, perform the remaining
substeps.
b Stop the top-level service.
Replace Service with the name or identifier of the top-level service:
serviced service stop Service
c Monitor the stop.
serviced service status
When the status of the top-level service and all child services is stopped, proceed to the next step.
3 Stop the Control Center service.
systemctl stop serviced
a Display the identifiers of all containers, running and exited.
docker ps -qa
■ If the command returns no result, stop. This procedure is complete. ■ If the command returns a result, perform the following substeps.
b Remove all remaining containers.
docker ps -qa | xargs --no-run-if-empty docker rm -fv
c Display the identifiers of all containers, running and exited.
docker ps -qa
■ If the command returns no result, stop. This procedure is complete. ■ If the command returns a result, perform the remaining substeps.
d Disable the automatic startup of serviced. systemctl disable serviced
e Reboot the host.
reboot
f Log in to the master host as root, or as a user with superuser privileges.
g Enable the automatic startup of serviced. systemctl enable serviced
Stopping Control Center (multi-host deployment)
To stop Control Center in a multi-host deployment, perform the procedures in this section, in order.
Stopping a master host (multi-host deployment)
Use this procedure to stop the Control Center service (serviced) on the master host in a multi-host
deployment.
1 Log in to the master host as root, or as a user with superuser privileges.
2 Stop the top-level service serviced is managing, if necessary.
a Show the status of running services.
serviced service status
The top-level service is the service listed immediately below the headings line.
■ If the status of the top-level service and all child services is stopped, proceed to the next step.
■ If the status of the top-level service and all child services is not stopped, perform the remaining
substeps.
Replace Service with the name or identifier of the top-level service:
serviced service stop Service
c Monitor the stop.
serviced service status
When the status of the top-level service and all child services is stopped, proceed to the next step.
3 Stop the Control Center service.
systemctl stop serviced
4 Ensure that no containers remain in the local repository. a Display the identifiers of all containers, running and exited.
docker ps -qa
■ If the command returns no result, stop. This procedure is complete. ■ If the command returns a result, perform the following substeps.
b Remove all remaining containers.
docker ps -qa | xargs --no-run-if-empty docker rm -fv
c Display the identifiers of all containers, running and exited.
docker ps -qa
■ If the command returns no result, stop. This procedure is complete. ■ If the command returns a result, perform the remaining substeps.
d Disable the automatic startup of serviced. systemctl disable serviced
e Reboot the host.
reboot
f Log in to the master host as root, or as a user with superuser privileges.
g Enable the automatic startup of serviced. systemctl enable serviced
Stopping a delegate host
Use this procedure to stop the Control Center service (serviced) on a delegate host in a multi-host
deployment. Repeat this procedure on each delegate host in your deployment. 1 Log in to the delegate host as root, or as a user with superuser privileges.
2 Stop the Control Center service.
3 Ensure that no containers remain in the local repository. a Display the identifiers of all containers, running and exited.
docker ps -qa
■ If the command returns no result, proceed to the next step. ■ If the command returns a result, perform the following substeps.
b Remove all remaining containers.
docker ps -qa | xargs --no-run-if-empty docker rm -fv
■ If the remove command completes, proceed to the next step.
■ If the remove command does not complete, the most likely cause is an NFS conflict. Perform the
following substeps.
c Stop the NFS and Docker services.
systemctl stop nfs && systemctl stop docker
d Start the NFS and Docker services.
systemctl start nfs && systemctl start docker
e Repeat the attempt to remove all remaining containers.
docker ps -qa | xargs --no-run-if-empty docker rm -fv
■ If the remove command completes, proceed to the next step.
■ If the remove command does not complete, perform the remaining substeps.
f Disable the automatic startup of serviced. systemctl disable serviced
g Reboot the host.
reboot
h Log in to the delegate host as root, or as a user with superuser privileges.
i Enable the automatic startup of serviced. systemctl enable serviced
4 Dismount all filesystems mounted from the Control Center master host.
This step ensures no stale mounts remain when the storage on the master host is replaced. a Identify filesystems mounted from the master host.
awk '/serviced/ { print $1, $2 }' < /proc/mounts \ | grep -v '/opt/serviced/var/isvcs'
■ If the preceding command returns no result, stop. This procedure is complete. ■ If the preceding command returns a result, perform the following substeps.
b Force the filesystems to dismount.
for FS in $(awk '/serviced/ { print $2 }' < /proc/mounts \ | grep -v '/opt/serviced/var/isvcs')
do
umount -f $FS done
c Identify filesystems mounted from the master host.
awk '/serviced/ { print $1, $2 }' < /proc/mounts \ | grep -v '/opt/serviced/var/isvcs'
■ If the preceding command returns no result, stop. This procedure is complete. ■ If the preceding command returns a result, perform the following substeps.
d Perform a lazy dismount.
for FS in $(awk '/serviced/ { print $2 }' < /proc/mounts \ | grep -v '/opt/serviced/var/isvcs')
do
umount -f -l $FS done
e Restart the NFS service.
systemctl restart nfs
f Determine whether any filesystems remain mounted from the master host.
awk '/serviced/ { print $1, $2 }' < /proc/mounts \ | grep -v '/opt/serviced/var/isvcs'
■ If the preceding command returns no result, stop. This procedure is complete. ■ If the preceding command returns a result, perform the remaining substeps.
g Disable the automatic startup of serviced. systemctl disable serviced
h Reboot the host.
reboot
i Log in to the delegate host as root, or as a user with superuser privileges.
j Enable the automatic startup of serviced. systemctl enable serviced
Upgrading a master host from 1.3.x to 1.4.2
11
Use this chapter to upgrade a Control Center 1.3.x master host to 1.4.2. Before performing the procedures in this chapter, download required software. See Downloading and staging required files on page 13.
Identifying storage for audit logging
The default configuration of Control Center audit logging requires 10GB of storage in /var/log/serviced
on the master host. Use this procedure to determine whether sufficient space is available. 1 Log in to the master host as root, or as a user with superuser privileges.
2 Display the amount of space available in /var/log.
The /var/log/serviced directory does not exist until Control Center is upgraded. df -h /var/log
Typically, /var/log is mounted on the root filesystem, /.
3 Display the amount of space available in /tmp.
Docker requires 10GB of storage for temporary files, and the Control Center Installation Guide includes instructions to link the Docker temporary directory to /tmp.
df -h /tmp
Like /var/log, /tmp is typically mounted on the root filesystem, /.
If /var/log and /tmp each have 10GB of available storage, for a combined total of 20GB, then the master
host has sufficient space for audit logging. Otherwise, you must choose one of the following alternatives:
■ After upgrading Control Center, mount the serviced audit log directory on a larger local or remote file
system, modify the settings in the /opt/serviced/etc/logrotate.conf configuration file.
■ Use a cron job to copy the files to a larger local or remote file system.
■ Forward the log files to a log management application.
Updating Docker
Use this procedure to update Docker to version 17.09.0. 1 Log in as root, or as a user with superuser privileges.
Upgrades no longer require external repositories.
rm -f /etc/yum.repos.d/docker.repo
3 Update the operating system, if necessary. a Determine which release is installed.
cat /etc/redhat-release
■ If the result is 7.2, 7.3, or 7.4, proceed to the next step.
■ If the result is 7.1, perform the remaining substeps.
b Disable automatic start of serviced. systemctl disable serviced
c Update the operating system, and then restart the host.
The following commands require internet access or a local mirror of operating system packages.
yum makecache fast && yum update && reboot
d Log in as root, or as a user with superuser privileges.
e Enable automatic start of serviced. systemctl enable serviced
4 Update the Linux kernel, if necessary.
a Determine which kernel version is installed.
uname -r
If the result is lower than 3.10.0-327.22.2.el7.x86_64, perform the following substeps.
b Disable automatic start of serviced. systemctl disable serviced
c Update the kernel, and then restart the host.
The following commands require internet access or a local mirror of operating system packages.
yum makecache fast && yum update kernel && reboot
d Log in as root, or as a user with superuser privileges.
e Enable automatic start of serviced. systemctl enable serviced
5 Stop the Docker service.
systemctl stop docker
6 Remove Docker.
Control Center 1.3.0, 1.3.1, or 1.3.2:
rpm -e --nodeps docker-engine
Control Center 1.3.3:
rpm -e --nodeps docker-ce
b Clean the yum databases. yum clean all
7 Install Docker CE 17.09.0.
yum install --enablerepo=zenoss-mirror docker-ce
If yum returns an error due to dependency issues, see Resolving package dependency conflicts on page
128 for potential resolutions. 8 Start the Docker service.
systemctl start docker
9 Remove a previous workaround for an NFS rpcbind issue.
a Remove the NFS service drop-in file, if it exists.
test -f /etc/systemd/system/nfs-server.service.d/nfs-server.conf \ && rm -f /etc/systemd/system/nfs-server.service.d/nfs-server.conf
b Reload the systemd manager configuration. systemctl daemon-reload
Loading image files
Perform the steps in Downloading and staging required files on page 13 before performing this procedure. Use this procedure to load images into the local Docker registry.
1 Log in to the master host as root, or as a user with superuser privileges.
2 Change directory to /root. cd /root
3 Extract the images.
for image in install-*.run do
echo -n "$image: " ./$image
done
Image extraction begins when you press the y key. If you press the y key and then Return key, the current image is extracted, but the next one is not.
4 List the images in the registry.
docker images
The result should show one image for each archive file. 5 Optional: Delete the archive files.
rm -i ./install-*.run
Updating Control Center on the master host
Use this procedure to update Control Center on the master host to version 1.4.2. 1 Log in to the master host as root, or as a user with superuser privileges.
2 Save the current serviced configuration file as a reference.
a Rename the file.
mv /etc/default/serviced /etc/default/serviced-pre-1.4.2
b Set permissions to read-only.
chmod 0440 /etc/default/serviced-pre-1.4.2
3 Remove the external Zenoss repository package. Upgrades no longer require external repositories.
yum remove zenoss-repo-1-1.x86_64
4 Install the new version of Control Center.
yum install --enablerepo=zenoss-mirror \
/opt/zenoss-repo-mirror/serviced-1.4.2-1.x86_64.rpm
If yum returns an error due to dependency issues, see Resolving package dependency conflicts on page
128 for potential resolutions.
5 Make a backup copy of the new configuration file. a Copy the file.
cp /etc/default/serviced /etc/default/serviced-1.4.2-orig
b Set permissions to read-only.
chmod 0440 /etc/default/serviced-1.4.2-orig
6 Compare the new configuration file with the configuration file of the previous release. a Identify the configuration files to compare.
ls -l /etc/default/serviced*
The original versions of the configuration files should end with orig, but you may have to compare the
dates of the files.
Replace New-Version with the name of the new configuration file, and replace Previous-Version with the name of the previous configuration file:
diff New-Version Previous-Version
For example, to compare versions 1.2.0 and 1.4.2, enter the following command:
diff /etc/default/serviced-1.2.0-orig \ /etc/default/serviced-1.4.2-orig
■ If the command returns no result, restore the backup of the previous configuration file.
cp /etc/default/serviced-pre-1.4.2 \
/etc/default/serviced && chmod 0644 /etc/default/serviced
■ If the command returns a result, restore the backup of the previous configuration file, and then optionally,
use the results to edit the restored version.
cp /etc/default/serviced-pre-1.4.2 \
/etc/default/serviced && chmod 0644 /etc/default/serviced
For more information about configuring the master host, see Control Center configuration variables on page 133.
7 Update the log file management configuration file, if necessary.
The default configuration of the /opt/serviced/etc/logrotate.conf file now uses file size
rather than file age to determine when to rotate logs. If you customized /opt/serviced/etc/ logrotate.conf for your environment, your customizations are saved in /opt/serviced/etc/ logrotate.conf.bak. Compare the new and old versions, and update the new one as desired.
■ If you are upgrading a multi-host deployment, continue to the next procedure. ■ If you are upgrading a single-host deployment, start Control Center.